Week 08 - Embedded Programming
Assignment:
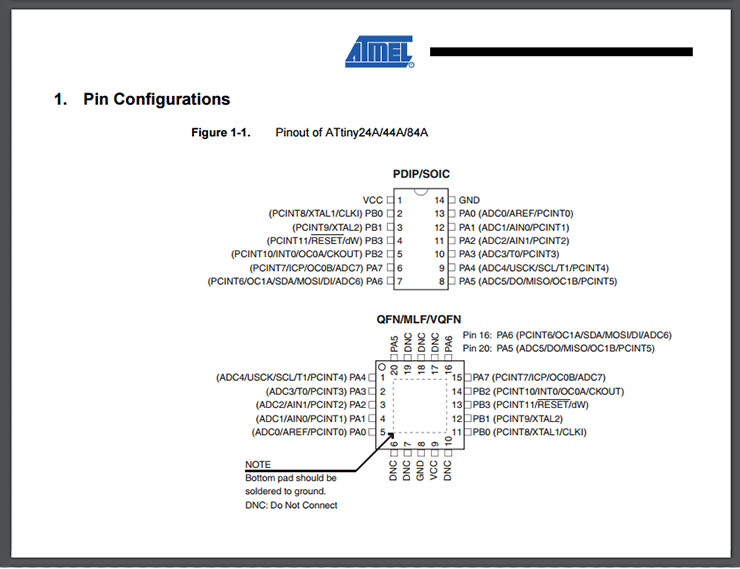
- read a microcontroller data sheet to get familiar with its terms
- program your board to do something, with as many different programming languages and programming environments as possible
- This week’s home work page
Understanding where I'm standing: For this week, I've decided to dive into electronics, from its core, to get to a point that all these yet nonesense terms would get at least some notion to why they even exist.
So I did it. Starting from scratch. What's electronics and how it works.
First thing I noticed was: Electrons flow from negative to positive.
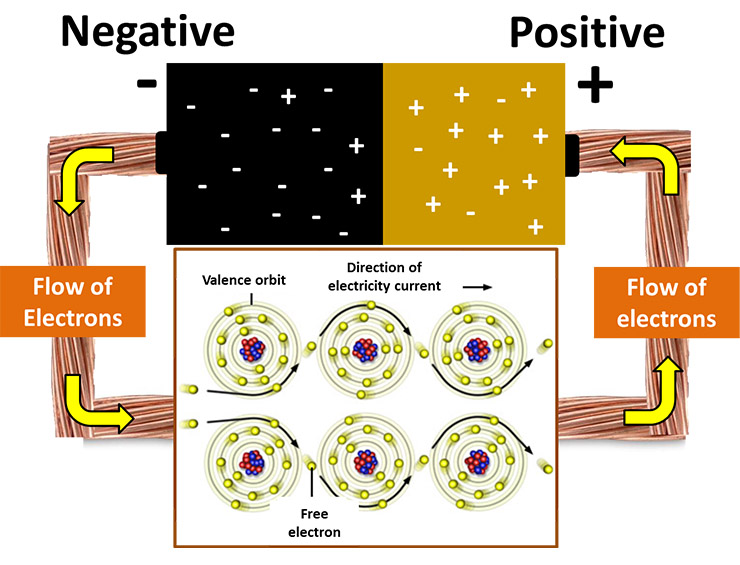
That sounds VERY simple, but then, all schematics you see, it seems like it would be the other way around.
And why is that?
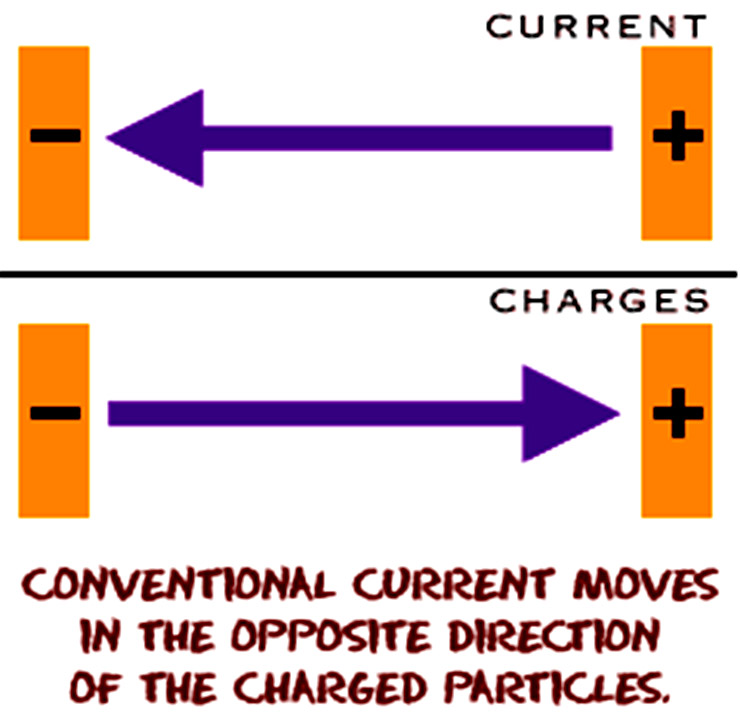
Physicists agreed to always use positive charges to determine how electric field lines would be drawn. Following through on that agreement, they also agreed to explain charge flow in terms of positive charges rather than electrons. So although electrons would flow from negative to positive, by convention (agreement), physicists refer to conventional current as a flow from high potential/voltage (positive) to low potential/voltage (negative). Reminding you that potential is like electrical height, this means that conventional current flows "downhill", which makes sense.
Ok, one less thing bothering me.
This already helped making sense to a lot of locked knowledge I had. Feels good!
Starting with Arduino:Arduino is an open-source electronics platform based on easy-to-use hardware and software. It's intended for anyone making interactive projects. -Arduino's website
It's exactly like that. And because it also looks easy, it makes it easy to understand what's happening under it.
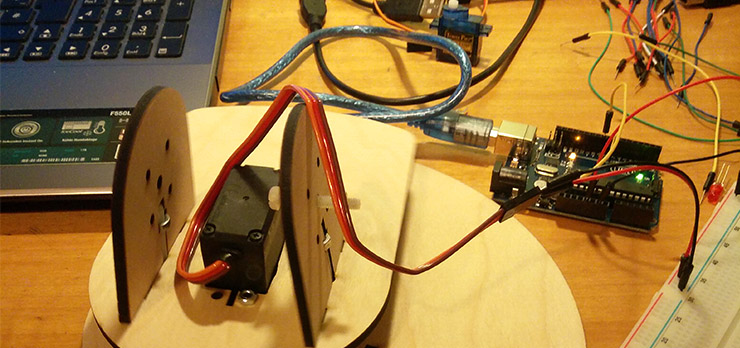
This was me trying out with servos. You connect the servo to ACC(+)red wire, Ground(-)brown wire, and Information/object/pulse (Orange) to a PWM (in my case, the 9th of an Arduino Uno), and the example "servo sweep".
Amazing. But I won't enter too much this matter. I'm are here to program my hello_board with a led and a button.
Programming my Hello_board with Arduino IDE: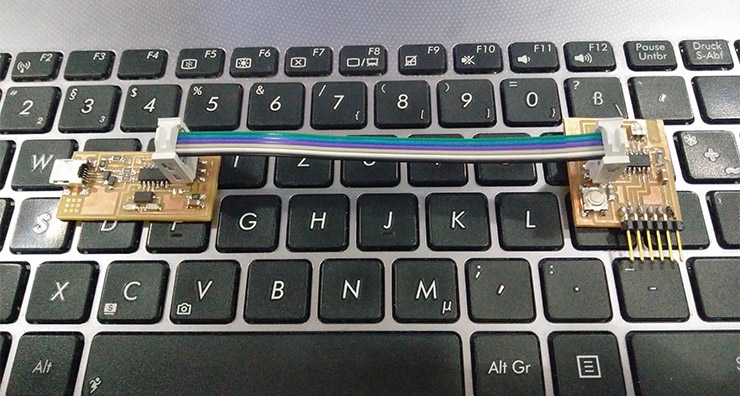
It took me very long to make windows 8.1 recognize my ISP-Programmer, but one of our Fab-Academy mates found this driver and that worked. It is the first one, the V1.12.
Once you get there, you need, in your Arduino IDE, to add the libraries of the microchips, to select the ATtiny44A, which is the one I'm using.
To do so, copy this url:
https://raw.githubusercontent.com/damellis/attiny/ide-1.6.x-boards-manager/package_damellis_attiny_index.json
to: (On your Arduino IDE software)
File-> Preferences
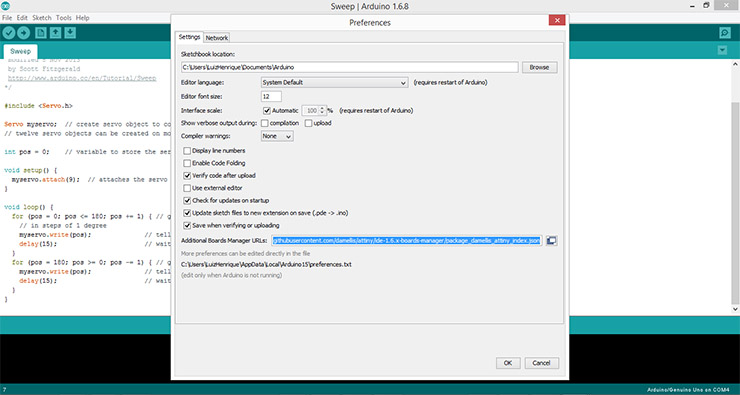
And paste it to: "Additional Boards Manager URLs" field.
You should see it like this:
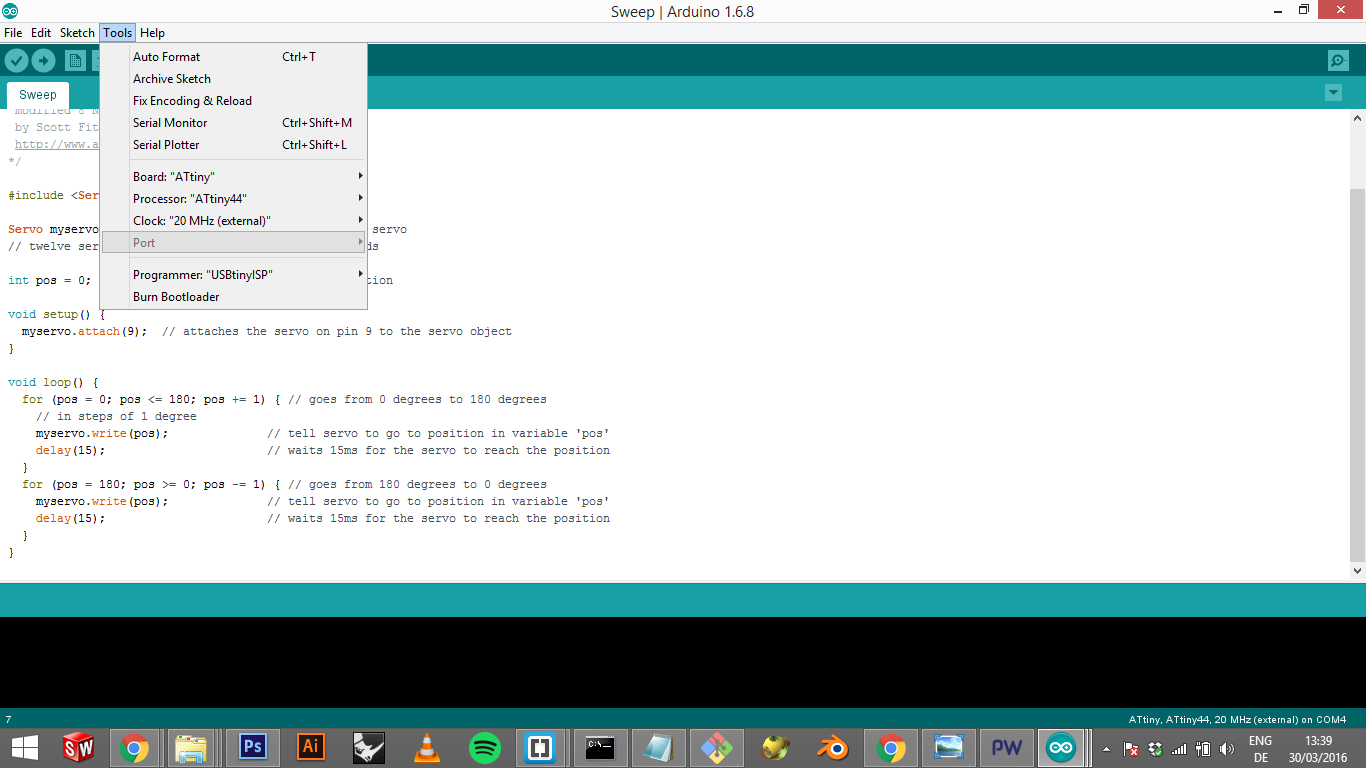
In "Board", instead of the Arduino Uno, which it was the one I was using till now, I now selected the "ATtiny" family option.
Then, Processor: ATtiny44, which is the one I'm using, and Clock 20MHz, the one we soldered to our boards.
Programmer is the USBtinyISP, then click on "Burn Bootloader"
It worked!!!
Hello Board Blinking for the first time from Luiz H H Bueno on Vimeo.
VERY nice! The feeling is of power, potetial to make your own board. Incredible. I'll definately do some other boards.
Now Let's see if it works.
Loading my first code to test my board::
As simple as that, I opened my Arduino IDE software (where I programmed the board) and I loaded the Blink Code, on:
File->Example->Basics->Blink
and this is the code you're going to find:
// the setup function runs once when you press reset or power the board
void setup() {
// initialize digital pin 13 as an output.
pinMode(13, OUTPUT);
}
// the loop function runs over and over again forever
void loop() {
digitalWrite(13, HIGH); // turn the LED on (HIGH is the voltage level)
delay(1000); // wait for a second
digitalWrite(13, LOW); // turn the LED off by making the voltage LOW
delay(1000); // wait for a second
}
In my case, my LED was not on the pin 13, but instead on PIN 7.
So just substitute in the code all numbers "13" for numbers "7"
IT BLINKSSS!!!! Check the video above.
So for you to program it (Burn Bootload), you need to power the board also. Don't forget that. Once the board is programmed, you loaded your first code, lets say Blink, then power these pins and you will see it running.
In my case, the Blink Blinking ;)