Machine Making
Input Devices
[Simply Left-Click On The Photos To Enlarge Them]
Credits to Marije For Designing The Header For The Main Page & For This Pag.
While The Rest of The Team Worked On Designing & Putting Together The Machine I Worked On The Code To Operate The Machine
List of Useful Links
Essential:
=> https://github.com/nadya/pygestalt
=> http://monograph.io/james/m-mtm
=> http://fabacademy.org/archives/2015/doc/MachineMakingNotes.html
Links to needed software:
=> https://learn.adafruit.com/arduino-lesson-17-email-sending-movement-detector/installing-python-and-pyserial
=> http://www.ftdichip.com/Drivers/VCP.htm
Documentation to implement the Python code:
=> http://www.fabacademy.org/archives/2015/doc/projects/gestalt-doc/api/modules.html
Other projects needed for inspiration and debugging:
=> http://www.fabacademy.org/archives/2015/eu/labs/vienna_hl/machine_week.html
=> http://fabacademy.org/archives/2015/eu/labs/frosinone/mechanical.html
=> http://fabacademy.org/archives/2015/as/labs/vigyam/machine/project.html
=> http://fabacademy.org/archives/2015/eu/labs/amsterdam/mtm/machinebuilding2015.html
Download The Files:
The Process:
The first step of the programming phase was setting up the hardware.Having a total of 4 Gestalt nodes and 1 Netfab I was able to get into the programming directly after understanding how to connect up the board correctly:
fortunately for me Emma sat with me and showed me how to connect up the board.
After the necessary basic introduction I was left on my own to figure out the programming basing myself on the documentation from the previous years:
Connecting the boards:
Connecting the Gestalt Nodes to each other are amply documented on the official fab academy site dedicated to them (http://monograph.io/james/m-mtm) the only difference for us was that they had been already flashed, so there was no need for us to do it, and the FabNet had already been milled and stuffed following this documentation; this was done by the students from the previous year who themselves followed the general fab academy guide
Programming:
[There are some software which I have installed before hand which some of the guides to use the node suggest to use, while some others don't. Because I can't verify whether having installed them makes a difference, but I suggest you do:
=>https://learn.adafruit.com/arduino-lesson-17-email-sending-movement-detector/installing-python-and-pyserial
{Follow the instructions on this page to install pyserial}
=>https://www.python.org/downloads/
{Download and install the version with the closesest release date; for me 3.4.4}
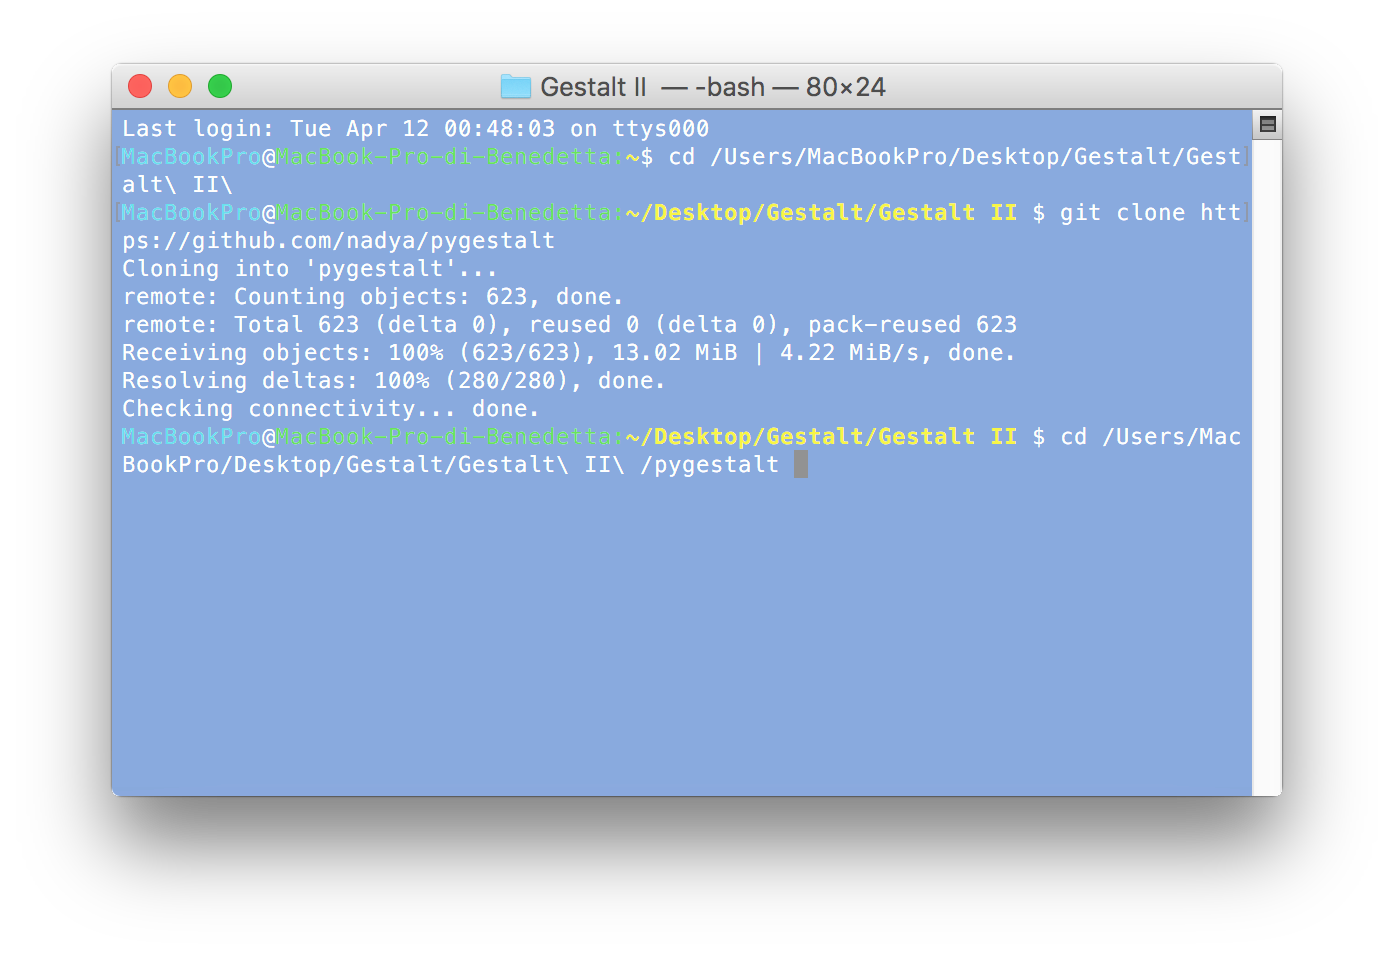
The first step with programming was cloning the pygestalt git repository (https://github.com/nadya/pygestalt). This is done through the terminal by choosing the folder you want to save the repository in with cd/[desired directory] (ex. cd/Users/MacBookPro/Desktop) and using the command git clone https://github.com/nadya/pygestalt.
Once this is completed we open with the directory where we saved
[All steps shown in the picture below on each line]
The next step is installing the setup.py this is done by writing in the command sudo python setup.py install in the terminal.
If you have a password on your computer it will ask for it, just type it in and hit enter, it should work.
[This is what it should look like]

Once you hit enter and no errors pop-up the next step, if you are on OS-X is to check the ID of your FTDI cable, this is done by inserting the command /dev/tty.usb* in the terminal when the FTDI cable is connected. It should give an output similar to => /dev/tty.usbserial-FTXW4F9H (which is the ID of my own FTDI cable) all of this name is essential! We can then open to edit the xy_plotter.py file, this can be found in the following directory pygestalt/examples/machines/htmaa (what you use to edit this file is up to you, I used Xcode): You should modify the code to add /dev/tty.usbserial-FTXW4F9H to the definition of portName [Therefore it should look like the following]

[As mentioned on "Getting started with Gestalt nodes" you will also need to install the FTDI drivers to match with your OS (Found here: http://www.ftdichip.com/Drivers/VCP.htm )]
After this was done, what is left is personalizing the code to our need.
Since we are going to use three axis, and the 'xy_plotter example' can only controls two, I needed to add the capability of controlling another one.
The other examples in the folder helped in understanding the underlying logic, also the official documentation was helpful (http://www.fabacademy.org/archives/2015/doc/projects/gestalt-doc/api/modules.html).
Essentially I modified the original program to contain references to a third axis by mimicking the existing axis. [This consisted of the following changes]

2. Added the self.uAxis node to the definition of the xyuNode variable which controls the nodes

(before it was ['mm','mm])


This is my first true contribution to the code; With this we can set an indefinite amount of coordinates which define answer positions (here we only have three answers represented as ans_one, ans_two & ans_three) this then puts them in a list and a random selector picks an answer and executes the moves in a standard manner to ensure that the extrusion and returning to the zero point are standardize amongst all answers. (After testing, the motor response seemed quite fast and does not allow the person to see the answer for long enough; the move matrix is cosutmizable and delayable this should be done to te users desires)
I would also like to note that now there are three parameters instead of two, to control all three motors.
The positions of the answers can not be derived mathematically so they should be mapped manually, thus I wrote the code "Manual control" to find the position of all answers; this is very susciptable to slight changes in the structure and is prone to failure.
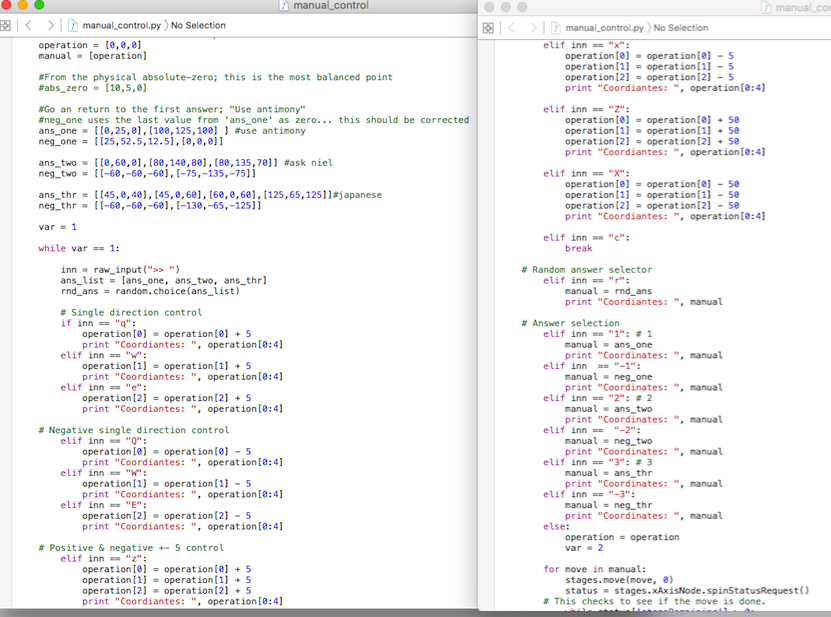
The positions of the answers can not be derived mathematically so they should be mapped manually, thus I wrote the code "Manual control" to find the position of all answers; this is very susceptible to slight changes in the structure and is prone to failure.