Home
Biography
Projects
Final Project
Etchig Process
In this page I will be documenting the chemical etching process I use for most of my circuit boards.
Tools
- Laser cutter
- Design computer with Adobe Illustrator (or something)
- Razor blade
Materials
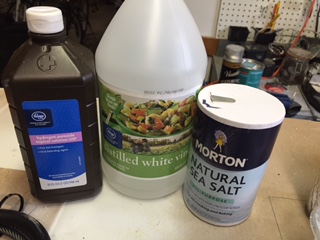
- Vinegar
- Hydrogen Peroxide
- Salt (without anti ckaig agents works best)
- blank PCB
- Masking tape that will fit your PCB
- Double sided tape
Steps to prepare the PCB for etching
- Start by preparing the PCB. Place masking tape large enough to cover your circuit on top of the blank PCB. Remove any air bubbles
- Apply double sided tape to the back of the PCB and plced it into the laser cutter aligned with the zero of the meachine. Make sure the board will not lift during the autofocus procedure.
- Export the image of the circuit board you have designed, preferrably to a high resolution or to an svg
- Edit the image so that the traces are white and the background is black
- If you have Adobe Illustrator, export the image again to a PNG, otherwise, skip to step 5
- Reopen the PNG in AI then center the image on the artboard, select the image, and click trace image
- Click print and navigate to the preferences for the laser cutter. I use 600 DPI, autofocus, 50% power, 50% speed, and the material size is set to the size of the PCB. Settings will vary from cutter to cutter.
- Set up your laser cutter and click print. Time will vary between laser cutters and size of the circuit
- Once the first run is done, you may need to run the etch again untill most of the adhesive is gone.
- Once most of the adhesive is gone, remove the board and the double sided tape and iron the board to help adhere the tape to the board further.
Steps to prepare the solution and for etching
- Prepare a 50-50 solution of vinegar and Hydrogrn Peroxide inside a plastic container (the solution oxidizes most metals). Now is a good time to add some salt in
- Place the PCB into the solution and wait. This method can take a long time, but is much safer than faster methods.
- Add/replace with extra solution as you go, and keep the solution out of light if possible, since the Hydrogen Peroxide will decay in bright light.
- Once the PCB is done, remove the board from the solution with anything other than your hands and wash the remaining solution off.
- Rub the tape off and sand the remaining copper down for soldering.
- Dispose of the solution safely (however that is in your locale), since it contaains copper compounds that are harmful to plantlife and wildlife (and us).