The aims of this week were:
1. Read a microcontroller data sheet
2. Program your board to do something, with as many different programme languages and programming environments as possible.
I'm dyslexic, this is one of the tricks I use to help me understand stuffThe first thing I wanted to find out about the ATtiny was the difference between the Attiny44A and the ATtiny44. So I read this data sheet, because I wondered if the problems with my ISP were due to differences between the 2 types. According to that two page data sheet the only notable difference is the 44A performs more efficiently.
Now I try to fathom the Data sheet proper. I found it very difficult indeed. I didn't really understand a lot of the acronyms and terminology. I also find linear almost mathematical style of writing a challenge. That said, I stared at it for long enough to give me something to build on, as I discovered the meaning of its contents. There are examples of C Code compared to Assembly Code. I don't have a very meaningful understanding of these code examples but I recognise the value of studying them. I am already noticing how Arduino uses the C syntax. I will continue to refer back to these as a way to learn how the coding relates to the actual hardware.
I made extensive use of the Fabacademy student archives this week. This helped me understand that the importance of the data sheets lies in knowing how to use them. They are reference documents. One of my Fablab people, Craig explained how he does this on his blog. I didn't appreciate what he was trying to tell me, until I admitted to myself that I wasn't actually going to fully understand everything there is to know about The ATtiny44A in one week!
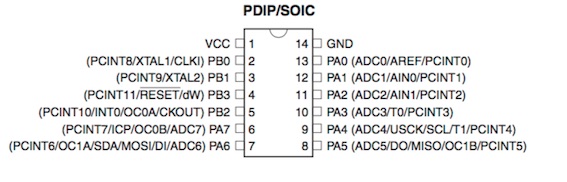
So I went in and found the basic pin configurations
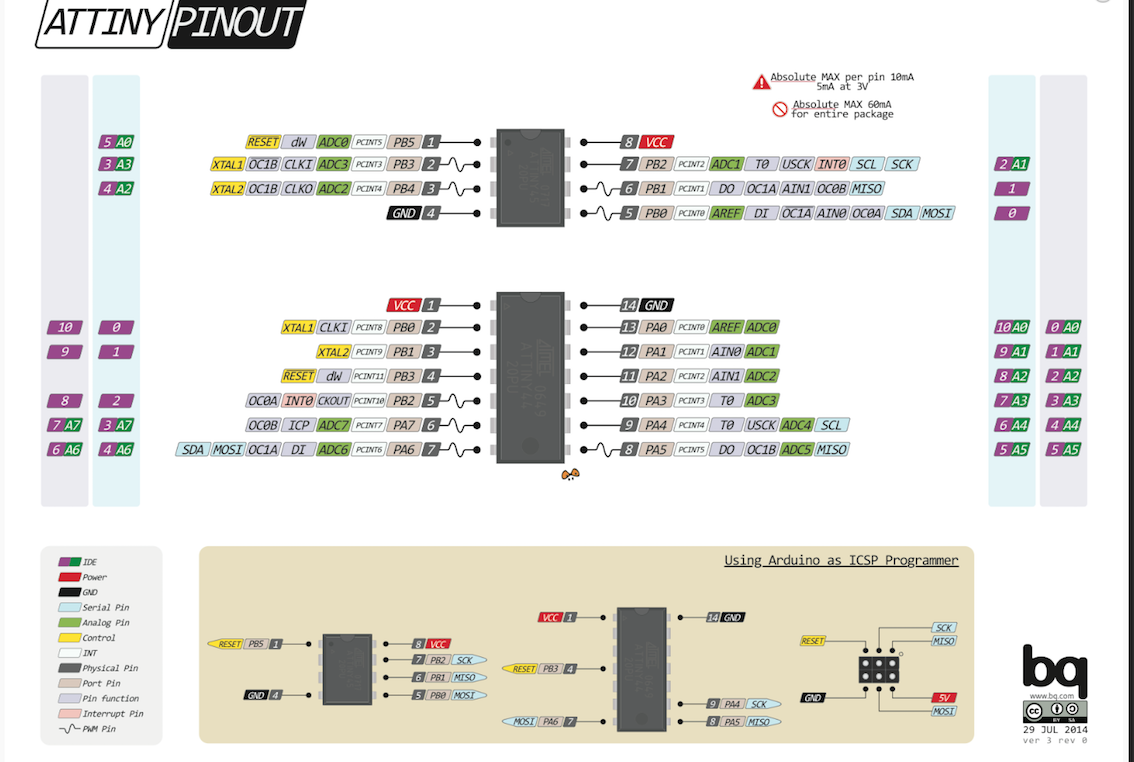
Then I found a pinout translation, so that I can program the ATtiny from the Arduino IDE. The colour coding indicates the use and alternate uses each pin offers. 42bots
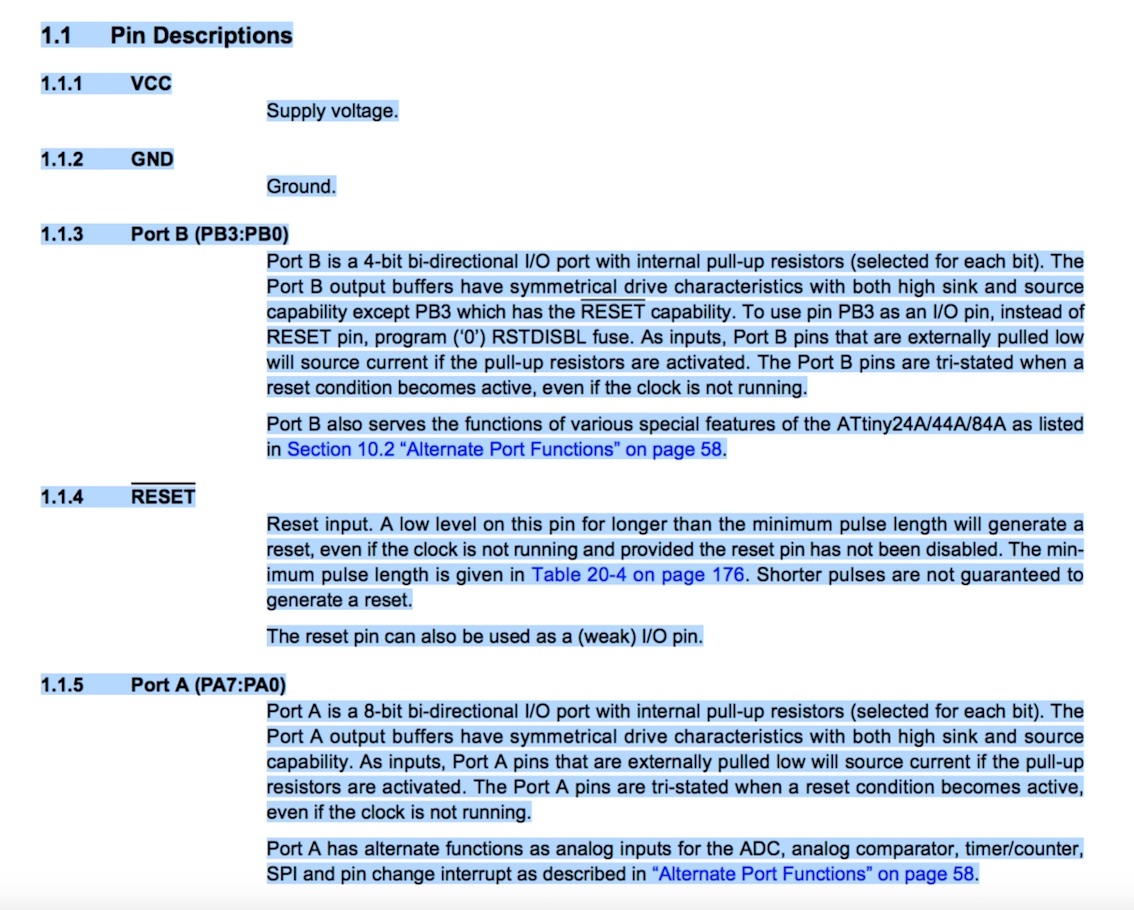
The pinout descriptions from the data sheet leads into more detailed port information in the data sheet.
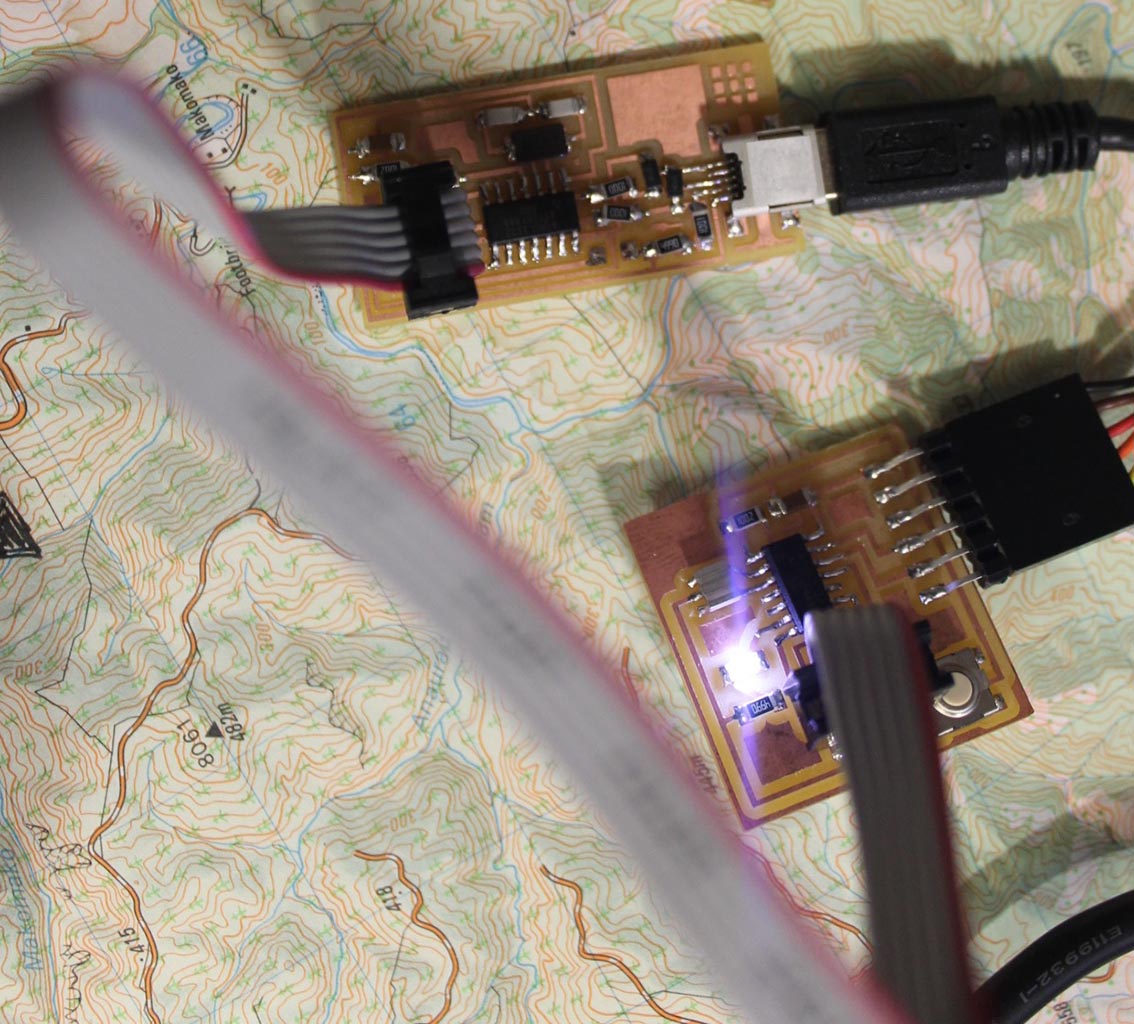
On the way to getting my LED light fired up, I encountered all sorts of hardware and software difficulties. Not having my own working ISP didn't help. Neither did the issue of the smoke coming out of my overheating Echo boards ATtiny44A! I could not get Arduinos board manager to download the ATtiny44 to its list, despite thoroughly following the instructions from the tutorials.
Eventually I discovered two incorrectly sized resistors on my ISP. This was a result of my not reading the numbers printed on the resistors themselves. I relied on the storage labels in the cupboards. I realise now that electrical components can get mixed up in a Fablab as busy as ours. I need to check. I made a new ISP and managed to get it programmed and recognised by the usb bus in my computer. I also made a nice tidy replacement LED/button Echo board.
The software problems I encountered were frustrating, to say the least! Now after the smoke has cleared, I can see the silver lining. Now I have fewer expectations that computers are going to do what they are expected to do. The solution to the particular problem stopping Board Manager from downloading The ATtiny to its list was to uninstall Arduino. It took a while to find out that Arduino loads files into different locations on my computer, which means that when I uninstalled Aduino then reinstalled it, the problem persisted. What I did to solve the problem was open Finder, then open GO from the tabs, then Go to folder, then I typed ~/Library/ this took me to where the corrupt Arduino folder was. After I put that in the Trash, emptied the Trash then reinstalled Arduino, everything was good so I could get ATtiny onto the list.
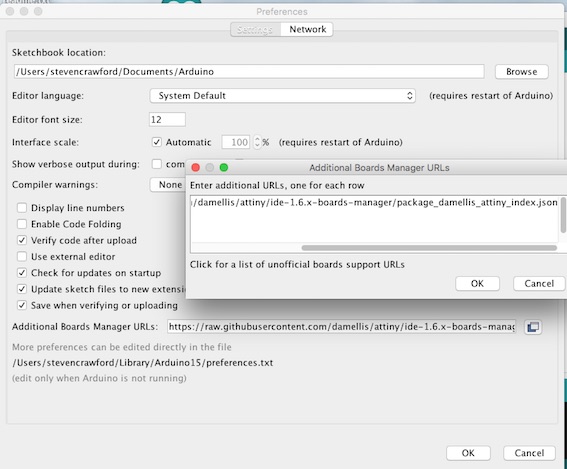
This is the best way to get ATtiny to the boards list. First Open preferences in Arduino. Then click on the blue and white icon at the far right hand side of Additional Boards Mananger URLs. A box will open. Click on the text that says "Click for a list of unofficial boards support URLs". That leads to a list of processers, that when selected get paisted to the board manager URL box. Click OK.Then restart the Arduino ide, open boards manager, go to the bottom of the list and install the processer. If that dosn't work, see above, the initial software downoad might have corrupted.
Get all these settings in place. Cross fingers, click on Burn Bootloader. If that is successful, Open File, Example, Basic then Blink. My LED is on pin 7.
Entry into how to learn applied embedded programming!
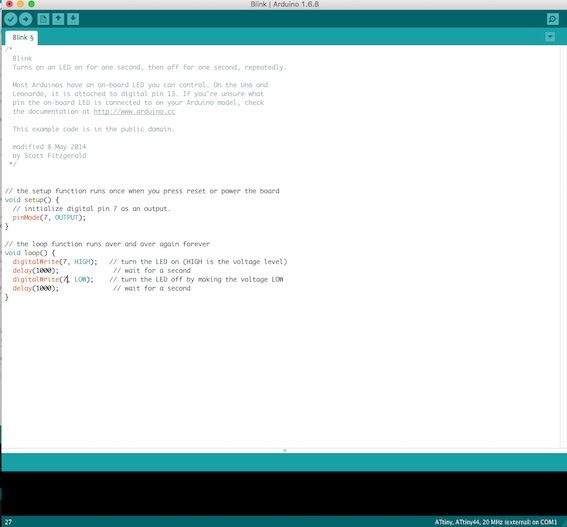
pin7 is the output for my LED.
Shelca put me onto a Lynda.com introduction tutorial about programming.Luckily our local library offers a subscription as part of my membership. This is good because as Shelca said, it's well worth watching Simon Allardice's tutorial on Programming.