Computer-Controlled Machining (Mar. 9)
Process
Below you will find my dictation, notes and documentation about the processes I went throught with regards to using the ShopBot CNC machine, VCarve design and making something big. Each of the topics will be covered in seperate sections. A link at the bottom of the page will take you to all of the files that I created for this exercise. For more information about Exercise 7.
Design and VCarve
I went home and asked my wife what would be useful item that we could use at home, after I suggested that I was thinking about creating a bookshelf. My wife was not a fan of this idea, because, she said we did not need a bookshelf or have the room for one. She suggested that it would helpful to have a step stool for her. I took her idea for a step stool a bit further. I came up with an idea to create a stepstool that she could use as well as our son, once he is able to walk so he can reach the bathroom sink to was his hands. Over all, I planning a head and my wife likes the idea. I developed my design around Art Mudler's Bathroom Stepstool. I used his general layout as a guide for design my own stepstool. I liked how his had rounded edges, handles and curves. I thought thought this would bbe helpful for having a small child around it.
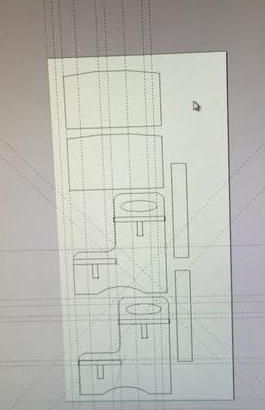
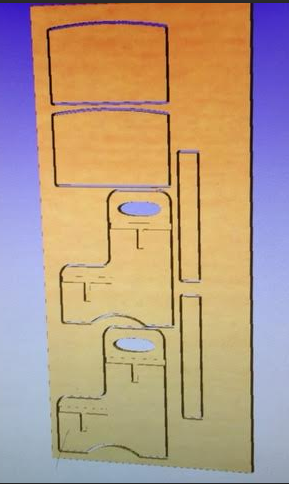
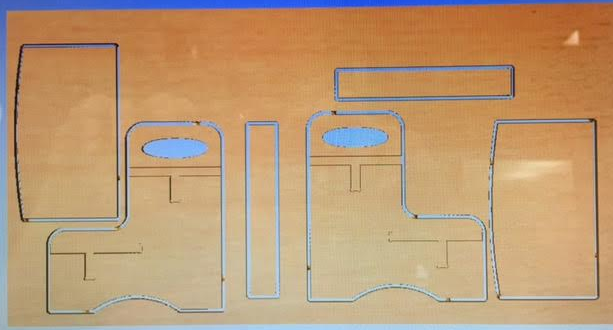
I used VCarve to design the stool parts. I create the stool using a series of guidelines to help layout my dimnesions after setting up the deminsions of the wood at 24"x24"x0.745". I used a caliper and a tape measure to double check the sizes. When creating guidelines, you can right click on them and gain teh ability to change the angle of them and delete them too after you drag them from the top or side to create gneral vertical or horziontel lines. Next, I drew lines with lengths and interconnected them to create squares and rectangles. Next, I used the arch tool to create curved edges in all of the corners while created the side pieces. Than I used the scissor tool to delete the corners. I kept using guide lines, espcially at angles to help with finding center points. Next, I create 2 horizontal rectangles the thickness of the wood that were 7 inches long and 2 two inche vertical pieces in the center of the horzinotal pieces as cut in and supports for the steps. I used the dog bone tool on the ends of the vertical pieces so the shopbot would be able to cut the corners as well the long horzontal pieces went oer the edge a little bit so it would cut them completely through the edge. I put an oval to create a handle near the top of the peice.
Now, I went over to setting up the features to be able to do the 3D cutting features. I set all the pieces to a 1/4" down bit with double flutes as well as I used 0.5 inch ramp on all my cuts as well as 4 tabs on all of the pieces and a conventional cut since I was using Birch plywood. I profiled the outside edge, pocketed the cut ins at 0.3725 (half the thickness of the wood), and pocked the oval all the way through at .0745 , which you will get a warning telling you that you are cutting all the way through the wood. I calcuated each part as well as ran the simualtion of the cuts multiple times in different view points to help with cutting down on mistakes, because, it helps you be able to see to different issues. It is important to save your work as a VCarve file and a ShopBot file. When you save your ShopBot files, make sure to click all of the profiles, because, if you do not do this you will leave off different profiles. I learned this when I was attempting to cut my piece the first time, which I used a 3D Air Cut (which is an awesome way to see if your cut is going to work because it has the Z axis raised up and cuts over the profile), my pieces only cut one profile due to me not checking the other profiles.
I than made a second document with the same peices setup and made two steps that were 7.5 inches long by 13 inches wide as well as two 13 inches long by 2 inches high support pieces for the steps. These were simple profile cuts using the same features for calculation as before. It is important to check the box for tabs and ramps.
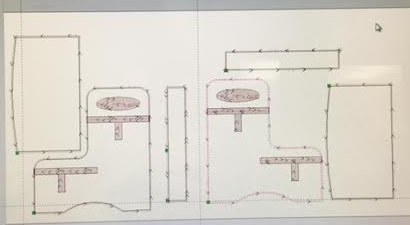
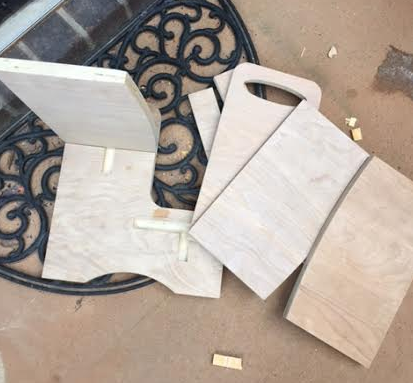
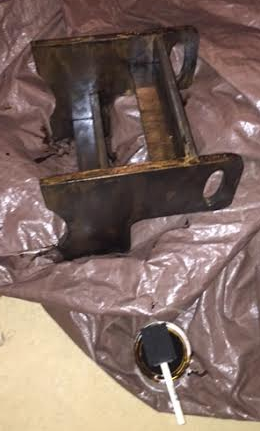
Next, I merge the two documents together by creating one document with all of the parts. I decided to use a 48"x24"x0.745" piece of birch plywood for my cut. Merging everything made it a easier process. I did make one mistake when cutting the first time, I forgot to mirror the side peiece of my bench and end up with two right sides, which you can see in the first two photos below. I than went back and bought another peice of wood and made a mirror change to my piece. When moving parts that have multiple parts, it is important to group them before moving them. You than will need to ungroup them before usign the recaluate all feature for all of your parts. Also, if your tabs snap during cutting your peices will began to move and be destroyed, which happen to me. With that being said, do not leave the room while your projects is being cut. I was able to stop the ShopBot and grab a piece when a tab snapped. I finished the cut using a chizzel and hammer. I also learned that the order you cut in is important. You should do any pocket cuts first on a piece before doing the profile, because, it cuts back on vibration of the part and limits the change of the tab breaking.
Corrected files below:
ShopBot
When using the ShopBot, you need to warm up the spindle first, if no one else has used it that day. While the spindle was warming up, I took my piece of borch and screwed it to the top baord on the ShopBot. I put the bow of the board up, so when I screwed the corners down the center would be flat. I also used a C-clamp to hold another area down. Next, I followed the steps below:
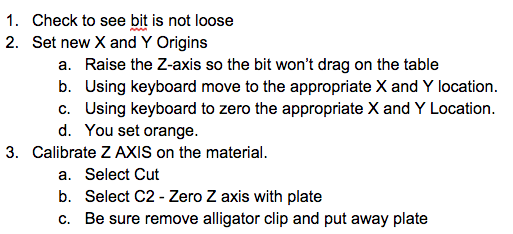
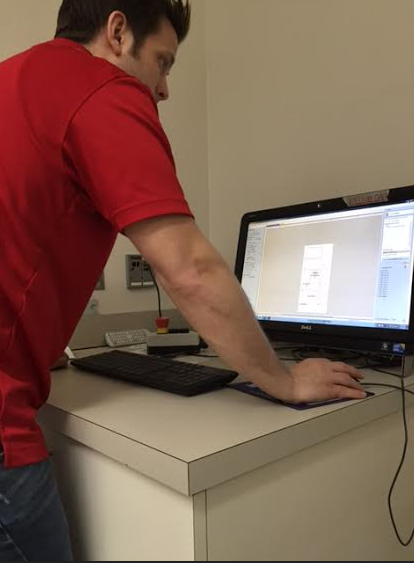
When I would go to cut my pieces, I would make sure that I had eye and ear protection. Next, I would use the preview feature to make sure my piece looked correct. This helped me when I would forget to click a profile and when my deminsion were backwards. For example, 48"x24" vs 24"x48" which make a large difference. You can see this mistake by the look on my face in the first image below; I am much happier in the second picture. Also, it is important to have your vacuum on when cutting, so you do not have dust everywhere.
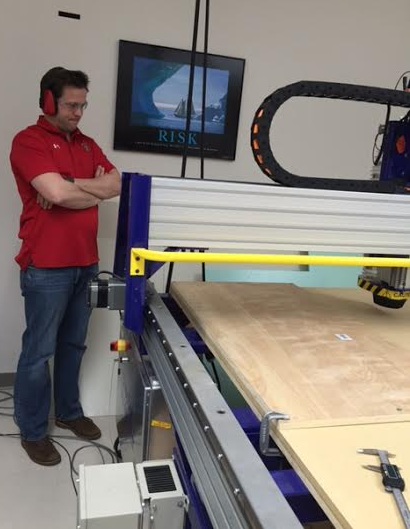
It does take time using the arrow keys on the keyboard when moving the spindal. Also, the JH short cut, which stands for Jog Home, is an awesome feature for going back to your relative zero point. It is important to hit the green button so the spindle is on before hitting start when cutting. If not, you will break your bit.
Finishing and Assembling
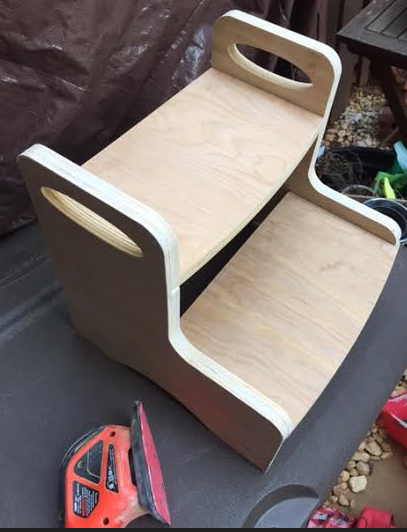
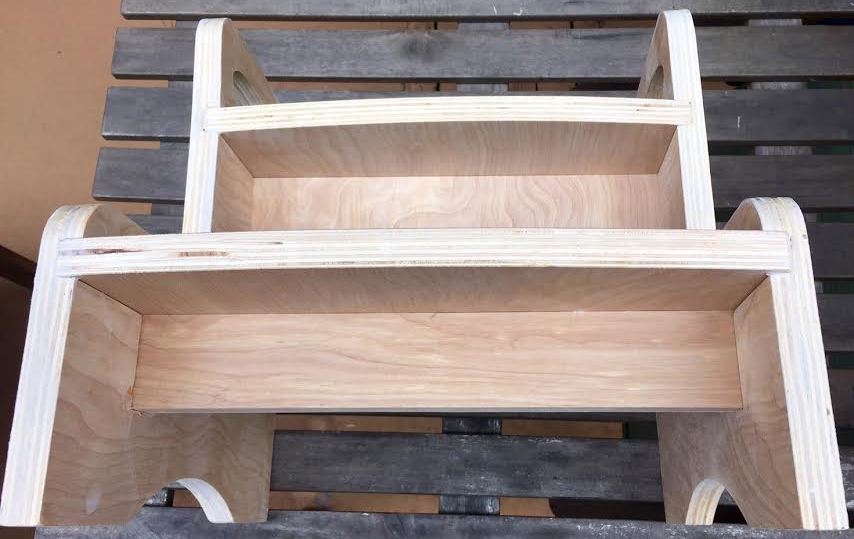
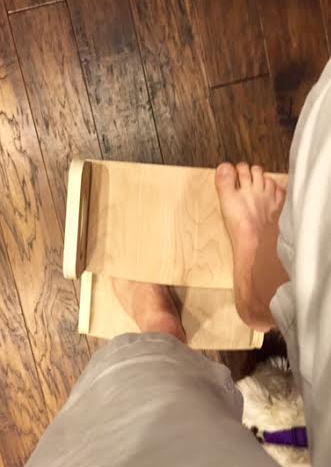
After cutting all of parts(the second time around from making mistakes), I sanded all of the parts with sandpaper, Dremel Multi-Max Tool with a sander attachment, and a Black and Decker Mouse Sander. I did that to get rid of the tabs and the rough edges. I also chipped so wood out to make them fit as well, but this can be a problem when using plywood due to it wanting seperate into layers. Next, I sanded the cut outs a lot due to the imperfections in the man made wood not actually being the sizes it reads as well as not being the same thickness all around as well as due to the ShopBot cutting so preciously. I needed to do this to fit my step and support pieces into the sides. This took a few hours to get right. I was going to use wood glue, but it was such a tight fit that I did not even use it. I only used a rubber hammer to put the pieces together. I than used wood glue to fill in the imperfections of using birch plywood. When I do this again, I wood use hardwood so I will not have to deal with plywood. Plywood is great for certain projects and prototyping pieces. Plywood has to many imperfections as well as it can seperate when trying to chizzel out a chip. Lastly, I stained the wood a gloss expresso brown to match the bathroom and kitchen cabinets throughout my house that my wife picked out. I than put a finishing satin polyurethane to protect the wood. I also tested it by standing on it myself as well as my mother-in-law stood on it too. Below are pictures of the overall build, assemble and finishing process:


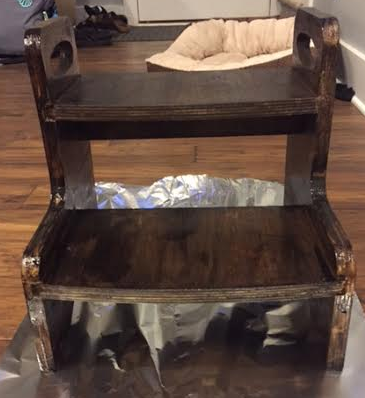
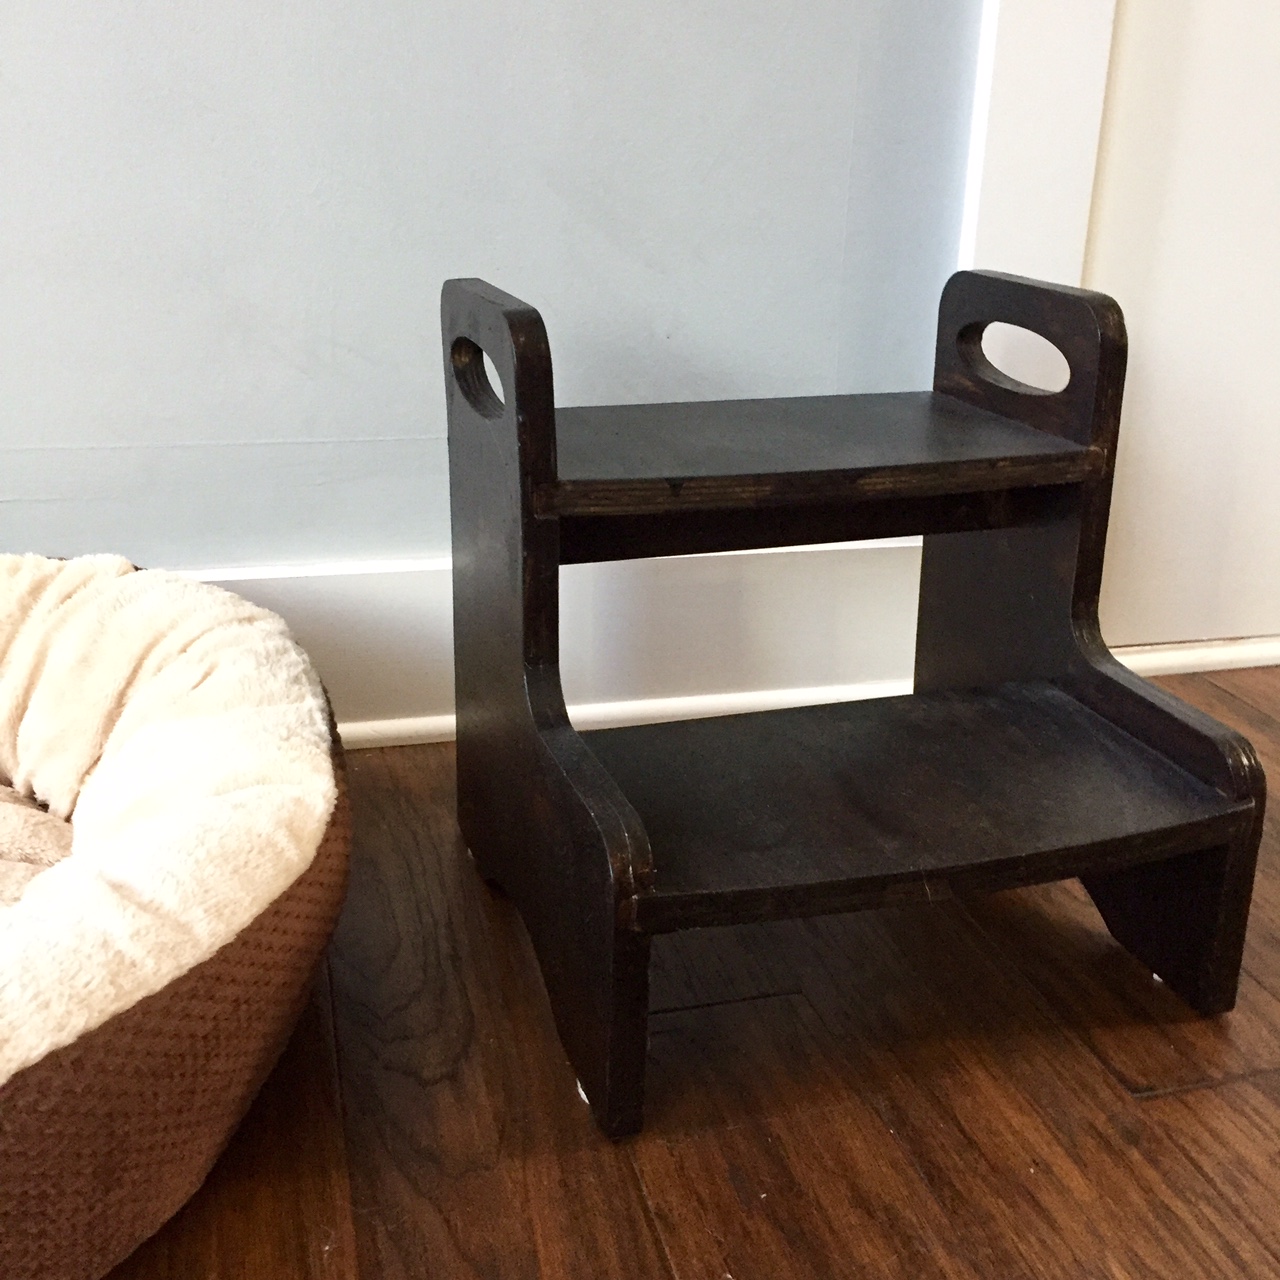
Below is an image of my finished step stool. I added sticky pads to the bottom of it, so it won't scratch the wooden floors in my house. Lastly, my wife loves it!
Project Files
This is a button to access the files created for this exercise course for all of the above softwares.