Electronics production
Assignment for week four (February 19, 2014)
The fourth week of the programme focused on Electronics production.
The assignment was to make FabISP in-circuit programmer. So, since
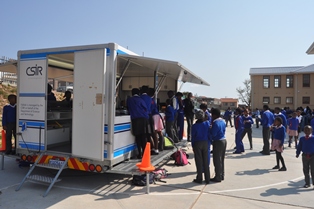
well I do not have a "fixed" FabLab - I do my projects in my Mobile
FabLab. This is the first and only Mobile FabLab in South Africa,
which I happen to manage. It is used as a vehicle to stimulate an
interest and appreciation for science and maths studies among young
people in both primary and secondary schools; particularly schools
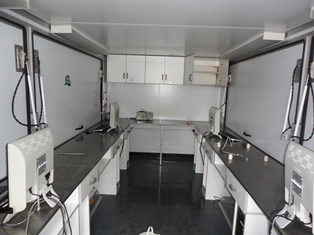
in both township and rural areas. The Mobile FabLab has all standard
FabLab equipment except for a ShopBot.
The evening of the last FabAcademy (Wednesday, 19th Feb), we
experienced a lot of rain with severe thunderstorms. The
thunderstorms caused blackouts in most residential areas and made
roads un-drivable. On Thursday morning when I got to the lab, I
discovered it was flooded with water, which damaged my machines.

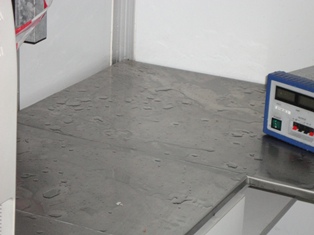

All my equipment had to be collected for repairs, and as such, I was
taken out of commision due to the unavailability of the equipment
and could not do the assignment. I am currently in the process of
fully stocking our Soshanguve FabLab, so I didn't have access to
what I would have expected to by virtue of the natural disaster. The
Mobile FabLab was also collected to be sealed, by the manufacturer.
The lesson I learned from this experiece is to frequently assess an
check the Mobile FabLab for any irregularities, and to ensure it
does not get flooded again in future.
Check back next week after I get the equipment back on line, for
this week's unit/ assignment.
So, it took me 3 weeks for me to finaly managed to do the
Electronics production assignment. I finally recieved the components
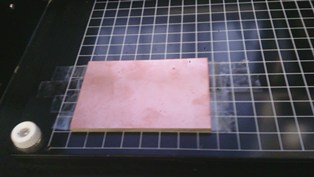
for the assignment and used the Soshanguve FabLab Modela to mill out
the circuit board.
The assignment for the week was to make a FabISP in system
programmer for AVR microcontrollers. This assignment entailed
milling a circuit board, soldering components on it and programming
the microcontroller on the board. Out of all tutorials, I chose to
use David Mellis' tutorial.
1. Communication between Modela and Mac
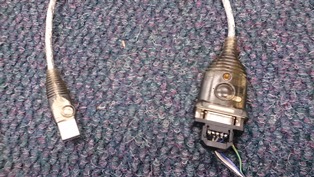
Initially, I struggled to get the communication between Modela and
my mac going. I was using the USB-Serial port cable, but could not
get the communication going. When I tried to send the "make.rml"
to Modela, I got the error that read "could not open port
/dev/ttyUSB0" - "Permission denied:
/dev/ttyUSB0".
Looking up the error on the web, the suggested solution was to get
permission to access the port which was found. This entailed adding
my user account (lindi) to the dial out group. This was achieved by
checking which group I currently belonged to. On terminal, I typed
"group" which returned a list of groups available. I then typed a
command "sudo gpasswd --add lindi dial out". I logged
out and in again for the changed to take effect. This resolved my
communication problem.
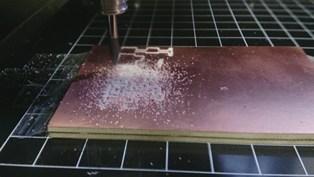
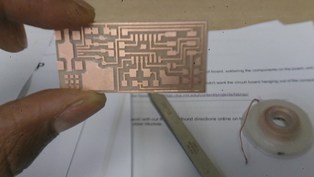
2. Milling the board
- I placed the sacrificial board onto Modela bed using double
sided tape
- I then placed the board to mill out the circuit from onto the
sacrificial board
- I opened up the fab module on Ubuntu and loaded the file to
mill out, ensuring all settings were correct; with a 1/64" bit
was used for milling and a 1/32" bit used for butting out the
board.

- I managed to mill out the board correctly the first time, and
cleaned it with alcohol and a brush
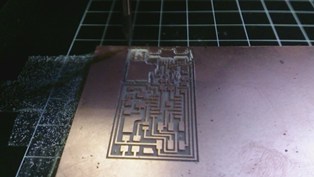
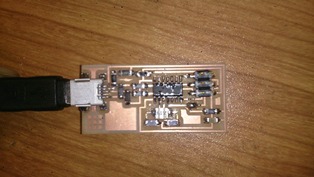
3. Populating the board
- I stated soldering the smaller components first and ended with
the larger/higher ones. This was fairly an easy process.
- I used a maginifying glass to visually inspect the board for
any dry joints and any shorts created by the solder. All seemed
ok.
- Finally, I used the multimeter to check if there were no short
between the power and ground on the board.
5. Installing the necessary software for
AVR Programming
- To get the GCC and AVRdude on Ubuntu, I used the following
commands:
- sudo apt-get install flex byacc bison gcc libusb-dev avrdude
- sudo apt-get install gcc-avr (then typed "y" whenasked to do
so)
- sudo apt-get install avr-libc
- sudo apt-get install libc6-dev
- To download and Unzip the firmware, I used the following
commands:
- cd /Desktop (changed my directory to Desktop)
- wget
http://academy.cba.mit.edu/classes/embedded_programming/firmware.zip
(to download the firmware)
- unzip firmware.zip (to unzip the firmware)
All went with this process.
6. Programming the ATtiny44
- Before using the FabISP, I needed to program the ATtiny44
microcontroller first.
- To achieve this, I needed another programmer to be plugged in
to the 6-pin programming header on the board I just milled out.
- I used the Atmel AVRISPmkII in system programmer, and had to
edit the make file as per line below:
- gedit Makefile (which opened the window containing
the Makefile)
- AVRDUDE = avrdude -c avrispmkii -P usb
-p $ (DEVIDE)

- I ensured that SJ1 was closed and connected both the FabISP
board and AVRISPmkII on my usb ports
- There was no smoke coming out of the board.
- I typed the following commands on Ubuntu terminal, to program
the FabISP:
- make clean
- make hex
- sudo make fuse
- sudo make program
- All commands responded as per tutorial, which means they were
all successful.
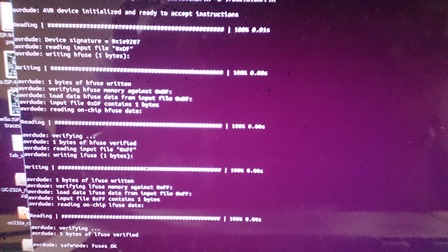
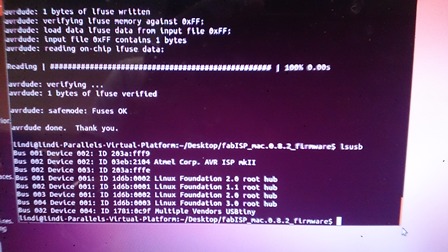
7. Verifying that the ISP is working
- On Ubuntu terminal window, I typed the command:
- lsusb
- this displayed a message as below
- On Mac,
- I clicked on "apple" menu
- Selected "about this Mac"
- Selected "more info"
- Clicked on "system report"
- Under "Hardware" menu, I clicked on "USB"
- The "FabISP" was diplayed on the list
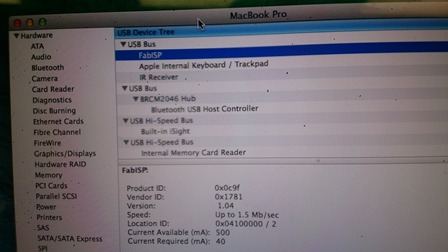
My FabISP device was successfully
programmed and recognised by my Mac