 Fletch's Fab Academy 2014 Blog
05. 3D Scanning and Printing
This weeks assignment had a few parts:
- Design and print a small object that couldn't be made
subtractively
- 3D scan an object - We did some of methods individually and
some as a group to allow us to cover more.
- (Extra) Print a copy of the 3D scan
- (Extra) Design a 3D scanner
05.01 Design and Print an Object
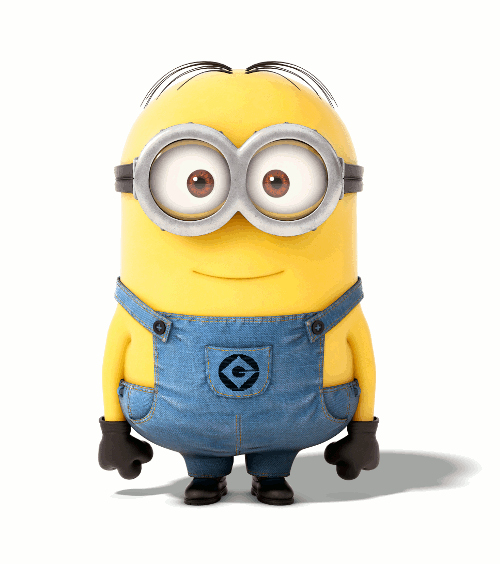
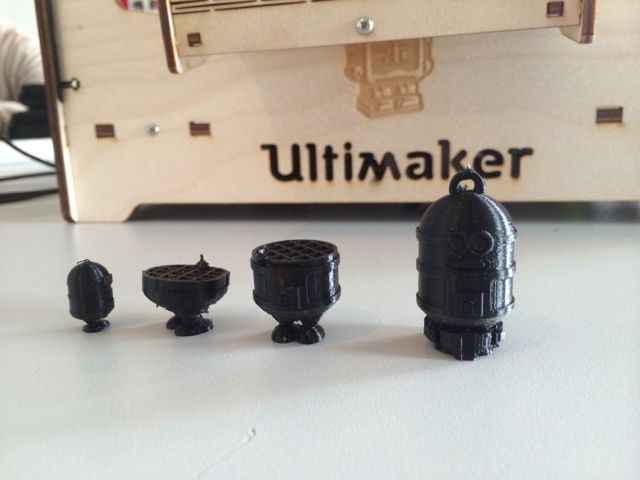
For this I though it would be cool to make a 3D print of one of the
minions from Despicable Me, I used the image below as inspiration.
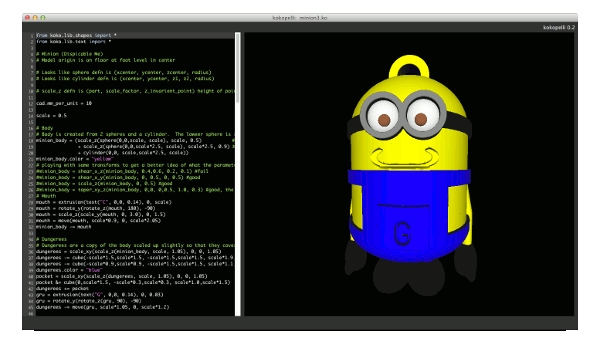
I designed the model in Kokopelli, I've added a loop to his head so
that he can be used as a key fob. The script is available here, it needs a little tidy up to
make it fully parameterised.
There are a few parts of this model that need work such as the mouth
and the angle of the shoulder straps. After completion of the
Fab Academy course I plan to investigate some of the other shapes
and transforms in Kokopelli and put together a little tutorial
showing them all. I'll also include how I built this minion
model in the tutorial.
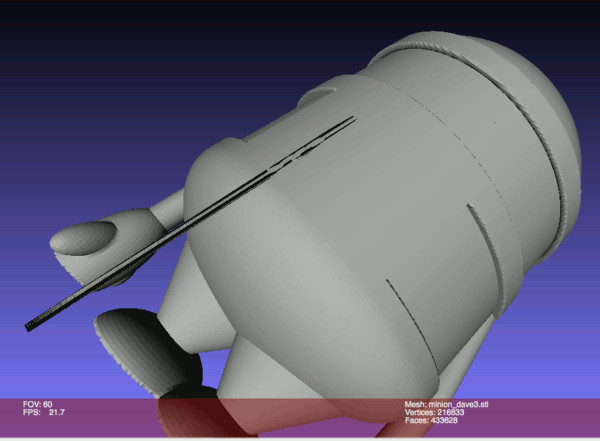
Note that when I export the STL from Kokopelli, it generates this
infinitely thin strip of triangles on the back of the model (see
image below of the model in Meshlab). I'll drop objects from
the model at some point to investigate why it does this. As
the triangle strip is so thin the printer ignores it, so I
eventually stopped trying to clean the mesh and just printed the
STL's as is.
Here is the part printing on the Ultimaker.
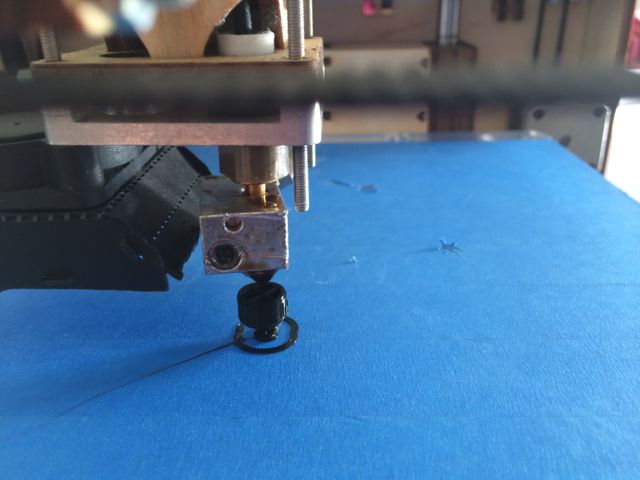
The initial part only took about 5 minutes to print but was too
small and the printer couldn't resolve some of the detail in the
model, so I scaled it up in the Ultimaker printing software 'Cura'
by a factor of 2 and re-printed it. I had a few failed
attempts here as my laptop went to sleep during the print process,
leaving me with a partially printed model! But finally I
got a complete one as shown below. Note these early test
versions didn't have the arms that the model now has and the large
model still has the support material that Cura automatically added
around its feet.
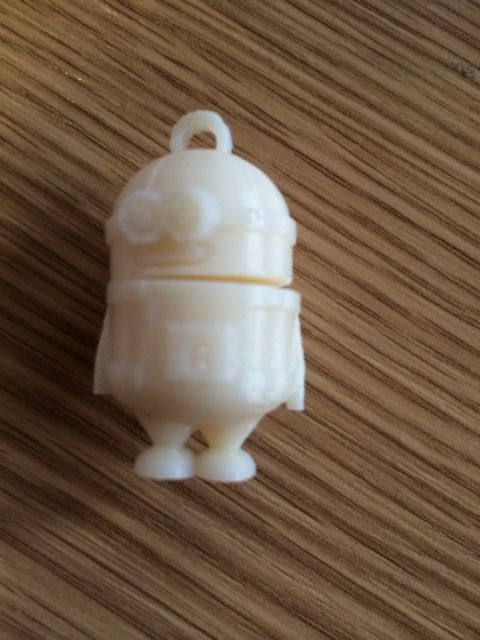
I then added the arms to the model and printed a copy on both the
Ultimaker and the Dimension 1200 to compare the quality.
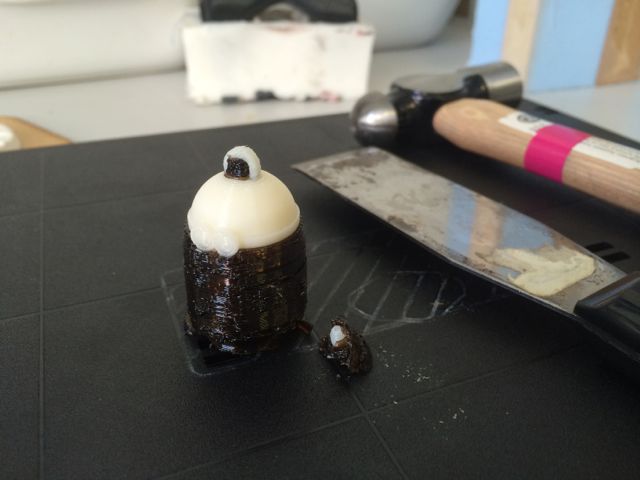
Picture below shows the model from the Dimension printer with it's
support material still in situe, and some of the tools use to
'gently' remove it from the baseplate. Note that one of the
arms was snapped off removing the model from the base.
Theoretically the Ultimaker has a better resolution than the
Dimension printer, however as you can see in the image below, the
print from the Dimension (white plastic) is actually more consistent
and cleaner.
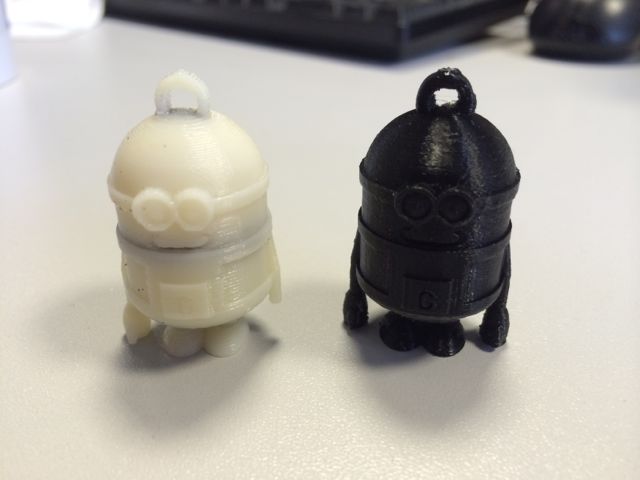
The fact that the Dimension printer prints a removable support
material opens up all sorts of possibilities and I plan to extend
this task to print a one piece minion with a rotating head.
05.02 Scan an Object
There are a large number of 3D scanning methods available and we
wanted to try as many of them as possible, so the other Manchester
students and I decided to split this task and do some individual
scanning as well as testing some methods as a group. The group
worked on these methods together and then picked one each to write
up.
05.02.1 Group Work on Scanning
This is a list of the scanning methods we tried, with links to the
individual write ups.
- Roland Modela Scanning
- by James
- Autodesk 123D Catch - by Annie
- FabScan - by Mike
- Reconstruct Me (Microsoft Kinect)
- Structured Light
05.02.2 Individual Work on Scanning
In addition to the group work above, I used Autodesk 123D Catch to
scan a variety of objects. I chose thing of different sizes
and types to see how well the system performed with each. All
my 123D scans were captured using the iPhone app and the built in
camera on my iPhone 5. I also printed out some of my 123D
scans. The online version of 123D Catch proved to be too slow
(even on my modern Mac Book Pro) to reliably edit or clean up the
captured meshes. I eventually ended up downloading the meshes
and either printing as is or cleaning up in netfab and meshlab.
Scan of the same pencil sharpener used in the Modela scan above,
each scan is from a set of between 30 and 40 photos. Object
size approx. 20mm.
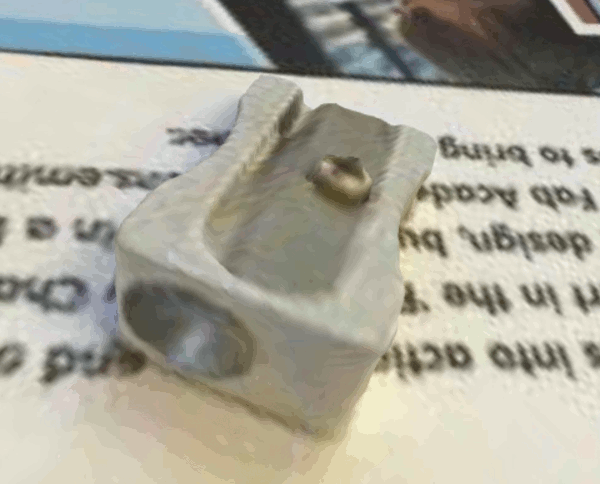
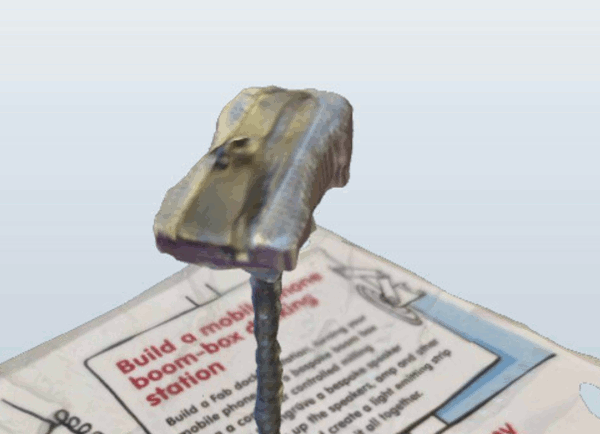
I scanned this twice, once with the object flat on a table top and
once with the object suspended in mid air on the end of a
screw. In some of the other scans I had done, object on a
table type surface did not have clean boundaries between the object
and the surface, 123D understandably had trouble distinguishing the
two. Hence I tried with the object in mid air, this also
allowed me to get the camera in at a better angle all of the way
around such a small object. I was expecting better results
from the mid-air scan and was surprised that it was worse.
More investigation required to understand why.
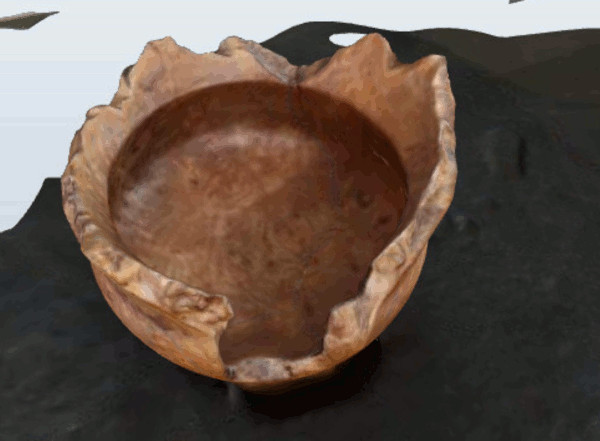
123D scan of a turned wooden bowl that we had at home. Scan
from a set of about 50 photos. Object size approx. 200mm.
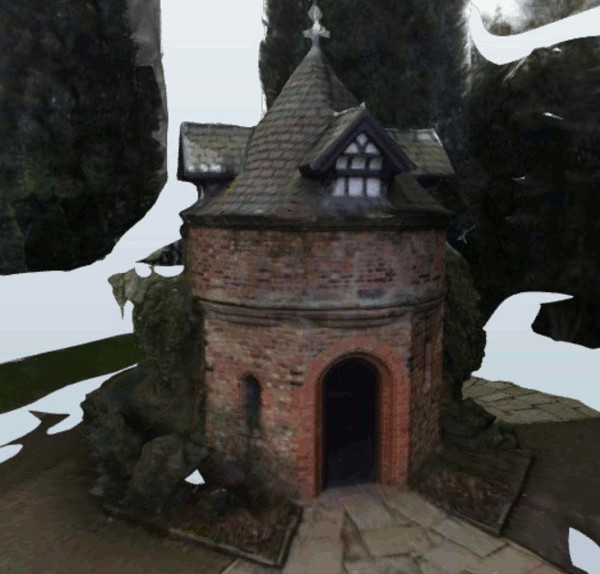
123D scan of an interesting building (Dovecote) in our local
park. Scan from a set of about 50 photos. Object size
approx. 4000mm.
This nicely highlights how 3D scanning can be used fro archival
purposes to keep a record of historic artifacts.
STL Files for all of the 123D Catch models can be downloaded from my
123D Catch page http://www.123dapp.com/MyCorner/JamesFletcher139-21142139/models.
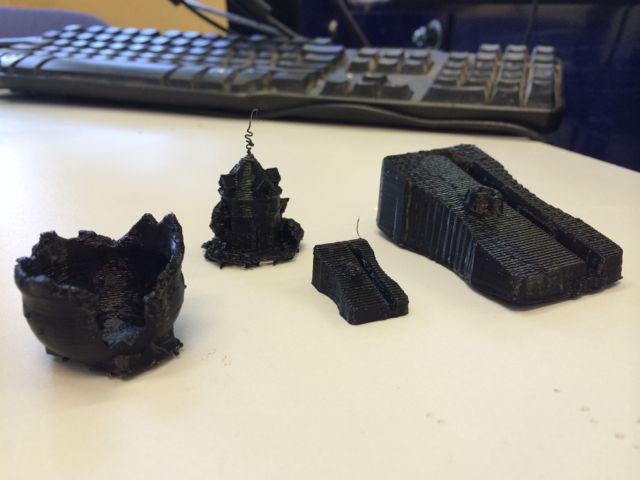
05.03 Print the Scanned Objects
I also printed both the wooden bowl and the dovecote, the image
below shows the prints of all of our 3D scanned objects.
05.04 Build the Scanner
I'm fascinated by the concept of structured light scanning and I'd
like to build a structured light scanner, however I ran out of time
this week. Maybe building it, working on improving the
resolution and making it a Rasp Pi powered self contained device
would make a good final project.
I also think the the now considered 'ancient' concept of a '3D arm'
type scanner is much under rated. It seems to have been
usurped by the 'cool crowd' of laser scanners and
photogrammetry. However I think it still has a place as very
accurate way of scanning certain types of objects.
05.05 3D Printing Update
In later weeks I've found time to modify my Minion model to have a
captive rotating head and re-print it on the Dimension
printer. Newer design files here.