 Fletch's Fab Academy 2014 Blog
11. Composites
This weeks assignment is to design and make a 3D mold (around 1ft
square) and produce a fiber composite part in it.
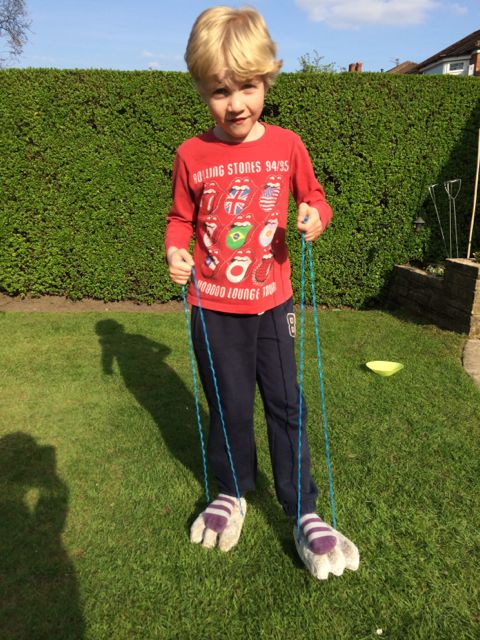
So I decided to make some 'Gruffalo'
monster feet type stilts for my 5 year old son. We initially
did some process tests as a group which I've described towards the
end of this page.
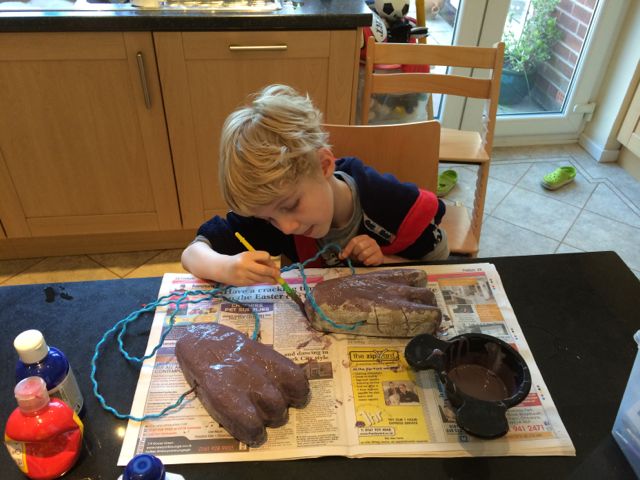
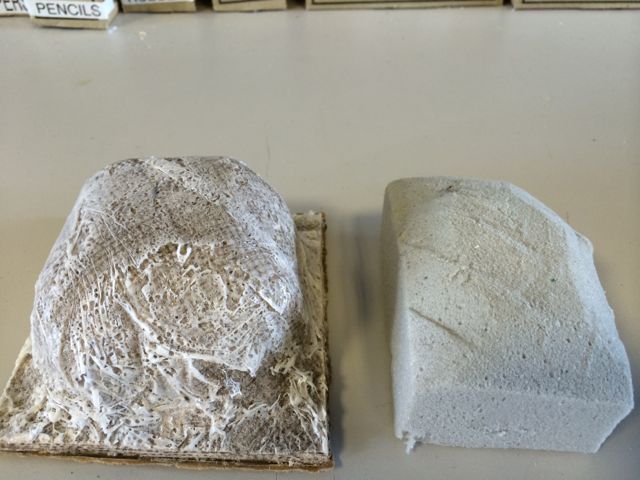
11.01 Making the Monster Feet
After our process tests I decided that the best method was to keep a
foam core inside the composite as this provided a very rigid final
part that was most likely to survive 'abuse' from my kids.
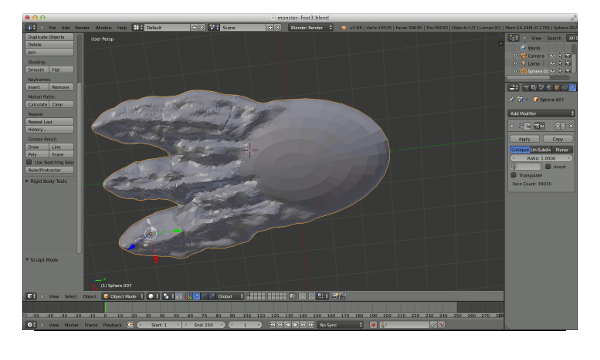
As part of this assignment it seemed like a good time to start to
learn a more 'artistic' 3D modelling package as most of my 3D work
up to now has been done using Kokopelli, so I started to learn Blender. I modeled a very
poor monster foot in Blender by first creating a sequence of spheres
that roughly matched the shape I wanted, squashing them, combining
them into one single mesh and then using the 'sculpt' mode to create
a more foot like object.
I then exported the STL file form Blender and used PartWorks 3D to
scale it to the maximum size that would fit on the foam offcuts we
had available. I ignored the fact that the object had a lower
surface that the shopbot wouldn't be able to mill and just set the
machine up to cut the top surface and then cut out around the object
leaving tabs so that I had a thick foam foot with a flat underside.
STL file here (sorry
it's nearly 800Kb!).
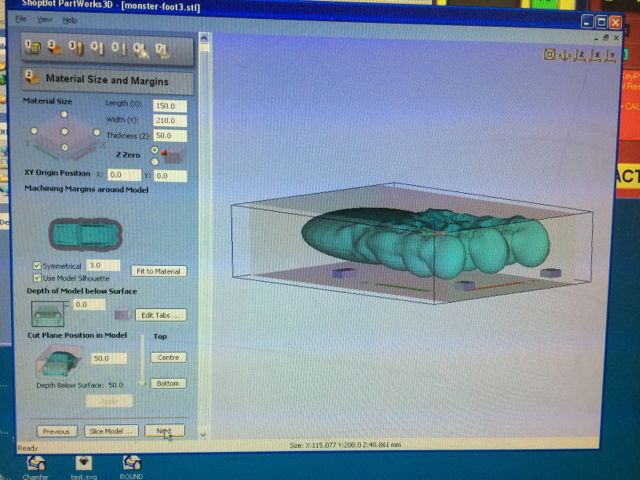
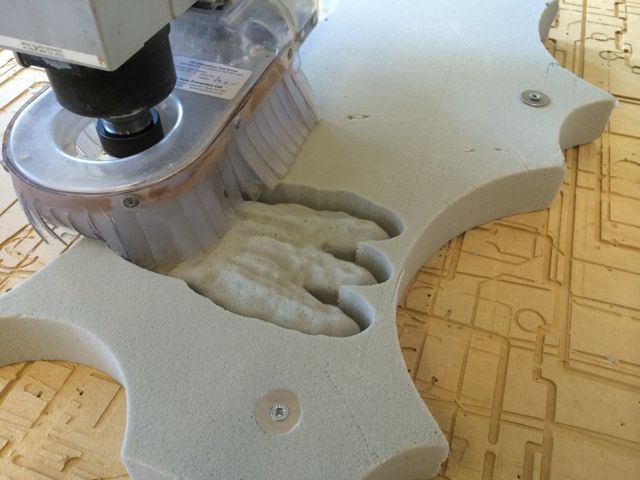
I machined two foam feet. I used a spindle speed of 12000rpm,
9 inch/sec feed rate for the roughing pass, 4.5 inch/sec feed rate
for the finishing pass.
I then proceeded to cover them with two layers of hessian
each. I decided to use the Smooth-Cast 310 as my resin because
we had pretty much run out of West System Epoxy in the lab.
Before covering each foot I pushed a piece of 0.5 inch PVC tubing
through the foam at about the mid point of the foot to leave a
channel for the rope. I cut some teeth into the end of the
tube with a craft knife so that I could rotate it like a drill and
get it through the foam easily.
The first foot I tried to cover with with single sheets with darts
cut so that they folded to fit. This was a difficult process
as the Smooth-Cast material has a very low viscosity and doesn't
provide much natural adhesion between the hessian and the
foam. It was difficult to keep all of the layers in place and
we ended up using staples to hold layers whilst I tried to assemble
it all.
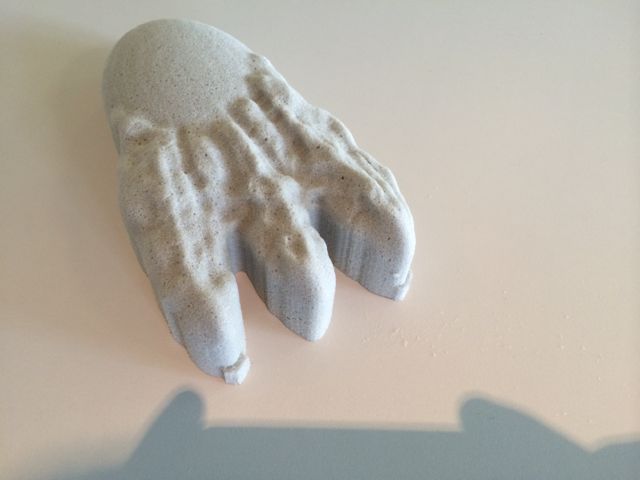
After a couple of hours at room temperature the part was cured
enough to remove from the mold. It was very rigid but required
quite a bit of cleaning up of edges with a Dremmel and sanding to
remove excess fabric that had 'escaped' in my messy assembly
process.
As the first foot proved so difficult to assemble I decided to try a
slightly different method for the second one. I cut the fabric
into 1 to 2 inch wide strips and soaked them in a bath of
Smooth-Cast before wrapping them around the foam mold.
This second attempt was much easier to assemble without resorting to
extra pairs of hands or staples. Although the final result had
about as much excess material that required removal.
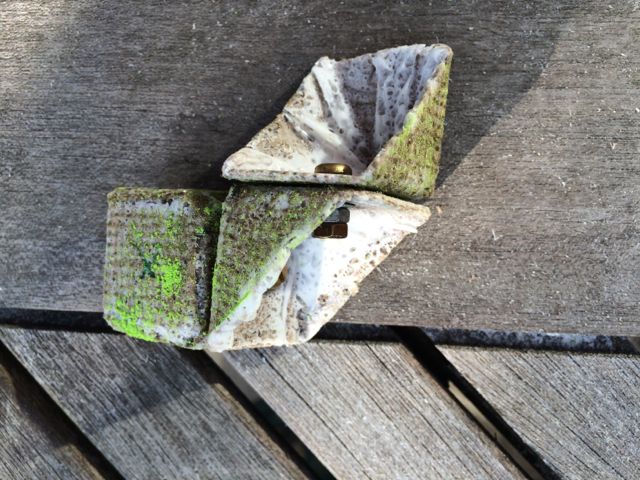
After a bit of tidying up here are the final finished feet. My
5 year old has promised me that he will paint them during his Easter
holidays.

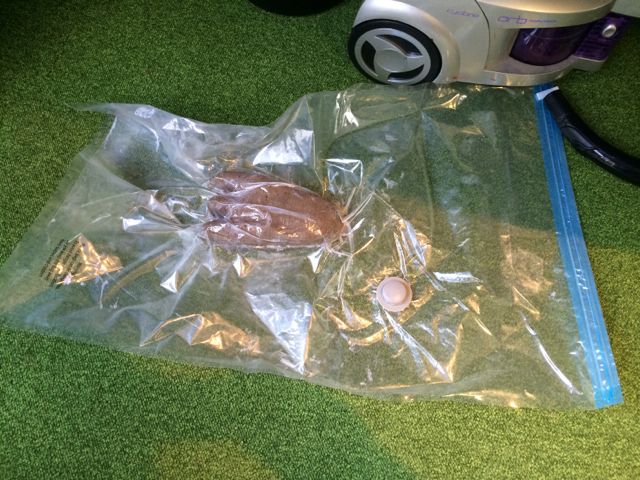
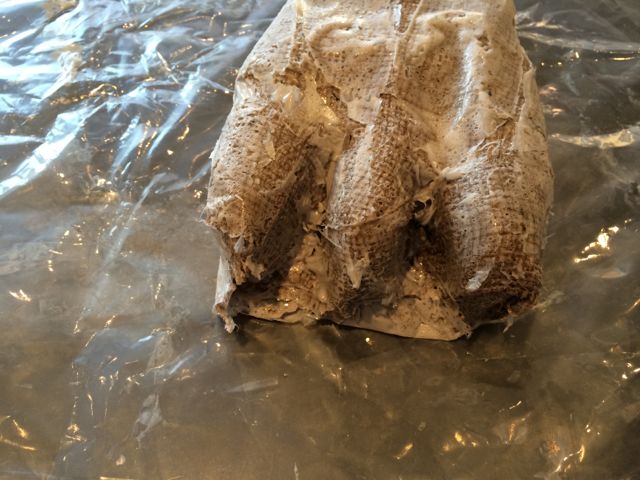
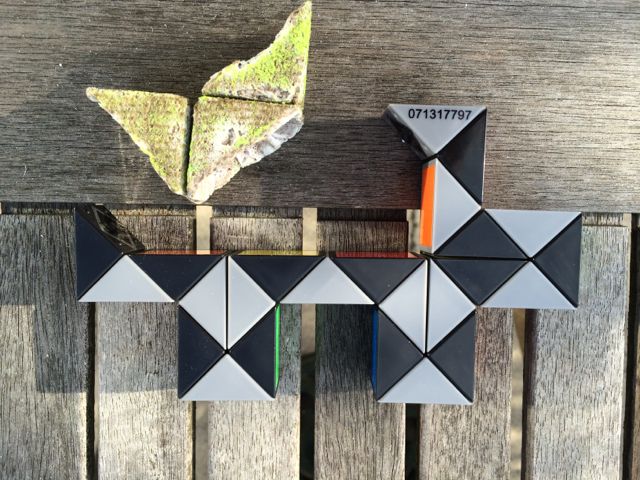
11.02 Rubiks Snake Segments
One of my possible final project ideas is to make a self folding
Rubiks Snake. So i did a quick test making a few Rubiks Snake
segments. I used an open one part mold and vacuum bagging
during the curing process.
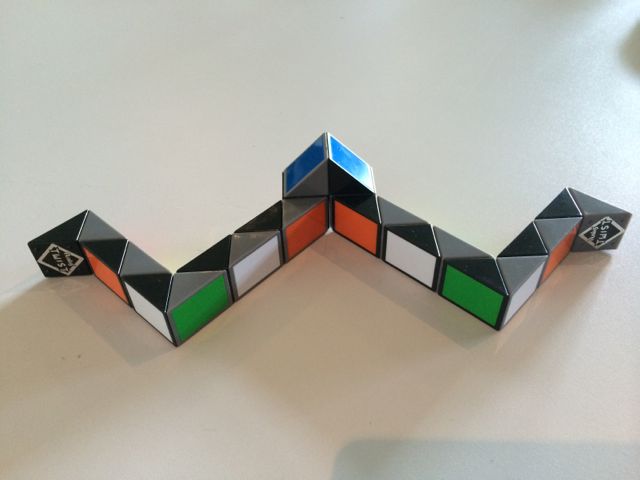
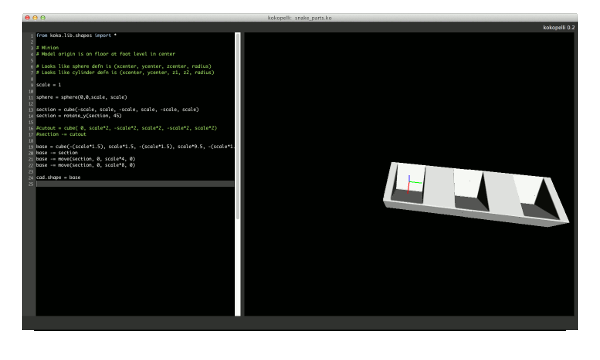
I created a very simple test mold in Kokopelli with space for three
snake segments. After cutting the mold I tried to see if I
could seal the small surface bubbles with spray paint, but this
wasn't very successful.
I measured and cut fabric to fit so that I had two layers all over
the mold. I then covered the surface of the mold in Vaseline
to help release the parts before vacuum bagging all three segments
at once.
Even with the Vaseline it required a bit of force to remove the
parts from the mold and I suspect that I wouldn't be able to use the
mold more than a few times. After a quick clean up and sanding
I drilled some holes in the center of the square faces and assembled
my very short snake.
11.03 Process Tests / Experimentation
Composites don't seem to come up that often in our lab so we decided
to experiment as a group with the processes involved before deciding
exactly what to do for our individual work.
In the lab we had the following materials:
- High density weave hessian
- Low density weave hessian (Burlap)
- West System 105 Resin and 205 Hardener
- SmoothOn Smooth-Cast 310 liquid plastic
11.03.1 Test 1 - Open Mold
We found a large wooden object in the lab and decided to use it as
an open mold, just layering sheets of hesian and using the West
System 105 Epoxy.
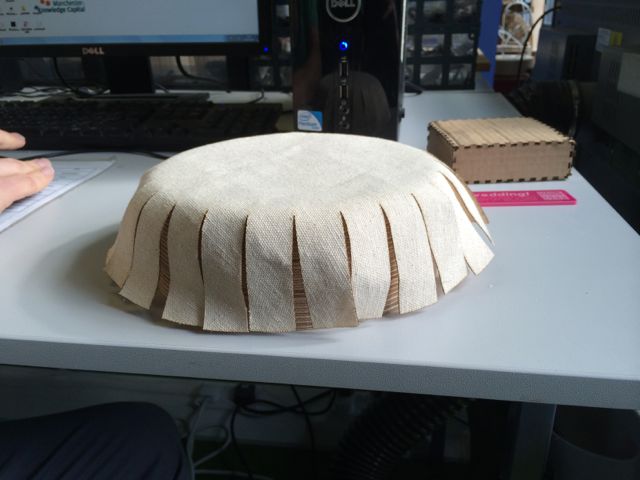
As the object was almost a cylinder (it was actually a truncated
cone) we lasercut the fabric to fit. We decided to do 2 layers
with a different cut pattern for each layer to produce
overlaps. We covered the wooden mold in cling film to stop the
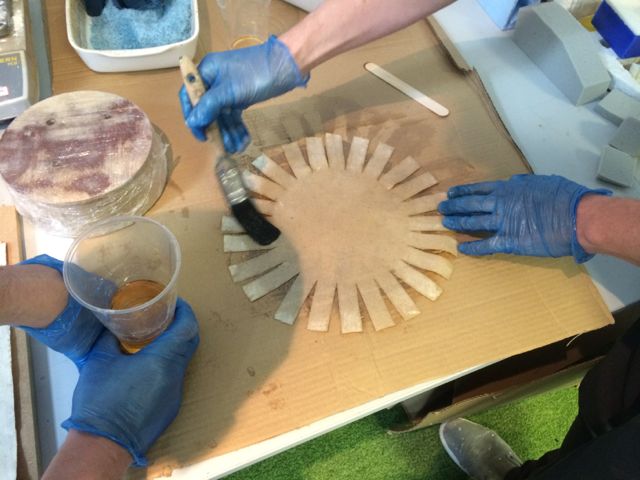
epoxy sticking to it.
We then worked the Epoxy into the fabric with an old paintbrush and
layered it onto the mold, left over epoxy was poured ontop and
worked into the fabric.
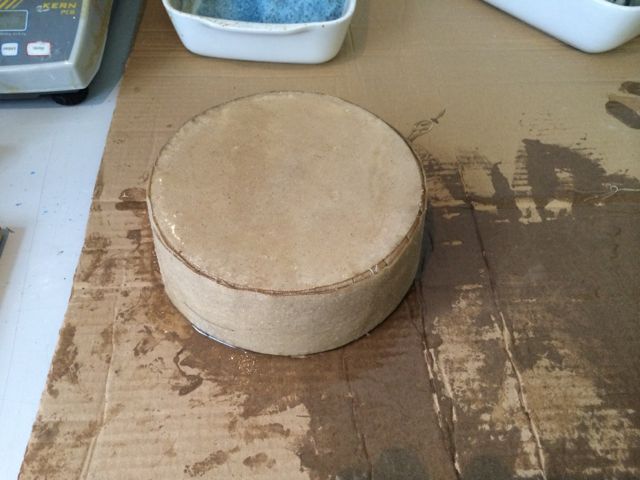
Final object de-molded.
When we initially de-molded the object it was still slightly
flexible. Over an additional 24 hours it became much more
rigid. Once it had fully hardened we all had a go at standing
on it to test it's strength. Not a particularly scientific
test, but fun.
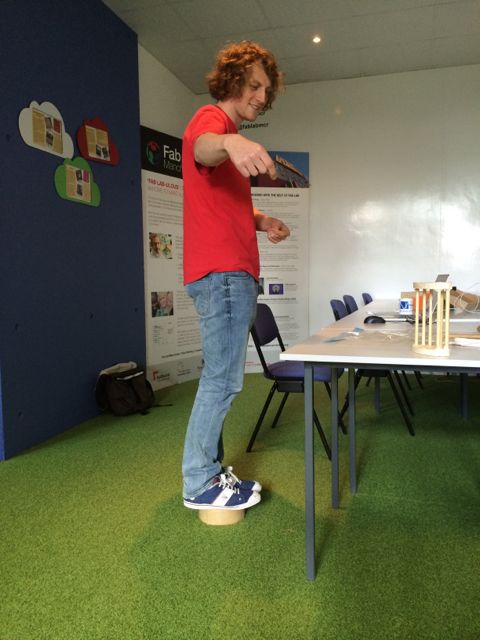
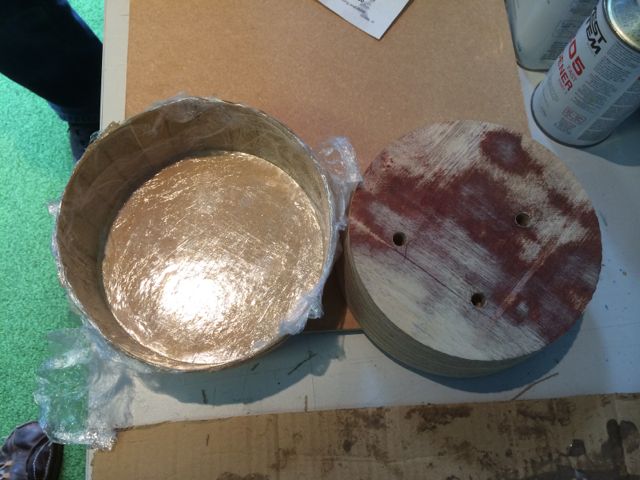
What we learnt:
- Even a simple open mold can produce a very strong object.
- For a regular shape it's easy enough to laser cut the fabric,
but more attention needs to be paid to the joints on the sharp
edges.
- Probably needs more than 2 layers.
- Working the Epoxy into the material with a brush is too slow
and the epoxy starts to go off before we can completely cover
the fabric. It also renders the brush useless afterwards.
- The Epoxy goes very 'jelly' like once it starts to go off and
is difficult to use at that point.
- The Epoxy generates a lot of heat when it goes off.
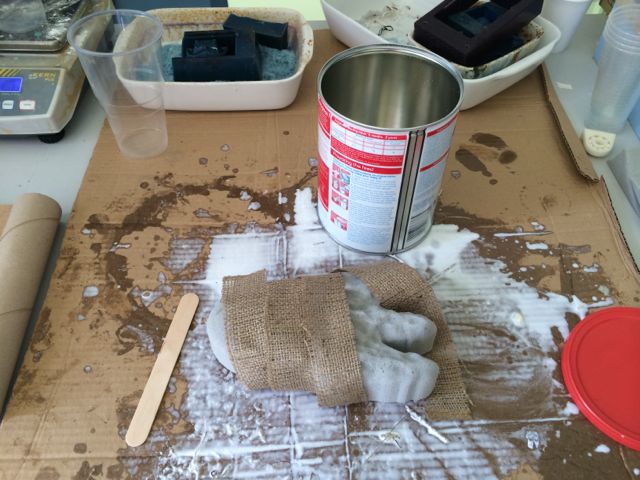
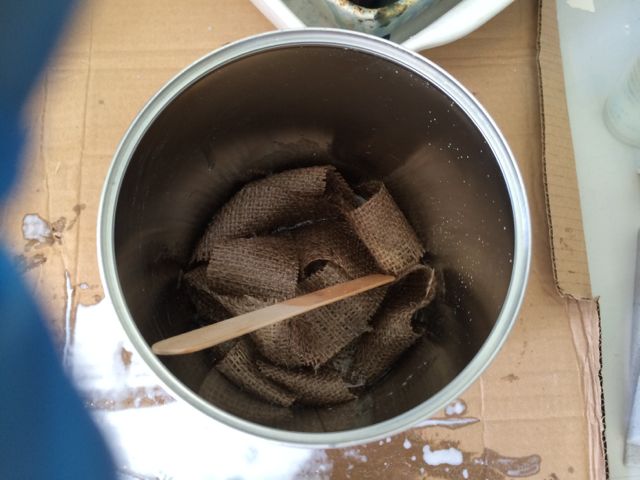
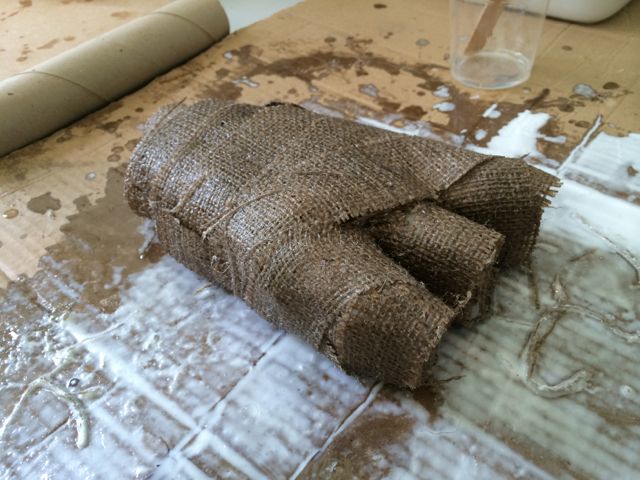
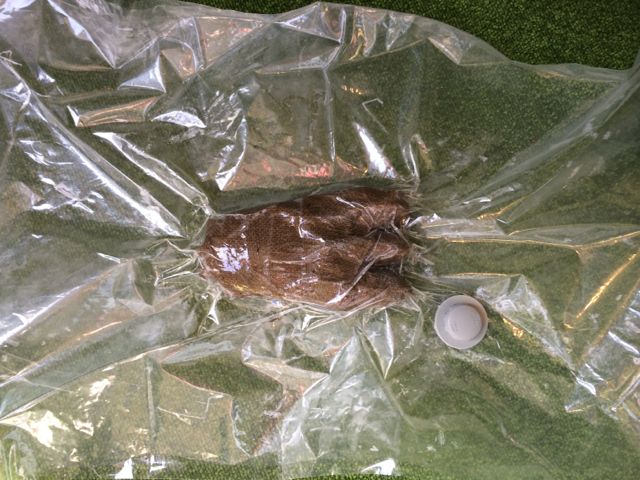
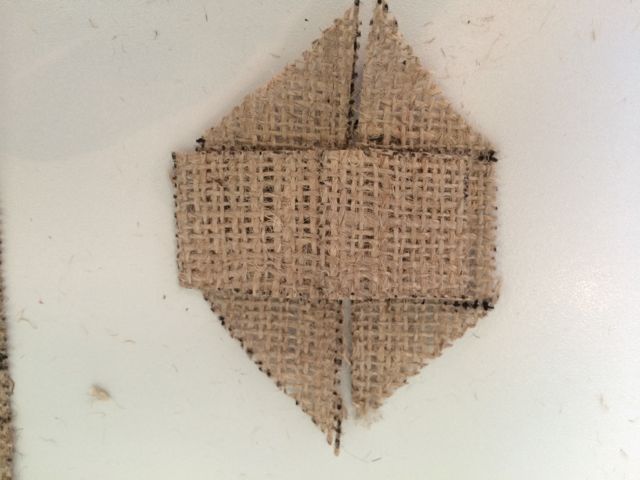
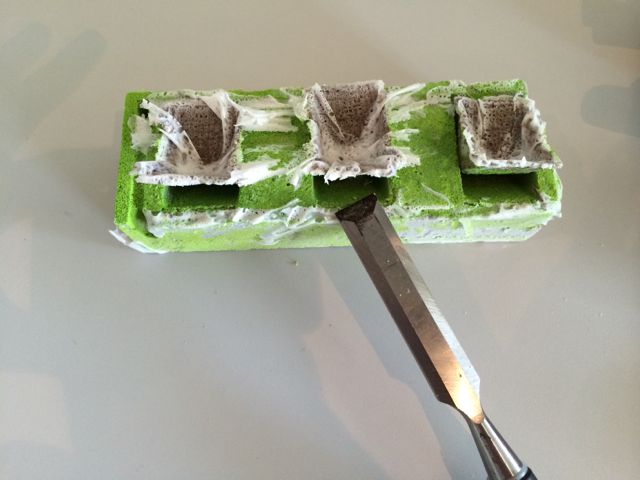
11.03.2 Test 2 - Vacuum Bag
For our second test we decided to mold around a foam core using the
smooth-cast 310 and a vacuum bag. We cut a simple block shape
in the foam with a craft knife, layered a hand cut square of fabric
with darts cut into it, poured on the mixed smooth-cast and used a
wooden stirrer to spread it around. The whole thing was rather
messy, so we assembled it all on a piece of cardboard and inserted
it 'cardboard and all' into the vacuum bag.
For the vacuum bags we used 'clothes storage' bags and a standard
vacuum cleaner to generate our vacuum. The vacuum had to be
'topped up' every 30 minutes or so as the bags were slightly leaky.
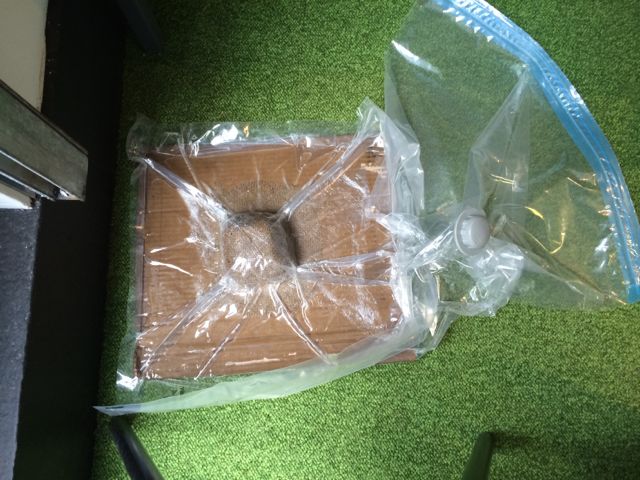
What we learnt:
- This object proved to be very light and strong, stronger than
the foam core on it's own.
- The surface finish was very messy, with lots of ridges from
the folds created in the bag under vacuum.
- The smooth-cast 310 is very runny and much more difficult to
contain than the epoxy. However this means that its also
very quick to work into the fabirc.
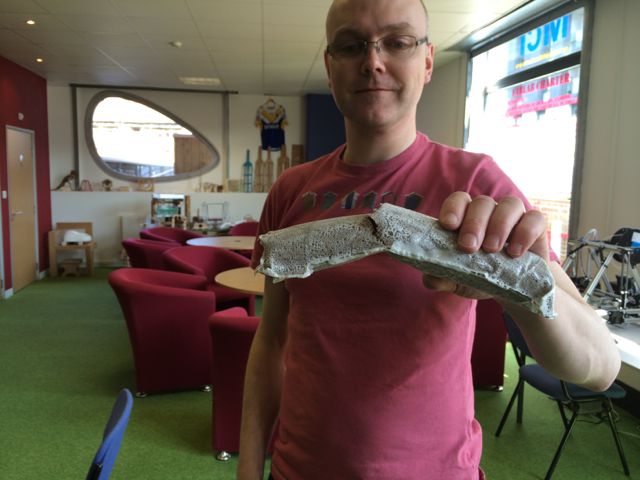
11.03.3 Test 3 - Strength
We covered a cardboard tube from the center of a roll of paper towel
to see if we could make a structural component. We used two
strips of hessian winding in opposite directions and Smooth-Cast
310. The final object wasn't very pretty but it did take my
weight.
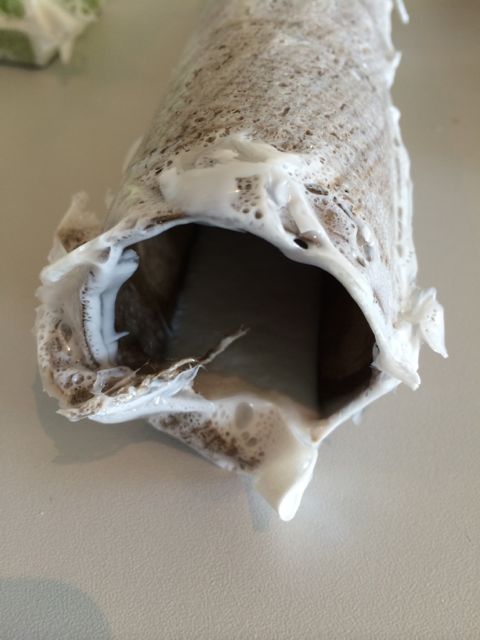
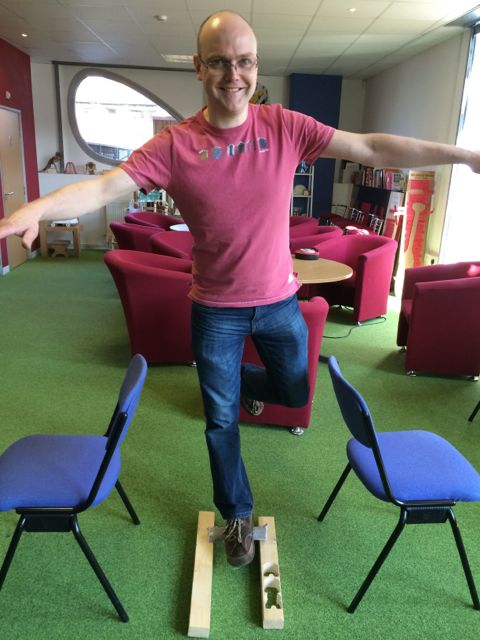
After a while it finally failed! When we came back to this
part the following day it felt much more rigid. With more care
and longer curing time I think we could make genuine structural
parts out of these materials.
11.04 Conclusions
It's messy.
Care is required to make the final parts 'tidy' without the need for
lots of post process cleaning of edges etc.
Update
Oliver has painted his monster feet!