Exercise 07 - Computer-Controlled Machining
Make something big on a CNC machine
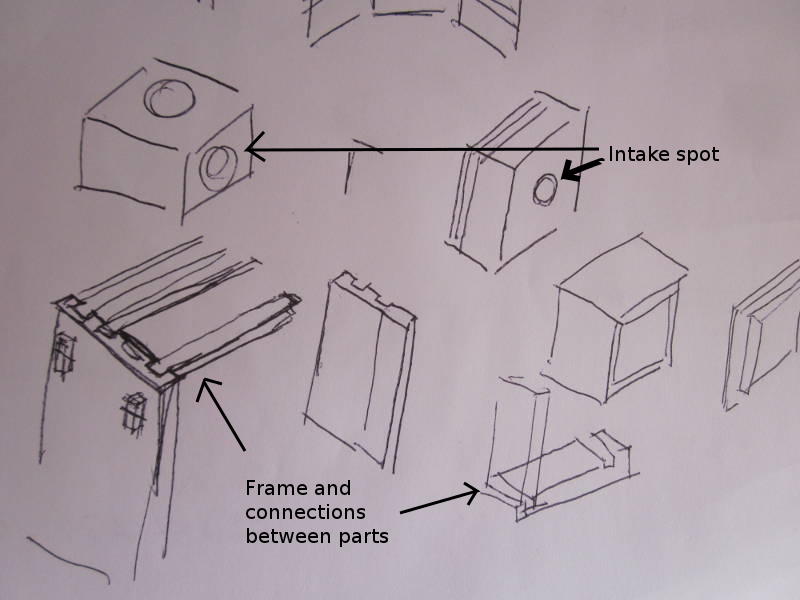
Sketching the frame for my final project
This week I worked on the design and production of a frame that could have been the frame of my final project. My final project is a filtering device that could be used together with one of the machines normally present in a Fab Lab.
In the picutre below you can see the kind of filter that at the beginning I had in mind. This is an example of a filtering device that works together with a machine that cuts pieces of wood. So it could be easly adapted for our CNC Machine.

My sketches:


Some issues ocurred during this week. Solution: keep the design simple, don't lose time and finish the job
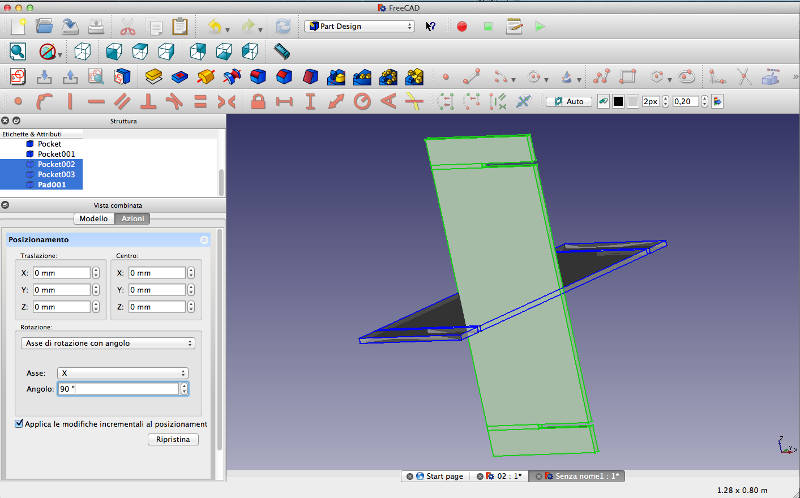
During this week I used a new aided-design software: FreeCad. It was the first time for me with FreeCad and I found it not very simple and user-friendly.
It was also the first time for me with V-Carve and with the CNC machine.
We had also a problem at the lab with the CNC machine that didn't work for two days. Both the tutor and the expert of the fab lab told me to try to fix it by my own. I tried to fix it but I couldn't solve the problem untill one guy from the lab helped me and he solved the problem.
So I had some troubles during this week and I had to keep the design very simple and I didn't have time to try more complex geometries. At least I managed to check all the steps of the exercise and I finished the work along the week.
I thought that during my final project I would have used again the CNC machine but at the end I shifted to a smaller filtering device where the laser cutting machine was enough to process the frame.
Learning and testing FreeCad
I checked several video tutorials to start using FreeCad.
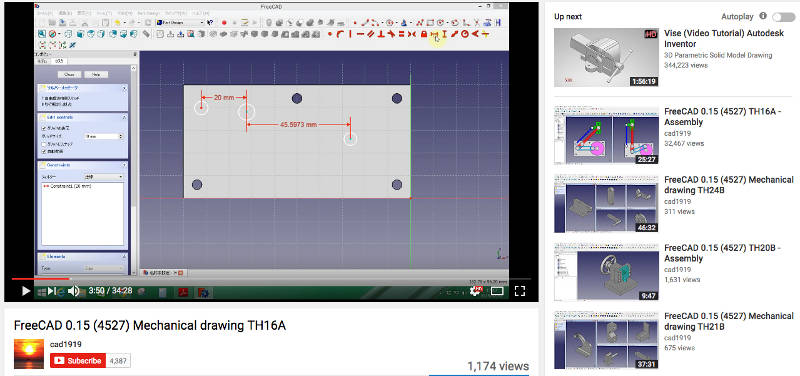
The sofware is parametric and this was handy when I had to modify the design.
At the beginning there were also engravings in my design.
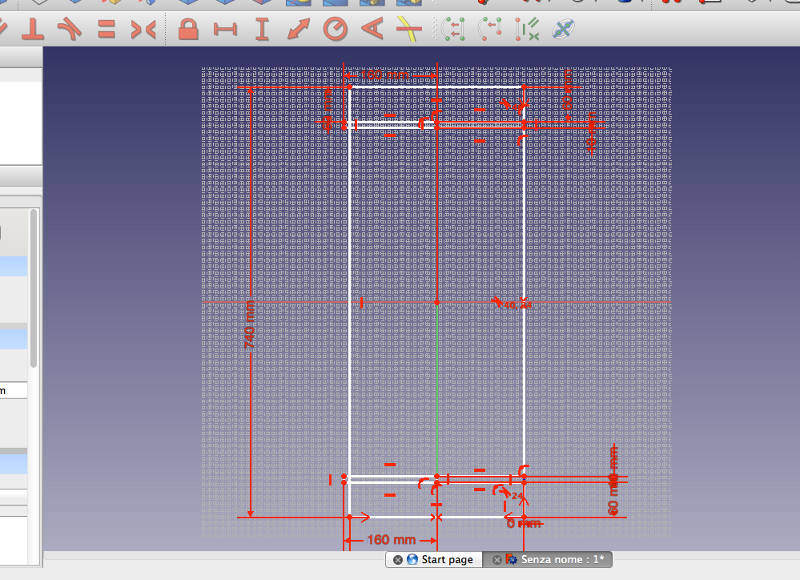
I draw a unique piece that could be used to do the complete frame. In my mind this was just a test.

I tried to visualise the assembly of the complete frame but my skills about FreeCad were still too low.
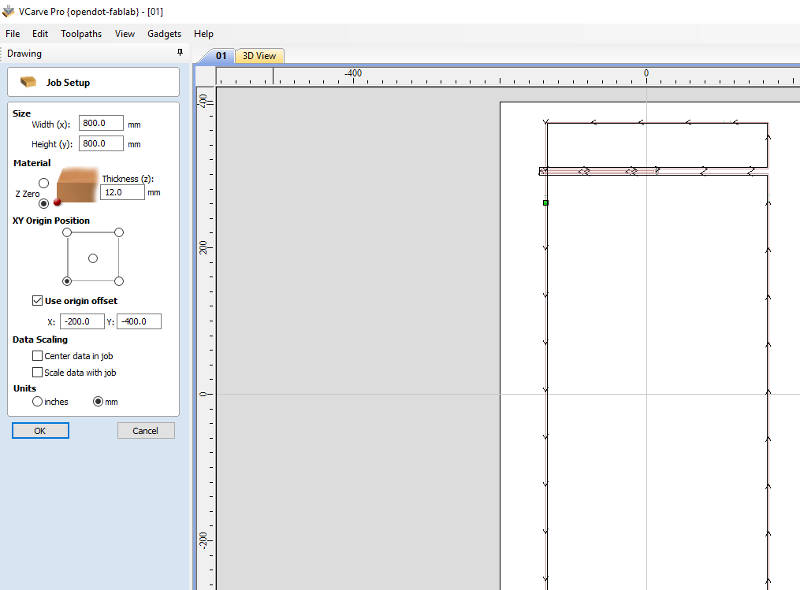
Learning and testing VCarve Pro
I imported the file .step in VCarve Pro and I set the parameters but I realised I did a mistake in my design during the weekend. Infact I chose the wrong thickness of the OSB panel that was prepared for the students of the Fab Academy.
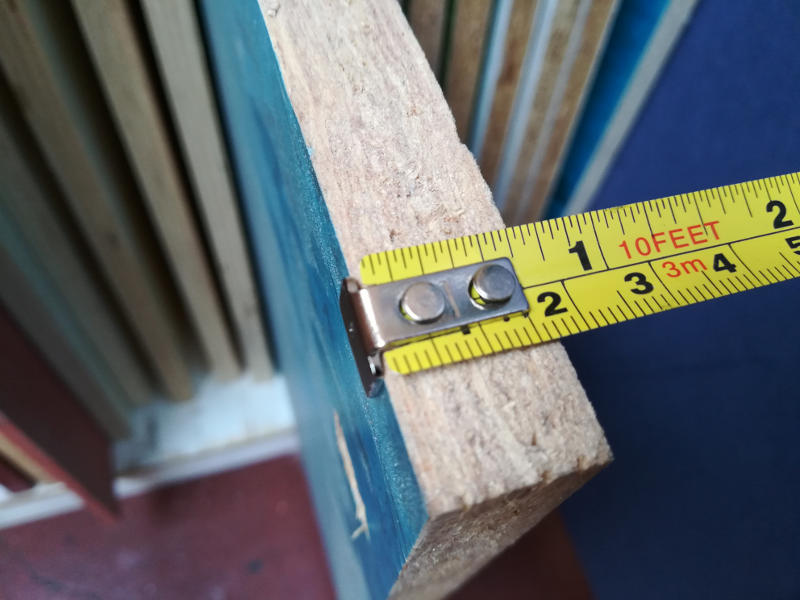
Mistake: back to parametric design
Here the real thickness of the OSB panel.
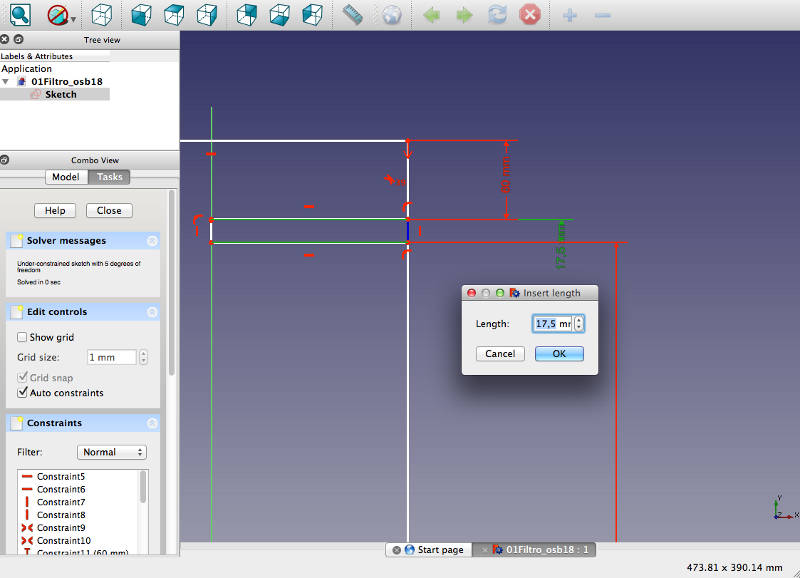
I could easly modify my design changing just one parameter because the drawing was parametric.
The final result of the unique type of piece capable to build the entire frame.

Second time VCarve Pro
I set all the parameters in VCarve and I saved them to be able to use them again in the future.
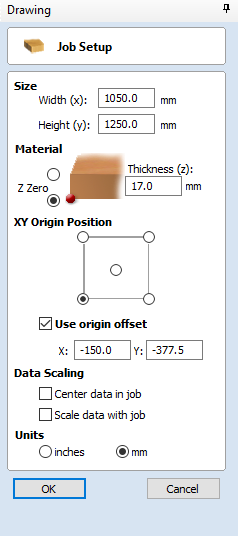
Drawing settings
Size of the milling area (check your sheet)
Thickness of the wood sheet (check your sheet)
XY origin of the milling area and offset (check your sheet)
Unit of measurement
Toolpaths settings
Start and cut depth (= to the thickness of the wood sheet)
Select tool (see next window)
Path of the tool and rotation (look at the end mill)
Tabs to hold the parts (at least three per part)
Safe Z (= the height where the milling tool moves between cuts)

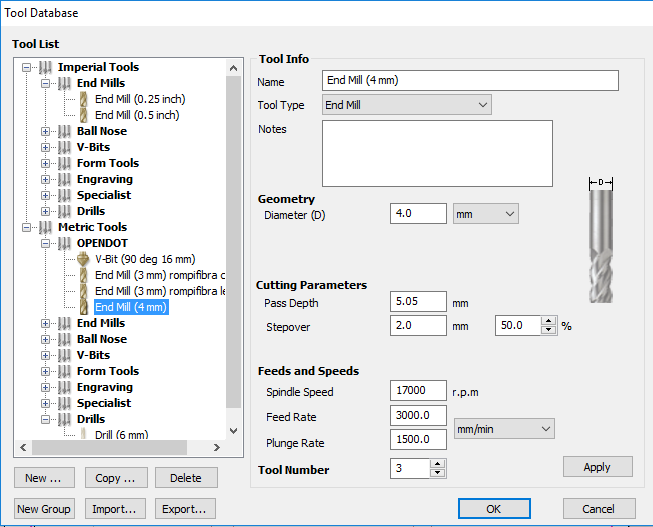
End mill settings
Pass depth = 5.05 mm (depth of the cut)
Stepover = 2 mm (offset between toolpaths)
Spindle speed = 17000 r.p.m. (rotational speed of the end mill)
Feed rate = 3000 mm/min (moving speed when the tool is cutting)
Plunge rate = 1500 mm/min (entering speed of the tool in the material)
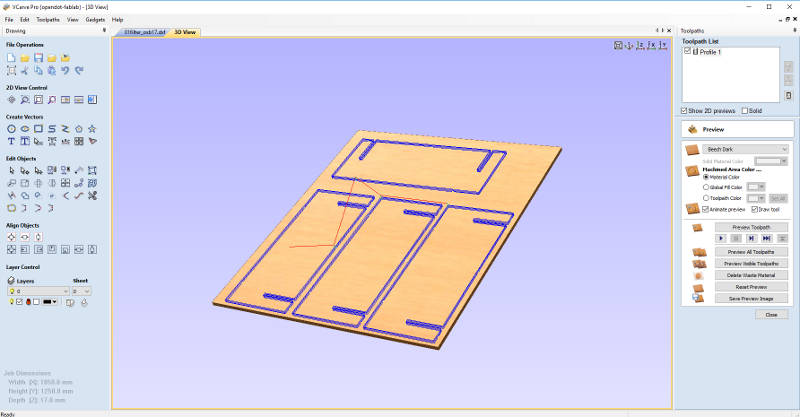
Preview
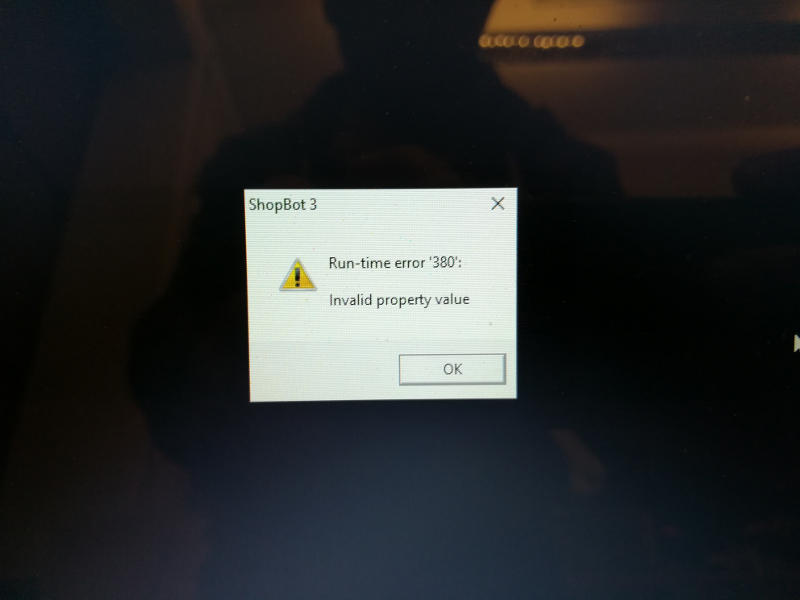
Error initializing control software of CNC machine
Here there is the error that stucked me for almost two days with the CNC machine blocked.
Milling
On Thursday I recordered this videos where Tiziano from OpenDot gave us an introduction to how to inzialise and use the ShopBot milling machine.
Some days after and precisely on Wednesday, after the problem to the machine was solved, I checked again those two videos on my smartphone and I was able to mill my pieces.
Resuming steps (video n.1):
Fix the wood sheet to the working area. Check the phisical position of your coordinate system that you have set in VCarve.
Check connections between laptop and CNC machine
Push the Reset button of the machine and the machine re-starts
Use the red and yellow controllers to move the endmill for replacement and also to set the zero x,y,z of your coordinate system
If you need to change the end mill: block the machine removing the alarm key
See the video if have any doubt removing the old end mill and putting the new one. See also the video n.2 for to set the new zero x,y,z
Resuming steps (video n.2):
Do zero x,y,z in differnt spots and keep the lower one
When you change the scale of the movment remember that the first movement will be done by the machine with the old scale
Click Cut Part to load the file
Start the fan connected to the filter that will clean the working area
Click start on the controller
Click yes to the windows that push up asking if you changed the end mill and if you did new zero x,y,z
Remember to push the green Start button on the machine to start the rotation of the spindle before the cut starts
Keep your finger over the space key on the lap top to pause the job if it is needed.
Push the red button on the CNC machine if something not safe happens
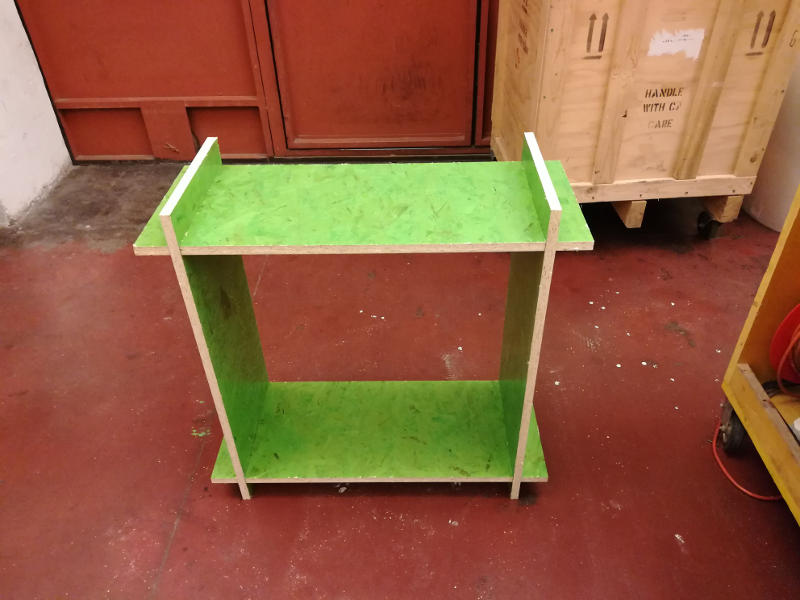
Here the result!
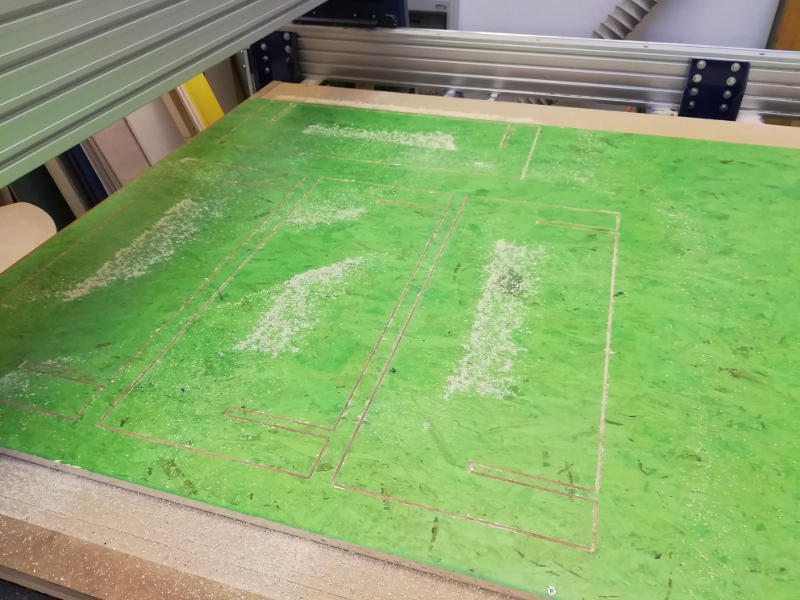
No glue, no bolts, but the frame was stable and it just needed to be closed with two panels on the front and on the back. My plan was to develop it during the final project but at the end I worked on a smaller device where the laser cutting machine was enough to produce all the frames and parts in wood.