#week 16
Interface and Application Programming
This weeks assignment
Write an application that interfaces with an input and/or output device that you made, comparing as many tool options as possible.
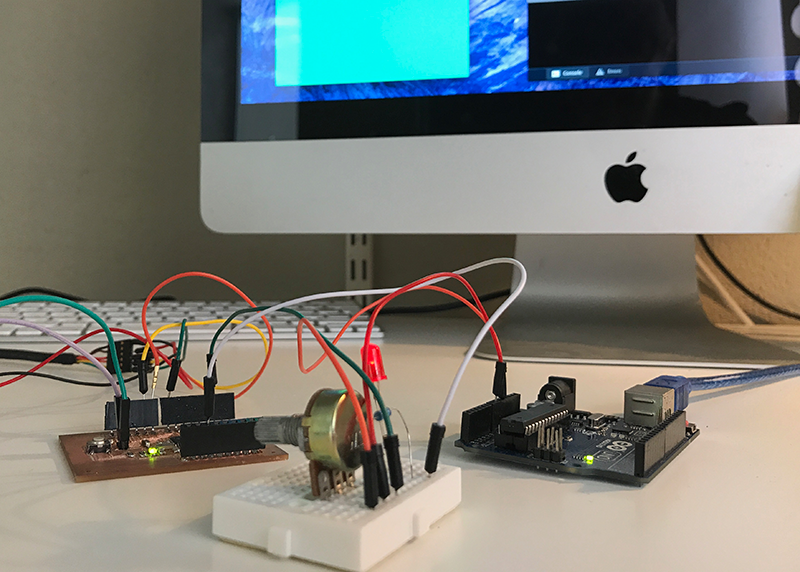
For this week, I chose to use my two Satscha boards and programme the interface using Arduino IDE and Processing.
I followed a tutorial on this page for how to set up the boards and code in both IDE and Processing, and sending data from Arduino to Processing.
I was slightly familiar with Processing from before, but I have never connected it to an Arduino - so wanted to look more into it.
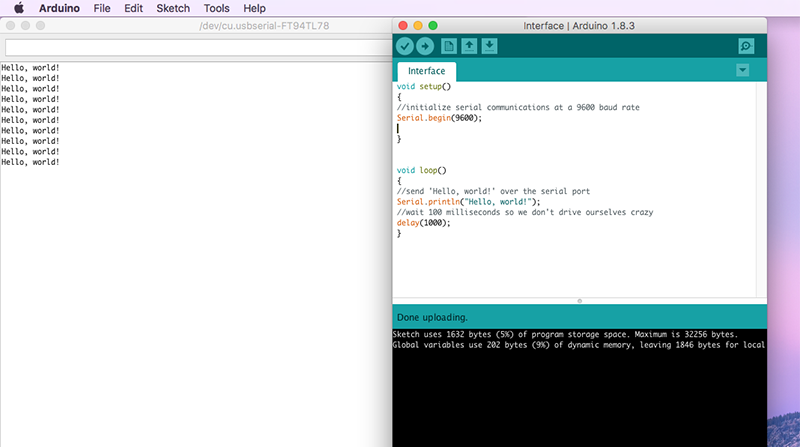
The tutorial was pretty much straight forward, untill I was going to upload the code to Processing, after the Arduino.
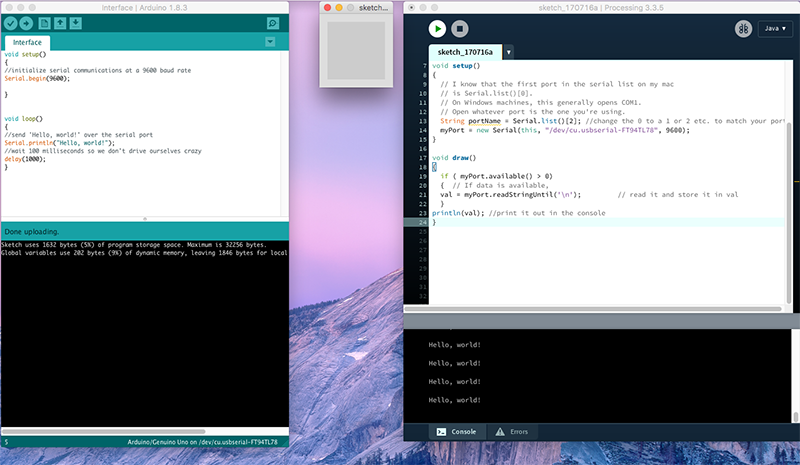
I had to change the code so Processing would listen in on the right Port (Number 2), but I still got the error: "Port is busy"
I had to do some searching for this part, because it didn't say anywhere what the solution was. Untill I came across a comment that someone made 2 years after questions was raised, and it turns out that you can't have IDE's serial monitor open when you run the code in Processing. It can only run one window at a time..
So I closed the Serial Monitor in IDE and it "Hello World" was running perfectly!
Arduino code
void setup()
{
//initialize serial communications at a 9600 baud rate
Serial.begin(9600);
}
void loop()
{
//send 'Hello, world!' over the serial port
Serial.println("Hello, world!");
//wait 100 milliseconds so we don't drive ourselves crazy
delay(1000);
}
Processing code
String portName = Serial.list()[2];
myPort = new Serial(this, "/dev/cu.usbserial-FT94TL78", 9600);
}
void draw()
{
if ( myPort.available() > 0)
{ // If data is available,
val = myPort.readStringUntil('\n'); // read it and store it in val
}
println(val); //print it out in the console
}
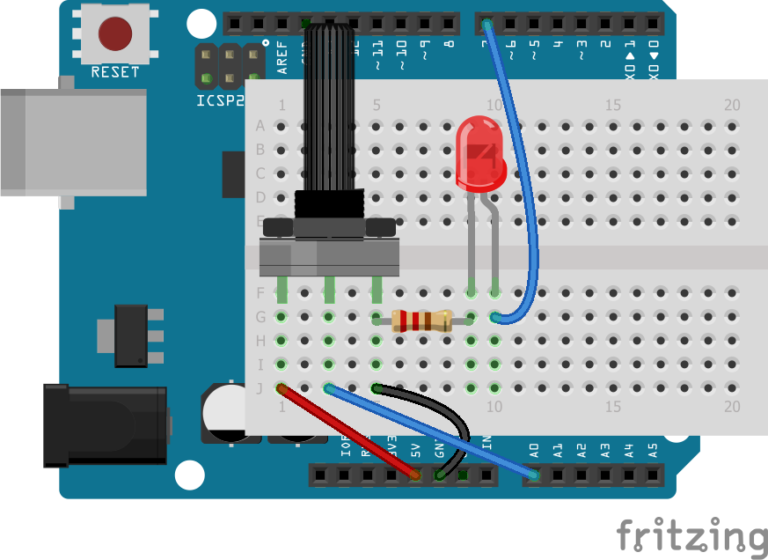
For making a communication interface both ways - to and from the Arduin/Processing - I hooked up my Satscha board to a breadboard, and placed a potentiometer and an LED onto it.
The aim is to be able to turn the LED on and off by clicking left/right in the Processing window, and to be able to change the color in the window by rotating the potentiometer.
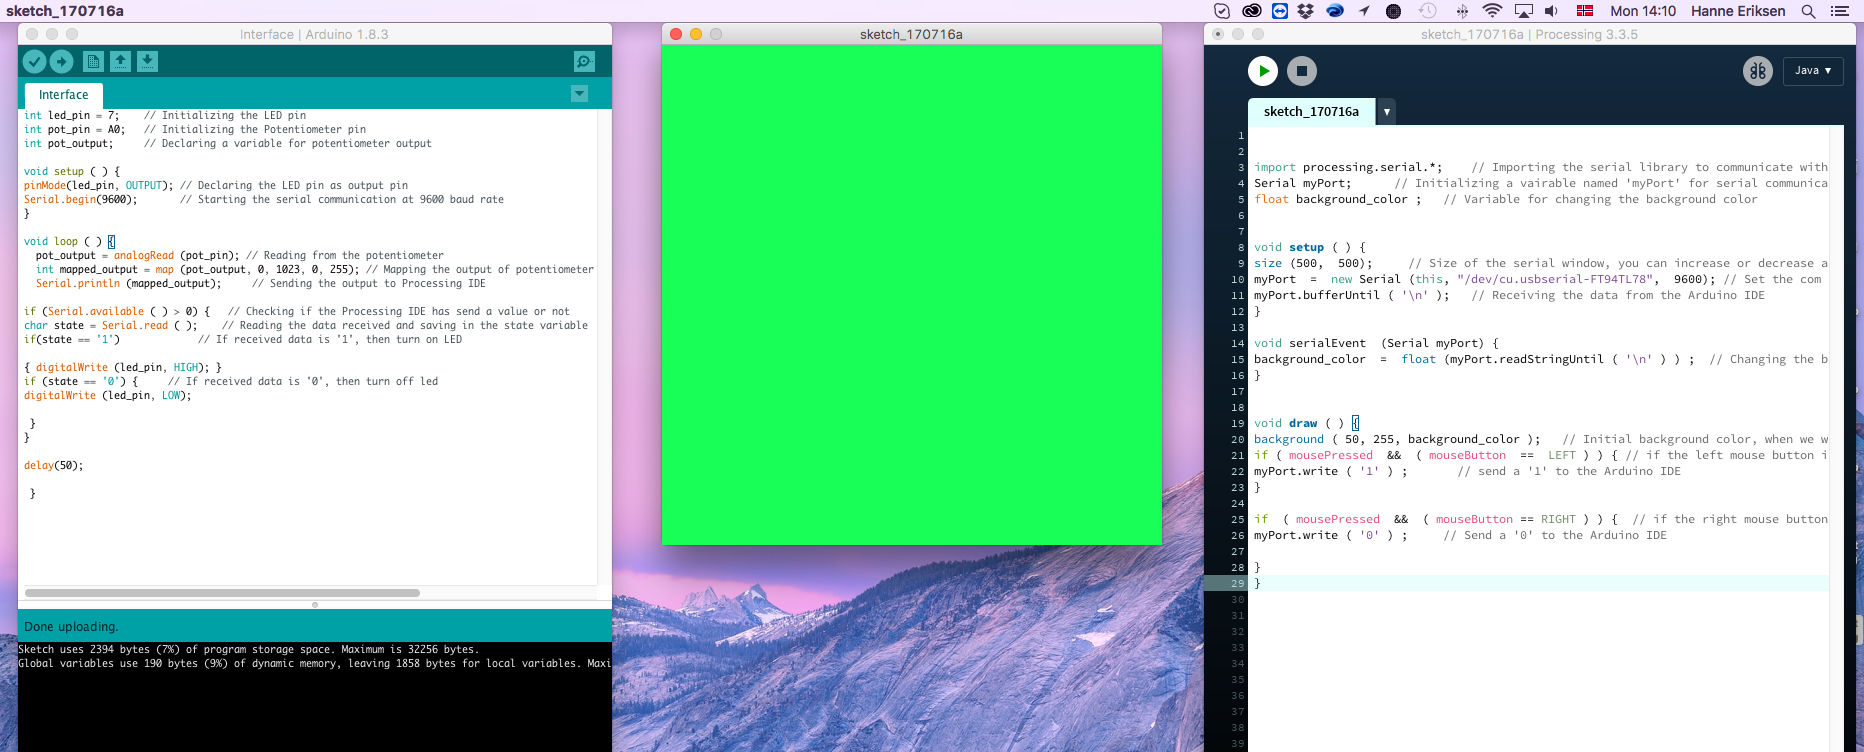
Final Code
Arduino
int led_pin = 7; // Initializing the LED pin
int pot_pin = A0; // Initializing the Potentiometer pin
int pot_output; // Declaring a variable for potentiometer output
void setup ( ) {
pinMode(led_pin, OUTPUT); // Declaring the LED pin as output pin
Serial.begin(9600); // Starting the serial communication at 9600 baud rate
}
void loop ( ) {
pot_output = analogRead (pot_pin); // Reading from the potentiometer
int mapped_output = map (pot_output, 0, 1023, 0, 255); // Mapping the output of potentiometer to 0-255 to be read by the Processing IDE
Serial.println (mapped_output); // Sending the output to Processing IDE
if (Serial.available ( ) > 0) { // Checking if the Processing IDE has send a value or not
char state = Serial.read ( ); // Reading the data received and saving in the state variable
if(state == '1') // If received data is '1', then turn on LED
{ digitalWrite (led_pin, HIGH); }
if (state == '0') { // If received data is '0', then turn off led
digitalWrite (led_pin, LOW);
}
}
delay(50);
}
Processing
import processing.serial.*; // Importing the serial library to communicate with the Arduino
Serial myPort; // Initializing a vairable named 'myPort' for serial communication
float background_color ; // Variable for changing the background color
void setup ( ) {
size (500, 500); // Size of the serial window, you can increase or decrease as you want
myPort = new Serial (this, "/dev/cu.usbserial-FT94TL78", 9600); // Set the com port and the baud rate according to the Arduino IDE
myPort.bufferUntil ( '\n' ); // Receiving the data from the Arduino IDE
}
void serialEvent (Serial myPort) {
background_color = float (myPort.readStringUntil ( '\n' ) ) ; // Changing the background color according to received data
}
void draw ( ) {
background ( 50, 255, background_color ); // Initial background color, when we will open the serial window
if ( mousePressed && ( mouseButton == LEFT ) ) { // if the left mouse button is pressed
myPort.write ( '1' ) ; // send a '1' to the Arduino IDE
}
if ( mousePressed && ( mouseButton == RIGHT ) ) { // if the right mouse button is pressed
myPort.write ( '0' ) ; // Send a '0' to the Arduino IDE
}
}