#week 8
embedded programming
This weeks assignment
Read a microcontroller data sheet.
Program your board to do something, with as many different programming languages and programming environments as possible.
programming with arduino
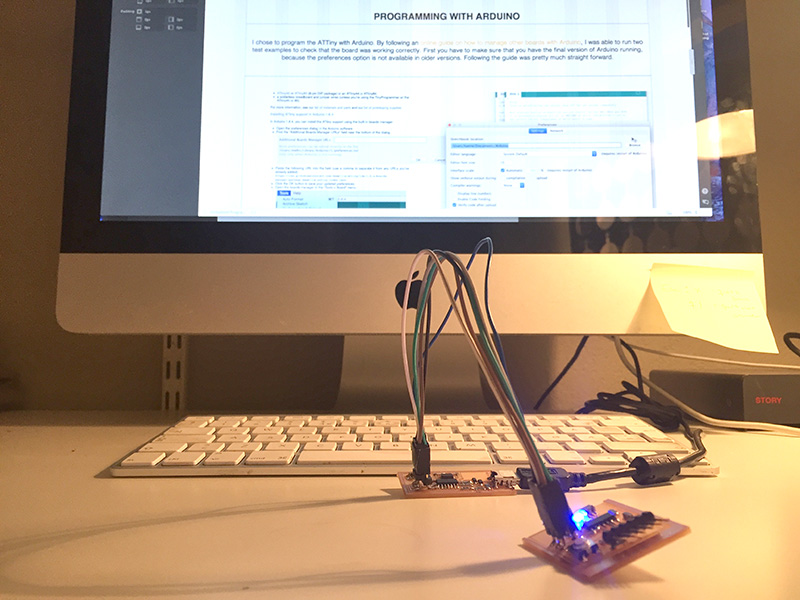
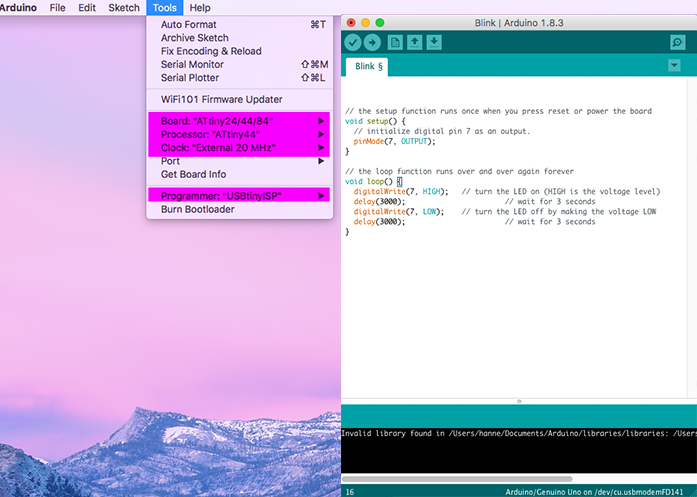
I chose to program the ATTiny with Arduino. By following an online guide on how to manage other boards with Arduino, I was able to run two test examples to check that the board was working correctly. First you have to make sure that you have the final version of Arduino running, because the preferences option is not available in older versions. Following the guide was pretty much straight forward.
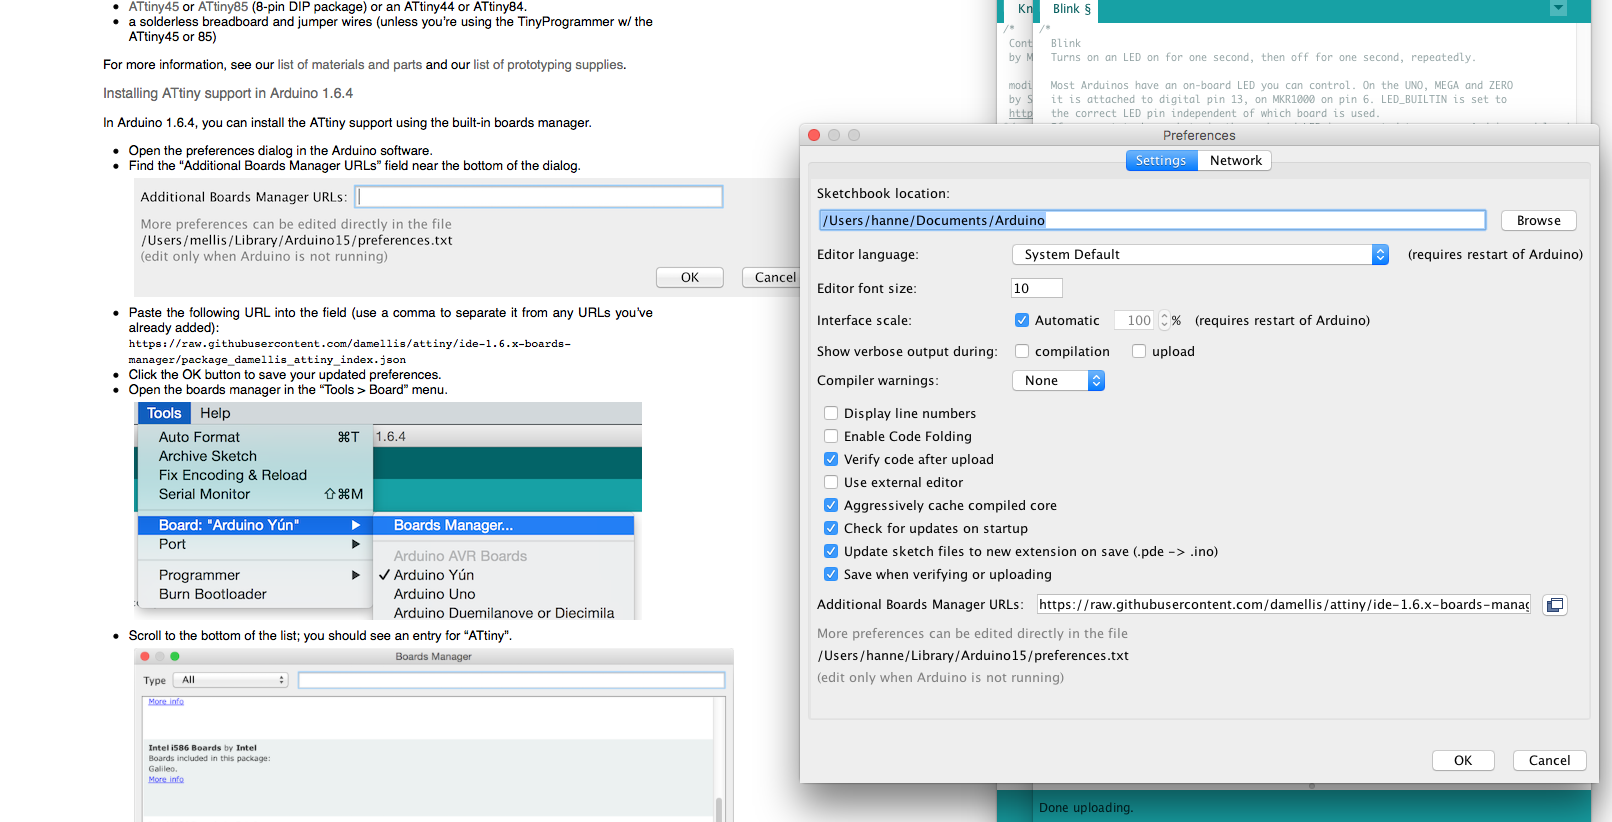
After installing the board, I connected the microcontroller to my computer and changed these setting under "Tools". Make sure you also run "Burn Bootloader" before you load the code.
I used the example "Blink" from the Arduino library, and in the code I set the pin output from the builtin LED on the ArduinoUNO board, to the number "7". I then changed the delay from 1000 to 3000 - making the LED blink every 3rd second - instead of every second. I then uploaded it to the board. This worked fine!
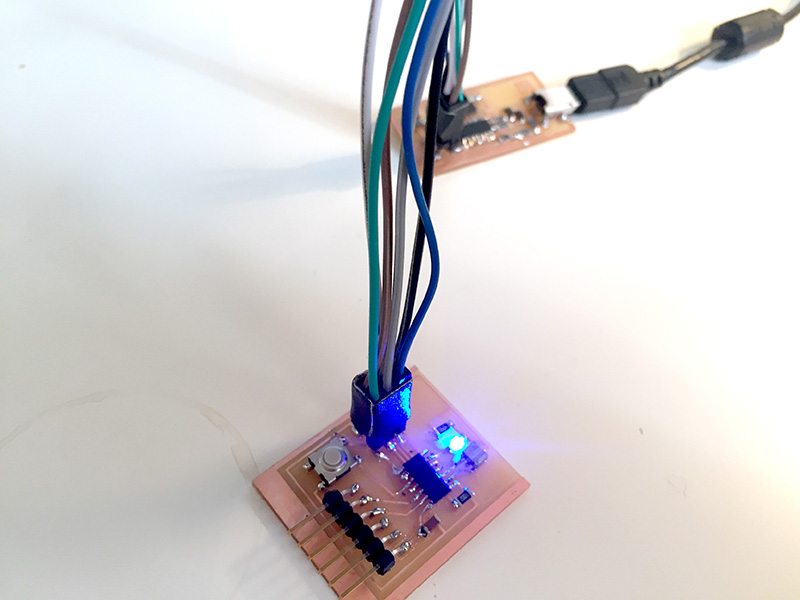
I then uploaded the example for the button, with the output pin "7" for the LED, and changed the input pin to "3" for the button. This was not working on the test. It turned out that the soldering for the button was a bit "off". But after a quick fix to make sure there was connection, I went back and connected it to power - and it worked excellent!
Programming the Satscha Board
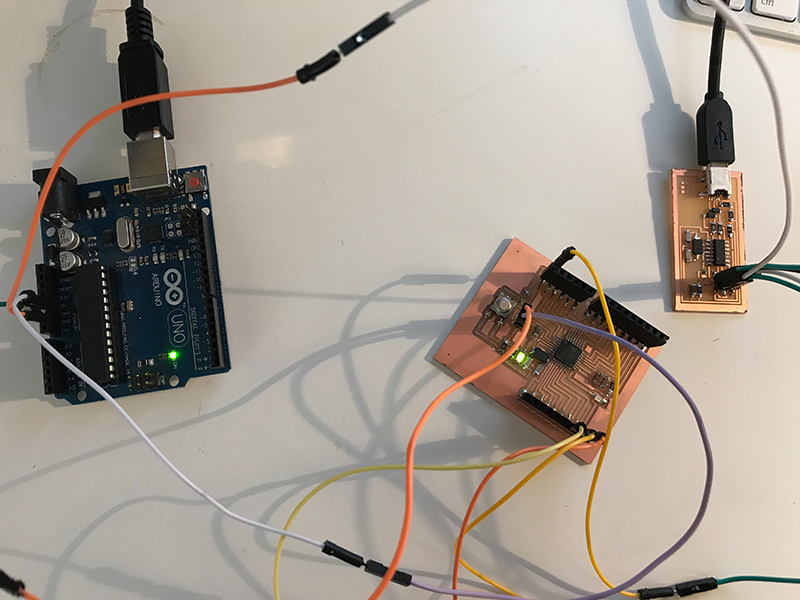
For programming the Satschaboard, I ended up using Arduino UNO. I tried to use the FabISP first, but since the controller did not show up under "Ports" in Arduino IO - I had to switch over to Arduino UNO. I later went back and did a debugging for the FabISP - see the debugging documentation here
Steps for programming the Satscha board
You can read the whole documentation and instructions here , I have shortened and simplified the process below:
1. Connect the Arduino board to the computer.
2. Open the sketch ArduinoISP from the sketch library in Arduino IO - and find find where it says "delay:20". Change this to "delay:40".
3. Upload the sketch to the Arduino UNO.
4. Put a 10pf capacitor between "Reset" and "GND" pin.
5. Connect the Satscha board as showed in the diagram below.
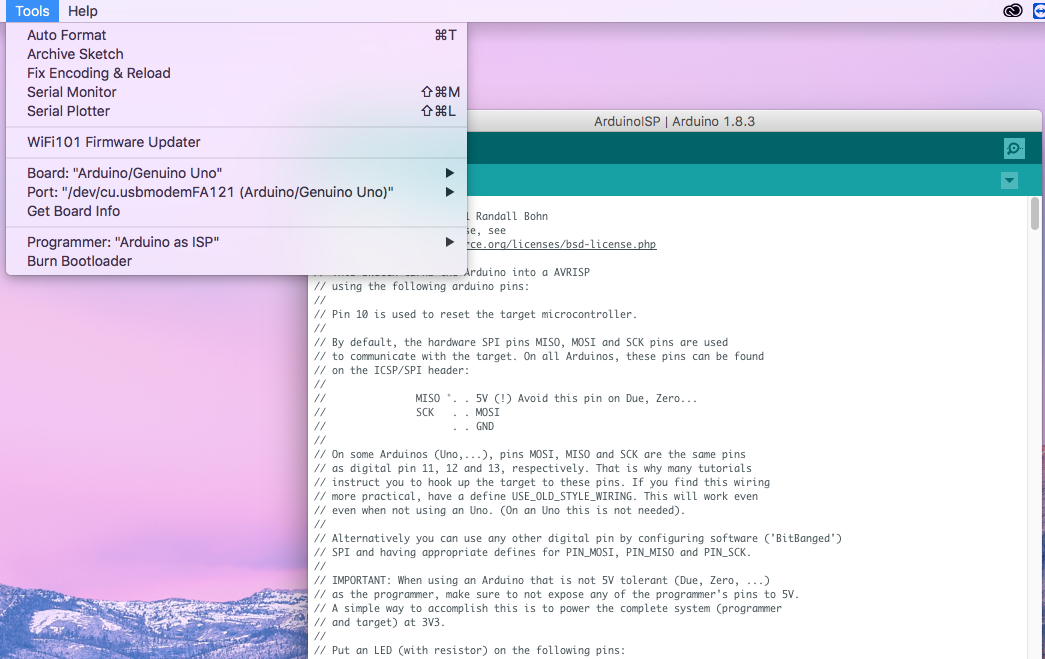
6. Configure the settings in Arduino IO as follow:
- Board: Arduino UNO
- Port: USB modem/Arduino UNO
- Programmer: Arduino AS ISP
7. Click "Burn bootloader"

8. This will send the code through the Arduino and onto the Satscha board. Remove the capasitor after burning the bootloader.
9. The new board should now work as a regular Arduino UNO.
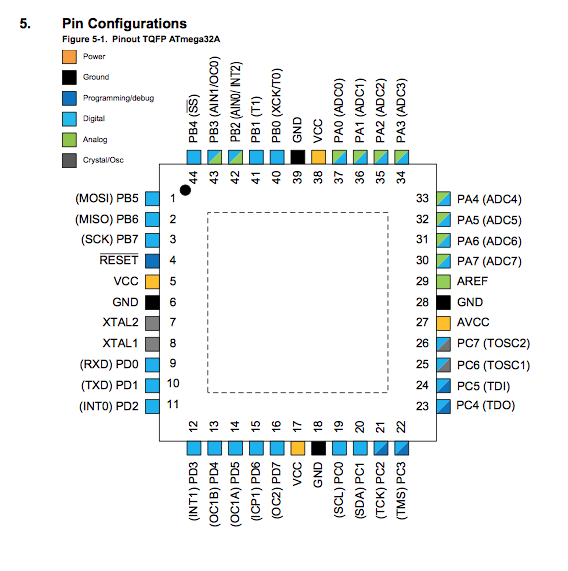
DATASHEET
The datasheet I read was the sheet for the Atmega32A - which is the microcontroller that is used on the Satscha board.
The most usefull points that I found in the datasheet was:
Operating voltage
2.7 - 5.5V - which tells what voltage to use
Max operating frequency
16MHz - which tells what kind of crystal that works with it (16mhz crystal)
The pin configurations and the description of the different ports.