Watering Plant Machine
The Idea
The idea is to develop an automatic plant watering machine that helps people who are out of their homes for a period of time. The system will move on the X and Y axis, a water pump will be built that will be automatically activated to water on the matrix of 3x3 positions that will correspond to 9 spaces to put planters. Initially we planned to use the CoreXY theory to move the head over the X and Y, but after several attempts, we realized that the structure needed for the movement to be stable is complex and we do not have enough time, so we use screws without end and nuts for displacement
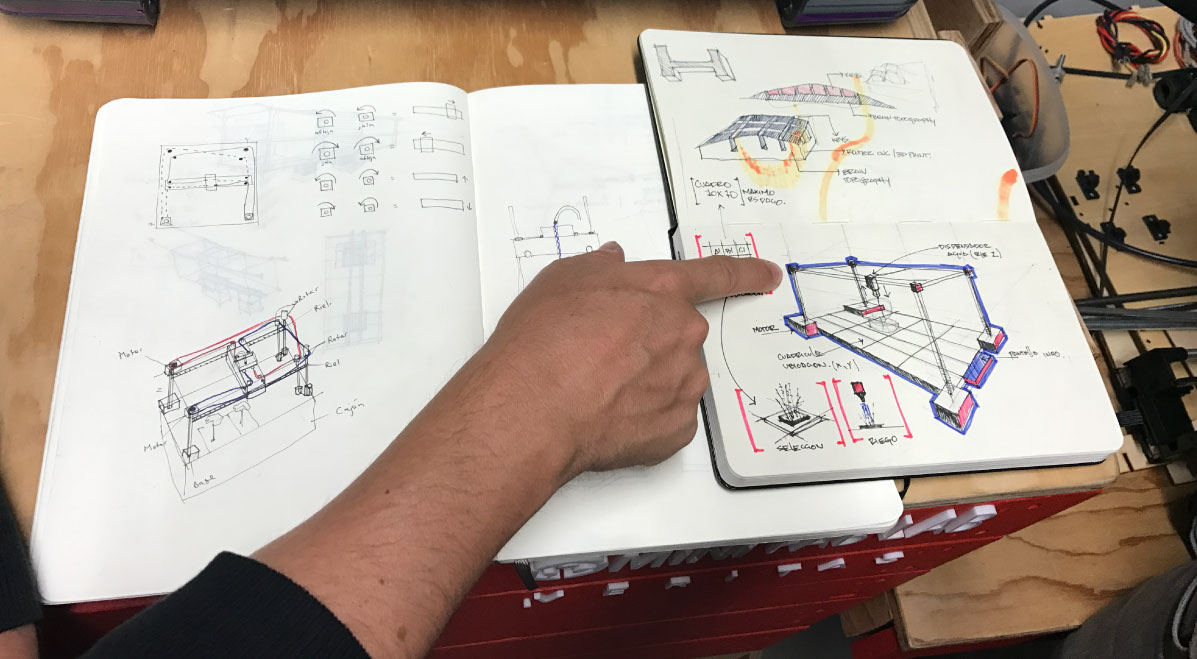
Picture 1: First sketch of the machine drawn by Esteban Oreamuno (student of architecture)
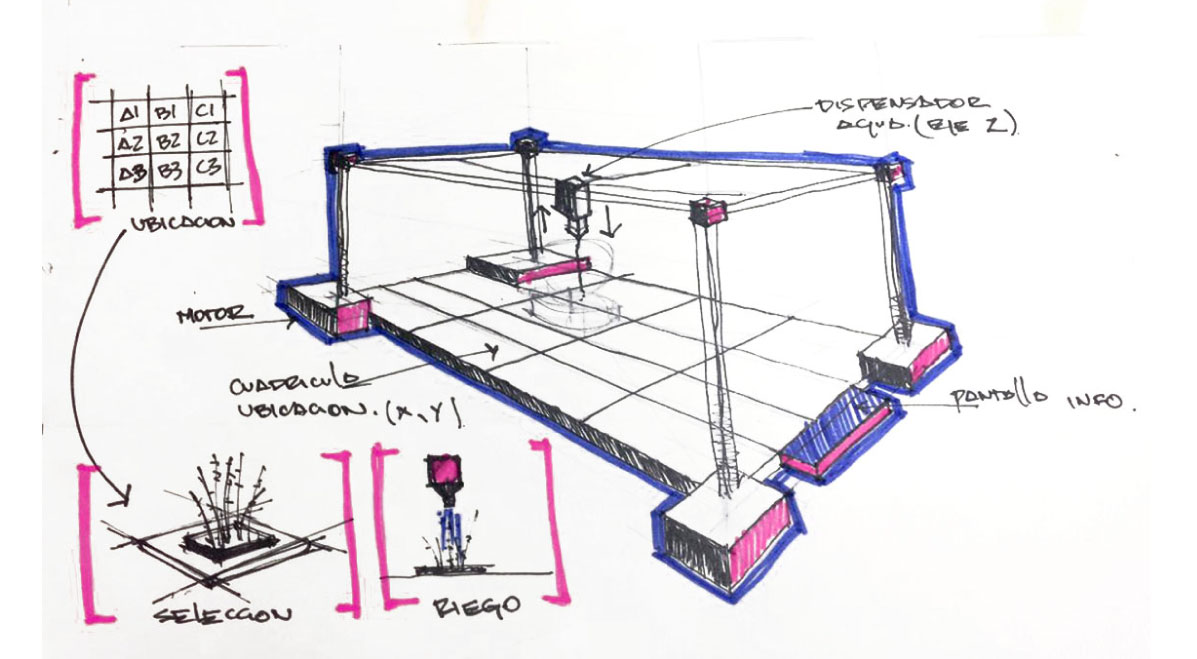
Picture 2: In the brainstorming (all team members) we plan to put a screen of 16x2 segments to give information regarding the movement of the machine, we also thought to move a small tank of water that would open and close automatically on each floor
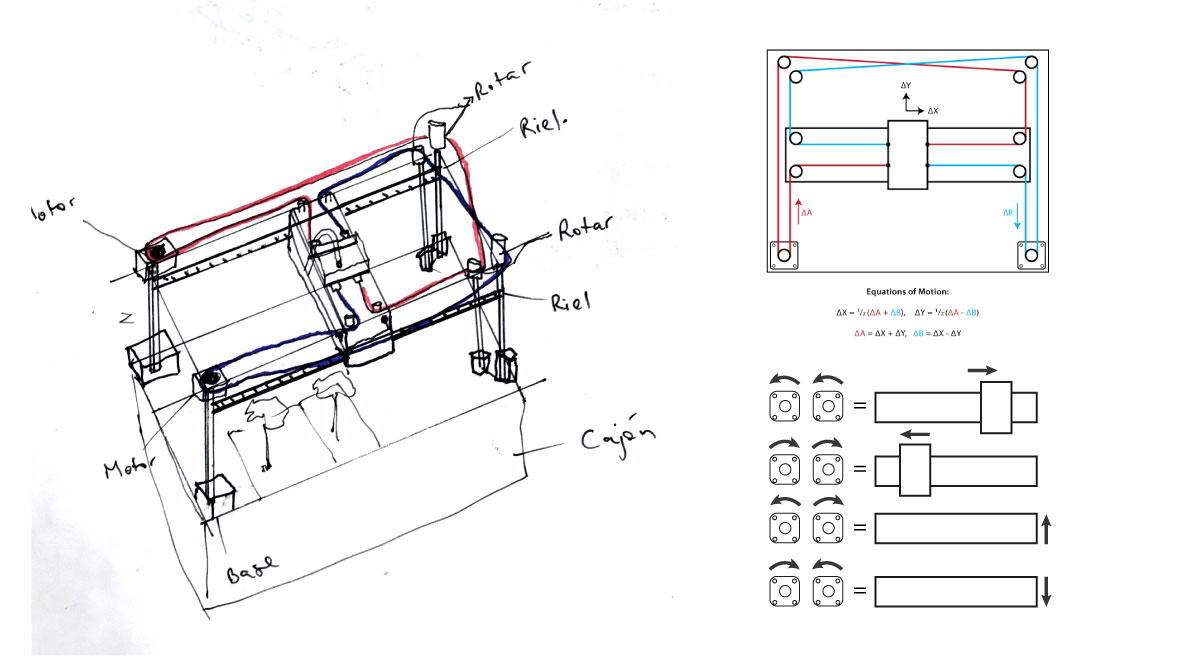
Picture 3: Robert Garita (director of FabLab Veritas) told us about the CoreXY theory, so Juan Carlos Miranda and Esteban Castro studied it and with the help of Esteban Oreamuno made this drawing. This theory explains that it is possible to move a head in the X and Y axes using 2 fixed motors, ropes and pulleys
Team members and roles

Esteban Castro
Ability: Rhino expert. Assignments: designer, laser cutter, 3D prints, assembly

Esteban Oreamuno
Ability: Corel Draw expert. Assignments: sketches, laser cutter, assembly

Esterlyn Quesada
Ability: C++ expert. Assignments: programming, steppers assembly, tester

Montserrat Ciges
Ability: Communication expert. Assignments: documentation, pictures, tester

Juan Carlos Miranda
Ability: Electronic expert. Assignments: electric and mobile parts assembly
Materials
We salvaged many materials from a broken 3D printer. From it, we got motors, cables, motor drivers, metal rods, switches, screws and nuts and others. For the body of the machine we used MDF, wich is more suitable because it is a large machine. MDF is not waterproof though, so, water may damage the structure. Future prototypes may need other materials, or maybe a coat of paint. We also use PLA filaments to print some parts

Picture 4: Inventory of available parts
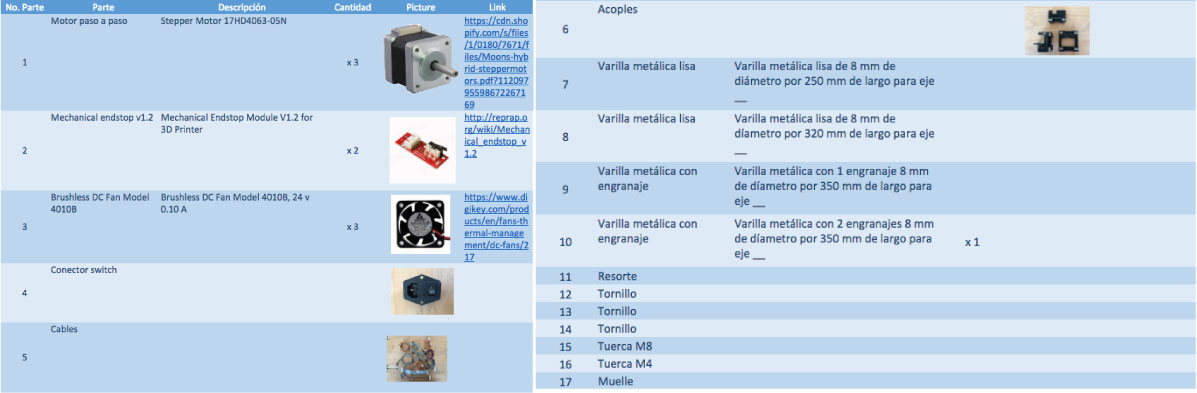
Picture 5: Estimated list of parts we would need for the machine
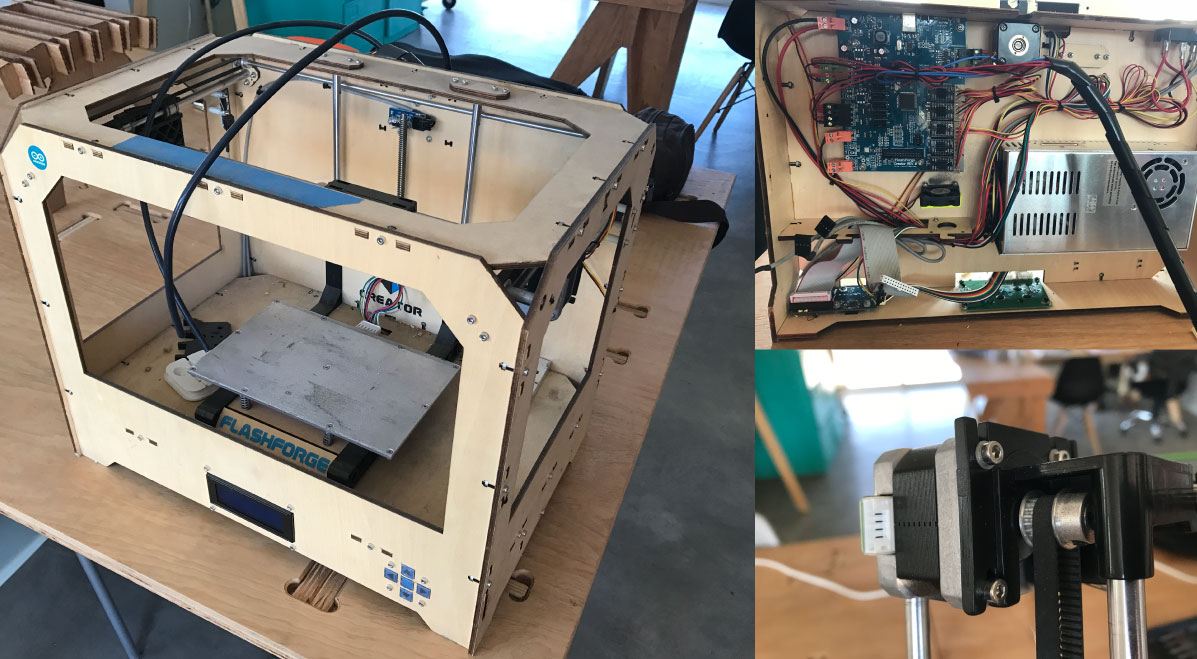
Picture 6: 3D printer discarded and disassembled to reuse parts
Assembly
The final assembly of the machine took many hours of work by the whole team, mainly solving design problems, in the end we made the first prototype work
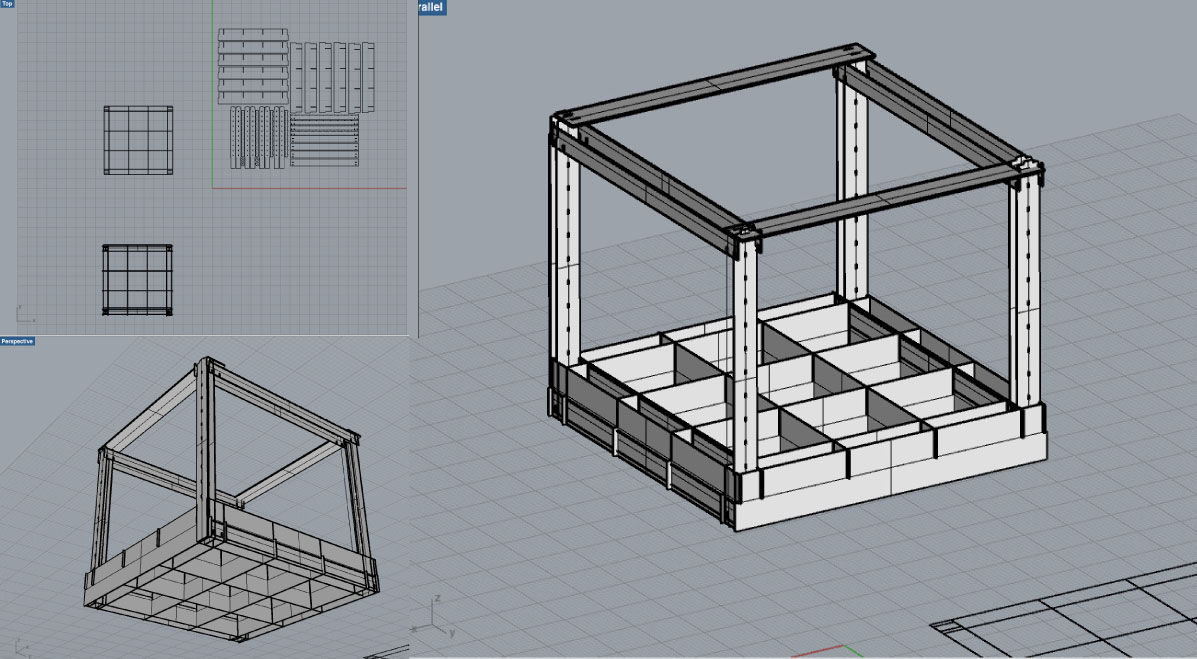
Picture 7: Structure design in Rhino
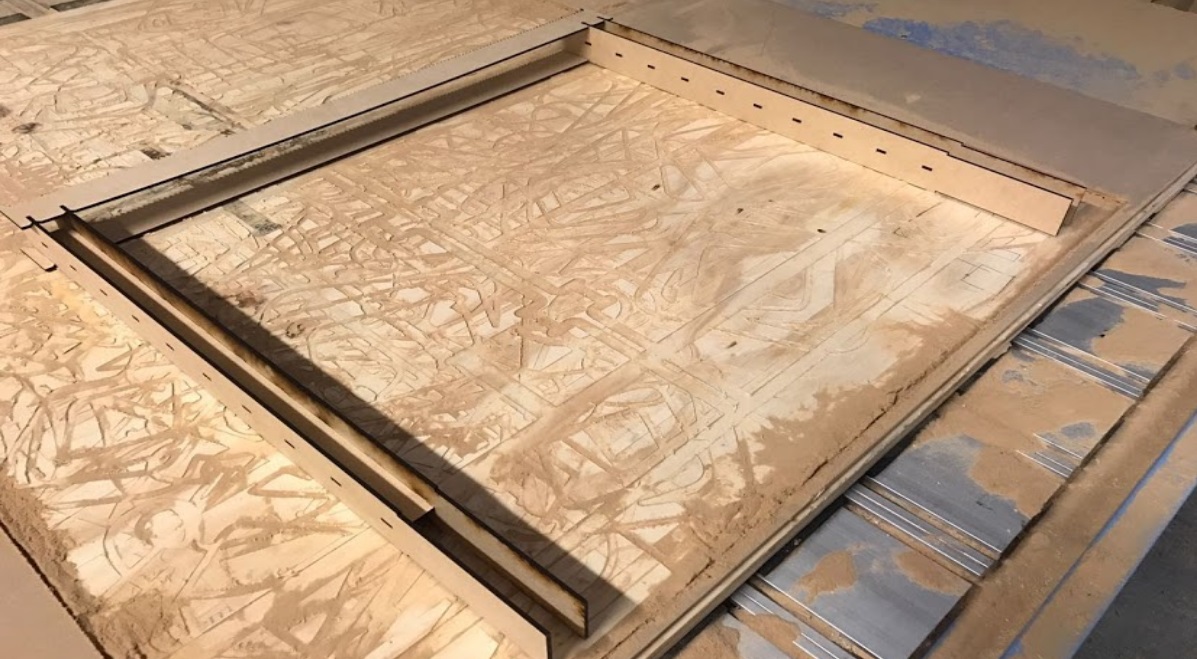
Picture 8: The assembly begins after cut the parts with laser
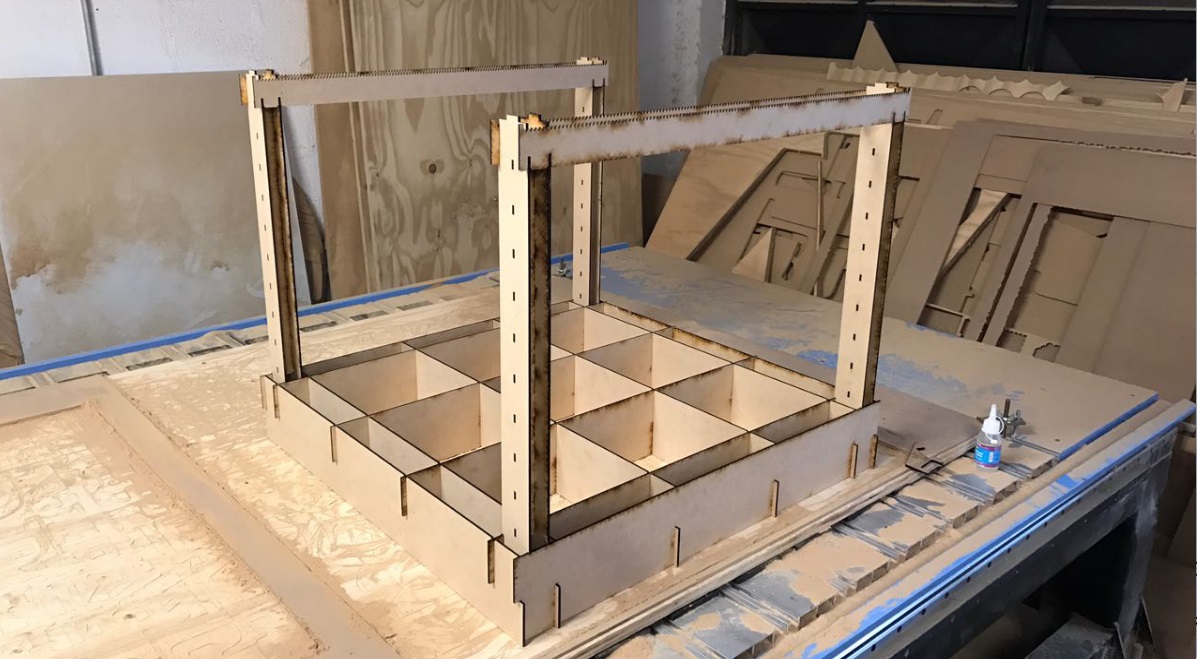
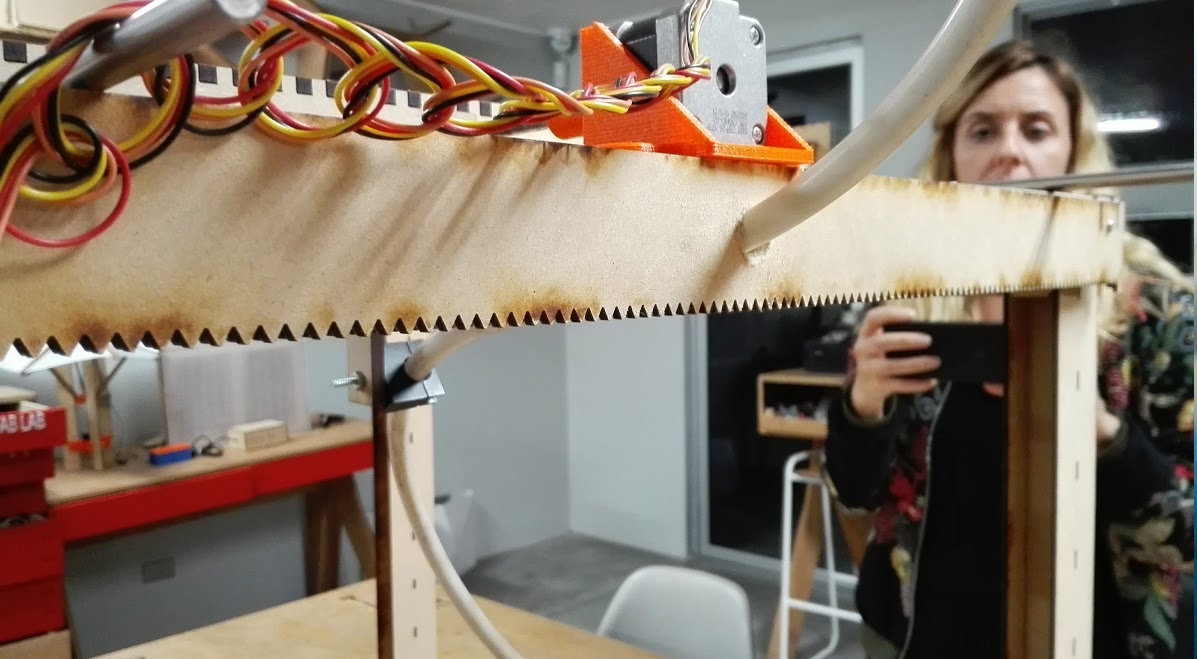
Picture 9: The final height of the structure is approximately 60 centimeters
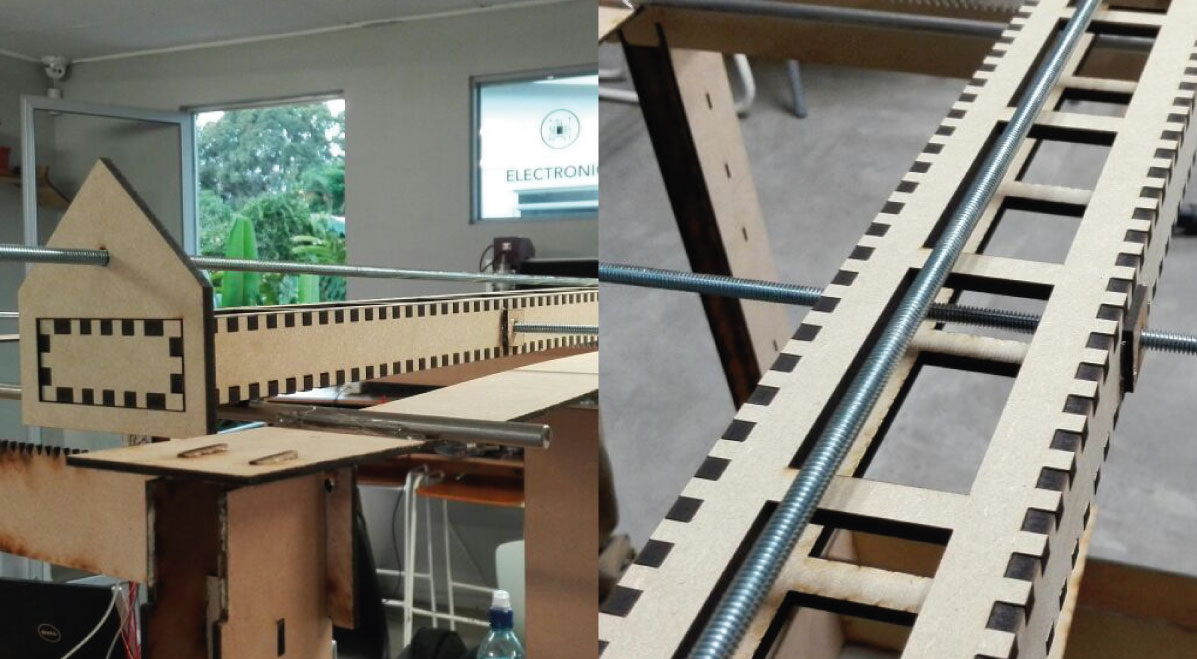
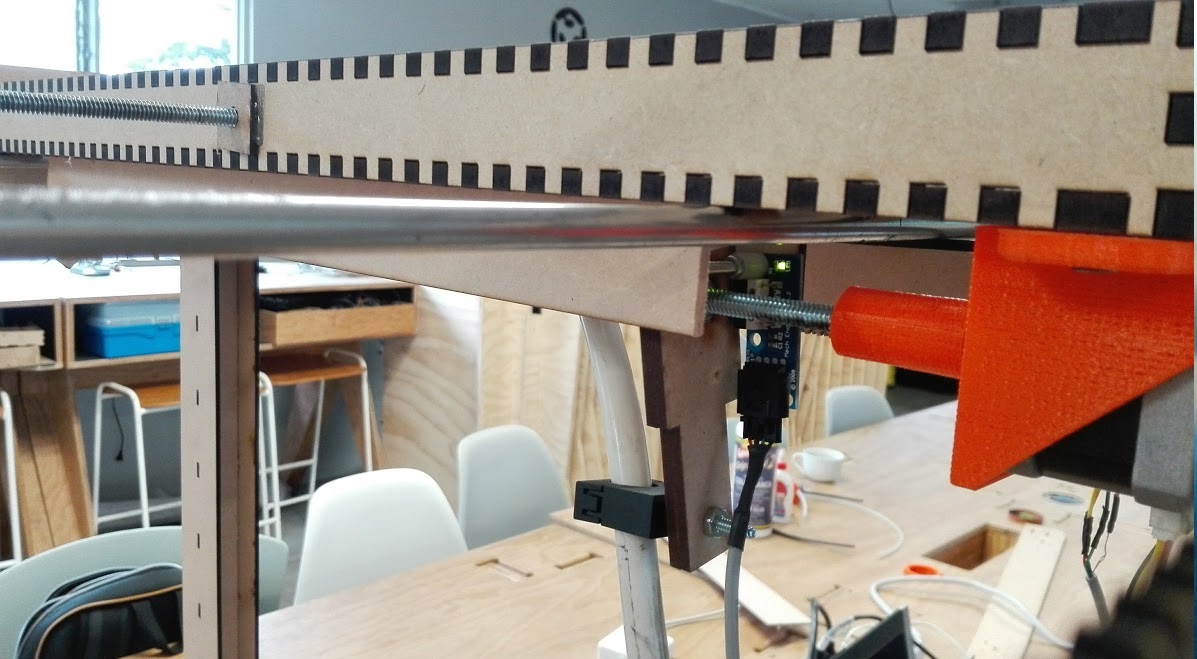
Picture 10: The machine uses 2 endless screws for the X and Y axes, the movable parts are made of MDF cut with laser
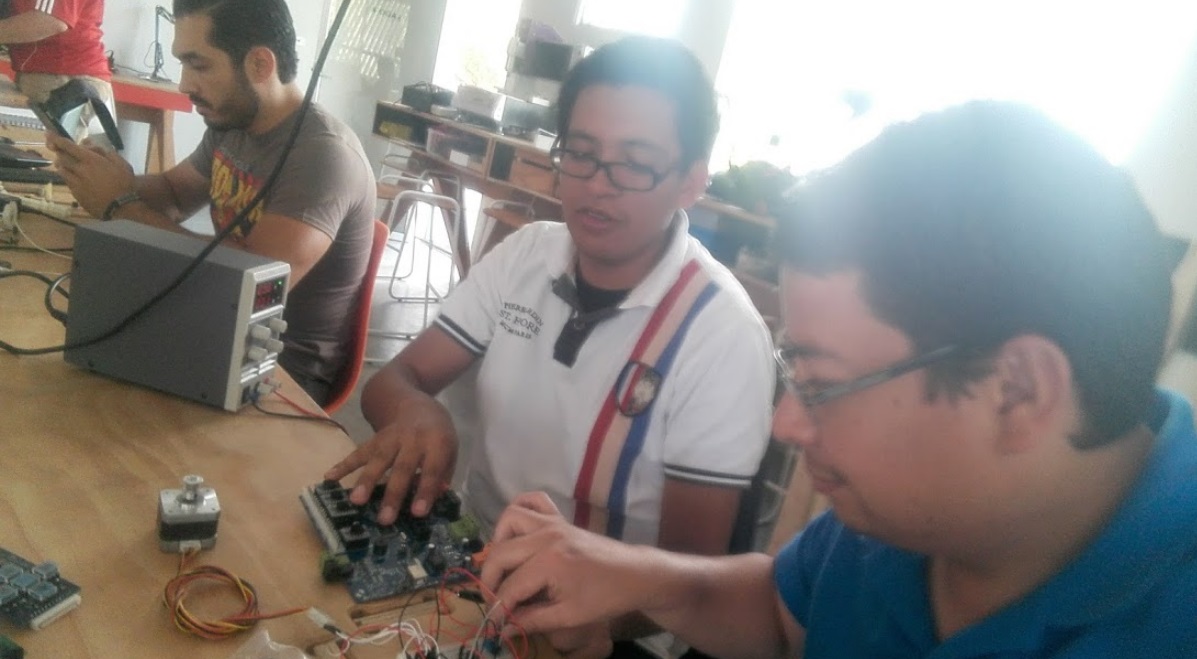
Picture 11: While one part of the team is in charge of the structure, the rest work on putting the steppers and the water pump
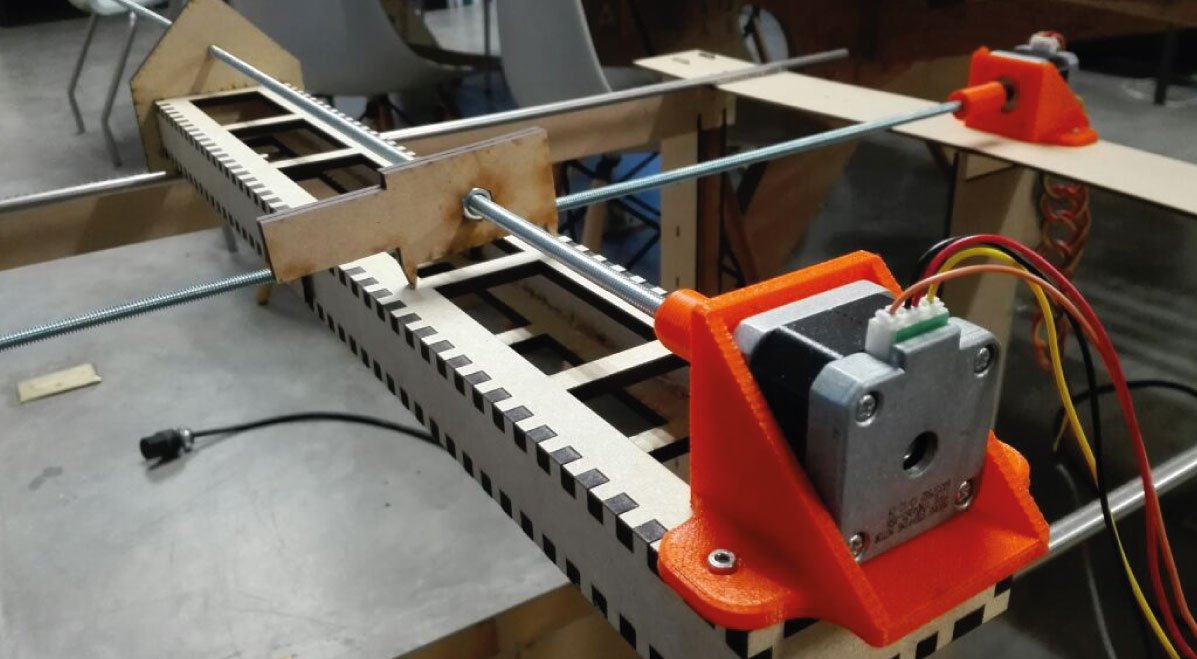
Picture 12: The movement is very smooth and stable, although it had problems of design that later we would arrange

Picture 13: For the prototype we use Arduino because we need to handle the drivers of the steppers, relay and buttons. We print with 3D supports for steppers
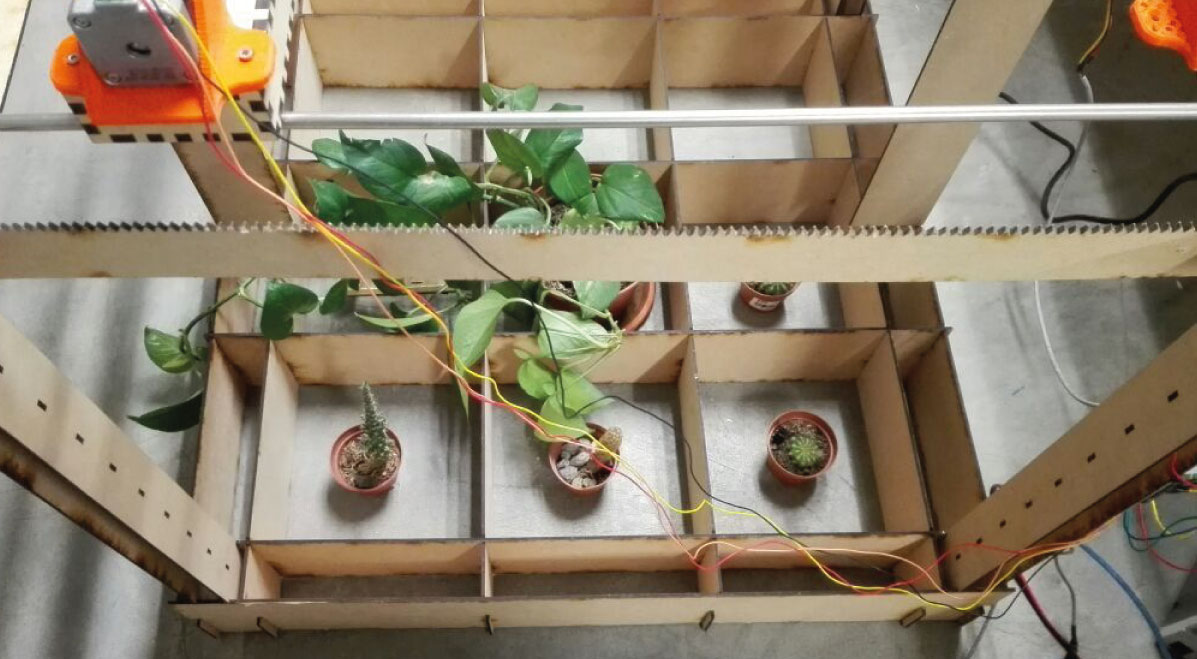
Picture 14: This photograph shows more clearly the idea of the project, in this case we put real plants to illustrate the positions and how the machine will water one by one
Picture 15: Among the corrections in the design is that we change the position of the Y axis as it originally passes over the endless screw of the X axis, this represented an obstacle for the hose. Then we introduce the hose behind the machine and attach it to the head
Picture 16: We put buttons for the X and Y axes, to know the origin or HOME and from there move the head to the different positions of irrigation
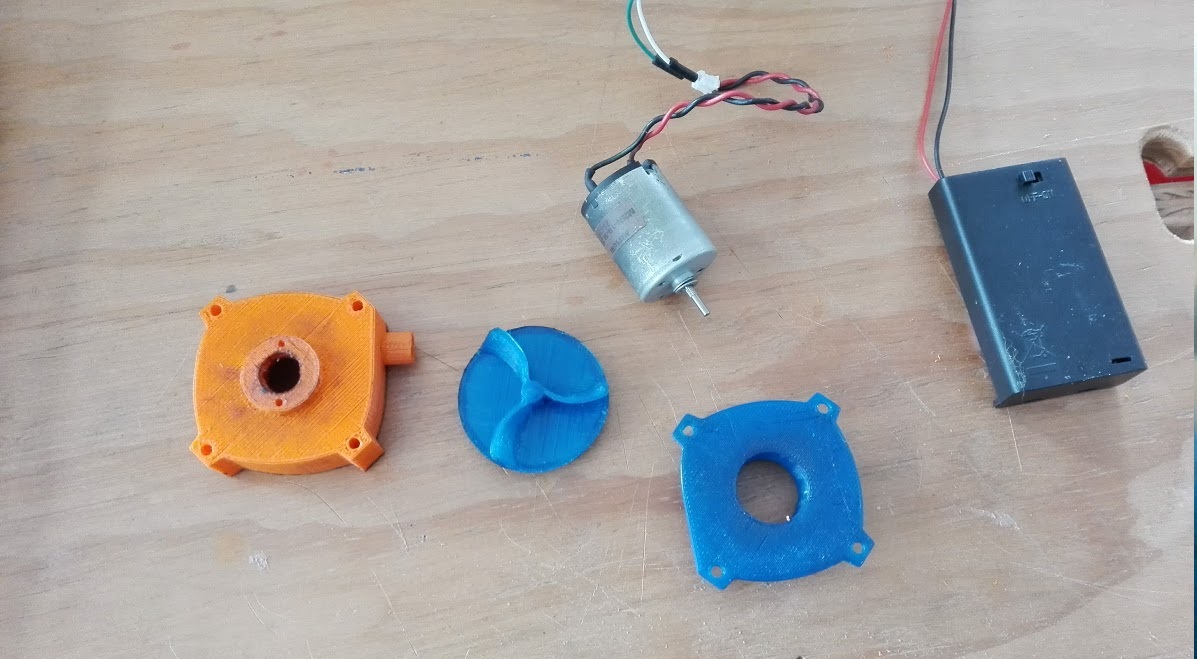
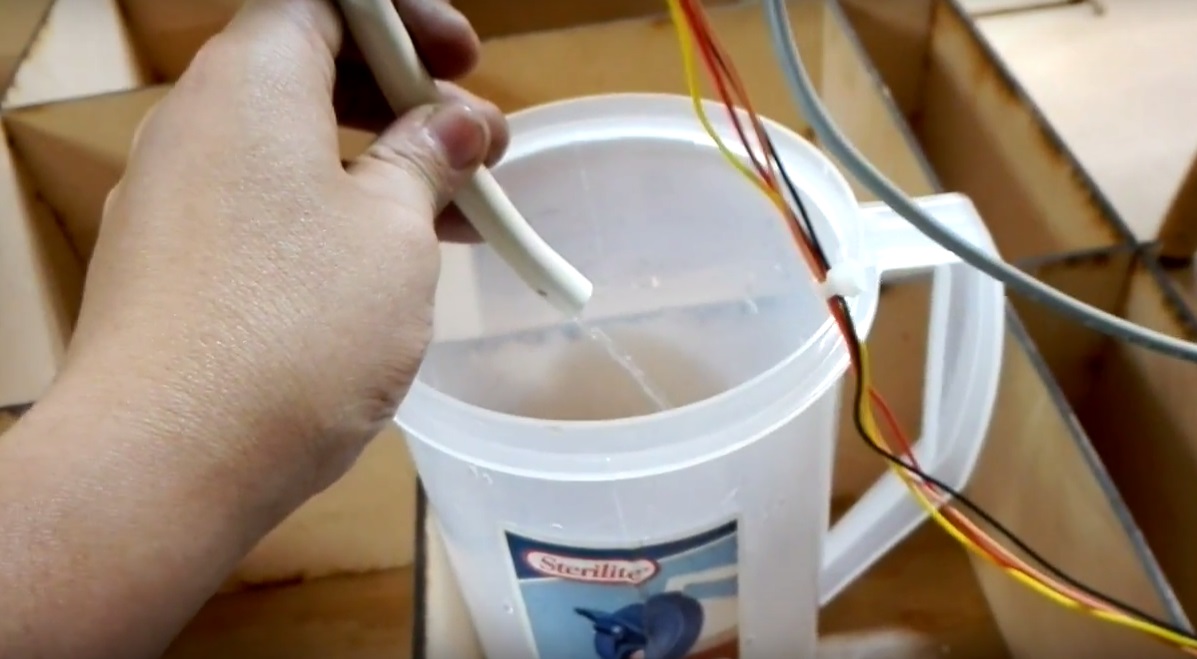
Picture 17: The water pump is printed in 3D, using an existing model that can be downloaded here
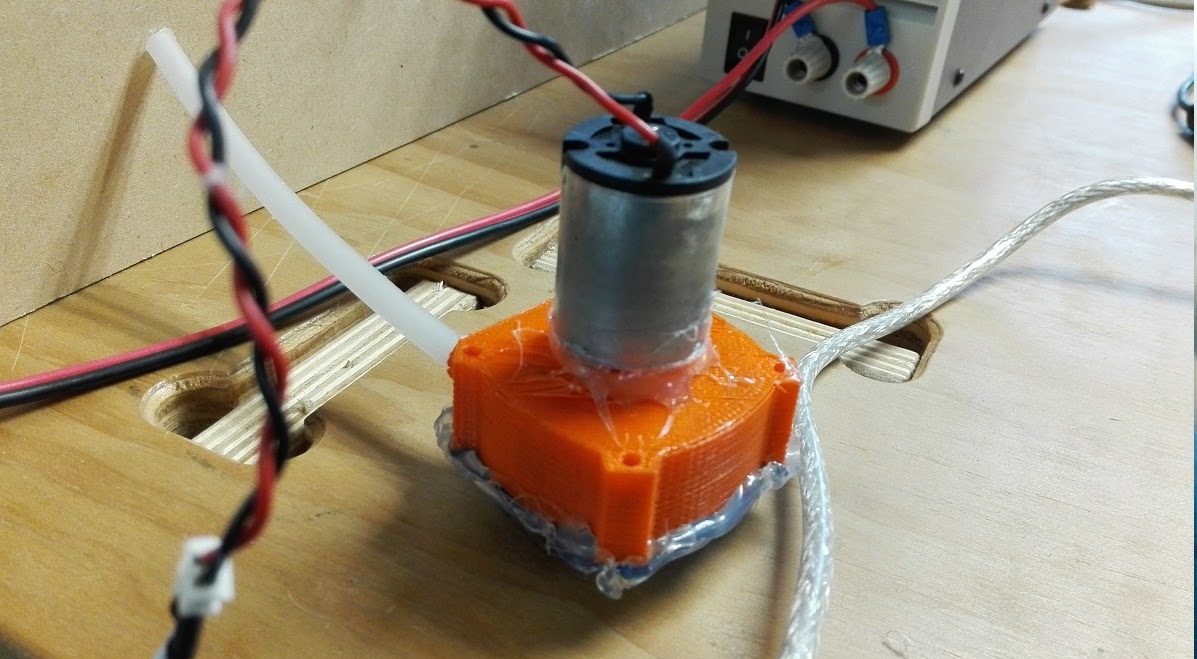
Picture 18: We used an old motor extracted from an inkjet printer and sealed the slots with hot silicone
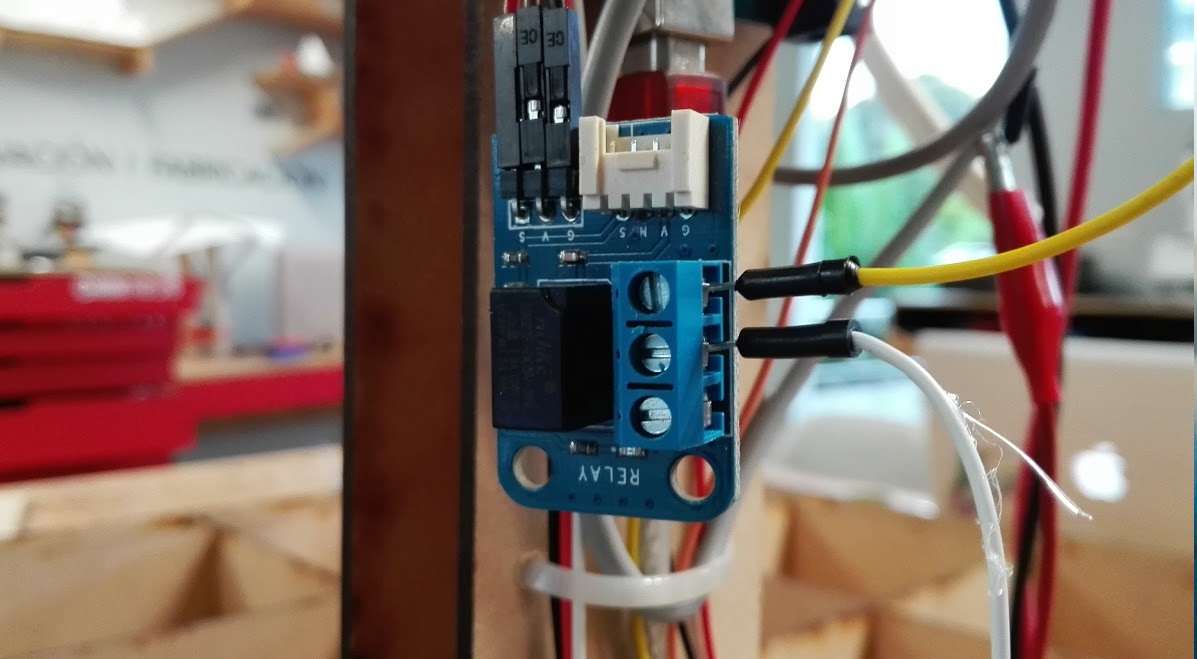
Picture 19: We use a relay to turn the pump on and off
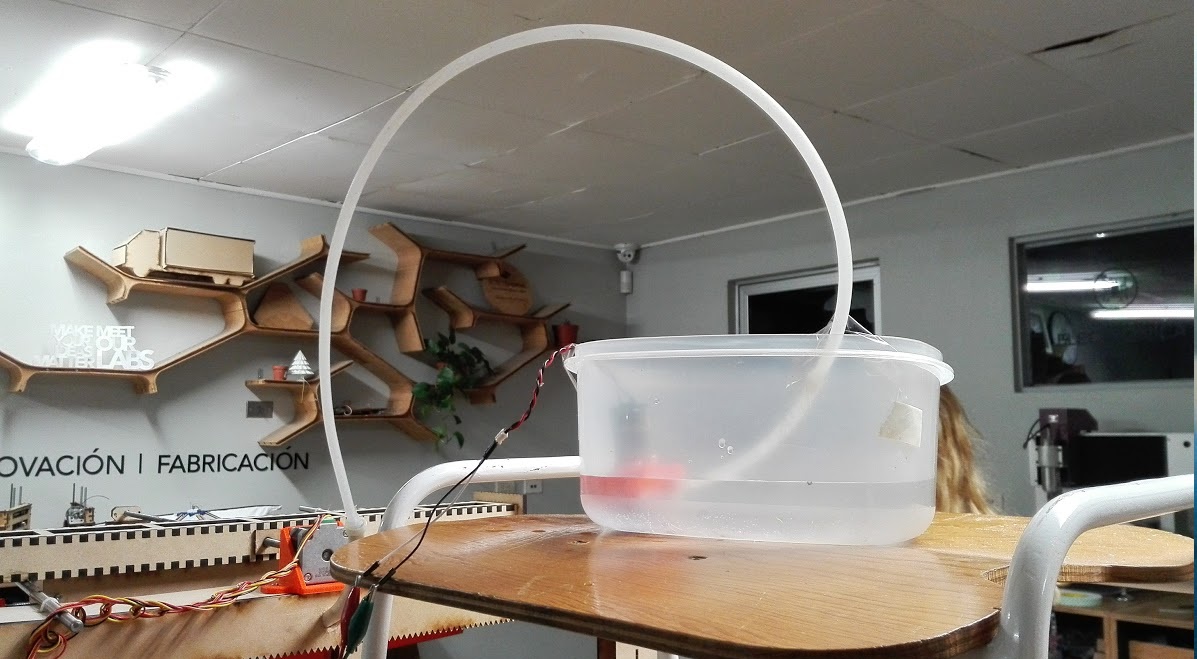
Picture 20: Because the water pump motor is small, it did not have enough outside to push the water to the end of the hose, so we had to place the container on high with water
Picture 21: In spite of all the drawbacks we made the prototype work. The code used on the machine can be downloaded here