12. MOULDING AND CASTING
Index
- Assignment
- Introduction
- Cad modeling
- Making the positive mould
- Making the negative mould
- Making the parts with metal
- Its show time again
- Problems Faced
- Summary
A. Assignment
- Design a 3D mould, machine it, and cast parts from it.
B. Introduction
In this week we are working with moulding and casting. My intention is to make a small trophy with metal. Something like this. My plan is to make the half of the model and use it to build the mould. Now use this mould to make two identical copies of the half structure of the trophy and then join then togather.
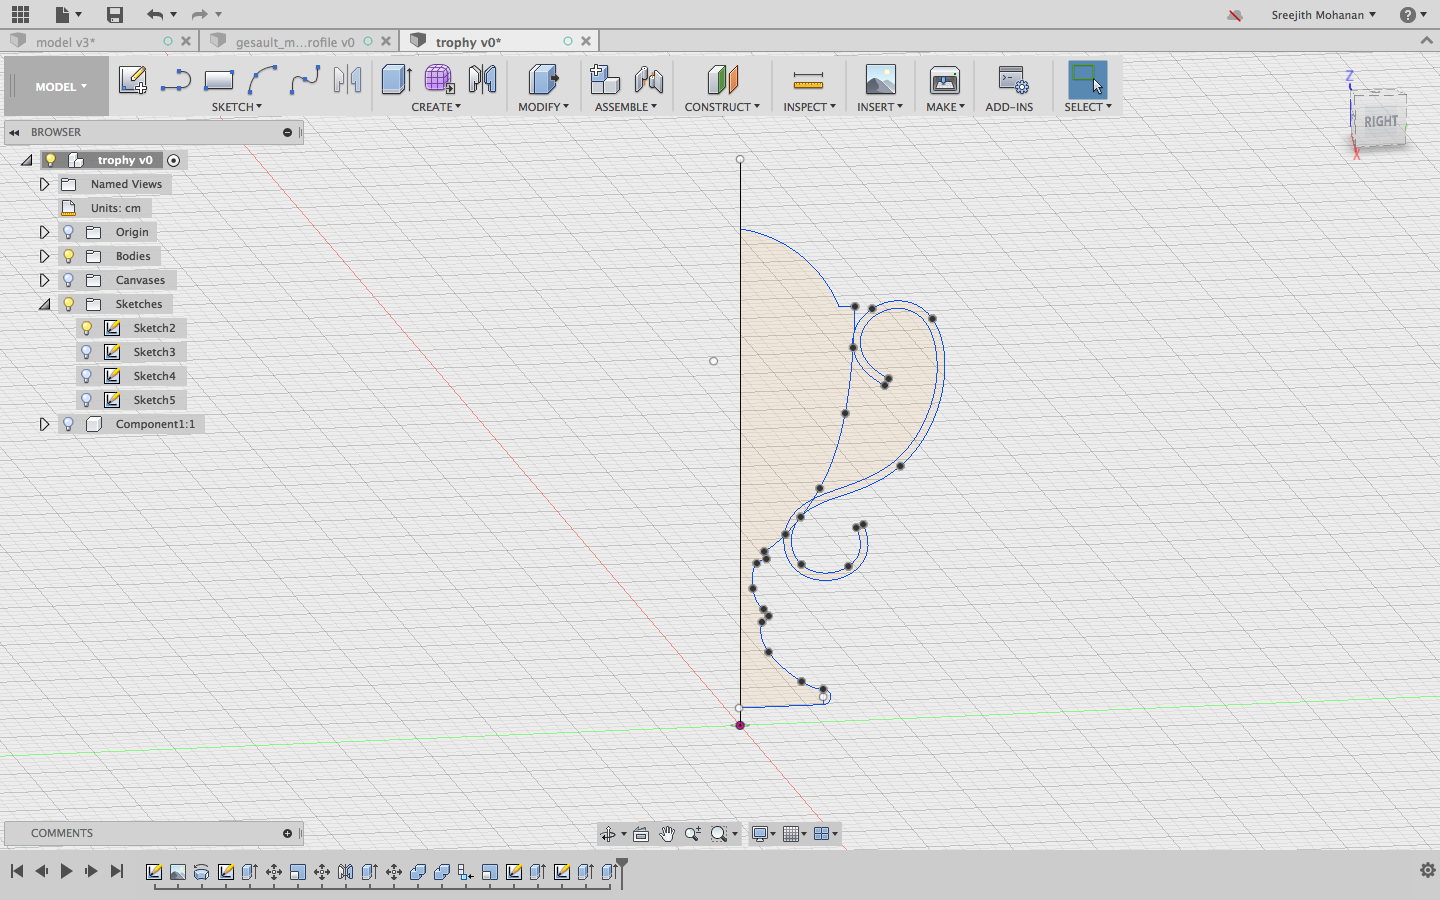
c. CAD Modeling the part
Starting the design with the sketches. I mostly used like and curve tools for the
purpose
Initial sketches
I used the extrude and revolve tools to generate the model.
As a specific requirement for cutting in modella, i made the box around it and removed the half of the
model.
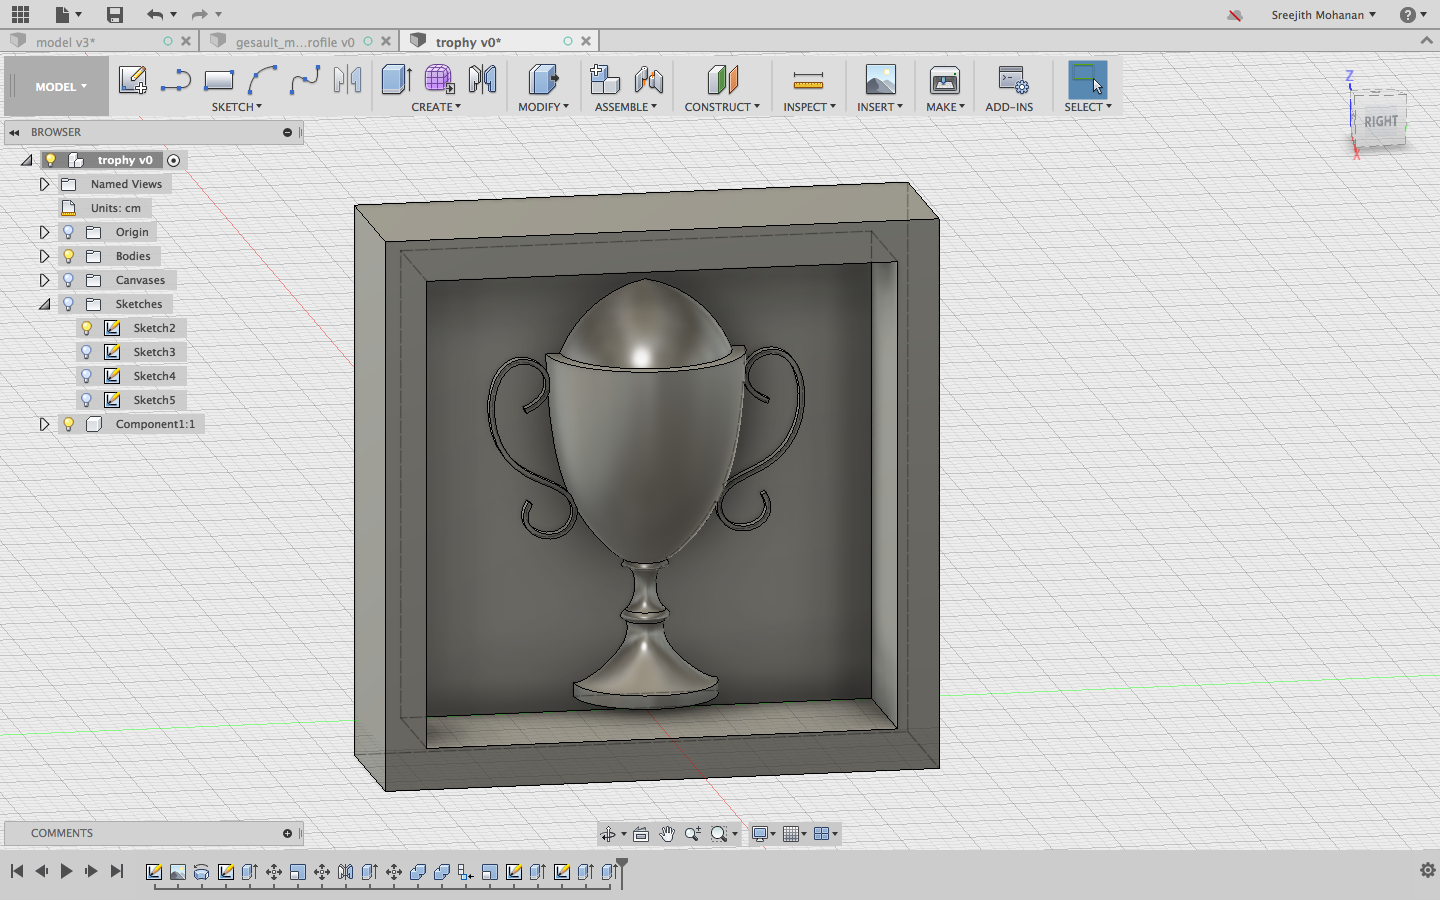
Final model ready to cut in modella.
cad model.
Original
fussion file
d. Making the positive mould in modella
For making positive moulds we use industrial grade wax blocks. The sperifications of the wax we are using in our lab are listed below.
- Hardness: 53 (Shore "D" Scale)
- Melt Point (Ring & Ball Method): 240 degrees F (116C)
- Viscosity 270 degrees F = 1790cP
- Volumetric Shrinkage (for recycling, from melting point to room temp): 5% typical
- Coefficient of Thermal Expansion (in./in. ºF): 9.5 x 10⁻⁵
First thing to do is to mound this block of wax on the modella machine as you do for pcbs. Make sure that it is placed at the bottom left corner properly aligned to the moving base of the modella machine. We do the cutting in two steps: Roughing and finishing. Roughing is done with a flat end mill and removes large chunks of material. The shape wont be clear after roughing. In roughing operation the surface is smoothed by more precise and smooth movements.Finishing gives the final touch to the mould. The following are the steps i followed in making mould in wax.
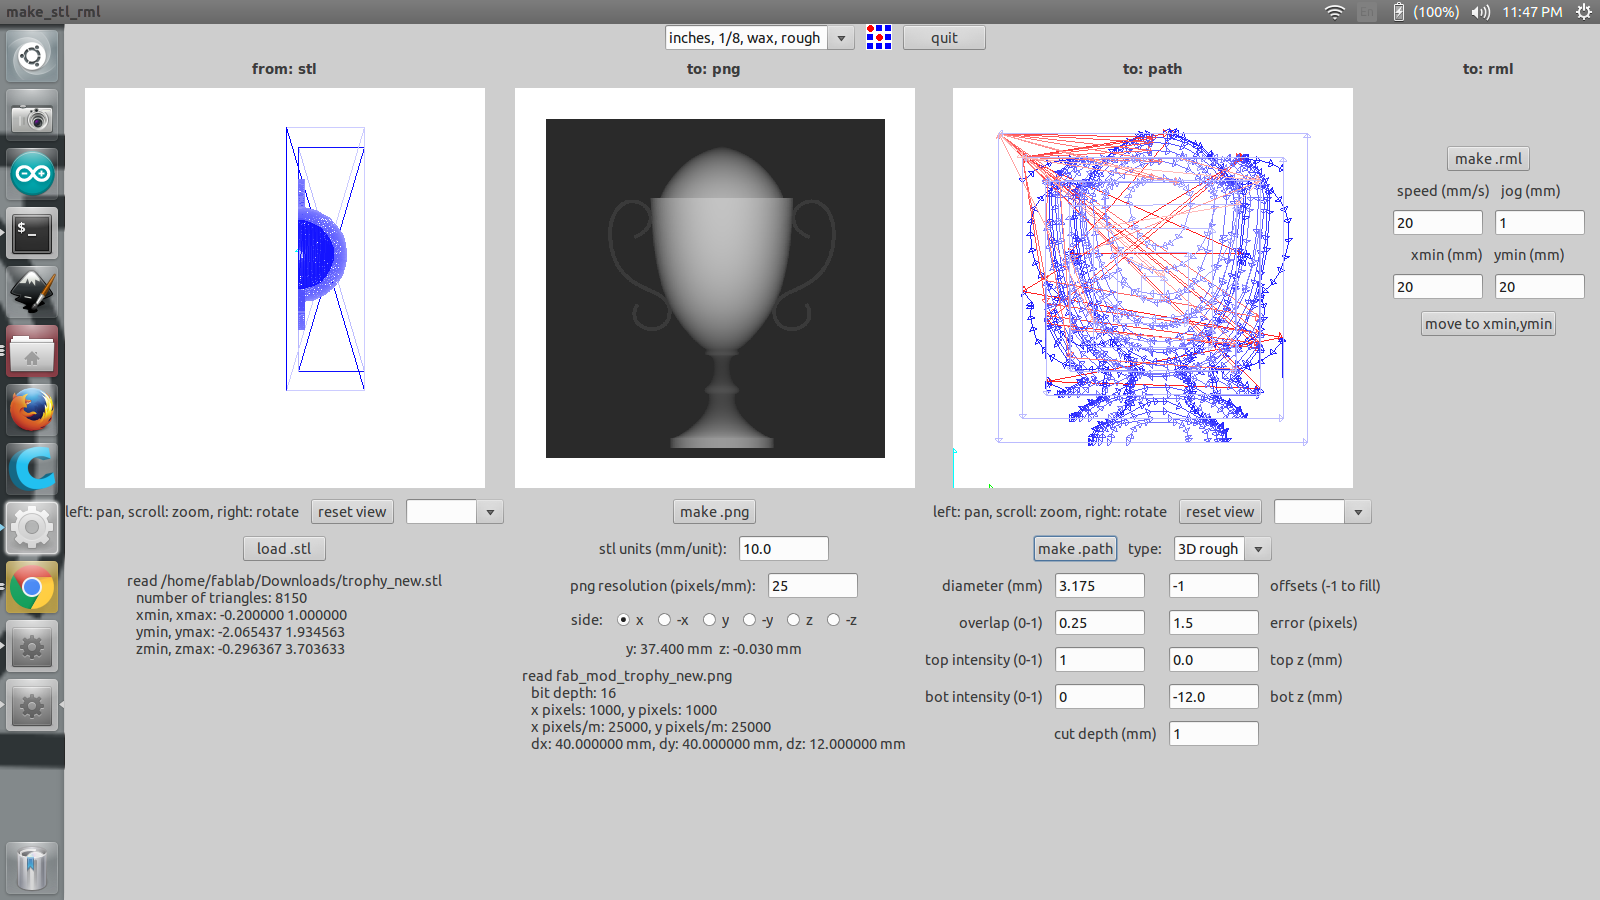
- First open the fab modules. we use a local version.
- Now from the dropdown pick the stl in the input dropdown
- Pick rml modella 20 in the other dropdown and click the generate button
- A new window will appear, in this window click on the button to load the stl file. After loading the model, pick the option- 1/16 inch roughing. This will load a set of settings to be used. The default setting is fine except the 'pixels per mm' i changed it to 10.
- Click on generate rml and then send it, Remember to set the zero before starting cutting and to use
1/8 inch
cutting end mill. Once you click the send it button, the machine will start the roughing operation
.
Modella roughing settings
After roughing cut
- After roughing its time to do the finishing. Now chagne the settings from the top dropdown menu to 1/8 inch finishing and change the end mill to 1/16 inch ball type; this is the finishing end mill
- Again move the end mill to the same position as before to have the same point as origin and remake
the rml
with the new settings and click send it to start milling.
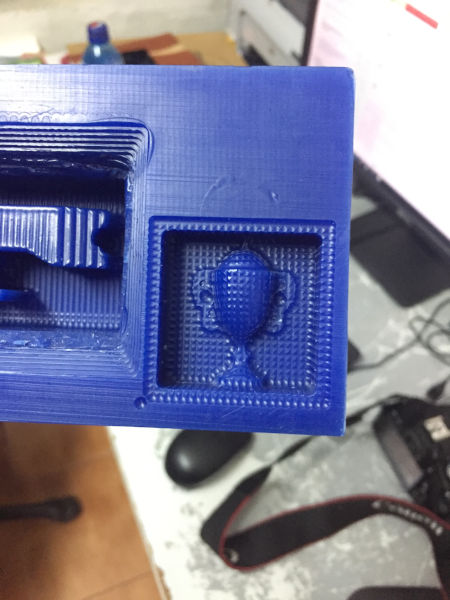
After finishing cut
d. Making the negative mould using the casting materials
Casting is the process of pouring liquid material to a mould which will harden later to take the shape as of the mould. There are a few casting materials available in our lab. They are listed below.
- OOMO-25 - Liquid Silicone rubber
- SORTA clear-37 - Translucent silicone rubbers
- Mold max-60- Heat resistant silicone rubber
- Smooth cast305- liquid plastics
- High gloss transparent epoxy resign- Liquid plastic locally procured
- Liquid Silicone Rubber1 (LSR1)- locally procured
- First you find the amount of material needed to make the mould. To do that we poured water on the
wax mould and get the volume. Now letting the density of water the LSR1 to be the same, i measured
the
weight
of water and then took the same weight of the material. Remember that the weight of resin and
hardener
together need
to be the same as the water weight.
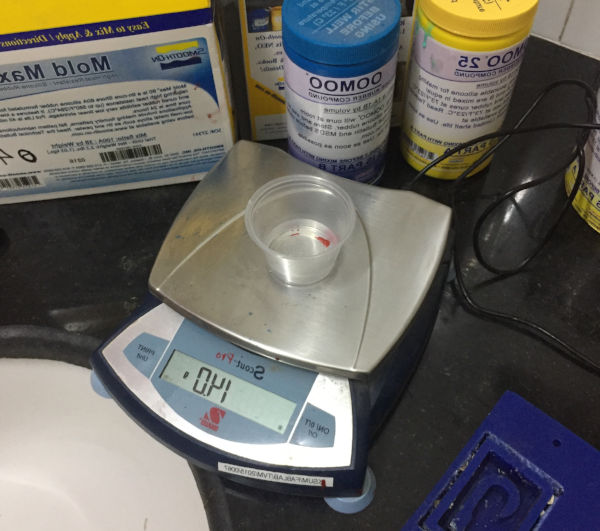
Weighting the material - Casting materials can some times cause health issues so necessory precautions should be taken while handling these materials. Use gloves and avoid contact with skin. Also try not to smell the material and avoid direct fumes if any.
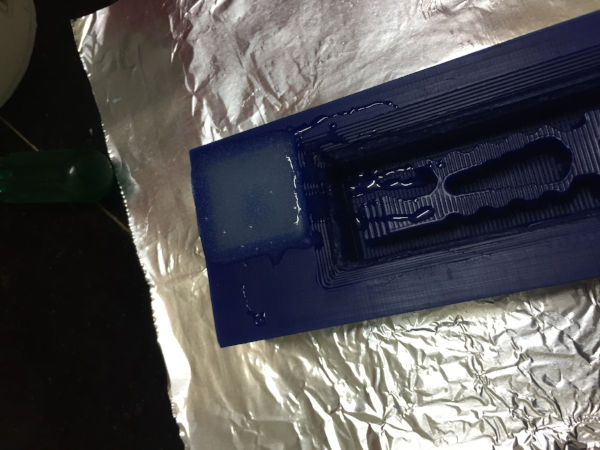
- After taking requited quantity of material, mix it thoroughly and with a stick slowly pour the mix
into the
wax mould.
Take real care not to let air bubbles into the mould for this its good to pour the material from a
height in
a
small thread like stream.
Weighting the material
Finally let the material cure. This takes around 24 hours. - The next day you can pull out the rubber mould from the wax mould.
Take care not to break it. I made two such moulds.
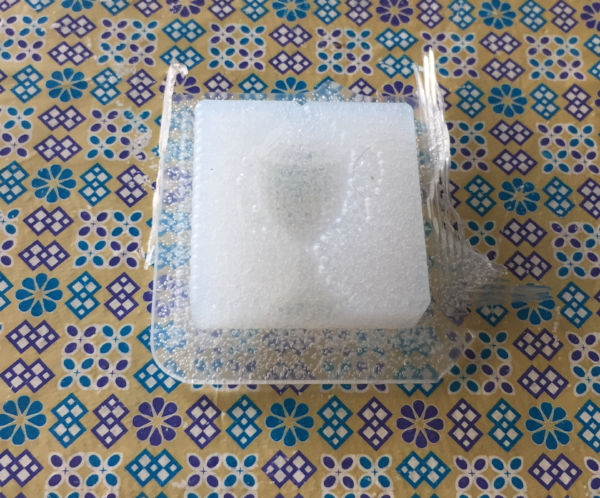
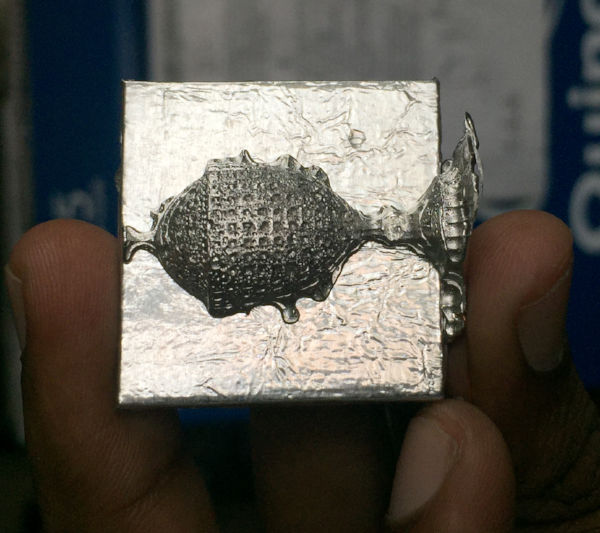
Silicon rubber mould
I am using LSR1 for making my mould. It has a ample setting time and also i have seen it giving very
good
result thus making it an ideal choice for me. The ratio of mixing is 100% part A and 10% part B.
LSR properties
e. Metal casting
I am planning to try metal casting at first. The metal we are having is BABIT. It has a very low melting points compare to other metals and alloys and thus make it a safe candidate for any amateure metal workers. We will use the slicon rubber mould which we have already made and pour the hot metal into it so that the metal takes the shape of the mould.
- The first step is to take the metal piece of BABIT( alloy of {}) and heat it the furnace at around 500 degree celsius. At around 10 minutes the metal mealts into a silvery fluid. Be extra vigelent and take necessary precausions while handling the furnace and the melted metal. This can cause serious burns if exposed. Use gloves and tongs while handling the crucible.
-
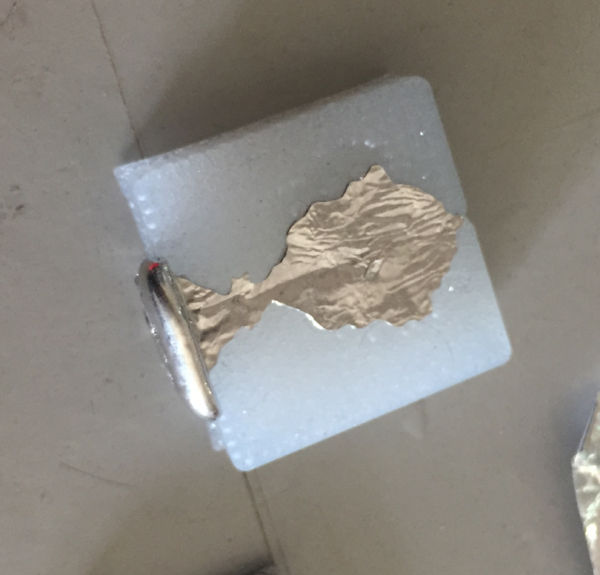
As i am planning to make the trophy is halves i didnt wanted to pour the metal of the face, as there
will
be excess metal on the face and need lot of filing. So i decided to pour the metal from the bottom
of the
trophy.
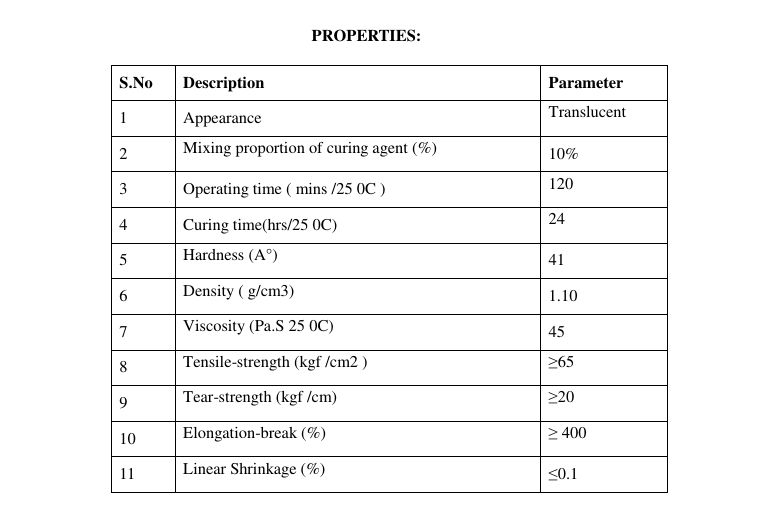
Thus i need to coved the side and top of the mould.I used a craftwood piece covered in an alluminium
foil to
cover up the bottom and side,
leaving only the top part for pouring the meatal. I tired these items to the mould with a copper
wire.
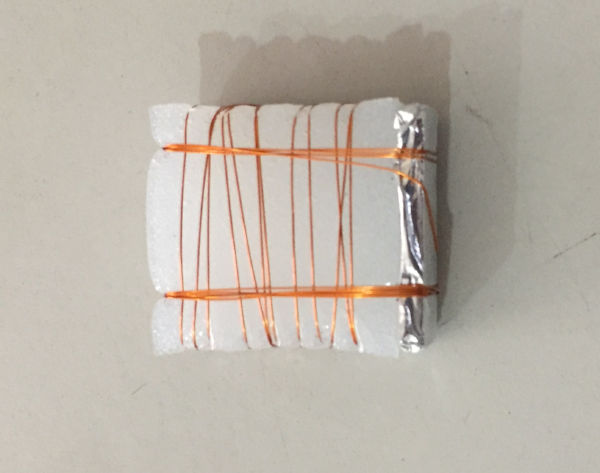
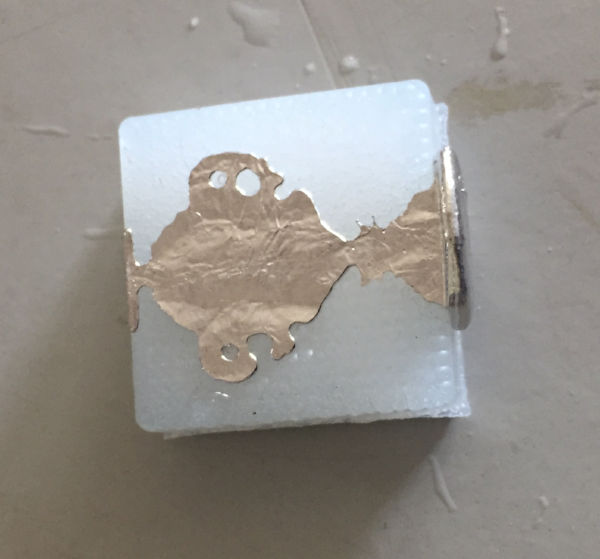
mould ready to cast -
Now its time to pour the hot metal into the mould. Take necessory precautions while working around
with the furnace and hot metal. Use the glooves and the holder to take the hot metal container. Now
slowly
pour
the metal into the hole.
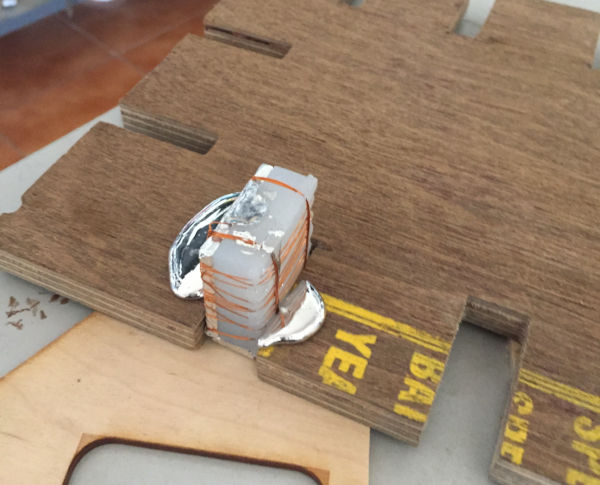
After pourng the metal - Next thing to do is to wait for the metal to cool. If you are'nt patient enough you can even pour
cold
water over the assembly for quick cooling. I have tried both and there where slight improvement when
cooled quickly with water. Now you can slowly remove the coverings and take out the cast.
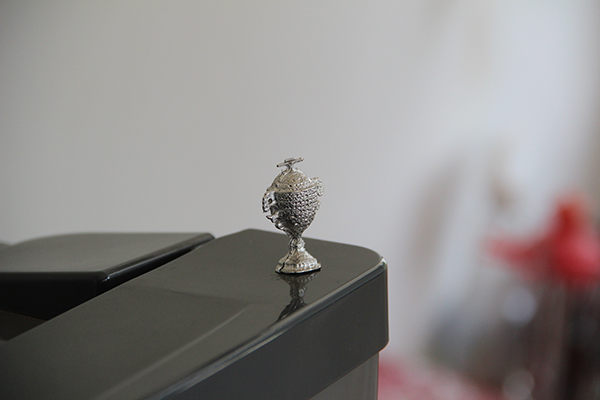
piece1 side 1
piece1 side 2
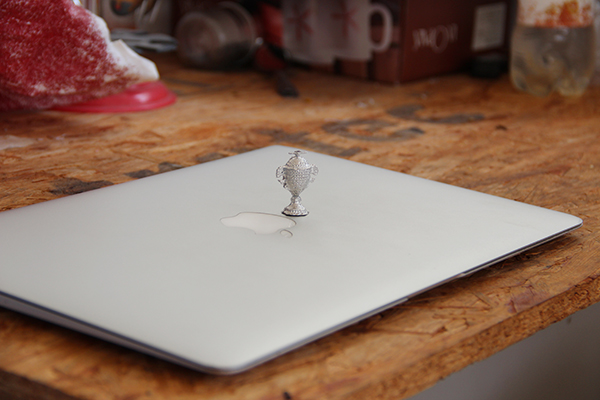
piece2 side 1 - I repreated the steps a few times to get 2 casts with required quality. finally i joined both the pieces using a soldering icon.
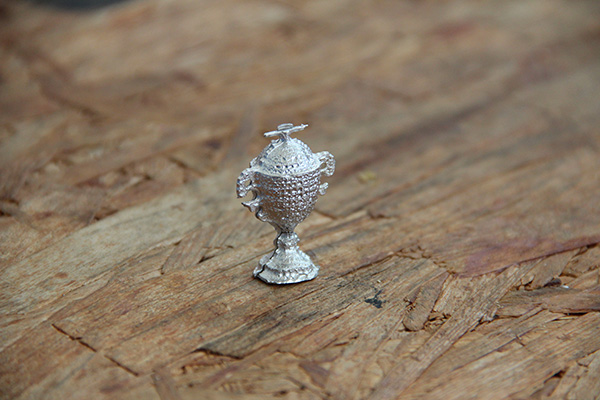
e1. Its show time ( My favorite part )
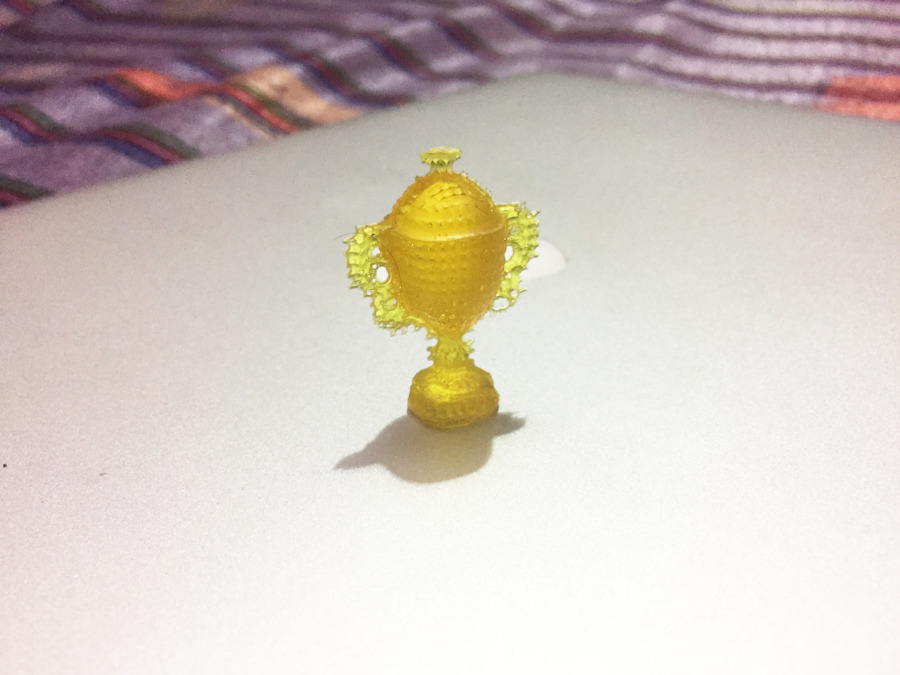
e. Plastic casting
I am using high glossy epoxy resin for plastic casting. Referring to the datasheet, the setting time is 30 minutes and the agil time is 10 minutes. The ratio of mixing is 100: 60. I followed the same steps as i did for silicon rubber casting. One extra step you need to do is to add the coloring pigment and mix it thoroughly. You will need only a drop of it. I used the yellow pigment. I reused the silicon moulds. This time i used both the moulds( remember i made two of them) and places them togather such that the cavity is in the middle. Later i tied them up such that they dont fall apart. Finally poured the mix and allowing to set.
e1. Its show time
d. Problems faced
- At first i exported the stl in ASCII but the fabmods crashed giving the warning that it can take only binary files.
- Once i was pouring the metal on the mould, the metal was no enough, i melted more metal and later poured in to fill the mould. I found that the end product was very brittle in the region where the two layers meet and broke off while filing away the extra parts.
- The parts of the cast which touches the silicon rubber is not smooth. Still figuring it out how to make it smooth. One suggestion from the instructor is to deposit a layer of carbon on the silicon mould surface using a candle and then do the metal casting.
e. Summary
- Make positive moulds in wax with modella
- Created negative mould in silicon rubber using the previous mould
- Used the silicon rubber mould to cast metal and resin

This work is licensed under a Creative Commons Attribution-NonCommercial-ShareAlike 4.0 International License.