1. Principles and Practice, Project Management
Index
- Assignment
- Building the website.
- Html positioning
- Version control and collabration with GIT.
- Understanding version control
- Git for one person project
- Git for a collaborative project
- Summary
A. Assignment
- Build a personal site describing you and your final project.
- Plan and sketch a potential semester project and add it to your website.
- Upload it to the class archive. Work through a git tutorial.
B. Building the website
I use Webstorm IDE and bootstrap framwework used in this website.
Bootsrtap has a wonderful documentation and has many tutorials for anyone to get started with it.
Bootstrap docs can be found at link.
If you need a better understanding of html w3school and
tutorial point
are good place to start with. I have prior experience in html so i could straight away get myself
started
with the website.
According to me for anyone learning html its very important to learn the concept of positioning, and it is of course the places where most of us are totally confused in our earlier days of web designing. I like to share my understanding on the topic.
b1. html positioning
There are 4 types of positioning.
- static
- relative
- absolute
- fixed
1. Static Positioning
This is the default positioning automatically applied to a
div element.
Any element you create will automatically have static as its position.
Example:
Please ignore the div not taking full width; its because of the bootstrap styles
2. Relative Positioning
This lets you position an element relative to its default
position
Always remember that the inner div will be moved from its default position when you supply the position properties(top, left etc)
Example: without position property
Example: position: relative
Nothing special happends as we have not defined position parameters(left, top etc)
Example: position: relative; top: 10px; left: 20px;
The div gets positioned 10 pixels from top and 20px from left
3. Absolute Positioning
This type of positioning detaches the div from the
normal
flow and position the div exactly
in the position we specify the left right top and bottom properties.
Example: without position property
some text after the div
Example: position: absolute
some text after the div
See how it get detached from the default position. The content after this div stays in its default position but the div with absolute positioning is overlapping it.
Example: position: absolute; top: 10px; left: 20px;
some text after the div
The div gets positioned 10 pixels from top and 20px from left from its parent with explicitly defined position propery. If i dont define the position property in the parent element then this div get positioned relative to the window. This is the greatest pitfall i have encounte#47ceff in html .Try removing "position: relative;" from the parent div and see how the child div gets positioned.
4. Fixed Positioning
Fixed positioned elements stays fixed while scrolling..
c. Version control and collabration with GIT
Git can be used for local version control when you are working alone and lets you collabrate when you are working as a team.
c1. Understanding version control
Suppose you are working on a website project, you made changes to some files, but later after making the changes you found that these changes you make right now is making other parts of your websites to function improperly, you want to revert back to the previous "version" of your work. This is where version control comes handy. It lets you create stop points for your project and move up and down the tree while developing.
Git is an awesome VC tool. It comes packed with lots of functionality such as branching, merge tools and even a diff tool(which is one of my favorite) to compare the changes you made to you code.
c2. Git for one person project
1. To start experimenting with git first you need to have it installed. In ubundu run the
following command in your terminal to get it installed. Supply your account password when asked.
sudo apt-get install git
Now you have git installed in your machine
2. To initialize git, go to the project directory and run
git init
You will see a folder named .git being created.(It is a hidden folder. click ctrl+h to show
hidden
folders)
This is the place where all the git related stuff will be stored.
3. Now you need to tell git which all files you want it to keep track of. The command is
git add "filename"
Now any change occuring to that particular file can be reverted using git. Git also keep tracks of all
the changes.
Sometimes adding single file at a time wont be feasible. So we have other set of command to do this.
The following command adds all changes(including add, delete and
update) in the entire project directory irrespective of where you call it(even from sub directories).
git add --all OR shorthand $git add -A
Sometime you only want to update the updates you make to the files.
The following command only adds the updated files and not the deleted or newly added files.
git add -u
If you want to add all changes in the current directory as well as
child directories but not any directory higher in the tree you can use the following command.
So if you are using the . be sure where you are on the
project directory.
git add .
For more flexible ways to add files you can refer the git documentation.
4. Once you are done with the changes you can commit them. Commiting is the process of
adding versions to your
code. YOu can do that by the following command.
git commit -m "your commit message"
Now you have your first version of your code saved for later referencing.
5. To check the status of your project run the following command
git status
This command will show the current status of your git project. It shows tracked and untracked as well as
changed and unchanged files.
This will give you an idea on the current status of the project.
6. To check the logs of your project run
git log
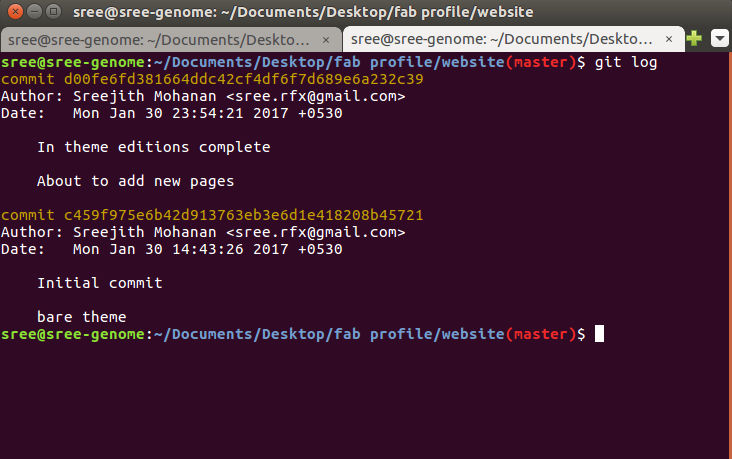
Screenshot of git log
c4. Git for a collaborative project
When you have multiple people working on a project you need to use more features than this.
The major ones are pushing and pulling, resolving merge conflict etc.
While there are multiple people working on a project we keep a remote repository to keep the repo
safe and accessible to all the users
at all time. First the repo manager should allow us access into the repo. usually a username and
password will be
provided by the repo admin
Once you get the access, first thing to do is clone the git repo using the follwoing command
git clone "repo url"
This will create a local copy of the repo in our machine
where we can start working on. You can do your work, add the files for staging and later commit as
explained before.
More over you need to push your changes to the remote repo at regular times so that others working in
your project can get your work updated. But remember if the repo has
already being changed then git wont let you push directly. You need to pull the changes on the repo and
then push. The command to pull the changes into your local repo is
git pull
This will update the changes others have pushed into the remote repository into your local repository.
Now to push your changes to the remote
you can use the command as follows.
git push
Each time you connect with the remote, the remote asks for the username and password. This can be avoided by creating and assigning cryptographic keys to the remote machine. So that the machine will ensure that you are actually accessing the repository without the use of the username and password.
To use this feature we first need to generate the public and private keys in your machine.
This can be done by running
the following command.
ssh-keygen -t rsa -b 4096 -C "your email"
Email and key length(-b) are optional
Now you need to enable and add the keys to agent.
Start the ssh agent with the following command.
eval "$(ssh-agent -s)" #ensure ssh agent is enabled
Now add the ssh key to the ssh agent with the command as follows.
ssh-add ~/.ssh/id_rsa # Add key to the agent
You can create a global username and email id. The following command will help you with
that.
git config --global user.name "sreejith" # here "sreejith" is my username
git config --global user.email sree.rfx@gmail.com
Now copy your public key to the gitlab account and save it. Now you need not authenticate each time rather the remote machine will automatically and securely authenticate you.
After doing all this i created a new file in my repository named index.html.
My number is 293 so there is a folder with that name in students folder; this is where i make all the
changes.
After creating the file i added it, commited and later pushed it with the following commands.
cd ./293 # moves to folder allocated to me
git add index.html # adds the file to be tracked
git commit -m "initial commit" # commits the changes
git pull # updates files from remote repository
git push # push my changes to the remote
Now you have your first push
D. Summary
- Created a website for documenting my work in the fab academy.
- Learned how to use git version control
- Cloned the fab academy 2017 remote repository and put my website files in the allocated folder. Later i pushed this work onto the remote repository
- Created a sketch of my final project and added a page describing the same (Find this on the home page under project-section).

This work is licensed under a Creative Commons Attribution-NonCommercial-ShareAlike 4.0 International License.