Computer Controlled Machining
In this we are assigned to make something big in CNC machine. So I decided to start my final project today. My final project is that Smart Component storage. For that I planned to build the box frame using plywood and trays using cardboard. Here what I did was that I made trays also in plywood itself later Im planning to do in cardboard itself.
ShopBot
The CNC machine available in our lab is Shopbot. It is a 3-axis machine and has a bed size of 4x8 feet.
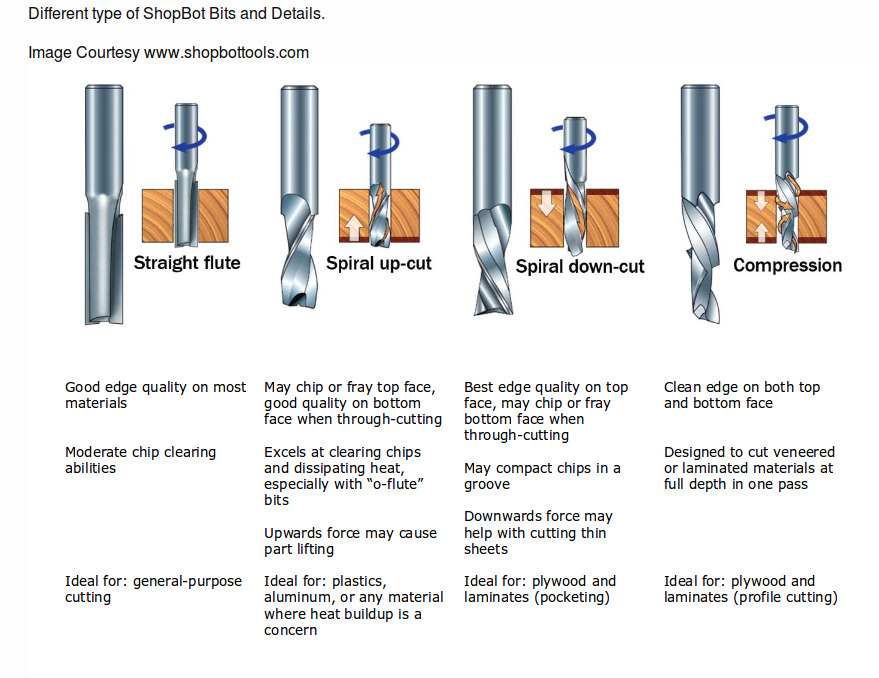
Selecting the Bit
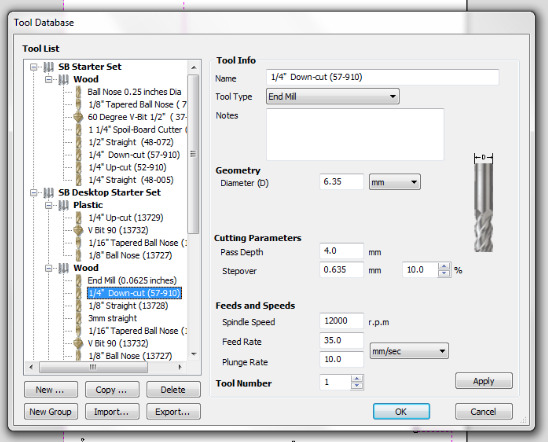
Here we mainly uses two types of bits viz 1/4mm and 1/8mm. What we have to do is that for each purpose each type of bit is used. Purpose varies from cutting and milling or making pockets. For each purpose we have to change the bits. Also we have to notice upcut and downcut operation. All these varies according to the types of the bits that we use.
Security Measures
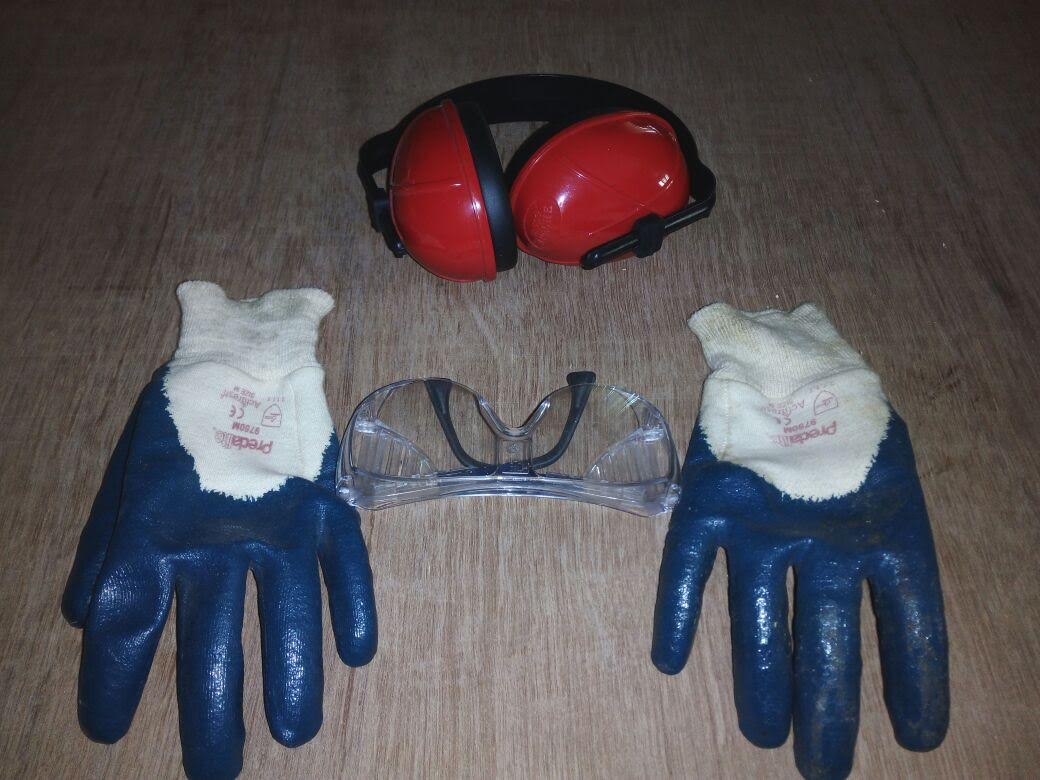
The next thing that the user must be take care of is that of the security. Mainly personnel security is the thing that one should take care of. For that there are certain things that one should take care of. One is that while working one should use glouse so that to care care of fingers and hands. Then goggles or safety glass is the other thing that is to be used. Hair should be tucked properly while using the machine. Ear plugs or ear cap is used. Ear cap must be used not only by the user but also all the personnel that gets affected of this must use ear caps. Loose clothes are prohibitted while using the machine and wear safety shoes. All this should be take care.
The Design
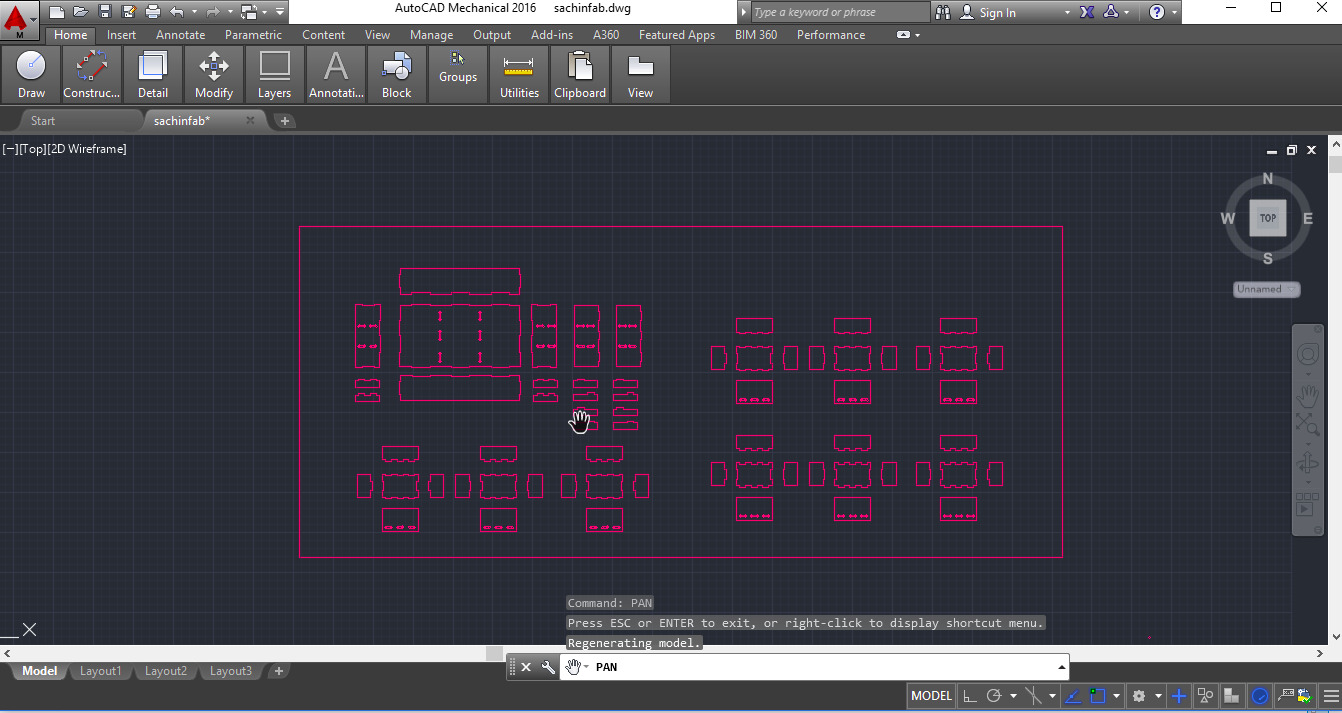
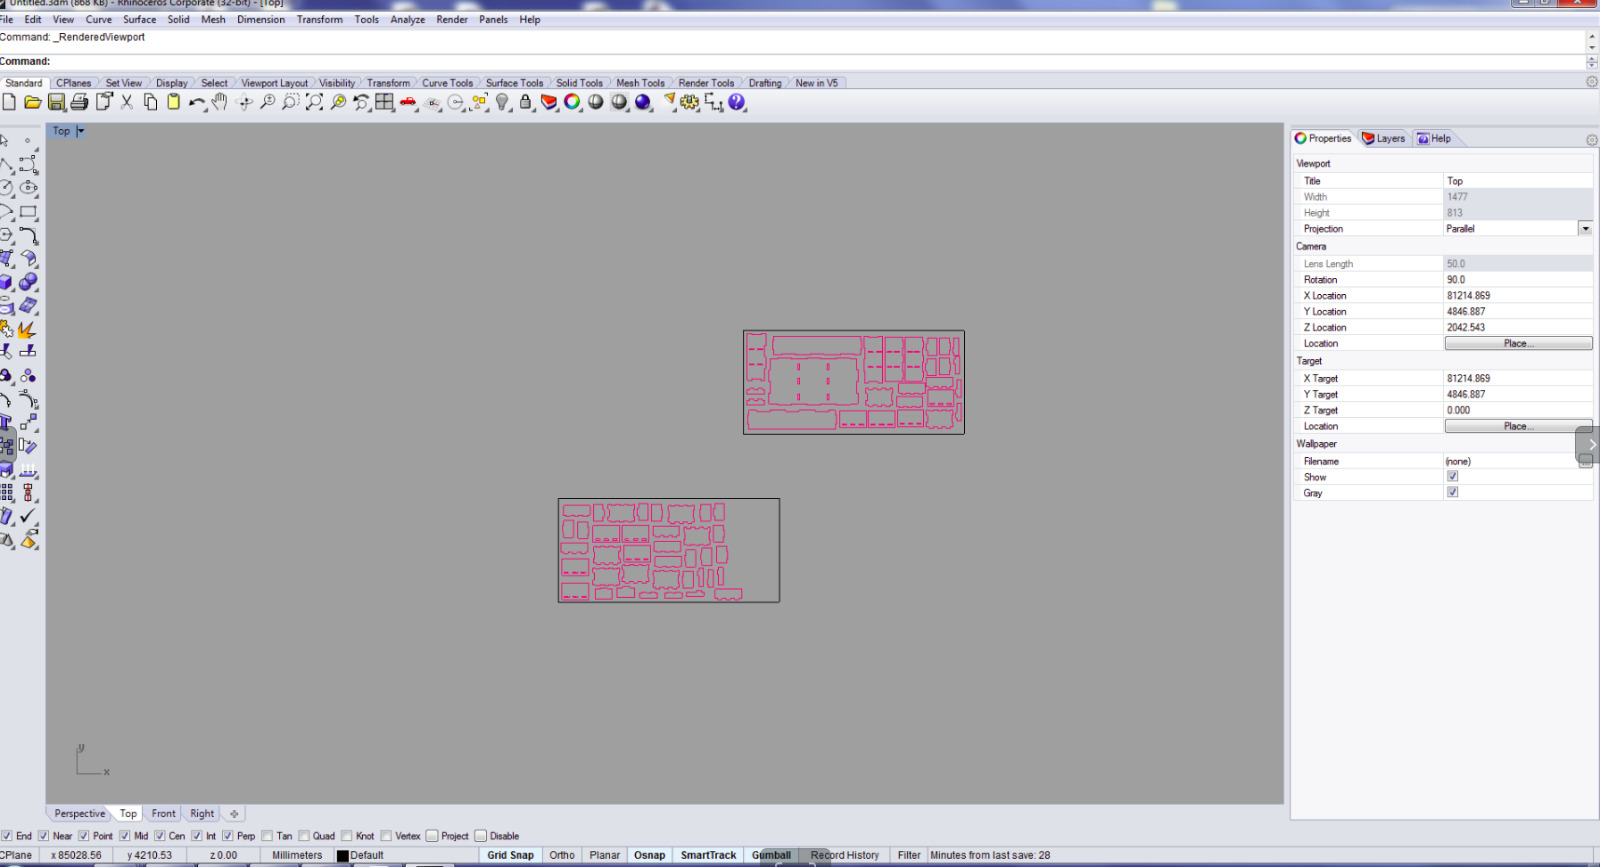
The next thing that should be take care of is that the design. For me I have to design one outer board or the shell part and 9 drawers. And the design was ok except the drawers. I made my designs in Autocad.
The length that I selected was 92.4cm and height I opted is 49.8cm for the entire box. As I need to place nine trays I put option for nine trays as well. So that section contains all together 15 pieces.
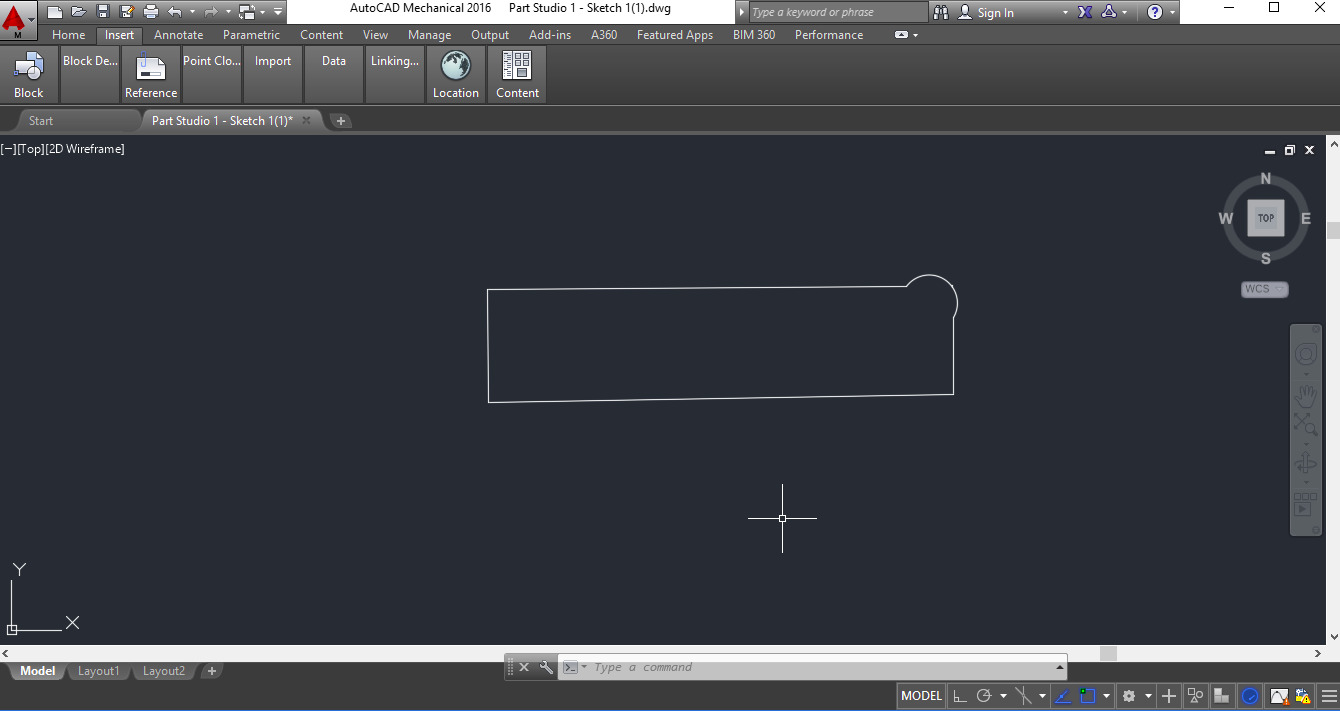
The next section is about my tray. 28cm was the lenth and 18cm the height I selected. Here one tray should contain 4 pieces alltogether and I selected all pieces uniformly which was the mistake I made. I should have made the design of each tray precisely and for ergonomic view measurement and udjustment should vary. Also leng that was insufficient to cover the central parts in between and clearence should have reduced.
This is the total overview of the pieces that I'v made.
Then in shopbot for perfect cutting of slots that we have made, we should provide dogs bone over those slots. So for it, a circle of 3cm have made and trimmed other portions. It can also be made in vcarve software from which the process is made. But most of the times, the curve should be visible. But if it is made in the design software itself, it should be much elegant.
Then after that I alligned the whole pieces into the beds. Even if, I alligned it in more precise manner I needed one and a half sheet for completing my whole work.
Into the machine.
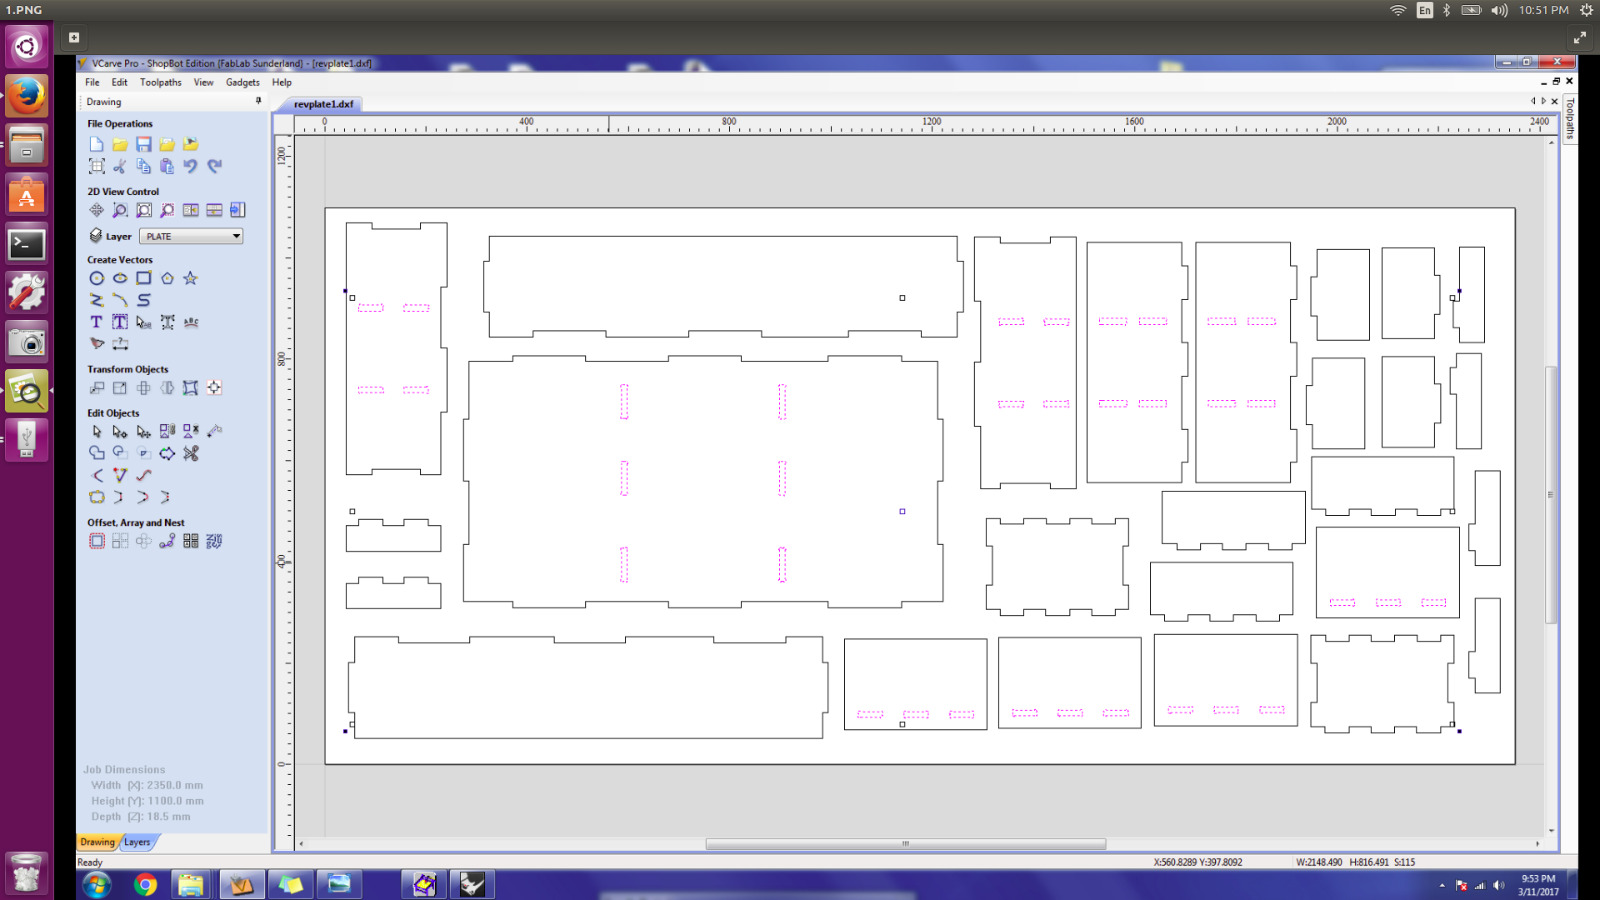
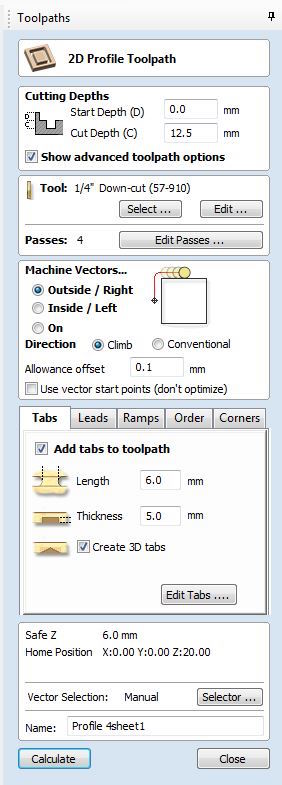
Then my dxf file is exported to vcarve software from where CNC machine is initiated. There all the settings should be made. We should generate toolpaths here. I selected my material thickness as 12.5cm and offset as 0. Then I joined all the closed shapes that was not joined.
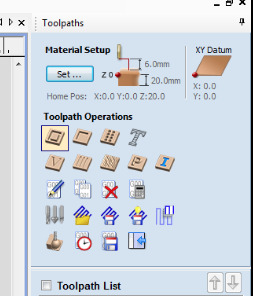
Next we have to take care of toolpaths. Here we can select different profile paths.
Then select the type of the bit that we need to use. If it is for cutting, 1/4mm is used. Also select the bit up cut or down cut.
Then vector path should be noted. For inner slots I selected incutt and for all others I opted outside cut. We can also se the simulation of the job in 3d window generated.
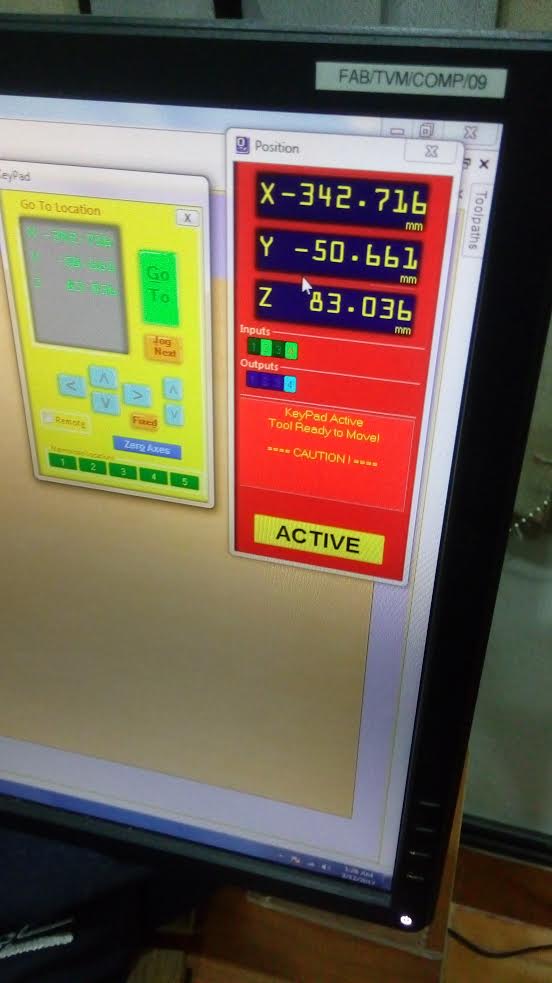
Then we need to move shop bot console. First we have to set x, y, z axis. For that move the machine manually by the arrows provided and note down the origin for further references if needed.
Then we have to set z axis. For that plate is removed and the clip provided is clipped over the zero router and for initialisation, plate is made to touch with the drill head. The process here taking part is that the drill head moves down and calculates the z axis. Once the process is completed return the alligator clip and plate to the previous position.
Once everything was made, go to the console and click the cut part select the Shopbot files you saved(.sbp) file and click start by this time one pop will come warning that after pressing the start button only you have to press OK then our job will start.
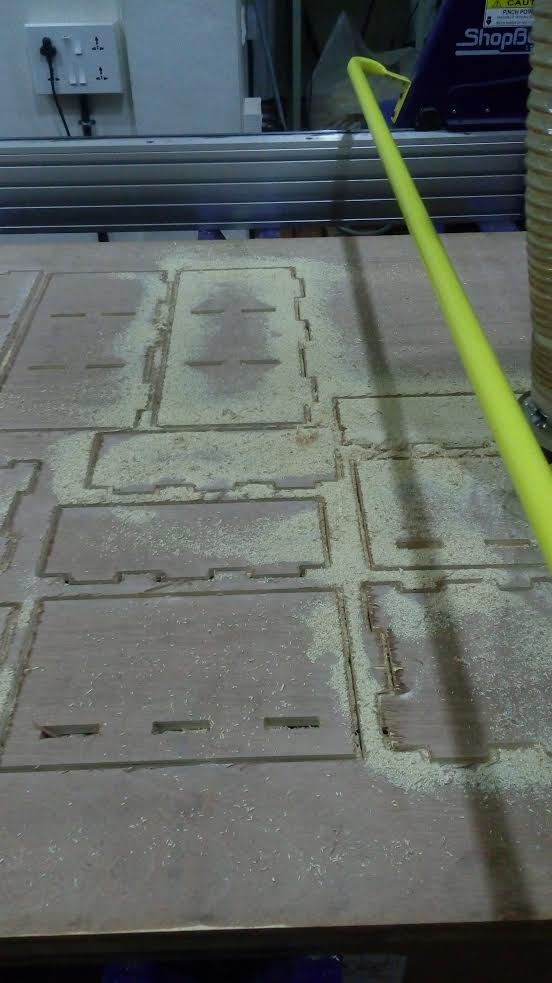
First of all, inner portion was got cut and then outer portion.
In between my process, exhaust got dropped down. So the dust particles was accumulated.
It was rectified that end porion of the duct has got bend and solved.
Then after my first session came to an end I found that I can add some parts of my design to the board again and I added other 6 parts also. Out of it five has came properly and last one got ata point of damage and then I stopped
My first session came to an end.
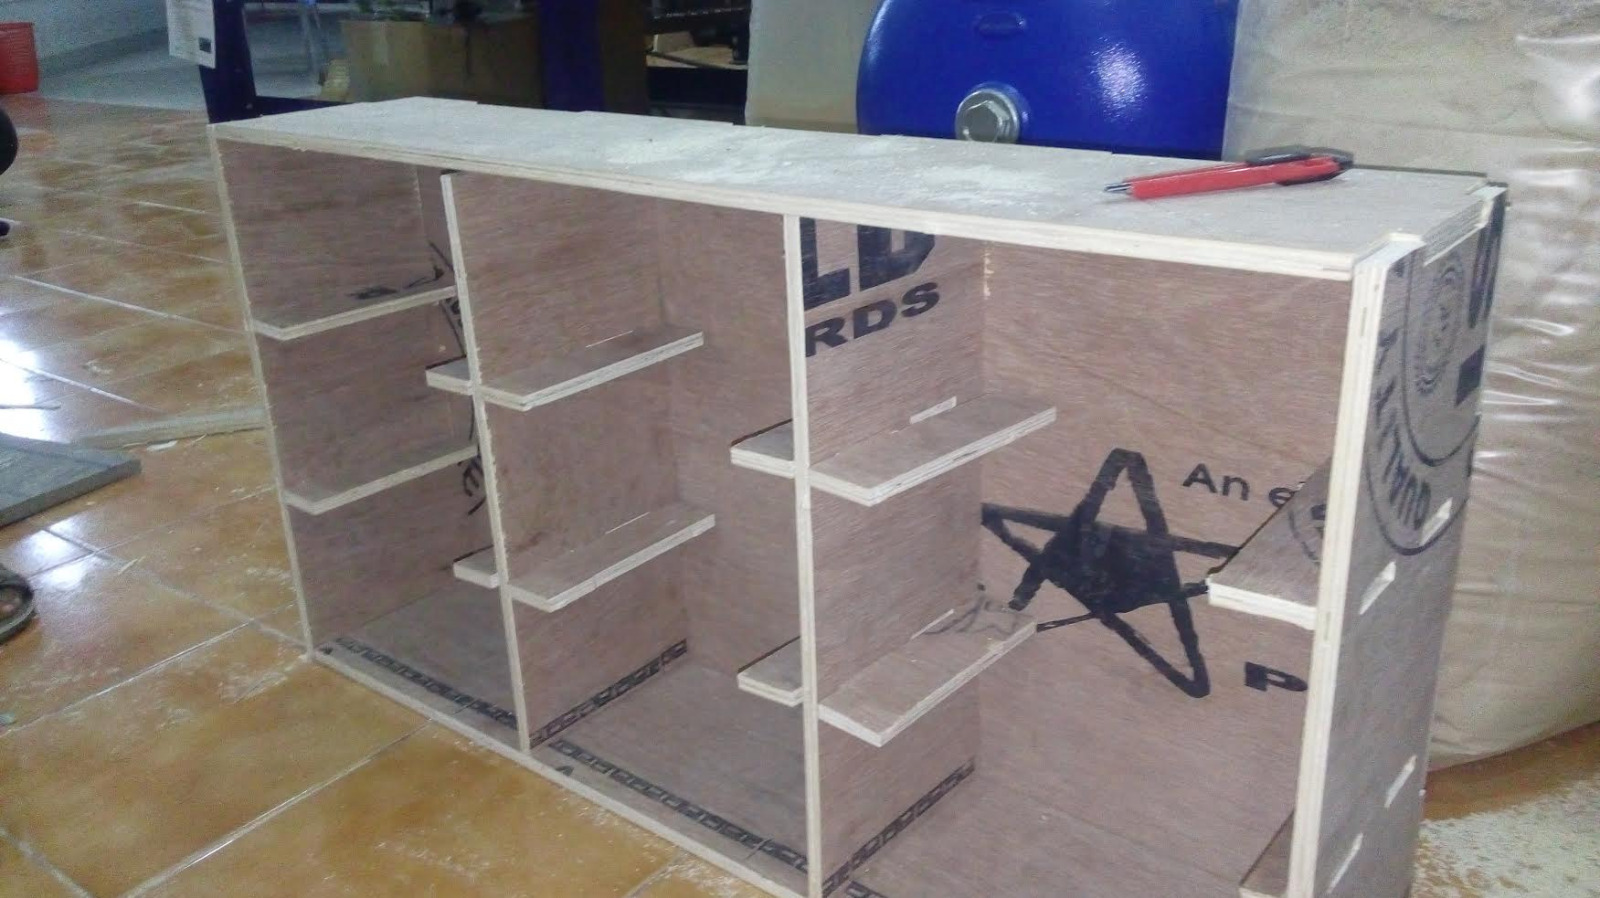
Similarly I added my second portion and after that by using chiesel I parted all the parts.
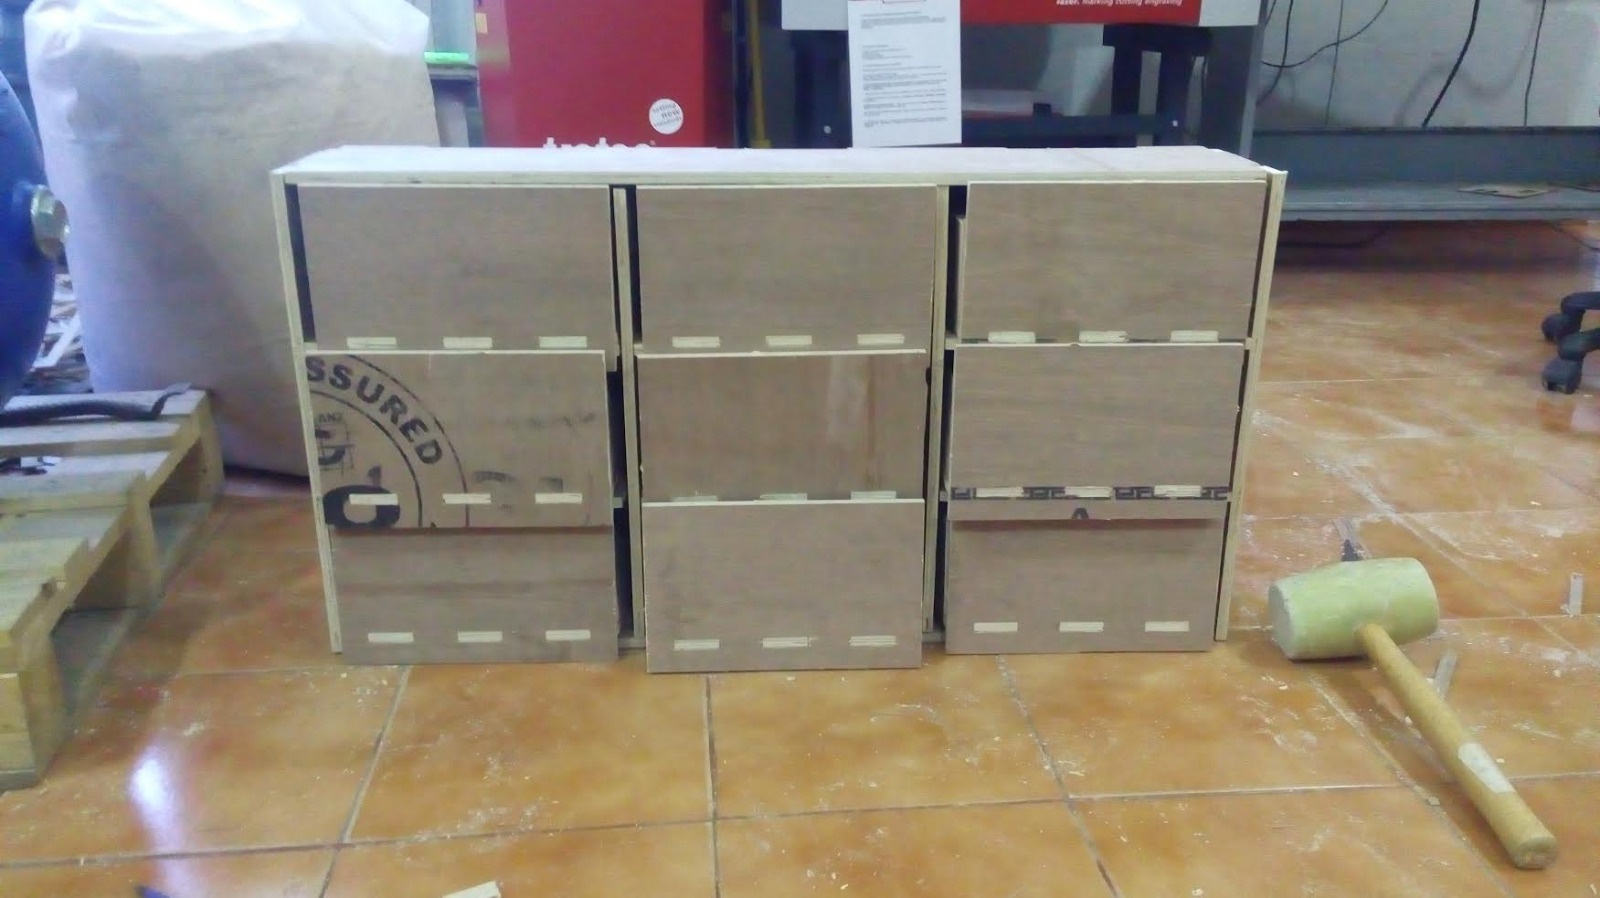
Then I assembled the outer parts and it came almost ok.
For tray as I gave only one fit it was not so fit. Also design didnt came in a proper way
Then I mounted all the portions together. Tray design should have to make much more better for my final project.