Chiara's work on stepper motor
Electronics infrastructure of our machine was mostly Chiara's work and you can find info abou stepper motors, GRBL and CNC shield here
.G-code writing
After few tips given by Chiara and my instructor, I wanted to test quickly our machine movements.
First problem I had was that, owing to bad luck or to some mates' boycott, once I took the baby (the BISCUIboT) home
to work on it on Easter vacation,
I missed some screws on the CNC shield. I therefore started unscrewing everything I had at had around me (beach radios, remote controls
, my brother's morning bell, a pedometer) but I gained no suitable screw until I looked (with lucky results :) ) among my dad's drawers and
I found proper substitutes
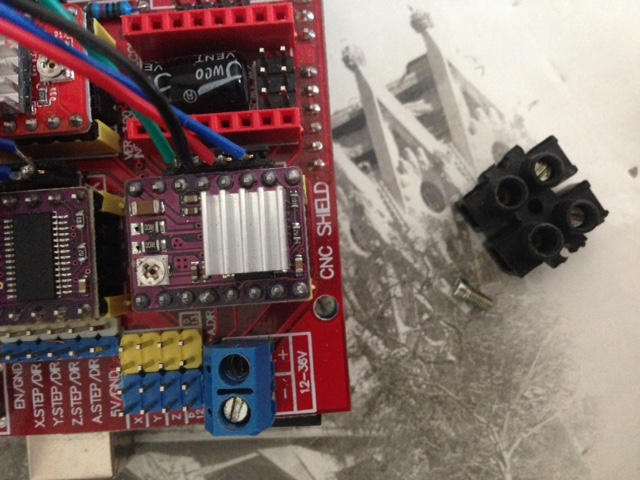 I then opened Arduino's serial monitor and as soon as it sent back GRBL right starting message, I randomly typed G-Code commands according
to CNC shield wiring, to check if rolling-pin and rollers moved in opposite directions:
I then opened Arduino's serial monitor and as soon as it sent back GRBL right starting message, I randomly typed G-Code commands according
to CNC shield wiring, to check if rolling-pin and rollers moved in opposite directions:
BISCUIboT Testing from Silvia Palazzi on Vimeo
I saw I had some problems since directions were the same and at a certain point they changed while moving. I double chechked connections and solderings but they seem to work fine.
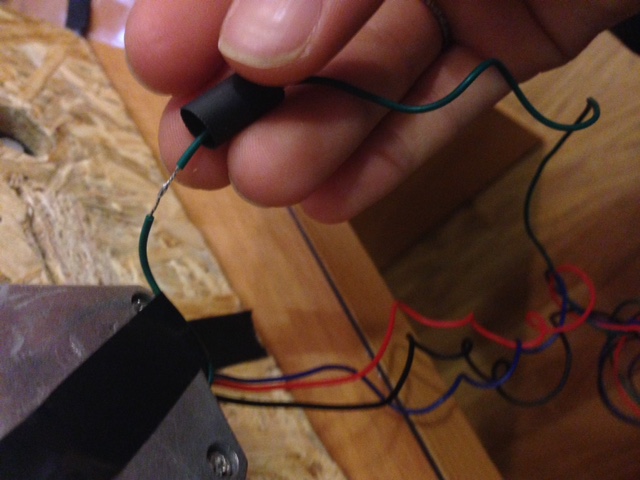
With no hope I decided to wish an happy Easter to the machine and put her back to bed until the day after, when, in lifting it up I saw this:
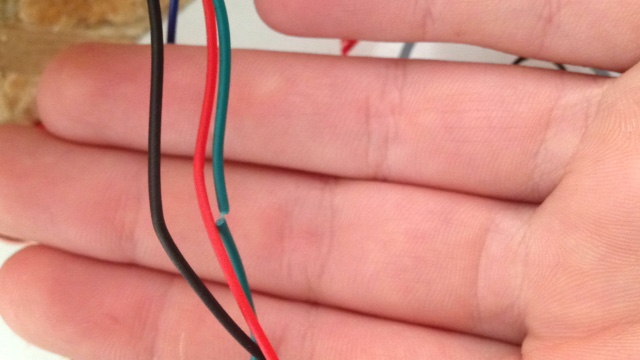 and I found ot were the problem originated from.
I then re-soldered that green wire and everything worked well then.
 What I then did was to make myself an idea about G-code and I soon realise that most of the machine I used to work with are fed with gcode lines.
To have a proof about that, I took as an example, a 3D printed part file and had a look at it.
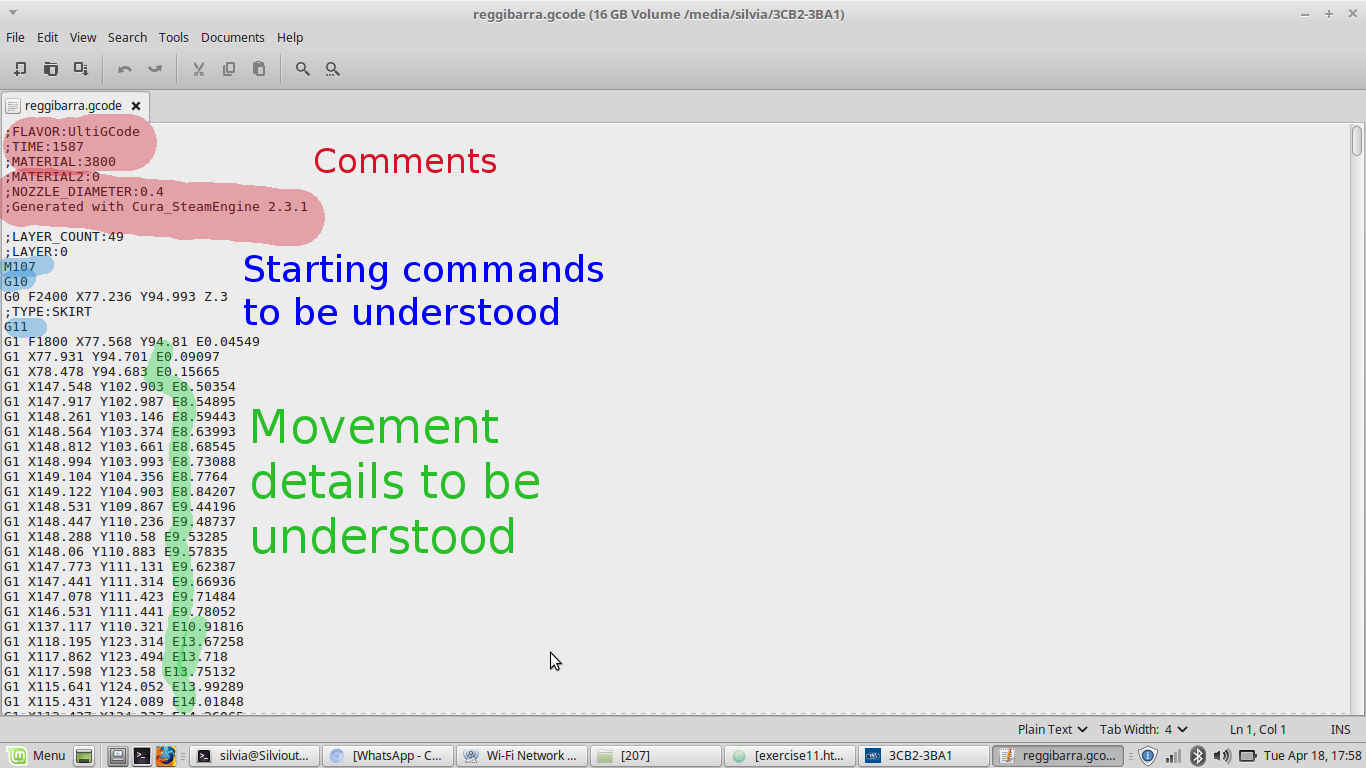 Commands I didn't highlight were axis movement per command.
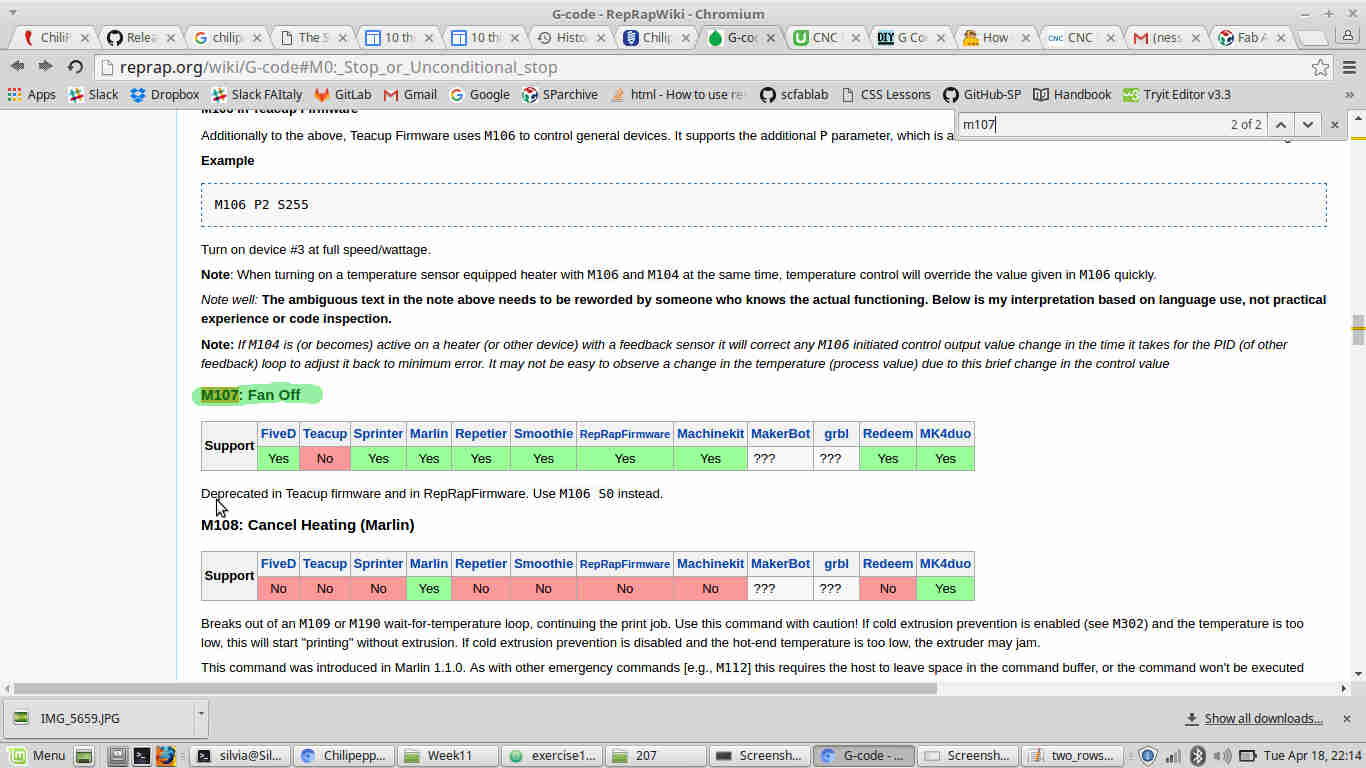
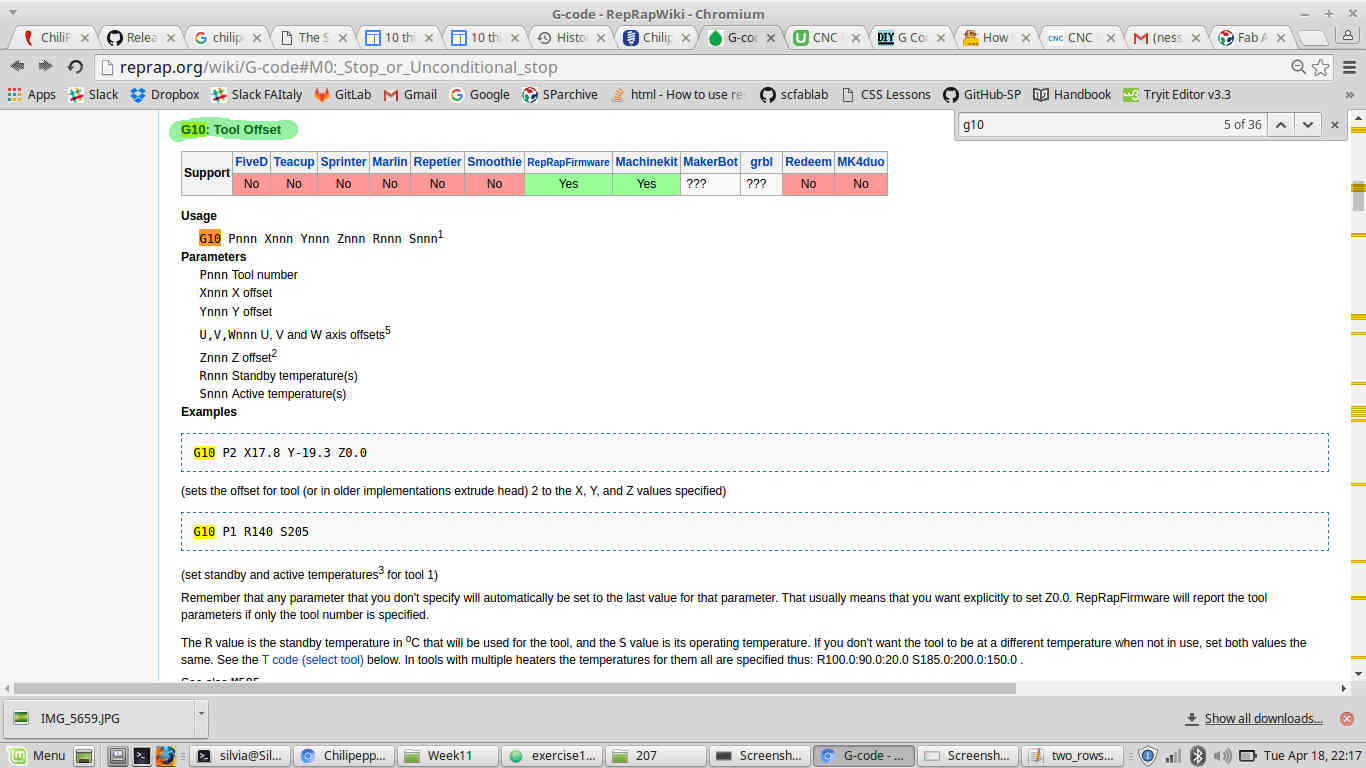
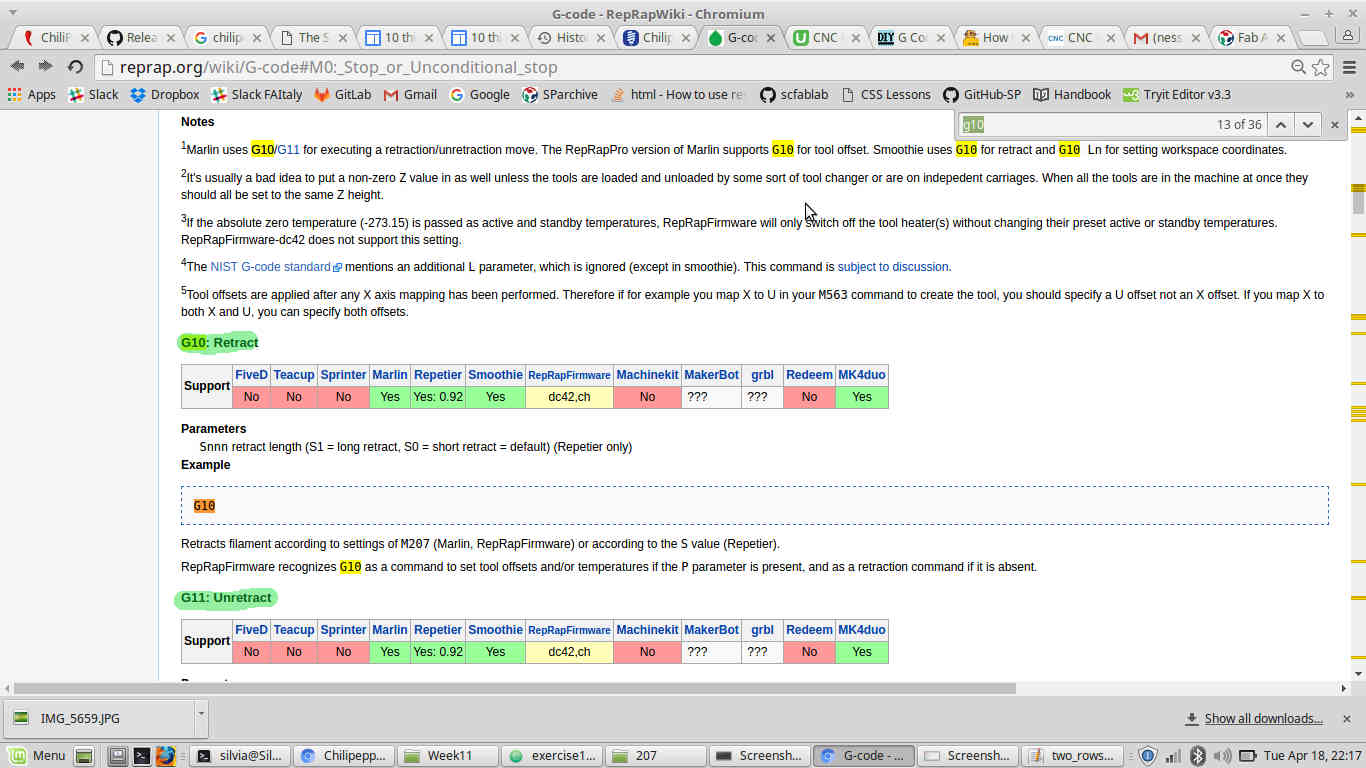
Below, definitions taken from Rep Rap:
M107
G10 & G11
EX.XXXX
E command is specific for 3D printer extruders, which is seen as an imaginary 4th axis (nice forum about it
here)
Writing my first G-code
I now knew I did need really simple commands to write my G-code, according to axis movement I desired.
With Chiara's help I tested step by step what the machine would
have moved like, so as to make adjustments immediately.
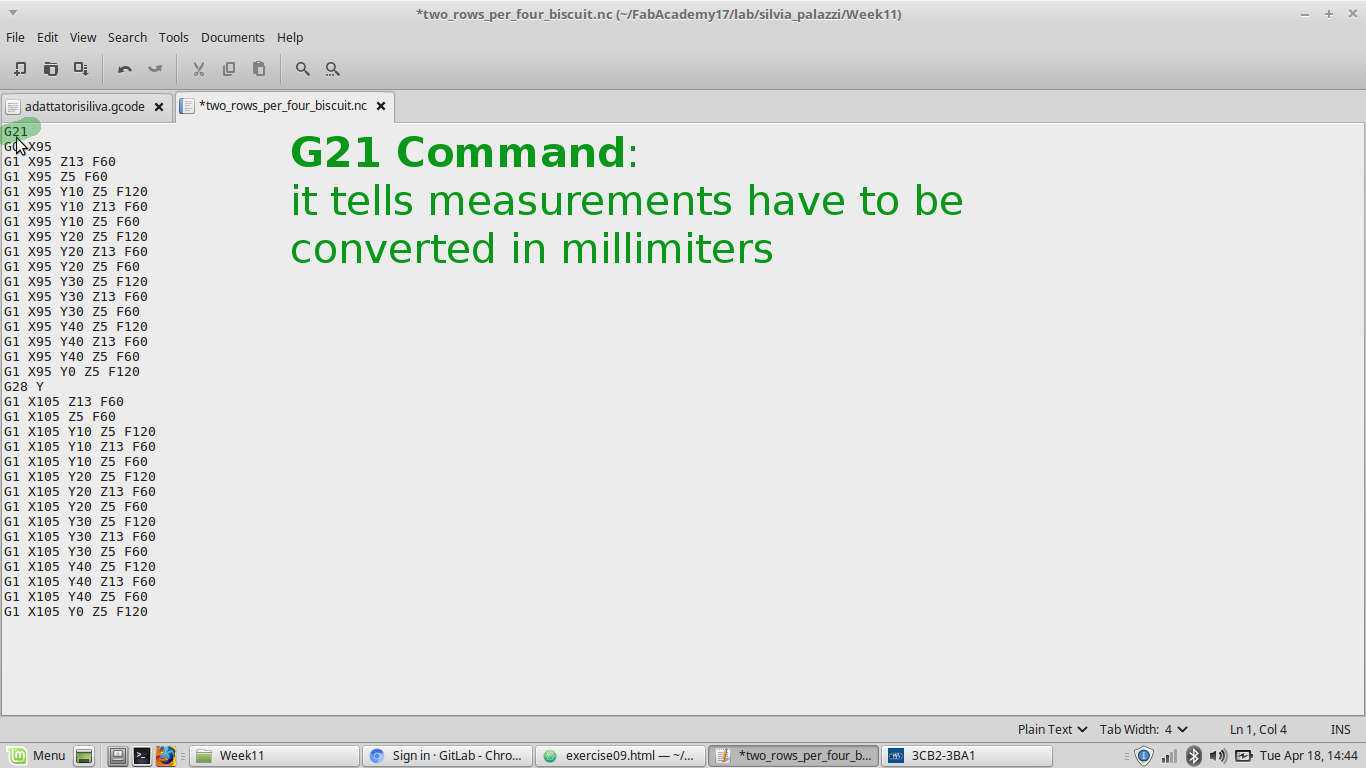
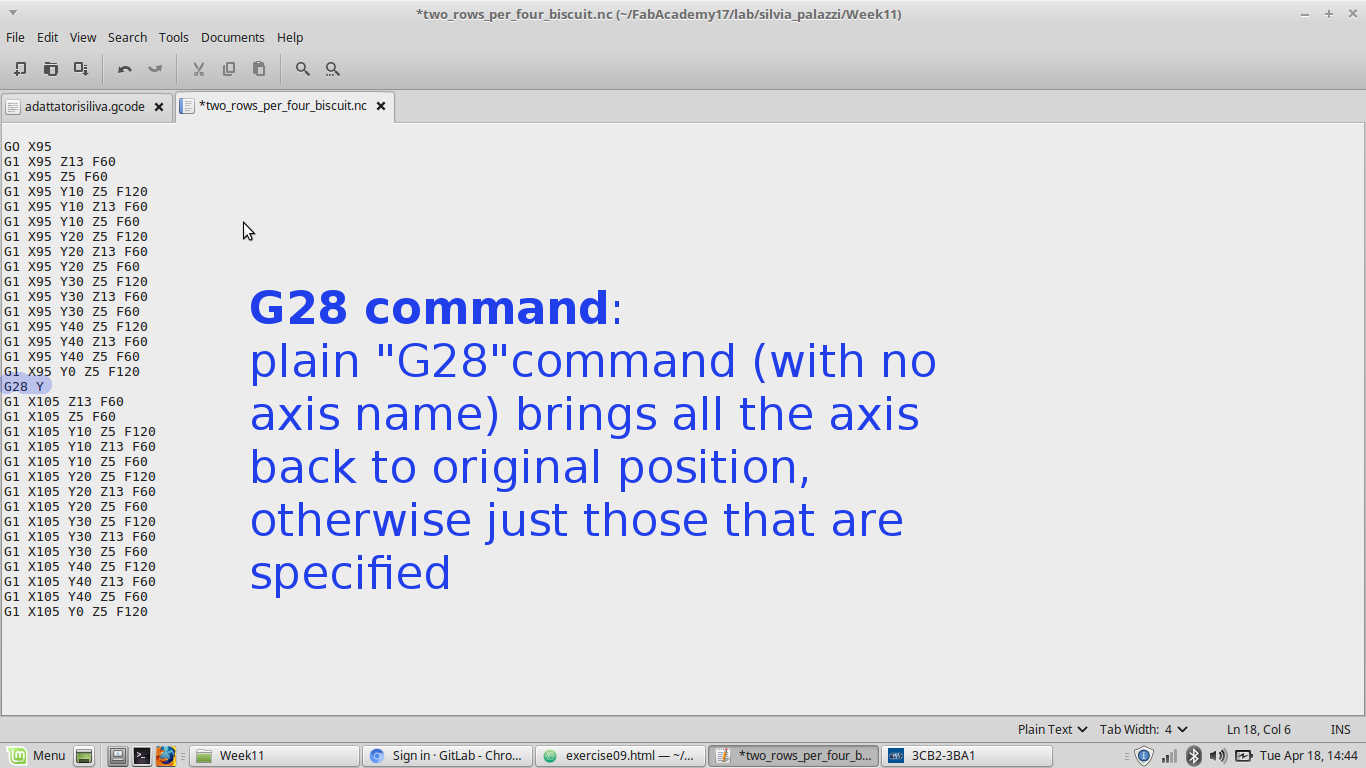
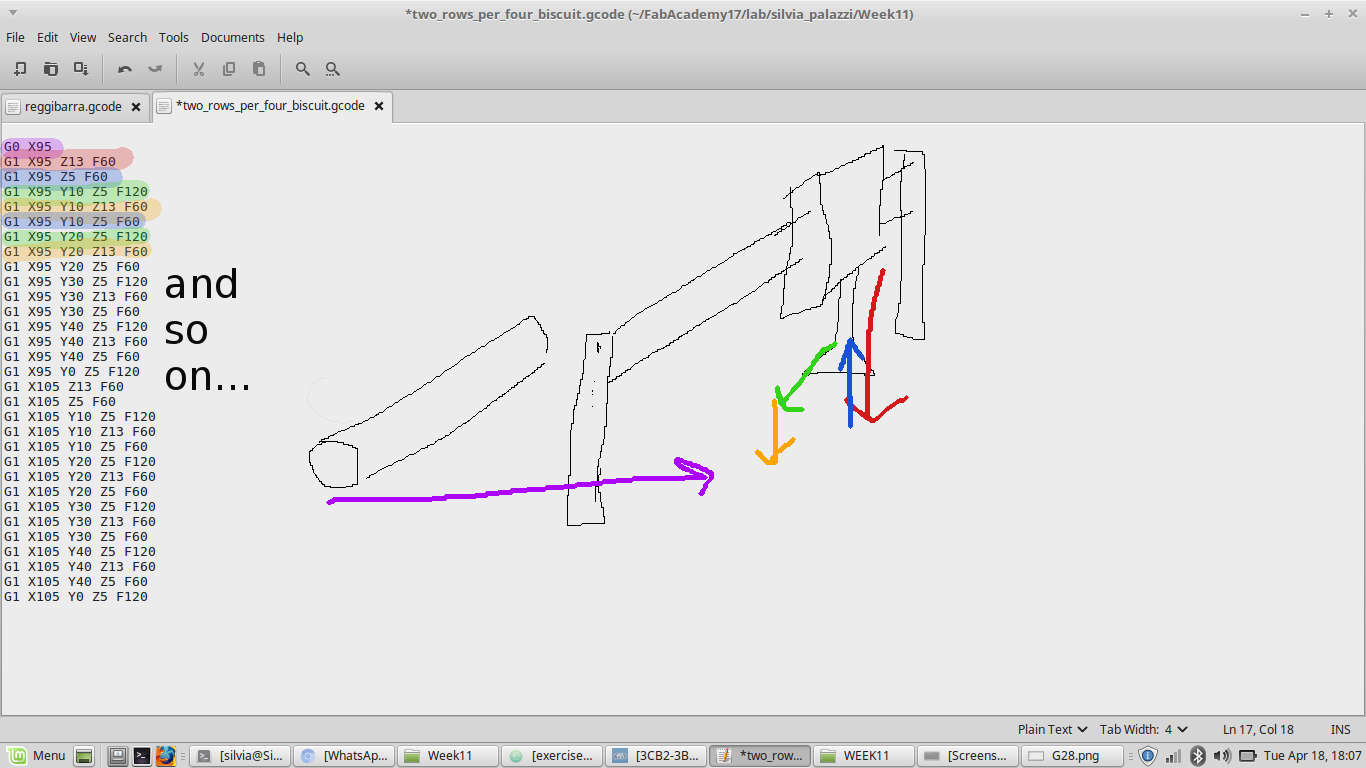
The code we ended up with is the one below:
G0 X95
G1 X95 Z13 F60
G1 X95 Z5 F60
G1 X95 Y10 Z5 F120
G1 X95 Y10 Z13 F60
G1 X95 Y10 Z5 F60
G1 X95 Y20 Z5 F120
G1 X95 Y20 Z13 F60
G1 X95 Y20 Z5 F60
G1 X95 Y30 Z5 F120
G1 X95 Y30 Z13 F60
G1 X95 Y30 Z5 F60
G1 X95 Y40 Z5 F120
G1 X95 Y40 Z13 F60
G1 X95 Y40 Z5 F60
G28 Y
G1 X105 Z13 F60
G1 X105 Z5 F60
G1 X105 Y10 Z5 F120
G1 X105 Y10 Z13 F60
G1 X105 Y10 Z5 F60
G1 X105 Y20 Z5 F120
G1 X105 Y20 Z13 F60
G1 X105 Y20 Z5 F60
G1 X105 Y30 Z5 F120
G1 X105 Y30 Z13 F60
G1 X105 Y30 Z5 F60
G1 X105 Y40 Z5 F120
G1 X105 Y40 Z13 F60
G1 X105 Y40 Z5 F60
G1 X105 Y0 Z5 F120
STEP by STEP EXPLANATION:
Chilipeppr and software issue
I then wanted to send the code to the machine and I decided to try with ChiliPeppr.
As soon as I opened it, I realized it only works with GRBL device connected to the PC and to talk to it you have to download particular packages
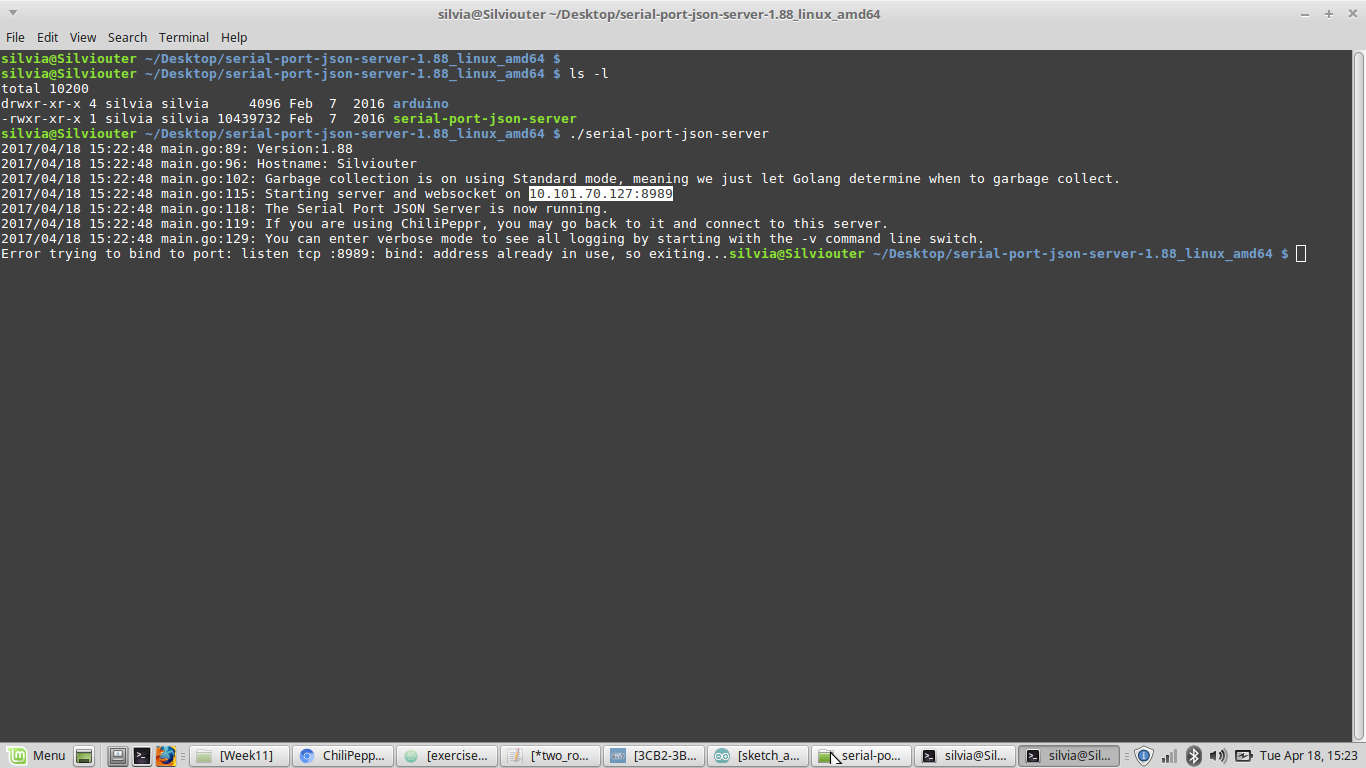
 then I extracted files and ran that program, which allows the connection between Arduino (with GRBL on) and ChiliPeppr server to use your computer as a bridge.
 Now the software (if everything is linked to power) should give you the possibility to select the board to send gcode to:
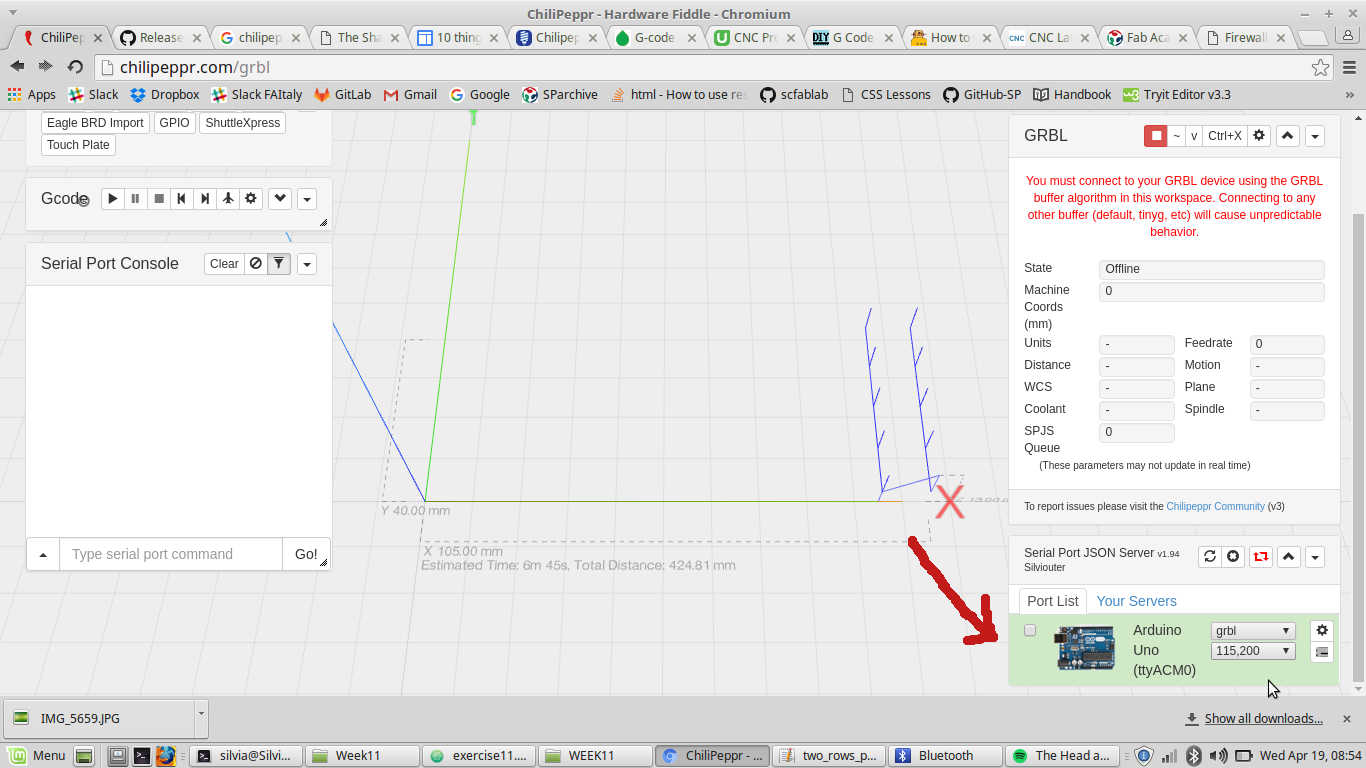 So I could say that the software could see my board, but then started many problems.
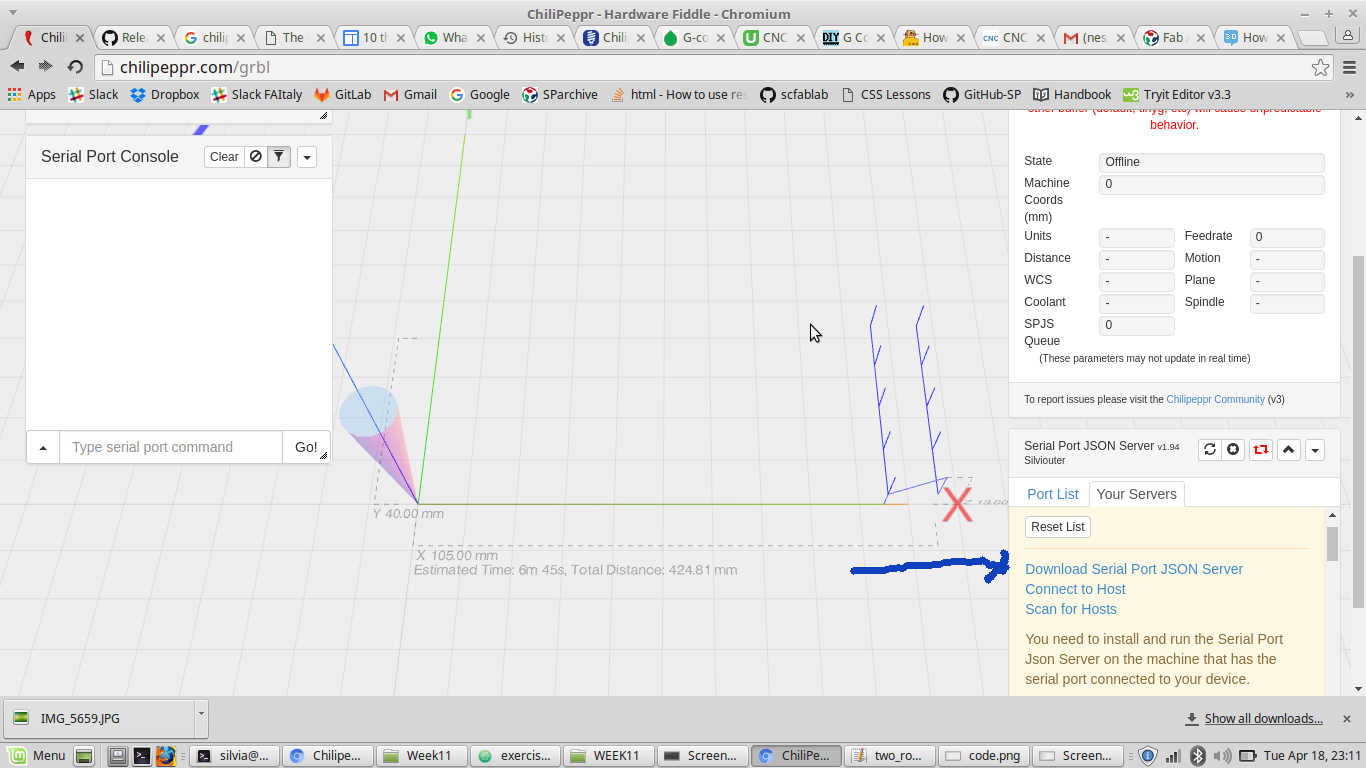
At first, as I dragged and dropped the code onto the workspace,
ChiliPeppr could see it all (as shown in the picture above) but simply played first gcode line in simulation.
NB: if you don't specify G20 or G21 at the beginning of your gcode, you'll be asked to do it as soon as you drop the code onto
the workspace.
Second issued came when suddenly the software decided it didn't want to see the board anymore, even when I ticked my Arduino, the tick immediately disappeared.
I tried to fix these problems my self with no results, I then asked help to Simone
and he started challenging my notebook sending crazy commands to the shell (it was too hard to me to understand something further than dmesg). Anyway, he told
me the notebook correctly saw Arduino so he suggested to get the last version of Serial port JSON server and we ran that one, but nothing changed much.
During the regional review, Fiore suggested to use a different way to send gcode to the machine
cause ChiliPeppr, being an online server, isn't such a stable via.
I then moved to Universal Gcode Sender
UGS
I needed to get UGS cause I hadn't it on my computer and I found last version here.
I tried extracting al files from folder with tar -xvzf folder but this command only suits .tar.gz folders. Since mine was
a .zip file I had to first run apt-get install unzip and only after unzip filename.zip.
NB: notice that unzip command won't create a folder were to place extracted files, but it will simply put
them in the folder you're in.
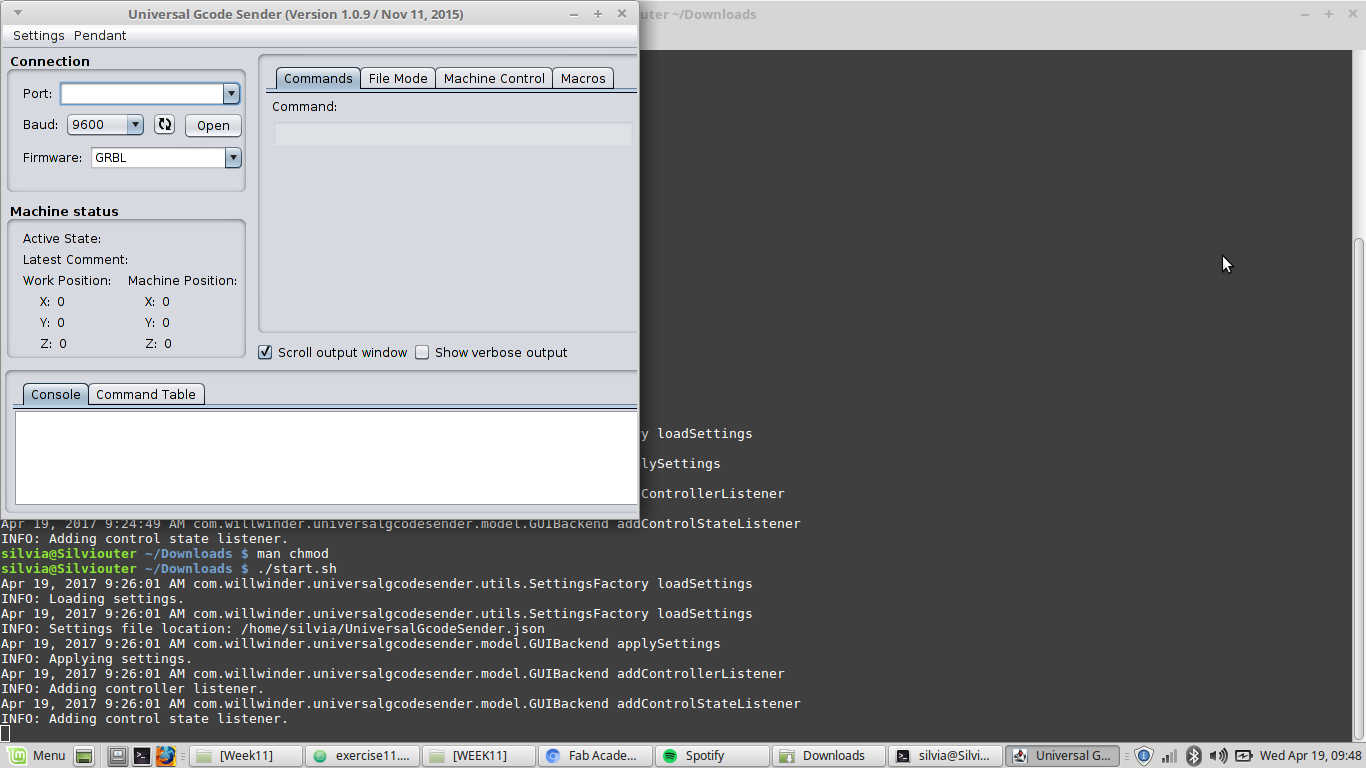
After, I wanted to run the program and I tried with ./program_starter (in my case I had a start.sh to run it) but probably it wasn't an executable file yet,
so I changed its properties with chmod +x file name (+x stands for "make it executable").
To have better knowledge I ran man chmod and read about it a bit.
UGS simply opened then:
 I chose right COM and baud rate:
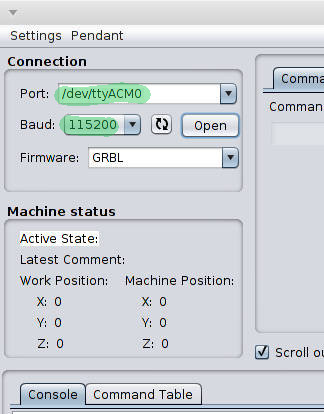 NB: remember baud rate is number of data sent per second.
I tried to send my gcode to the machine going into File Mode panel and clicking on Browse.
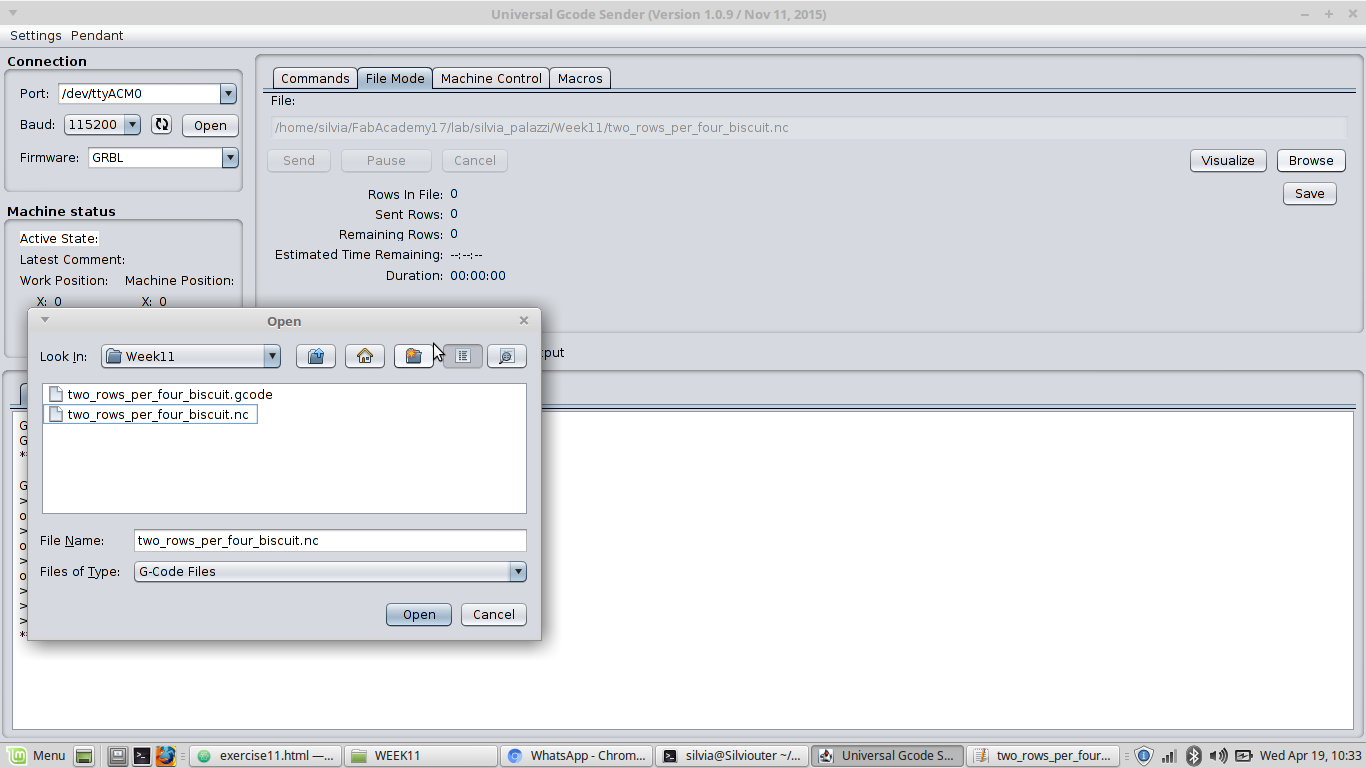 I chose file path but as soon as I clicked on OK
I received an empty STRING! error message.
I chose file path but as soon as I clicked on OK
I received an empty STRING! error message.
I checked I had no blank string on my code and I deleted G21 row.
I then repeated the action and the code ran correctly (by clicking on Send) but it just played the first line and did no action for remaining code.
 I then tried to send same gcode with Arduino's serial monitor but I soon realized I had a problem with Z axis cause it was the only one that did nothing when I sent
commands to it. With Chiara's help we started looking for where the problem came from
and, since the motor didn't work still using a different driver, since the motor worked wiring it to Y axis, we tought it may depend on CNC shield.
I then tried to send same gcode with Arduino's serial monitor but I soon realized I had a problem with Z axis cause it was the only one that did nothing when I sent
commands to it. With Chiara's help we started looking for where the problem came from
and, since the motor didn't work still using a different driver, since the motor worked wiring it to Y axis, we tought it may depend on CNC shield.
As always, problems
got fixed as soon as we tried from Chiara's notebook.
CONCLUSIONS: I have to fix my computer.