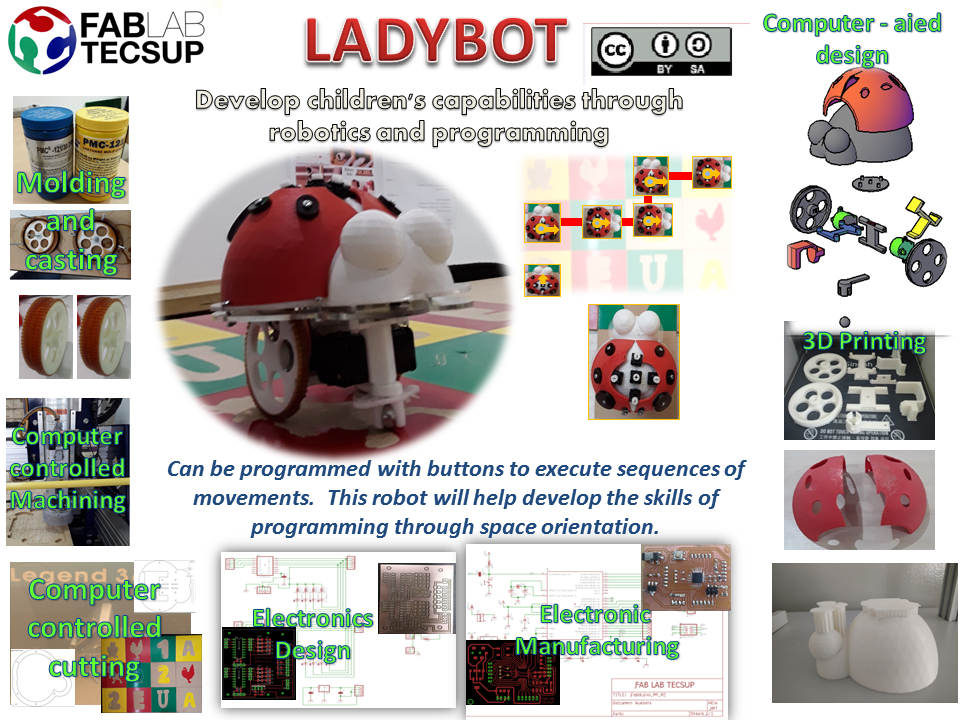
My final project is to develop a toy for children from 4 to 6 years, to develop their skills through robotics and programming. They can program with sequence sequence of movements, this toy will help to develop the toys programming skills and spatial orientation.
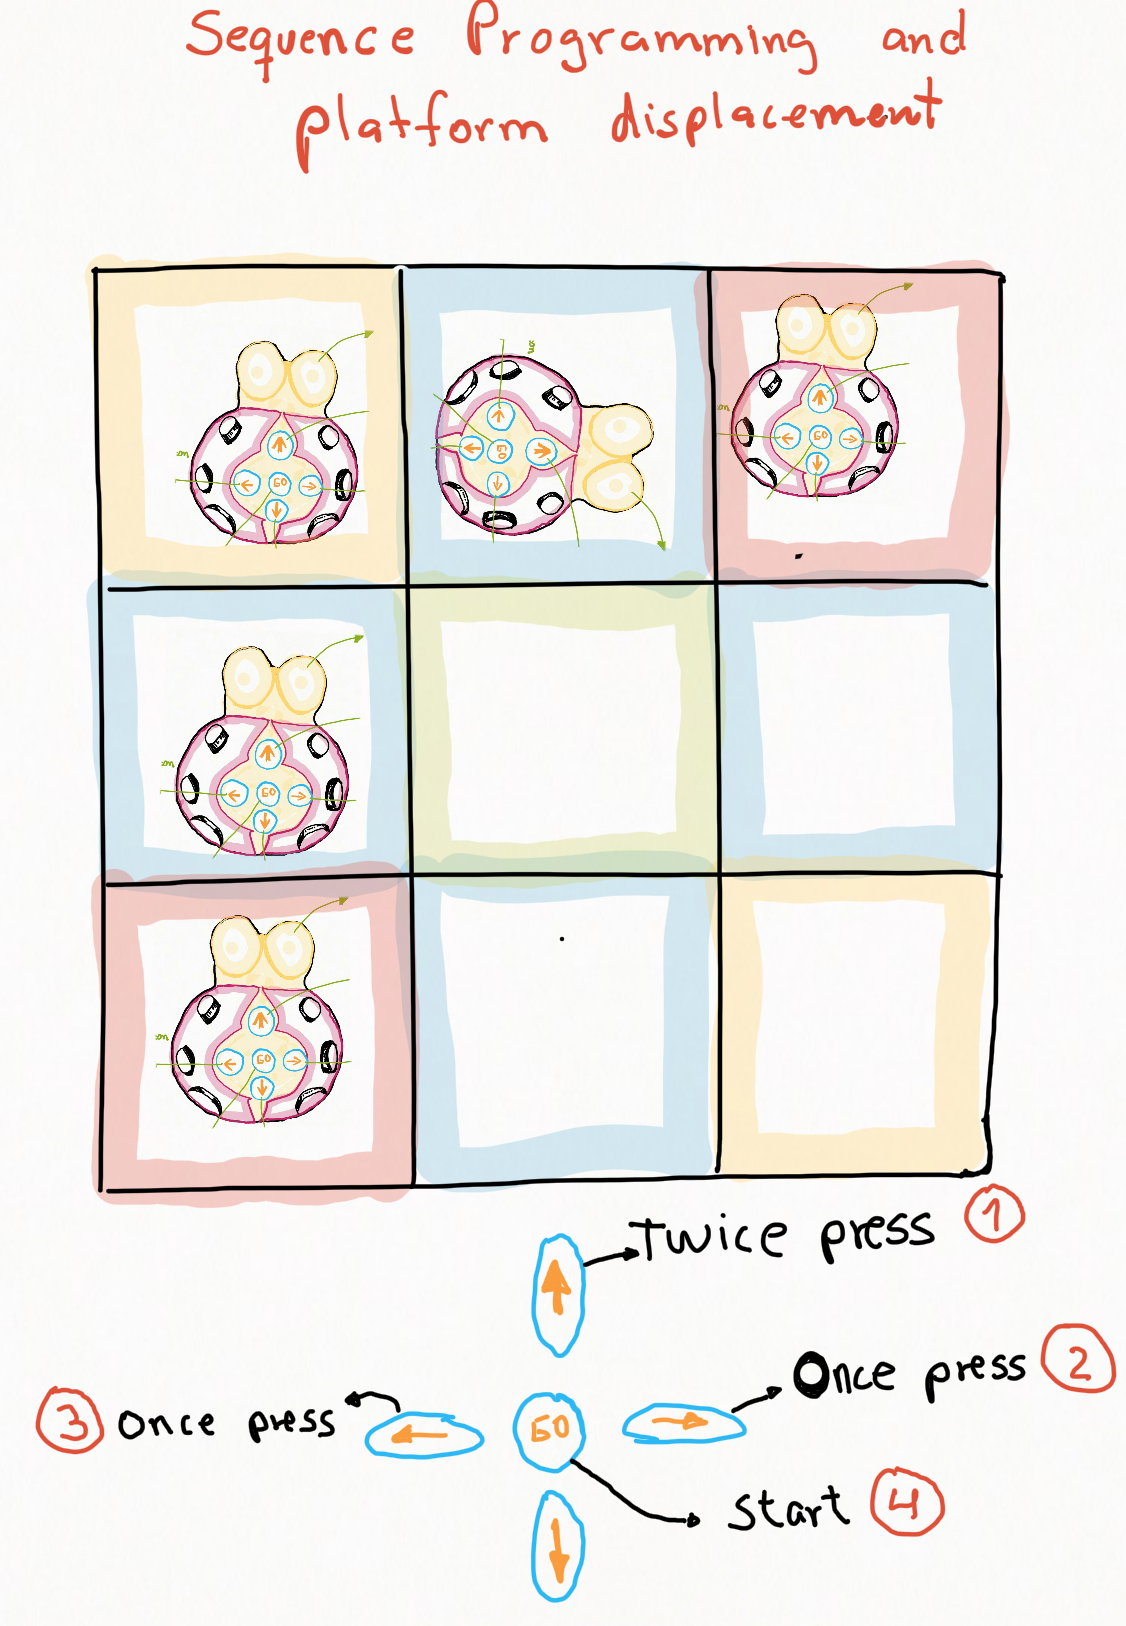
Then I will design a speed control system for stepper motors, determine the movements of the toy for different distances. All movements and movements will be made on a platform that will be divided by quadrants.
This characteristic of the toy,it will be possible for the child to establish his own algorithms to move in any location on the platform dividing by quadrants.
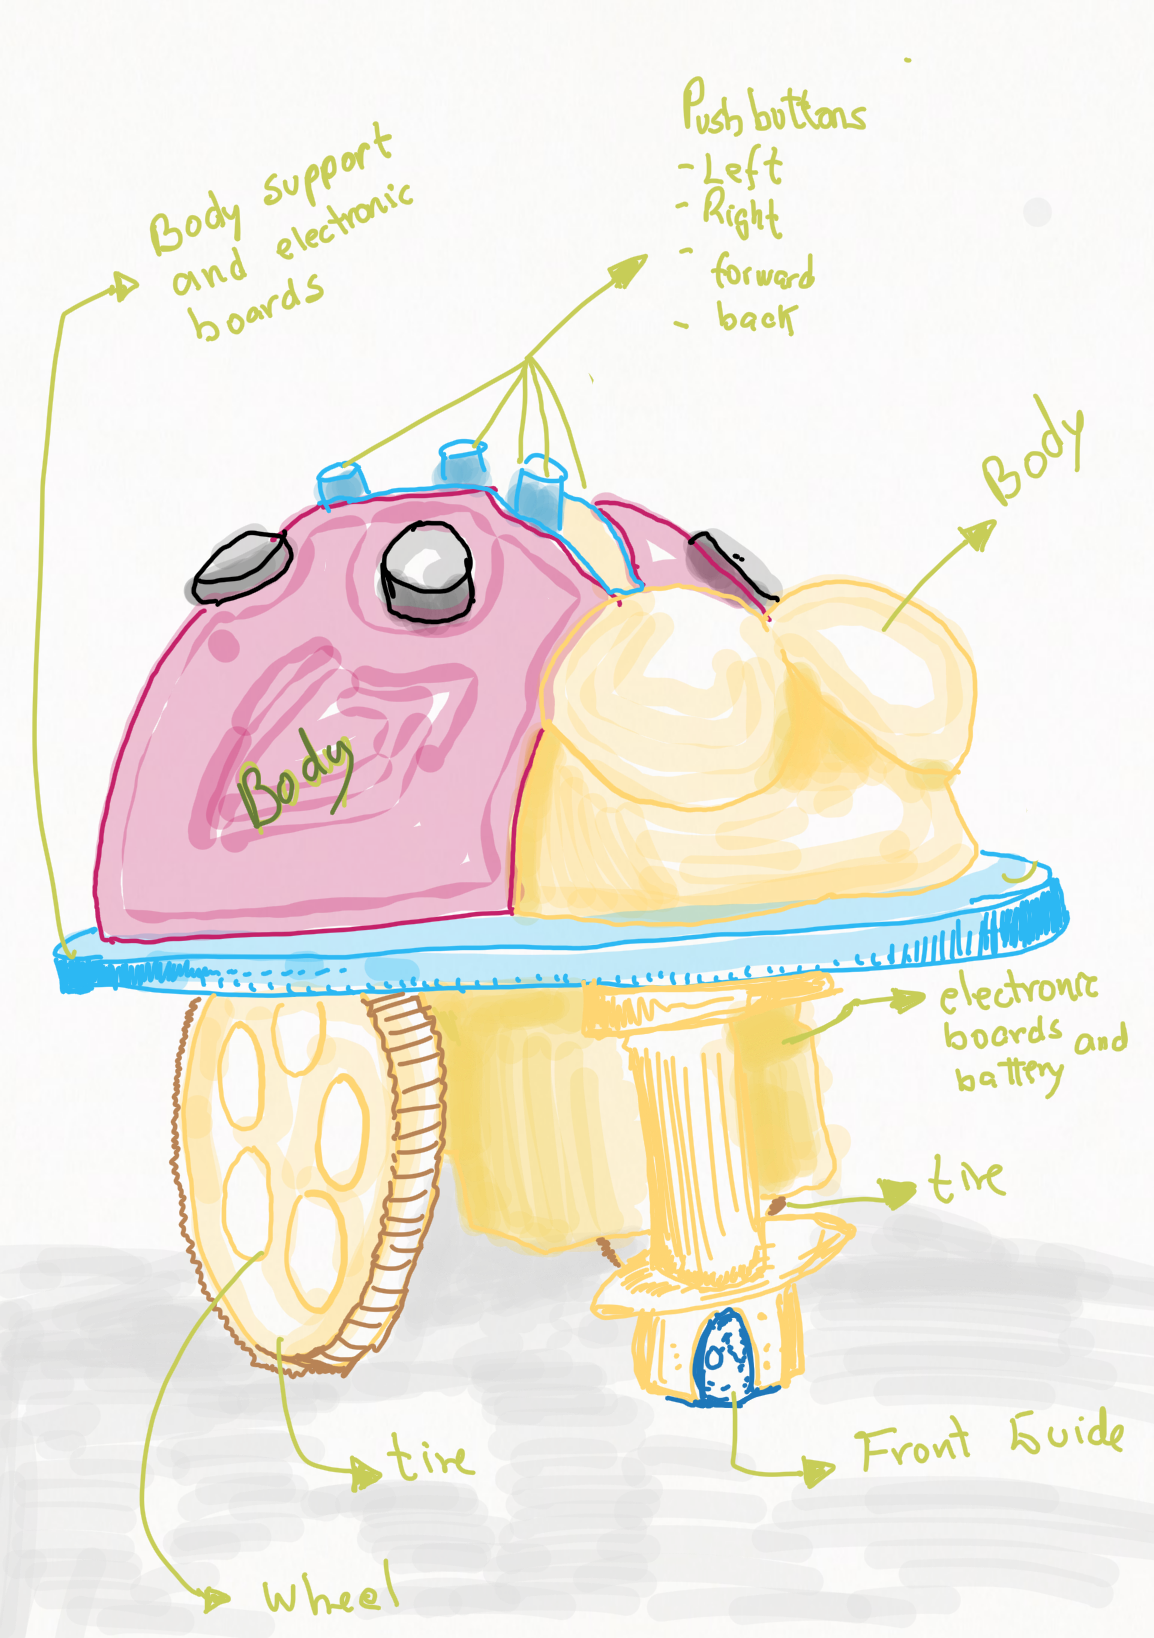
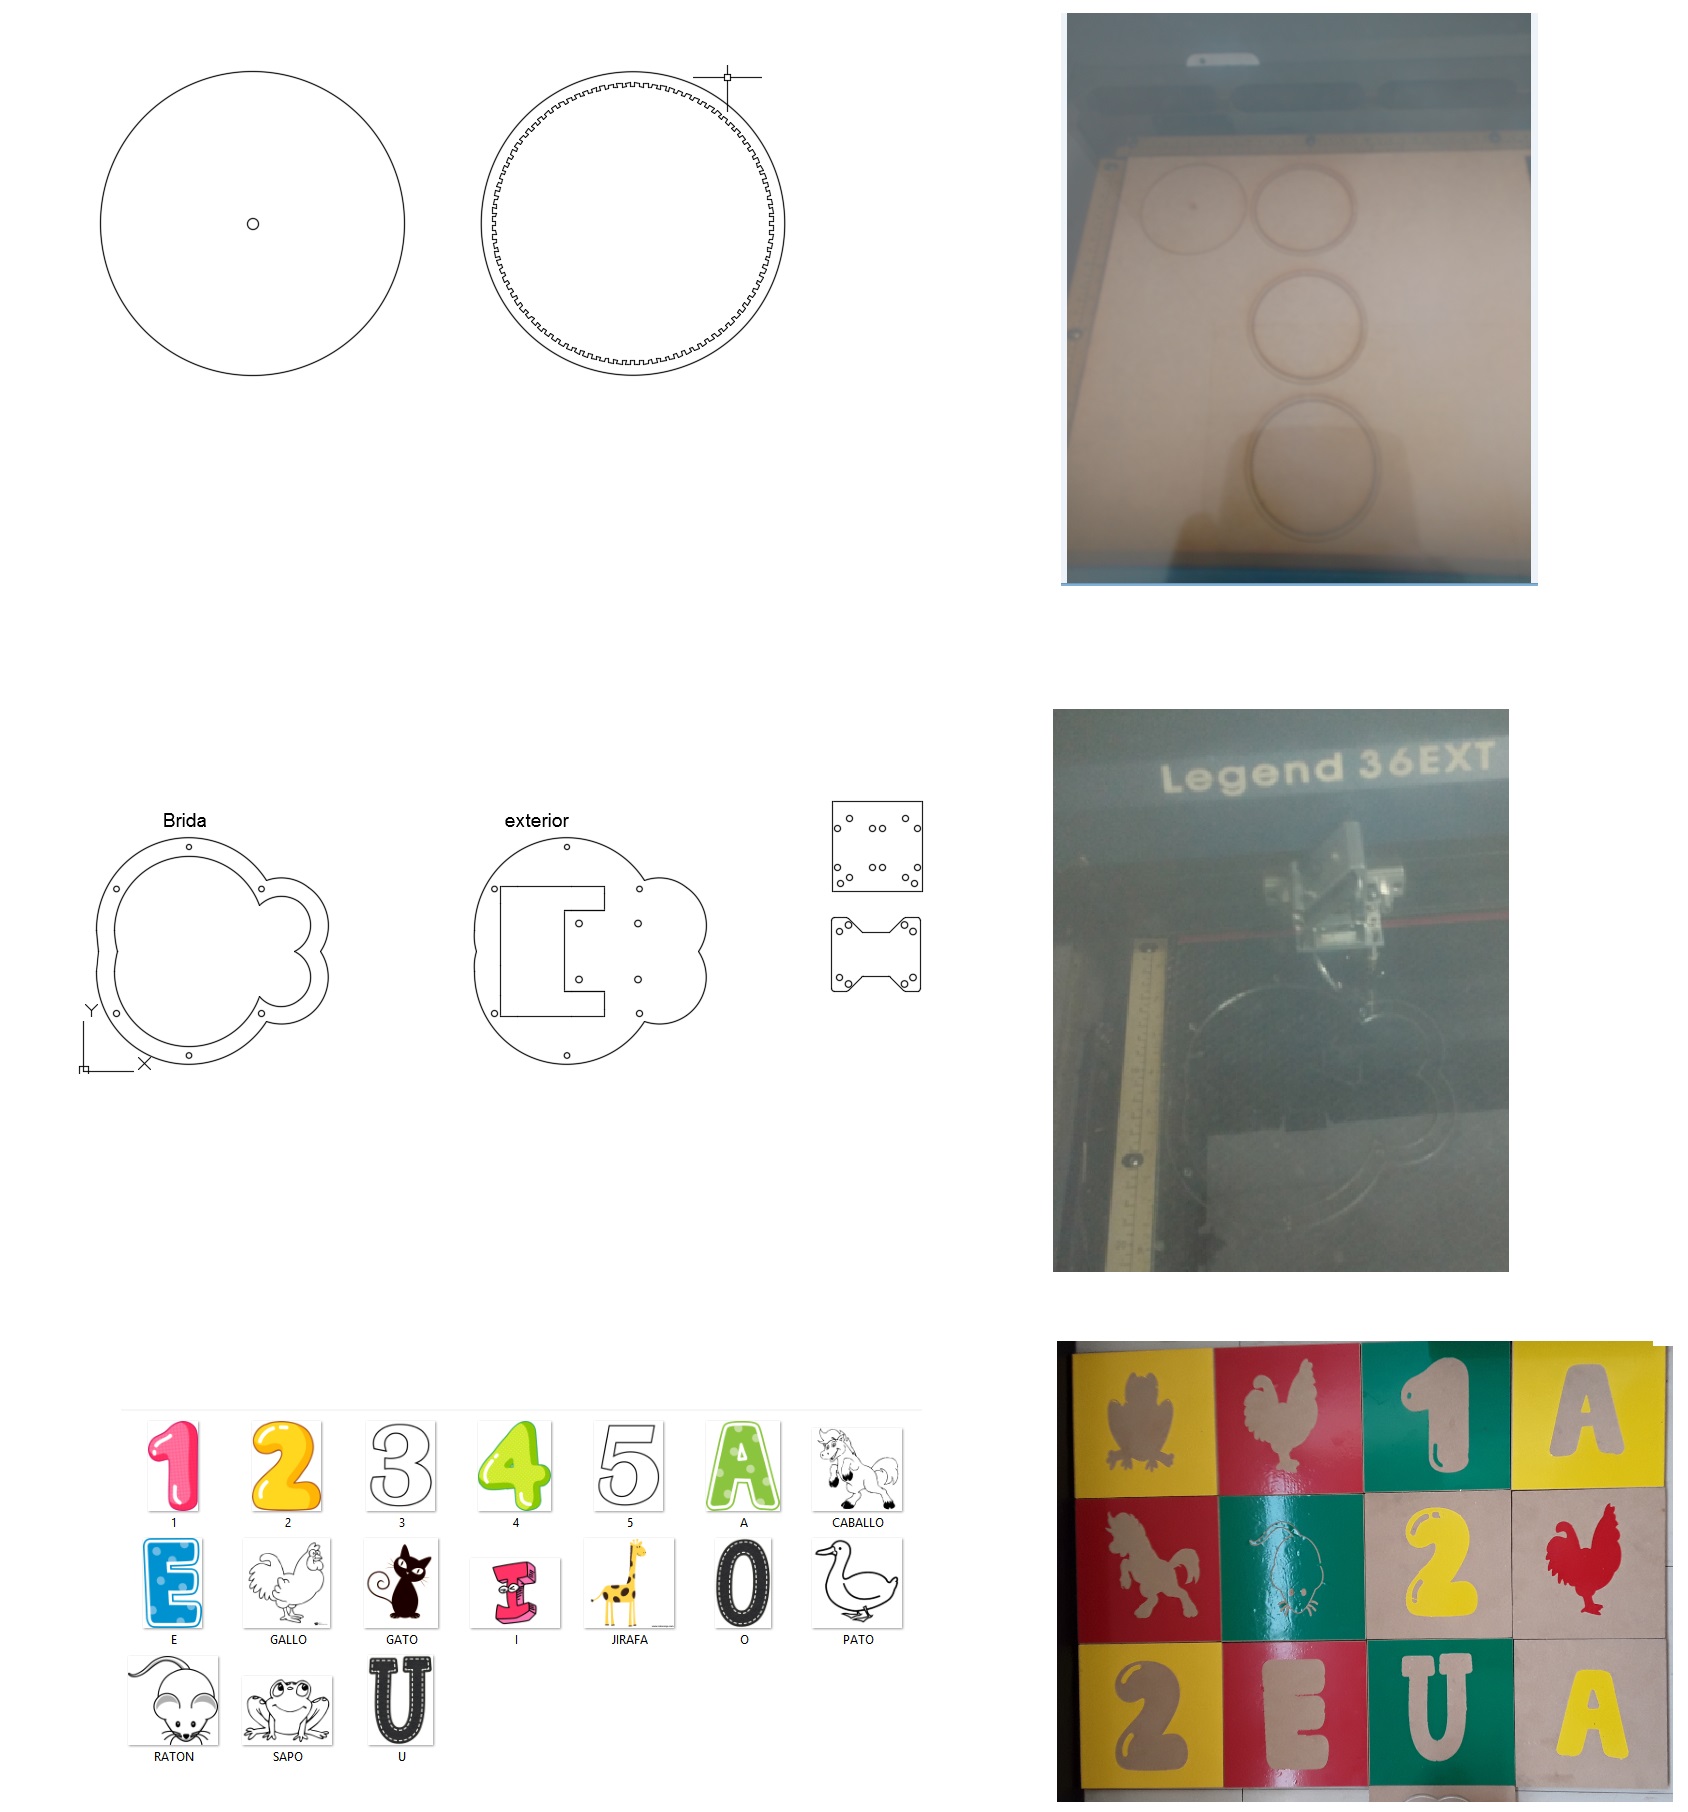
The development of the 2D and 3D design was done in autocad, the body of the toy and the transmission of the motors was made in the 3D printer, the supports for the body and for the electronic cards were made in the laser cutter
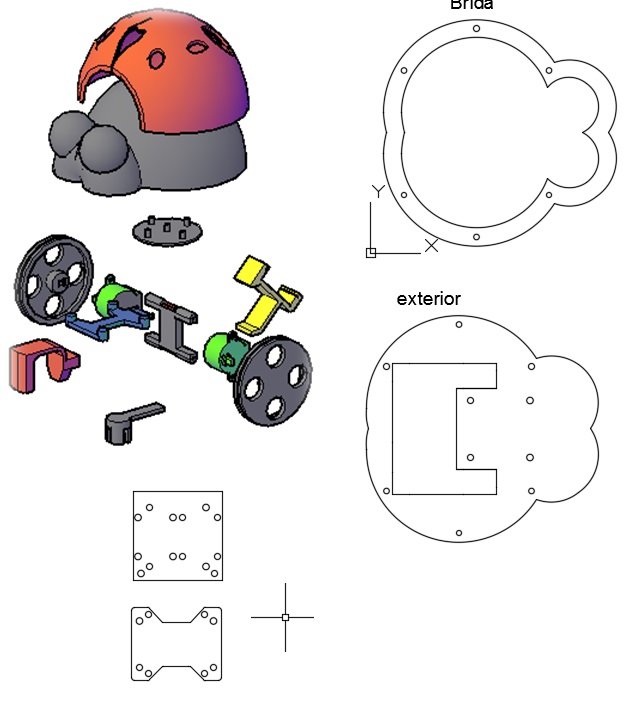
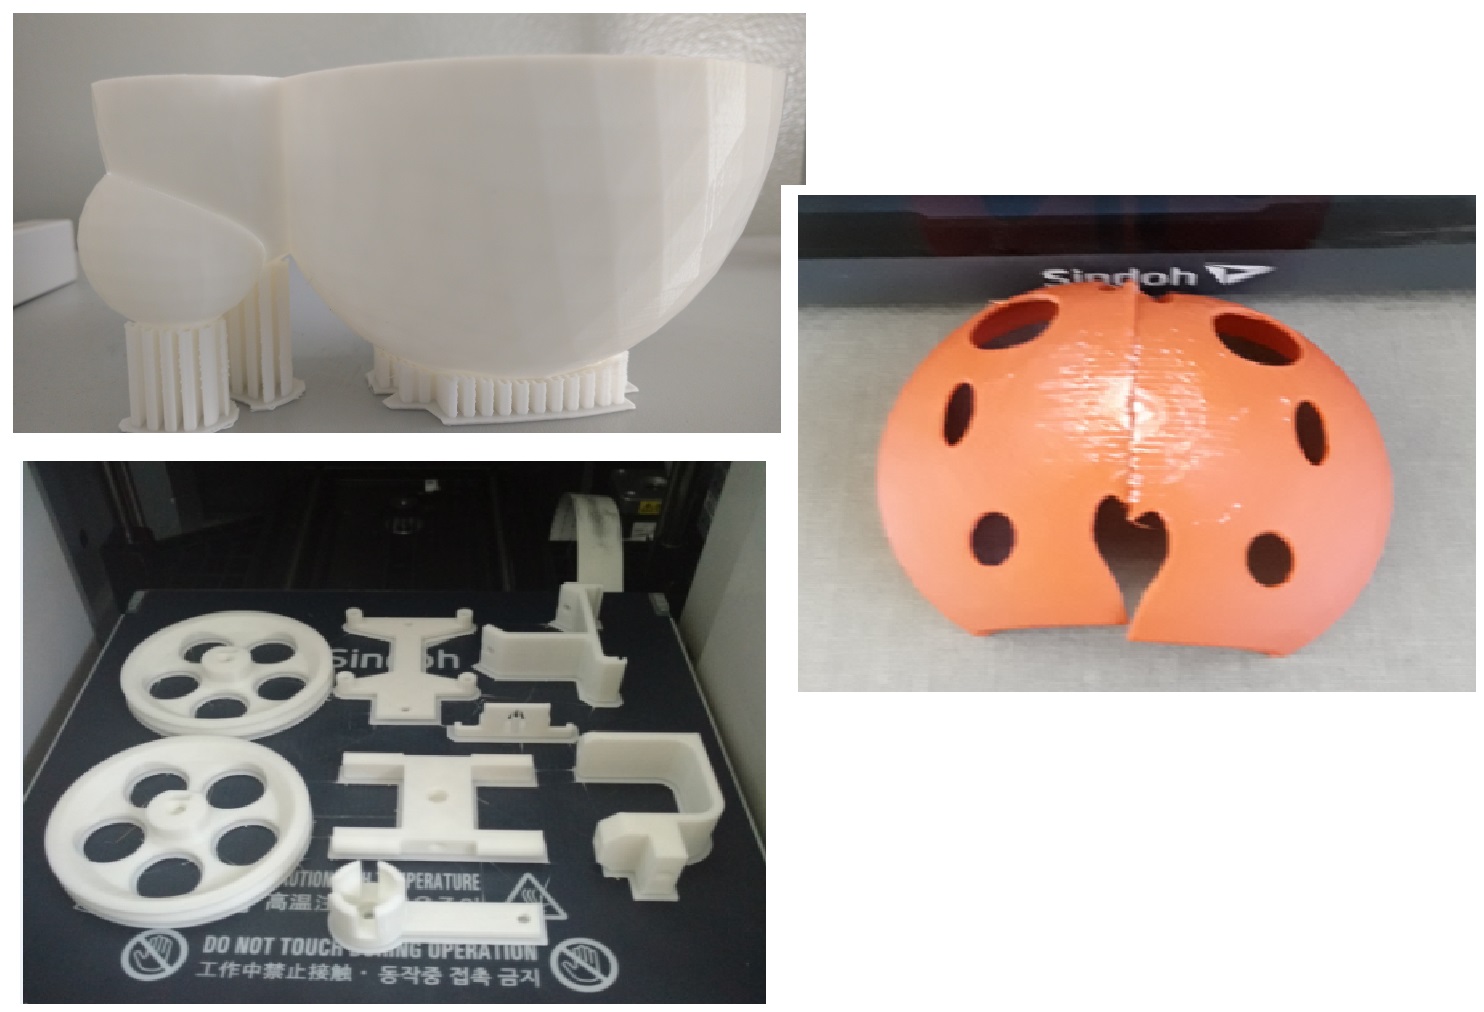
It was printed in 3D the body of the toy, the supports for the motors, and the transmission, the material of the support and transmission is PLA, this material has a good finish, the body of the toy was printed in ABS because it presents greater resistance to blows and Falls. Another additional data in PLA the extruder works at 200 ° C and the platform heats to 50 ° C, while the ABS extruder heats to 260 ° C and the platform to 70 ° C.
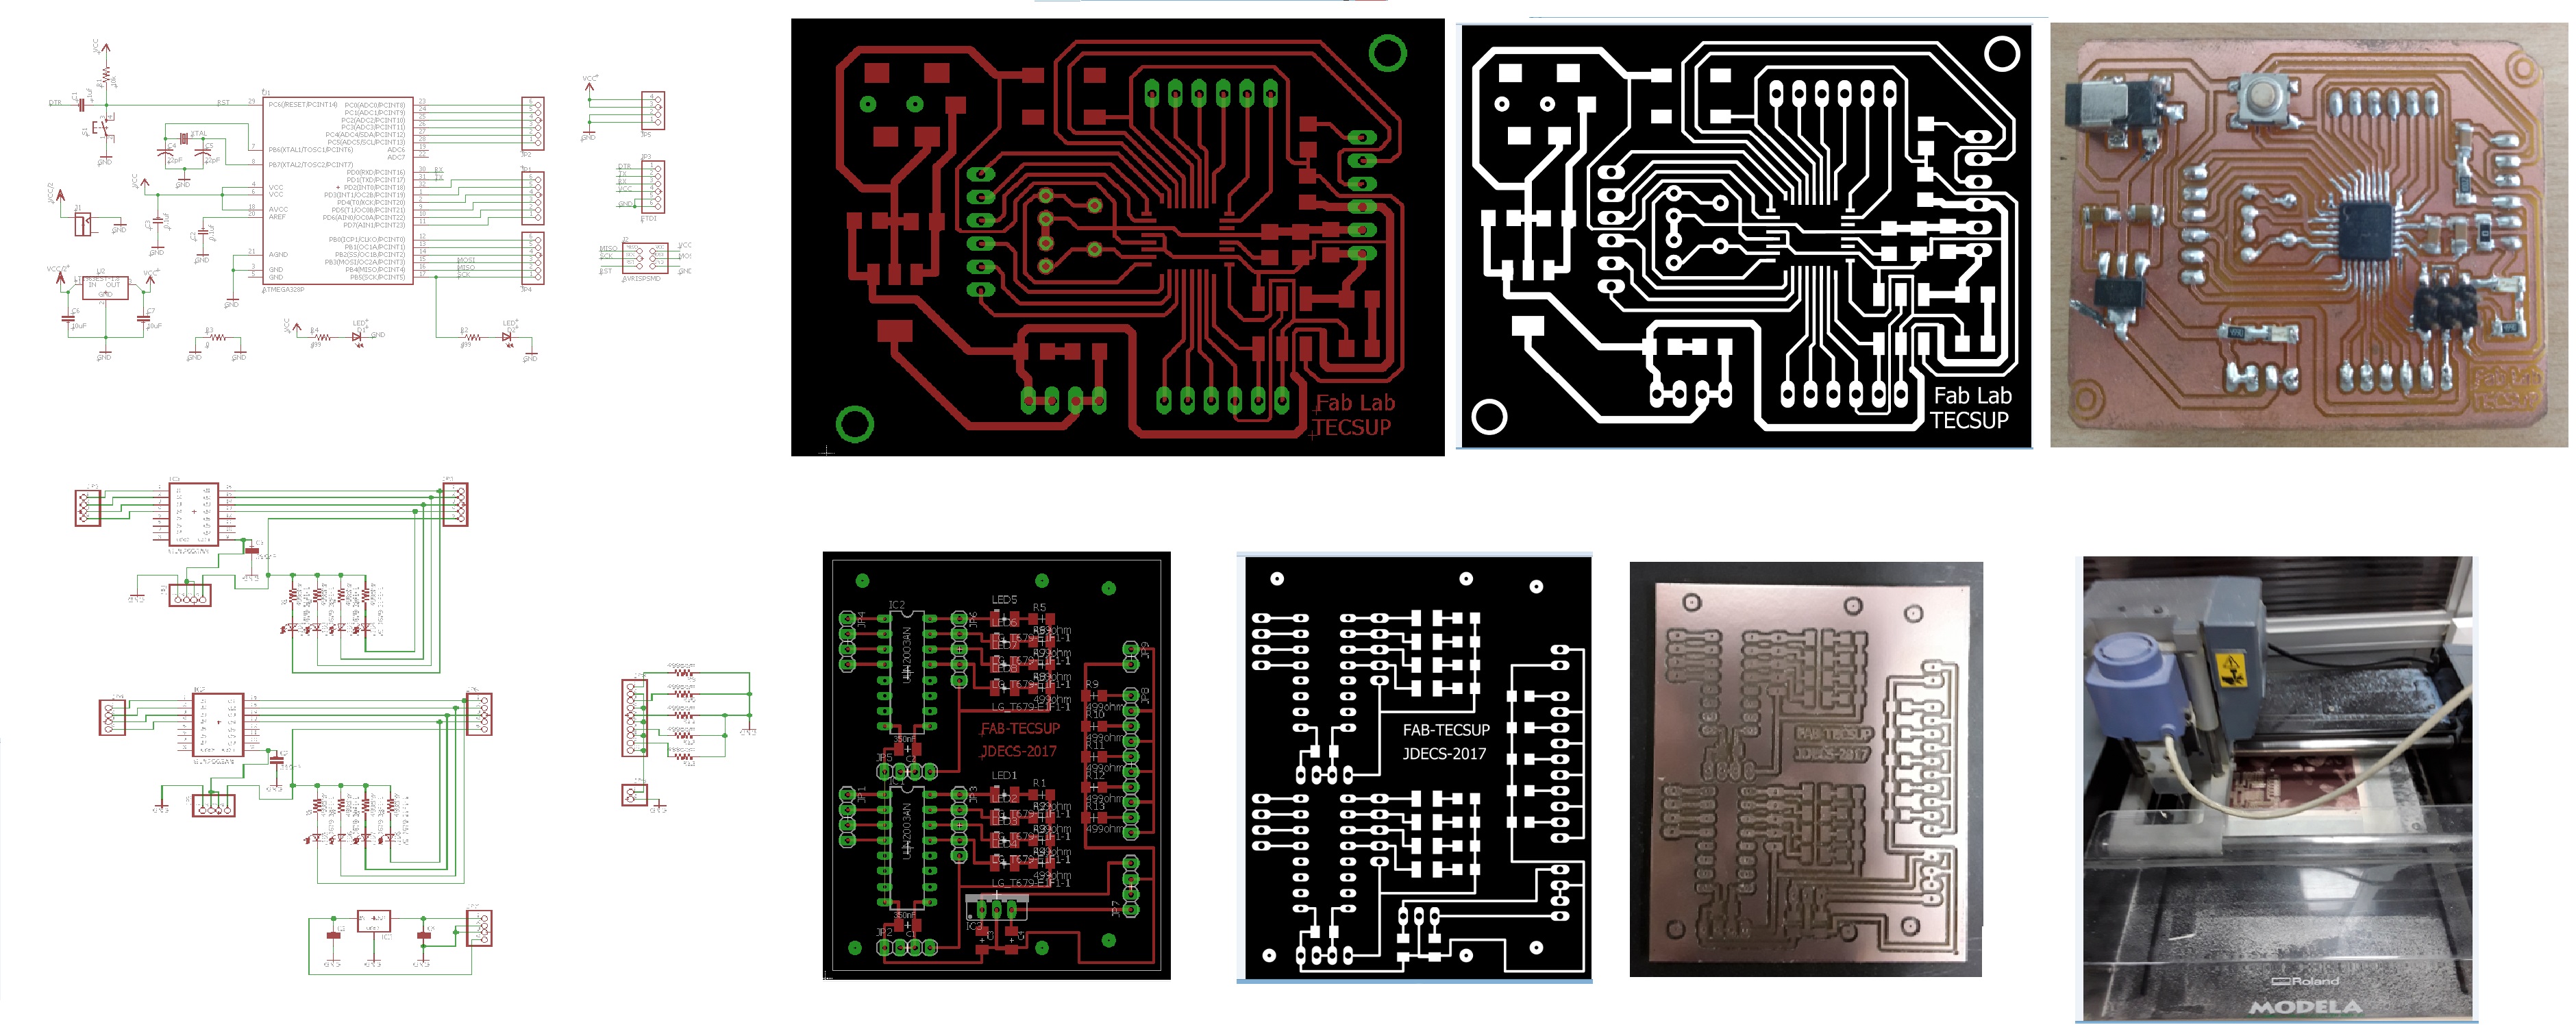
The electronic boards as a FABDUINO controller and the DRIVERS for the control of stepper motors, were designed in EAGLE. Then these designs exported to PNG image to make the cards in the MODELA machine and finally solder the electronic components on the card.
Use the laser cutter for body supports and electronic handles, in addition to developing the molds of the tires. In addition the vinyl cutter was also used for the figures of the platform, each quadrant was cut by the SHOPBOT
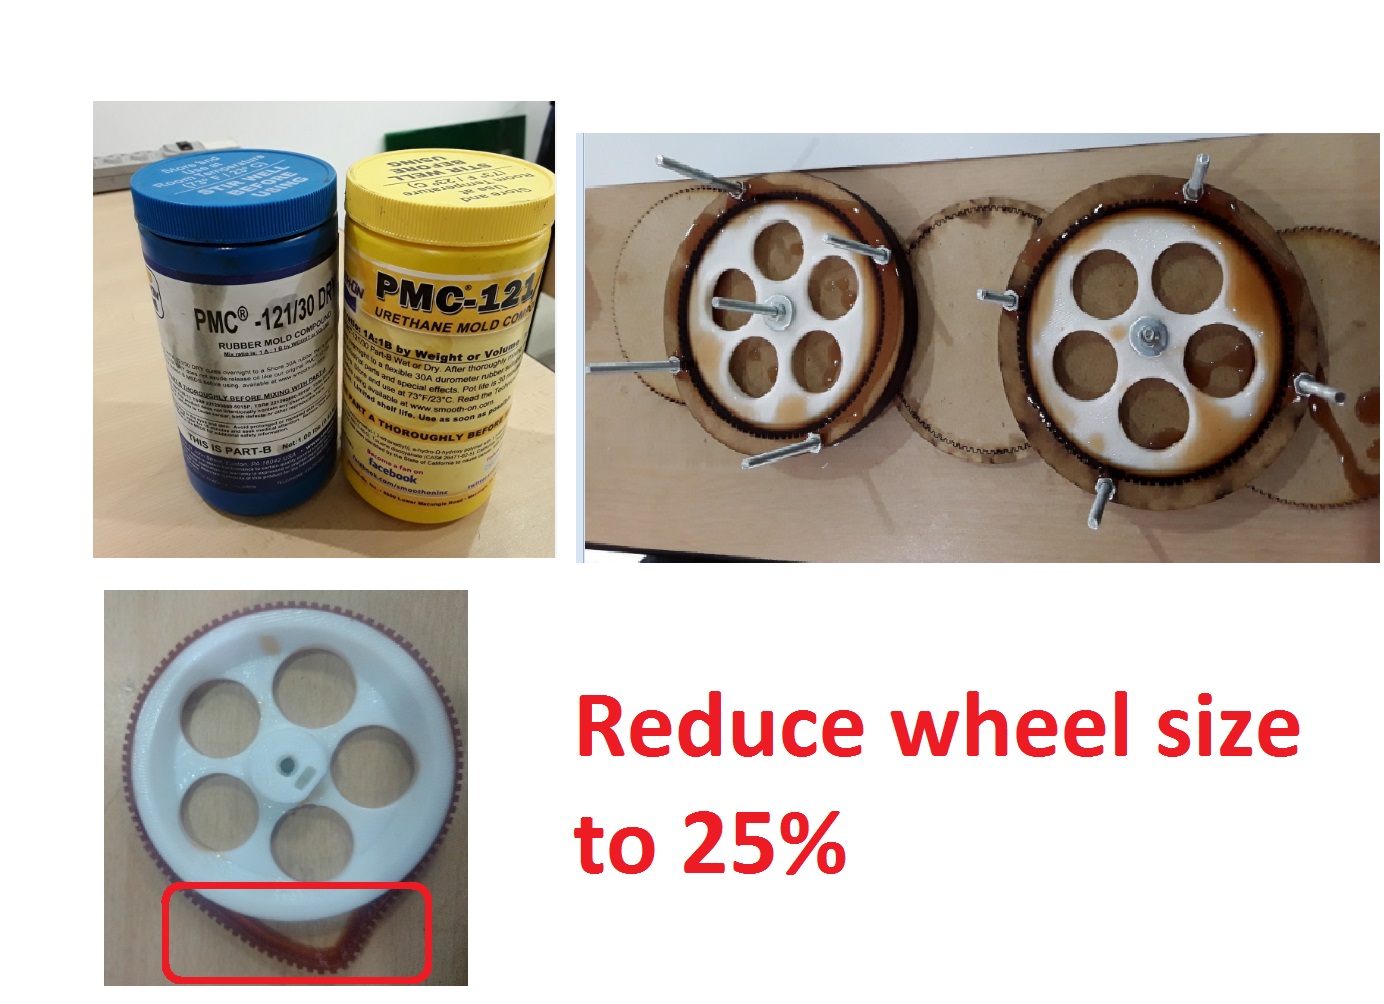
For the traction of the wheels, I made the tires with two materials RUBBER and URETHANE, in the mold made in the laser cutter and a wheel. I used only 10 grams of RUBBER and 10 grams of URETHANE and it took 30 minutes to dry. I made a mistake in the size of the mold, I did not consider the elasticity of the material. as the picture shows. According to this experience, the wheel size must be reduced by 25%, so that the rim is adjusted to fit the wheel.
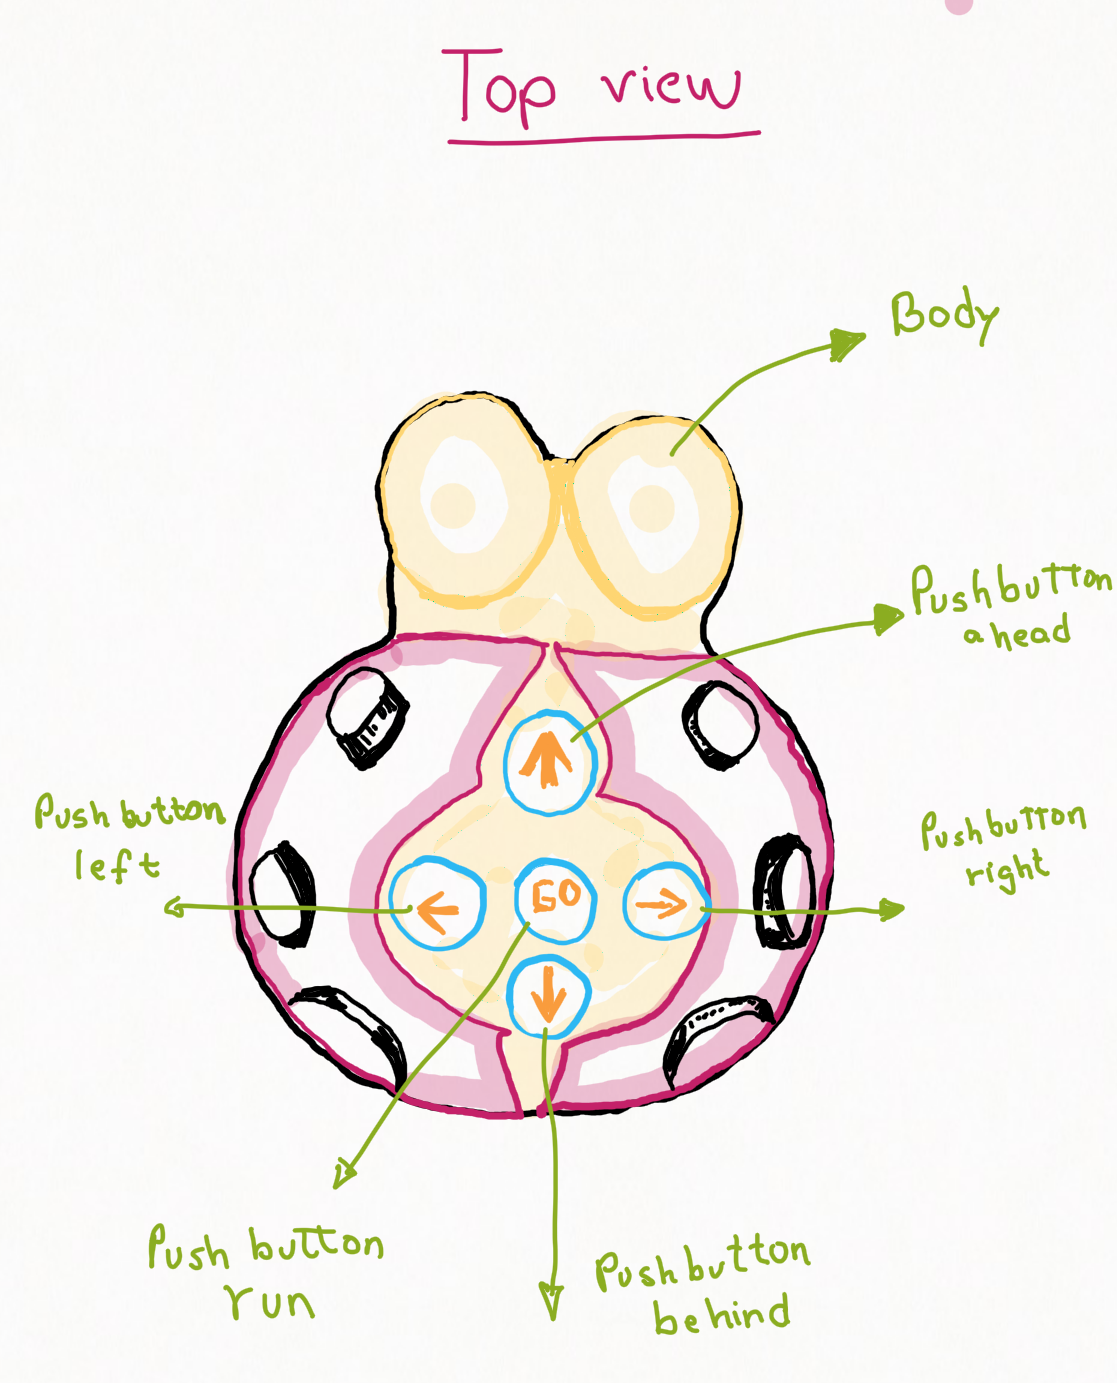
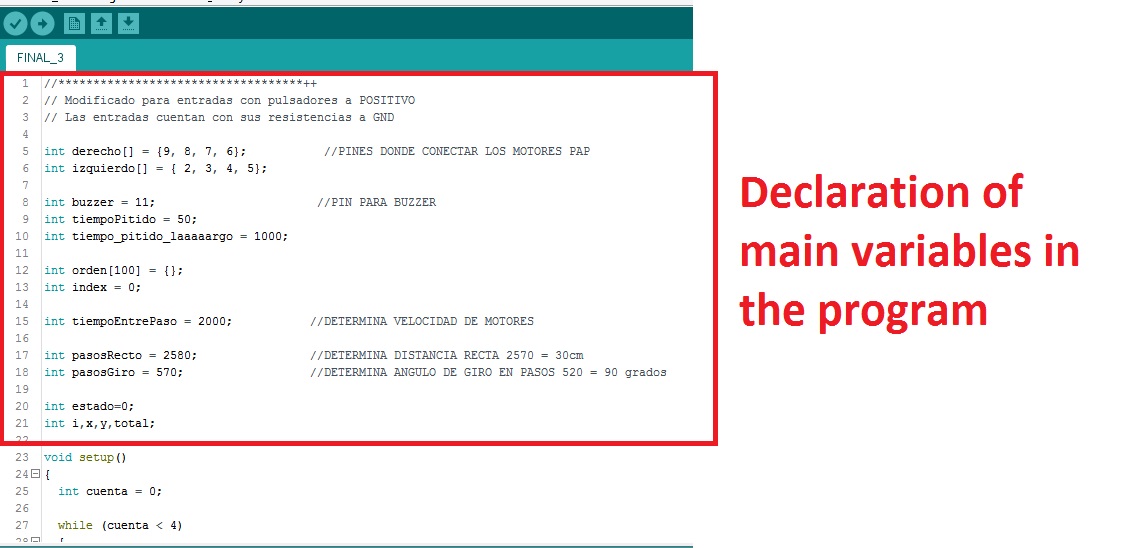
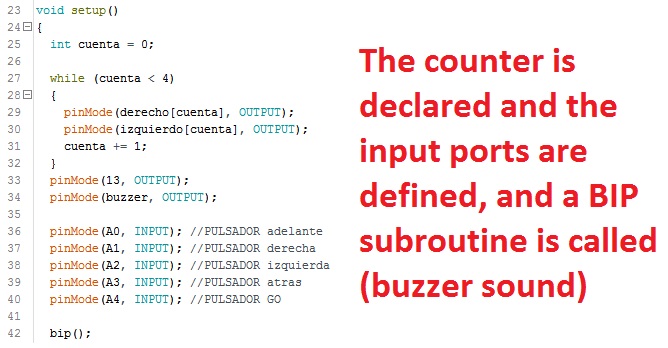
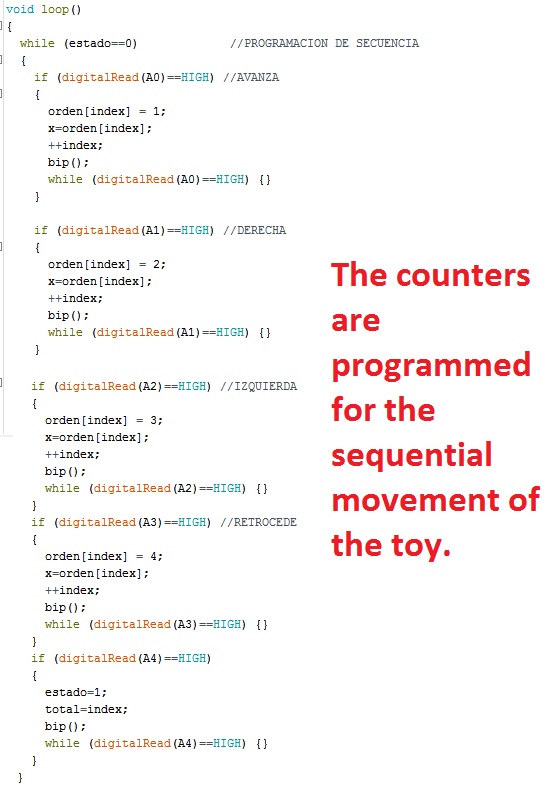
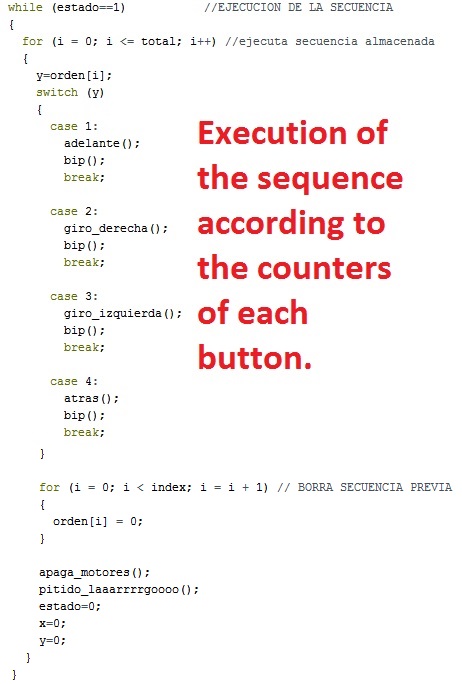
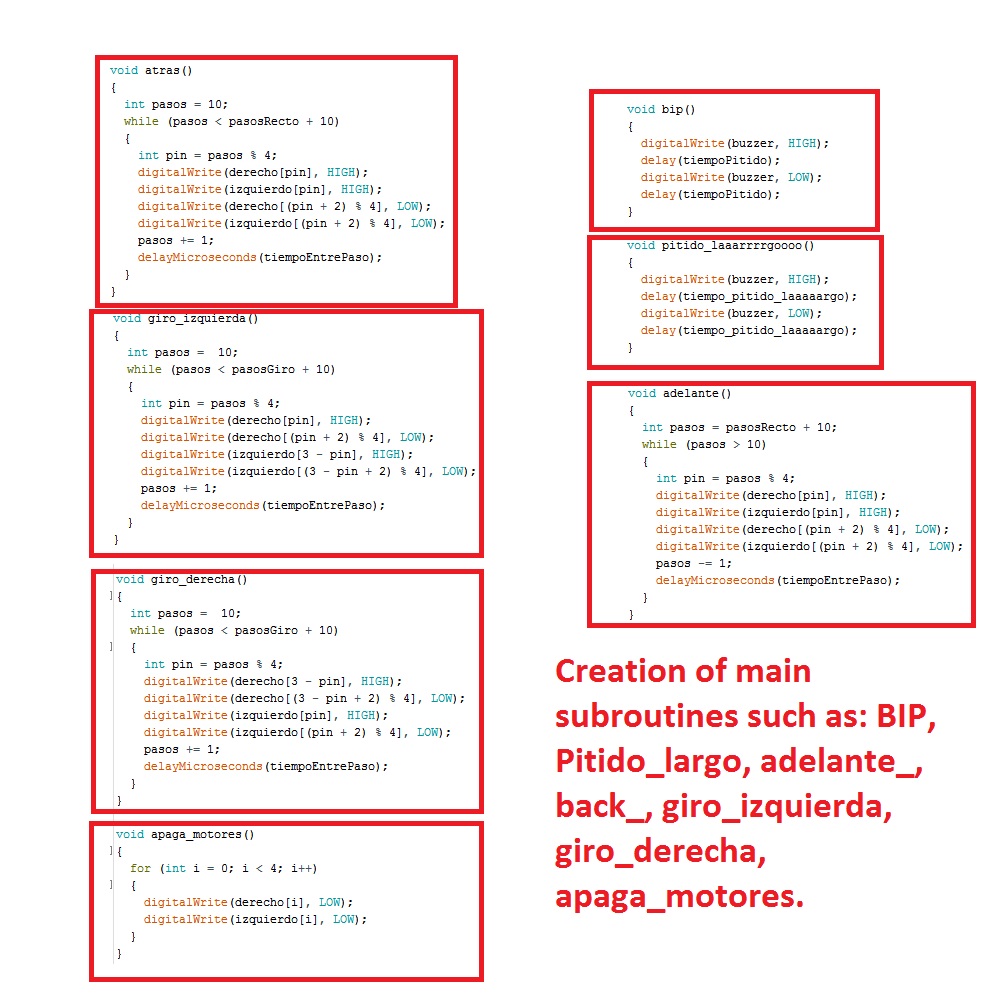
For sequential robotic toy programming, we used the IDE environment, the algorithm is as follows:
I used almost all the techniques of manufacture of prototypes I built the toy body in a size suitable for children. The experience about the construction was very interesting as it reinforced the knowledge acquired from the Fab Academy. This first prototype may be more interesting if you add Networks, applications for mobile or tablet to develop its complexity and thus raise the age range in children. Below I present an image and a video about the construction and operation.