Week16 : Interface and application programming
The assignment of this week :
● Write an application that interfaces with an input &/or output device that you made,
comparing as many tool options as possible.
● Interpret and implement design and programming protocols to create a Graphic User Interface (GUI).
In this week, I try to create three GUIs to do the following jobs:
1.GUI created by C# language of control LED ON/OFF.
2.GUI created by C# language of receiving PIR signal from device.
3.GUI created by APP Inventor of sending message to target board's LCD with bluetooth.
● GUI created by C# language of control LED ON/OFF
I use C# language to create the first interface. This GUI is to control the device's LED on and off. The device I use is the kasiboan kit which made last week. I use serial port to communicate with computer and device. The hardware connection between USB to RS232 cable and kasiboan kit is as follow:
USB-RS232 DTR -> RSTF
USB-RS232 RXD -> PIN 1(TX)
USB-RS232 TXD -> PIN 0(RX)
USB-RS232 VCC -> VCC
USB-RS232 GND -> GND
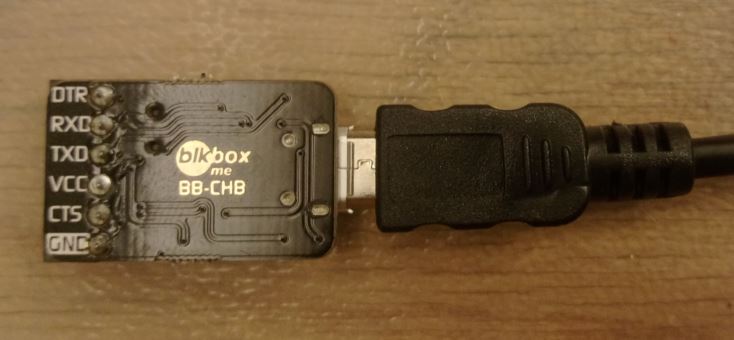
figure 1 : USB to RS232 cable.
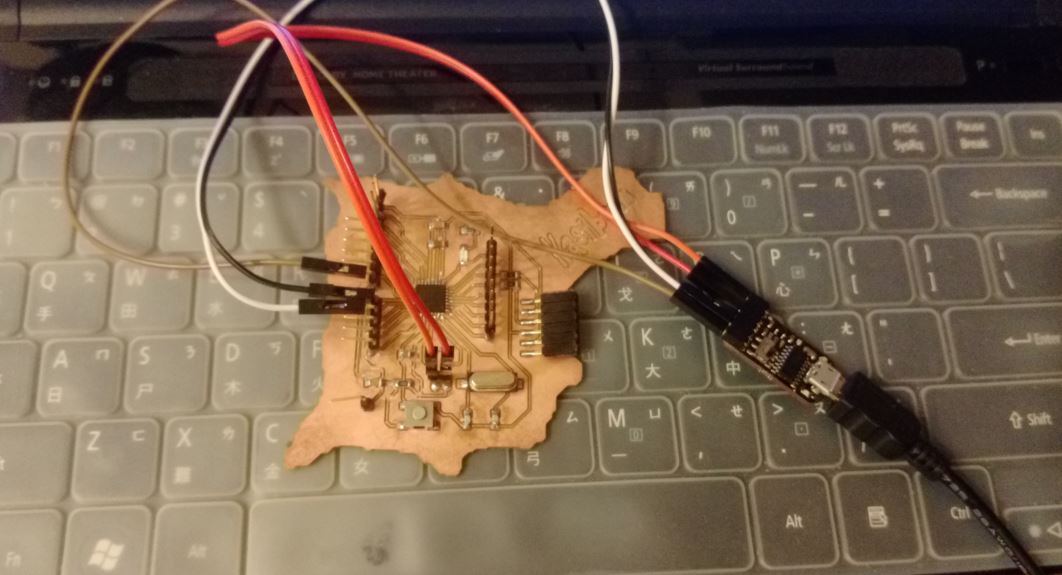
figure 2 : Serial port connection.
The GUI I created on the Visual Studio software. The GUI design steps are showed as follow:
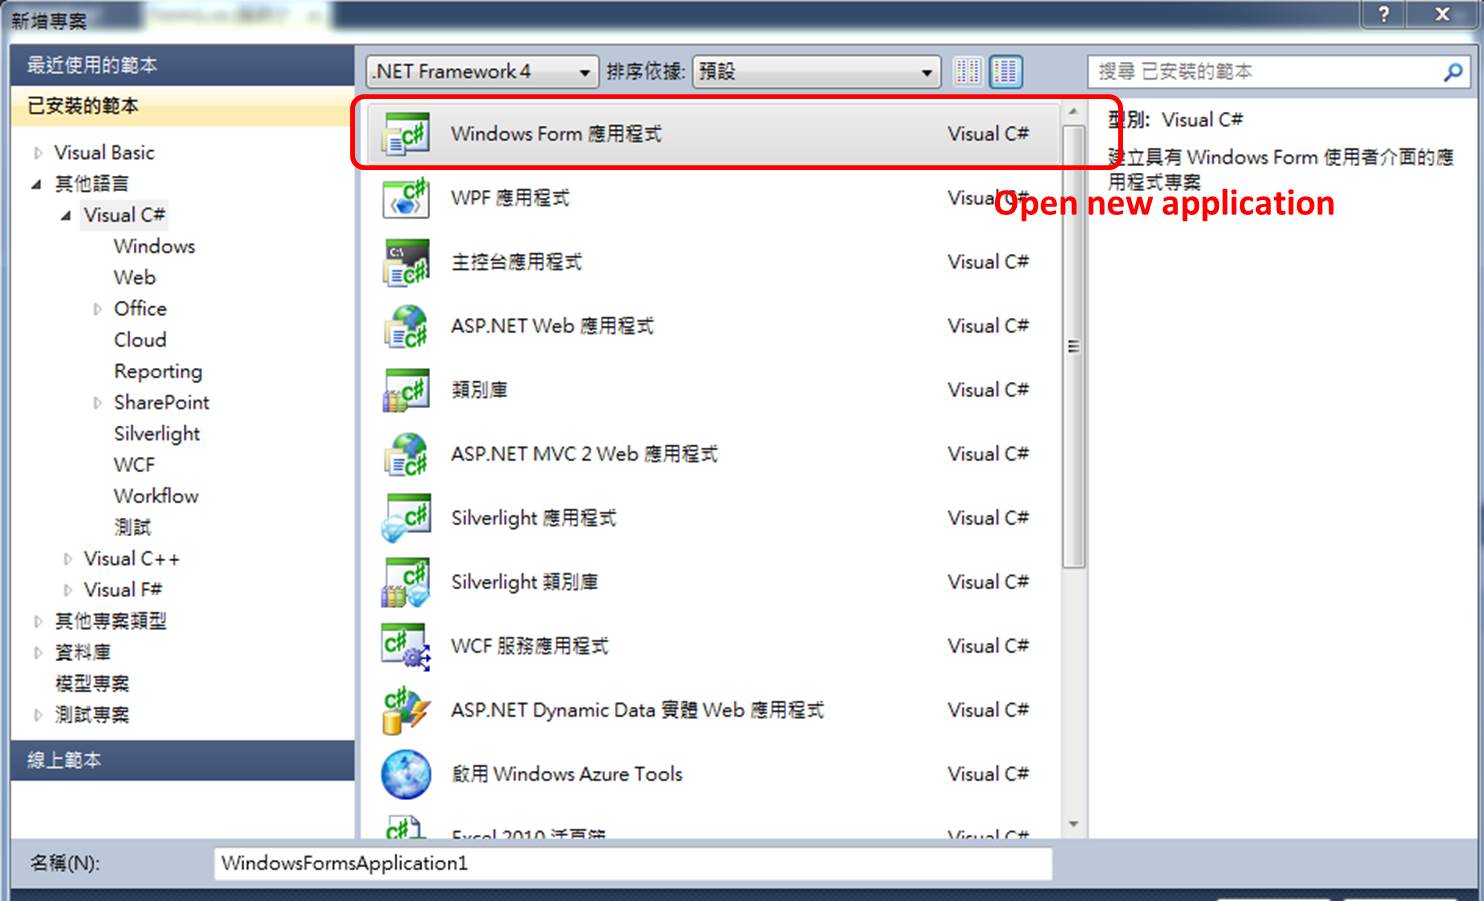
figure 3 : Open new application from Visual Studio.
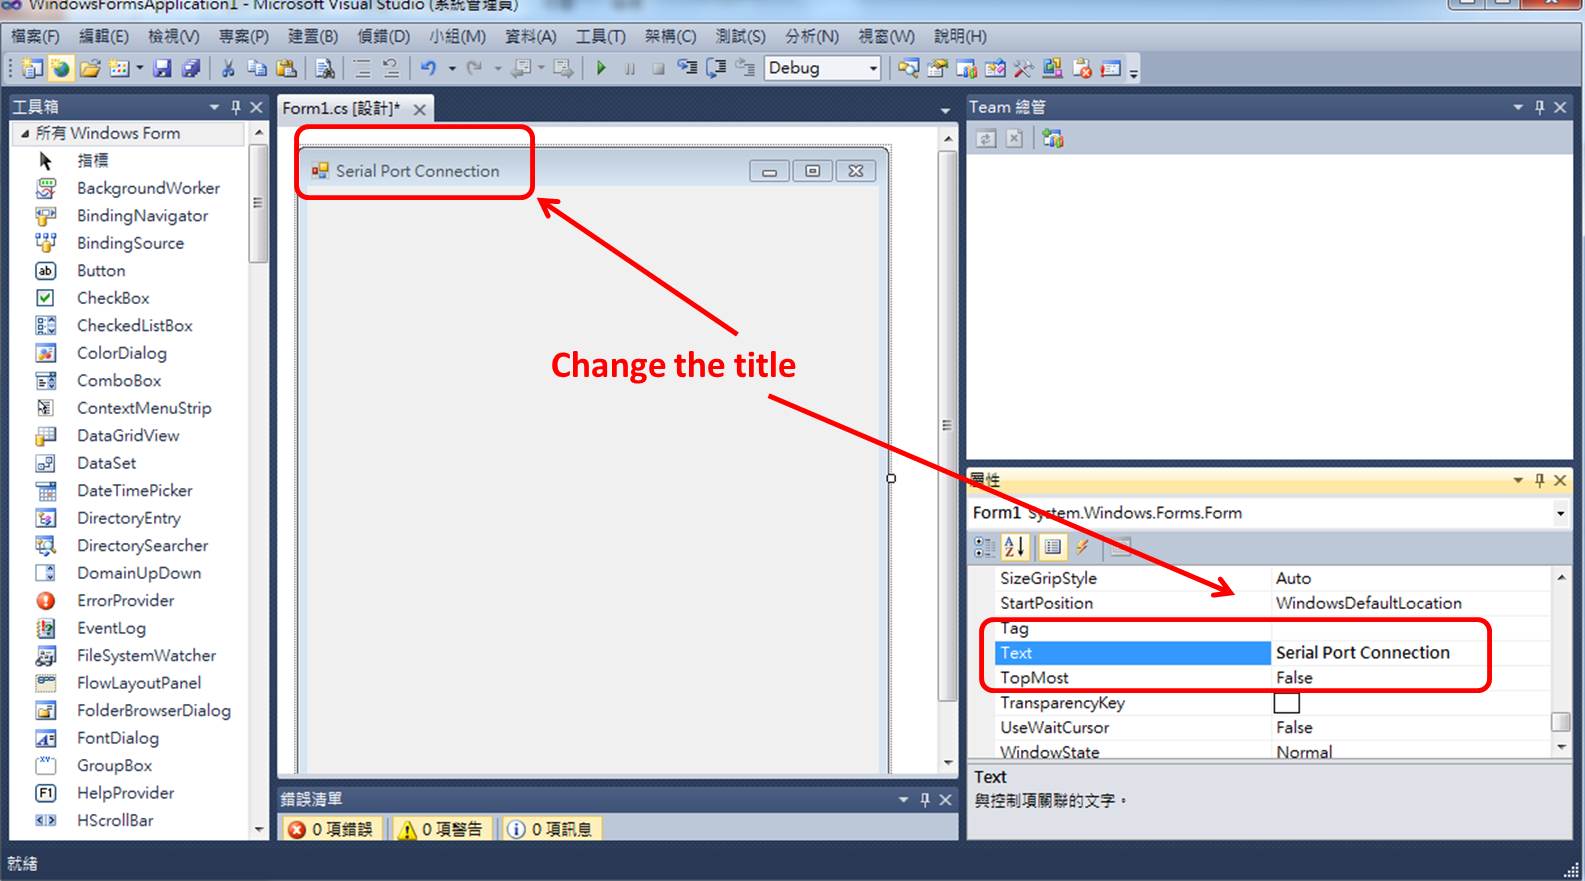
figure 4 : Change the title of the Form from its "Attribution-->Text".
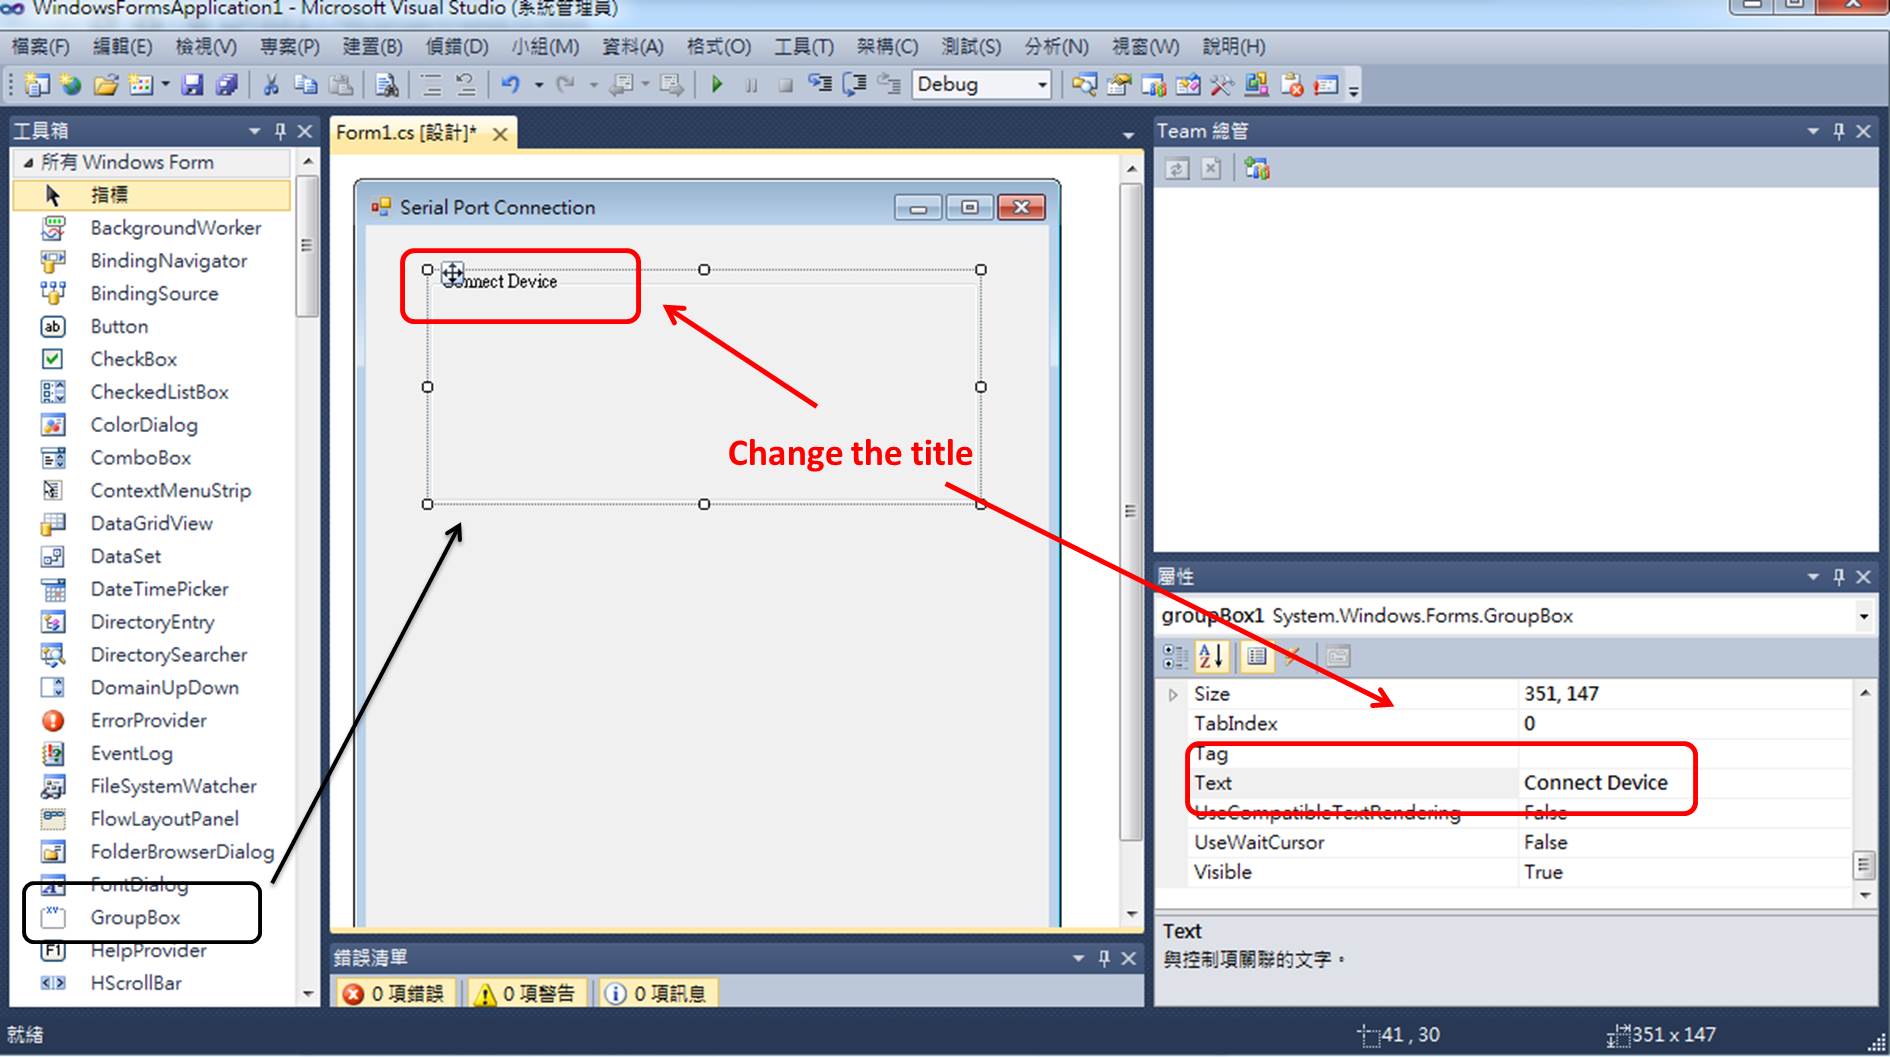
figure 5 : Drag the "GroupBox" and place onto the Form from the "Toolbox" and change the title from its "Attribution-->Text".
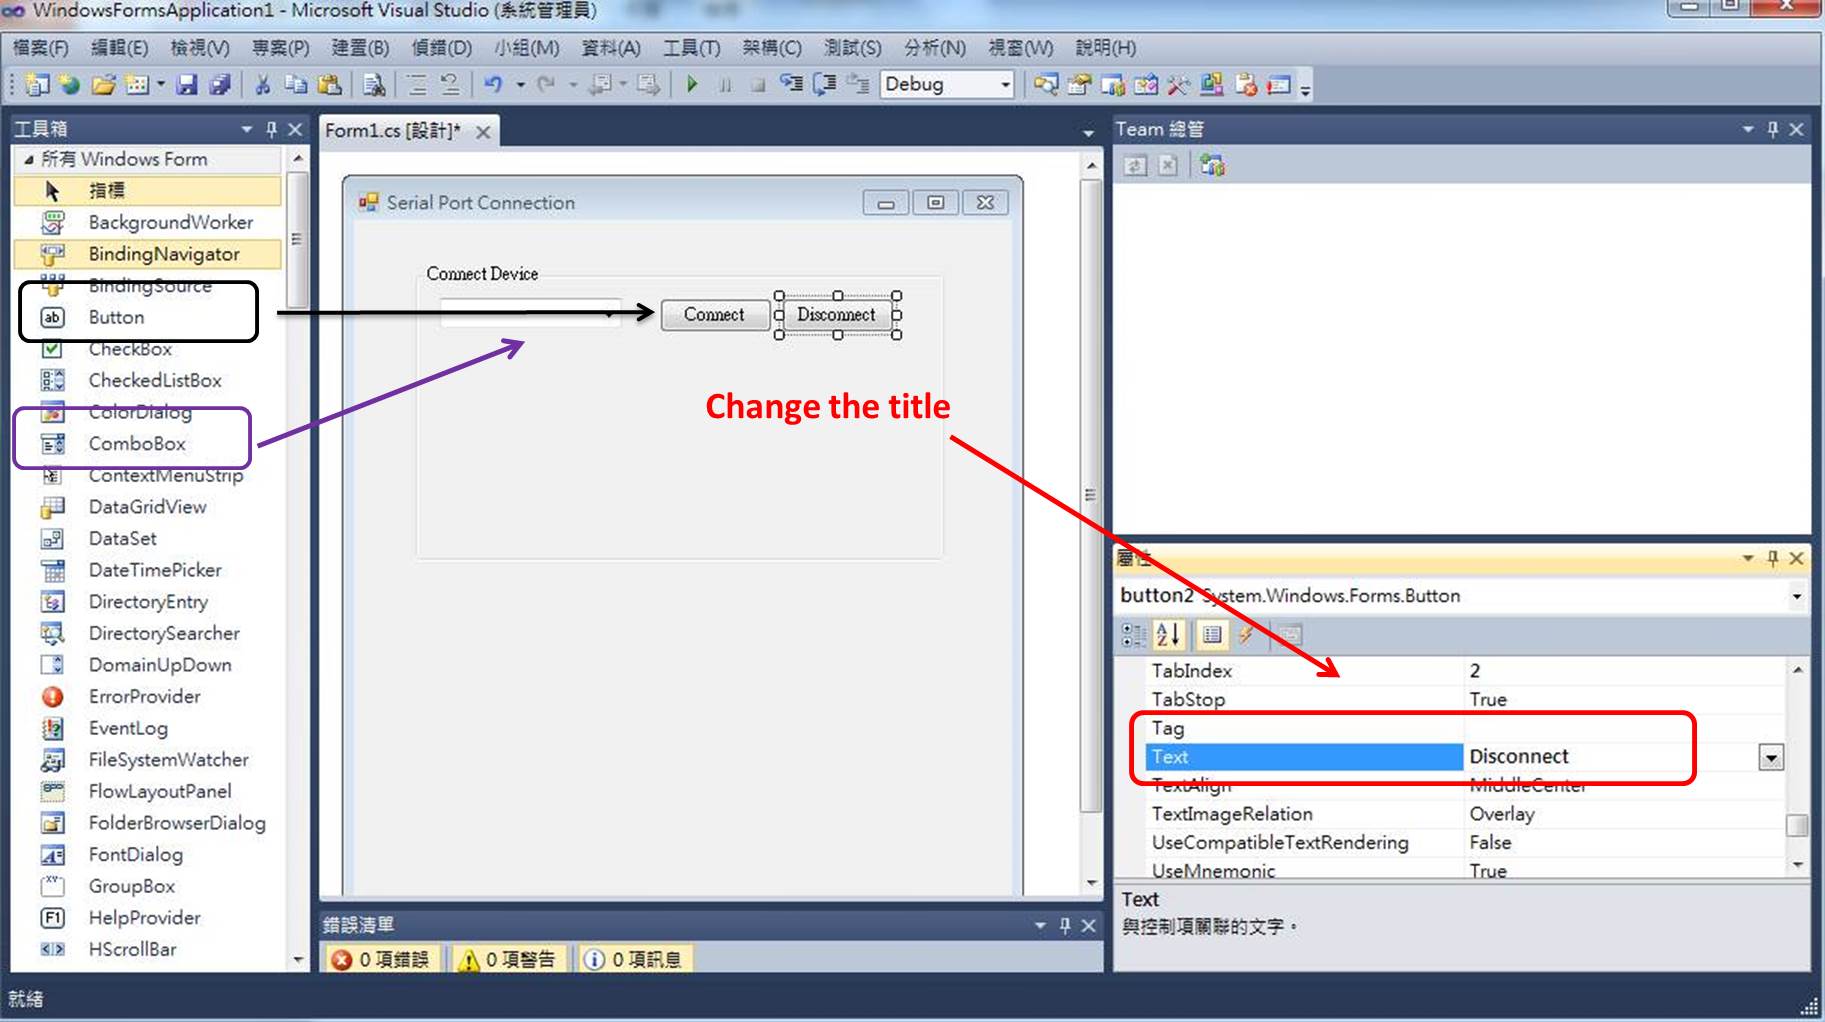
figure 6 : Drag one "ComboBox" and two "Button" and place onto the Form from the "Toolbox" and change the title from its "Attribution-->Text".
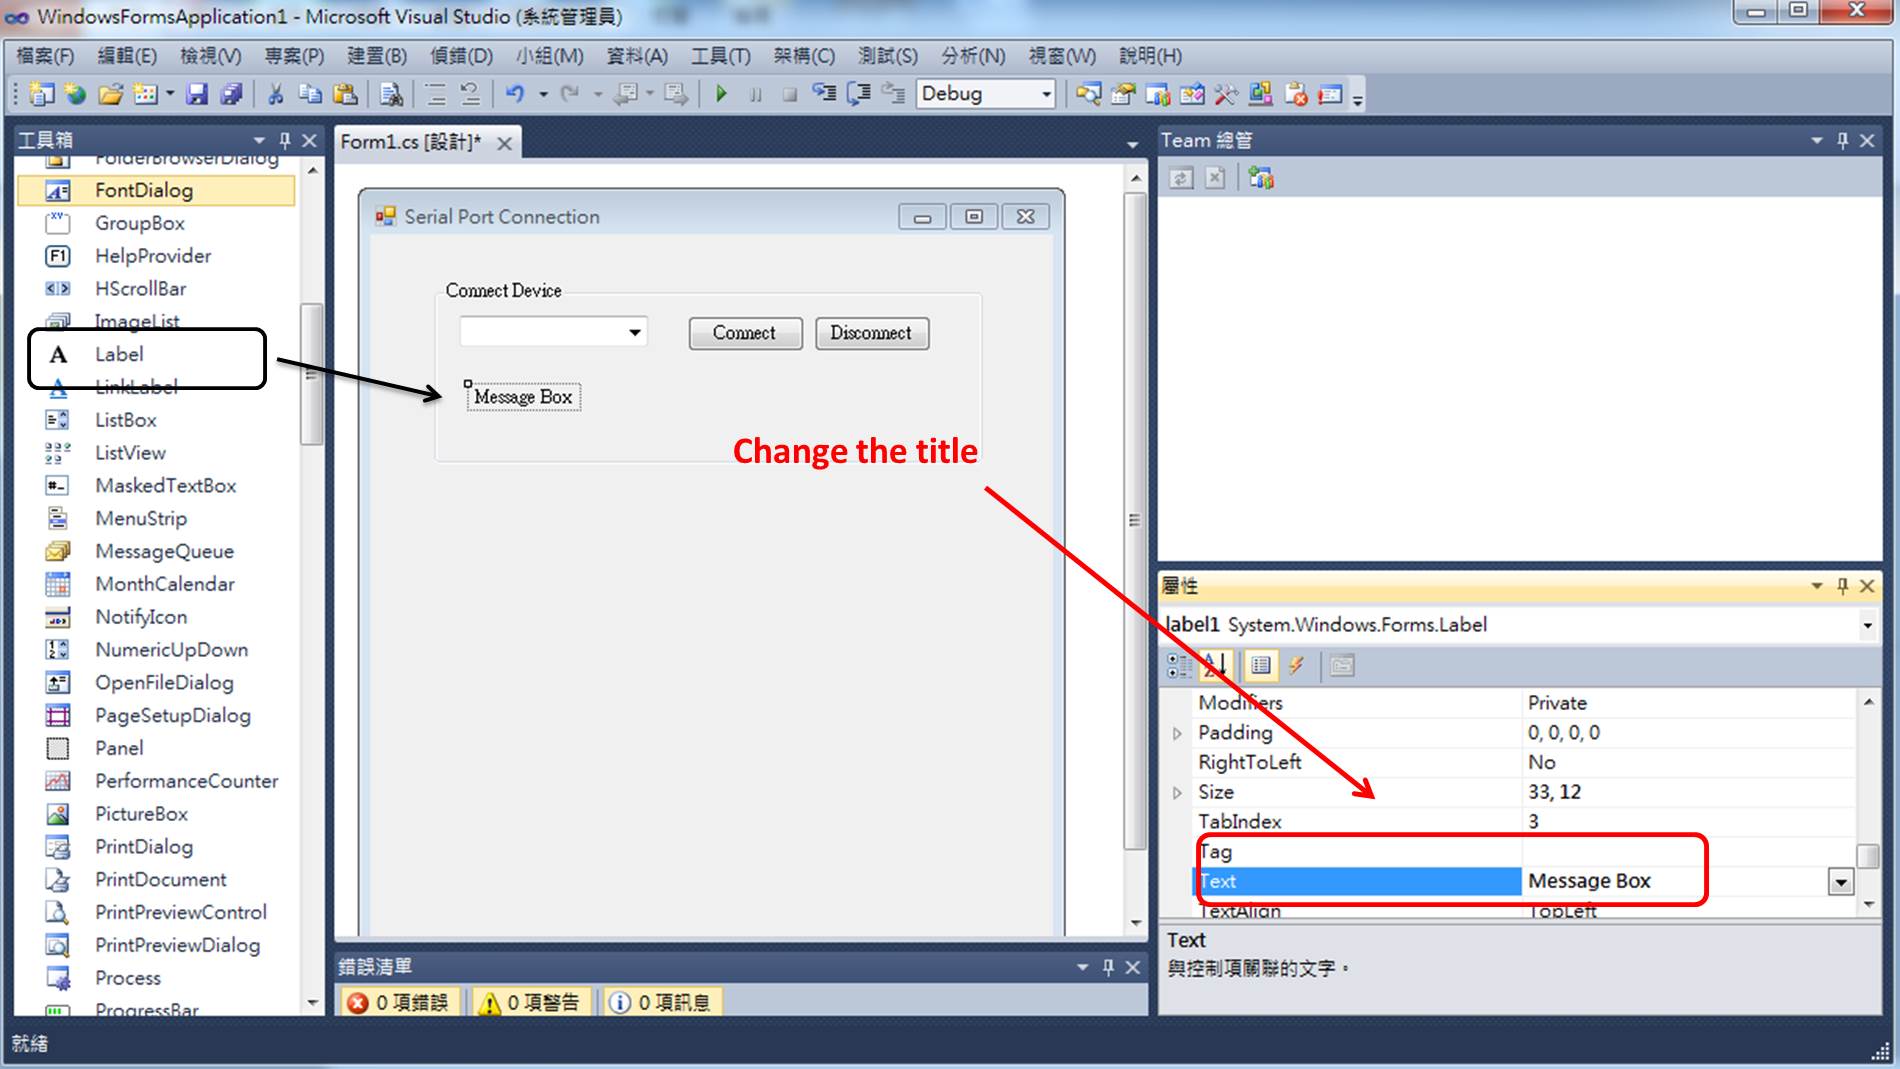
figure 7 : Drag one "Lable" and place onto the Form from the "Toolbox" and change the title from its "Attribution-->Text".
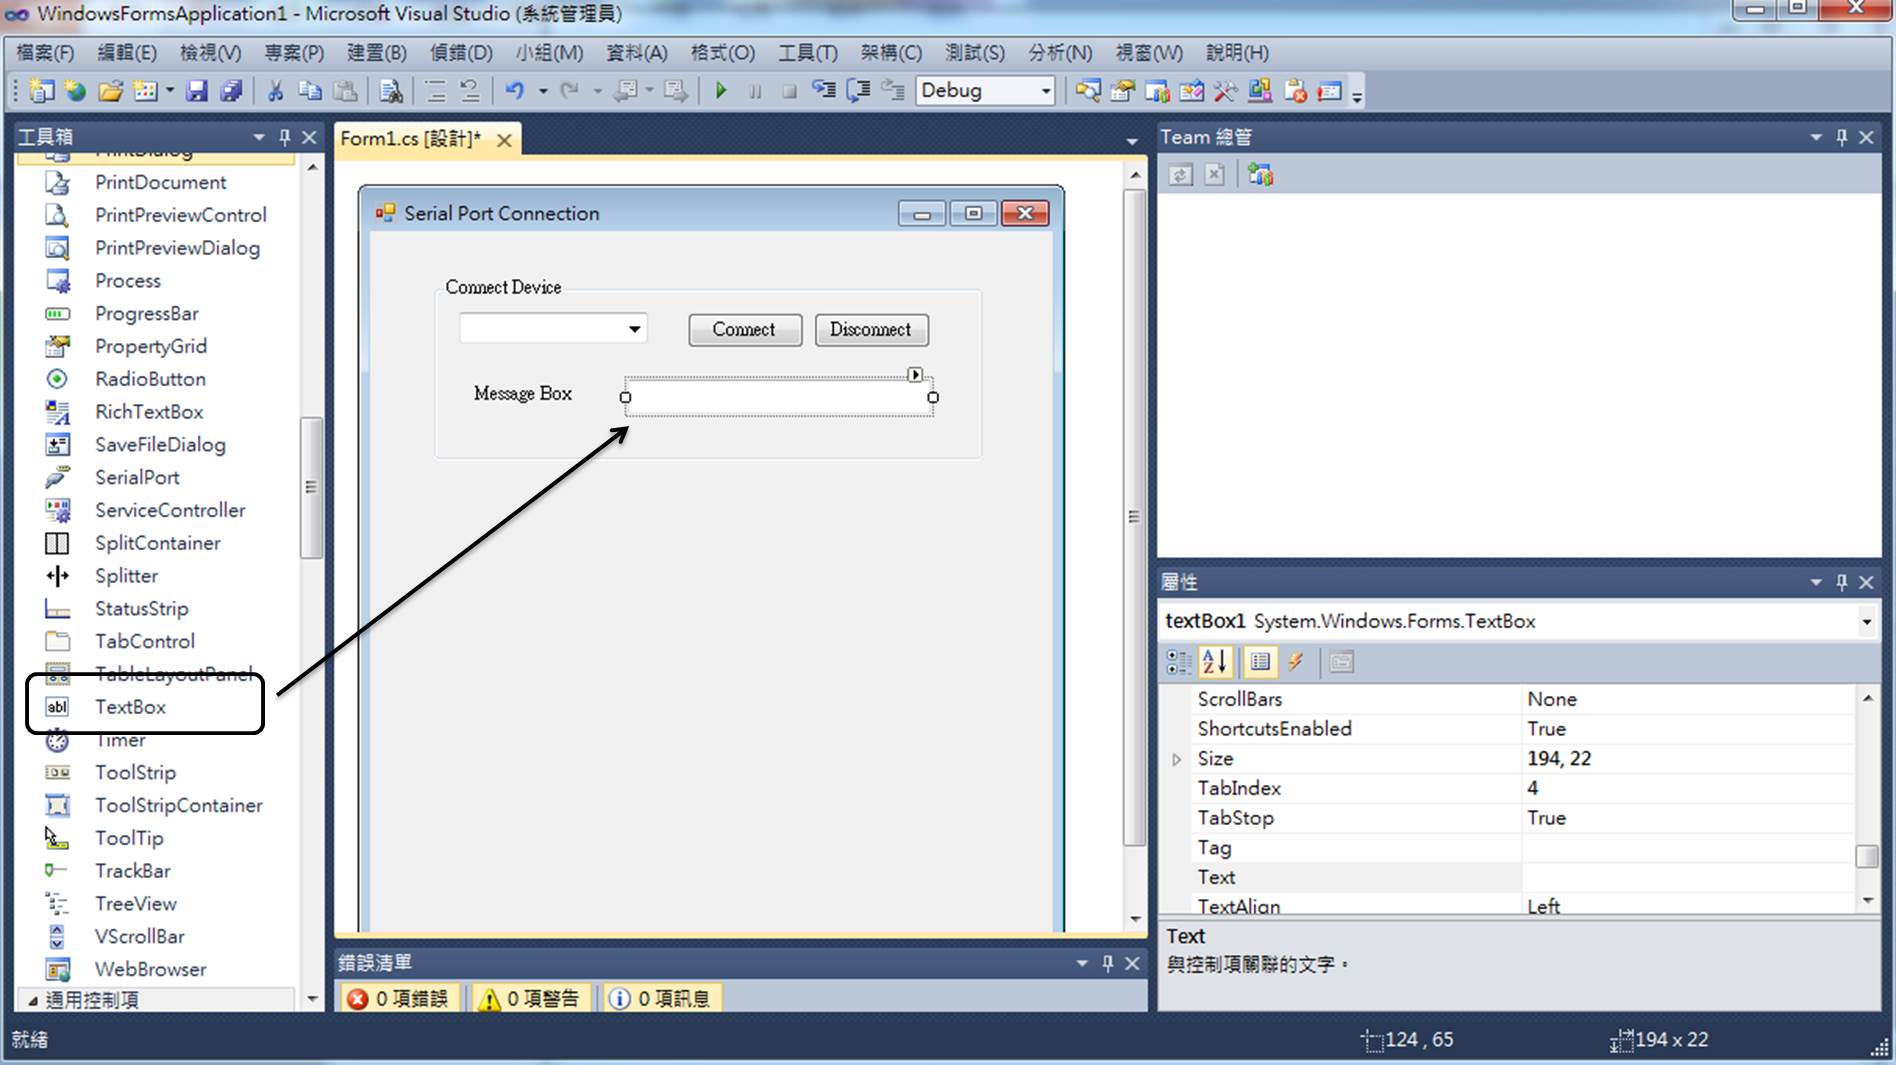
figure 8 : Drag one "Textbox" and place onto the Form from the "Toolbox".
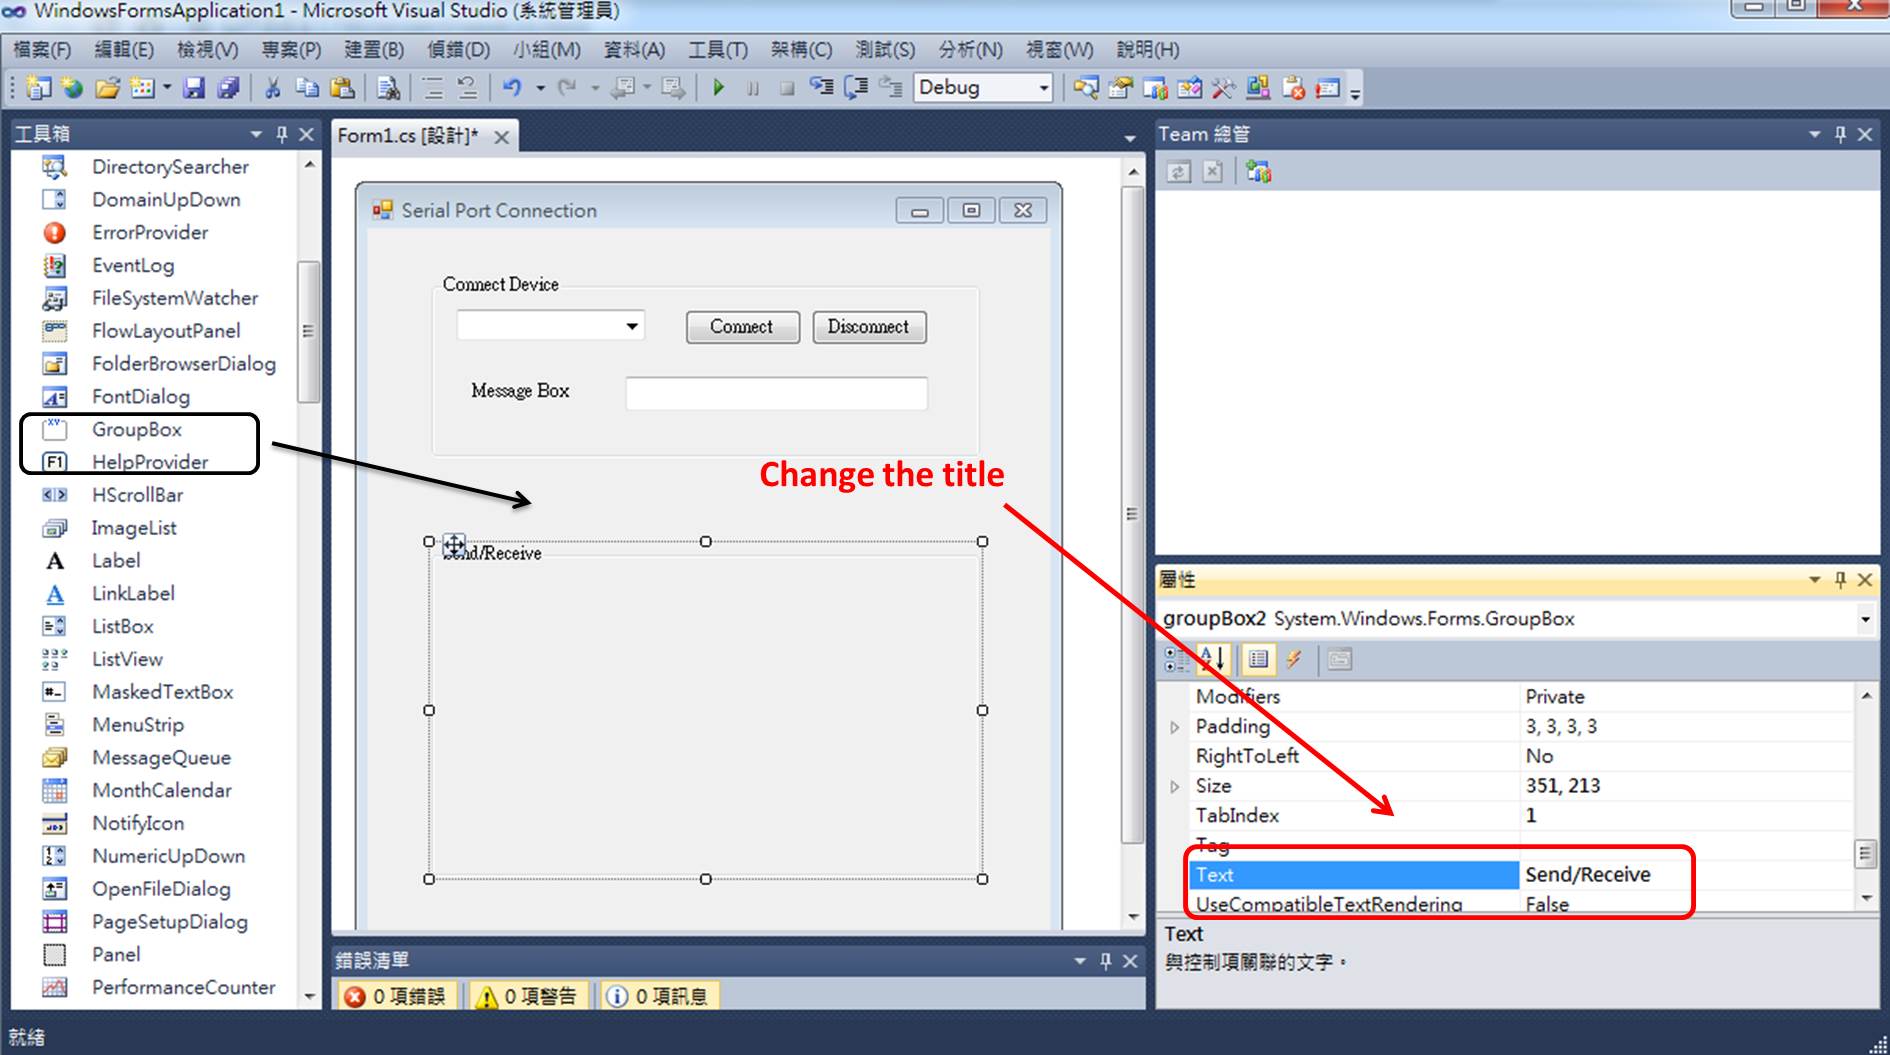
figure 9 : Drag one "GroupBox" and place onto the Form from the "Toolbox" and change the title from its "Attribution-->Text".
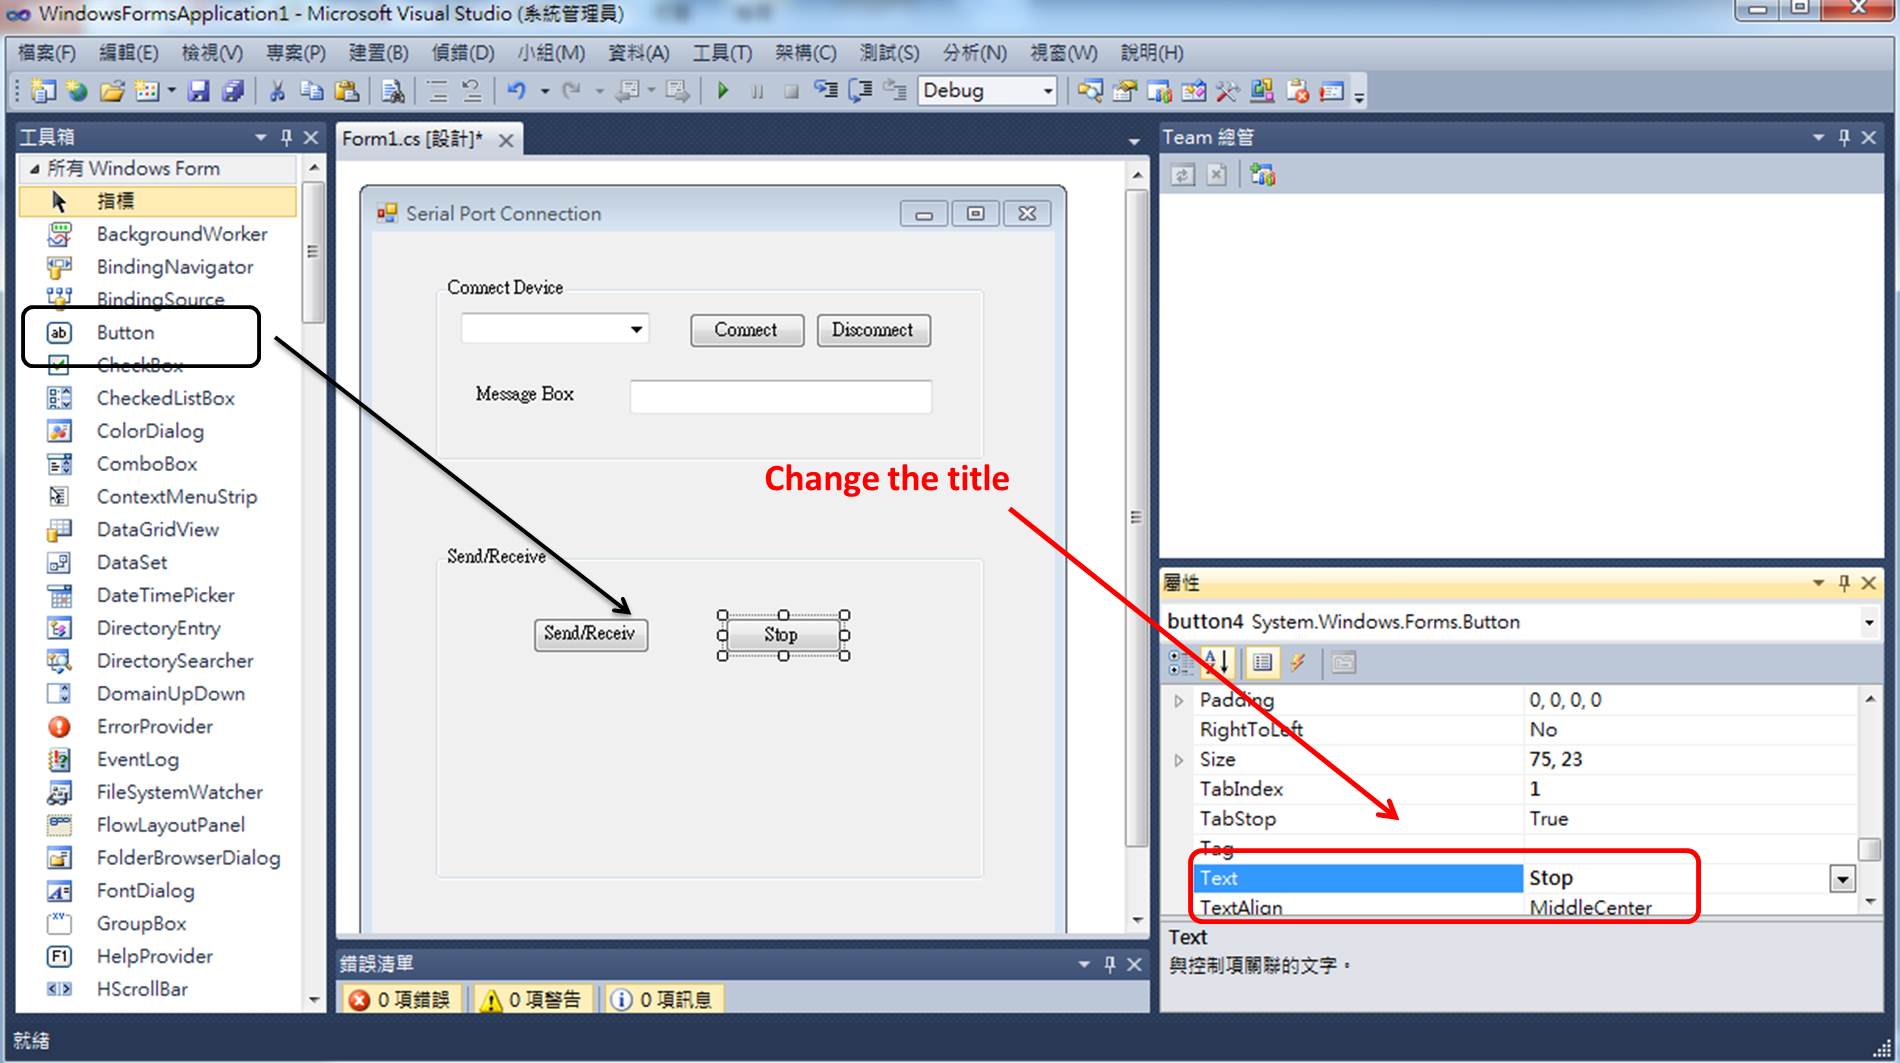
figure 10 : Drag two "Button" and place onto the Form from the "Toolbox" and change the title from its "Attribution-->Text".
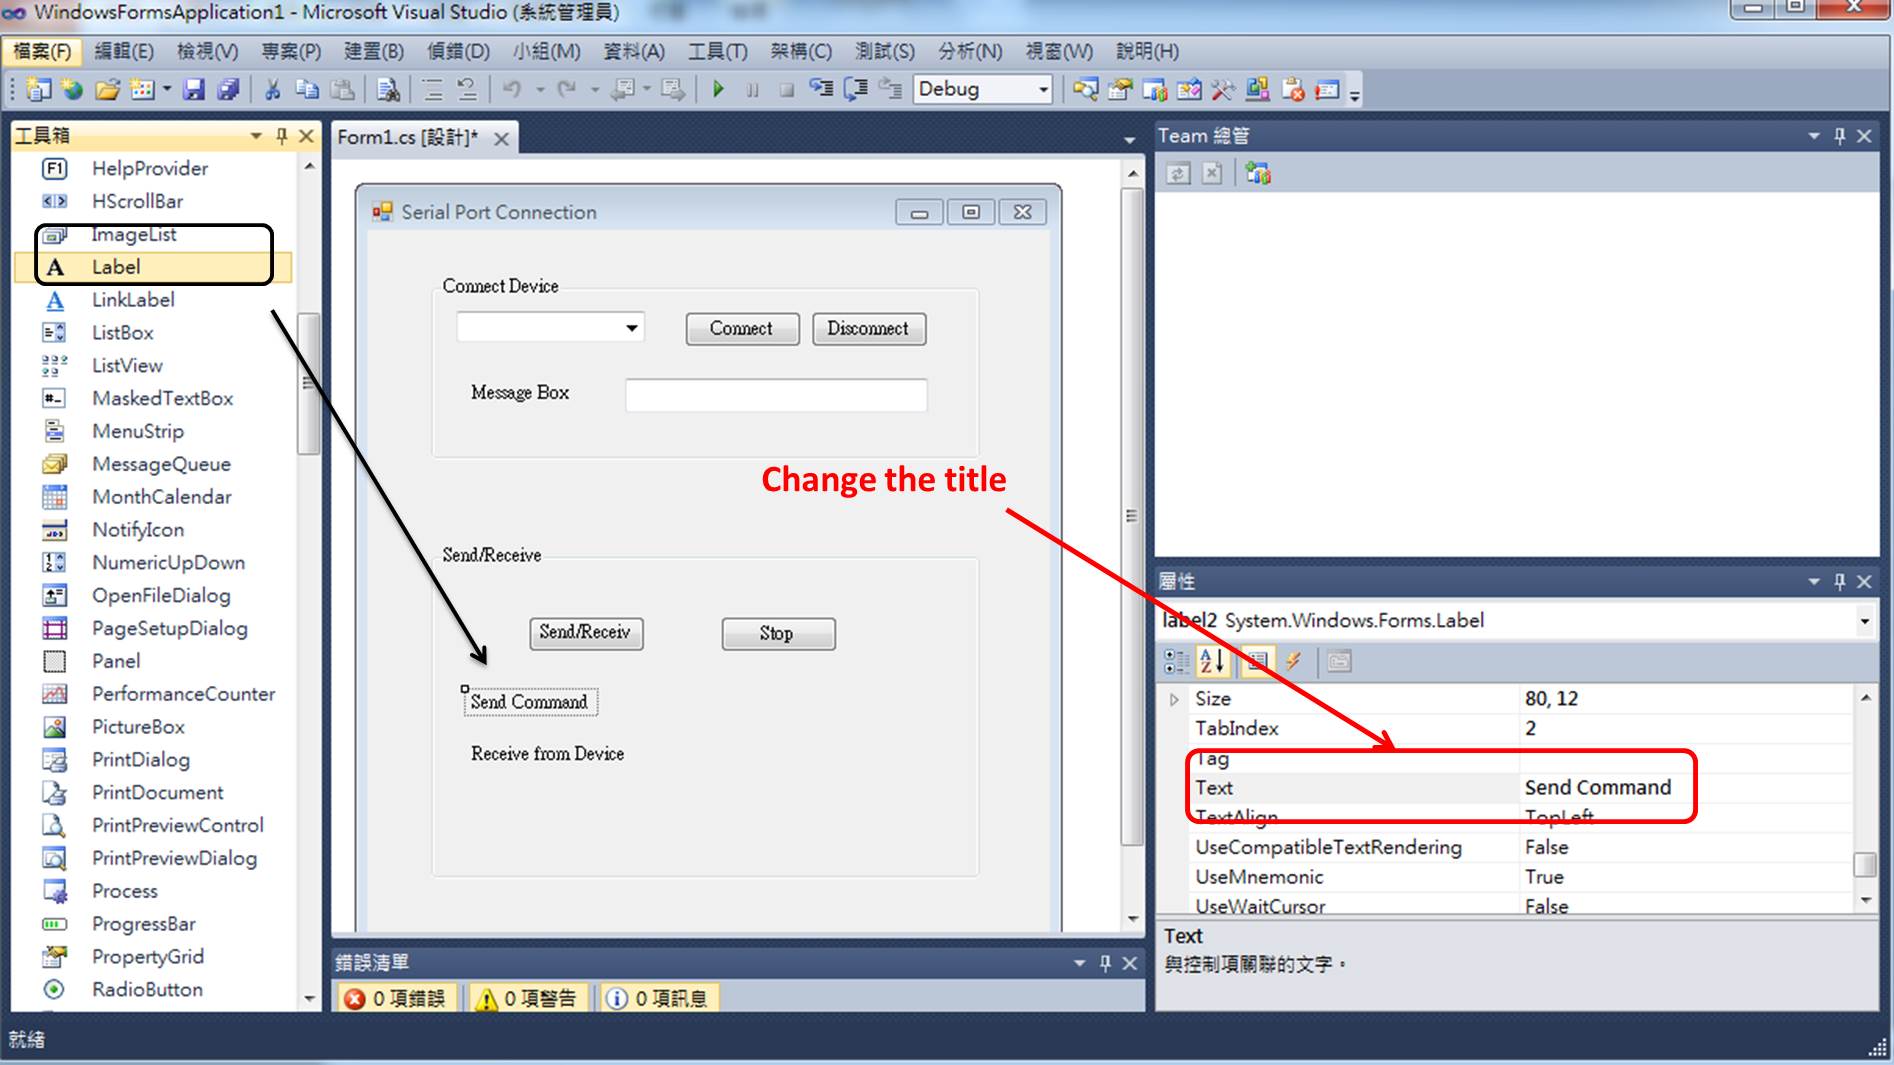
figure 11 : Drag two "Label" and place onto the Form from the "Toolbox" and change the title from its "Attribution-->Text".

figure 12 : Drag two "TextBox" and place onto the Form from the "Toolbox".
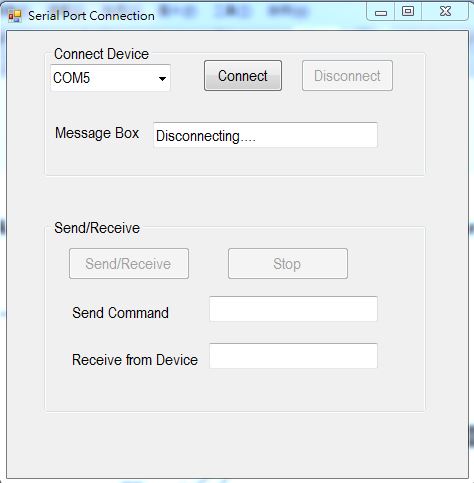
figure 13 : GUI for controlling the device's LED on/off.
After finishing the design of GUI, the next step is to write the proper C language to make the GUI work.
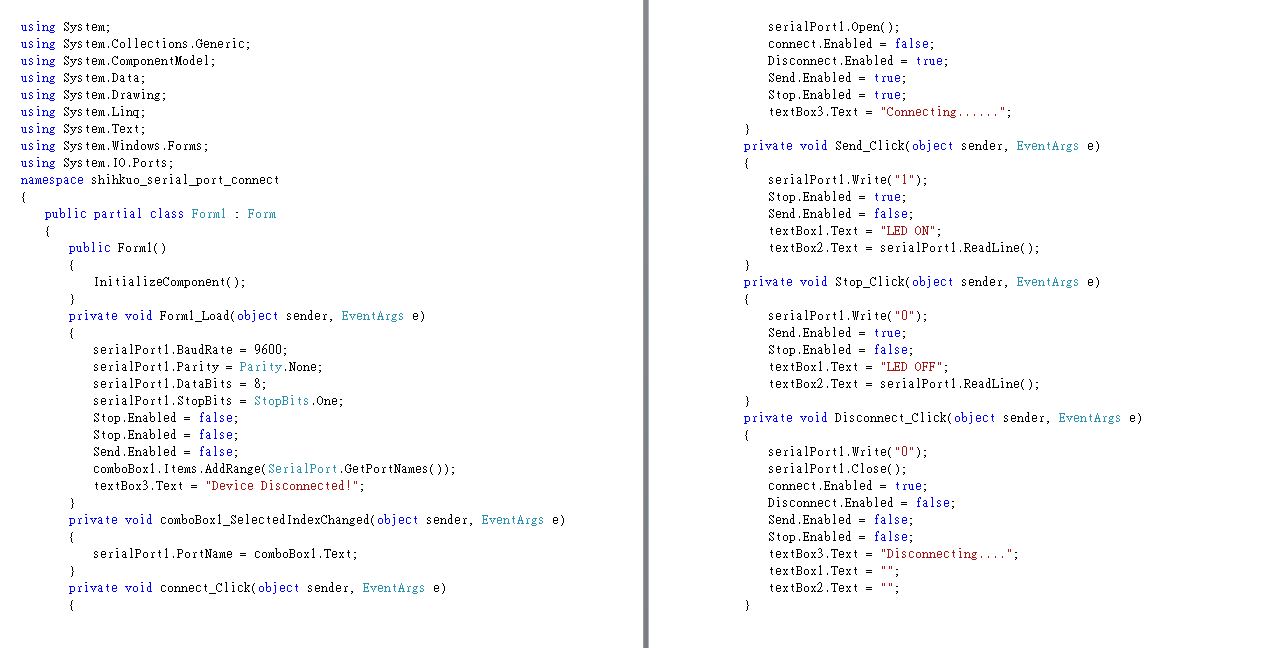
figure 14 : C# language of GUI for controlling the device's LED.
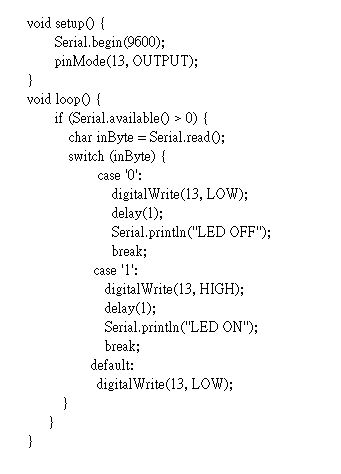
figure 15 : Program of control Led for kasiboan kit with arduino IDE.
The steps of using this GUI are as follow:
1.Chose the com port.
2.Push the "Connect" button to connect the device.
3.Push the "Send/Receive" button to turn on the LED.
("Send Commsnd" message box will show "LED ON", and "Receive from Device" message box will show "LED ON" while receive the led on feedback message.)
4.Push the "Stop" button to turn off the LED.
("Send Commsnd" message box will show "LED OFF", and "Receive from Device" message box will show "LED OFF" while receive the led off feedback message.)
The flowchat of this GUI is as follow:
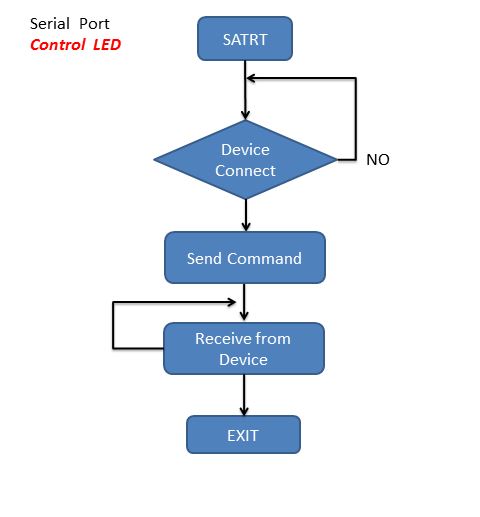
figure 16 : Flowchat of control the device's LED on/off.
The vedio of this GUI for control the device's LED on/off shows as follow :
● GUI created by C# language of receiving PIR signal from device
Then I also use C# language to create the seond interface. This GUI is to receive the PIR signal from device. I aslo use serial port to communicate with computer and device. The hardware connection between PIR sensor and kasiboan kit is as follow:
PIR sensor VCC -> VCC
PIR sensor OUT -> PIN 4
PIR sensor GND -> GND
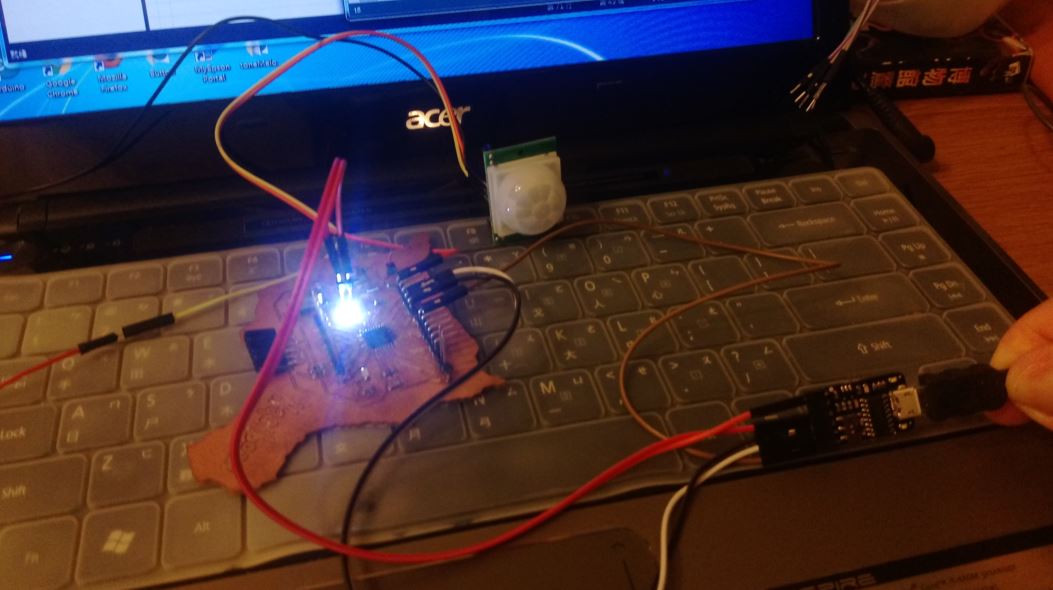
figure 17 : Connection between PIR sensor and kasiboan kit.

figure 18 : GUI for receiving the device's PIR signal.
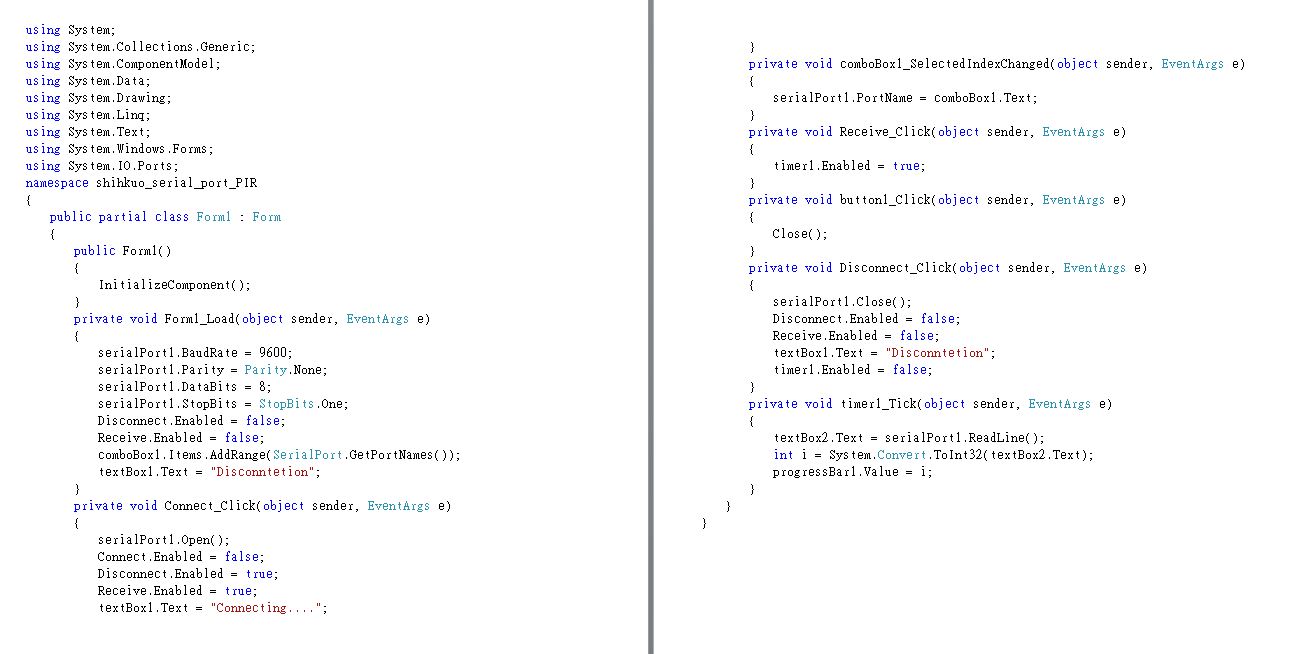
figure 19 : C# language of GUI for receiving the device's PIR signal.
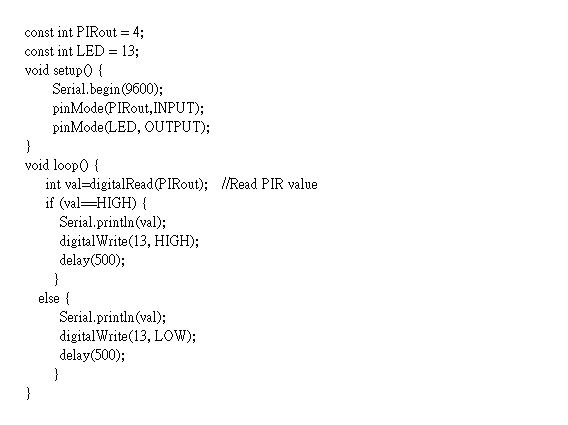
figure 20 : Program of PIR sensor with arduino IDE.
The steps of using this GUI are as follow:
1.Chose the com port.
2.Push the "Connect" button to connect the device.
3.Push the "Receive" button to receive the PIR signal.
("PIR Signal Status" message box will show "0" and "1" which receives from Device and the progress bar will also change at the time.)
4.Push the "EXIT" button to close the GUI.
The flowchat of this GUI is as follow:
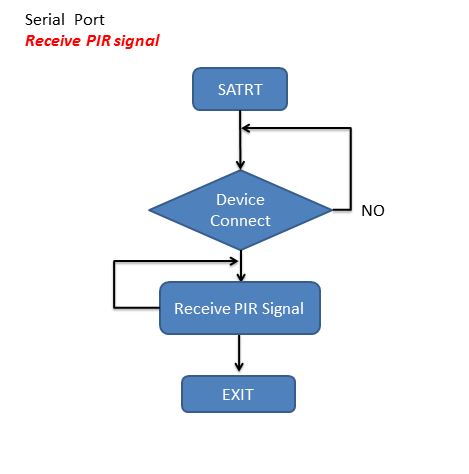
figure 21: Flowchat of receiving the PIR signal from device.
The vedio of this GUI for receiving the PIR signal from device shows as follow :
● GUI created by APP Inventor of sending message to target board's LCD with bluetooth
At last I use APP Inventor to create a cellphone interface. The GUI design steps are like Visual Studio, it also drag the elements from "Palette" and place onto the "Screen", and I can change the element's setting from the "Properties". This GUI is to send the message to the device and shows on the device's LCD at the same time. I use bluetooth to communicate with cellphone and device. The hardware connection between LCD, bluetooth and kasiboan kit is as follow:
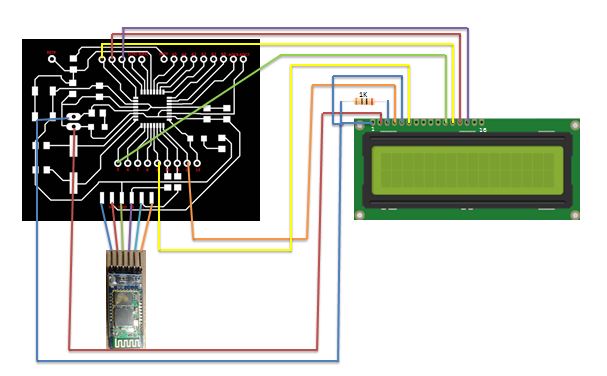
figure 22 : Connection between LCD, bluetooth and kasiboan kit.
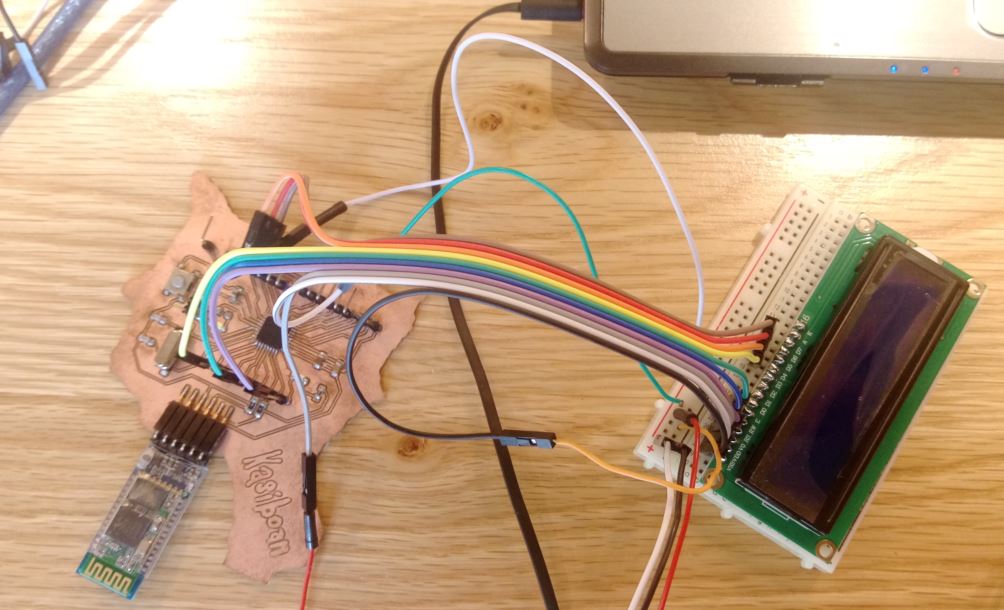
figure 23 : Connection between LCD, bluetooth and kasiboan kit.
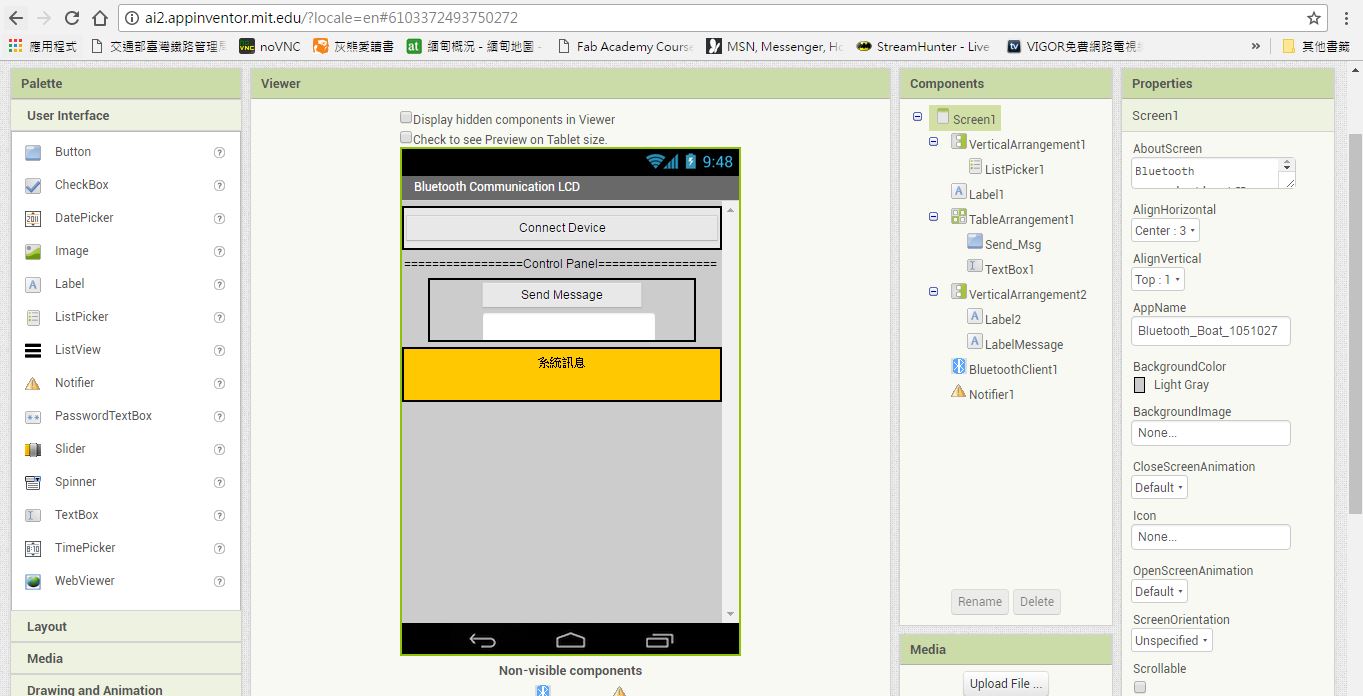
figure 24 : GUI is created with APP Inventor.
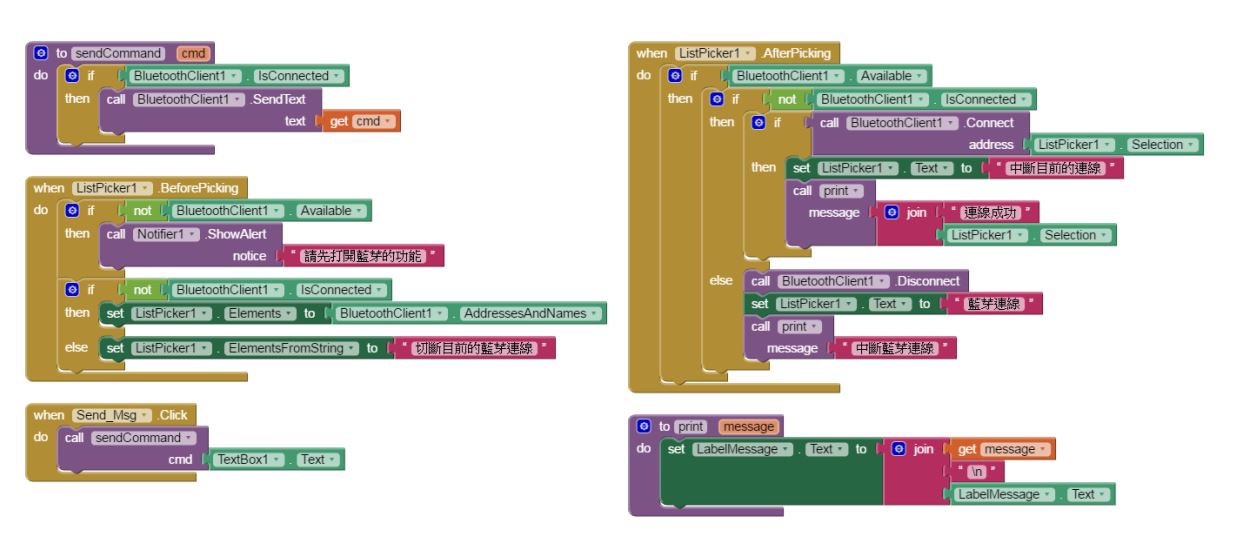
figure 25 : Program blocks of APP Inventor.
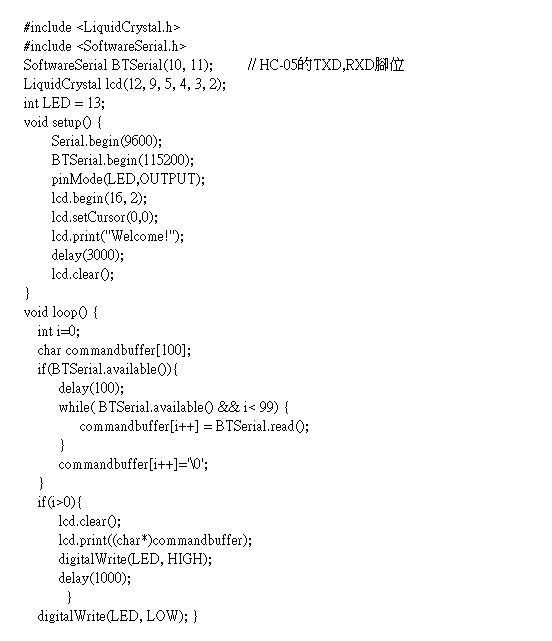
figure 26 : Program of receiving message and showing on LCD with arduino IDE.
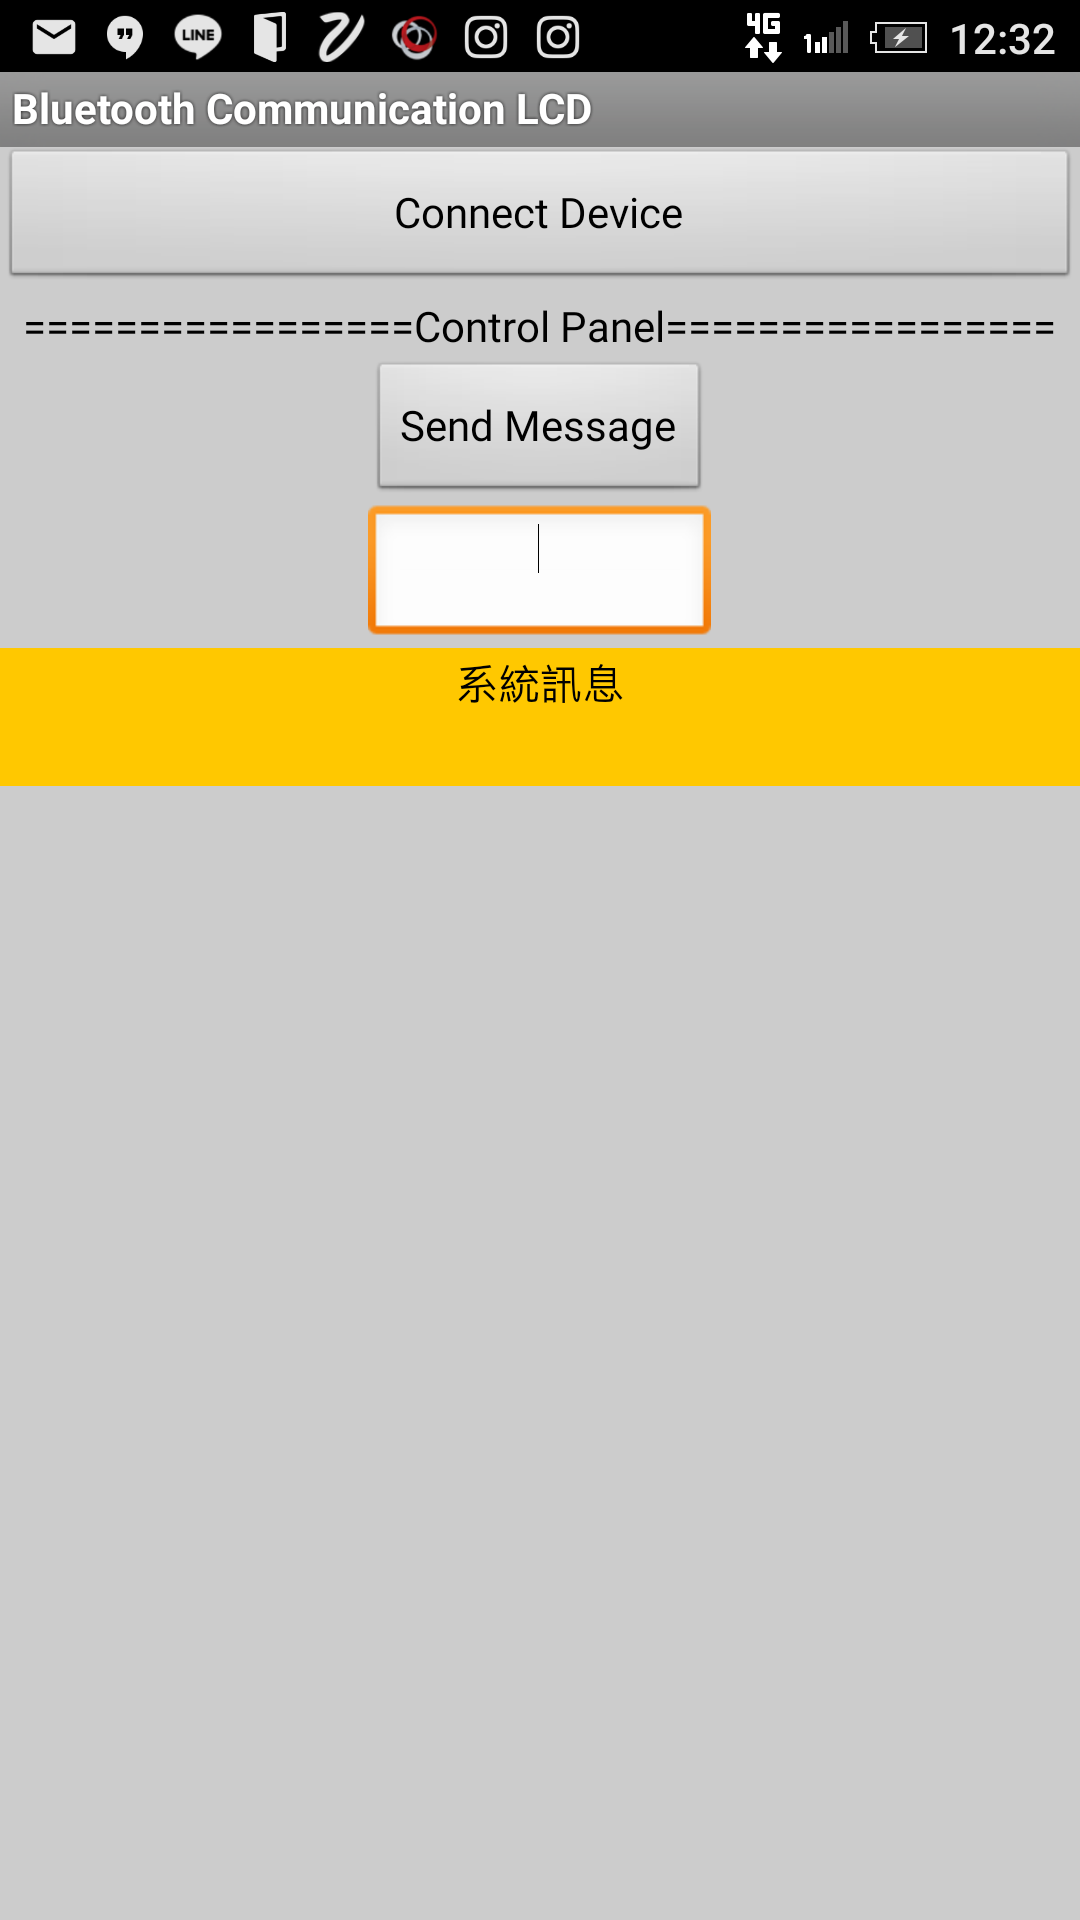
figure 27 : GUI on cellphone.
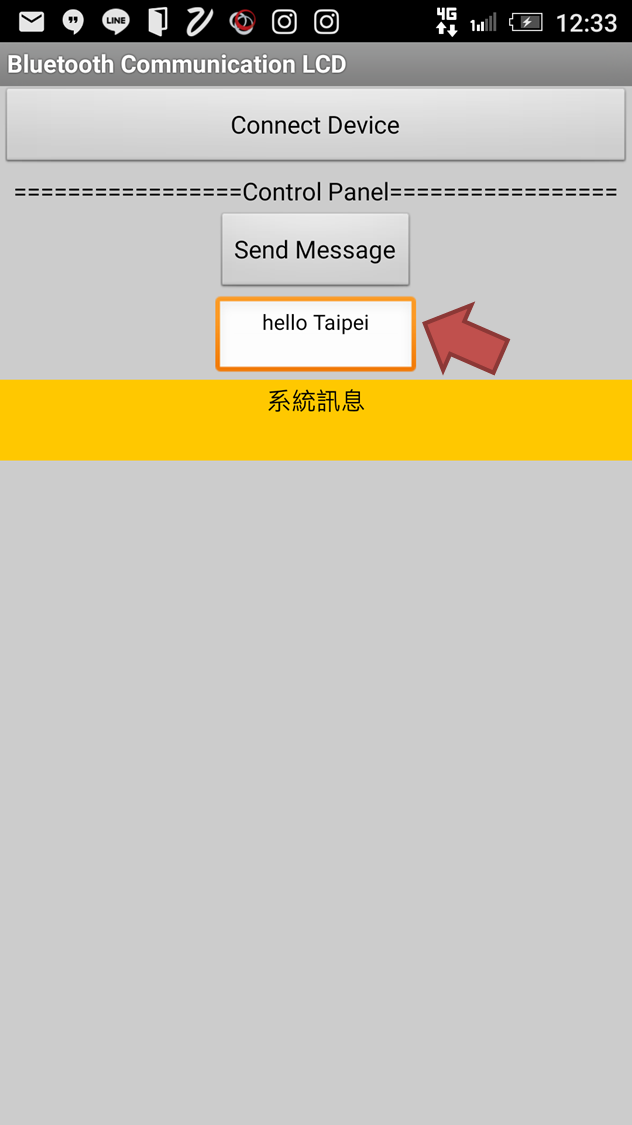
figure 28 : Type message on GUI and transmit to target board.
The steps of using this GUI are as follow:
1.Push the "Connect Device" button to connect the device with bluetooth.
2.Type message which wants to send on the textbox.
3.Push the "Send Message" button to transmit the message to the device and shows on it's LCD.
4.Push the "Disconnect" button to disconnect the bluetooth.
The flowchat of this GUI is as follow:
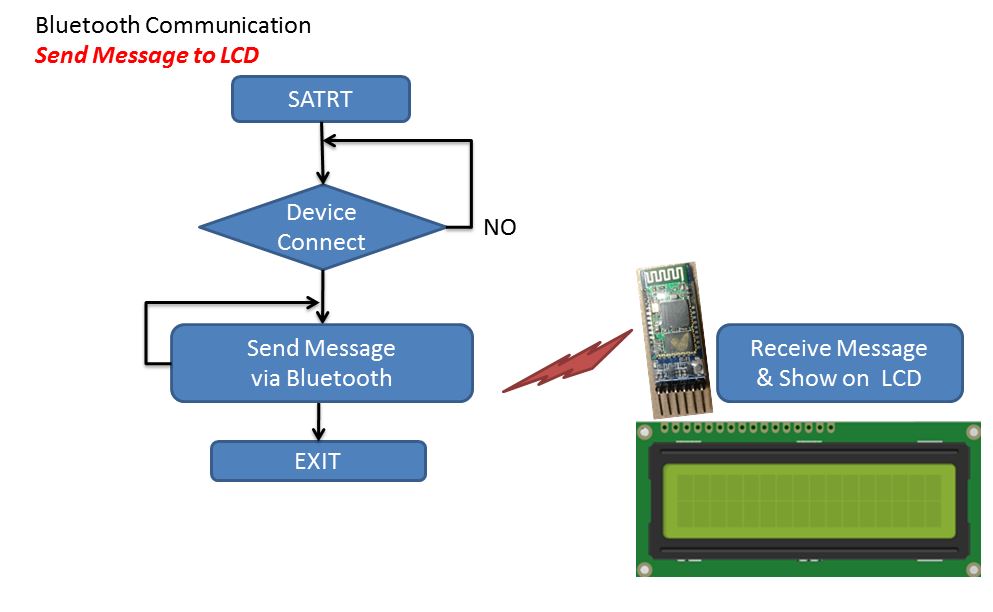
figure 29 : Flowchat of sending message to target board's LCD with bluetooth.
The vedio of this GUI for sending message to target board's LCD with bluetooth shows as follow :
● Source file
1. Program of control Led for kasiboan kit with arduino IDE.
2. Program of PIR sensor with arduino IDE.
3. Program of receiving message and showing on LCD with arduino IDE.
4. C# language of GUI for controlling the device's LED.
5. C# language of GUI for receiving the device's PIR signal.
6. Apk file format of cellphone(Android) interface.
7. Aia file format of cellphone (Android) interface.