Exercise 14 - Composites
Making Composites
This week on Composite, it is an interesting topic as I am unsure what will we expect from composite and the benefits of it.
As Neil was going through the class, I get to know in actual fact, things like Carbon Fibre, Kevlar are considered Composites, they are light and durable, which I am quite interested in the characteristics in it!
Our task was to create a ~ft2 object that later on to use burlap(wiki) and resin to make into a strong and durable item.
Our local guru, Mr Steven Chew showed his past work and explained to us what to tke note of when applying burlap. As the material is very absorbent, the quantity might require more than expected.
As locally we could not get MSDS like what Neil recommended, our Guru told us that we will be using this Resin from our local seller, we have a choice of Eplicote 1003 or Epicot 1006, the differences are the work time and the proportion being used.
Here are the differences:
- Epicote 1006: resin to activator ratio of 10:6, 30 min working time and 8-12 hrs cure time
- Epicote 1003: resin to activator ratio of 3:1, 5-10 min working time and 2 hrs cure time
He also explained to us on how to apply the composite material on to our mold.
Experimenting & Coupon making
I began to have some curiosity thinking on whether composite can be applied on to my final project as a heat resistant material to house the ceramic heater. But unfortunately, I was told that the resin would soften again when in contact with heat.
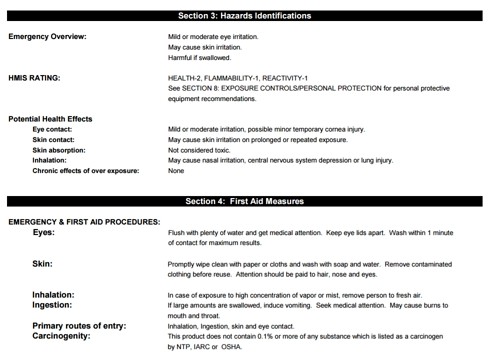
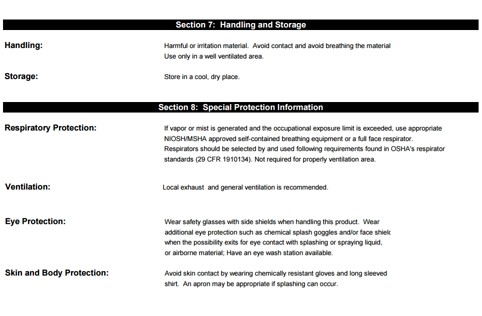
Before starting on working the resin, we did a finding on the MSDS (Material Safety Data Sheet), we couldn't find the exact brand, but after contacting the local vendor, they mentioned it is a common resin which is similar to those found online. And we did find one by PolyGem.
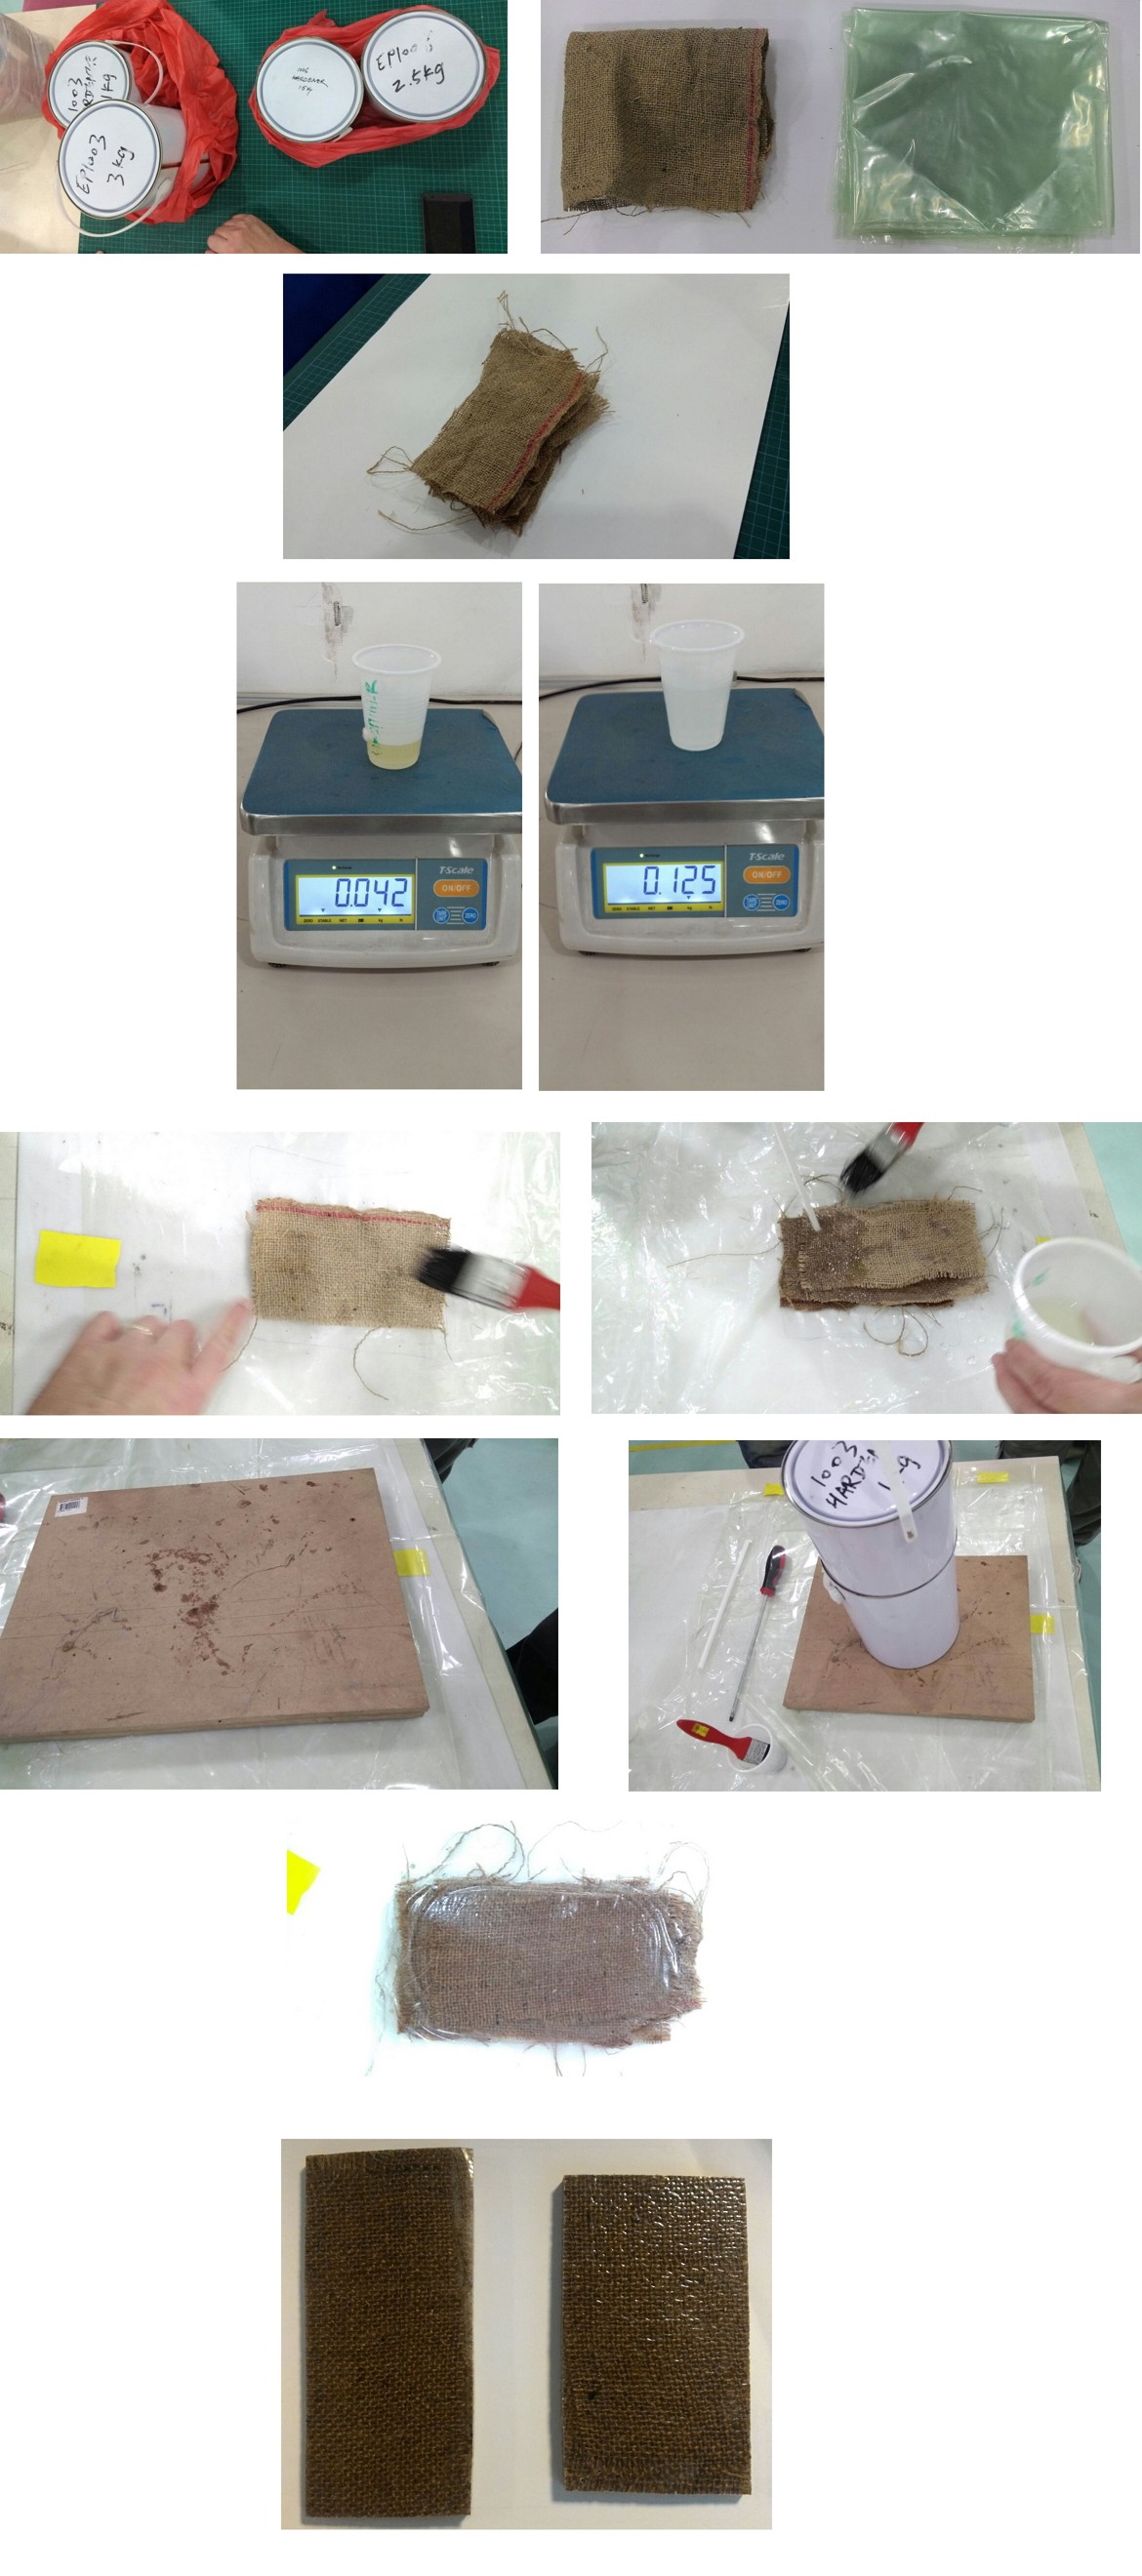
This is our process for the coupon:
Planning & Milling
After looking around at what I can do, I wanted to design a mask or a simple tray or plate, but after watching Neil's lecture, I've seen many people create many awesome designs like a canoe, bicycle frame and boat oars. I decided to make something that has some curves and useful! Yes, by making a spoon!
Now, this spoon is not meant for consumption use of course, but to scoop up fertilizer pallets or loosening soil for my parents when they are maintaining our plants outside our house.
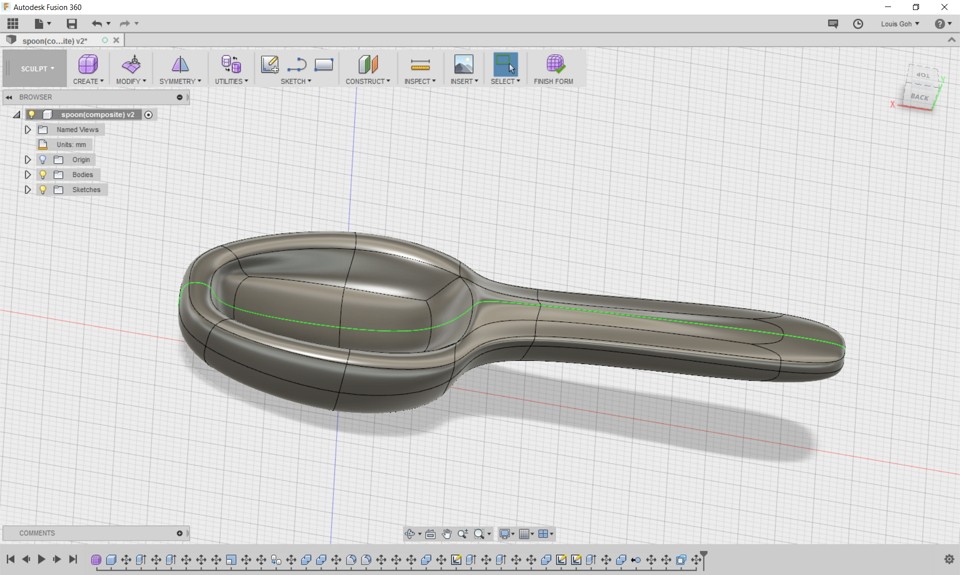
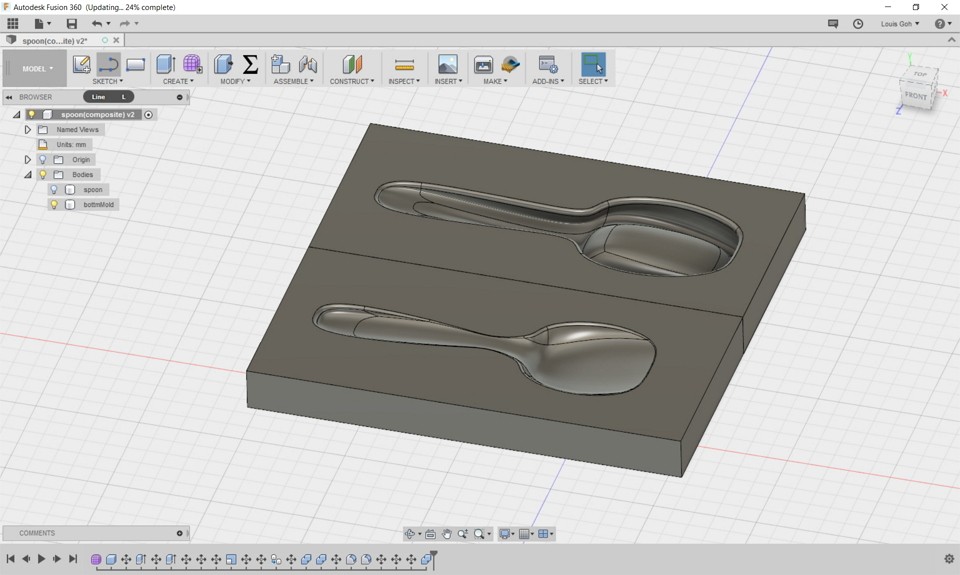
I designed my spoon in Fusion and using the sculpt feature to sculpt the spoon out, exporting it to STL and get it milled out in our Roland machine on the blue foam. I am thankful for Mr Soh Hong Guan, Mr Steven Foo, Mr Jeff Teo and Mr Walter Chan in helping me out during this period of time as I was ill on Thursday

I realised that burlap is quite thick and decided to try on other materials, I experimented with expired bandages (gauze) and triangular bandages (Marking Cloth).
I made 2 Coupons with the 2 materials and decided on using the triangular bandages instead for my weekly project composite.
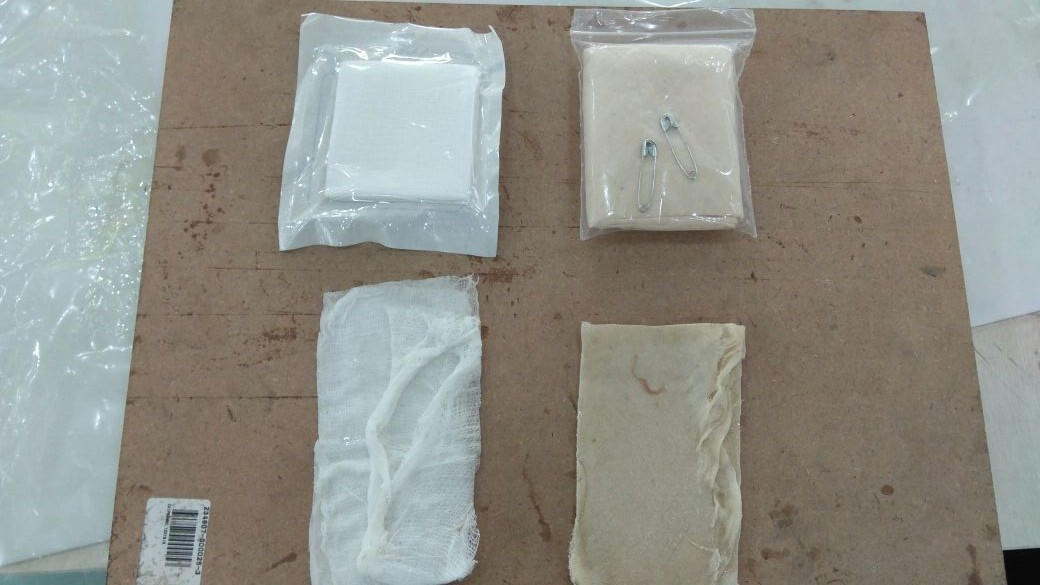
Therefore, I cut out the triangular bandages and measure the weight of the cloth, I got the measurement of approximately 10 grams.
I chose Epicote 1003 as I felt that I can work fast enough as my spoon is small. I measured the Hardener (with the cup zeroed) at 10 grams, Resin at approximately 30 grams. Give a good stir of around 5 minutes.
With the help of my fellow course mates, I wore latex gloves, overlay my mold with plastic and pushed in the cloth in with my course mates pouring in the resin mixture. In total I applied 8 layers of cloth, using a simple Hydrostatic technique of using a plastic bag and weigh it down on resin mixture.
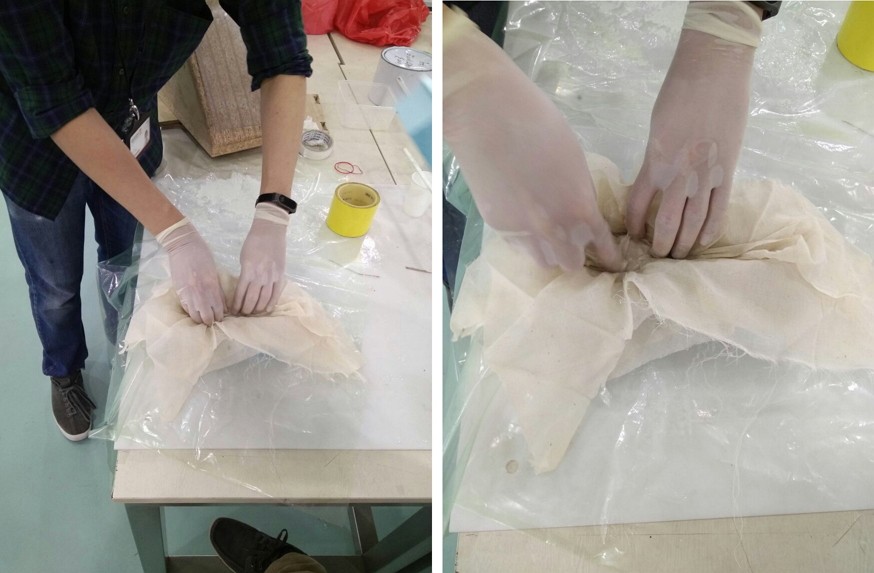
After applying the composite, I also realised the method that I've done is not really correct, I should have done a positive mold instead of a negative mold, and using the negative to provide the compression on my mold.
After drying, I managed to pull out my spoon and trim the sides with Rotary tool. And here is the hero shot:

Reflection
I realised after making the spoon, my mold is done not the correct way, even though it works and manage to get the essence of the spoon. I re-modeled it again, the proper way that I should do is to do a positive mold instead, like this shown below: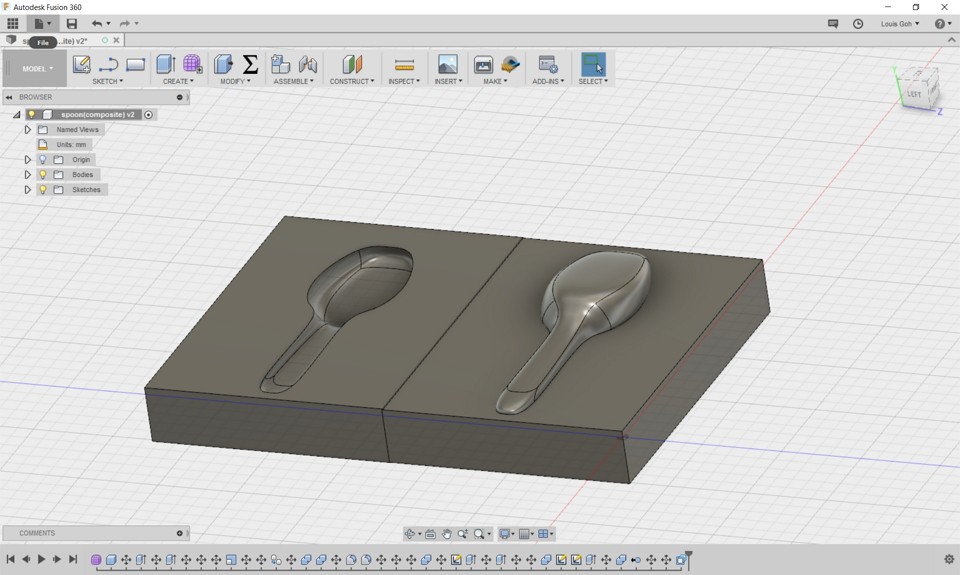
I will give it a try when I have the time to mill out the molds.
Download & Reference
First version of Spoon Mold: here
Updated version of Spoon Mold: here
Polygem MSDS: here