Exercise 2 - Computer-aided Design
There are many different Computer Aided Design (CAD) Software to do design 2D & 3D works. I have some experience in Photoshop & Illustrator, therefore today i will be doing some comparison on Open Source software alternative to the 2 popular paid softwares!
Raster and vector
In 2D graphics there are 2 popular terms we often hear, raster and vector. Now, we are covering these 2 terms and what are they used for!
I will be using a sketch I sketched on my Samsung Note 10.1 sometime ago, I will use it as an example to explain what is Raster and try converting it to Vector
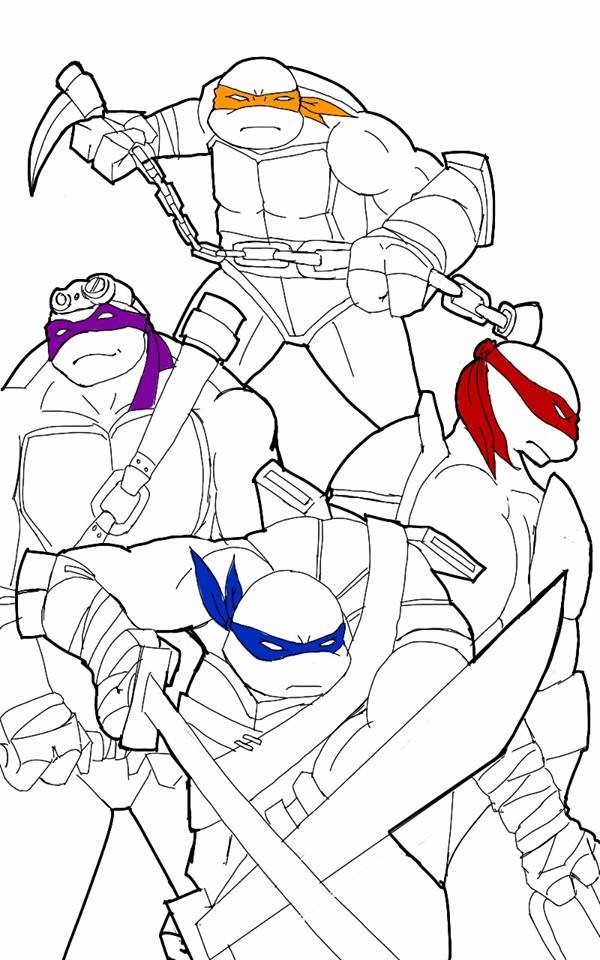
I present you, the 4 turtles named after the 4 famous Renaissance Artists!
What is Raster?
A raster image is made up of pixels, each a different colour, arranged to display an image.
Using GIMP
GIMP is a free alternative software to Adobe Photoshop, we are going to explore on how to change the background of my drawing and adding some colours to it
Using the fuzzy tool, I am able use GIMP's intelligent wand to quickly select similar colours. This function is similar to Photoshop's Magic Wand.

look at all the marching ants!
Now, one issue on using Fuzzy tool on a drawing is, it will pick up stray pixels that are not withing the range of the colour you first select as a whole.
We will need to increase the threshold at the Tool Options to have the stray pixels selected too.
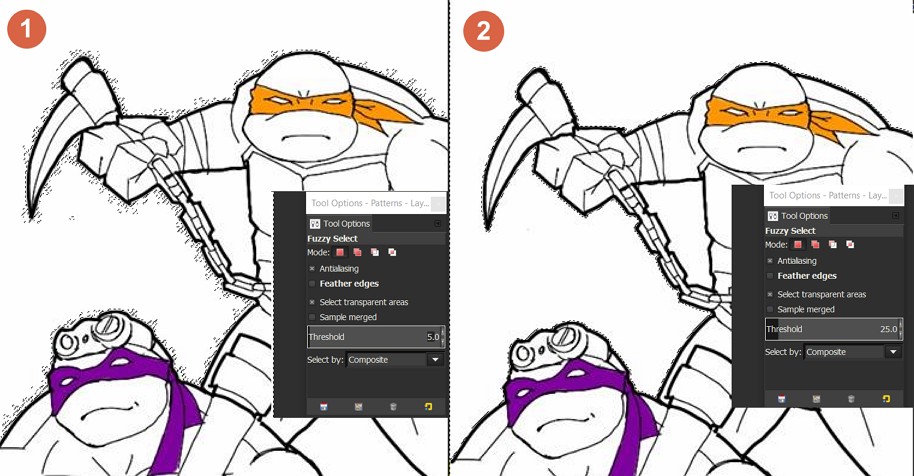
much neater now!
Next, I will be removing the white background. As this sketch is saved as jpeg, I will be removing the white background and super impose a badly ruined Chinatown!
Layer > Transparency > Add Alpha Channel

Checked background means Transparent background
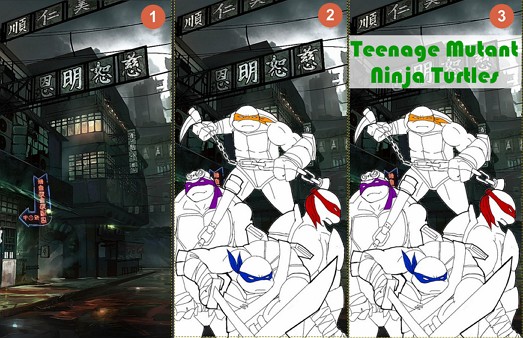
Lastly, I will be going thru how to super impose the background and how I added the text.
1) Go to File > Open as New Layer
We will be importing the newly created transparent background sketch to the downloaded ruined Chinatown
2) Next, I will be scaling my sketch according to the background picture.
Select the sketch layer > CTRL-T and scale accordingly.
3) Adding text by using the shortcut key "T", and adding another layer below the Text by using Shift+Ctrl+N.
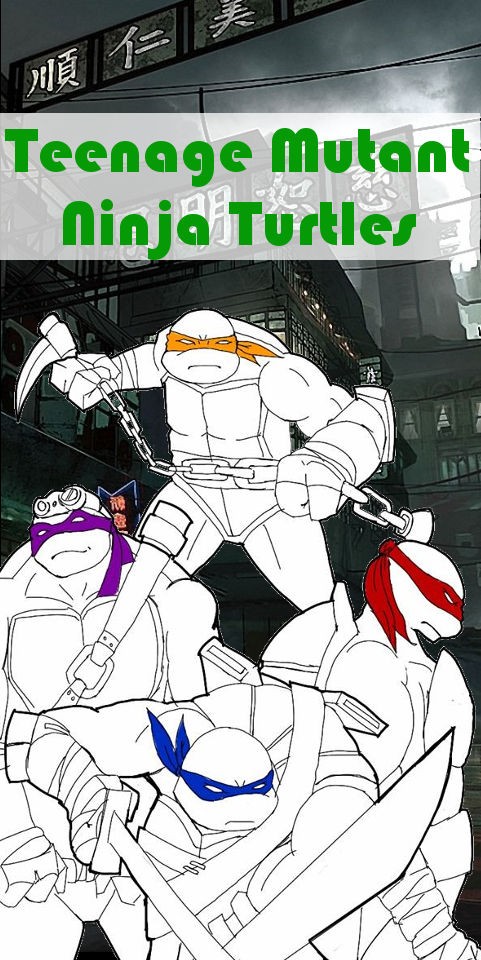
Download the poster here
But here is an issue...
Pixelated image!

Michaelangelo is not impressed!
So, what is Vector?
A vector imaged is made up of paths, each with a mathematical formula, telling the path how to shape and what colour to be filled.
The table below will show you the Pros and Cons of Raster and Vector
| Raster | Vector | |
|---|---|---|
| Pros | Rich details & precise editing | Infinite scalable and smaller file size |
| Cons | Blur when enlarge & bigger file size | Limited details |
Using Inkscape
Inkscape is an alternative software to Adobe Illustrator, for this tutorial, I will transform my sketch into a vector art and we will compare the differences.
1) Open up the sketch in Inkscape
2) Select the image by using CTRL+A
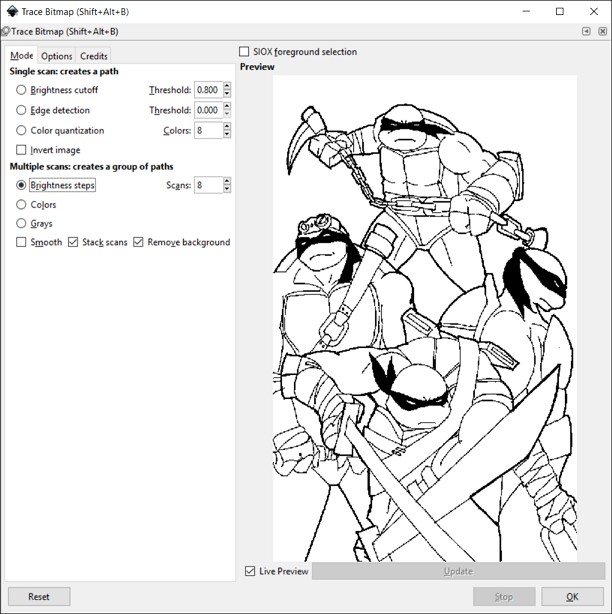
3) Then got to Path > Trace Bitmap
4) I will be using this set of settings for my conversion. Do note the back ground is also removed, only the outline remains.
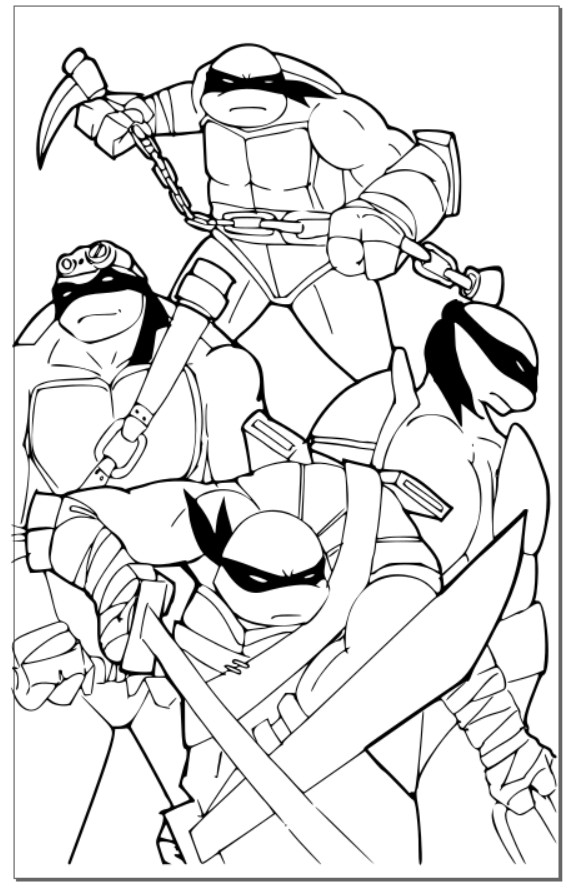
The classics, Black & White
Let's now compare the difference between Raster and Vector close up!

Looking sharp!
And this is the final output!
Download the SVG file
3D CAD
As a Maker Coach, we need to know some 3D modelling software so we can recommend students who wants to pick it up.
Therefore today I will be using 2 3D modelling software, from really basic to a powerful software.
TinkerCad
Imagine TinkerCad as Lego building blocks in the 3D world. Simply select geometric shapes and assembling it part by part, it is not the most powerful software but a really easy "Pick me up" software.
This is my prototype drawing of the Vacuum Former that I would like to make. Do note this is not drawn to scale!
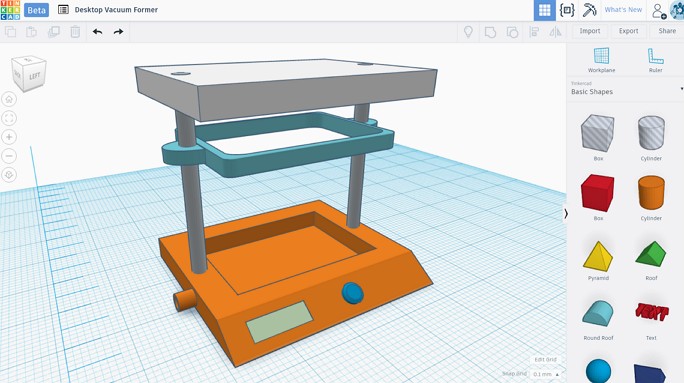
Easy to make, but missing out some awesome stuff at the moment file
Autodesk Fusion 360
Now, the downside of using Tinkercad is that it doesn't have features like simulation, parametric and features like editing the history.
Therefore I will attempt to use Fusion 360 to design a prototype for my final project.
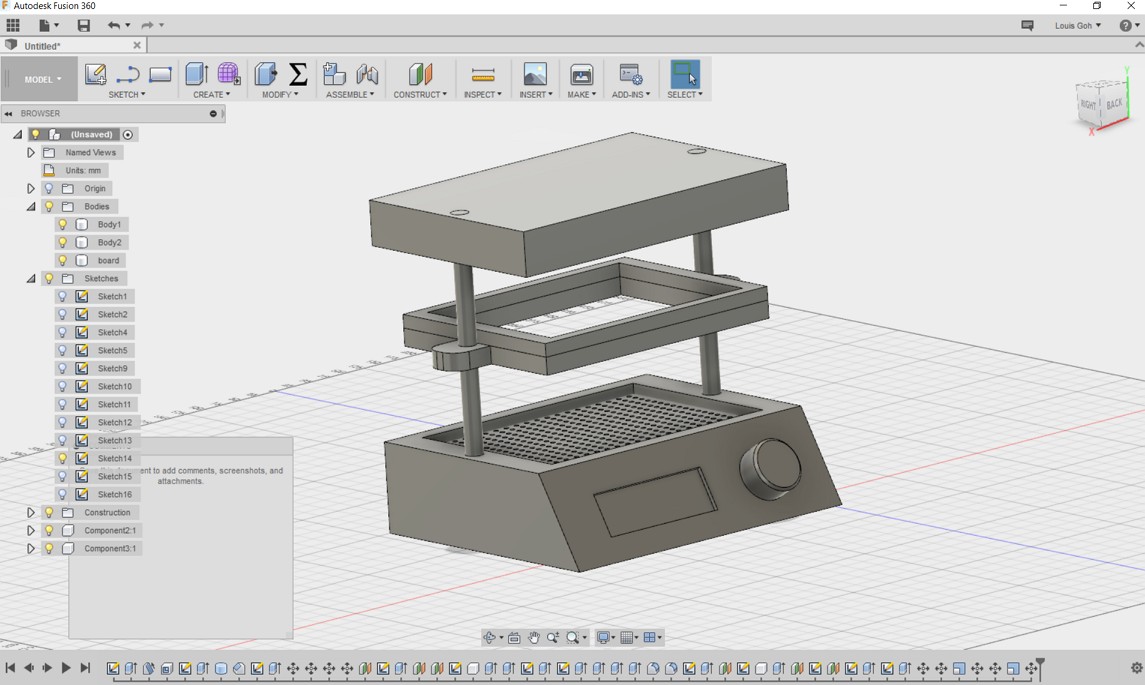
Easy to make, but missing out some awesome stuff at the moment file
It wasn't easy feat for Fusion360, it is a steep learning curve to use.
I didnt use any parametric this week as I am unfamilar with it, but I'll show how some basic shapes are created like a box to making a hole in the model.

This are some of the feature and tools that I used when designing in fusion
- Sketch tab - This is where you can create 2D shapes like squares, circles or even polygon on the workplane.
- Create tab - This section is where you 'PULL' or extrude your 2D drawings into a 3D shape which can be 3D printed later if needed.
- Modify tab (Parametric) - Parametric tool is where I have the ability to have flexibility to change value for my length, breadth or height of a 2D or 3D object.
- History bar - This is where I am able to retrace back my work and edit from there if I made a mistake.
Creating a box with a hole
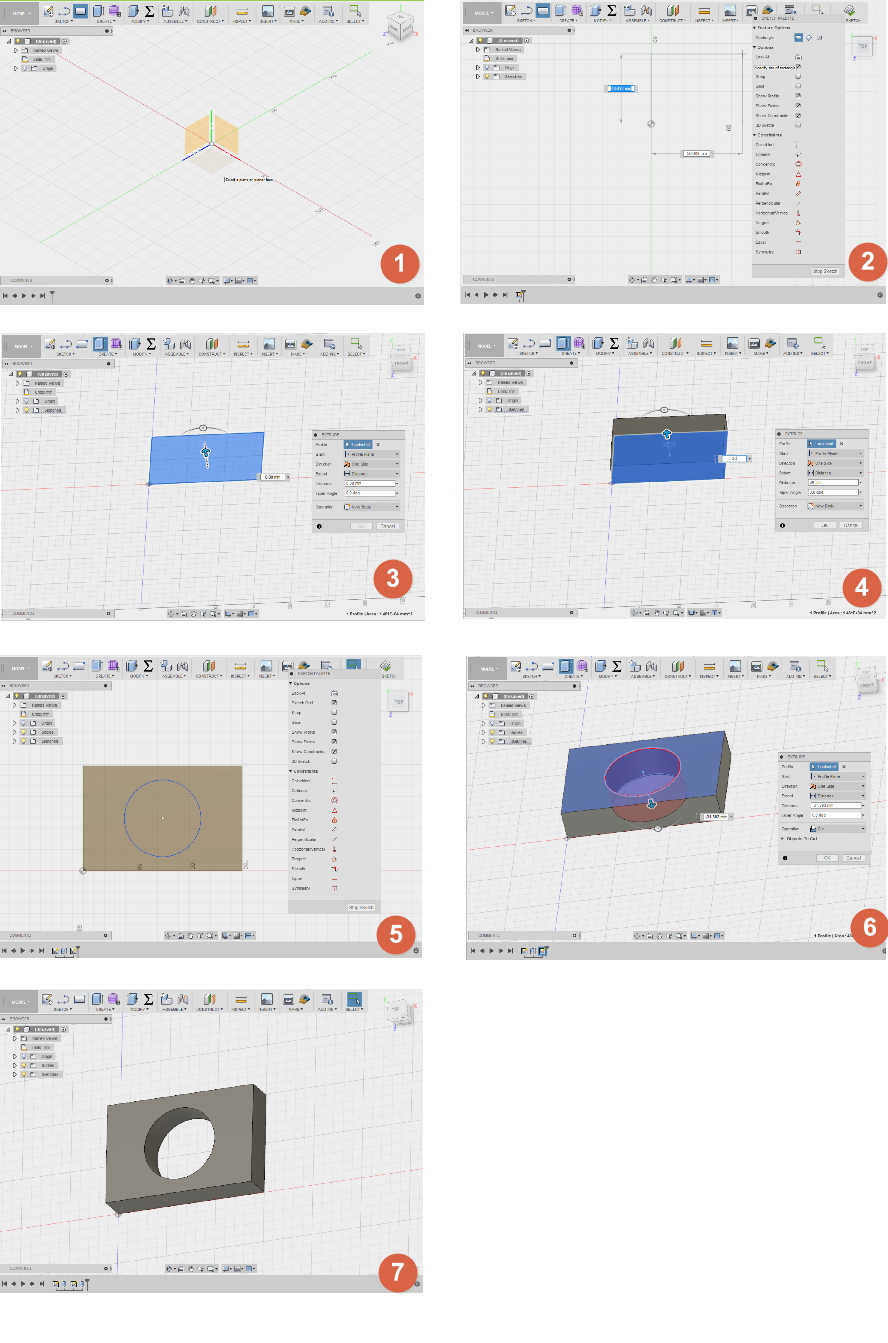
This are some of the feature and tools that I used when designing in fusion
1) Select the box under Sketch tab and choose an axis (x, y or z direction) to place the drawing.
2) Next, draw the box size with the left mouse button
3) To transform the drawing into a 3D model, select the Extrude button on the create tab. Select your 2D model (if it is not selected) and a small blue arrow will appear. You are able to pull it up with the blue arrow or adjust the height via the input text.
4) Once adjusted the value, just press Enter to confirm the height.
5) Next, we are going to create a circular hole through the box we just created to show how to boolean the box.
Same thing as step 1 & 2, we first click on the dropdown menu and select circle and choose the face we want the circle to be at.
6) Same as step 4, we use Extrude button from the Modify, we are able to create a hole in the box, this will perform a 'CUT' action.
7) Done.
Video on Fusion360 for beginners
Download
You can download my prototype 3D design here!
References:
Fusion 360 YouTube Channel: Link
Lynda.com Inkscape: Link
Lynda.com GIMP: Link