Exercise 4 - Electronics Production
Assignment for this week
FabISP
An ISP (In-system programming) also called In-Circuit Serial Programming (ICSP), is the ability of some programmable logic devices, microcontrollers, and other embedded devices to be programmed while installed in a complete system.
The FabISP is an in-system programmer for AVR microcontrollers. It allows you to program the microcontrollers on other boards you make.
Preparation for Milling
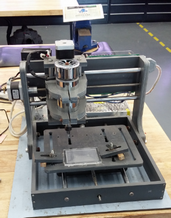
The machine that I will be using is the China made Mill PCB2020B. The PCB2020B machine in Fablab SP is a Mach-3 compatible milling machine. The USB-control board is USBCNC compatible and interfaces between the PC and the Mach-3 controller board. The input for the PCB2020B is a gcode file, which can be generated from Eagle using the pcb-gcode ULP.
 |
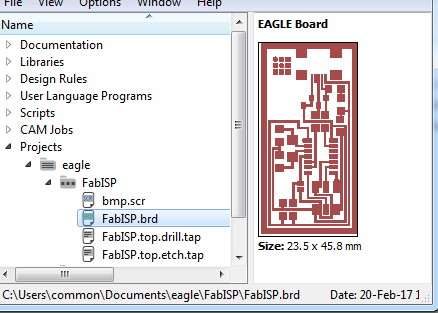
Next, access the FabISP PNG files from the class site and download the hello.ISP.44 board, traces and interior circuit board file.
With the PNG file downloaded, convert it to a BW bitmap images using PicPick to invert and then follow by MS Paint to save it as Monochrome Bitmap. This is because Eagle can only open Bitmap files with less than 256 colors.
Generating Gcode from Eagle
With reference to How to Install and Setup Eagle and Create G-code from Eagle. The following are the steps I did to generate Gcode from Eagle
- Launch Eagle and go to File > Import the saved FabISP bitmap file
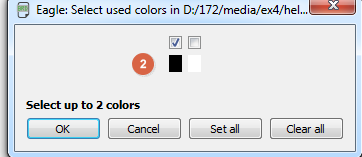
- Select only black and click OK
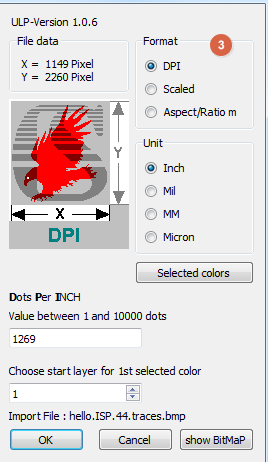
- Click on DPI, enter the DPI '1269' and layer '1'
- Click Run Script
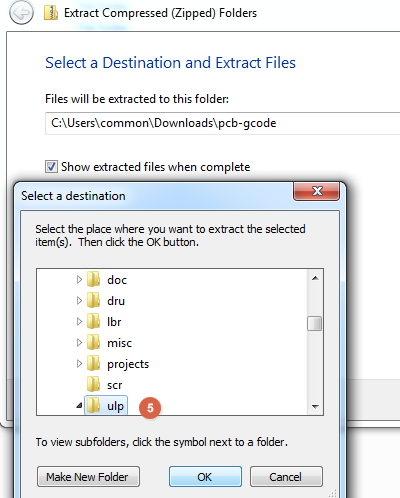
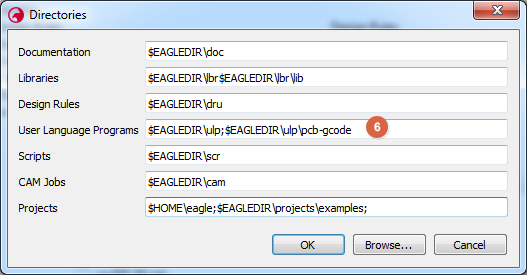
- Download PCB-gcode plugin, Unzip the downloaded file into the sub directory "ULP" of the Eagle folder
- Go to the Eagle Control Panel, select Options > Directories and add the path for the pcb-gcode to the User Language Programs section.
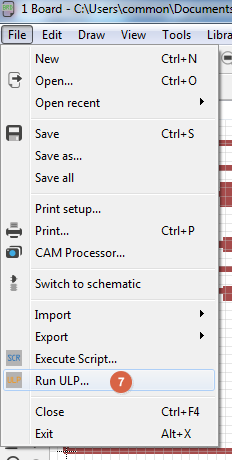
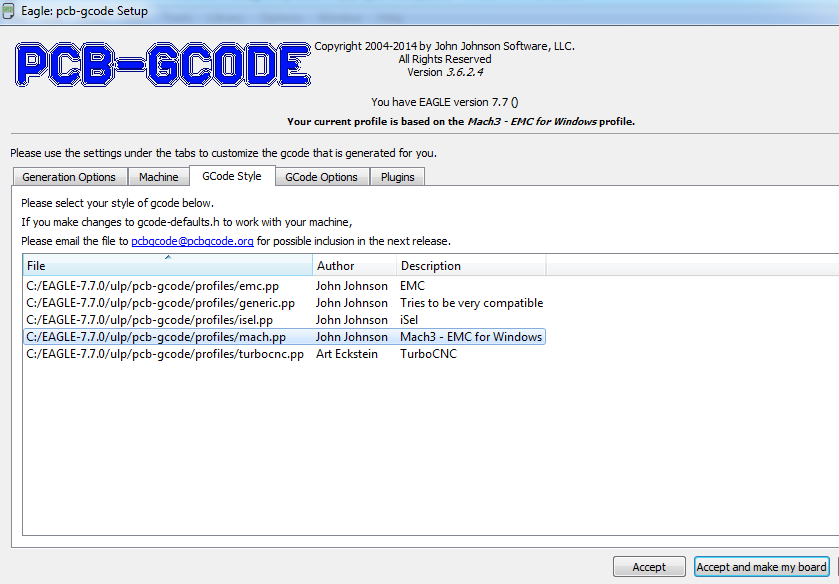
- Click on File > Run ULP
- Browse to Ulp and select pcb-gcode-setup.ulp
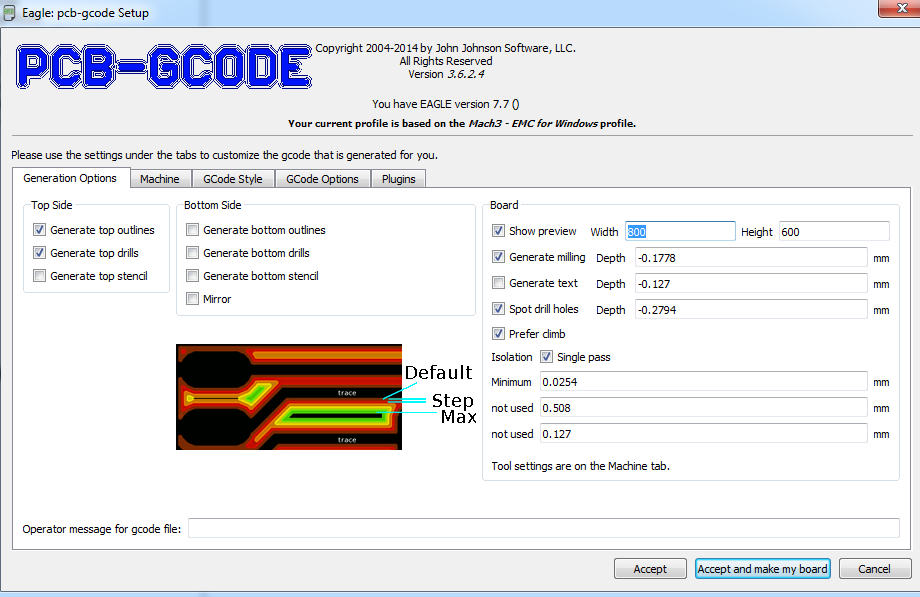
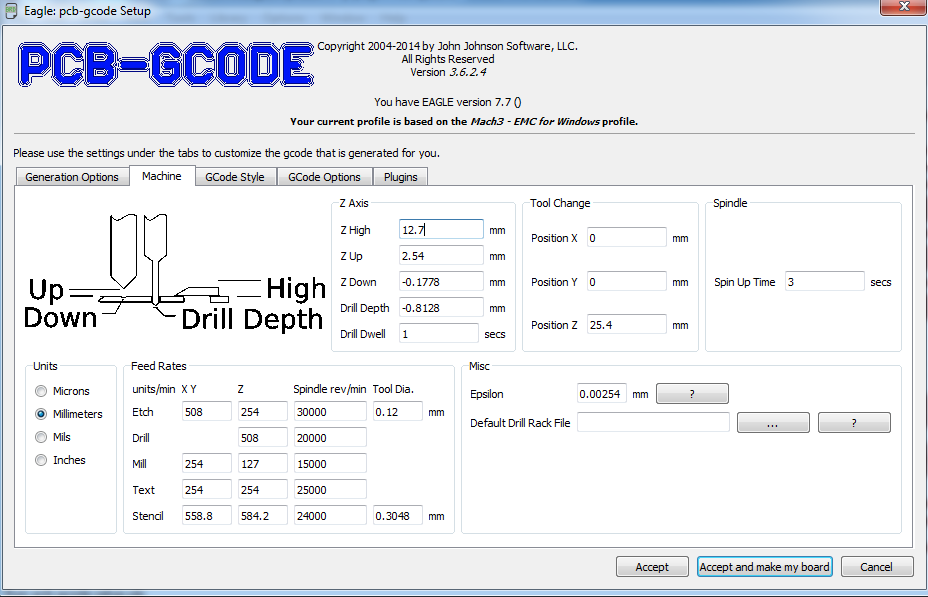
- Configure the settings for Generation Options and Machine Tab
- Continue with Gcode Style Tab and click on Accepting and Make my board
 |
 |
 |
 |
 |
 |
 |
 |
 |
 |
 |
 |
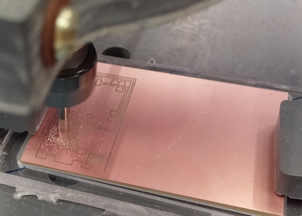
Milling the PCB
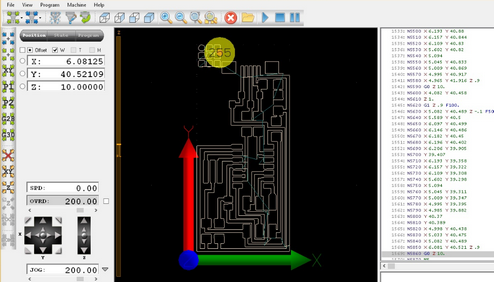
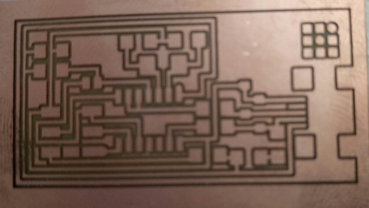
Local Instructor, Steven Chew selected a drill bit of 0.12mm for this milling exercise. With the gcode created earlier, locate the file ending with "..top.etch.tap" which are to be send for milling. Using the CNC USB Controller software for the PCB2020B, the loaded gcode file will be displayed as a graphic in the program. User can follow the progress of the milling operation and this image is updated as the traces is being milled. After positioning the mill-bit at respective designated Home location (XYZ 0,0,0 coordinates), a click on the "PLAY" button will trigger the milling process.
 |
 |
 |
 |
 |
Stuffing and Soldering
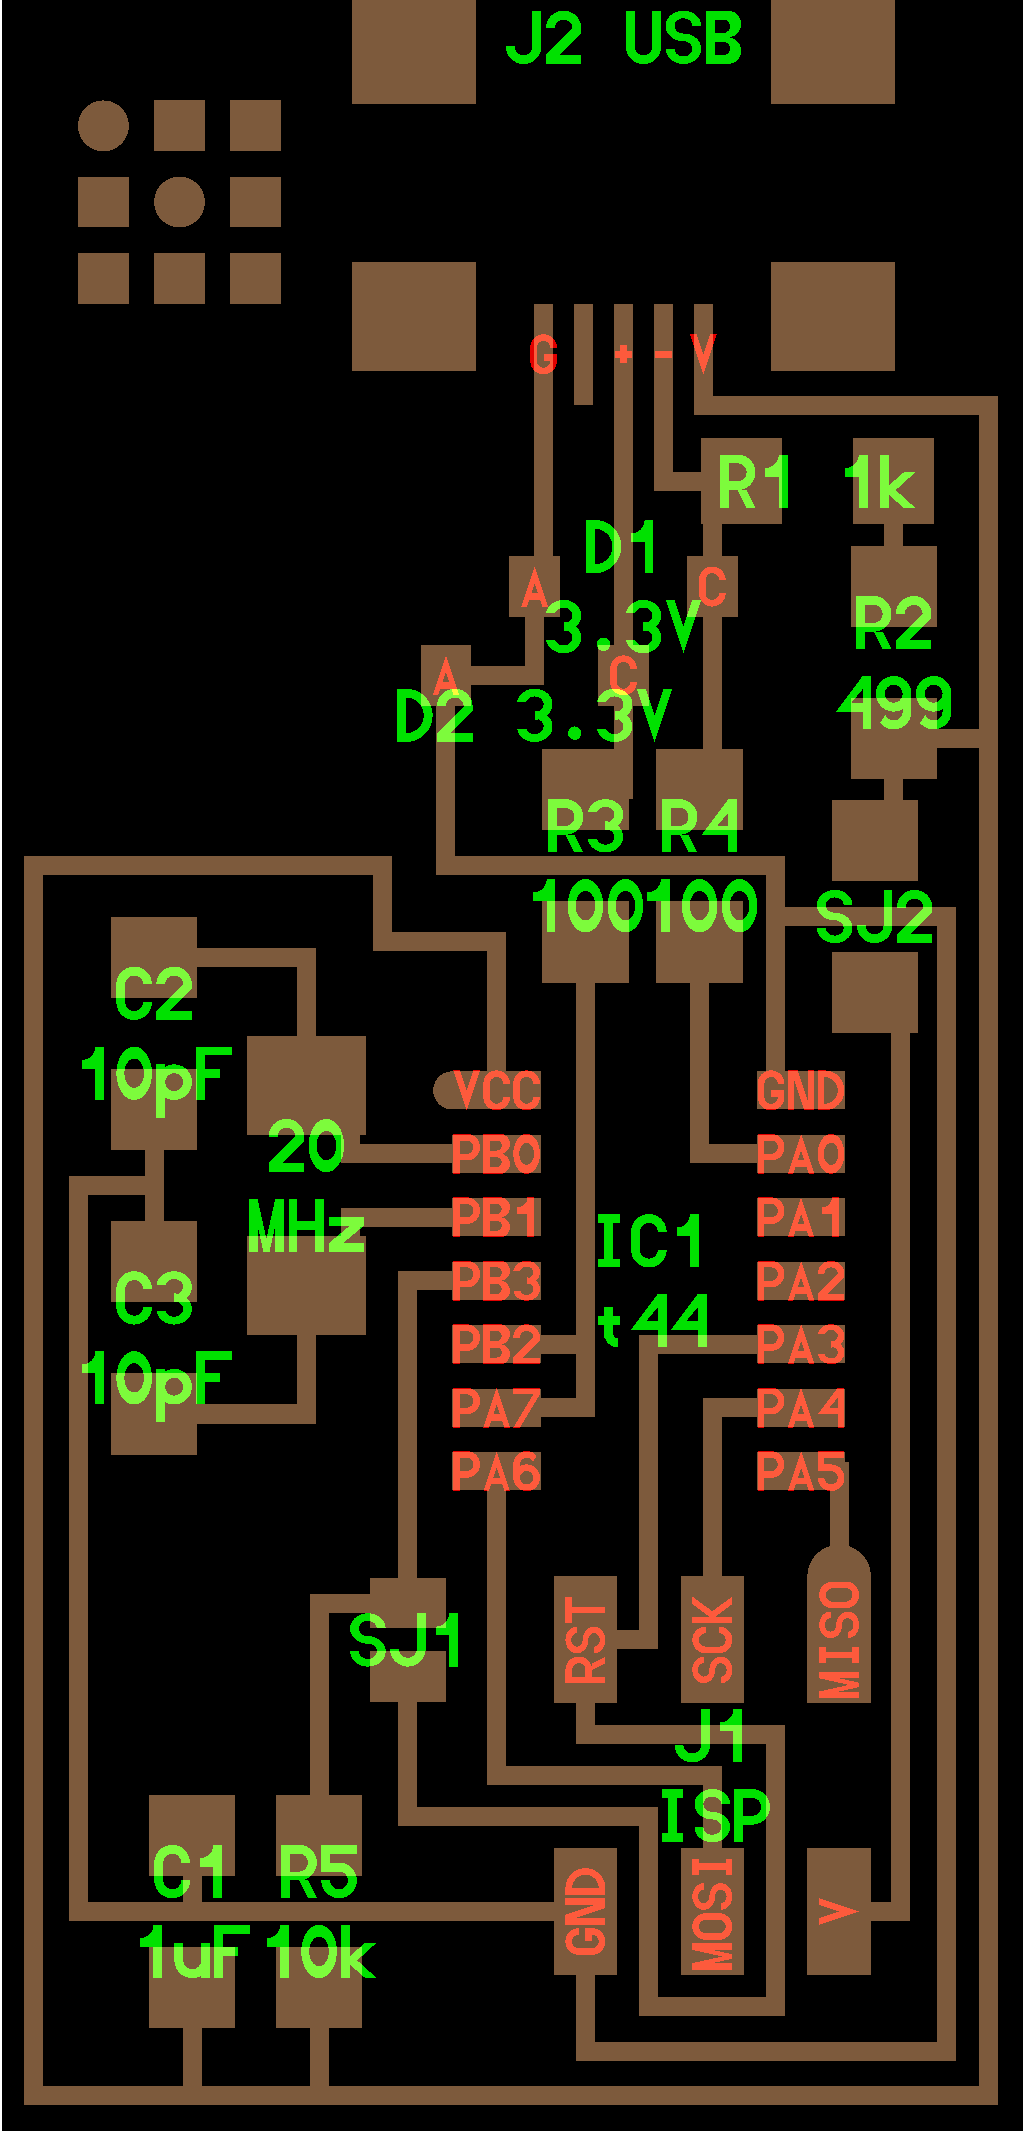
By making reference to FabISP board and components, you will be able to see what components you need to and where to place them on the board. The Components on the FabISP are:
|
|
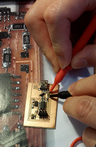
Local Instructor, Dorville has prepared the above components for our collection. After collection, I begin the journey of my first soldering for SMD Components. I started with the USB connector as I heard it was the most difficult part of the components. My right hand was holding the soldering iron while my left hand is trying to hold the USB connector with a twiser. It is very challenging as the legs for the USB connector legs are so tiny and any lost of concentration would result in soldering the tiny pins together. It took me many attempt before I eventually get it solder on the board.
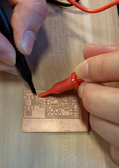
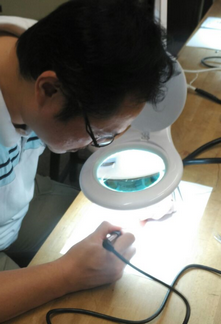
Next, come the ATTiny 44 microcontroller. Again very tiny leg that cannot be seen by naked eyes. A magnifying glass is needed to ensure that I did not put too much solder which is going to short the pin together. I continue with the rest of the component and check for continuity or short with a Multimeter.
 |
 |
 |
With the soldering done, my FabISP board is now ready for programming and I have to short both the SJ1 and SJ2 jumpers for the programming stage.
FabISP Programming and Firmware
The FabISP board which I have just soldered can be turned into an FabISP board by program it with another FabISP or a commercial ISP. An Arduino UNO can also be used for the task. There are 2 parts to program the firmware onto the FabISP board.
- Installing Avrdude to program AVR microcontrollers
- Download the firmware from class site and creating the FabISP hex file.
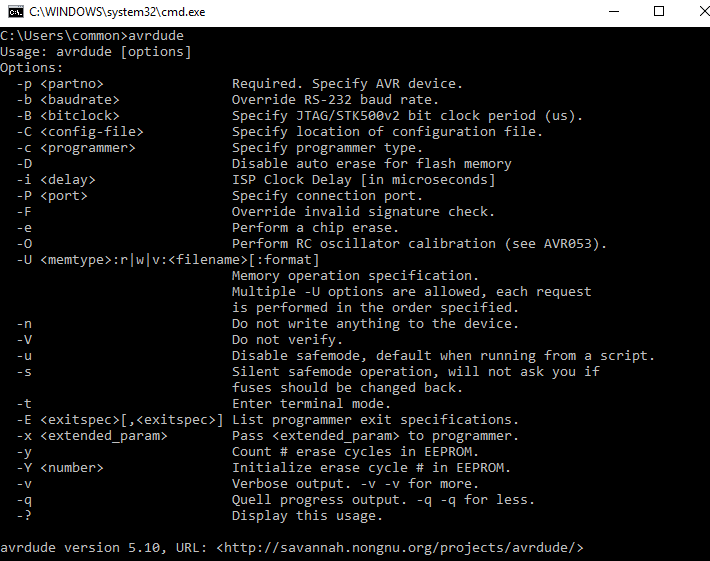
As I am using a Windows OS laptop, I will follow the step by step guide on the installation of Avrdude which is to program the AVR microcontrollers, a test on the avrdude in the windows command prompt.
Next, downloaded the FabISP firmware from the class site and unzipped it. Within the unzip firmware folder, there is a Makefile which is set up to work with the AVRISP2 by default. If you are using another programmer, you will need to edit the Makefile.
The following will need to be edited by removing the '#' depending on the programmer used
    #AVRDUDE = avrdude -c usbtiny -p $(DEVICE) # edit this line for your programmer
    AVRDUDE = avrdude -c avrisp2 -P usb -p $(DEVICE) # edit this line for your programmer
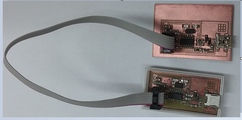
Arduino Uno as an ISP
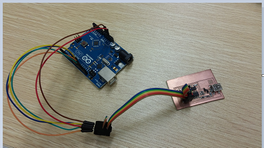
I will be using Arduino Uno to program my FabISP board. I follow this guide to setup the Arduino and the FabISP board.
Connect the Arduino Uno to FabISP as follows
|
 |
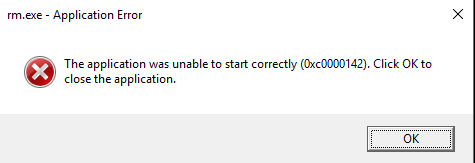
With the above connected, based on the guide in Programming FabISP. I get the following error messages when execute the Make Clean and Fuse Command
D:\firmware\fabISP_mac.0.8.2_firmware>make clean
rm -f main.hex main.lst main.obj main.cof main.list main.map main.eep.hex main.elf *.o usbdrv/*.o main.s usbdrv/oddebug.s usbdrv/usbdrv.s
make: *** [clean] Error -1073741502
 |
D:\firmware\fabISP_mac.0.8.2_firmware>make fuse
avrdude -c avrisp -p attiny44  -U hfuse:w:0xDF:m -U lfuse:w:0xFF:m
avrdude: initialization failed, rc=-1
Double check connections and try again, or use -F to override this check.
The following command will also executed with error messages using avrdude
  D:\firmware\fabISP_mac.0.8.2_firmware\avrdude -c avrisp2 -P com5 -p attiny44 -U hfuse:w:0xDF:m -U lfuse:w:0xFF:m -U flash:w:main.hex:i
  avrdude: please define PAGEL and BS2 signals in the configuration file for part ATtiny44
  avrdude: AVR device initialized and ready to accept instructions

  Reading | ##################################################### | 100% 0.01s

  avrdude: Device signature = -0x1e950f
  avrdude: Expected signature for ATtiny44 is 1E 92 07
           Double check chip, or use -F to overwrite this check.
After several attempt and checking similar error messages on the internet, it lead me to nowhere. My other colleague try it out on Mac OS and Ubuntu manage to execute the MAKE command however not able to detect the usbtiny when pluck into laptop. Have consulted Local Instructor, past Fab Academy participants like Mark and Walter Chan but error message persist. Decided to borrow a tested and program FabISP done by another past Fab Academy participant Siew Chin. Unfortunately the same error received despite editing the Makefile (Using usbtiny). At this juncture, decided to take a break and start to observe my FabISP board closely. I refer back to Troubleshooting Short Circuit and decide to resolder the FabISP board.
 |
Upon resoldering and also double checking on the circuit with Mulitmeter, I run the Avrdude command and the following is what I received
D:\firmware\fabISP_mac.0.8.2_firmware>make fuse
avrdude -c usbtiny -p attiny44  -U hfuse:w:0xDF:m -U lfuse:w:0xFF:m

avrdude: AVR device initialized and ready to accept instructions

Reading | ################################################## | 100% 0.01s

avrdude: Device signature = 0x1e9207
avrdude: reading input file "0xDF"
avrdude: writing hfuse (1 bytes):

Writing | ################################################## | 100% 0.00s

avrdude: 1 bytes of hfuse written
avrdude: verifying hfuse memory against 0xDF:
avrdude: load data hfuse data from input file 0xDF:
avrdude: input file 0xDF contains 1 bytes
avrdude: reading on-chip hfuse data:

Reading | ################################################## | 100% 0.00s

avrdude: verifying ...
avrdude: 1 bytes of hfuse verified
avrdude: reading input file "0xFF"
avrdude: writing lfuse (1 bytes):

Writing | ################################################## | 100% 0.01s

avrdude: 1 bytes of lfuse written
avrdude: verifying lfuse memory against 0xFF:
avrdude: load data lfuse data from input file 0xFF:
avrdude: input file 0xFF contains 1 bytes
avrdude: reading on-chip lfuse data:

Reading | ################################################## | 100% 0.00s

avrdude: verifying ...
avrdude: 1 bytes of lfuse verified

avrdude: safemode: Fuses OK

avrdude done.  Thank you.


D:\firmware\fabISP_mac.0.8.2_firmware>make program
avrdude -c usbtiny -p attiny44  -U flash:w:main.hex:i

avrdude: AVR device initialized and ready to accept instructions

Reading | ################################################## | 100% 0.01s

avrdude: Device signature = 0x1e9207
avrdude: NOTE: FLASH memory has been specified, an erase cycle will be performed
         To disable this feature, specify the -D option.
avrdude: erasing chip
avrdude: reading input file "main.hex"
avrdude: writing flash (2016 bytes):

Writing | ################################################## | 100% 1.69s


avrdude: 2016 bytes of flash written
avrdude: verifying flash memory against main.hex:
avrdude: load data flash data from input file main.hex:
avrdude: input file main.hex contains 2016 bytes
avrdude: reading on-chip flash data:

Reading | ################################################## | 100% 1.11s


avrdude: verifying ...
avrdude: 2016 bytes of flash verified

avrdude: safemode: Fuses OK

avrdude done.  Thank you.

avrdude -c usbtiny -p attiny44  -U hfuse:w:0xDF:m -U lfuse:w:0xFF:m

avrdude: AVR device initialized and ready to accept instructions

Reading | ################################################## | 100% 0.01s

avrdude: Device signature = 0x1e9207
avrdude: reading input file "0xDF"
avrdude: writing hfuse (1 bytes):

Writing | ################################################## | 100% 0.00s

avrdude: 1 bytes of hfuse written
avrdude: verifying hfuse memory against 0xDF:
avrdude: load data hfuse data from input file 0xDF:
avrdude: input file 0xDF contains 1 bytes
avrdude: reading on-chip hfuse data:

Reading | ################################################## | 100% 0.00s

avrdude: verifying ...
avrdude: 1 bytes of hfuse verified
avrdude: reading input file "0xFF"
avrdude: writing lfuse (1 bytes):

Writing | ################################################## | 100% 0.00s

avrdude: 1 bytes of lfuse written
avrdude: verifying lfuse memory against 0xFF:
avrdude: load data lfuse data from input file 0xFF:
avrdude: input file 0xFF contains 1 bytes
avrdude: reading on-chip lfuse data:

Reading | ################################################## | 100% 0.00s

avrdude: verifying ...
avrdude: 1 bytes of lfuse verified

avrdude: safemode: Fuses OK

avrdude done.  Thank you.
Yes, finally my FabISP board is now ready to be used as a programmer.
Verfying FabISP is working
- Connect one end of the usb cable to the mini usb of the FabISP and the other end to a laptop.
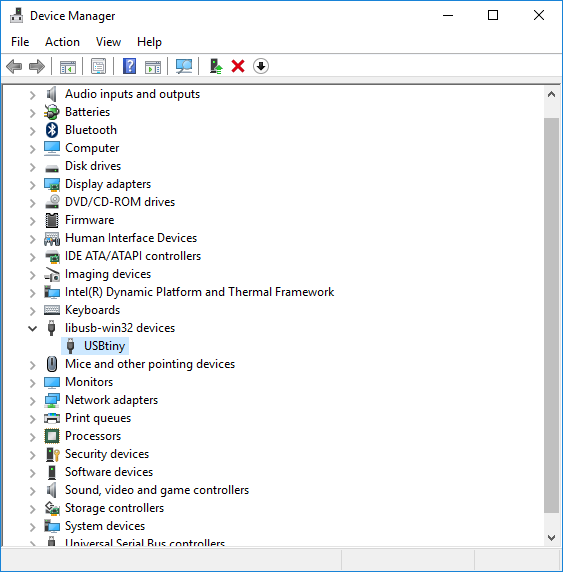
- The Com Port will detect FabISP with a question mark
- Download and update the FabISP driver
- USBTiny will appear
FabISP References
- FabISP Electronics Production
- FabISP Programming
- Arduino as an ISP
- FabISP a in-system programmer
- Arduino as ISP using avrdude
My Thought
After last week mad rush on Laser Cutting, this week is the start of the Electronic Production. I have zero knowledge on what is milling and never have I done any soldering on SMD Components. Have done some research on PCB Milling, Soldering Flux, Surface Mount Soldering, Common Soldering Problems, Eagle Setup and G-code from Eagle. Tons of information but little time to absorb. What frustrating me the most was Eagle and its PCB-gcode plugin. They have the latest version 8.0 but there is an issue on viewing the entire screen when running the ULP to generate the Gcode. No way for me to make changes on the setting and click on Accept Changes as I can't see the 3 buttons beneath the screen. My laptop hangs several times because of this, eventually I get it done by using a lower version of Eagle 7.7. After which I encounter another problems in java and shell issues. However, this is overcome by updating and installing the latest java. Have to spend time browsing the internet for solutions.
Then came the soldering, it is important to have essential tools like twiser, manifying glass, good soldering iron with the help of flux and thin solder. Without this, is very tough for someone who is doing it for the very first time as the pins and legs for the componenets are so tiny and not able to see with naked eyes. Of course, having a good environment where you can focus, with a steady hand and more practices this can be achieved however is important to note and refer to the guide Troubleshooting Short Circuit.
Finally, programming. With inadquate knowledge on this is rather tough, just like someone lost in the desert. Althought there are various comments and suggestion on the internet but none really works as you are told to try this and that.
To summarise, another busy week with a lot of learning points from soldering to programming. Not forgetting that we have our daily routine work to carry out and is tough to manage both work and assignment at the same time.