Week 4 Feb 15: Elecronics Production
Milling a circuit board, assembly, and programming.
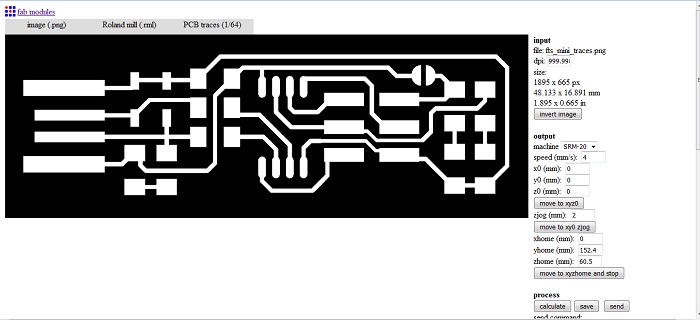
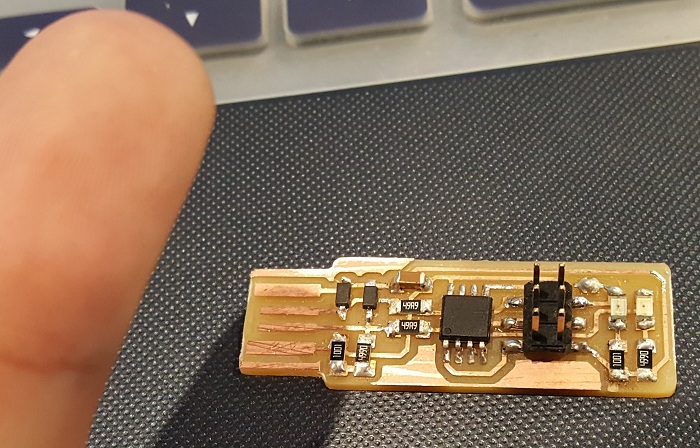
I chose to do the FabTinyISP as my programmer board since it had LEDs and I like shiny things. By first download the png file and using Fab Modules, we can change the file into something more compatible to the small milling machine. You first select the original file format you want to convert to machine orders, in our case a '.png'. After that you can select the tab Output to select which machine to output the file into, for example a Roland Mill. After that you select which process(is it just traces using a 1/64 mill bit or cutting the outline at a bigger 1/32 mill bit). We went though what each value meant and how to center the origin in the x, y, and z axis and then moved the files to the milling machine.
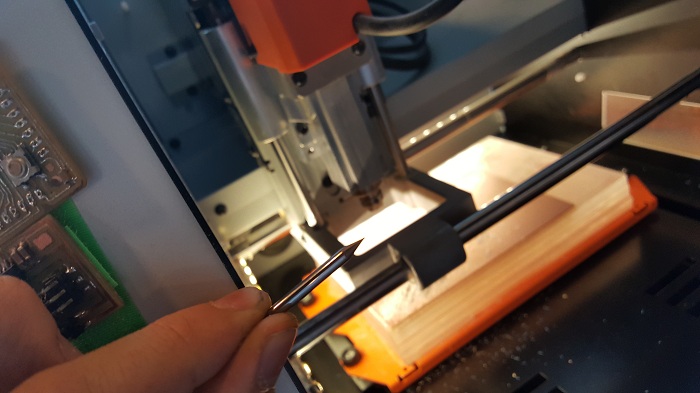
We got a blank circuit board which was cleaned and then leveled on to the SRAM 20 MonoFab. It was neat using the mill machine for the first time in my life. Also broke the mill bit on the first time, but I blame human error since I was told it was okay to use but the mill got loose halfway and showed me why there is a nice protective cover on the milling machine. On hind sight, I should have checked the height and double checked the mill myself if I am going to use it myself if it was properly tightened prior to using the machine but this lesson shows that humans are not to be trusted and almost all failures can be attributed to human error. I did keep the mill as a souvenir though which will constantly remind me of the ineptitudes of trust between humans and how I welcome our robot overlords soon.
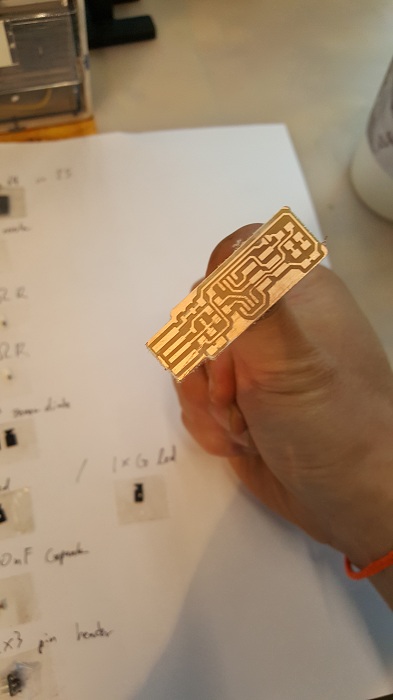
After double checking the proper settings for the origin to trace(using the 1/64 mill, speed at 4mm/s with the origing set at (0mm, 0mm, 0mm) zjog(how much it comes up after each path) at 12mm and number of offsets set at '4'and cut(1/32 mill, lower speed than trace at 0.4mm/s and number of offsets set to '1') the board, I stepped away to work on my super duper cool shiny thingy I was working on but then was called back cuz I had to prep on building the board. But it turns out it was probably the best thing to do, since it takes about 15 minutes for the board to be cut and during that time it best to find your components and read up on how to assemble them. Especially by writing your components down and using double sided tape to organize them prior to soldering while playing your laptop next to the station, it makes a world of difference in assembly. And by the time I got all the materials and station ready, by board was ready to go.

And so began the infamous dreaded soldering. I had tried it once when I had some broken earphones but honestly this is something quite new. It is very much infuriating and tedious as it was, especially when you found out midway that the resistors in the 49.9k were mixed with the 499k... People who do that are the reason Donald got elected. In the end though, I think I did a pretty swell job and got my board to not explode or smoke when plugged in, but just a shiny red LED to remind the singularity is soon and we should all be prepared.


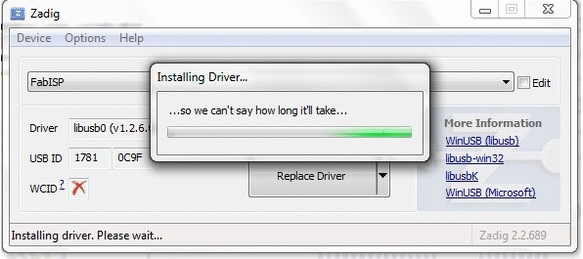
Now onto programming. I have a Windows laptop and for the first time in using it, I regretted not having a mac for the first time in my life because apparently it is much easier to install the software needed to program a board but basically I went to http://fab.cba.mit.edu/classes/863.16/doc/projects/ftsmin/index.html and just followed each step like I had some sort of idea of programming and downloaded just everything that was mentioned needed for windows and voila, the computer environment was ready for programming. However I faced interesting challenges again and explored new errors messages that I never knew existed. This is the third time this has happened to me. I wonder if they are conicidences. Probably not.
So I diggidy giggidy done did nothing for a hour trying to figure things out and repeating the same thing over and over until I realized I am an absolute moron who used 49.9K resistors instead of 49 resistors. I must have thought the K meant it had overclocking properties and was superior. On a resistor. ... I don't even

Alas I resoldered it in a minute and of course everything worked instantly.

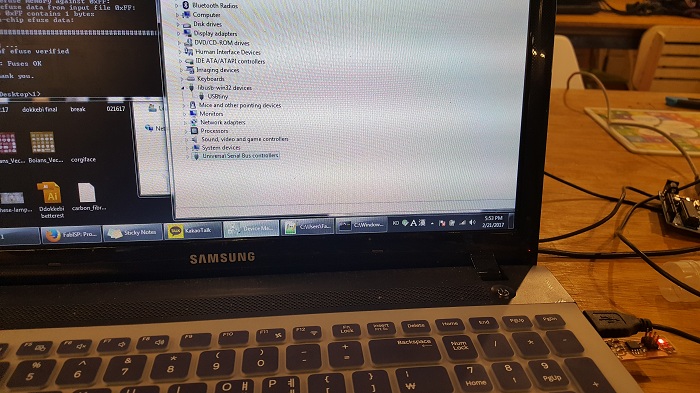
So then I tried Git bash to flash the board and found
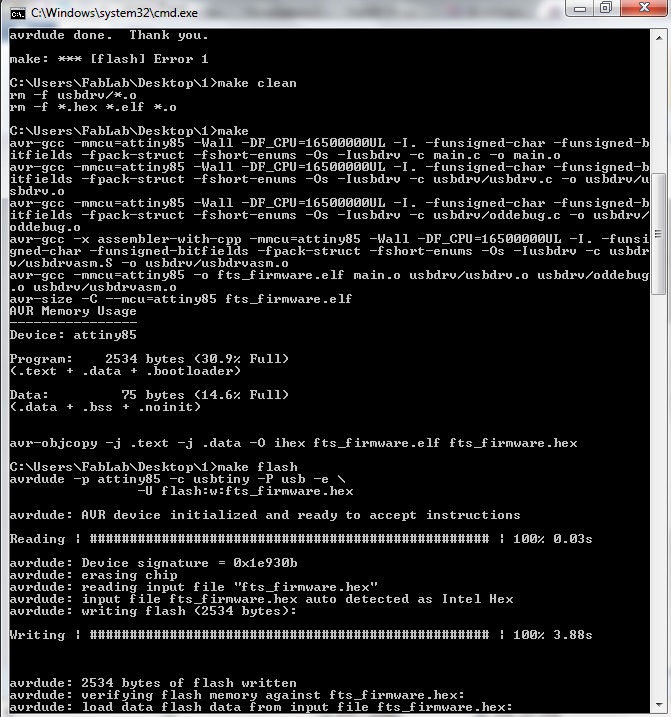

one tiny error which was due to using the attiny 85 instead and changed the code for the name and flashed it and finally ended with a working fabtiny
Conclusions: Humanity sucks, including me. Electronic design is a complicated process as anything can go wrong and one simple mistake, ranging from the milling the board, soldering issues, wrong components, wrong trust in humanity, software incompatibility, troubleshooting to find if its a hardware or software issue, coding issues, wrong settings, and common stupidity, can cause failure. But you learn more from your failures and I learned a huge amount this week.
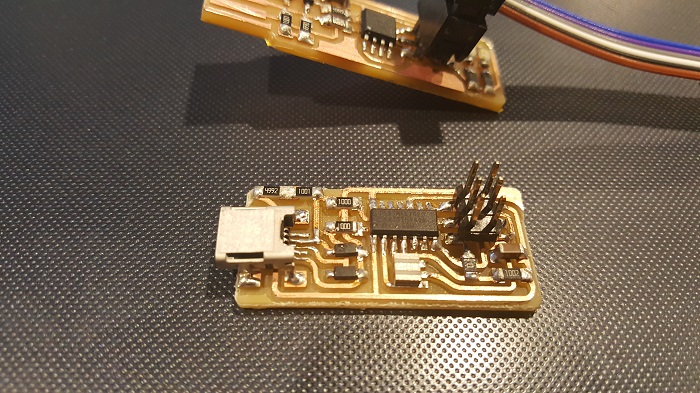
Quick edit: I made the FabOptimus too cuz I was bored and my instructor told me a microUSB would more likely last longer; will try to program it using my current board to make a backup programmer.