Week 3 Feb 8: Computer-Controlled Cutting
Vinyl cutter and parametric design of press fit kit
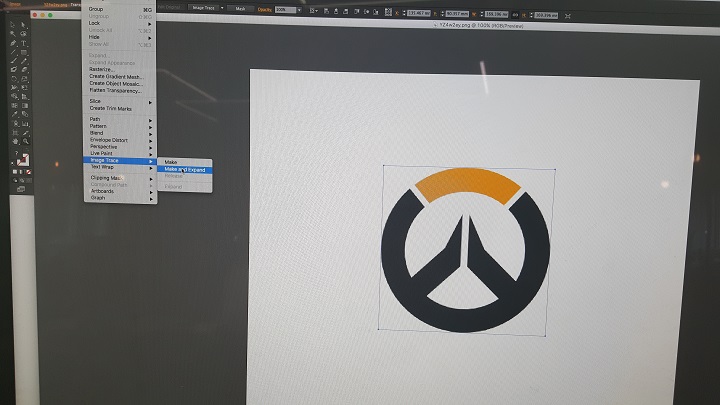
I wanted to make a stencil design and a vinyl sticker to put on my phone, so why not show my appreciation by using an example of an enjoyable electronic entertainment software that promotes hand eye coordination. I used some leftover silver and gold paper I bought unknowingly for this purpose but knowingly self rationalizing that I would use it in the future when I came across a paper shop shopping with a friend. Yay to impulse buying. I found a high resolution picture of the icon for the game and then since it was a rasterized image, I used image trace, got the outlines and converted it in Adobe Illustrator to vectorize it and exported it as a dxf which then fiddled with the machine settings and tried it for the first time without any expectations.
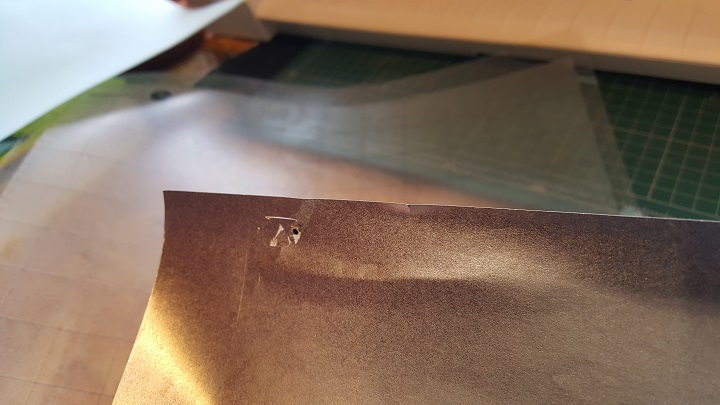
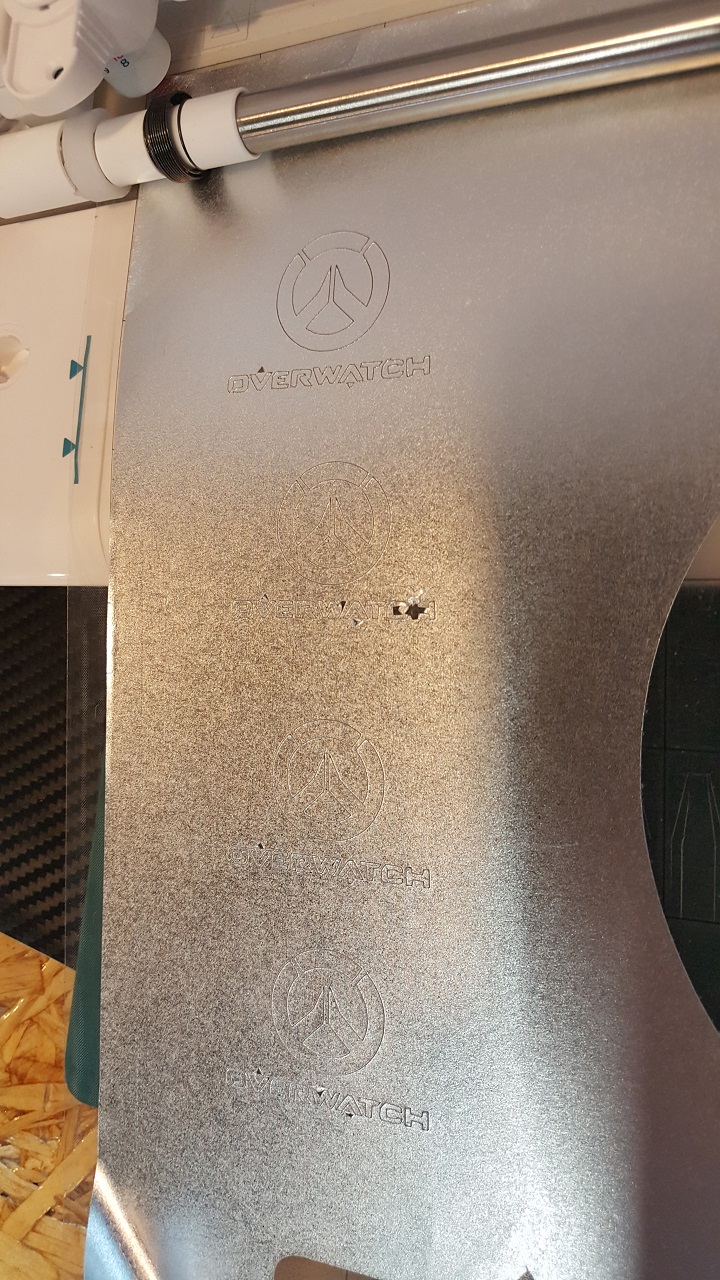
Initially the cuts came our ripped and uneven, where I learned it was due to the fact it was just normal paper with no supportive backing; it would require a base in order to cut it so I added a thicker plastic sticky backing to the paper. I also changed the depth of the cutter accordingly, both automatically and manually to learn how to use the machine. And behold, I have achieved an acceptable cut. I also tried the same specifications for the cuts below and other settings such as speed as well, and learned that going too fast will causing tearing and that even thought the settings may be the same, the quality of the paper or source will also greatly affect the cutting as well.
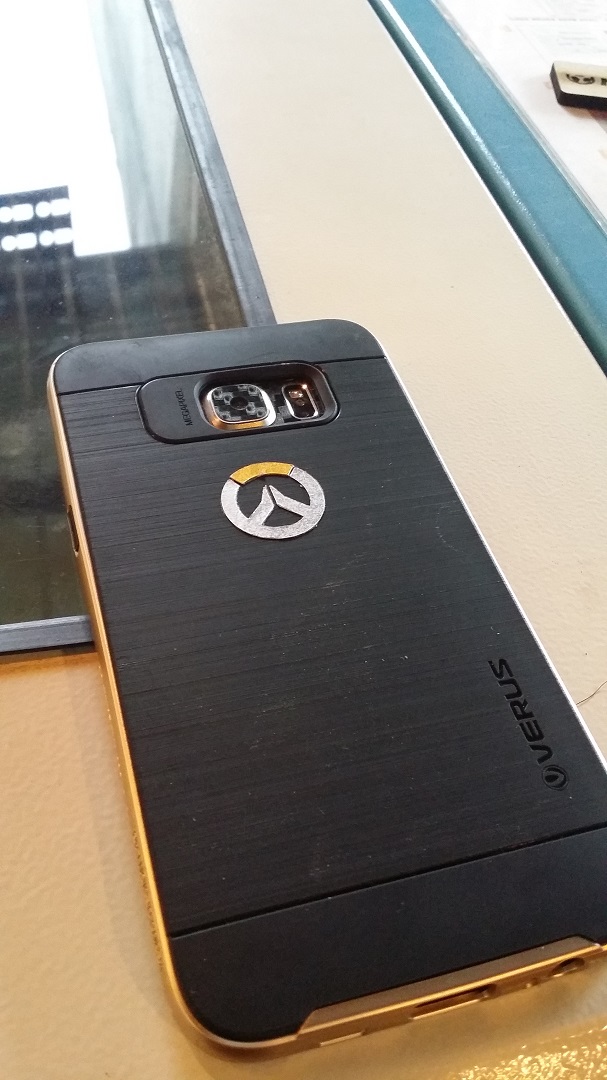
I added some sticky double sided tape on the back and recut it, also cutting the gold paper as well to produce a nice addition to my phone case. I think I will try usings other mediums as well as a bigger design and some protective covering next time to improve it.
This is the .svg file for the logo: Download .svg file
Conclusions: The source material plays a big part on the vinyl cutter, from the thickness and density to the uniformity of the surface. Each material will have different settings so test cutting and pin pointing the ideal cutting parameters is important. A minor future issue might be blade dulling from usage but learned how to replace the blades.
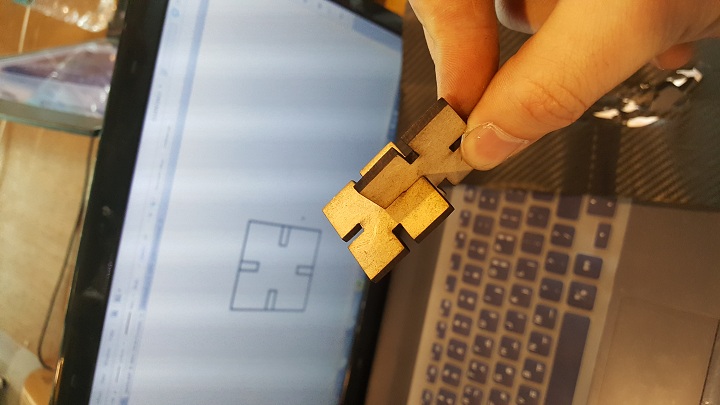
After that I jumped to doing parametric designs on for making a press fit kit. Using trusty fusion 360, I made two different designs of squares and triangles and wanted to make a lamp shade with my dokkebi design from last week so I can make a super duper cool light design and people who see it will be like, "Whoa, you made this?" and I'll be like, "Yea.", utilizing the parameters of 3mm to match my material. Things went according to plan until I realized that Fusion 360 is as frustrating as it is helpful. I was at the fablab during after hours when I wanted to save my design mid way, but then realized that I wasn't designing on my own account and I could not find a way to export this work to the desktop directly. Also, I realized an instant after logging out that I cannot access my files since this is some random person who I never heard of. Soooooooooooooooooooooooooooo that was a fun waste of time.
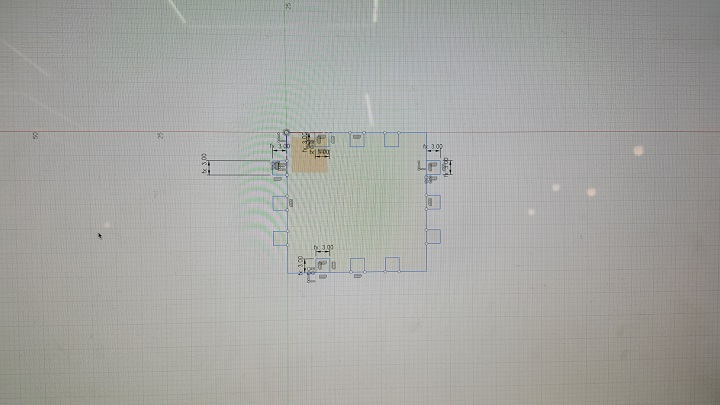
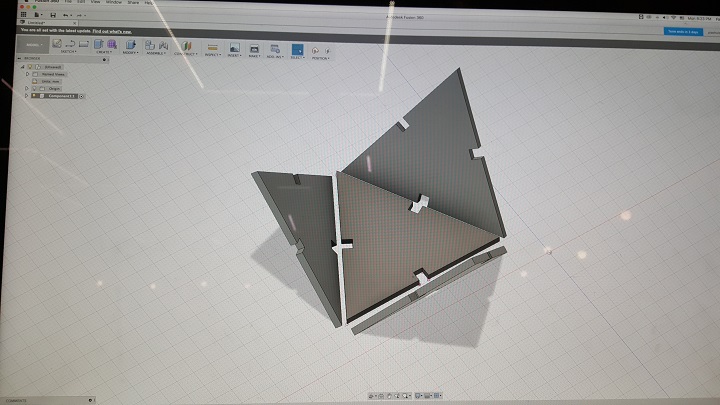
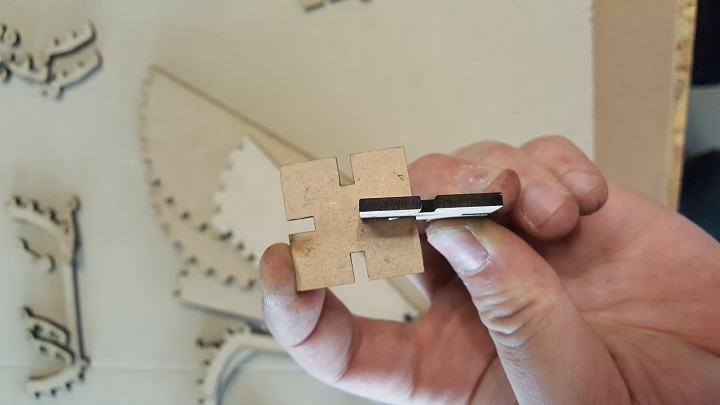
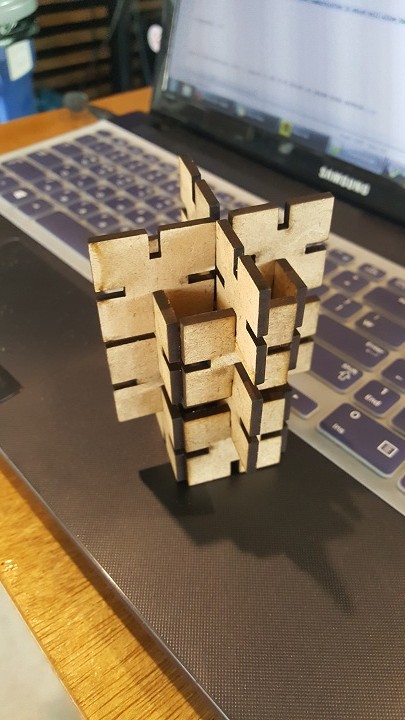
After getting home around 11pm and realizing I am way to tired to do another couple hours of design, I decided to just wake up early the next day and make another design and to cut the designs early at the lab. Knowing my track record, I knew that the initial design would never cut and fit since I had no idea what the kerf would be, nonetheless I started with a 3mm MDF at 85 power and 20 speed for the laser cutter. And in turns out the initial cut was indeed too wide and made too much wiggle room. So after several different iterations and adjusting the kerf ratio to about 0.2, I finally got them to be snug and fit without and issues. I plan to make additional joints of different shapes and hole insert numbers which can allow the faces to be connected in many different combinations. One thing to note that Rodrigo and I discussed is the amount of inserts, as we should rely on even numbers(after 3) which will allow the faces and other joints to eventually join back to the body at an acceptable angle.
This is the .svg file for the logo: Download .dxf file
I also tried to make a living hinge, where specific cuts would weaken the material but not allow a full dissection of the material, which creates an amazing effect of the material being able to "bend" when normally it would never be able to without suffering failure. Instead of using a template, I tried a different method where I would cut only half way in the material(by adjusting the power and speed). However I failed miserably.
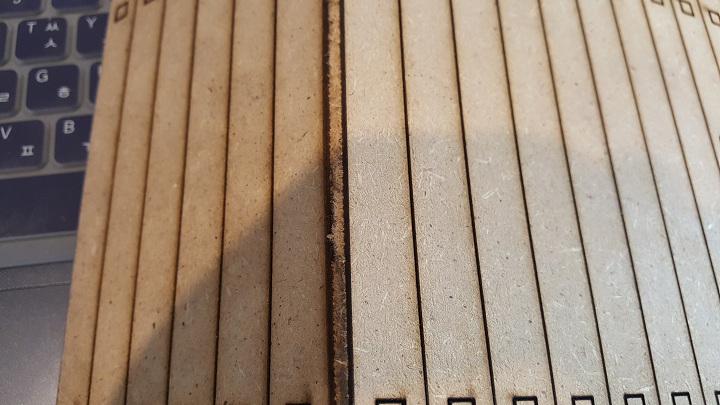
I assume it was a multitude of problems, but I think the major ones were that the space between the cuts was much too wide still and the depth of the cuts was not enough. It's Okay to try new things, but sometimes you should just use the goddamn templates.
For the group assignment, we decided each person will make different joints, such as clip/catch tenons, finger joints, and doweled mortise tenons, but using the acrylic. We used 3mm acrylic on purpose so that the if it were to break or crack it would signify a failure and we would base that on out successful design condition. I used a variation of the dowel tenon while incorporating what I learned from press fit. If I may humbly say so myself, my joint is so perfectly flush that even my grandpa who got a hip joint replacement through the wonders of modern medicine will comment how perfectly it fit. No he wouldn't because he never needed a joint replacement and neither do I understand how joint replacement surgery works nor if patients generally understand the medical process nor am I aware of how aligned joint replacement surgery generally is. But I did include a Mercy phrase so there's that. If you got the reference, you should totally add me on battlenet: tex #11744
For 3mm acrylic I used a height of 3.04mm and 3.6mm for width of the smaller fingers and a depth of 2.975mm and 3.18mm for width for the inserts for the fingers, doubling the numbers for the bigger fingers. Power was set at 85 and 15 speed for cutting, while the engraving I used cut as well but at 5 power and 200 speed to etch into the acrylic.
Dokkebi design file Download
This is the Dokkebi design file: Download .dxf file
Conclusions: There are many variables in the laser cutter, some easy to overlook but should not be such as power, which results in a bigger kerf and on the other hand easily noticeable but not a significant factor in the functionality of the design, such as darkening/smoking from excessive power. I haven't tried any cuts thicker than 8mm MDF or acrylic so far but I plan to in the future and will try to find the ideal settings for those materials. Also, I learned to LOG IN TO FUSION 360 WITH MY ACCOUNT BEFORE DOING ANYTHING.