Week 18 May 24th: Applications and implications
What my final project will be
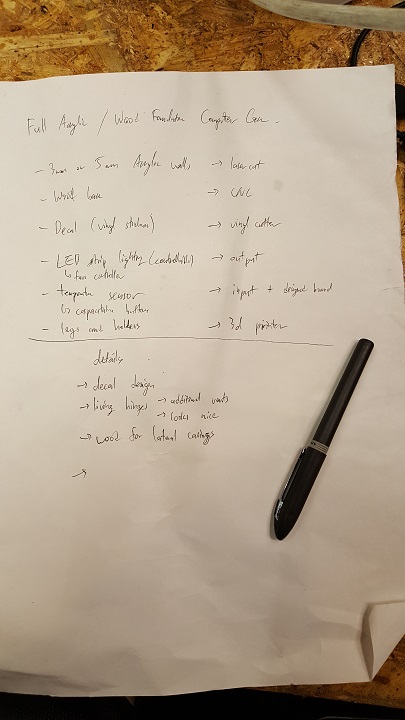
For the final project I have had several ideas. One idea was concerning my love and hobby of bikes and making a LED turn signal imbedded in the handlebars and safety light that can be all be controlled from the handlebars where my hands will be. Another option was making a custom LED flow staff, that will be great for practicing my fire poi without the hassle of getting burnt half the time. Another would be to improve upon my CNC'd computer desk which has a giant acrylic panel on top with an inside storage space where I store my broken laptops and cool stuff. However all 3 designs will need to include at least 3 different processes I learned in FabAcademy, which additive/subtrative processes and an input/output device.
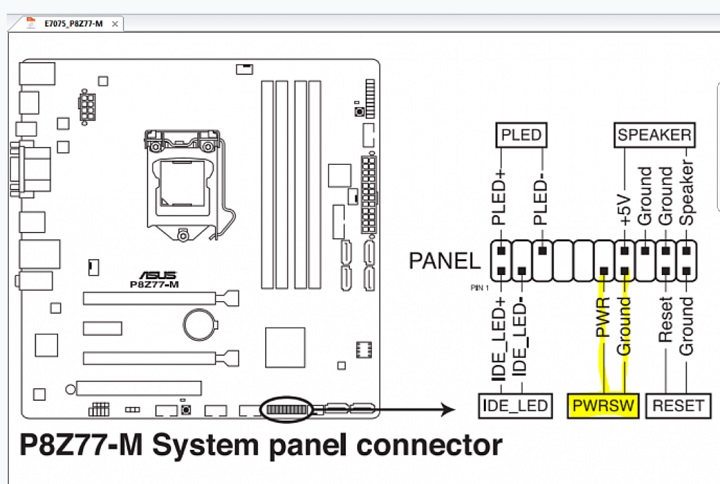
After a week I decided on a simpler but functional project where I would build a cool computer case. A computer case with LEDs and a clear acrylic side is all the rage nowadays, so why not one up that idea and make it even better? It will house my 3rd computer made from parts I don't use that I use to do things I would never do with my main computer. It will be made mainly from acrylic and/or wood and will cost very little in terms of materials since I have the computer components already and only base materials are needed to make it from. It will use CNC cutting, laser cutting, 3D printing, vinyl cutting, electronics design, input and output devices, and maybe a bit more if I can. I will need to find out the motherboard datasheet and find the specific locations to install the parts correctly as well as consider airflow and safety factors to prevent making a pipebomb. Sounds like fun. The acrylic cost me about 45USD as I bought a giant piece with Rodrigo and we went halfies on it. I didn't require that much acrylic but I kept making new discoveries on why this part won't fit and had to edit and cut them out again. The wood I stole from the dumpster but I imagine can be easily obtained for about 20USD or dumspter dived for it.
Update June 6th: Alright I just came back from an unexpected but awesome 19 day trip in China for the regional Burning Man (by the which, I honestly think is the best regional I've been to so far so I highly recommend it wholeheartedly and will see you there next year) and came back on Monday. And I haven't done a single thing for Fabacademy during the time I was there other than visit the Shanghai Fablabs, which was in of which really cool to see and meet the lovely people there, but non productive. So in conclusion I decided to choose the simplest final project idea I had thought of out of the 3 I had. A kick ass computer case for my kickass CNC desk.
I wanted to build a custom computer case that is see-thur, so I can totally nerd out, and also add some LEDs to make it even nerdier. I would use the lasercutter or CNC milling machine to cut out the walls and base of the case, utilize 3D printing to create holders/fittings for the computer components, add a LED strip to highlight the inside of the transparent case, include a heat sensor to monitor the internal temperature, and top it off which some additional cosmetics like custom vinyl stickers or manual fan controls. I already knew how to put together a computer and had some leftover parts, and by using the previously learned processes I can utilize them into my final project.
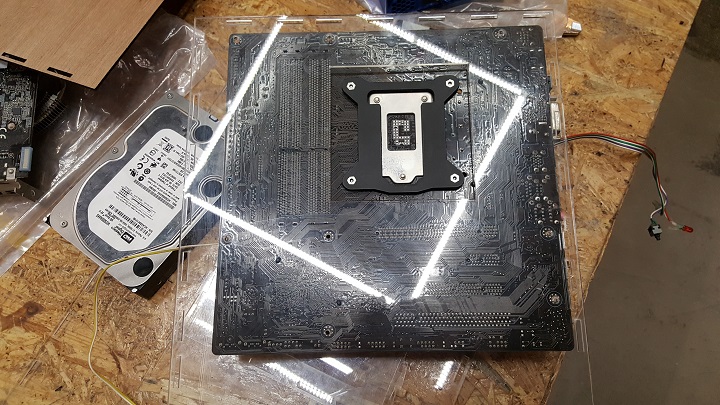
I designed the case in Fusion 360, using a standard micro ATX motherboard size for the screw holes and IO panel size/location. I increased the length a bit to accomodate the PSU and then added vents on top and bottom of the case, the one on top for a dedicated outflow fan.

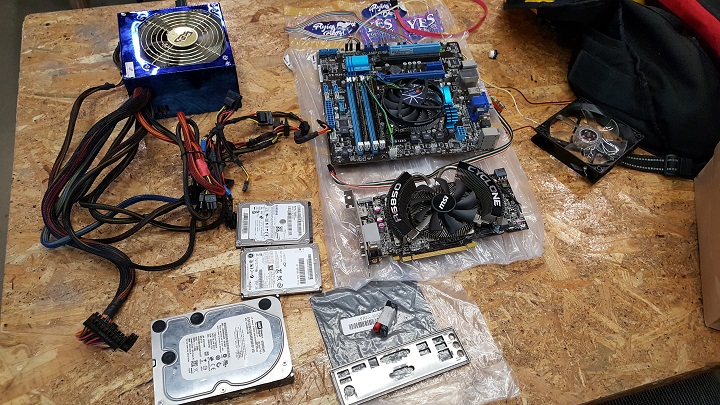
For the components of the PC, I'm using some old parts I had lying around: Asus P8Z-77m mobo, MSI cyclone R6850 1GB GPU, some random HDDs, 2 4GB ram sticks, an FSP epsilion 600w PSU, and random stuff like a 120mm fan and a controller board for the LED and On/Off switches which I will make.
I cut out the parts in acrylic first to see how it would fit and if all the slots and screw holes are in the correct position. Unfortunately but expectedly I made a few mistakes after wasting a few more panels and valuable laser cutter time, I made an acceptable press fit case. I added some filter thingies on the ventilation ports as well, and am considering adding a living hinge to expand from a simple box shape design and since a living hinge will allow more ventilation due to its natural characteristic. Also its super cool looking.
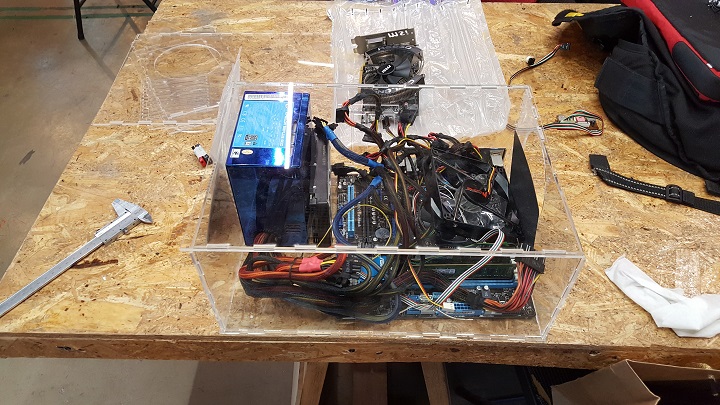
Mixing acrylic and wood together prototype.

There is still a huge problem with cable management where I need to make it clean and functional and yet not block the fans for airflow. I also need to get screws and install 3D printed HDD bay, add LEDs, control panel, etc. I spent a few days considering which final project to do, spent the rest of the week building a prototype to see if its feasibility and the minor but important details of the screw locations and the fit of the components, and next week will be the actual build and documentation of the build. I will have both additive(3D print of my SSD drive holder of my original design) and subtractive(CNC and laser cut) processes.