Week 13 April 19th: Molding and Casting
How to make your life easier
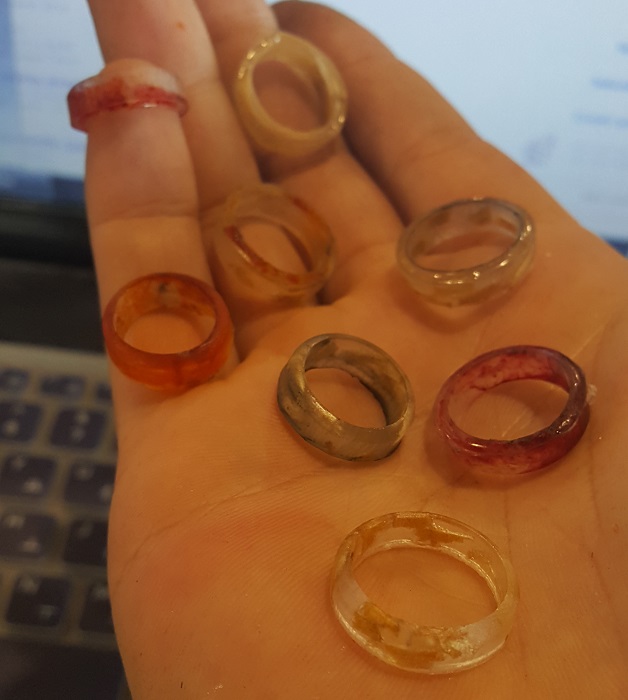
Before the FabAcademy, I used to make resin wood rings just cuz someone showed me some online and at most times I realize, I can probably make that. So I did.
However the whole process involves a great deal of time and dedication and muttering under your breath over and over 'why am I doing this, oh god please, I can feel the epoxy particles clogging my lungs, my fingers are dying' for hours as you sand down dozens of rings of which only 80 percent at best are good to keep. So Edu one day saw me and said, why not make molds? Which then I started to superglue two pieces of leftover acrylic together as ghetto molds while Edu shook his head watching me with an aura of annoyance and futility of my effective yet nonmodular ghetto way of doing things. But now that's all changed!(maybe not the annoyance as I continue to find new ways to unengineer things as I learn new things in the course)
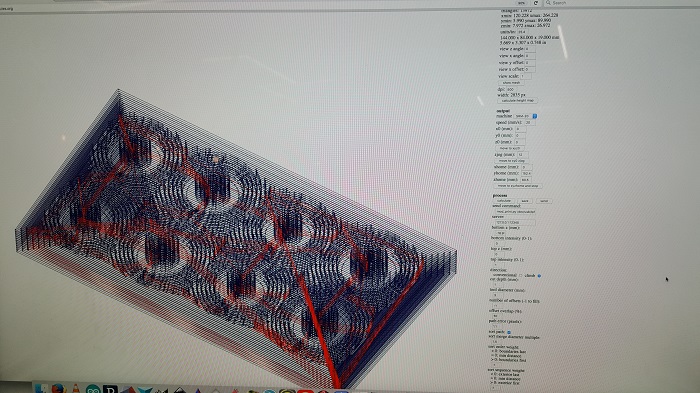
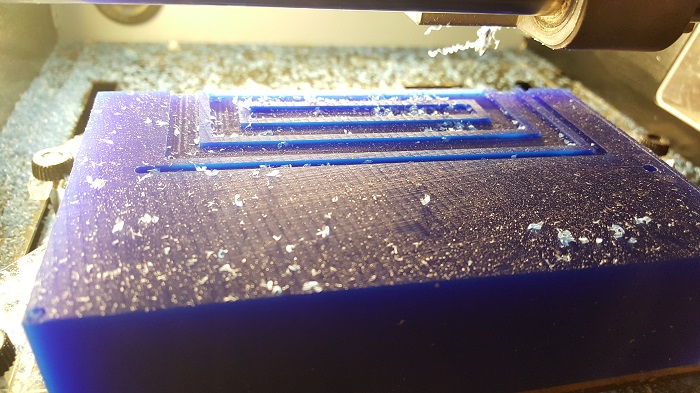
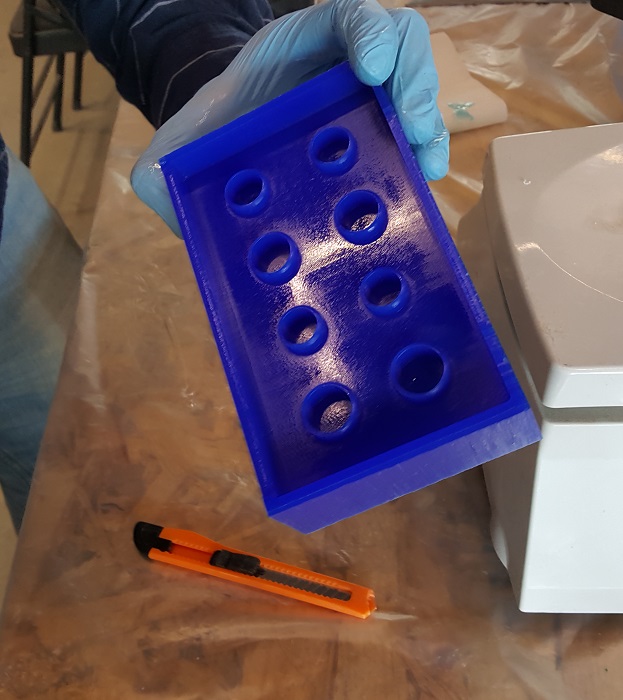
So instead of making blocks of things to carve a hole and then match the finger size and then grinding down all the edges, I can make a simple ring in one go. I modeled 8 rings with filleted edges on Fusion360 and then tried cutting them on the roland mill and used a 3mm mill at 20mm/s on 1mm depths layers to cut through the wax block(Genuine ferris File-A-Wax blue block, highly reccomended as you can even recycle them more than 7 times to resue them). However when I checked the cut the whole body seemed to have been displaced a few centimeters. I tried over double checking the settings but couldn't figure it out. So I just measured the distance it was displaced by and moved the y-axis by -38.5mm on fabmodules and it worked. Later I found out that fabmodules doesn't reset the origin that was set originally when designing in Fusion360, so it kept moving the origin. But hey, it came out fine so I can't complain. After that I switched to a smaller ball ended mill bit with a 90% intersection overlap on the same displaced origin for the second final cut and got the final wax mold.
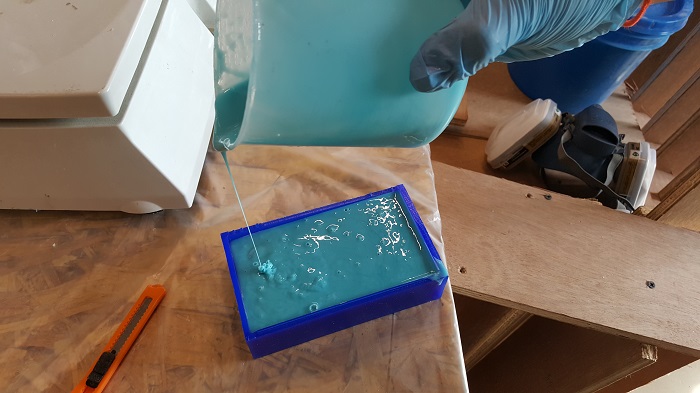
After the wax mold was cut, I sprayed some Easy Silicon Evac spray release agent to the mold and then mixed a batch of two part(checked datasheet and found it was a 1:1 by volume mix, mix time of 6 minutes and setting time of 30 minutes) Smooth-Sil platinum silicon rubber. Taking care not make any air bubbles during the pour in the inside the ring holes and pouring in the thinnest line possible, I poured at into slanted wax block from bottom to top and let it set while listening to Katy Perry's Hot and Cold 12 times and it came out very smooth and consistent.
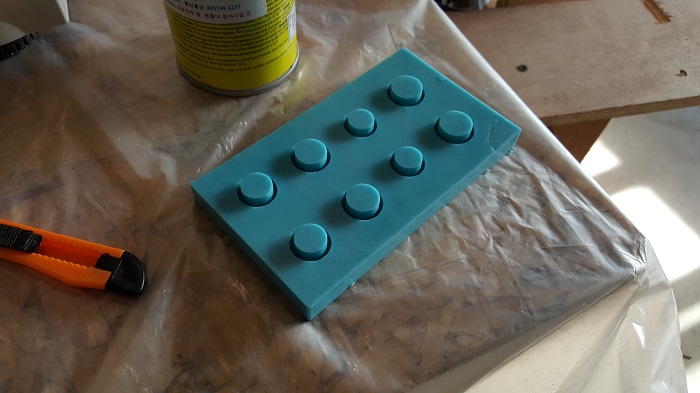
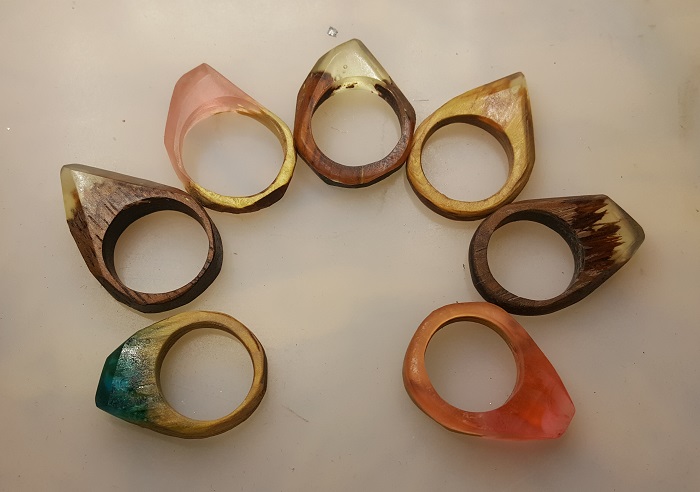
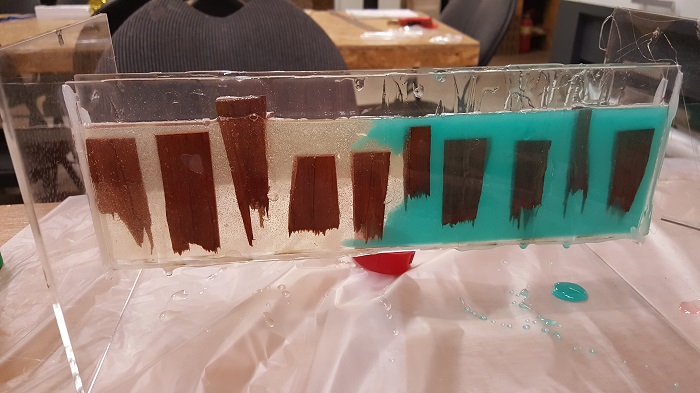
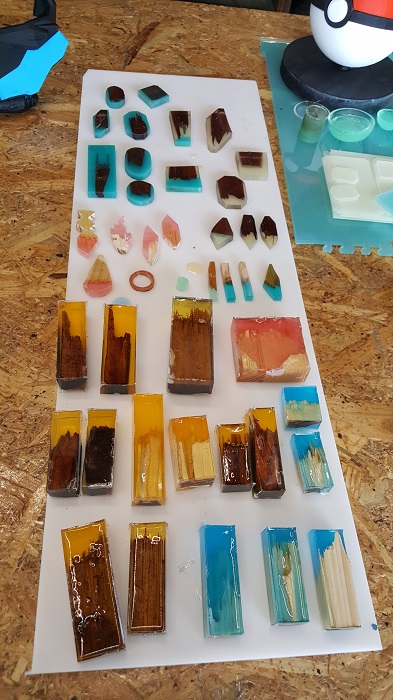
I first chose urethane hyper performance two part epoxy that sets in 30 minutes to cast a prototype for the rings. After seeing an uniform and useable example I then tried crystal jewelers epoxy and I added some colour pigment, luminescent powder for glow in the dark, and also some wood shavings to give it a bit more character and let it set overnight. I still need to shave a few bumps and buff it to a shine, but it came out far more better than I thought it would and I can easily make hundred more if I wanted to with a variety of inserts so I plan to next time make a double side mold with injection molding.
Download links: Mould .stl file