Molding and Casting
19.4.17Task: Design a 3D mould, machine it, and cast parts from it.
Modling and casting are the two process involved in many of the real world manufacturing process. Molding means the making the mold, which we can use to have the solid frame to make the cast the things. We can make the multiple things at a faster rate if we use molding and casting process rather than the rapid fabrication techniques like 3D printing and laser cutting. Modling and casting is very essential step for brining down the cost and lead time of the products.
So now our task is to create 3 things!
1. Create the Mould (Either via 3D printing or via Laser/ CNC Machine).
2. Create the composite (By mixing two or more constituent materials).
3. Apply composite on to the Mould and create the object.
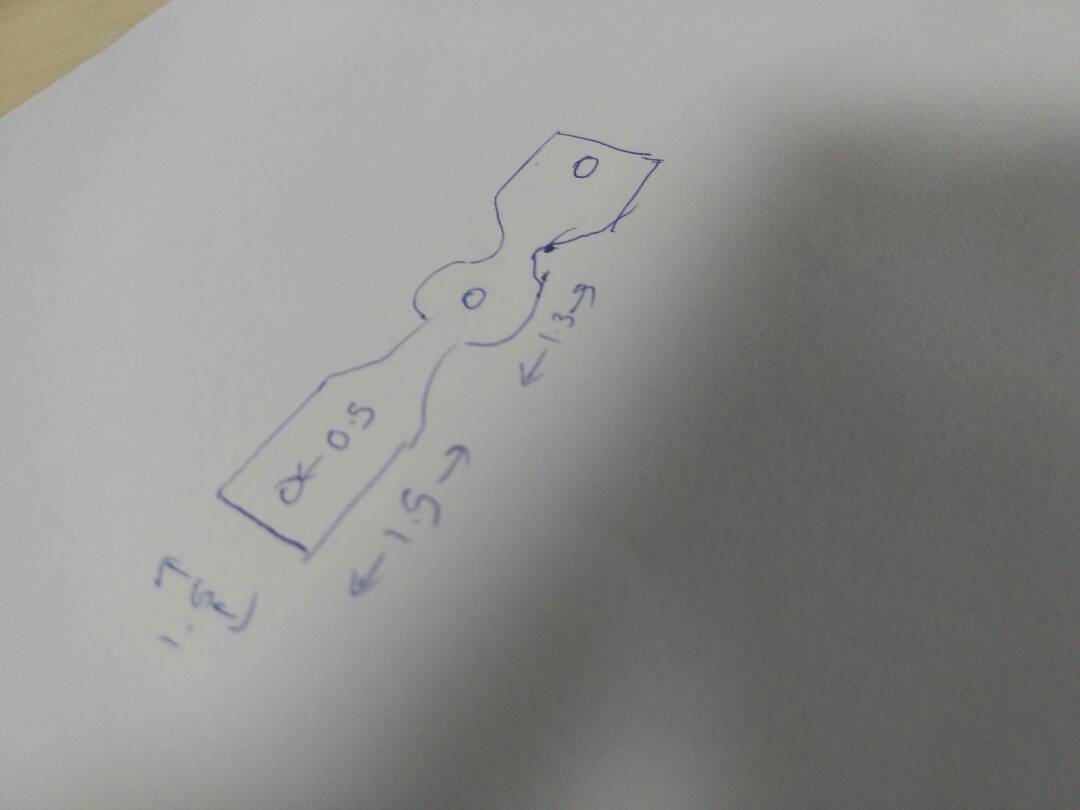
Step 1 : Create Sketch of the design. I wanted to create something small and useful. so I decided to create the pen/pencil holder for me. This is the sketch of it :
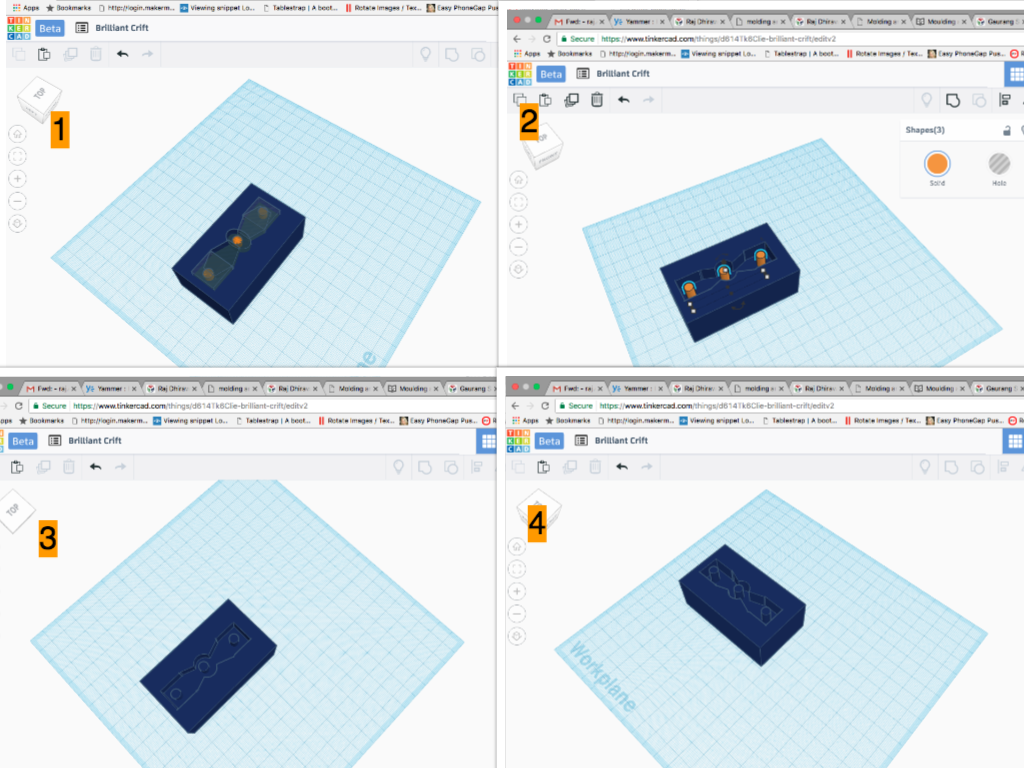
Step 2 : Created design in Tinkercad software.
Due to the easiness and simplicity as well as rapid design creation capability of Tinkercad.com it is becoming my favorite choice. Whenever I want to design less complicated structures. This includes creating 1 Rectangle, 2 Squares, 1 Ellipse, 2 Polygons, 3 circles to complete the design. I have decided to create a simple and effective design to test the assignment objective. After that I exported the design in .STL format.
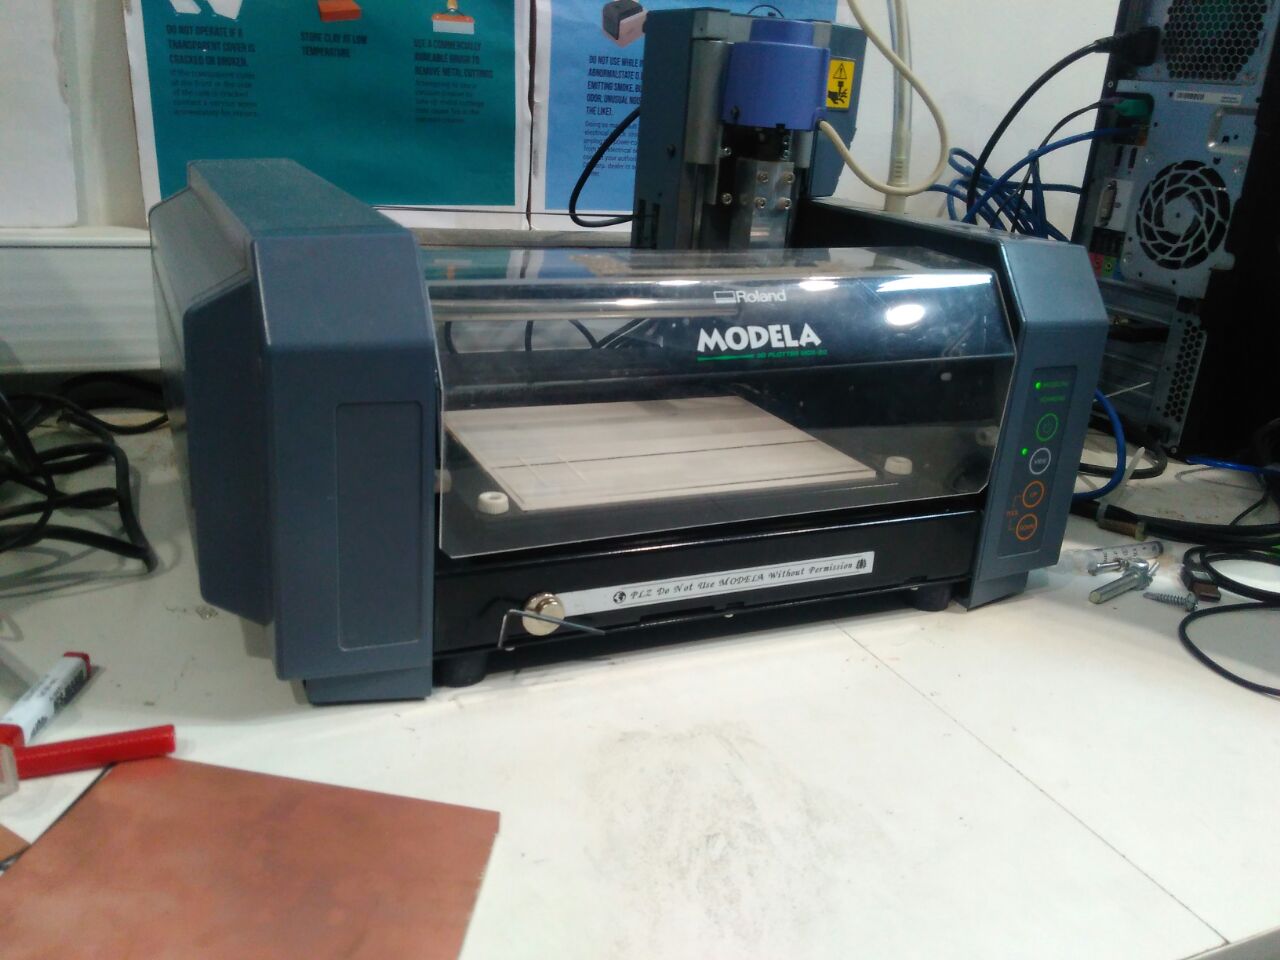
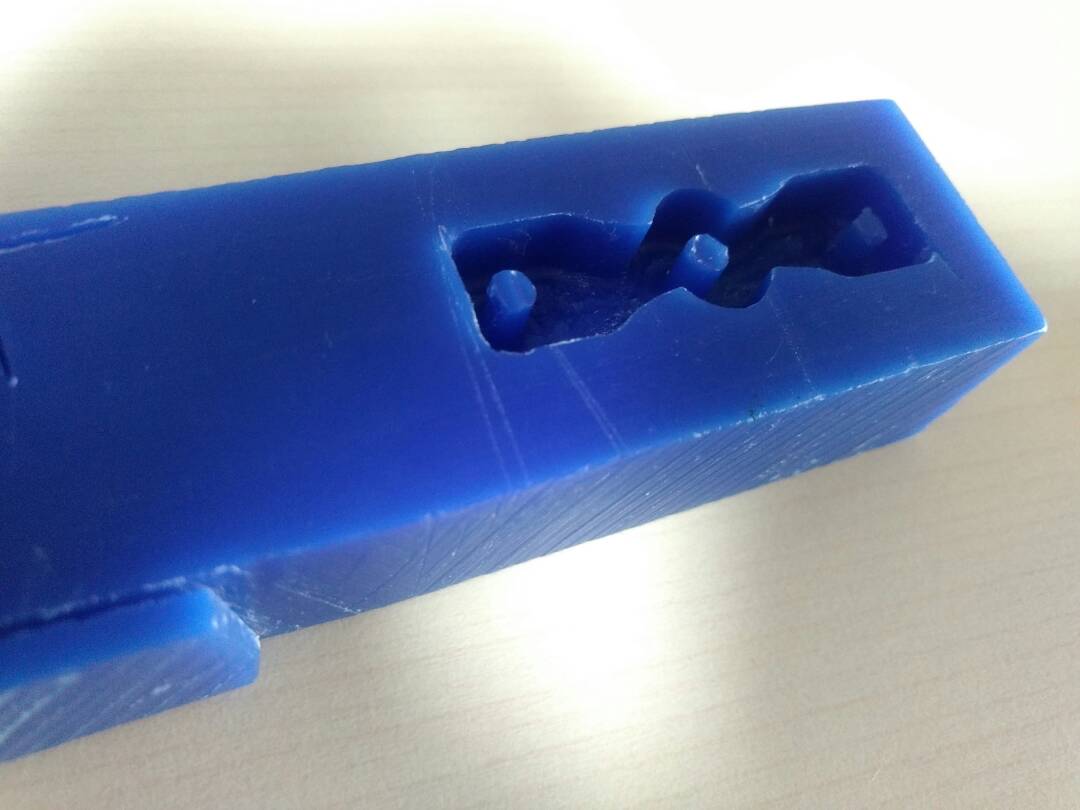
Step 3 : The next step was to crate the mold. I used the wax material for it. Now I have got one wax slab with the dimension of 115mm X 35mm X 25mm. This can accommodate my design. Now next step was to convert the .stl file into .rml file.
For Milling the Wax Mold and create the mold according to the design. For that I have used Fabmodules.
Step 4 :
Composite Preparation :
About the composites :
1. Silicon rubber
2. Hardner
Mixing Ratio :
1. Silicon : 10
2. Hardner : 1
Step 5 : Applying composite on to the Mould.
Step 6 : Removing the Casting.
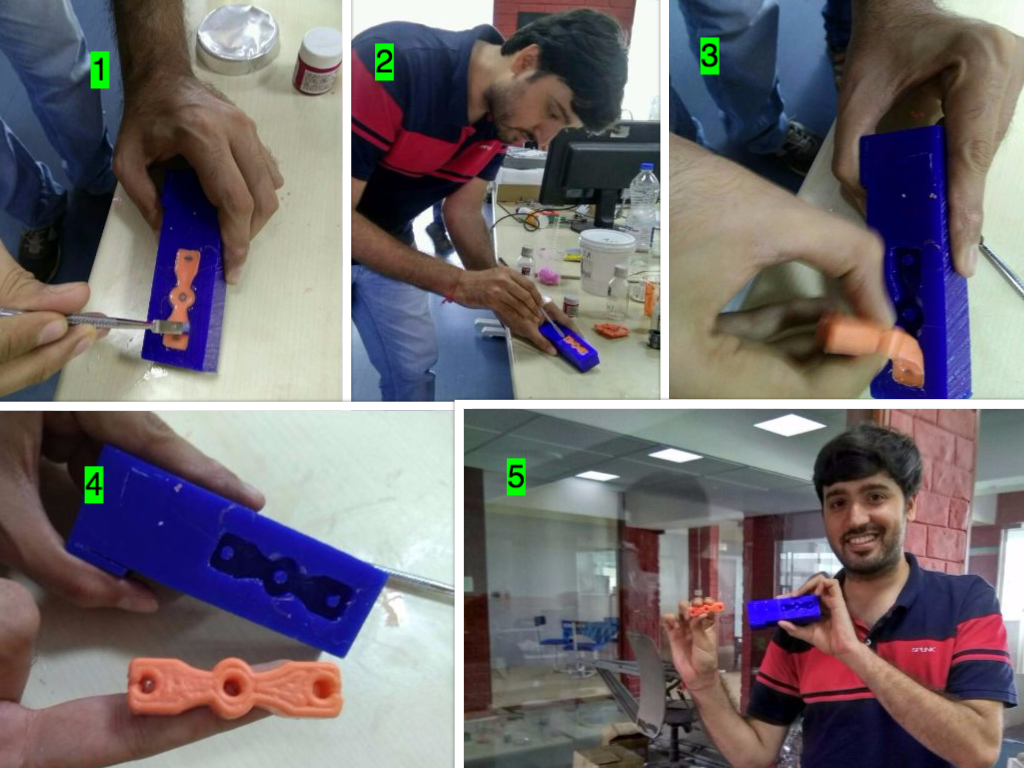
Hero Shots
Download Design Files