Principles And Practices, Project Management
25.1.17Task 1 : Make your own website
Technology used
- HTML
- CSS
- Java Script
Framework used
- Bootstrap
User interface guidelines used
- Material UI
Editor used
- Text Wrangler
Operating System used
- OS X El Capitan
Computer used
- Macbook Pro
As I am from Computer science background I was aware about various technologies and methodologies to create the website. I referred various online tutorials on to learn HTML, CSS, JS etc. One of the best documentation and easy going tutorial I found was www.w3schools.com
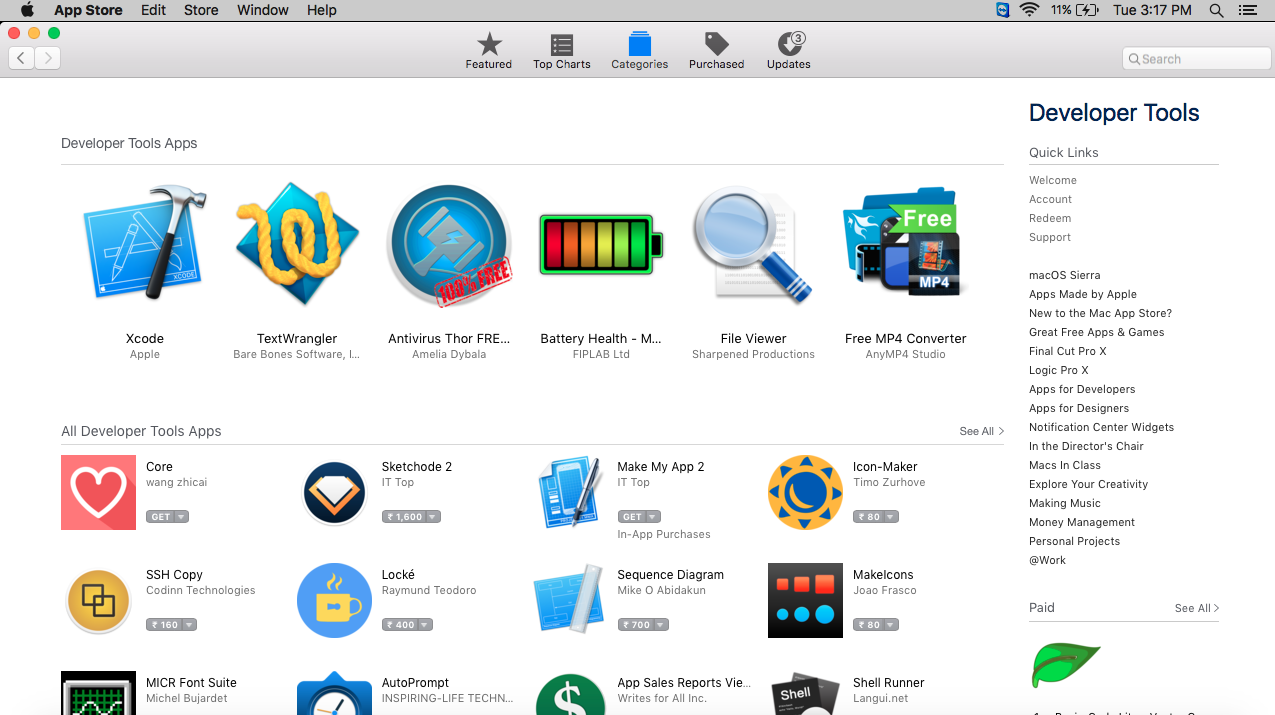
Since I have not done much of the development on MAC OS. I was not aware about the editors to use, so I did search on Apple app store and found Text Wrangler in top code editors app which was free to use.
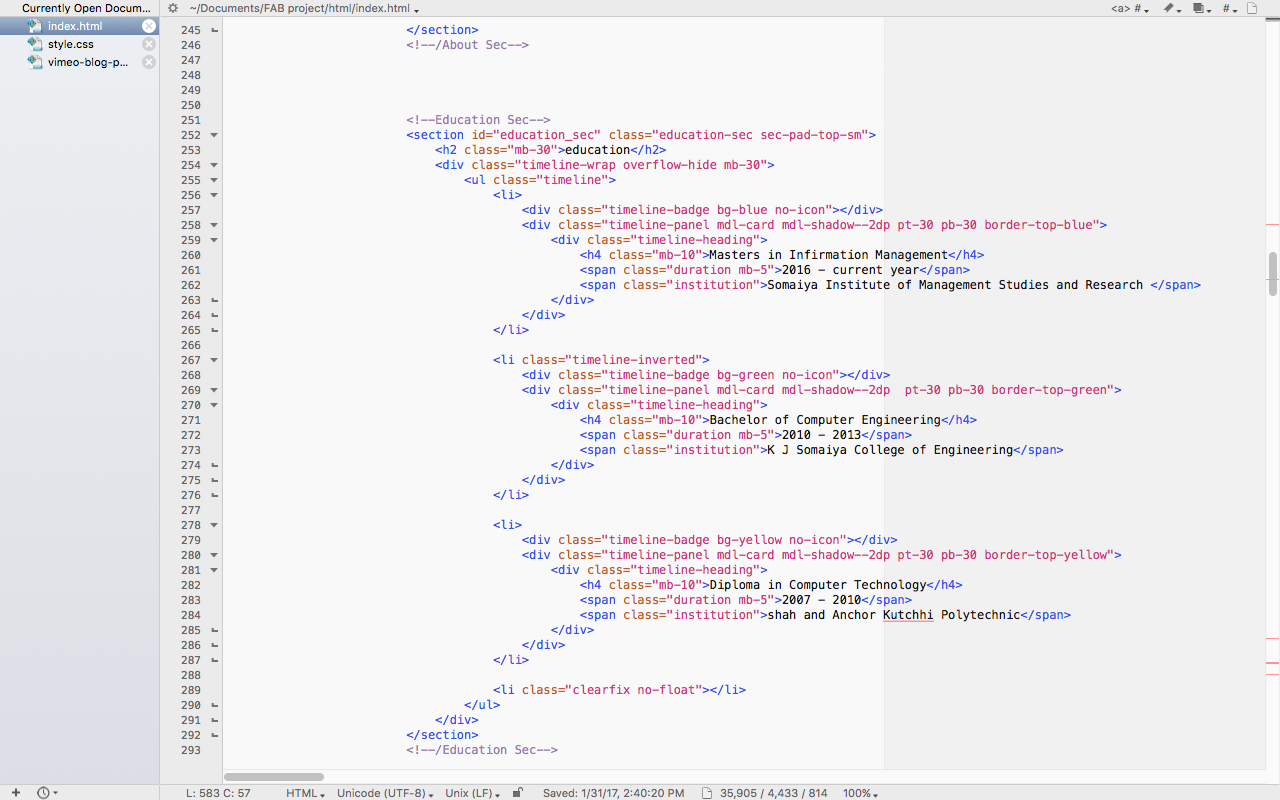
Text Wrangler for code editing purpose as the editor is very easy to use and provide color coding also provide brackets management and line code numbers facility. On the left side it provides the list of files which we are currently editing. So making it easy to switch between the files and also provides SAVE or NOT indicator in order to check whether we have saved our files or not.
Steps to Create website
- Understanding the requirement
- Creating Specifications from the requirement
- Creating design/layout by referring to multiple websites
- Confirming the website layout with local Fablab instructor
- Downloading required softwares and framework files to start the development
- Creating index.html file and creating resources folders like CSS, IMG, JS to store the resource files.
- Creating One more page to write about the first assignment.
Searching on the internet about the good website designs and saw lots of websites for the reference.
Link of website I visited for the reference :
https://themeforest.net
Task 2 : USING GIT
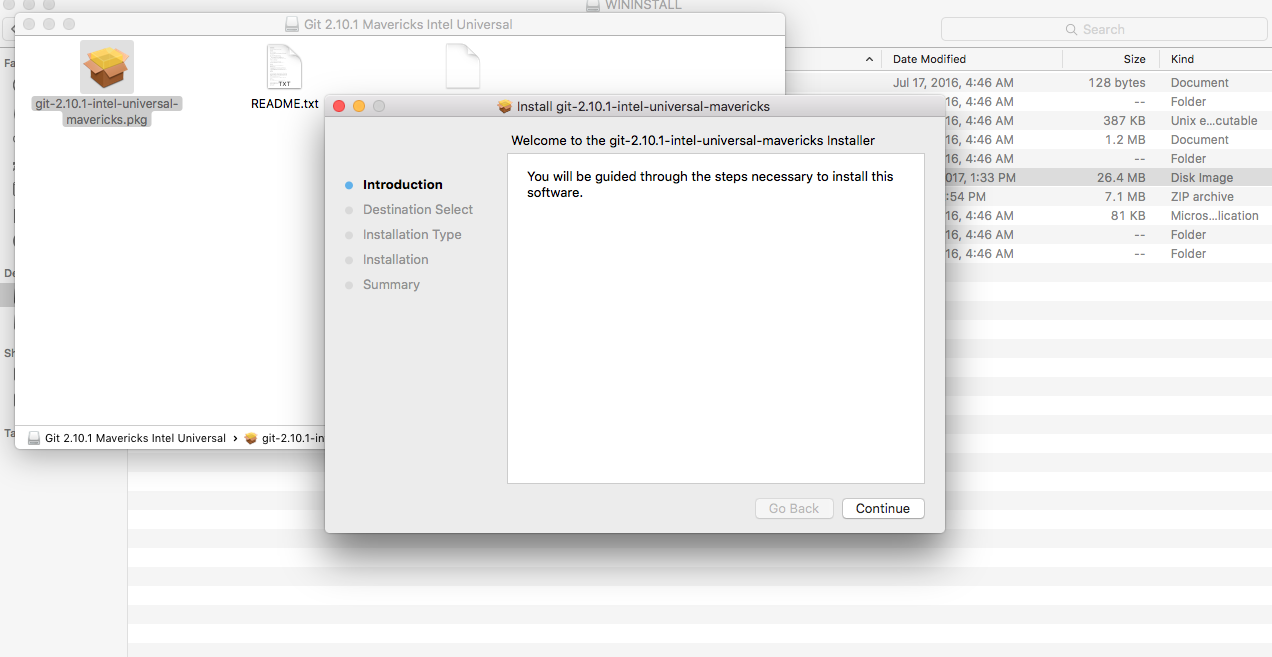
Step 1 : Download git-2.10.1-intel-universal-mavericks.dmg from the github for MAC OS X
Step 2 : To install git, double click on .dmg file
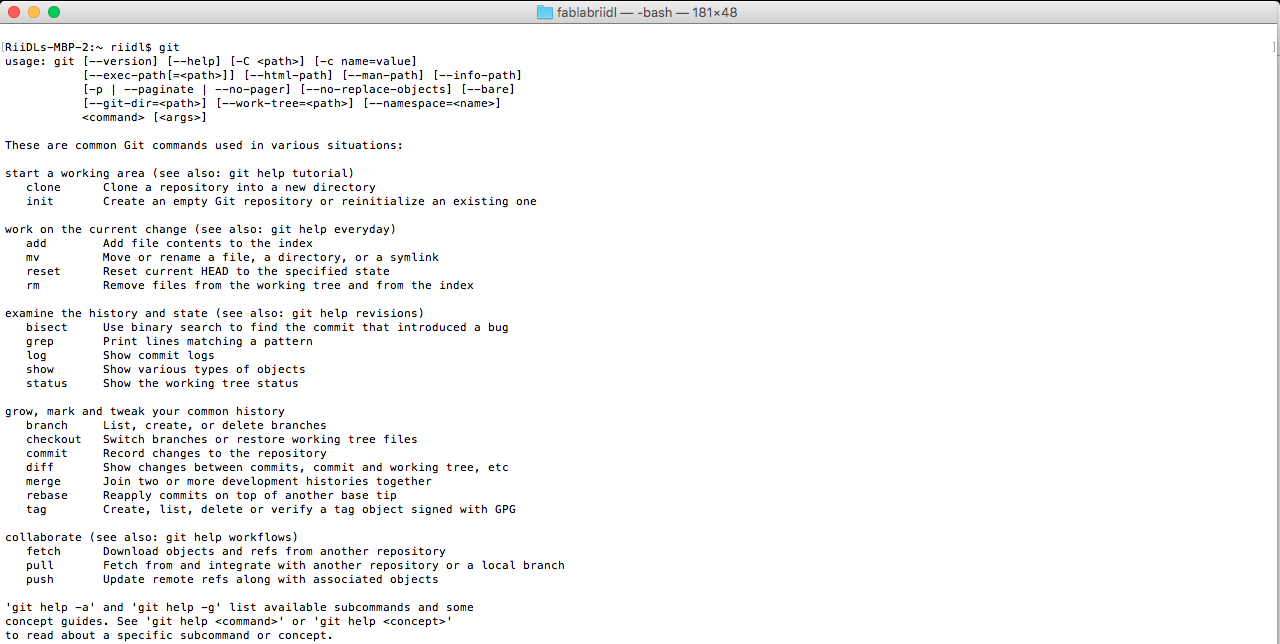
Step 3 : Open the terminal to check the git installation by typing git
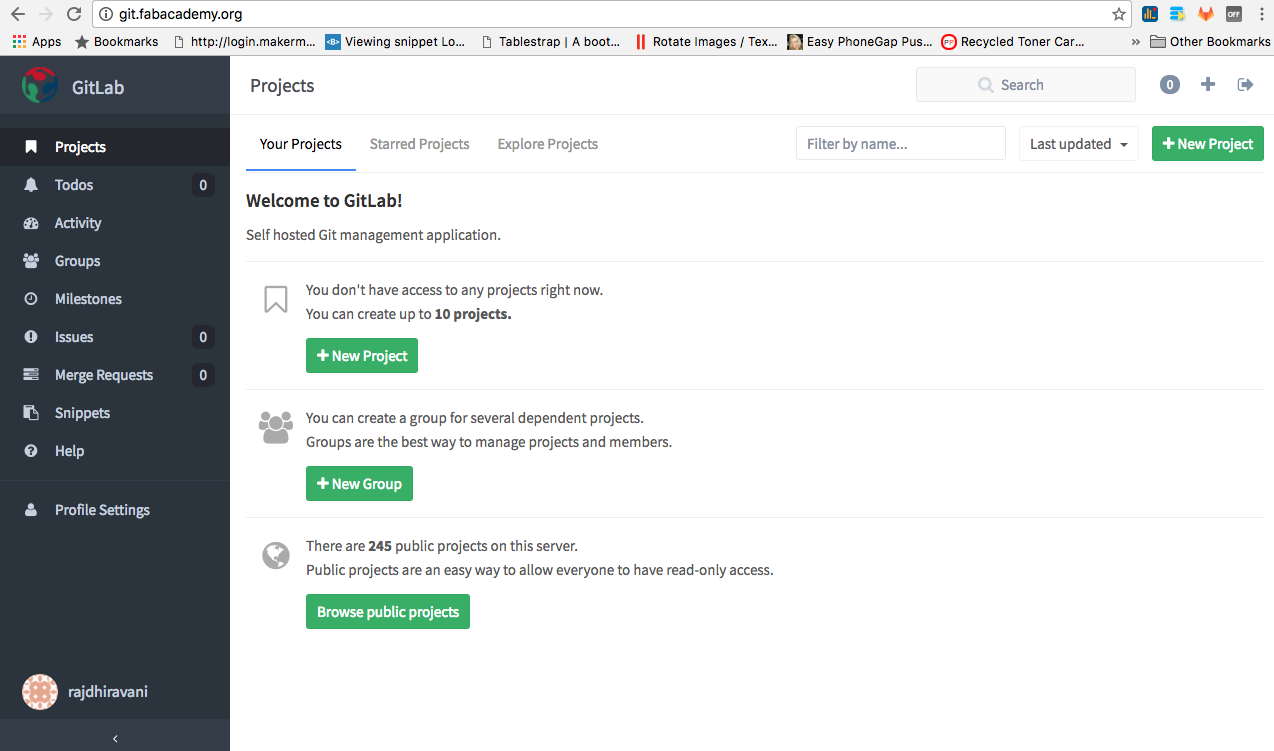
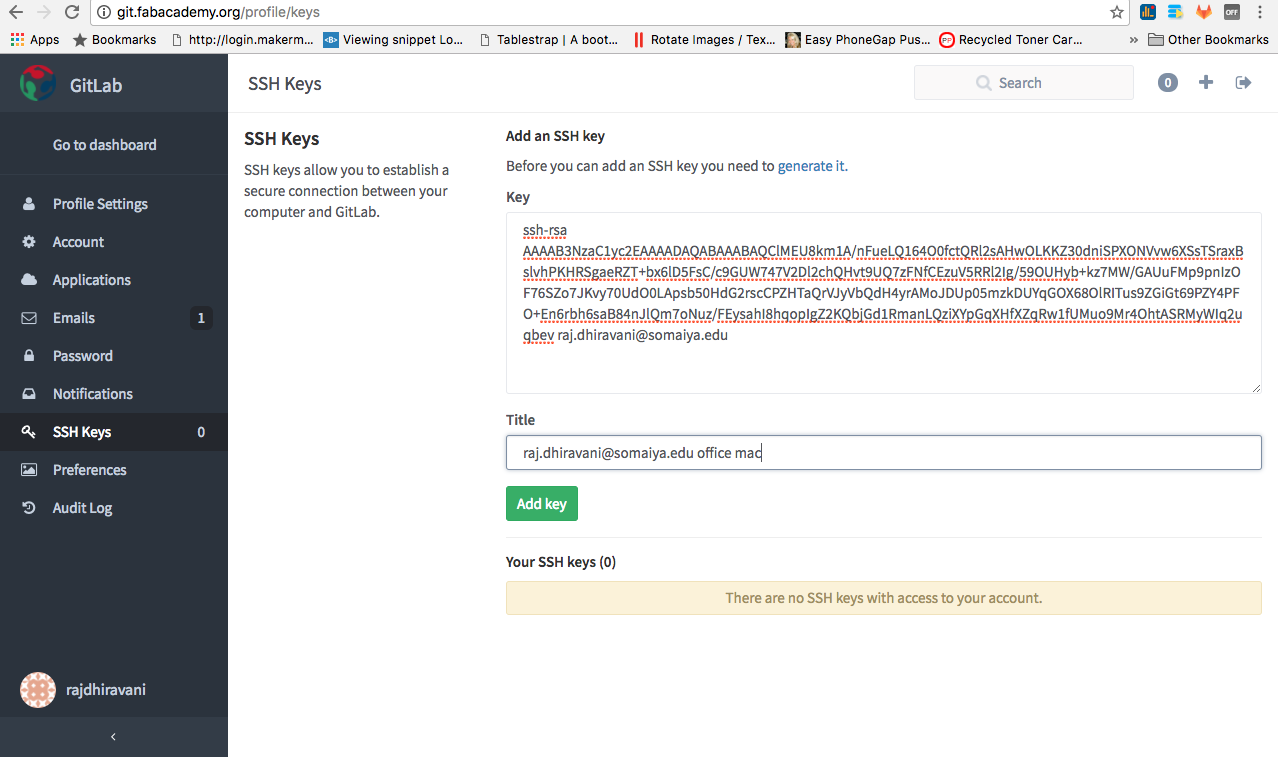
Step 4 : Log on to GitLab. URL : git.fabacademy.org
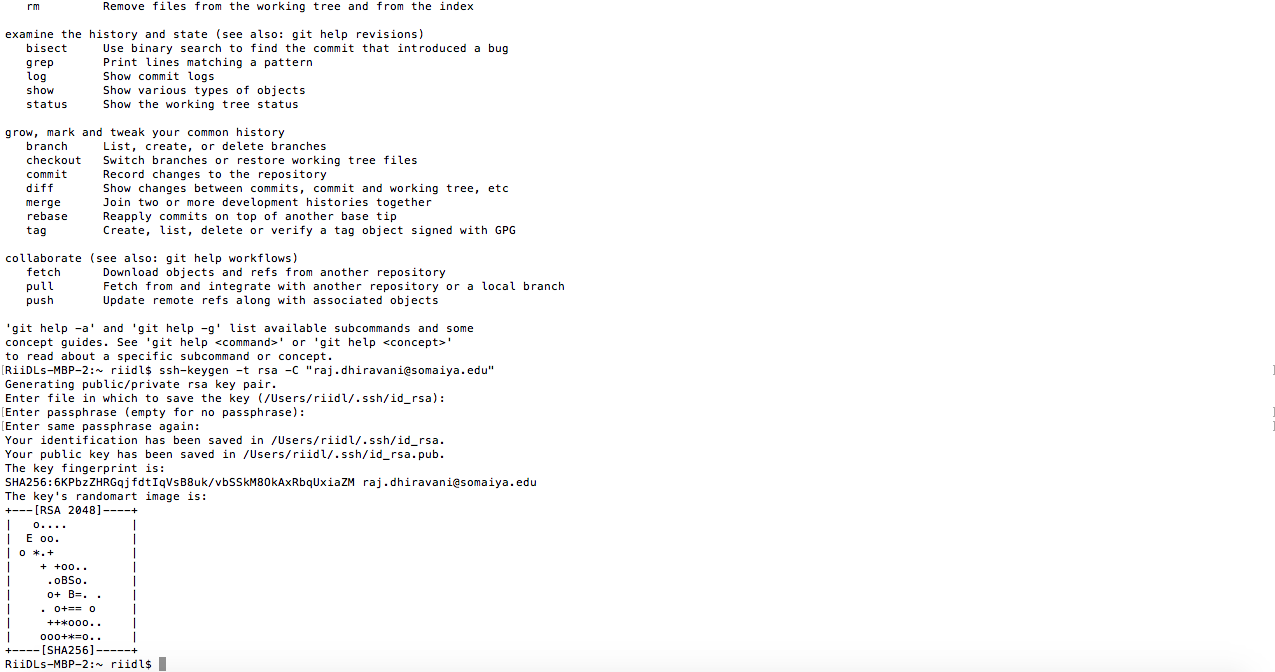
Step 5 : Create SSH key to connect with git, following the instructions on git.fabacademy.org
ssh-keygen -t rsa -C "raj.dhiravani@somaiya.edu"
Step 6 : Copy and paste the key on Gitlab (git.fabacademy.org)
Step 7 : Clone the repository copy the clone address from Gitlab
git clone git@git.fabacademy.org:fabacademy2017/fablabriidl.git
Step 8 : Change the Git configurations
git config --global user.name "Raj"
git config --global user.email "raj.dhiravani@somaiya.edu"
Step 9 : There will be a directory created in the name of your fablab. In my case it was fablabriidl. Copy paste or create html files in that directory under student/"Your roll number" folder.
Step 10 : Follow the basic git workflow. ( Credits - http://beachlab.org/fab2016/repo.html)
cd ~/folder_name # go to the repository folder
git pull # pull other students changes
git add --all # add your changes
git commit -m "message" # write a meaningful message
git push
Task 3 : FINAL PROJECT
Step 1 : Describing the idea of Final project
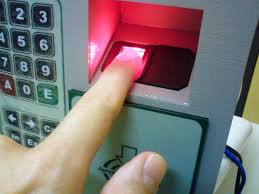
Log Book is very important in a FABLAB to determine the usage of Machines as well as Materials and the no. of hours machines were occupied and by whom.
So I wanted to digitize the system with Machine time slot booking as well as Fingerprint scanner to authorize the person to access the machine.
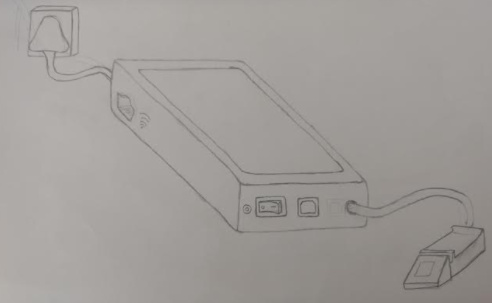
Step 2 : Drawing the Sketch of Final project
Changing the final project
Due to my limited experience of working on Electronic devices, and understanding the complexity of the project and limited time available to work on the assignments as well as final project, I am changing the final project idea.
UPDATED FINAL PROJECT
Problem Statement
Millions of women give birth every year, and many of them will have some kind of pregnancy-related complication. Those who don't get proper prenatal care run the risk that such complications won't be detected or won't be dealt with soon enough. And that can lead to potentially serious consequences for both the mother and her baby.
Of course, this isn't always possible or practical. But the sooner in pregnancy good care begins, the better for the health of both moms and their babies.
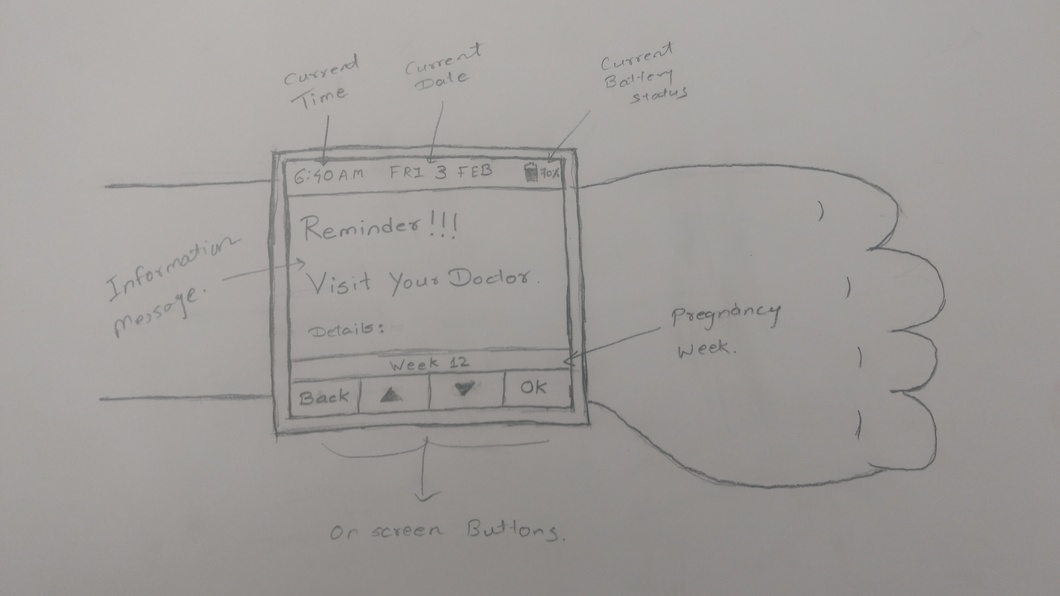
Proposed Solution
A wearable device that will Notify the pregnant women about :
- 1. Periodic checkups
- 2. Diet instructions
- 3. Details about checkups
- 4. Prenatal tests
- 5. Exercise reminder
- 6. Expected Delivery Date (EDD)
Device Description
The device will have the input as a date in which user have to put first day of last menstrual period (LMP).
Input will be taken from the small keypad containing 5 keys. Keys will be UP, DOWN, OK, BACK, RESET.
For the Output, the device will have a screen, vibration and speaker for sound.
The device will operate on the battery and one can charge the battery using Micro USB cable. A group of LEDs will determine the status of the battery.