Assignment 7
14.3.17Computer controlled Machining
Objective of this weeks Assignment
- Make something big!
This assignment is focused on the converting a CAD drawing into a real-life object. The Computer Numeric Control machine (CNC) takes input of design files and materials like wood, wax, acrylic, composites,etc. The output can be assembled to make the functional products. I was thinking about the things that would be fun to use and be interactive.
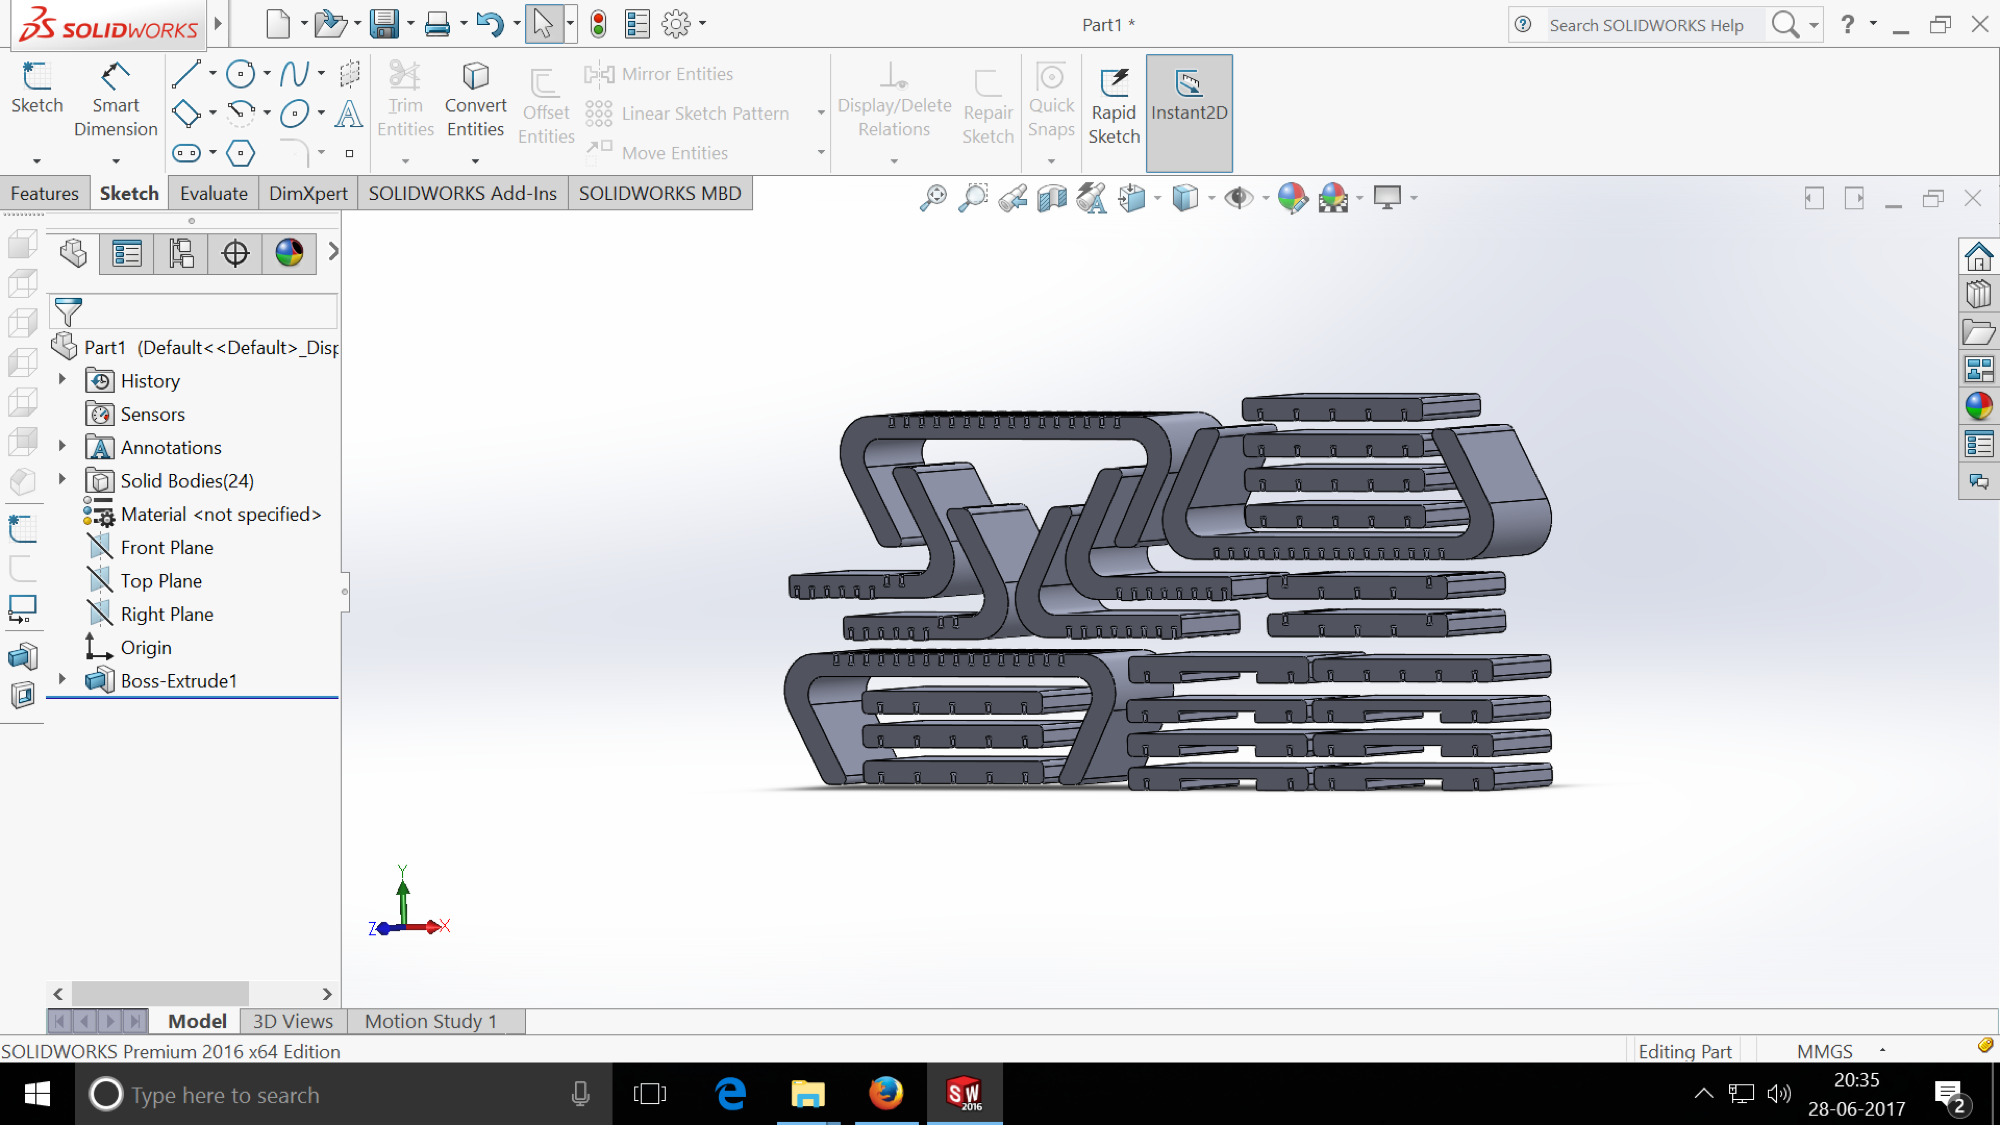
I decided to make two things for this assignment, A table and a harp. I used Solidworks to design the table and quickly started designing.
Dimensions of the table: 100cm x 56cm x 35cm
Thickness of the Plywood = 10mm, Thickness of the MDF = 20mm
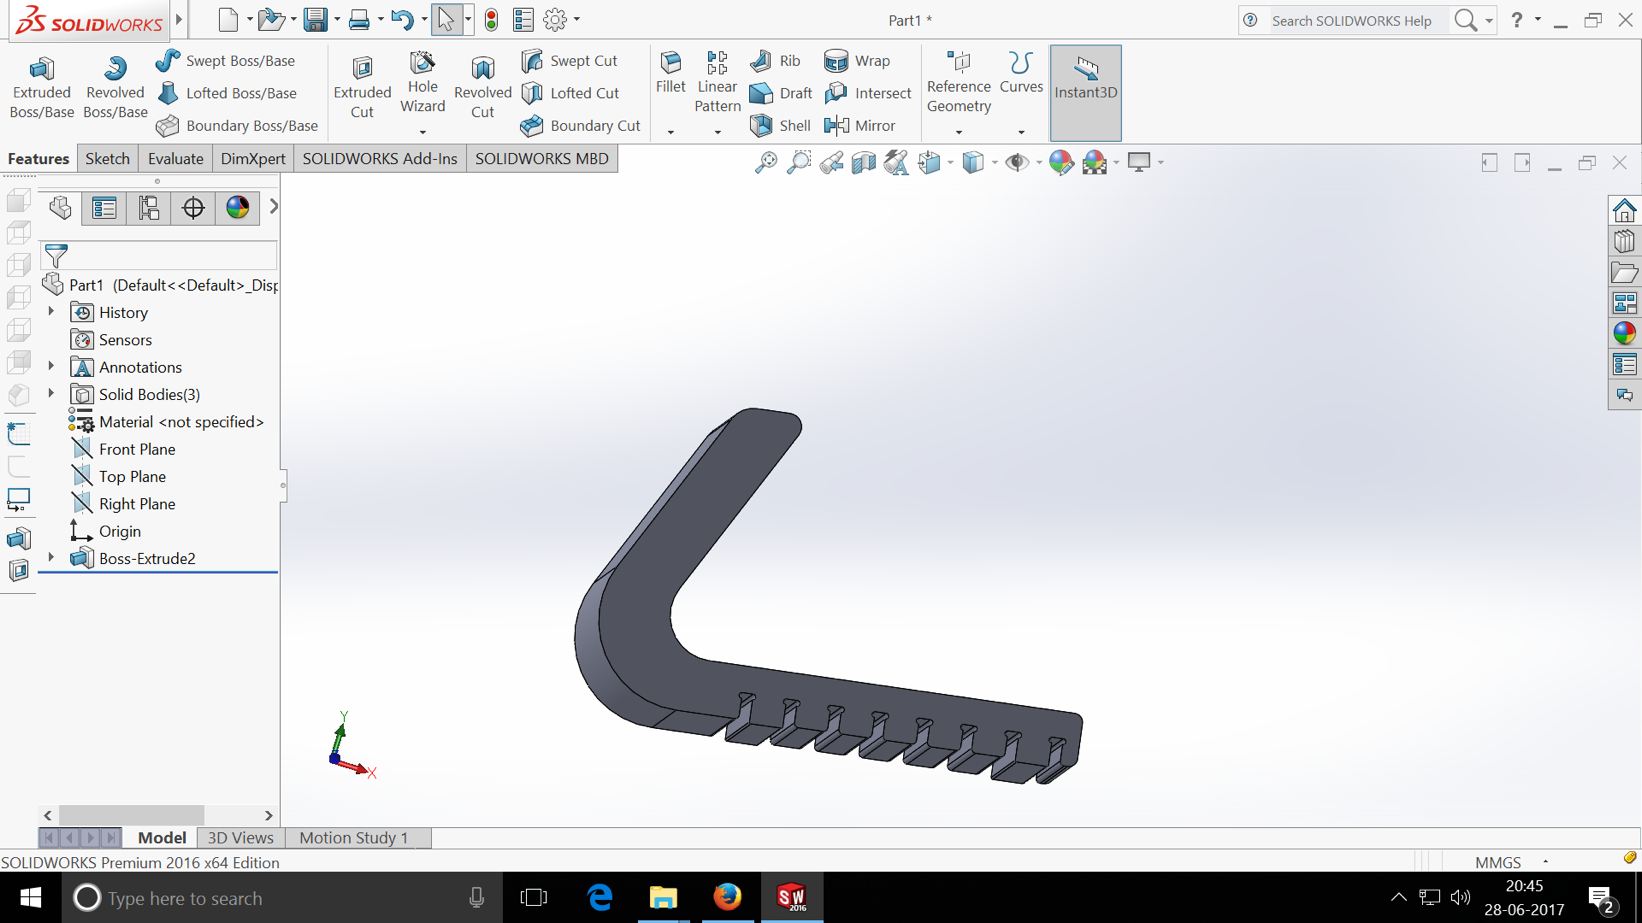
I used various tools from the Solidworks software, which are show in the images below.
You can follow the steps as shown below.
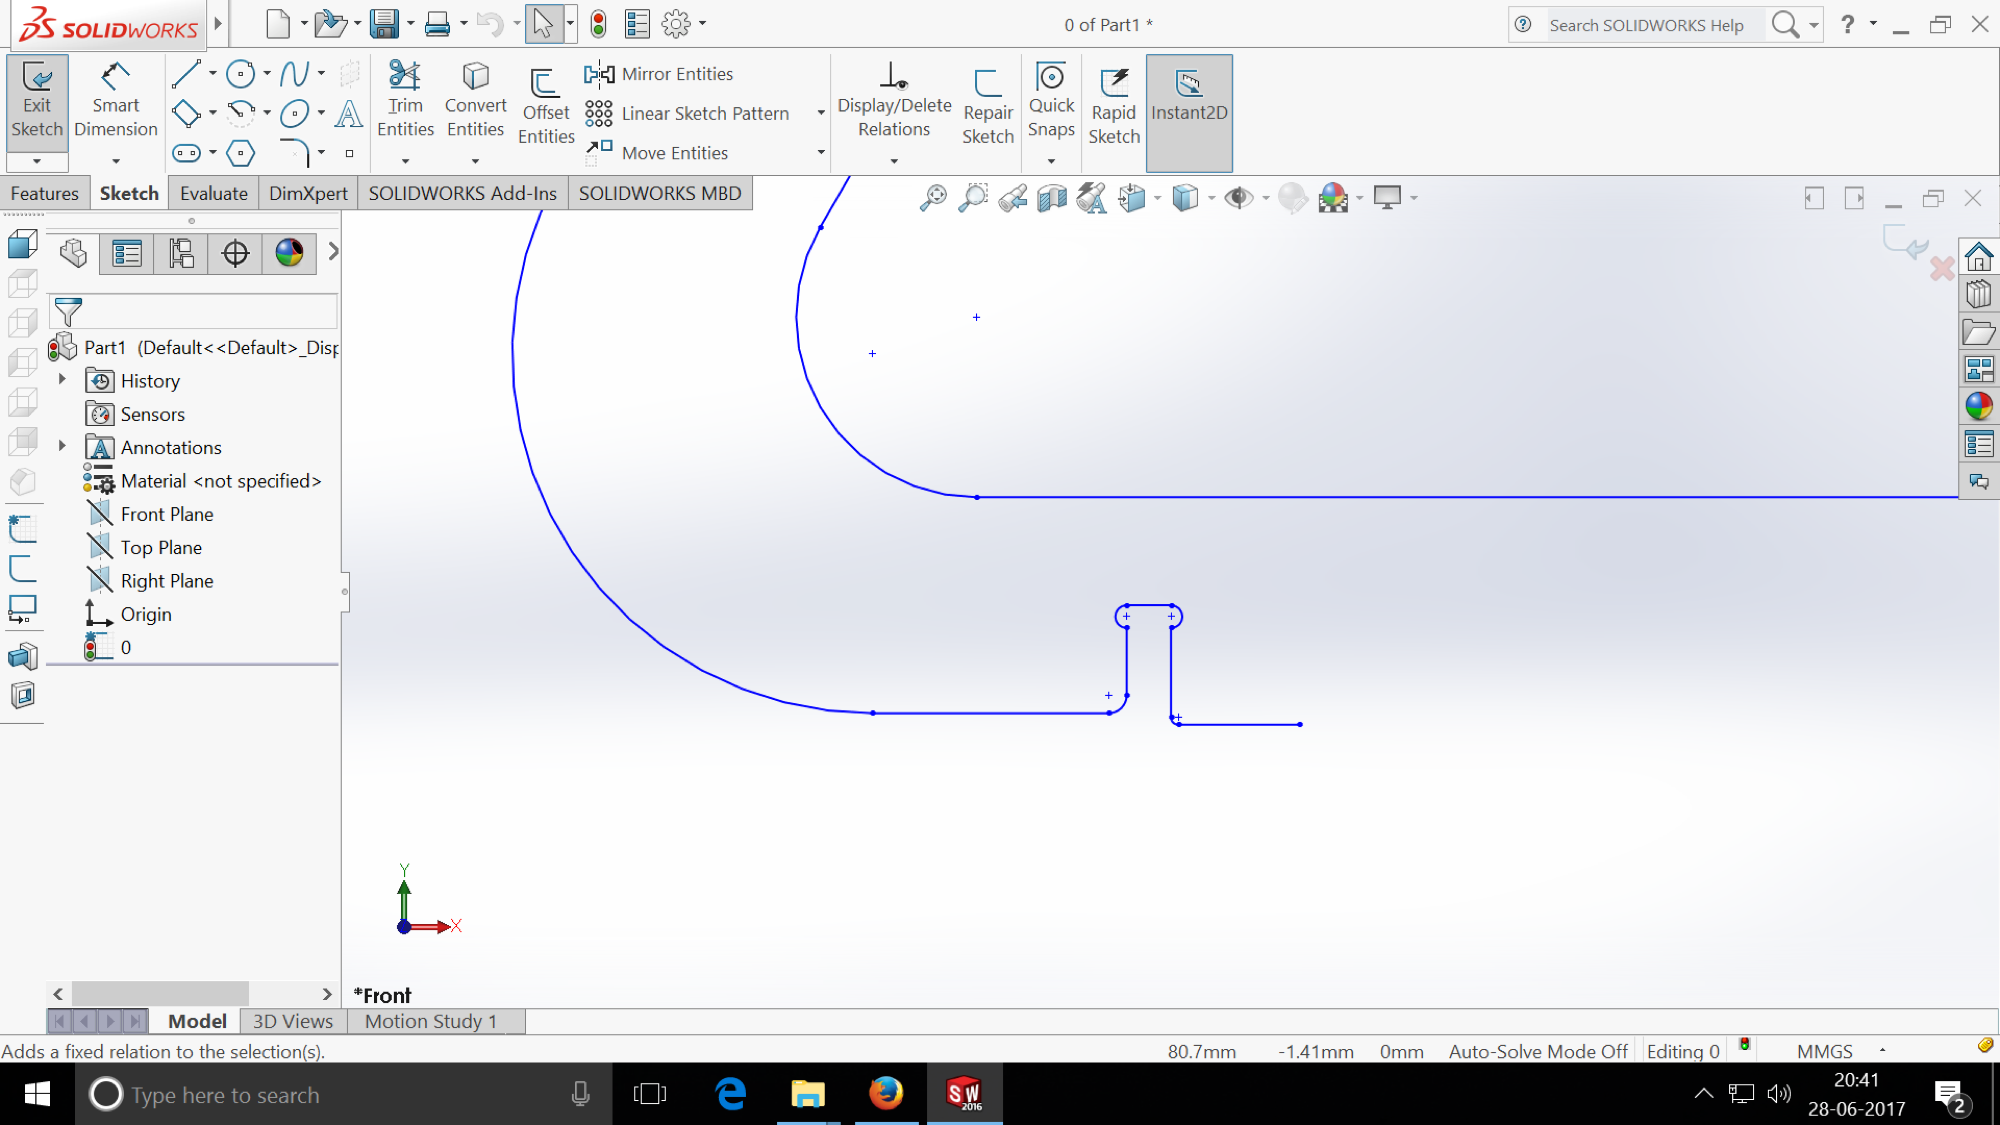
Draw an arc of 20mm radius using the arc tool.
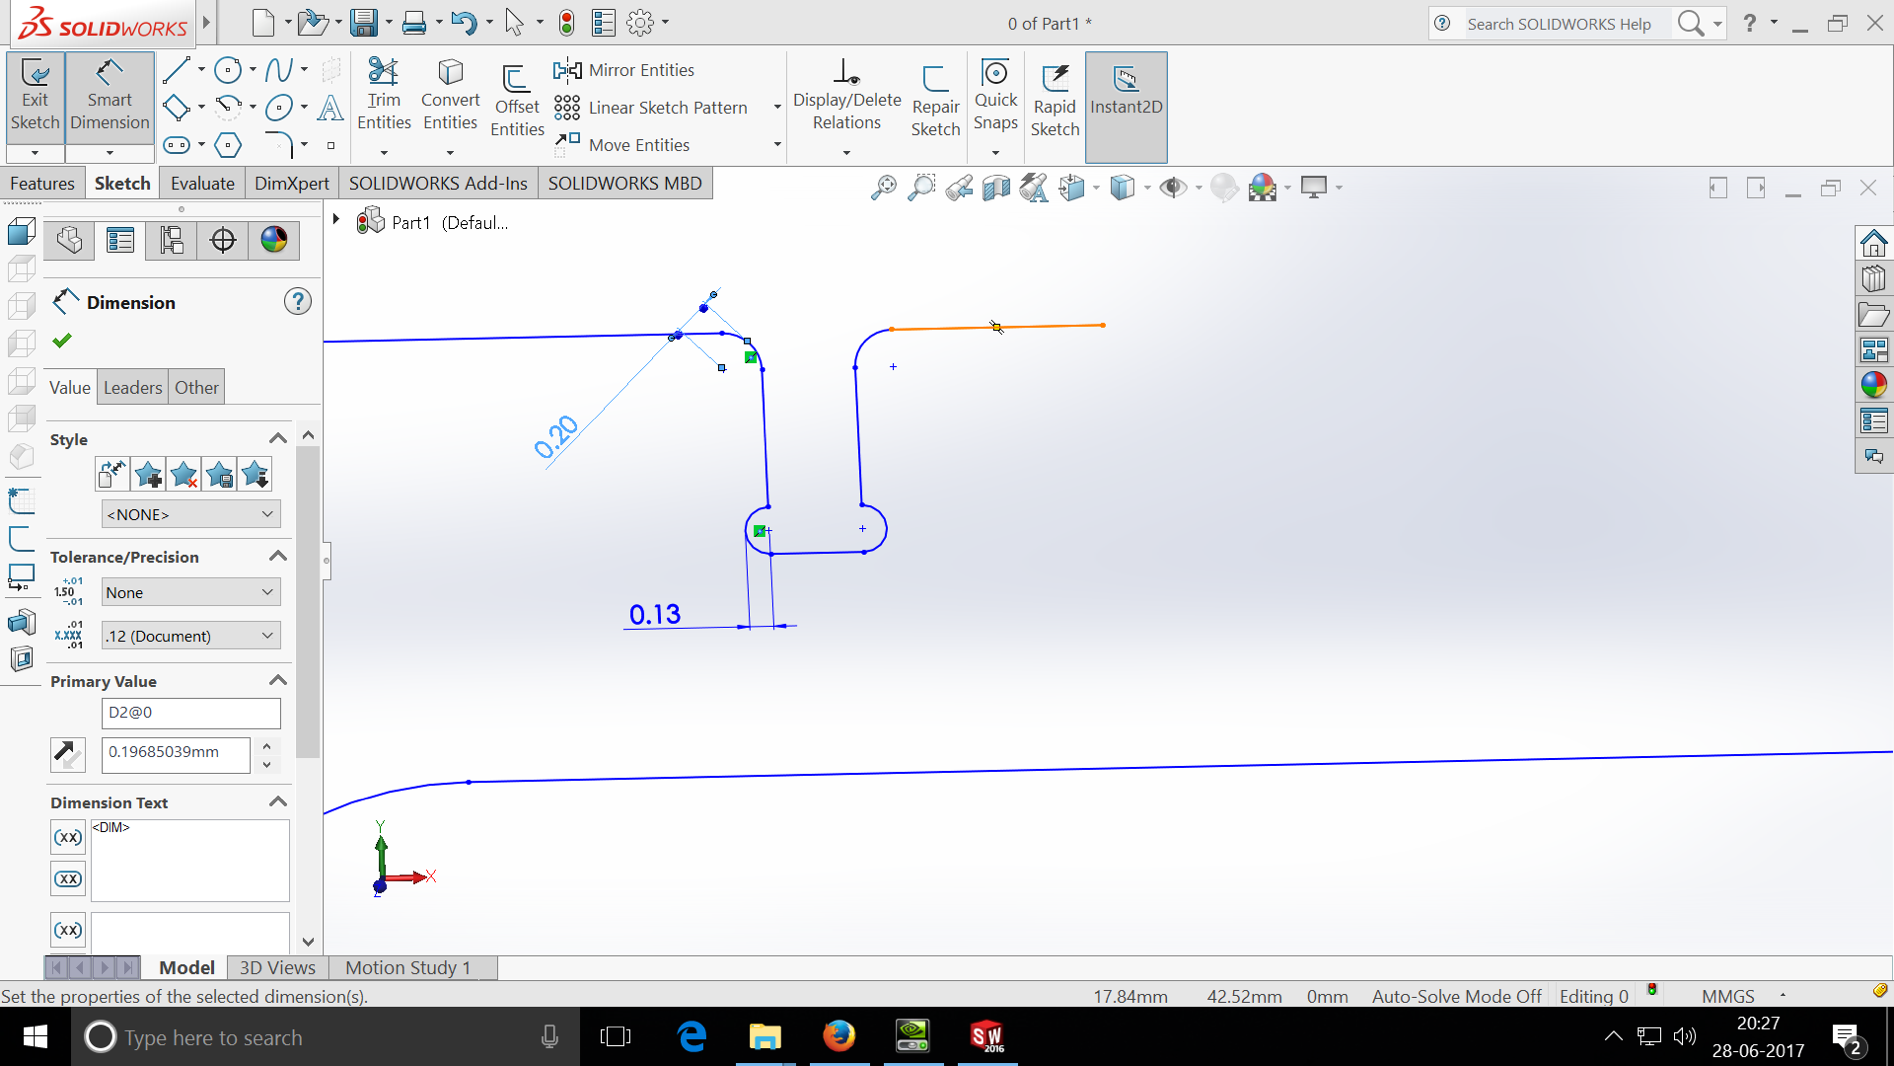
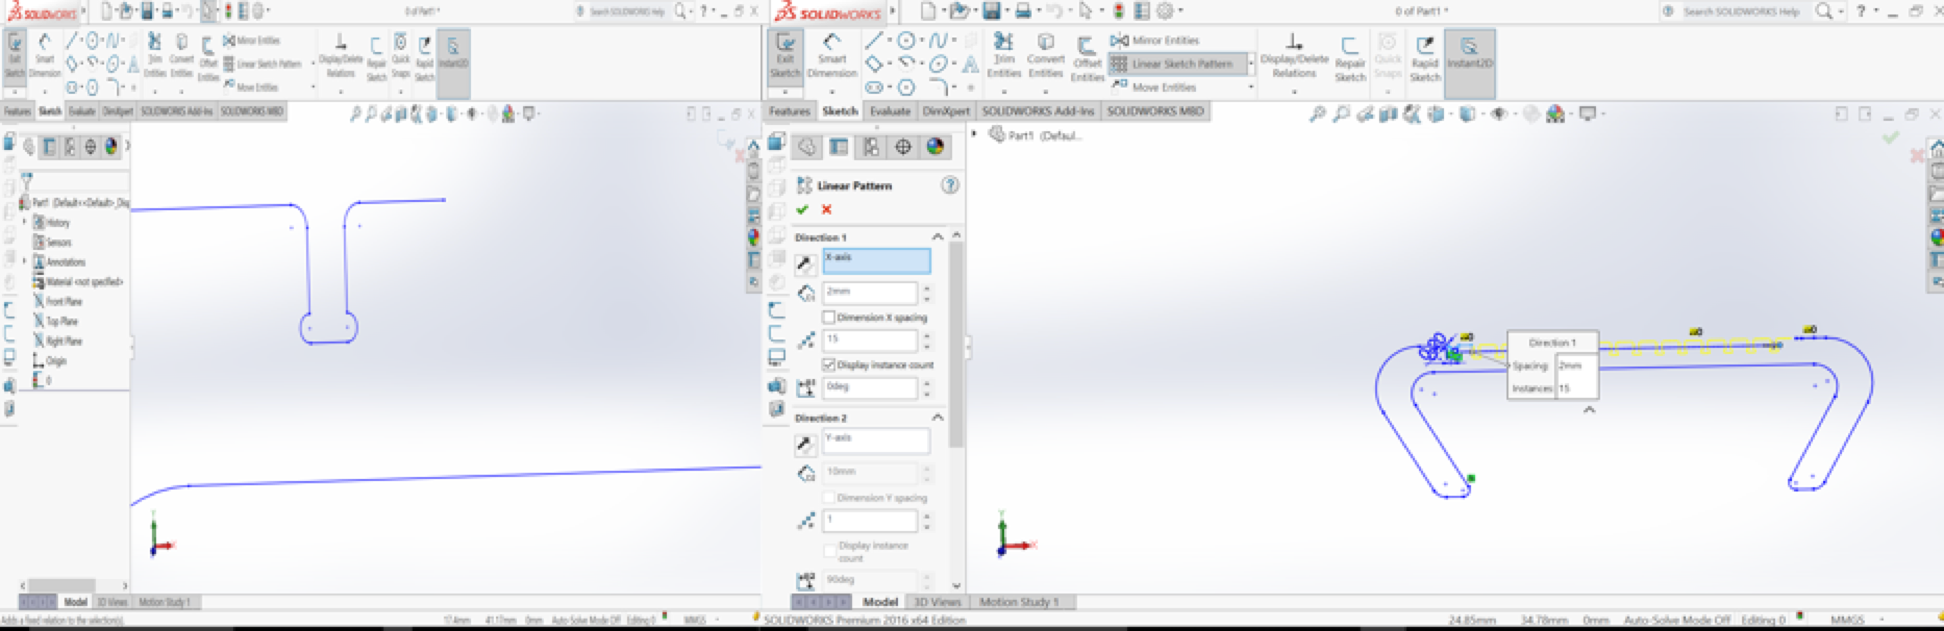
After a single segment is ready, I used the Linear elements tool (choose the linear array). I defined the spacing and the number of elements.
Spacing 10mm.
Iterations 15
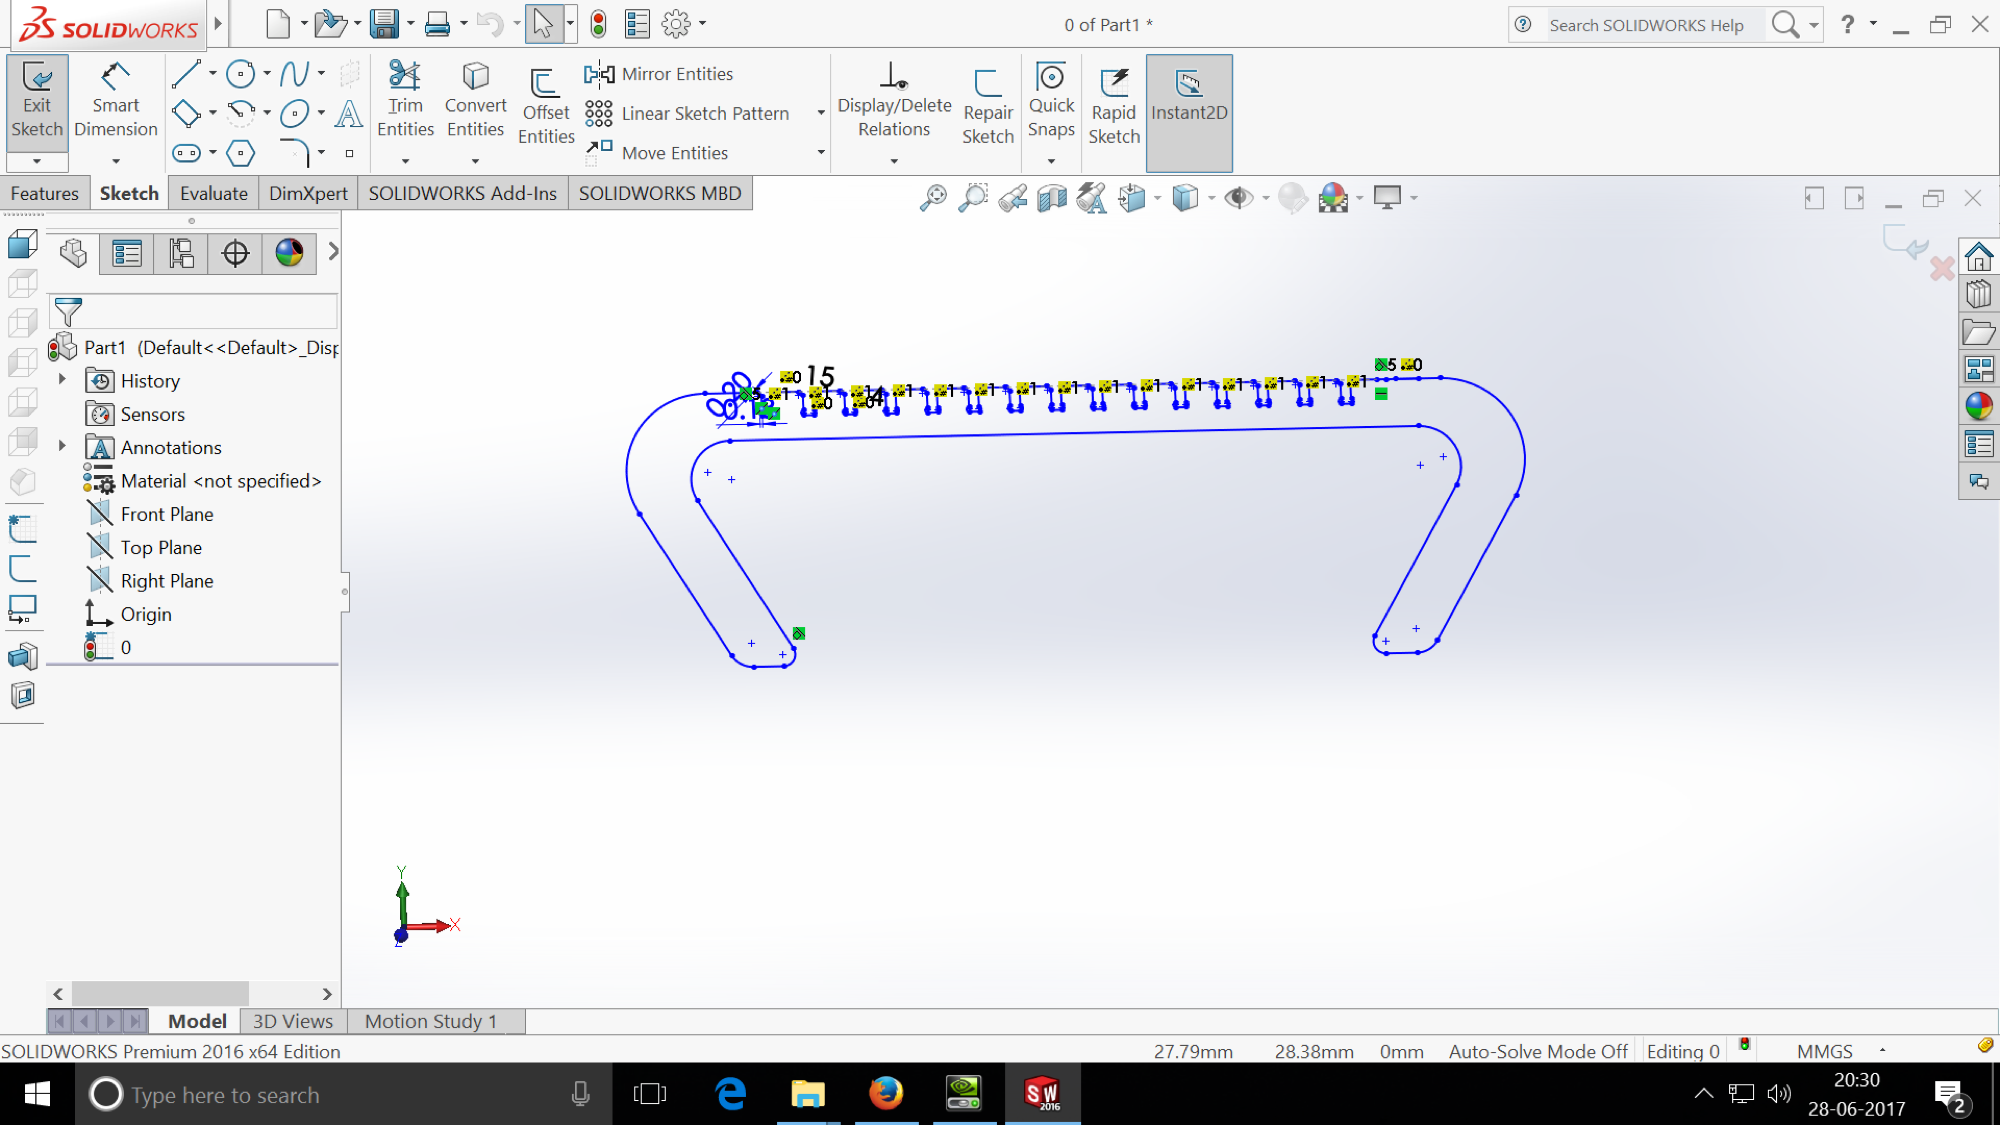
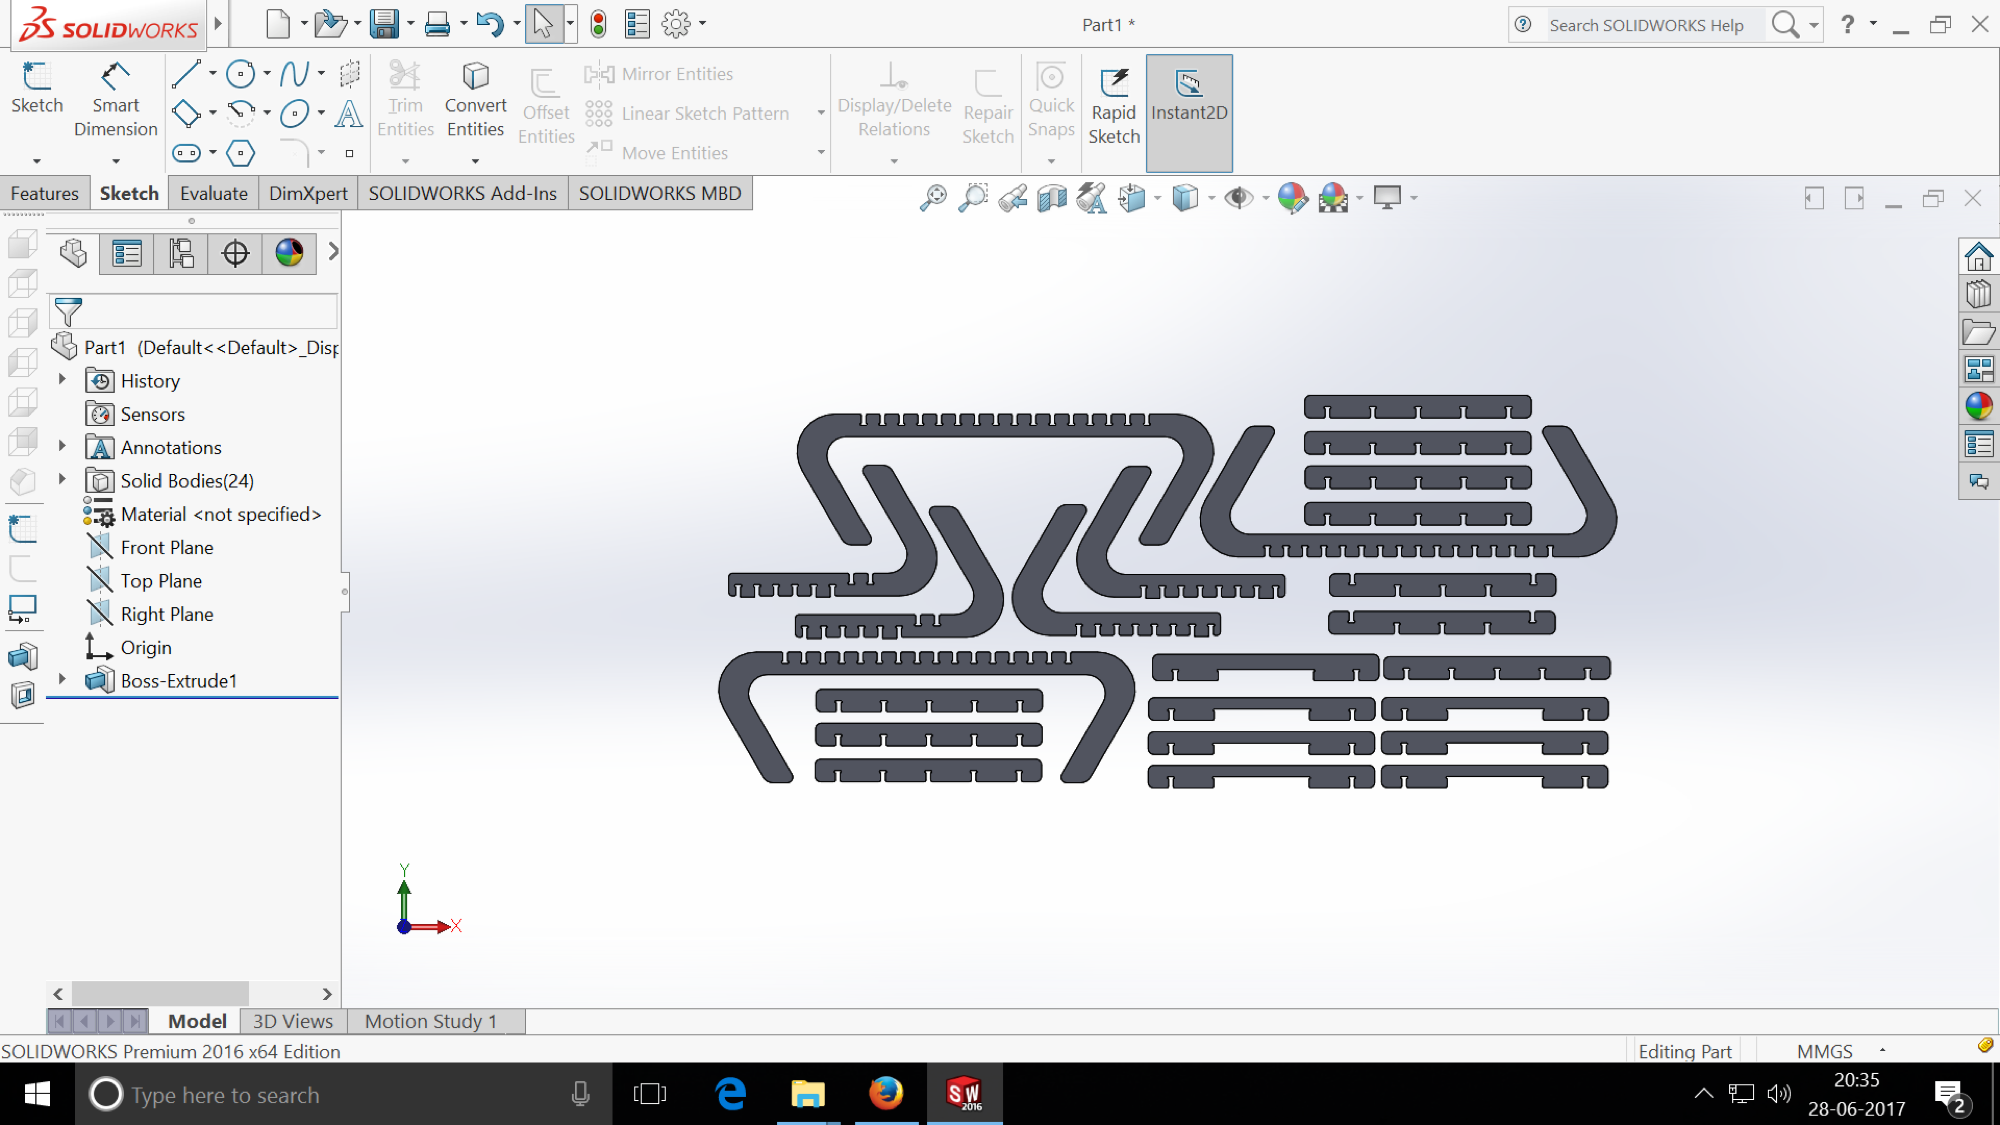
Using the boss extrude tool, make an extrusion of 12mm
Artcam file
Downloadable Artcam file for the above design in .mmg format
- Machine controls
I used an end mill, which is a type of milling cutter, a cutting tool used in industrial milling applications
I used a 6mm end mill to make table.
The dimension of the plywood is 4x8ft and thickness = 8mm
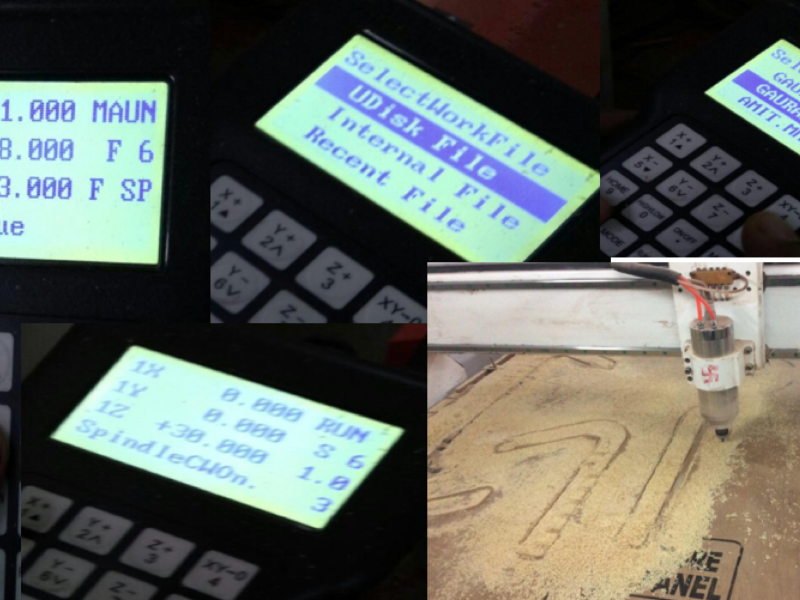
- Z Zeroing
1) The machine has to be aware about the Zero position, before we start the cutting.
2) Also we must know, what's the position of the tool with respect to material thickness.
3) How much depth it has to reach for cutting/engraving.
4) When I gave a command for zeroing the Z, the software makes the tool to go and touch the plywood.
5) I used a paper sheet between the tool and the plywood and made sure that the bit touched the plywood.
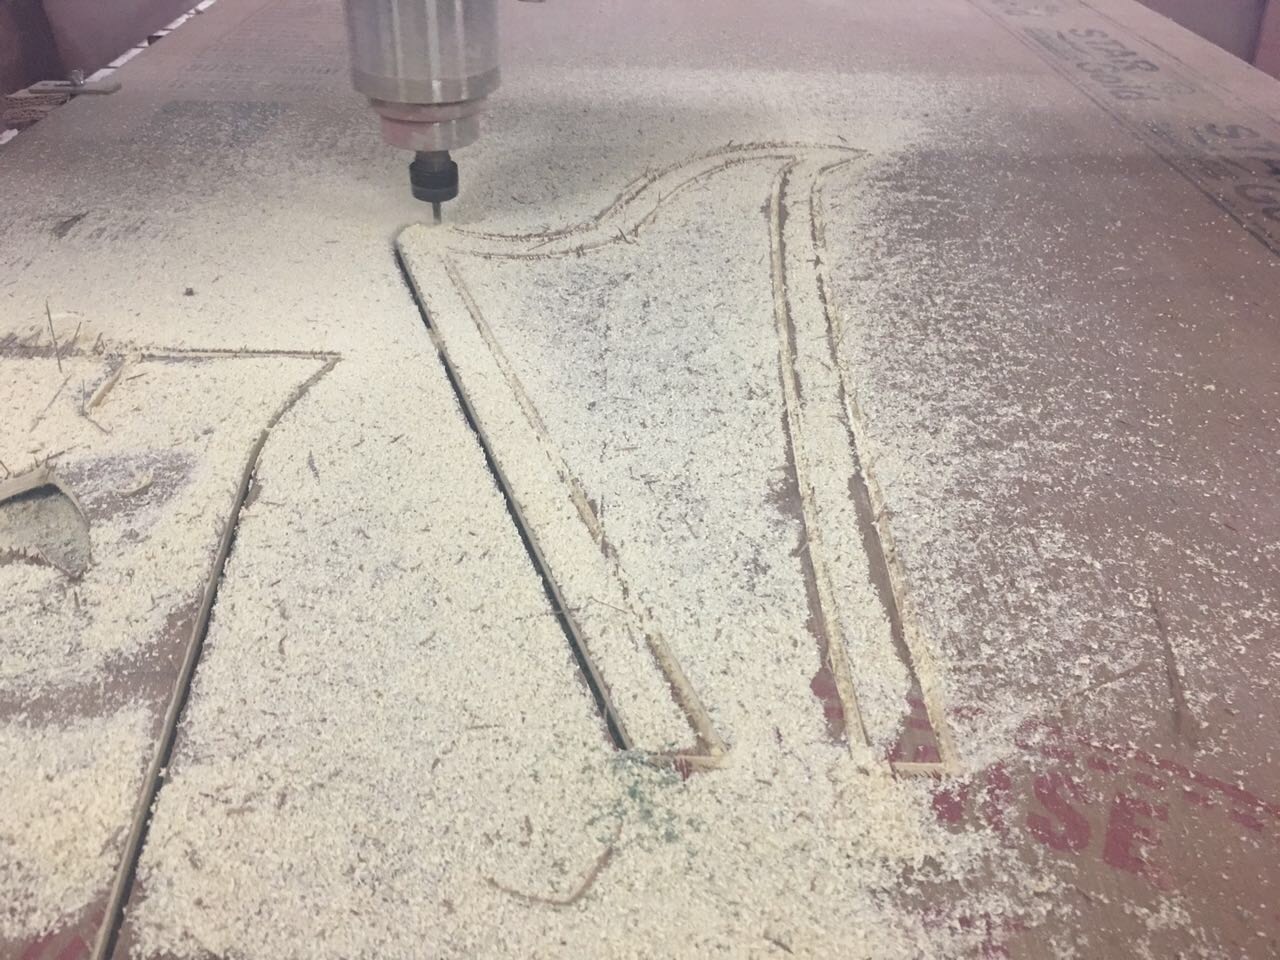
- I used a plywood to cut the body of the harp and an MDF to cut the base of the harp.
- Software used : Autodesk Artcam 2017
I imported the files (dxf format)
I used an end mill:
- End mills : It is a type of milling cutter, a cutting tool used in industrial milling applications
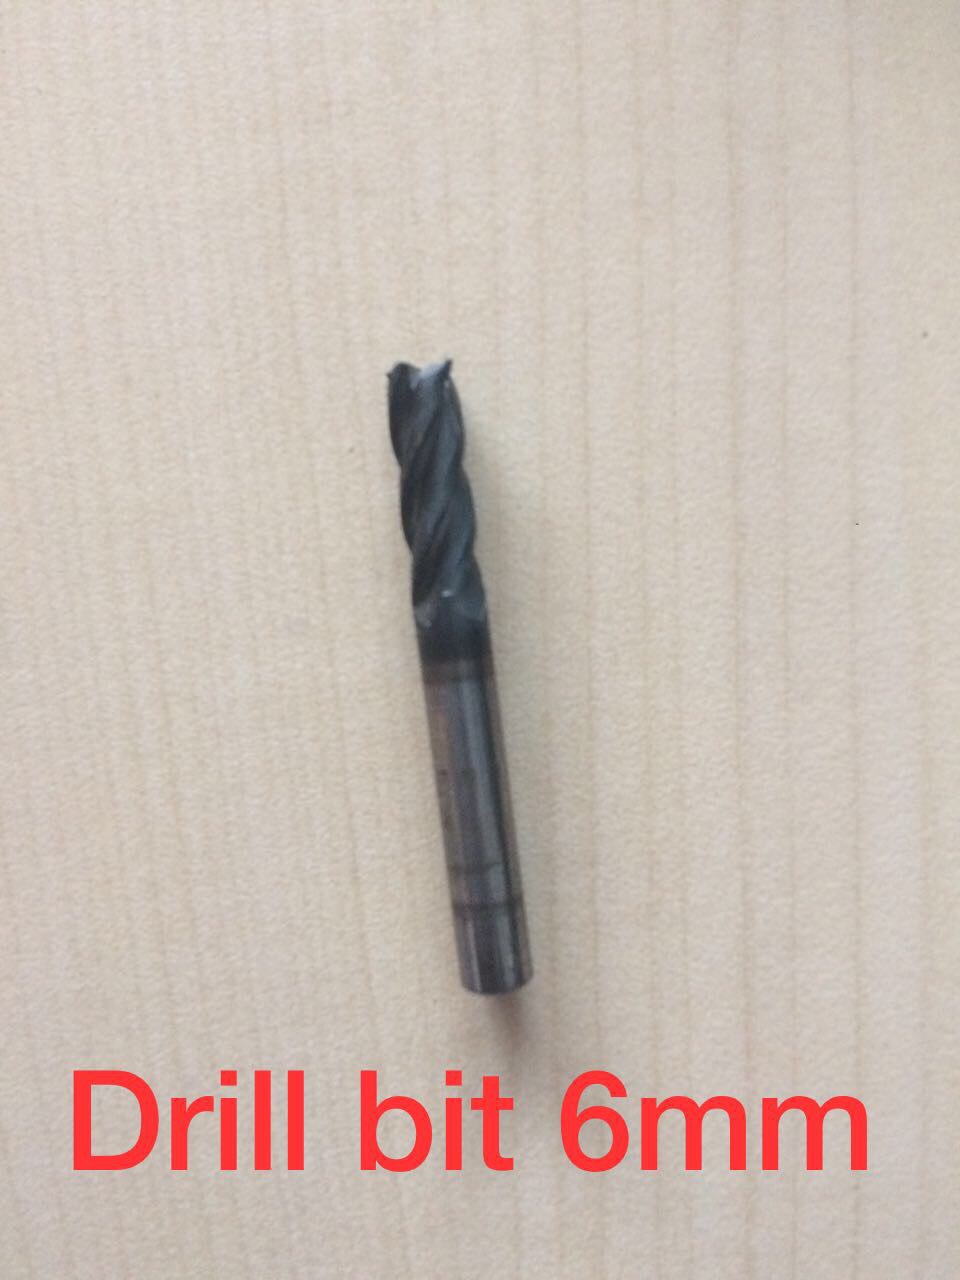
I used a 6mm end mill to make the base plate.
The dimension of the plywood is 4x8ft and thickness = 8mm
- Z Zeroing
- The machine has to be aware about the Zero position, before we start the cutting. - Also we must know, what's the position of the tool with respect to material thickness - How much depth it has to reach for cutting/engraving. - When I gave a command for zeroing the Z, the software makes the tool to go and touch the plywood. I used a paper sheet between the tool and the plywood and made sure that the bit touched the plywood.
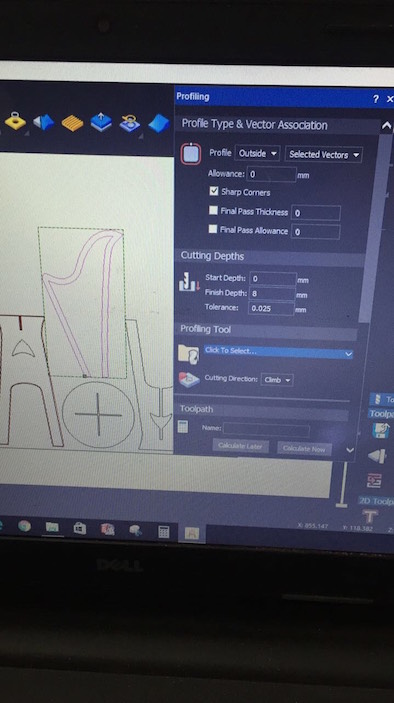
Steps to cut using a CNC machine
- Select: Create tool path "T"
- Select Outside for outer profile and inside for slots
- Finish depth must be as per thickness of the sheet i.e 8mm
- Select end mill 6mm tool from the library
- Select calculate now
- Format of the tool path file is Model Master 3 axis flat (*.mmg)
- Save the tool path
- Select the file in the pendrive
- Choose the stroke (outer, inner, on contour)
- Select the layer to take vector primitives; to make different trajectories, I put the details on different layers
- Choose the cut depth (Thickness of the plywood I used it was 10 mm)
- Choose the type of tool, it's diameter and other parameters, like feed for example
- Chose the way the tool will get into material. It can get down vertically, or be mooving on it's trajectory at the same time.
- At last we can push the button "Calculate now". The trajectory for the tool will be made.
- After that I selected "trajectories" -> "save trajectory as" from the upper menu.
Dos and Checks
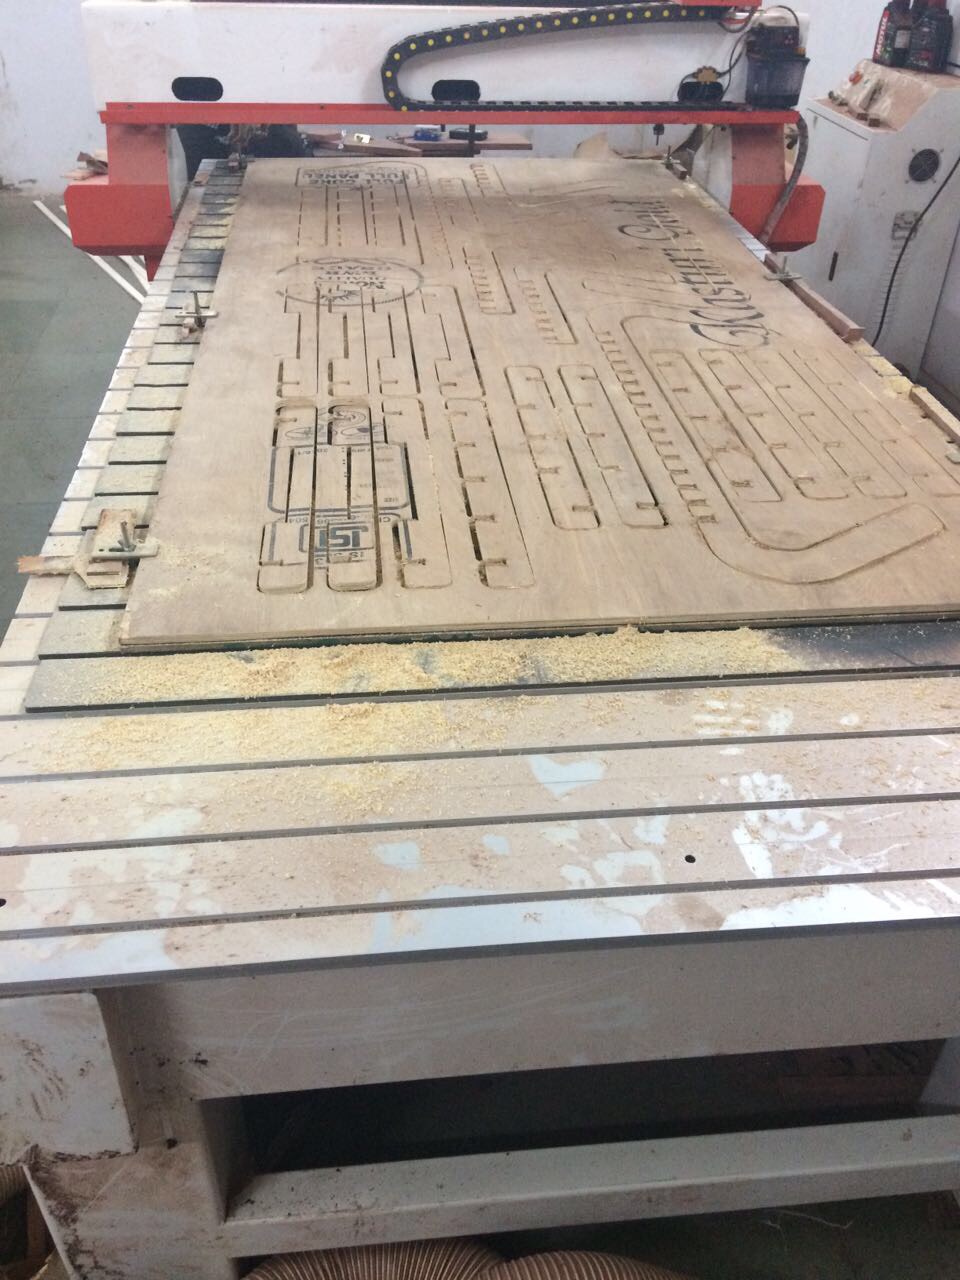
Set the origin and tighten the screws to lock the plywood on the CNC bed. Set the machine parameters. Do check the images below
1. Wear safety glasses and hearing protection when the router is in operation.
2. Check wood stock for defects before cutting, such as knots, cracks, and foreign objects.
3. Never leave the machine unattended while it is in operation.
4. Never reach into the working envelope of the machine while it is running.
5. Never perform any maintenance or cleanup without lockout power switch in off position.
6. Visually ensure that all tools and bits are completely stopped before removing guards or performing any clean-up or maintenance.
7. Avoid unsafe hold down practices that can shatter a bit or allow parts to move during cutting.
8. Create cutting files that avoid small parts flying out when being cut.
9. Be within reach of the e-stop or pause button when the machine is in operation.
10. Turn on the dust collection system and close all gates, except that for the CNC Router.
Downloadable files of the same.
Downloadable file: Gaurang.art
Downloadable file: Gaurang.mmg
Downloadable file: tablebody.dxf
Downloadable file: tabletop.dxf
Downloadable Solidworks part file for the above design in .SLDPRT format
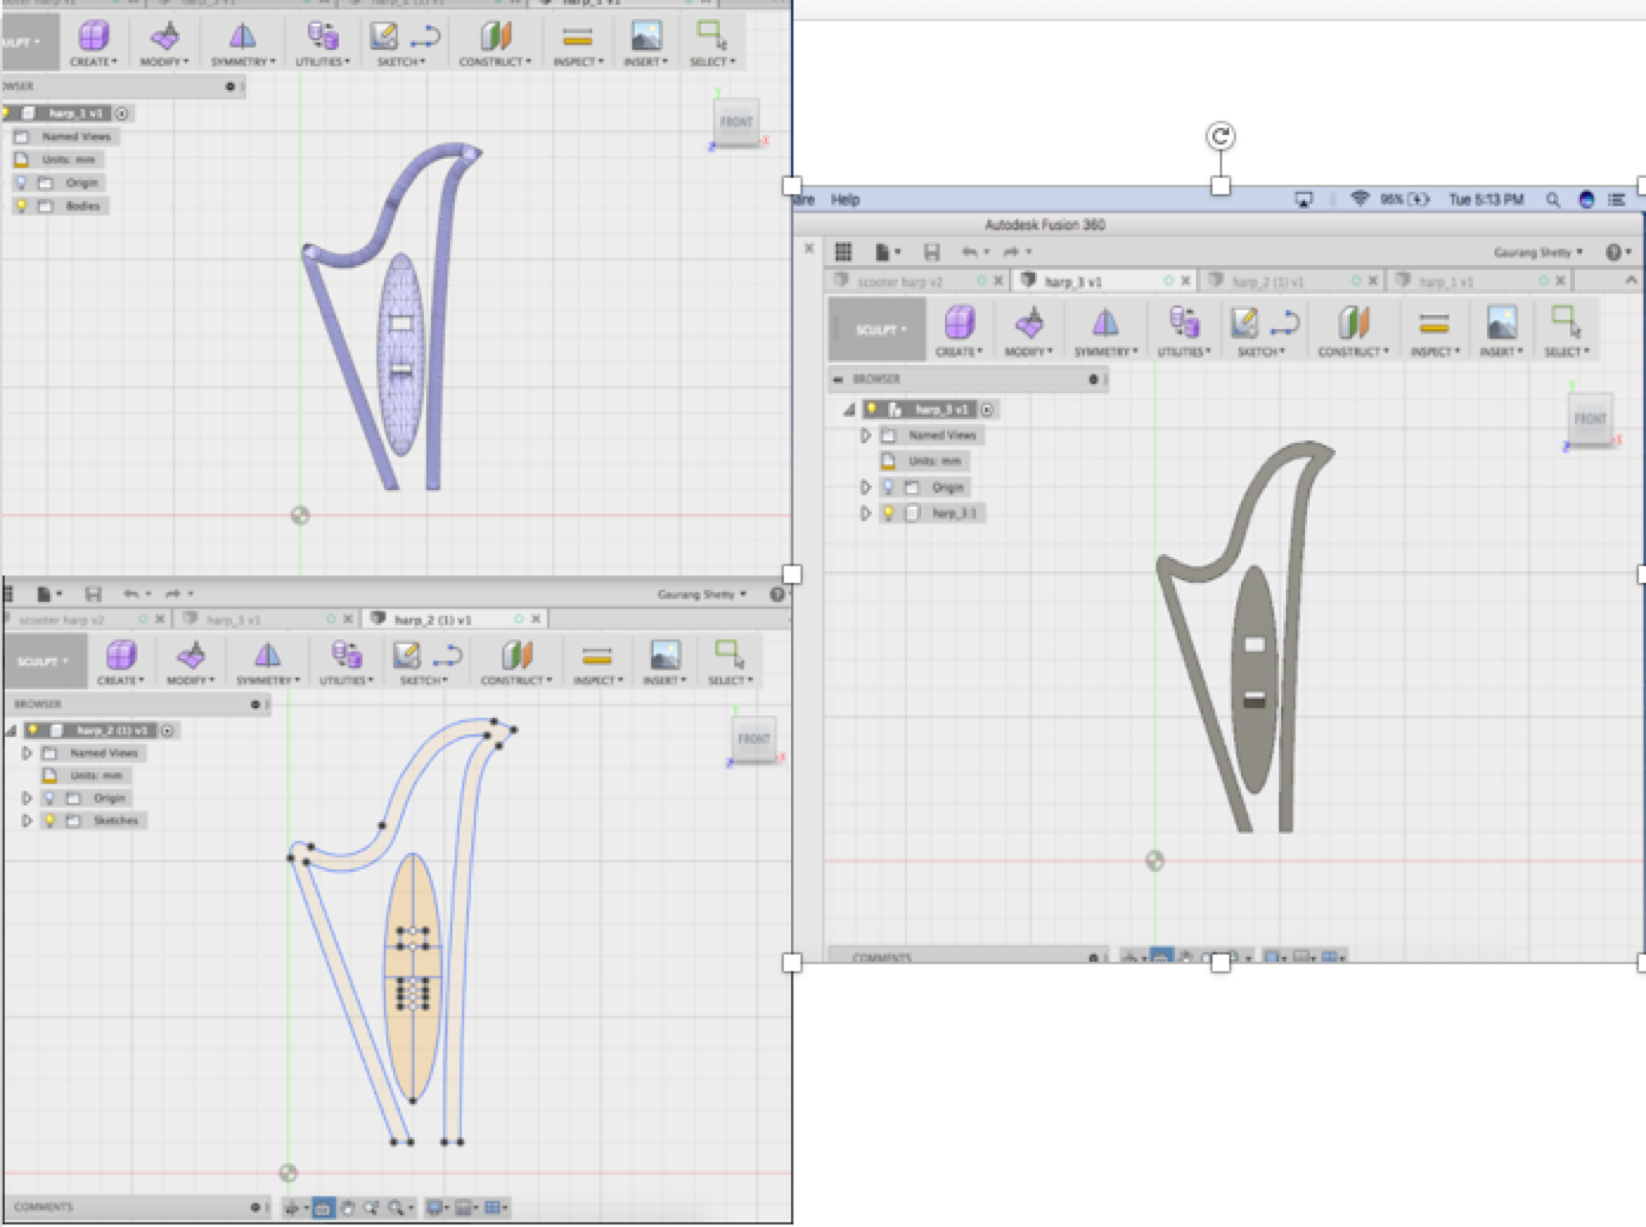
Take two: Making a harp wooden frame
I then decided to make a harp wooden installation for this weeks assignment.
After I complete my fab academy, I will work further on this project to make it a musical harp. I will plug the harp with IR sensors and a soundcard with speakers to emit musical sounds. I used waste plywood from our previous event MAKER MELA
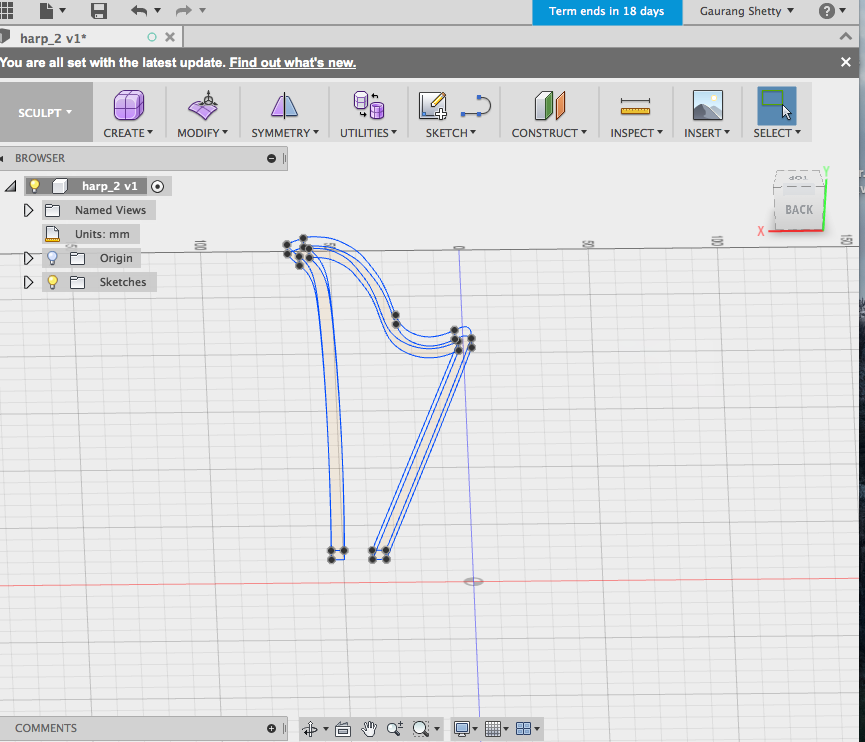
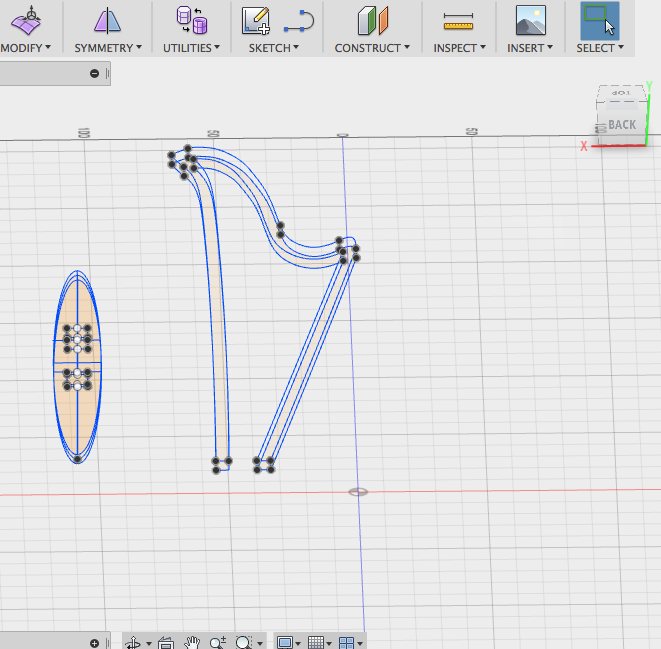
I used Fusion 360 to design the harp.I designed the file seeking inspiration from a harp which was present at our fablab.I started by sketching it on a paper and then jumped to the Autodesk Fusion 360 software to design the harp.
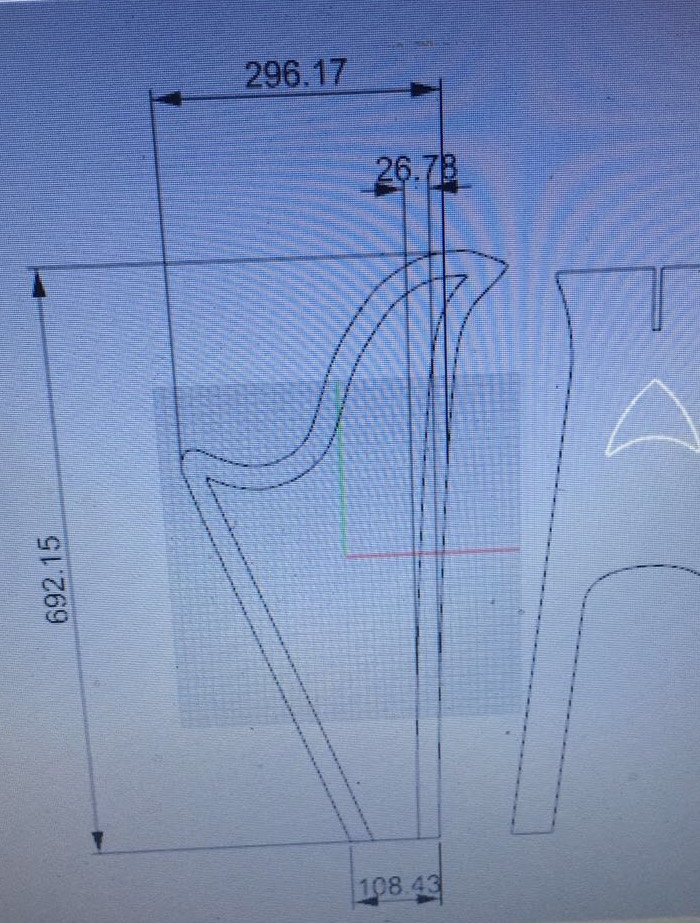
Dimension of the harp:
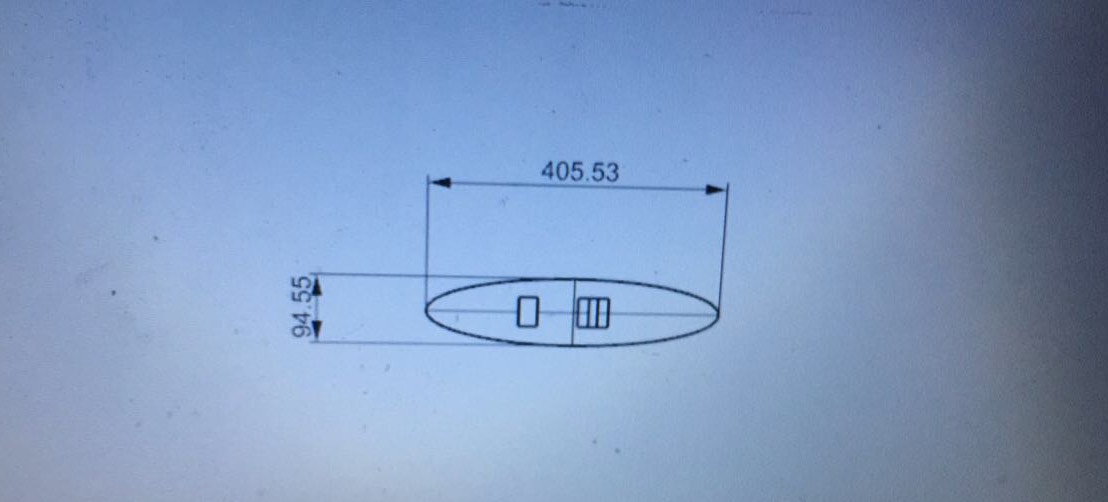
length = 692.15 , Breadth = 296.17 , Height = 26.78Dimension of the base:
length = 405.53 , Breadth = 94.55
Thickness of the Plywood = 10mm, Thickness of the MDF = 20mm
I used the spline tool from the sketch block in the Autodesk Fusion 360 software.
Machine controls
- I used a plywood to cut the body of the harp and an MDF to cut the base of the harp.
- Software used : Autodesk Artcam 2017
I imported the files (dxf format)
- Select: Create tool path "T"
- Select Outside for outer profile and inside for slots
- Finish depth must be as per thickness of the sheet i.e 8mm
- Select end mill 6mm tool from the library
- Select calculate now
- Format of the tool path file is Model Master 3 axis flat (*.mmg)
- Save the tool path
- Select the file in the pendrive
- Choose the stroke (outer, inner, on contour)
- Select the layer to take vector primitives; to make different trajectories, I put the details on different layers
- Choose the cut depth (Thickness of the plywood I used it was 10 mm)
- Choose the type of tool, it's diameter and other parameters, like feed for example
- Chose the way the tool will get into material. It can get down vertically, or be mooving on it's trajectory at the same time.
- At last we can push the button "Calculate now". The trajectory for the tool will be made.
- After that I selected "trajectories" -> "save trajectory as" from the upper menu.
Set the origin and tighten the screws to lock the plywood on the CNC bed.
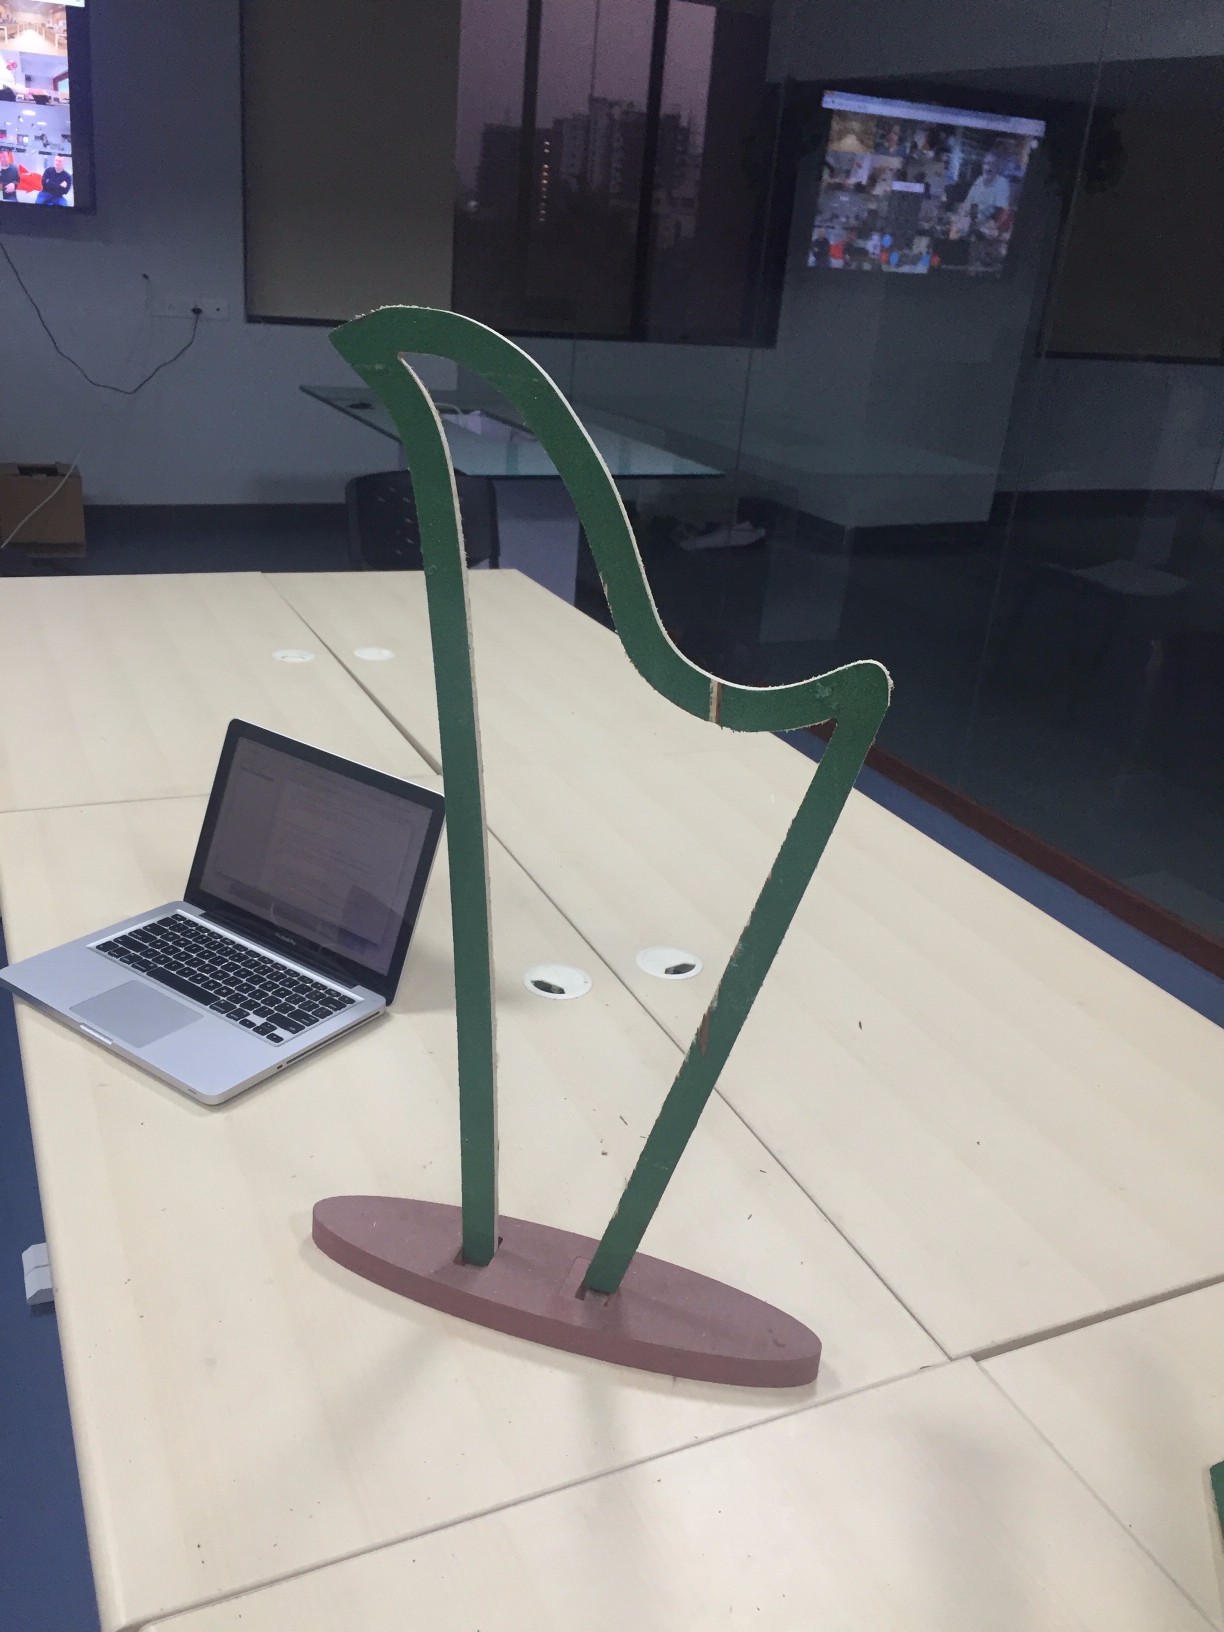
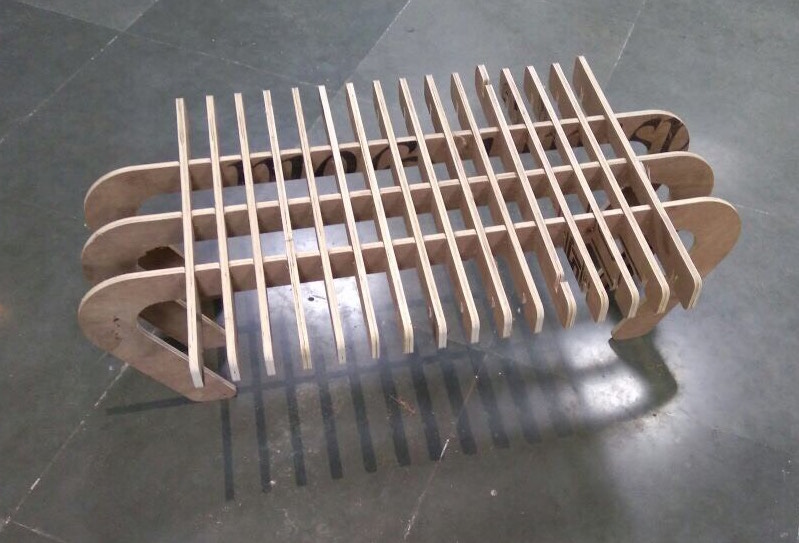
I press fitted the harp into the stand and it was ready.