Assignment 16
2.5.17Interfacing and Application Programming
Get started
I wanted to build an interface where in I can move my mouse over a defined area and this can trigger a device, eg: a LED will turn on.
What is processing and how it works?
Processing is an open source computer programming language and integrated development environment (IDE) built for the electronic arts, new media art, and visual design communities with the purpose of teaching the fundamentals of computer programming in a visual context, and to serve as the foundation for electronic sketchbooks.
The ease of experimenting with things in Processing is an advantage in learning to program.
Processing is actually a front-end to Java programs. At run-time the Processing code is translated to Java code.
Processing comes with a small but capable development environment (IDE), excellent documentation, a large library of extensions and a significant set of examples and demos
I've used Arduino IDE to communicate with my board. So now my task is to find a way to link my Arduino IDE with Processing.Luckily, Processing comes with a Serial library designed for just this kind of thing! If you don’t have a version of Processing, make sure you go to Processing.org and download the latest version for your operating system
This library allows you to control an Arduino board from Processing without writing code for the Arduino. Instead, you upload a standard firmware (program) to the board and communicate with it using the library. The firmware is called Firmata, and is included in the Arduino software
My board communicates using serial communication using the general USB port. and works with a baud rate of 9600.
The code is directly burnt on the board using the Processing IDE or Arduino IDE using the Serial library.
I programmed my board using Arduino IDE using the normal ISP programmer. then later using Processing I automated the switch system of on and off the LED.
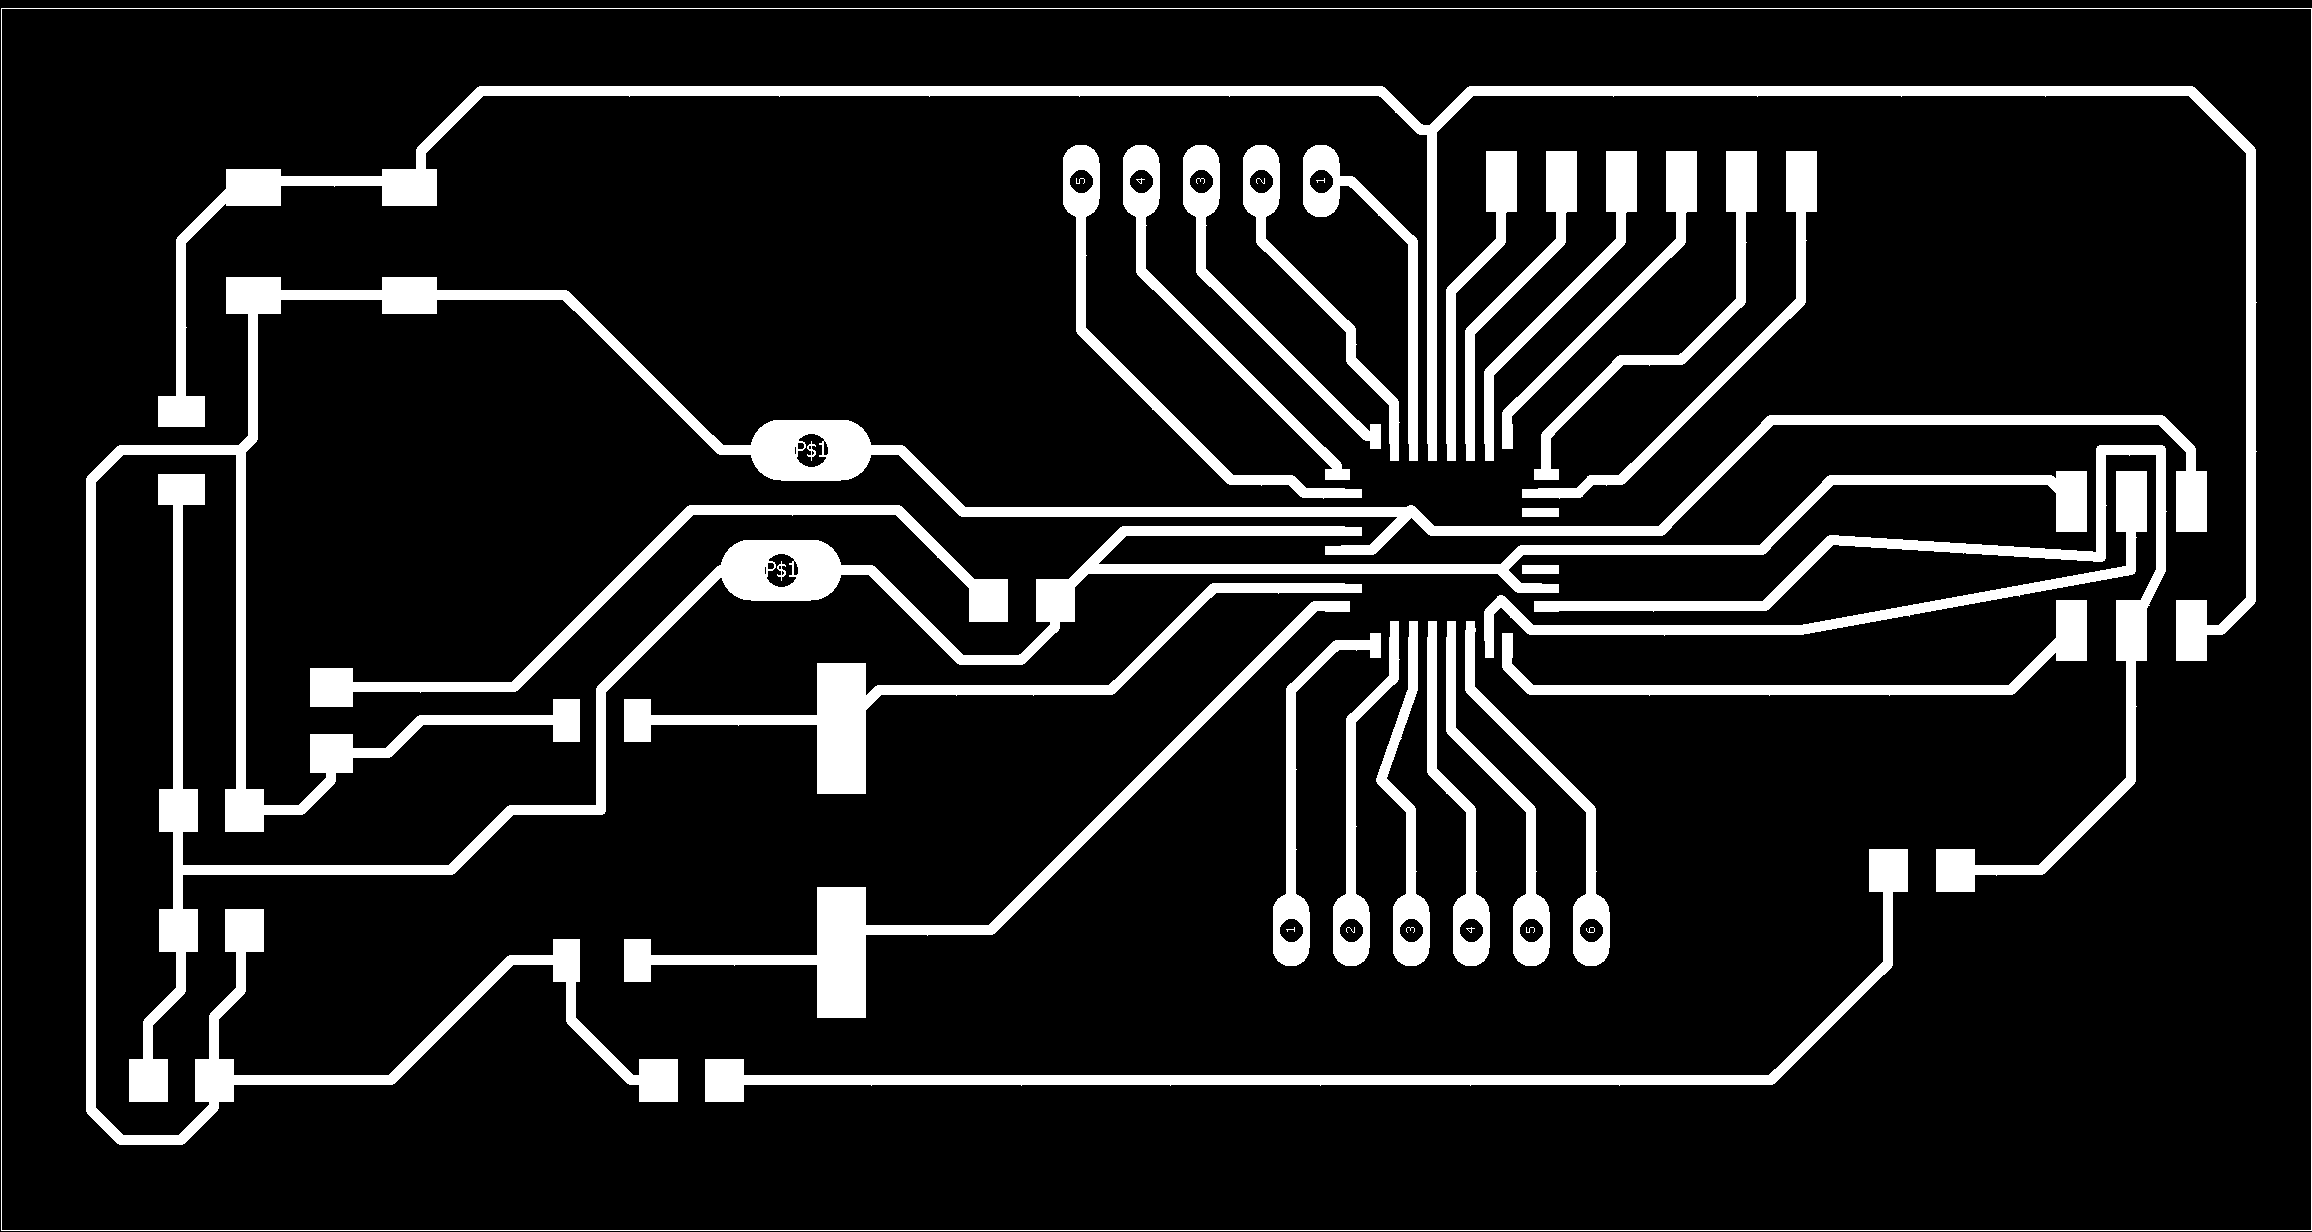
I started with making the PCB. I made a new board based on Atmega 328P which is the same one from assignment 10 (Output device). I used a modella milling machine to make my board.
Downloadable schematic file: sch format
Downloadable board file to make the layout: brd format
Downloadable image file, which was fed to the milling machine: png format
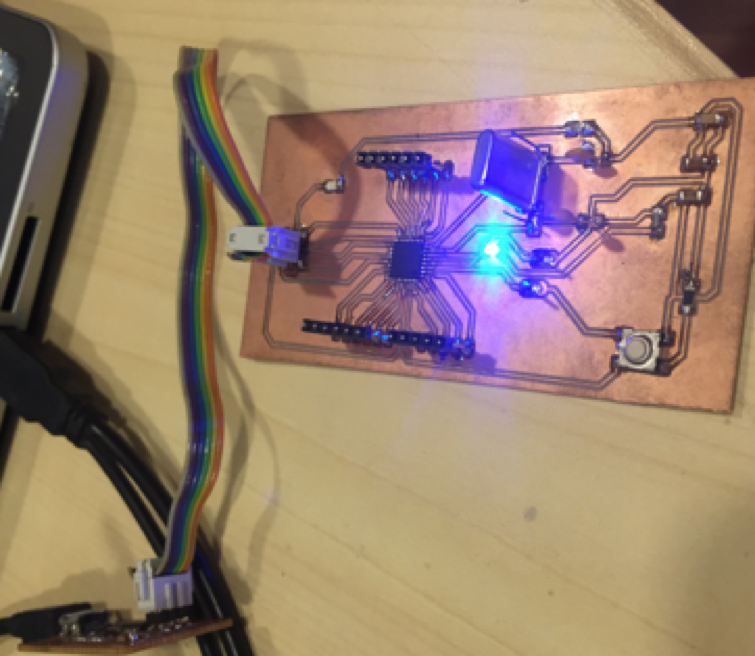
Once, I made the board I soldered all the smd components on the board and then used a FabISP programmer to program the board.
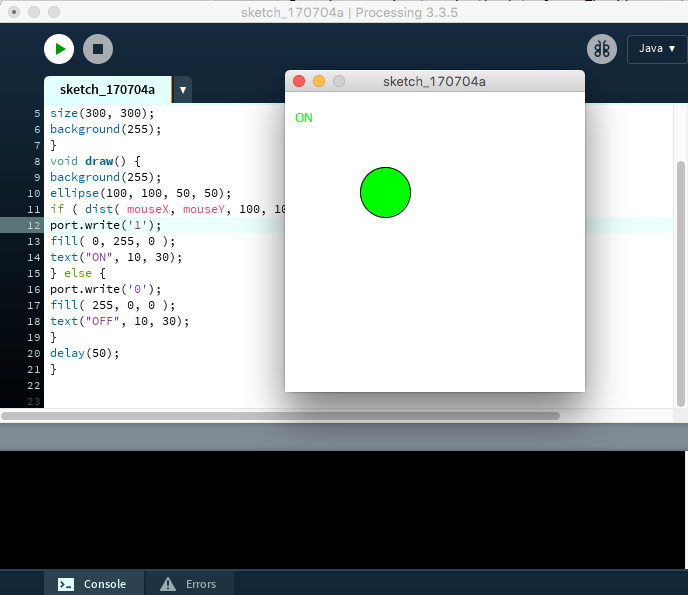
I used processing to make the interface. The idea was to hover the move pointer over the circle and turn ON the LED on Pin 13 my board. If the pointer if not on the circle then the LED will remain OFF.
Frame rate:
The default frame rate of the sketch is 60 frames a second, which means that the Arduino would be receiving new data every 16.6µs, which will caused me some problems. So by reducing the frame rate, you give the Arduino more time to read and act on the data it has.
The Xmouse and Ymouse gives you the current location of the mouse in terms of pixels from the top left corner. To “click” on a button, the mouse’s location must be within the horizontal and vertical limits of the button when the button is pressed.
Getting started with Processing and Arduino IDE programming
Connect your board and select the right com port. Once that is done, upload the Arduino sketch to the board. Now run the Processing program, and it will probably return an error. Ignore that and look in the serial monitor and you should see a number beside your com port number. That number is the number that you have to put into your Processing sketch, in where the square brackets are.
port = new Serial(this, "/dev/cu.usbmodem1421", 9600); //define the port at which the Arduino is connected
9600 is the baud rate, or the number of symbols being sent a second. The baud rate here should match the one in the Arduino sketch, otherwise it won’t work properly.
We will have to run the Processing sketch again. This set-up will allow us to turn ON the LED on my board, whenever the mouse pointer is on the ellipse in the processing window.
If it’s not working, make sure all the wires are connected properly. It that doesn’t work, check you com ports and the baud rate.
I used the same board, form Assignment 10 for this assignment.
Downloadable processing code: pde format
Downloadable Arduino code: ino format
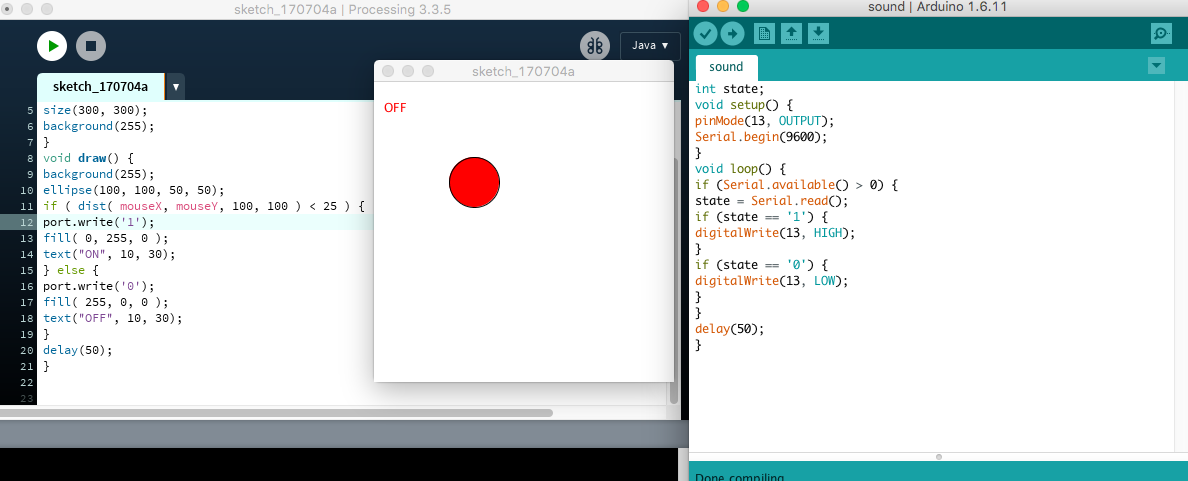
I wrote this code on processing:
import processing.serial.*;
Serial port;
void setup() {
port = new Serial(this, "/dev/cu.usbmodem1421", 9600); //define the port at which the Arduino is connected
size(300, 300);
background(255);
}
void draw() {
background(255);
ellipse(100, 100, 50, 50);
if ( dist( mouseX, mouseY, 100, 100 ) < 25 ) {
port.write('1');
fill( 0, 255, 0 );
text("ON", 10, 30);
} else {
port.write('0');
fill( 255, 0, 0 );
text("OFF", 10, 30);
}
delay(50);
}
I wrote this code on the Arduino IDE
int state;
void setup() {
pinMode(13, OUTPUT);
Serial.begin(9600);
}
void loop() {
if (Serial.available() > 0) {
state = Serial.read();
if (state == '1') {
digitalWrite(13, HIGH);
}
if (state == '0') {
digitalWrite(13, LOW);
}
}
delay(50);
}
I ran the code on the board and the led was turning ON, once I put the mouse pointer on the RED circle. It turns GREEN and the LED turns ON.
The processing software communicates with my board and responds with a Glowing LED on my board (Pin13), whenever I put a mouse pointer on the elipse.