*FOURTEEN*WEEK: COMPOSITES
Assignment
1. Assignment:
- Read the material safety data sheet (MSDS)and technical data sheet (TDS) for the resins that you're using.
- Design and fabricate a 3D mold and produce a fiber composite part in it
Assignment
DESIGN A 3D MOLD:
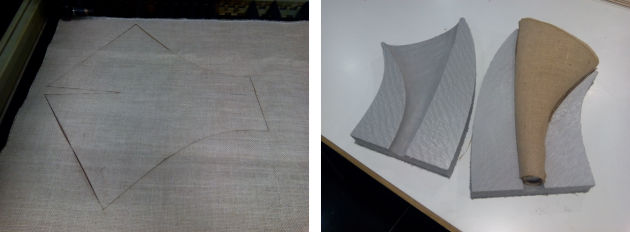
For the choice of object I relied on something that was nice with the burlap, because the size of the object and the finish, made it impossible for me to do any part of my final project.
In the end I decided to make a horn that was hollow.
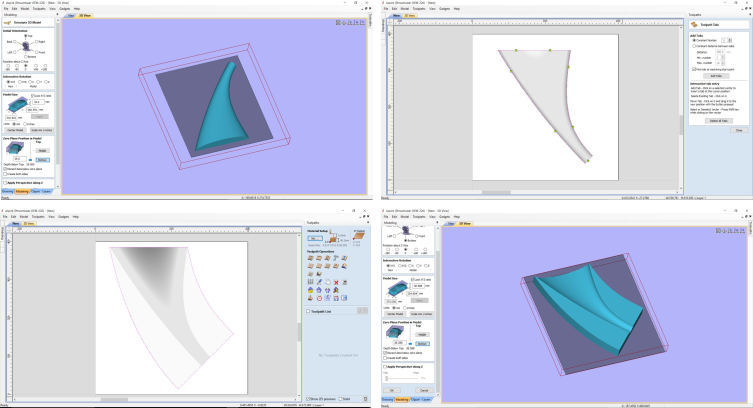
For the design of the 3D object I used the Fusion 360 program, I had some problems when making the 3D model of the horn, mainly because I didn't know how to make a curved conical element (which you can see HERE).
For the object I wanted to make I needed to make 4 molds, two of the inner part of the horn and two of the outside of the horn, between them leave a space of 4mm to enter the layers of burlap.
 To design it I created two sketches in different planes. The first in the XZ plane and the second plane was tilted, and to join it, I used the loft tool. Finally what made it had horn or trumpet shape was the option of "direction" instead of "free".


 The problem of this design was its thickness, for this I change the dimensions of the ellipse.

FABRICATE A 3D MOLD:
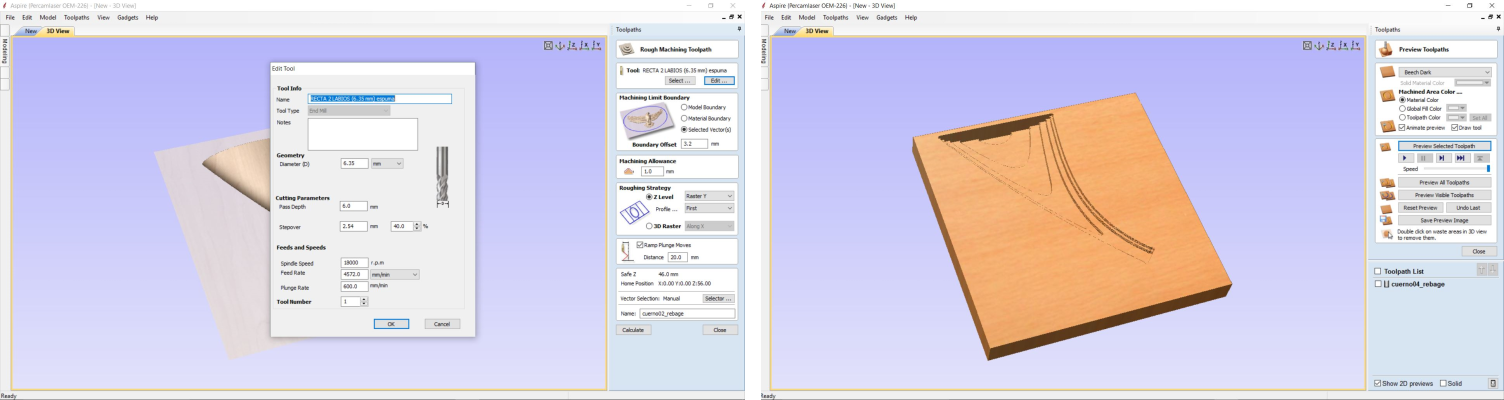
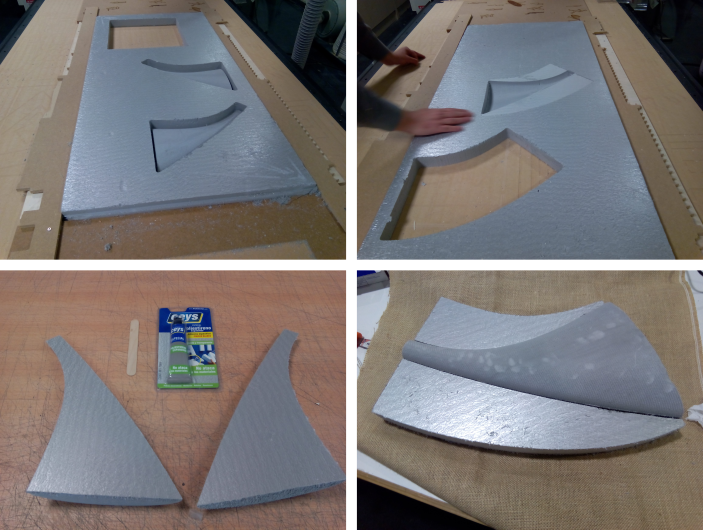
To make the composite I had to make the molds to put these 5 layers of fabric. The mold would be made with a foam that had a thickness of 40 mm.In order to make this horn or trumpet need these 4 molds, I started preparing them in the program "aspire".
The workflow for preparing these files was:
- Load the file and put it in the origin to make the cut. I also had to perform the boundary.
 - Make the recess with a 6.35 two-lip milling cutter, the parameters are those shown in the image highlighting a stepover of 40%, boundary offset 3.2 (the radius of the strawberry) and the entrance to the material in ramp a distance twenty.
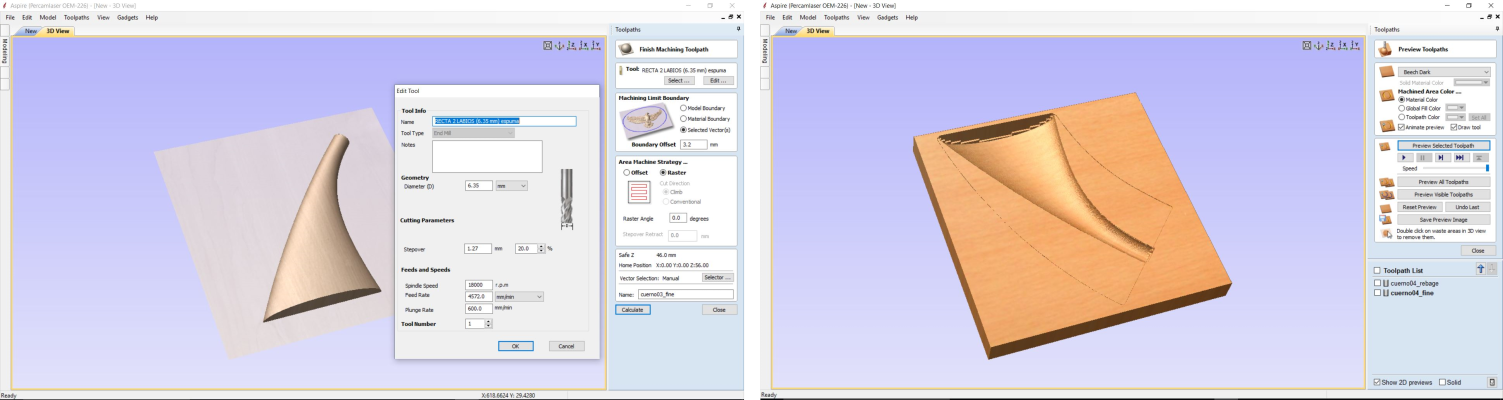
 - Make a layer of fine, using the two-lip milling cutter and diameter 6.35, the stepover modify it to take less putting it at 20%. This change in the stepover made it because the finish did not matter to me that it was very detailed, but instead to be able to finish in a week the composite needed to reduce the time enough.
 - Cut the model, also with a two-lip cutter of 6.35 in diameter, stepover to 10%, cutting outside, with ramp at 20 of distance and tabs (4 in each mold)
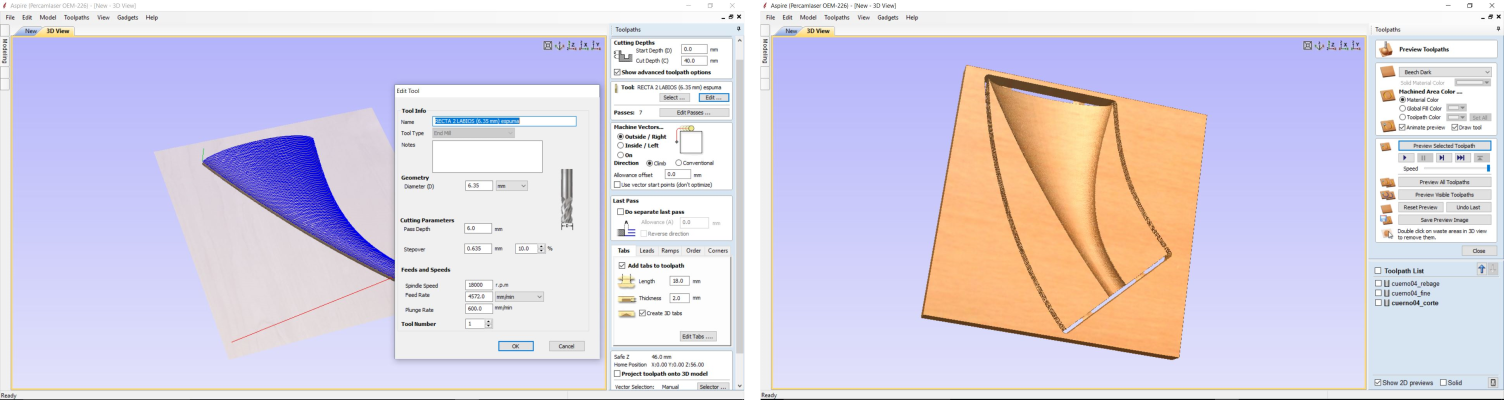 Finally what I got hit it and I proved that everything was correct. I had another mistake because the space I had left was not 4mm but 2mm. I had put in the sketch 4mm larger the diameter of the outer circle than the interior, being 2 mm the space that is created between the circles, not 4mm.
 DATASHEET FOR COMPOSITE:
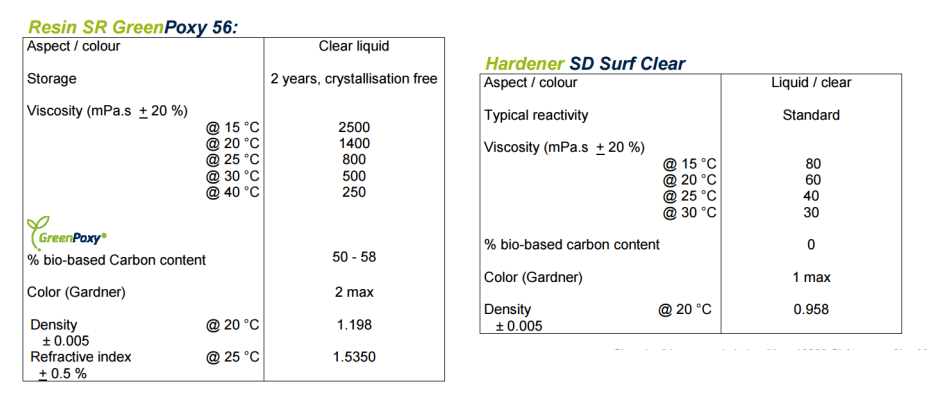
One of the most important components of this composite is the resin. For safety and usage, support me in the datasheets of this.
DATASHEET FOR COMPOSITE:
One of the most important components of this composite is the resin. For safety and usage, support me in the datasheets of this.
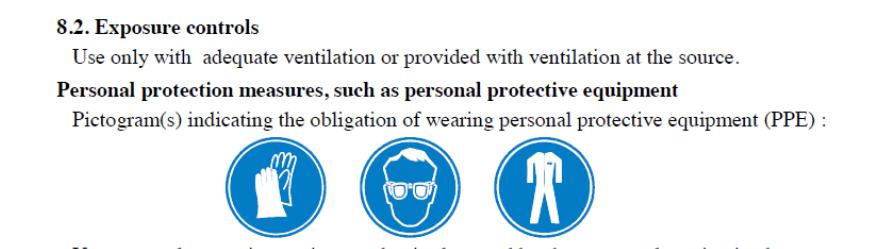
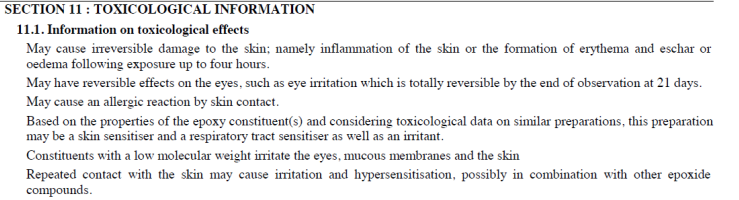
The safety datasheet(which you can see HERE).
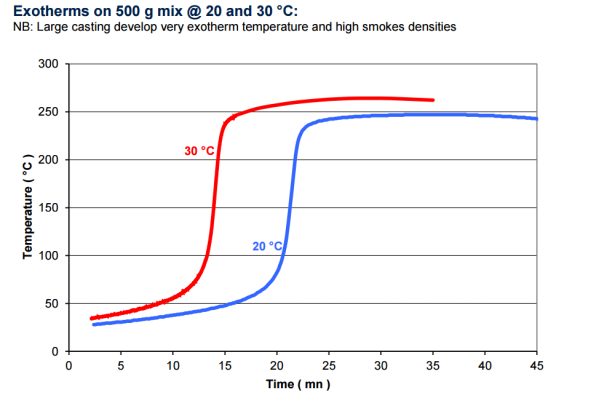
Teach you the main dangers that have to work with these types of resins that when combined produce an exothermic reaction.
Problems especially that occur if this resin has contact with the skin, the eyes, the ingestion .... In which case you should try to clean yourself as quickly as possible and go to a doctor.
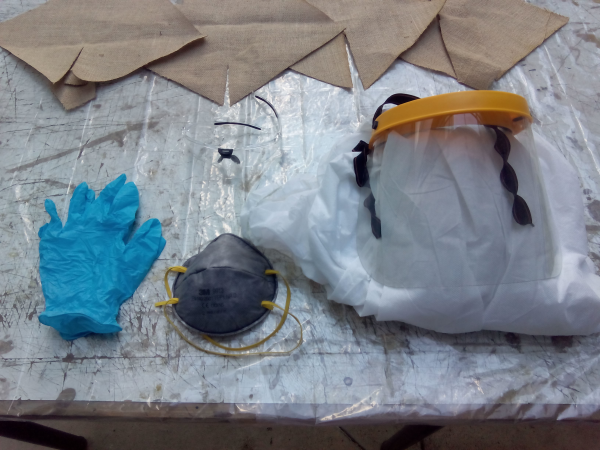
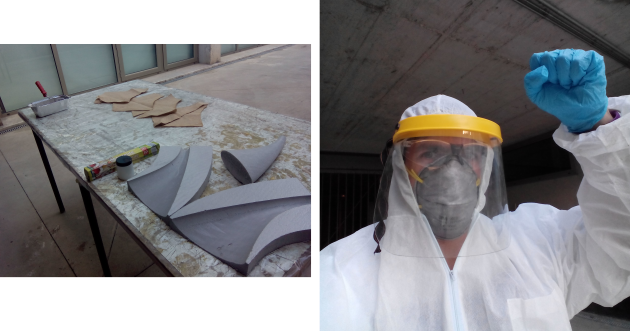
To avoid that these accidents occur at work you have to use:
- A paper mono
- Glasses
- Mask
- Gloves
 The using datasheet(which you can see HERE).
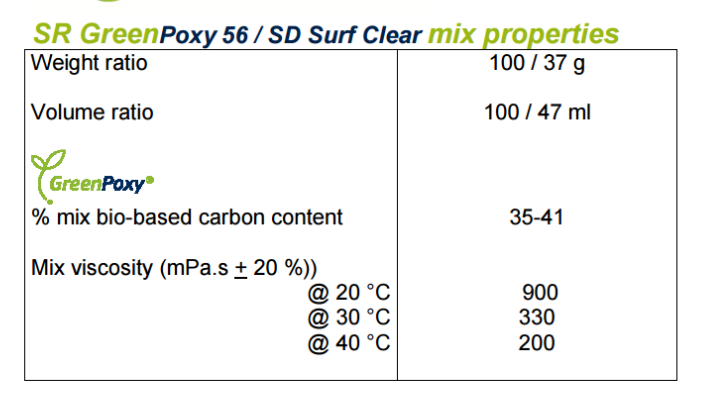
It explains what components you have and how you should use them. In my case use Epoxy 56 and SD surf clear that you have to collect them in a proportion of 100 / 47ml as shown in the image. When these products are put together, the exothermic reaction that varies its velocity as a function of the ambient temperature begins, in my case we are around 20ºC and therefore we have about 15 minutes to collect and apply the resin to the burlap.
The using datasheet(which you can see HERE).
It explains what components you have and how you should use them. In my case use Epoxy 56 and SD surf clear that you have to collect them in a proportion of 100 / 47ml as shown in the image. When these products are put together, the exothermic reaction that varies its velocity as a function of the ambient temperature begins, in my case we are around 20ºC and therefore we have about 15 minutes to collect and apply the resin to the burlap.
 TEST FOR COMPOSITE:
Before carrying out the final project, carry out some tests with a few coupons with the aim of:
TEST FOR COMPOSITE:
Before carrying out the final project, carry out some tests with a few coupons with the aim of:
1. To know how to calculate the proportions of epoxy and hardener, to do this I started by calculating the volume of the burlap.
 Once the volume was known the proportion was 50% of this volume of burlap and the other 50% of the resin, finally, this value would have to be divided in a proportion of 47 ml SD surf clear (= y) per 100 ml of Poxy 56 (= x).
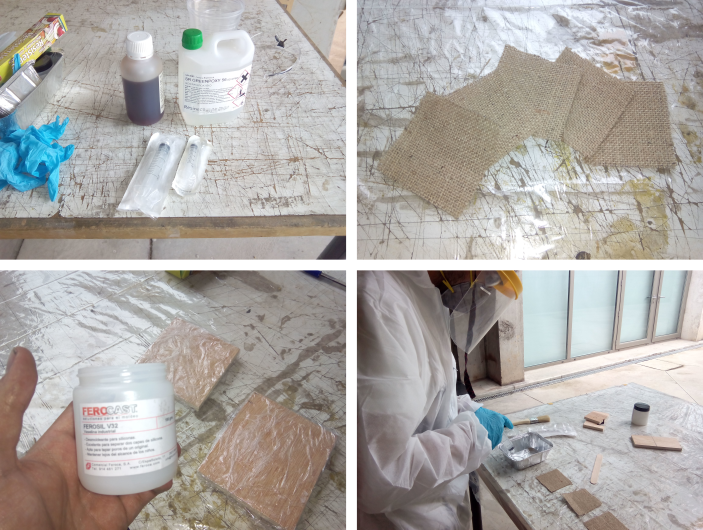
 2. Once the proportions were calculated, I put all the protection to manipulate the resin.
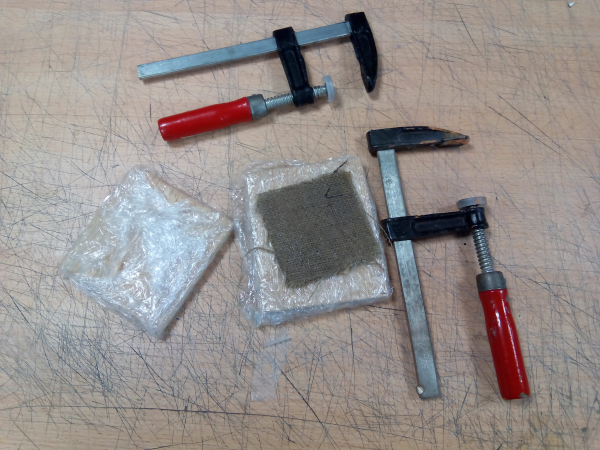
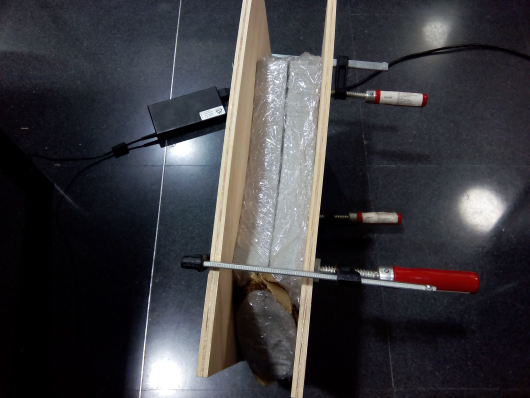
3. Put all the elements between them: the 5 pieces of burlap, a thermal tray to make the composition, a brush to spread the composition and also need two woods wrapped in thermoset plastic with petroleum jelly so that the composite is not stuck.
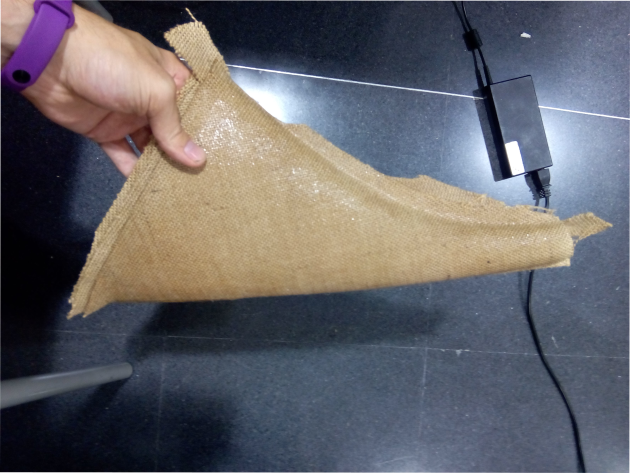
After doing the tests carried out the same steps for the final object and although it was more complicated when it was time to assemble it, what I did was to extend it well and go on gradually, and also to do many previous tests of how to organize me, this was the result.
 FILES:
- Interior01
- Interior02
- Exterior01
- Exterior02
- Project Fusion360.