Assignments:
- Read the material safety data sheet (MSDS) and technical data sheet (TDS) for the resins that you're using.
- Design and make a 3D mould (~ft2 /30x30cm), and produce a fibre composite part in it.
--- WORKFLOW ---
I will try to follow this workflow for this week.0. Read the datasheets.
1. Design a Mould.
2. Make the cut files.
3. Cut in Cnc machine or in laser cutting machine.
3b. (in laser cutting machine join the pieces).
4. Cut the fabric in laser cutting machine.
5. Prepare all the materials on the workbench.
6. Produce composite.
7. Allow to dry and cut the remaining composite.
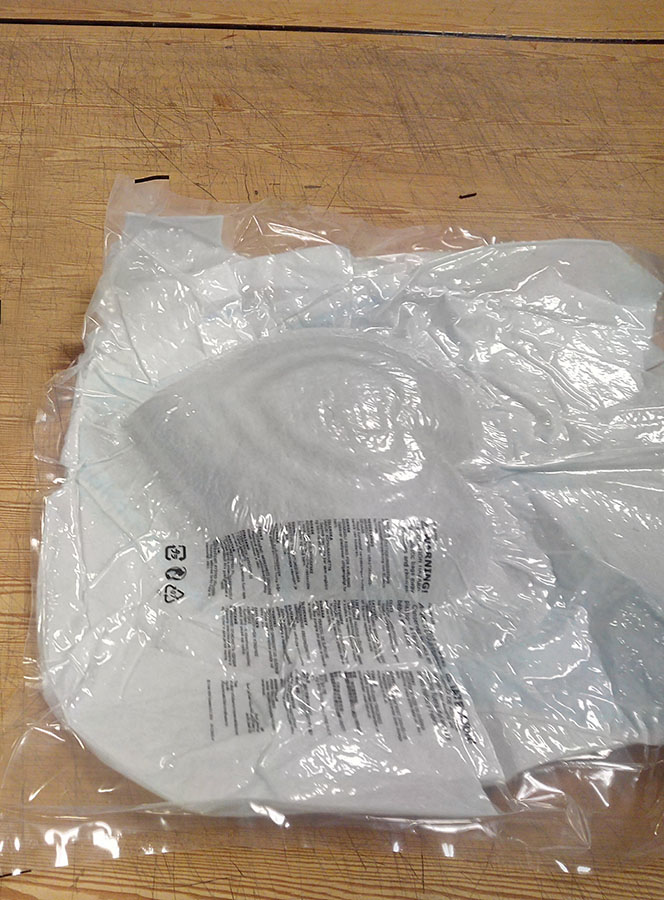
0. Read the material safety data sheet (MSDS) and technical data sheet (TDS)
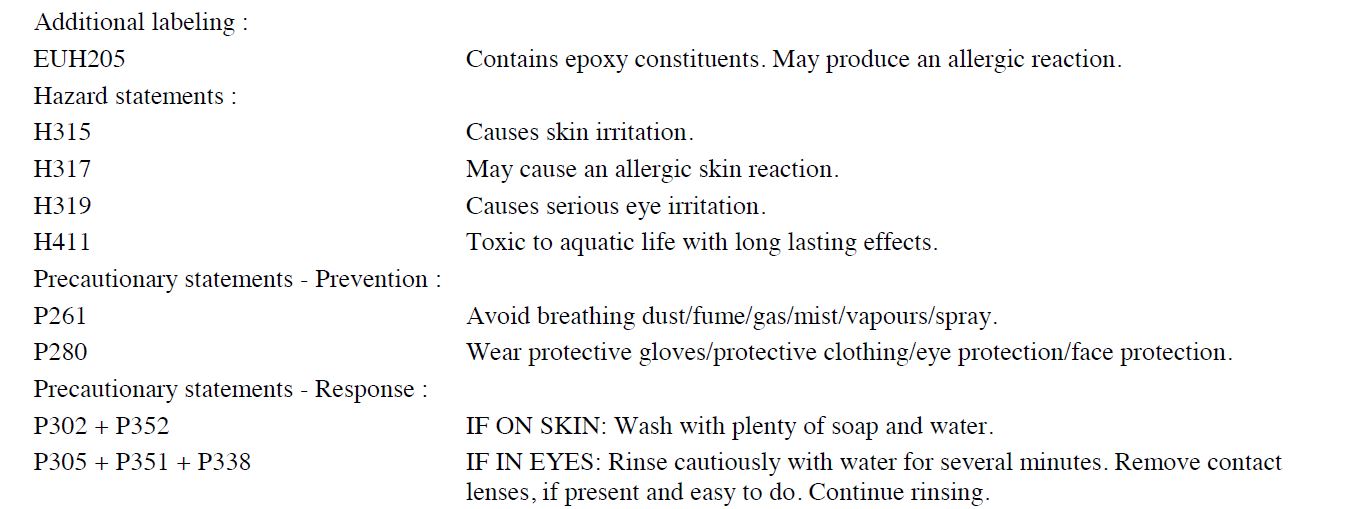
MSDS : At the beginning explains the hazards, and the rules of the substance uses, the dangers to the environment that it supposes, and what we must do in case of inhaling or having contact.
It also explains the means of protection that you should use such as, gloves, goggles, gown to protect the skin, mask of protection not to inhale.
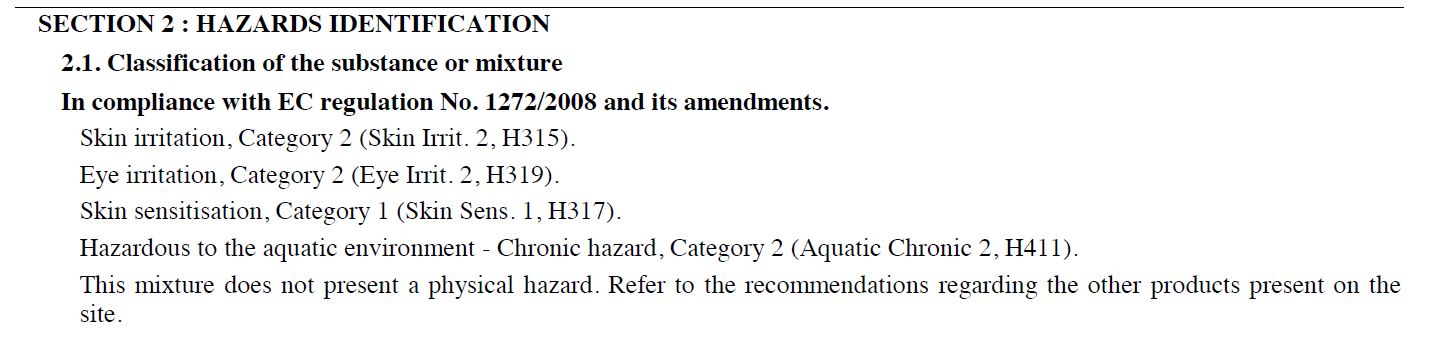
classification of the sustance.
consequences.

What happens in the event of...
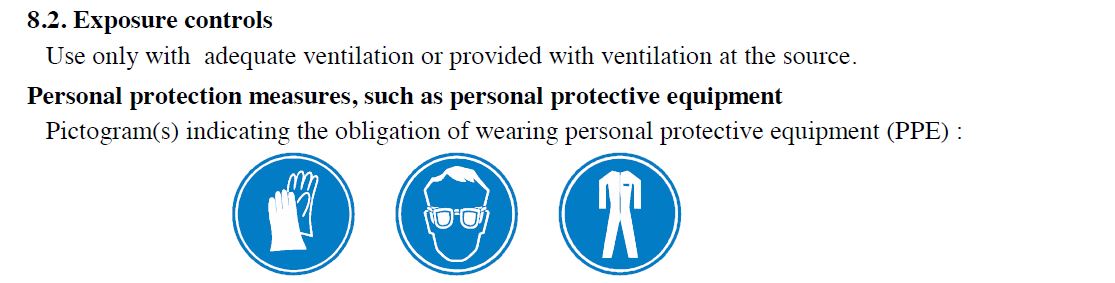
The part of protection elements.
And next, I read the TDS:
In the technical datasheet, as in the datasheets of molding and casting, explains the applications of the product, how to make the mixture, the setting times, the temperatures reaching and how they vary according to the ambient temperature are explained.
The proportions in the mixture, and the mechanical properties once it has dried.
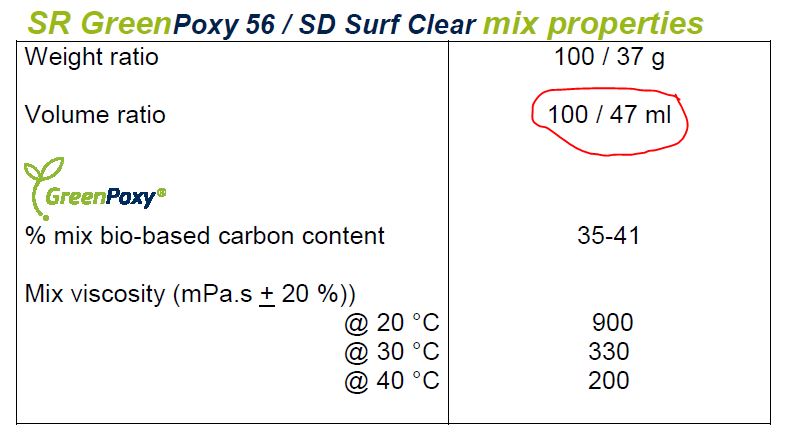
Volume ratio of the mixture.
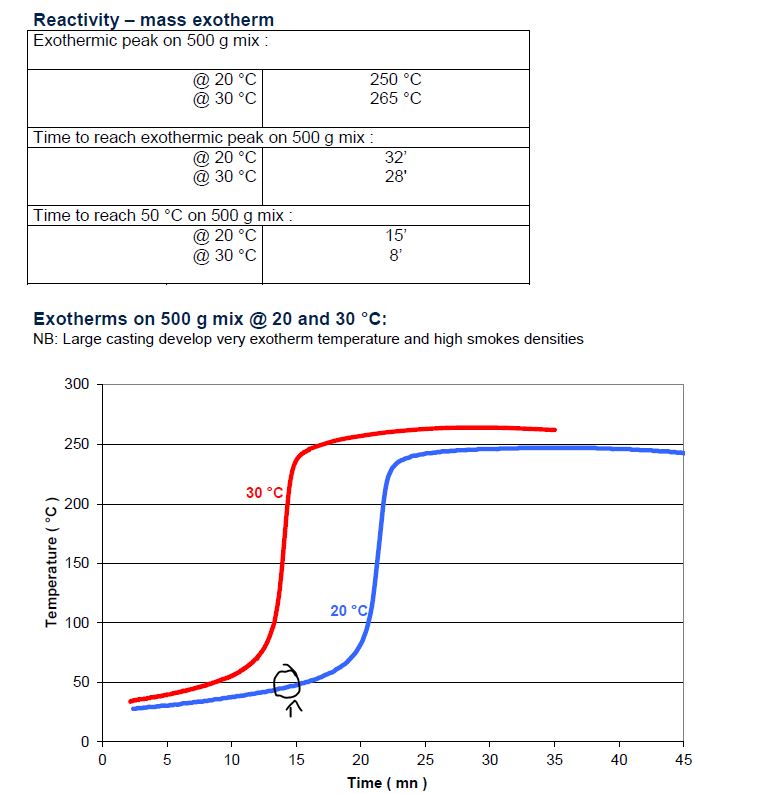
The reactivity its fast, You only have 15 minutes since you make the mixture until you apply it to the fiber layers and place it in the mould..
Properties once cured.
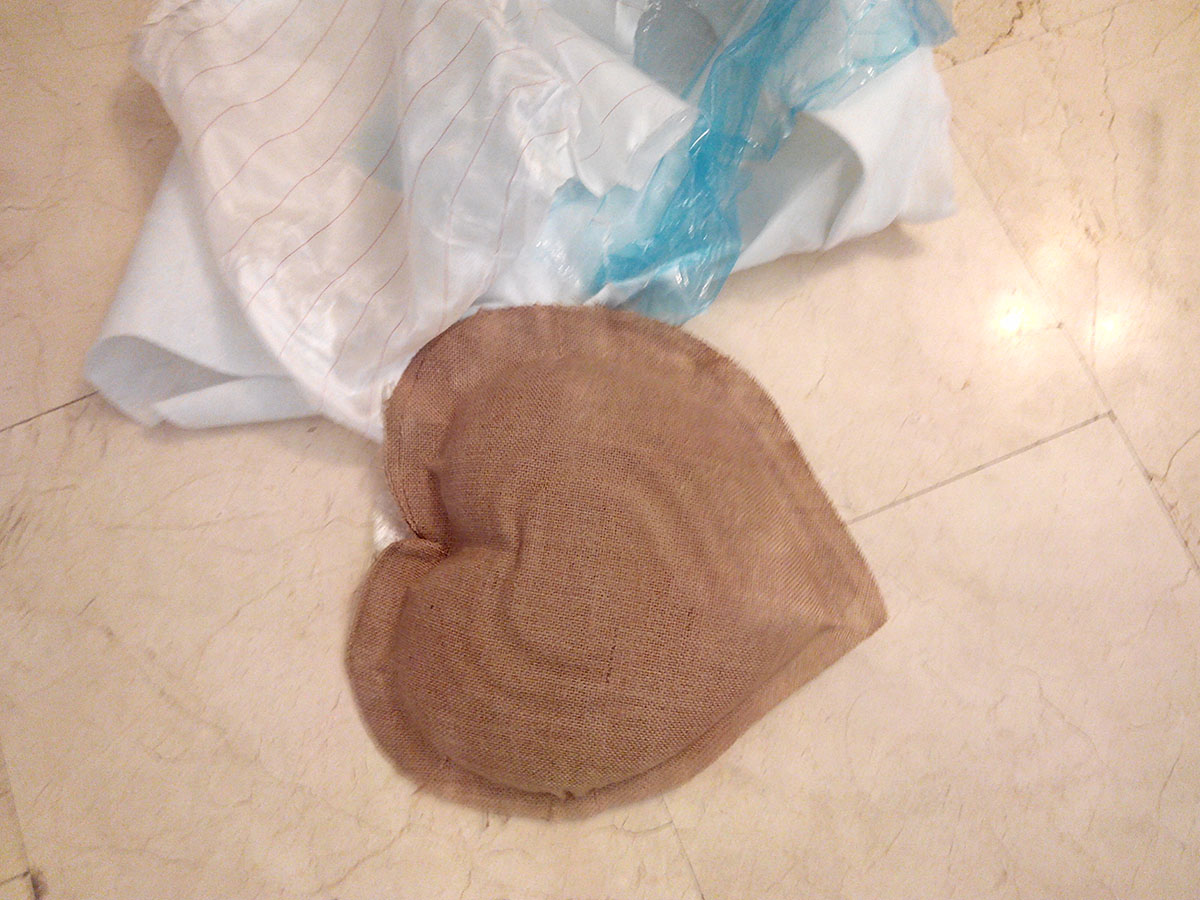
1. Design and make a 3D mould (~ft2 /30x30cm), and produce a fibre composite part in it.
For this assignment I am going to make a heart in burlap fabric for the mother´s day.
I hope she like it.
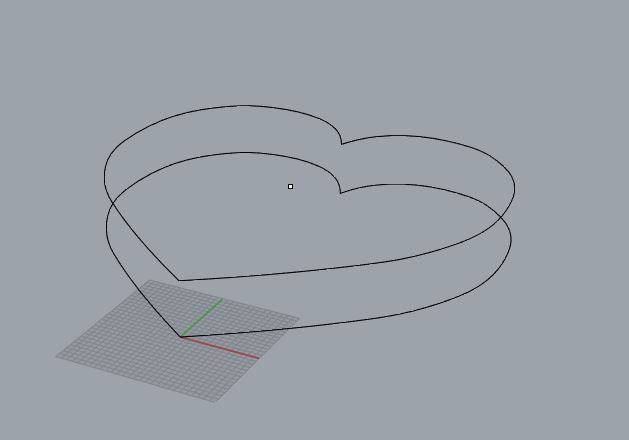
1. Design a Mould.
As this type of fabric is thick and I will make several layers, the very fine details will not be appreciated.
That's why I decided to make a rough mold with which I will gain milling time and the result I think will be similar.
The software used for the design is rhinoceros, and I have designed several cores of different sizes, different molds and also the files for laser cutting.
The design has also helped me to calculate the amount of material I have to use and the cut of the fabric.
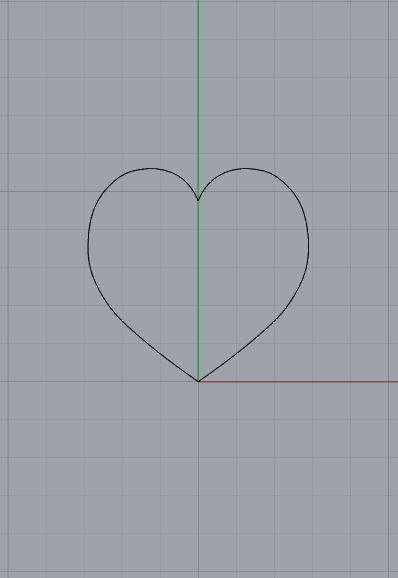
creating the shape
Multiples shapes can create a 3d form with Loft tool.
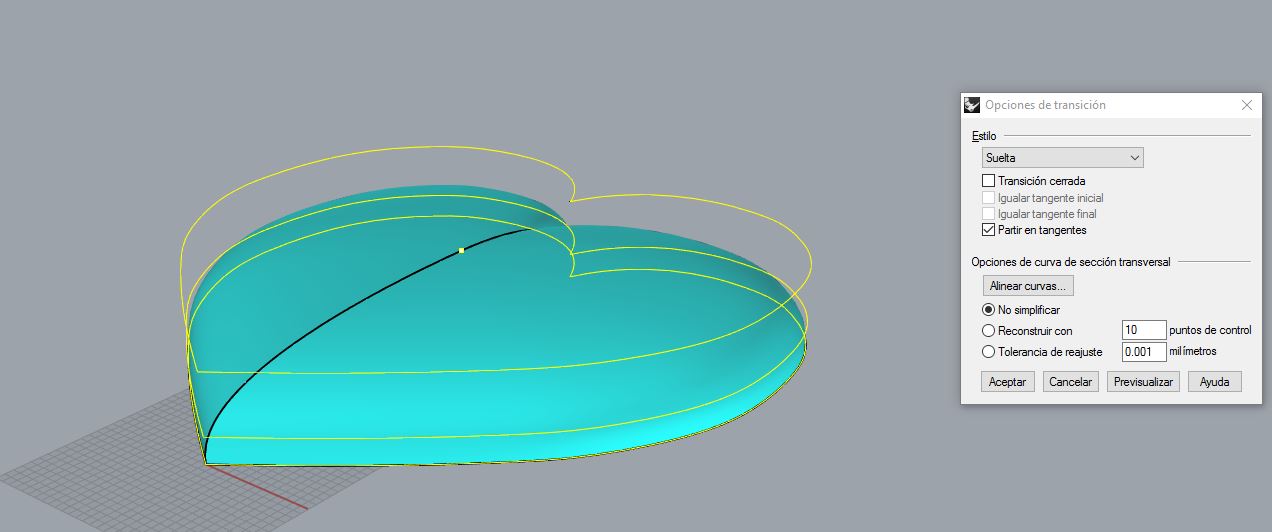
making loft

you can modify the 3d at real-time with tool record history
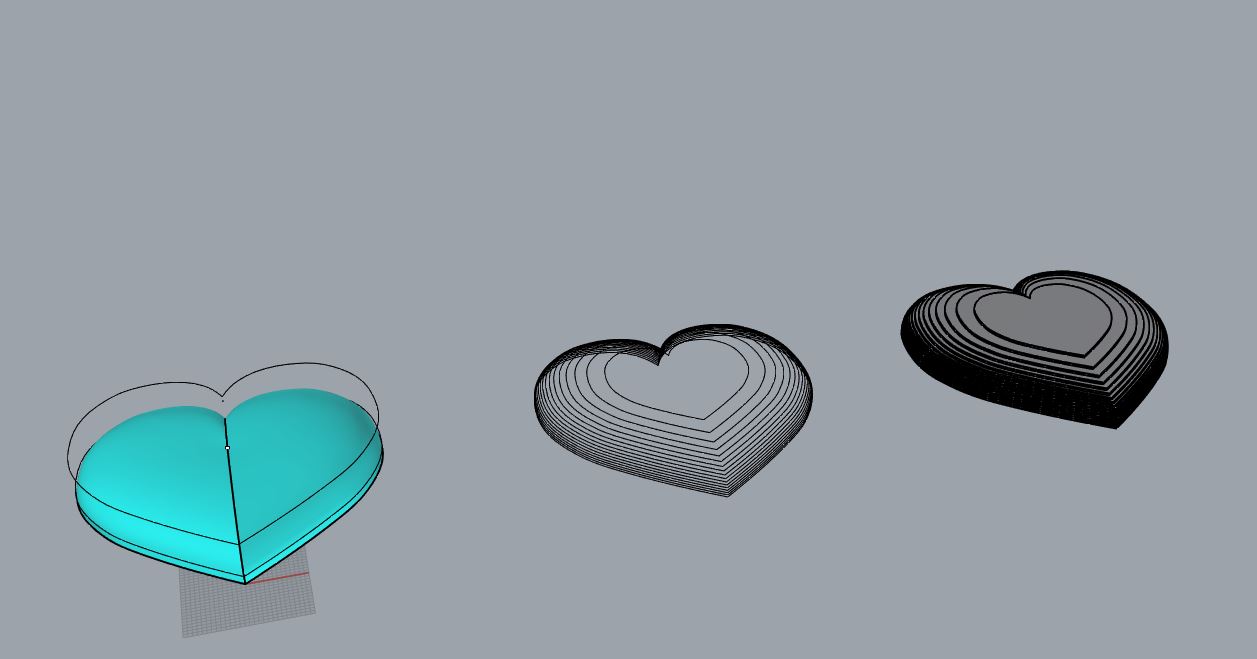
this will be the process of make the cutting layers, with the contour tool.
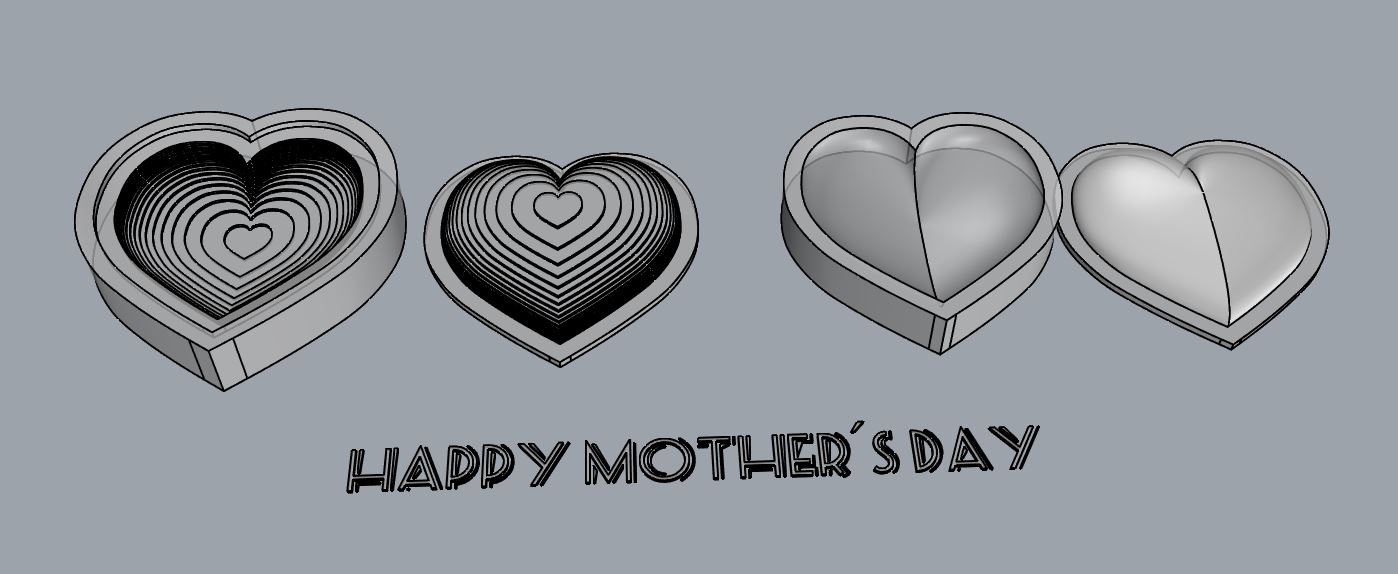
two 3d molds for laser and cnc.
I have designed the two types of mold, to use vacuum bag or to use a mold and a counter mold, I also have the design to do it in CNC mold and counter mold.
I decided to do it for the laser cut for the reasons I write above.
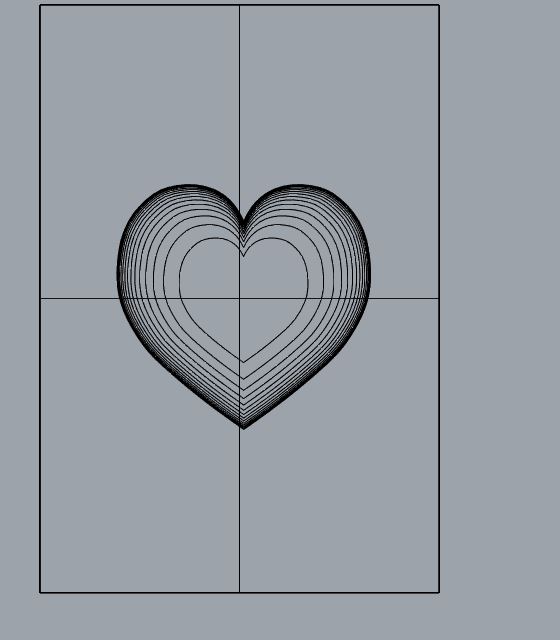
2. Make the cut files.

Laser cutting machine.
We draw the curves of the 3d, place them and separate them in 3 layers, engrave, cut and interior cut.
In each piece is recorded where the next one has to be placed, and the inner cut is to place the smaller pieces inside the larger pieces and thus save material.

cutting file to laser cutting machine.
I cut 18 pieces of MDF wood 5mm
Then place the pieces in the software used that is lasercut, setting the cutting parameters for MDF 5mm wood.
Parameters used:
S = Speed P = Power MP = Max power
External Cut: S = 8 P = 40 MP = 45
Inside cut: S = 8 P = 40 MP = 45
Recorded: S = 150 P = 11 MP = 12
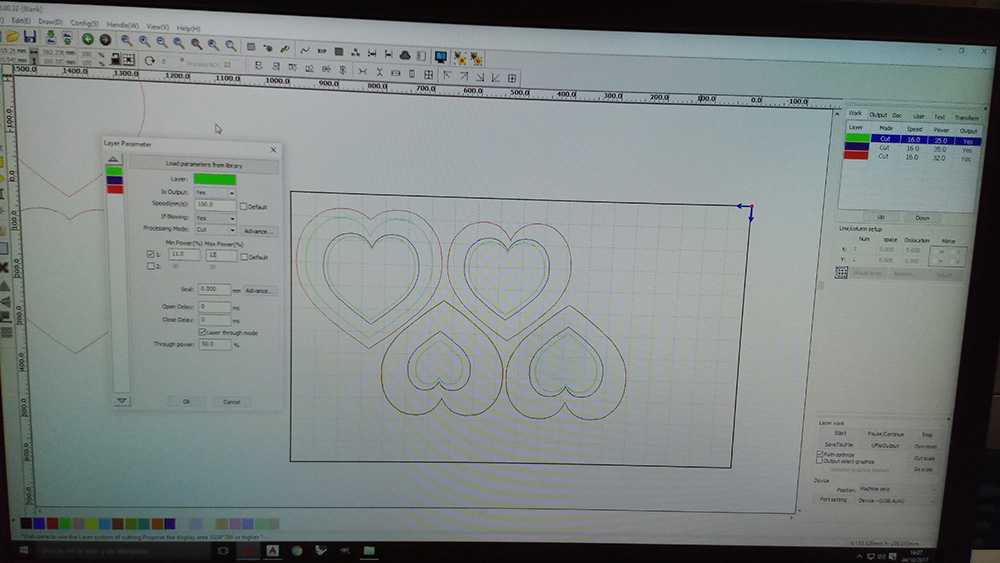
Preparing the file parameters.
3. Cut in Cnc machine or in laser cutting machine.
Took about 5 minutes to prepare the file, and about 15 minutes of laser cutting, the board used was 5mm thick mdf wood.
So I was faster than the cnc cut.
On the other hand I had to glue the pieces and the drying time until I could move the mold without danger was an hour, but allowed me to work on cutting the fabric.

MDF board material
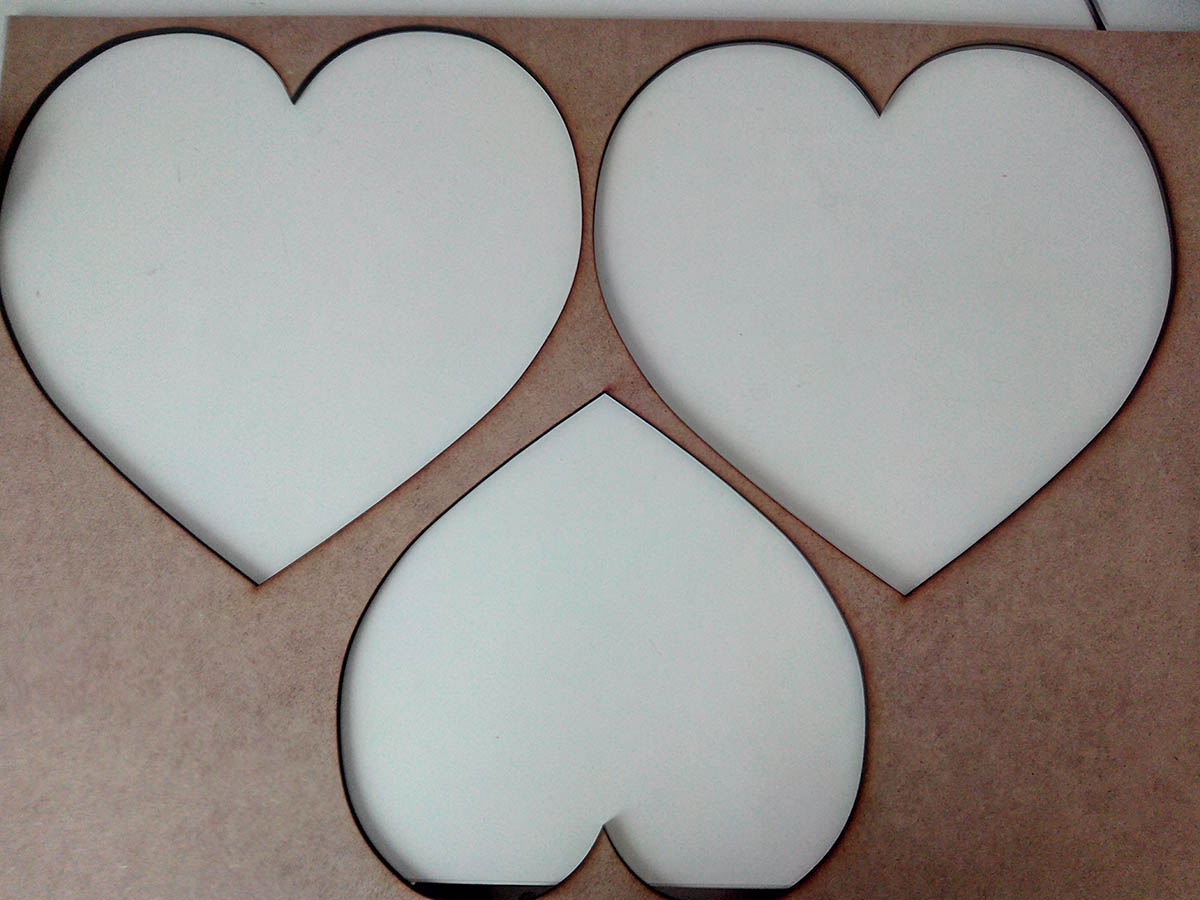
These are the parts I have cut from the material
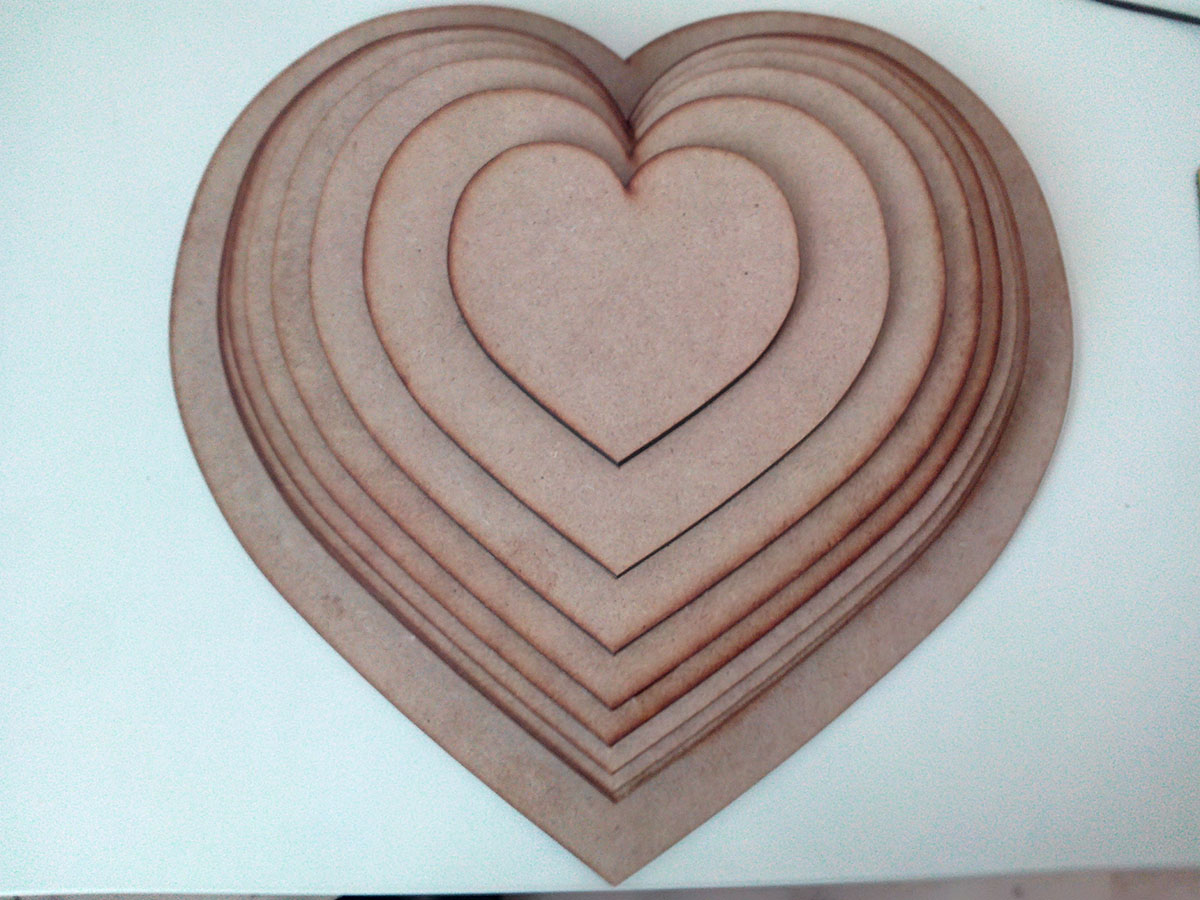
And this is the final result of the mould.
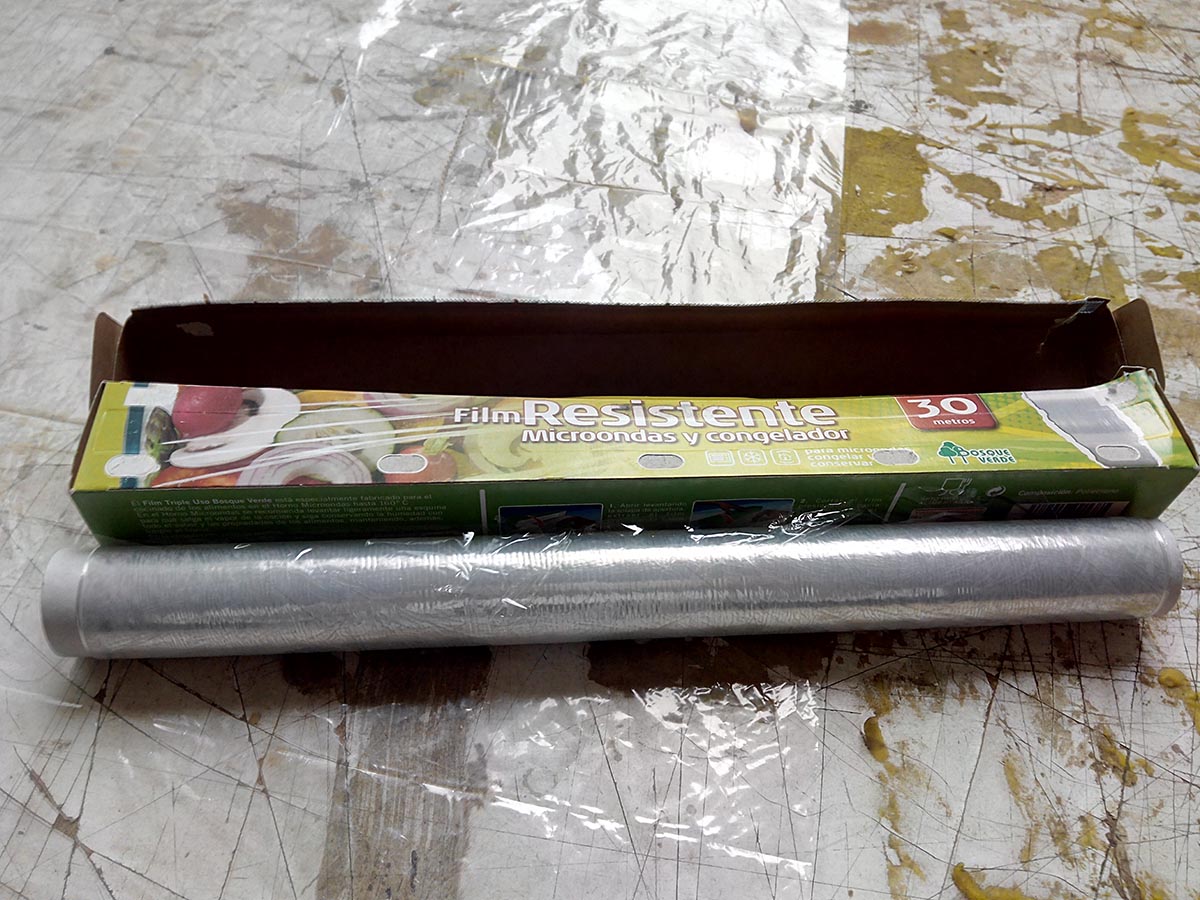
4. Cut the fabric in laser cutting machine.
I did some tests of the fabric to know the parameters that I had to use to cut.
As the fabric has no stiffness and wrinkles easily,I placed under a rigid plastic to which stick the fabric.
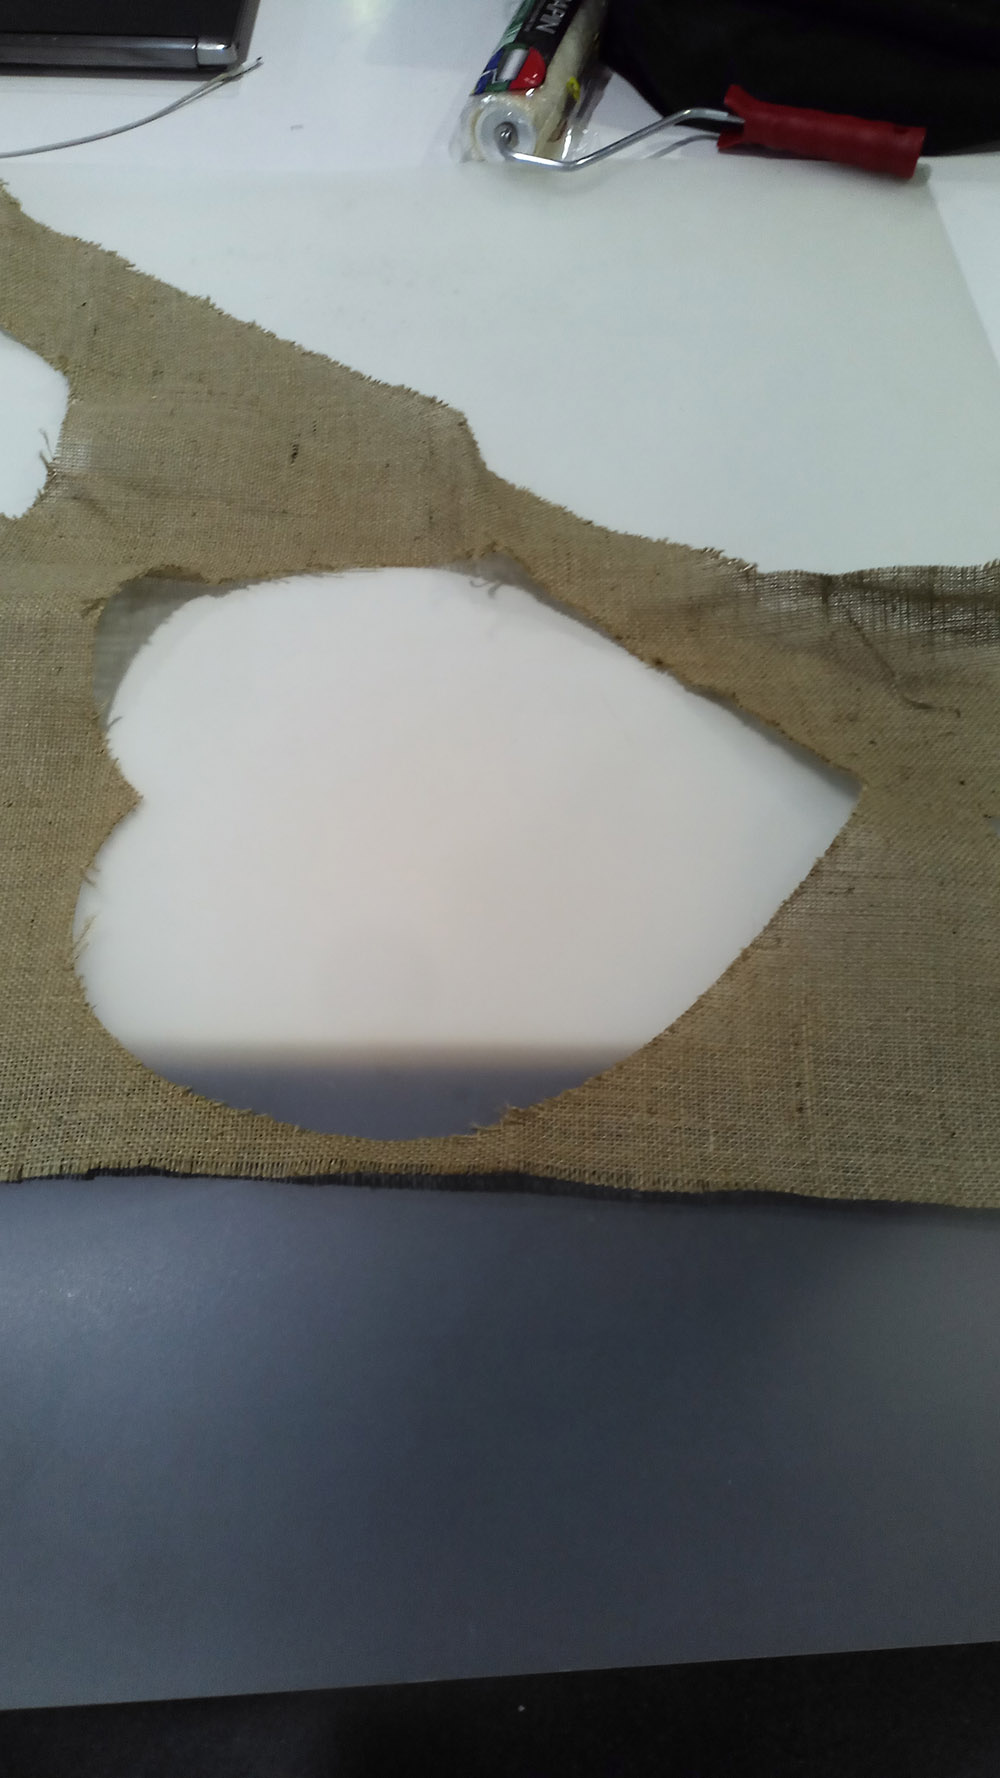
Fabric with rigid plastic behind.
To design the fabric cutting pattern, I used the developing tool of rhino, with this tool I convert a surface into a developable plane.
Since they are 5 pieces of cloth, the first one has the appropriate measure plus a small margin, and the others make it making a lag of 5mm each because they are going to have to be greater than the first ones that are put.
I prepare the cut file.
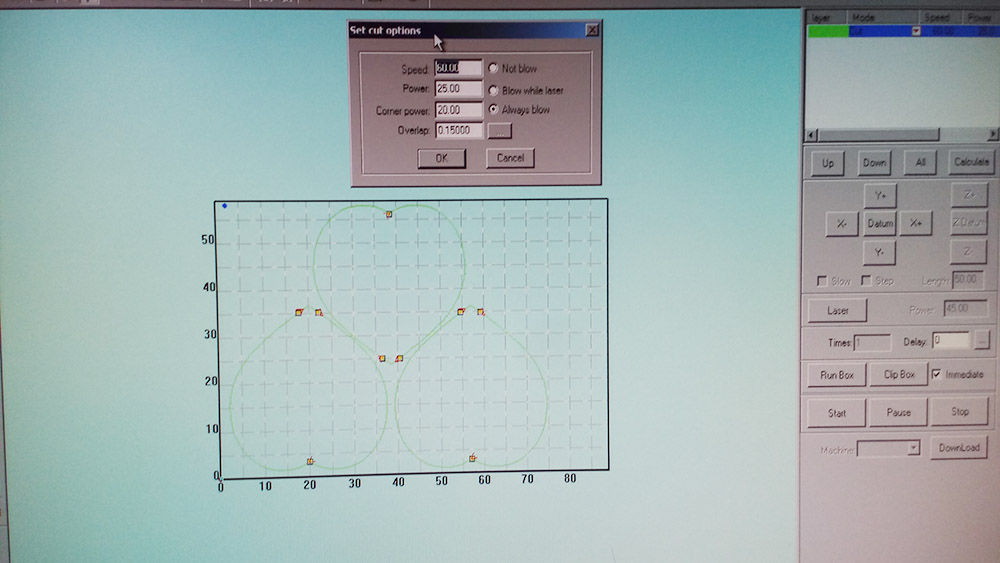
Preparing the cut file, in lasercut.
Parameters:
External Cut: S = 60 P = 25 CP = 20
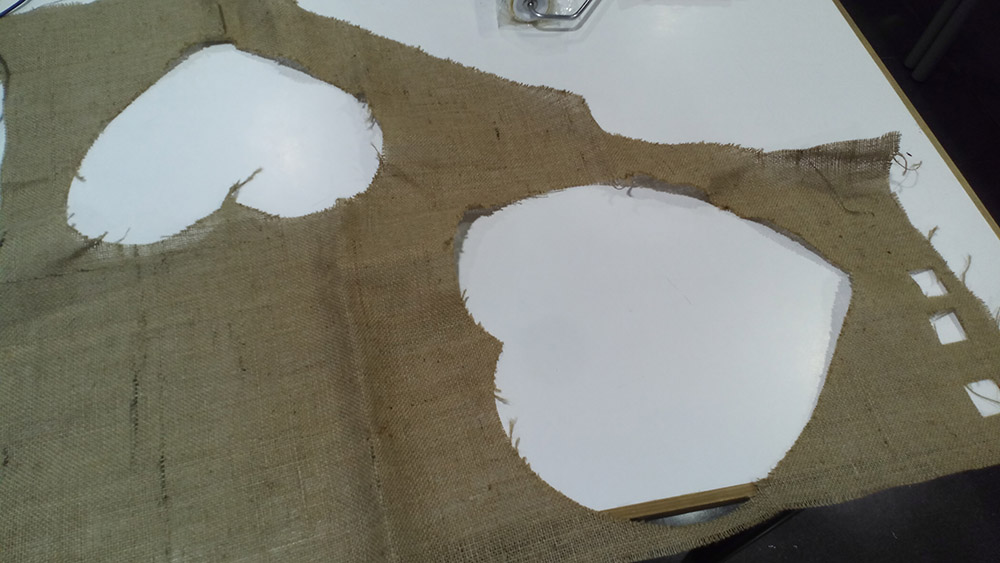
And this is the fabric cutted.
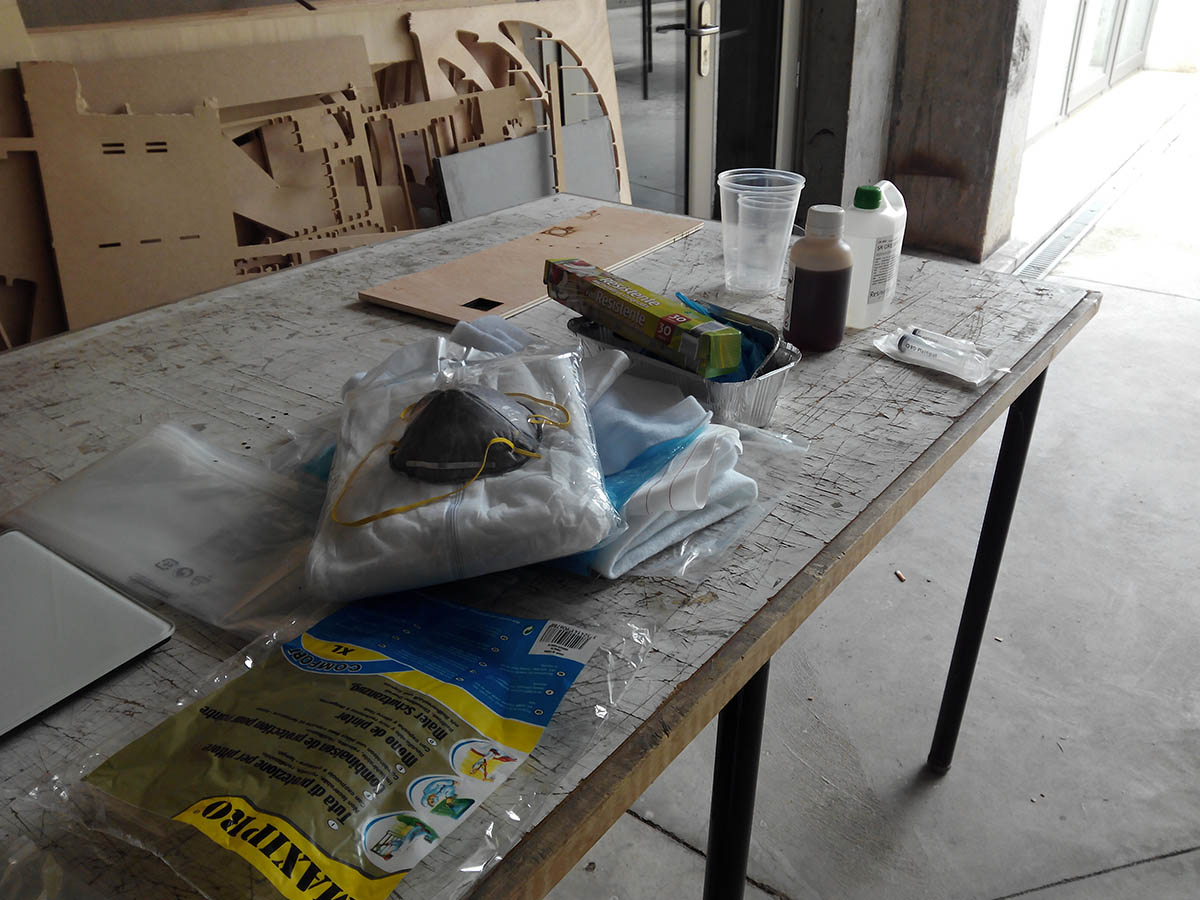
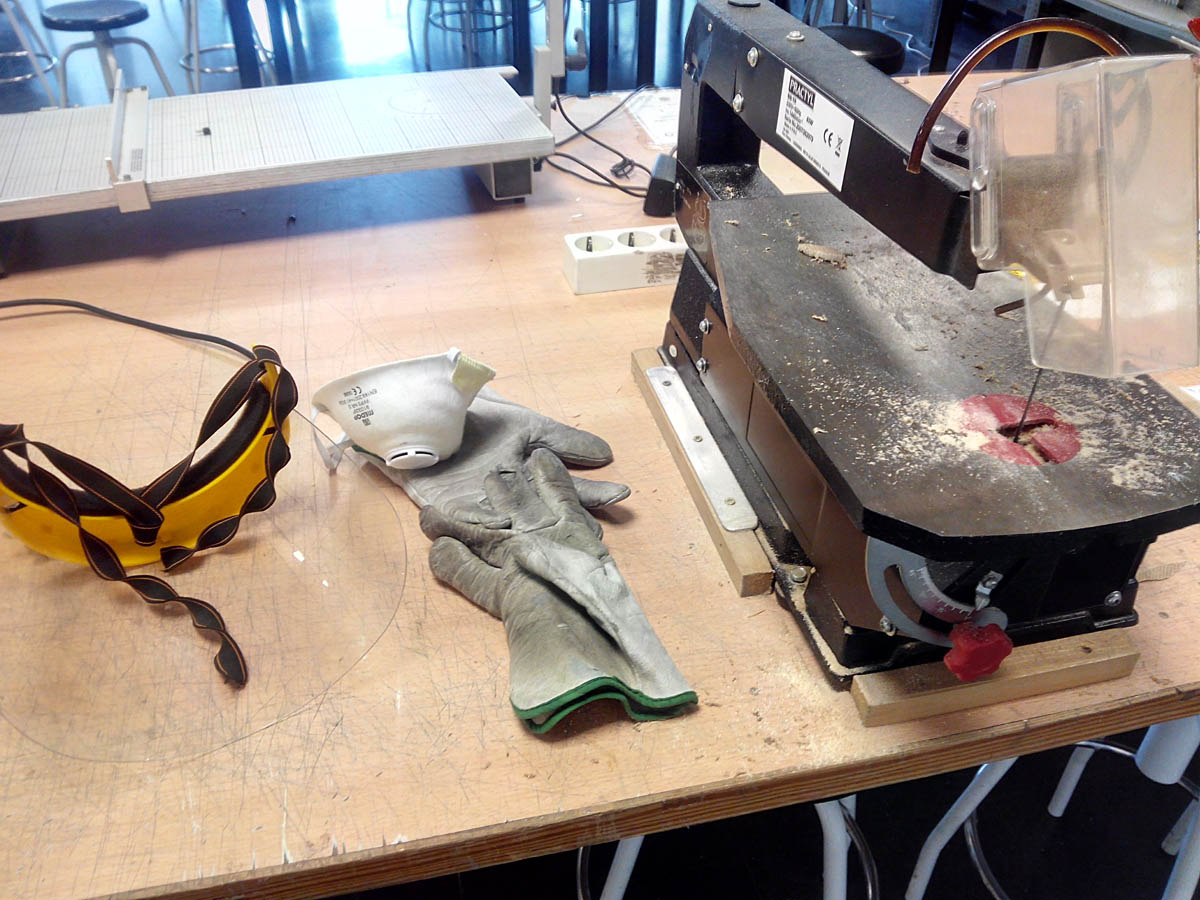
5. Prepare all the materials on the workbench.
So that the composite does not adhere and does not burn to the mold we use paper fill, with three layers will suffice, and we put petroleum jelly on the fill paper to separate it better.
Protective clothing:
glasses
coat
mask
Gloves
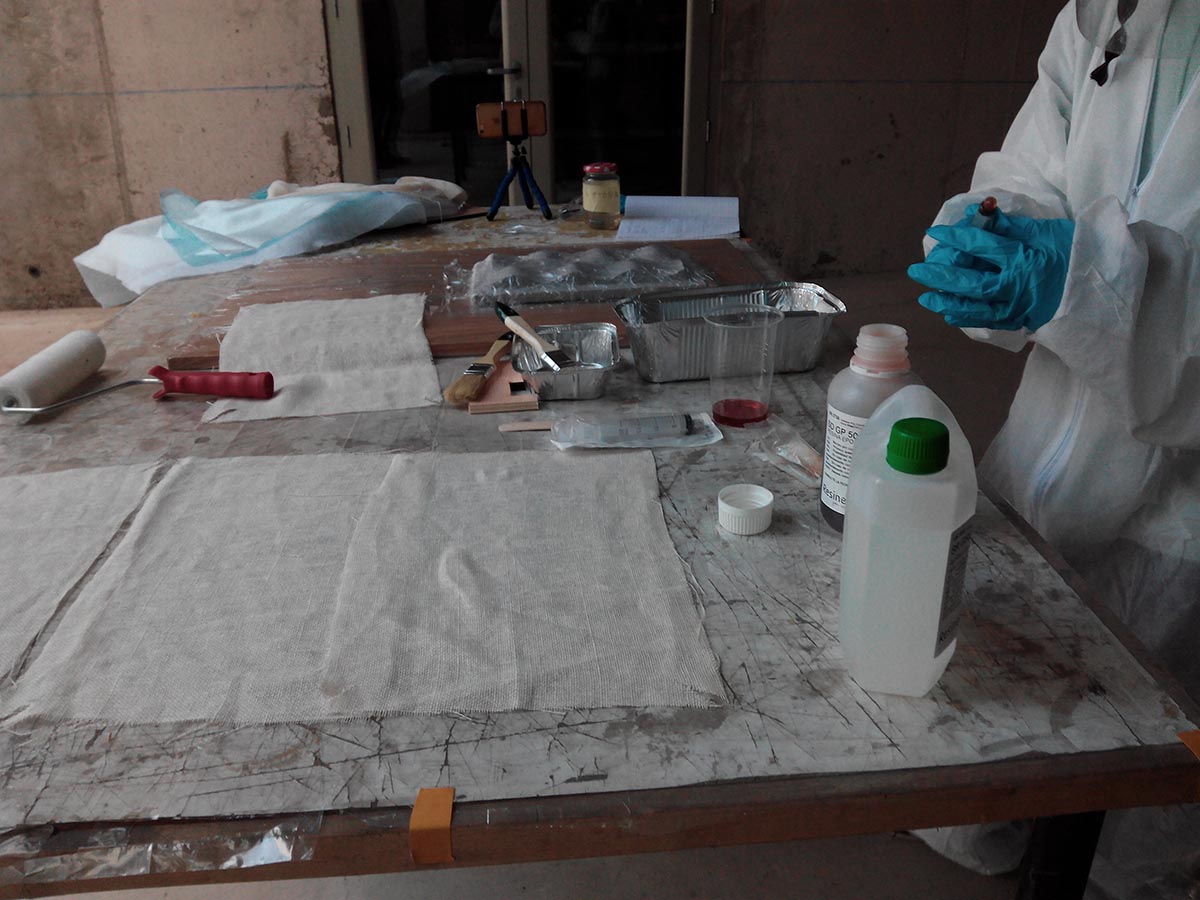
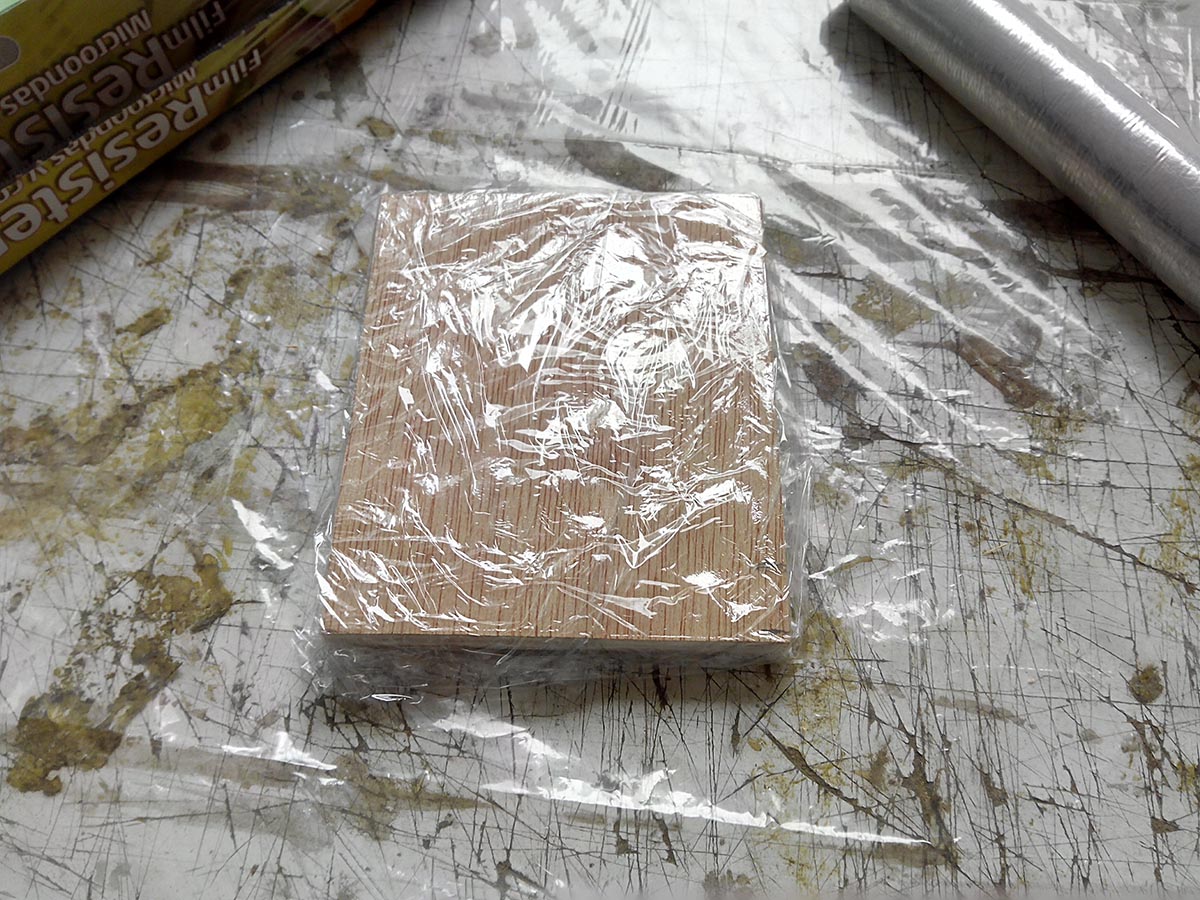
5.2 Testing with coupons and drawing conclusions.
Before performing the composite exercise, we perform a test to see the curing process of the resin and how to apply it on a surface.
The coupon is simple, a piece of wood to which we add the pieces of cloth and resin and let it cure with the pressure of some jacks.
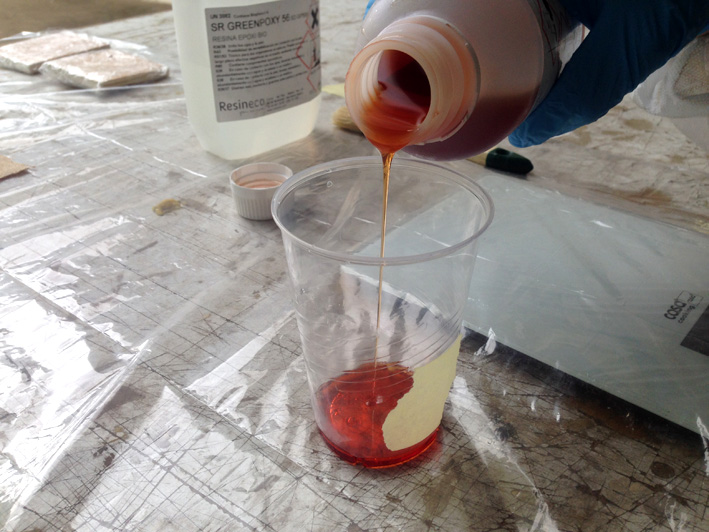
The mixing volume we must make for the test are 70mm x 70mm x 4mm = 19.6ml
Then we calculate the milliliters of SD clear clear and the ml of Poxy.
We divided 19.6 ml into 2 50% of volume in fabric and 50% of volume of resin.
In the datasheet the correct ratio is 100/47 100ml of Poxy per 47 ml of SD surf clear.
The operation is as follows, we divide 9.8 by 147 and the result is multiplied by 100 for the poxy and by 47 for the SD.
Results 6.66 ml of Poxy and 3.14 ml of Resin SD surf clear.
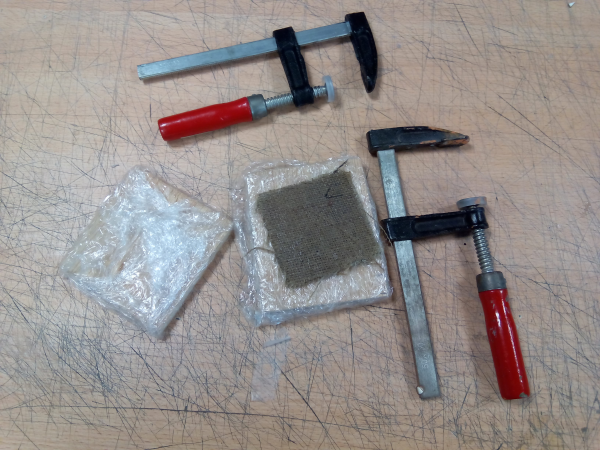
I prepare the workbench, and the security elements, I apply vaseline and fill paper to the coupons to protect from the temperature and that it does not remain stuck.

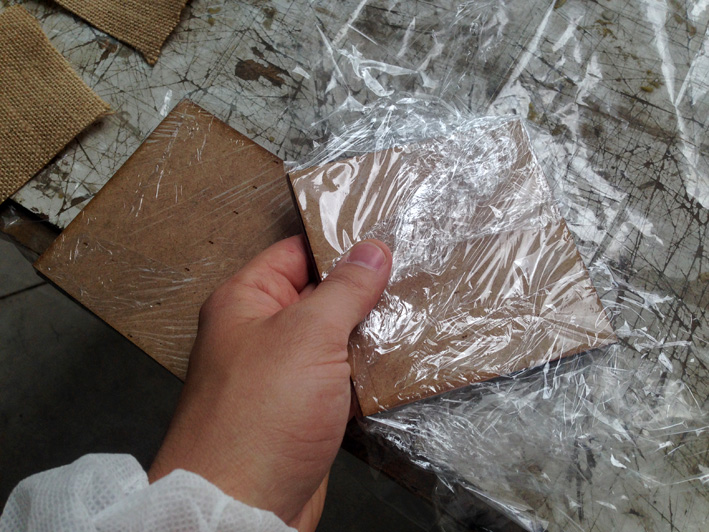
I apply the resin to the fabric and place it on the wood, when I finish put another layer of paper fill and let dry with the jacks under pressure.
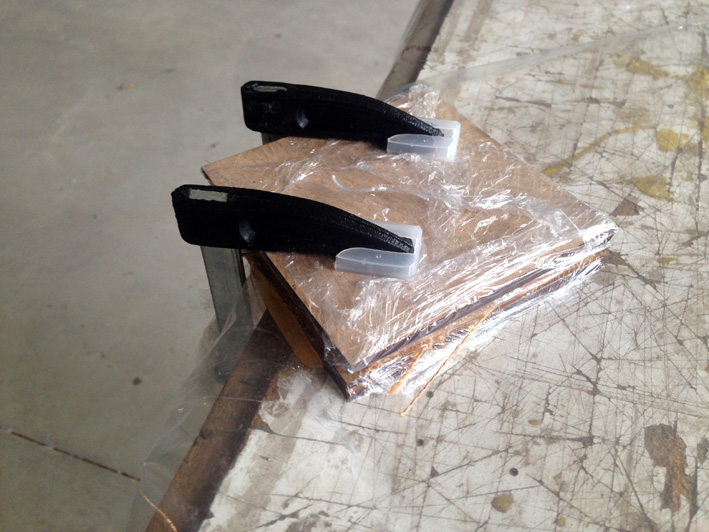
we made 2 coupons one with the amount of resin recommended in the calculation and another with 200% resin.
Conclusions:
It is better to prepare more quantity, because in the first pieces gives more quantity than in the last, the roller also absorbs enough amount of resin.
The resin is the component that brings hardness to the final fiber, if you put too much will solidify leaving a hard and rigid material.
The final result of the coupons was that one of them was correctly as a hardened fiber, which we had calculated the amount needed, and the other to which we added 200% was very hard and not flexible.
In this video you can see the result of the 2 coupons:
6. Produce composite.
I cut the strips of cloth with scissors in the areas where they could be folded.
I prepare the components of the mixture, I take the exact amount that in this case is proportional 100 per 47.
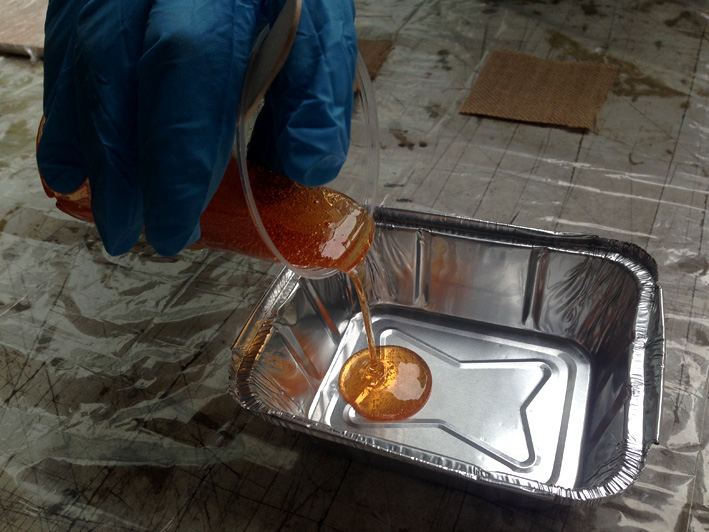
Mix with a stick for 2 minutes
Drop the mixture into an aluminum bowl.
With the help of the roller I evenly spread the mixture on the fabric strips.

I quickly put the strips of cloth in order on the mold, making sure that they are all well placed.
then I place the missing components, tissue paper, perforated plastic, and absorbent cotton paper.
Why i place this components? you can see below.
The method used to apply pressure and cure is that of the vacuum bag, I wanted to try this method, but I could have done it any other way, with a water bag, or with a countermold.
Appendix: Vacuum bagging:
Vacuum bagging (or vacuum bag laminating) is a clamping method that uses atmospheric pressure to hold the adhesive or resin-coated components of a lamination in place until the adhesive cures.
The effectiveness of vacuum bagging permits the laminating of a wide range of materials from traditional wood veneers to synthetic fibers and core materials.
Vacuum bagging uses atmospheric pressure as a clamp to hold laminate plies together. The laminate is sealed within an airtight envelope. The envelope may be an airtight mold on one side and an airtight bag on the other. When the bag is sealed to the mold, pressure on the outside and inside of this envelope is equal to atmospheric pressure: approximately 29 inches of mercury (Hg), or 14.7 psi (one atmosphere). As a vacuum pump evacuates air from the inside of the envelope, air pressure inside of the envelope is reduced while air pressure outside of the envelope remains at 14.7 psi. Atmospheric pressure forces the sides of the envelope and everything within the envelope together, putting equal and even pressure over the surface of the envelope.

Advantages of vacuum bagging:
Even clamping pressure
Control of resin content
Custom shapes
Efficient laminating
Vacuum Bagging Equipment:
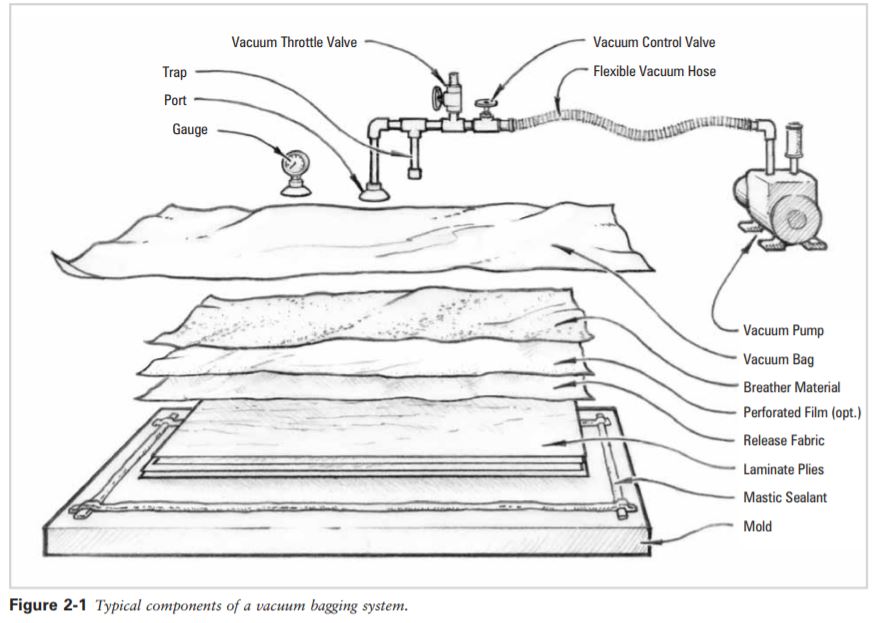
Breather Material - A breather (or bleeder) cloth allows air from all parts of the envelope to be drawn to a port or manifold by providing a slight air space between the bag and the laminate.
Perforated film - A perforated plastic film may be used in conjunction with the release fabric. This film helps hold the resin in the laminate when high vacuum pressure is used with slow curing resin systems or thin laminates.
Release fabric - Release fabric is a smooth woven fabric that will not bond to epoxy. It is used to separate the breather and the laminate.
Mastic sealant - Mastic is used to provide a continuous airtight seal between the bag and the mold around the perimeter of the mold ( I used Scotch tape).
I wrap everything in a vacuum bag and vacuum the air until it is completely empty. I close and wrap the bag by putting duct tape on the ends so that no air can enter.
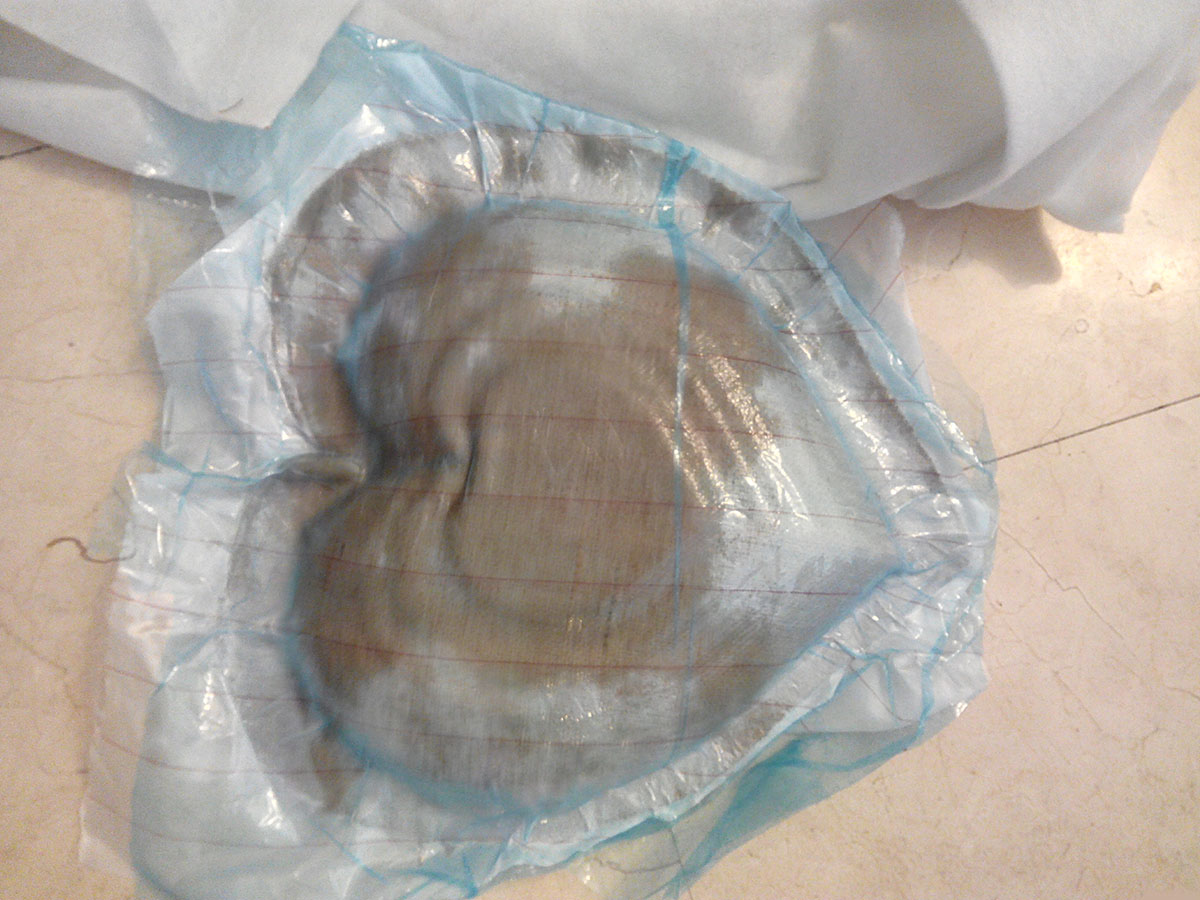
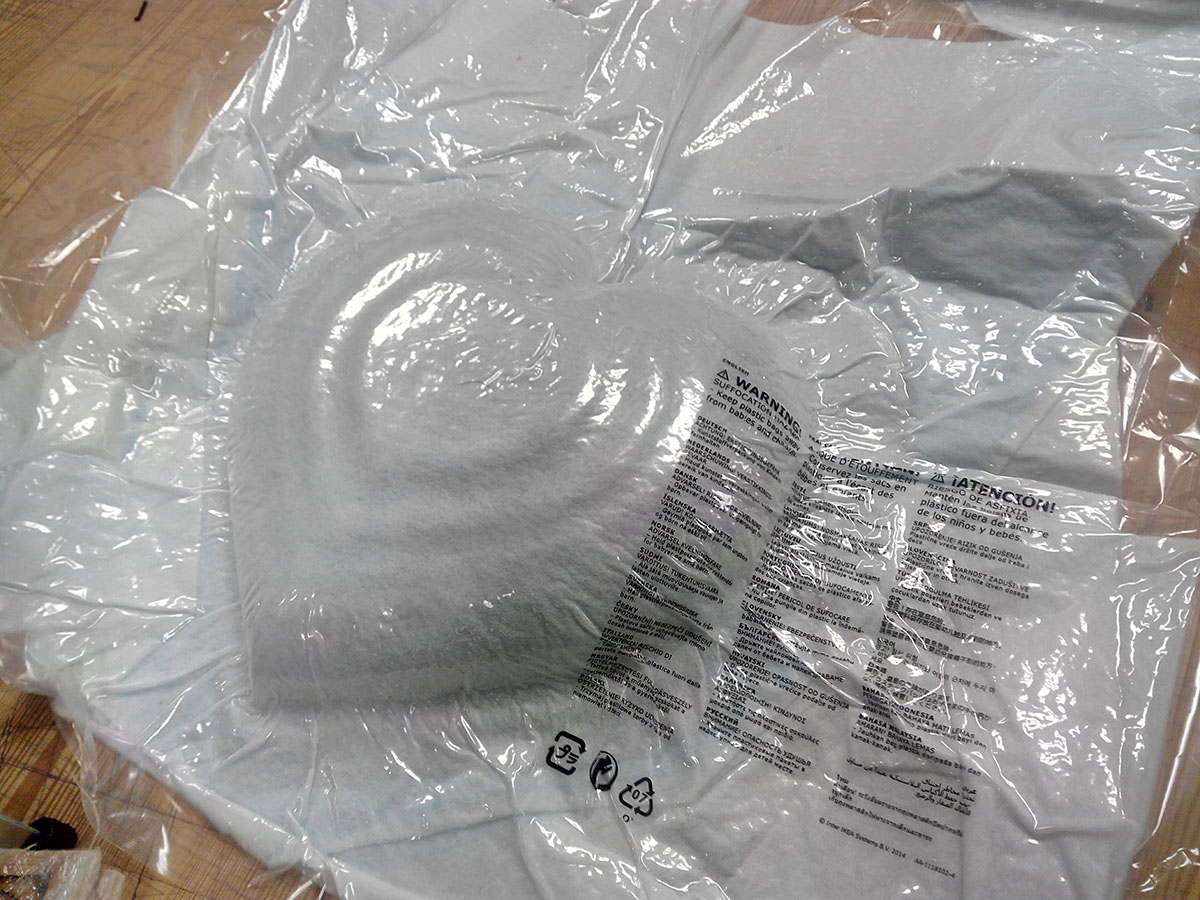
vacuum bag.
The final result is the perfectly sealed composite in vacuum curing.
7. Allow to dry and cut the remaining composite.
I waited 2 days to remove the composite from the mold to take photos, and on the third day I cut the edges with a saw.
I gave him another layer of resin to get its final consistency.
Cutting the leftover material with a saw.
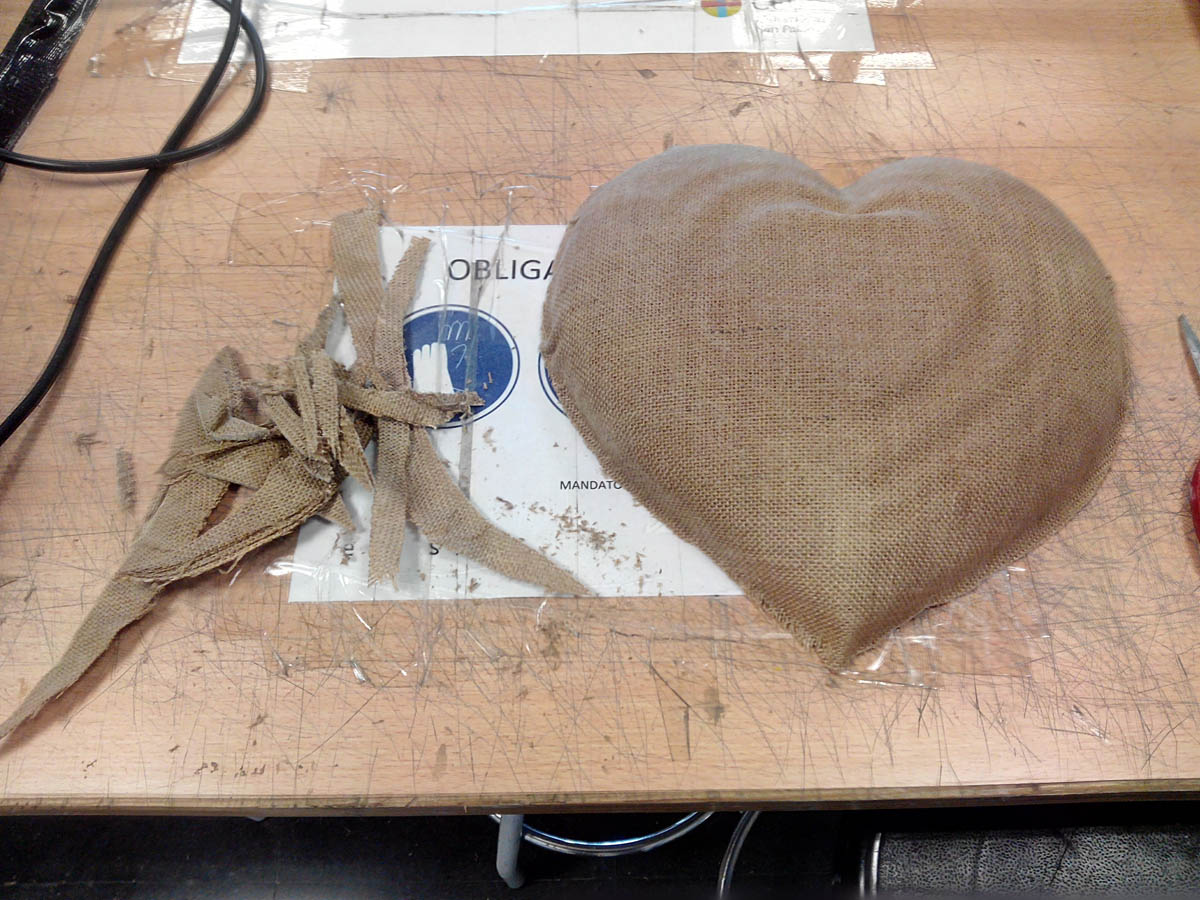
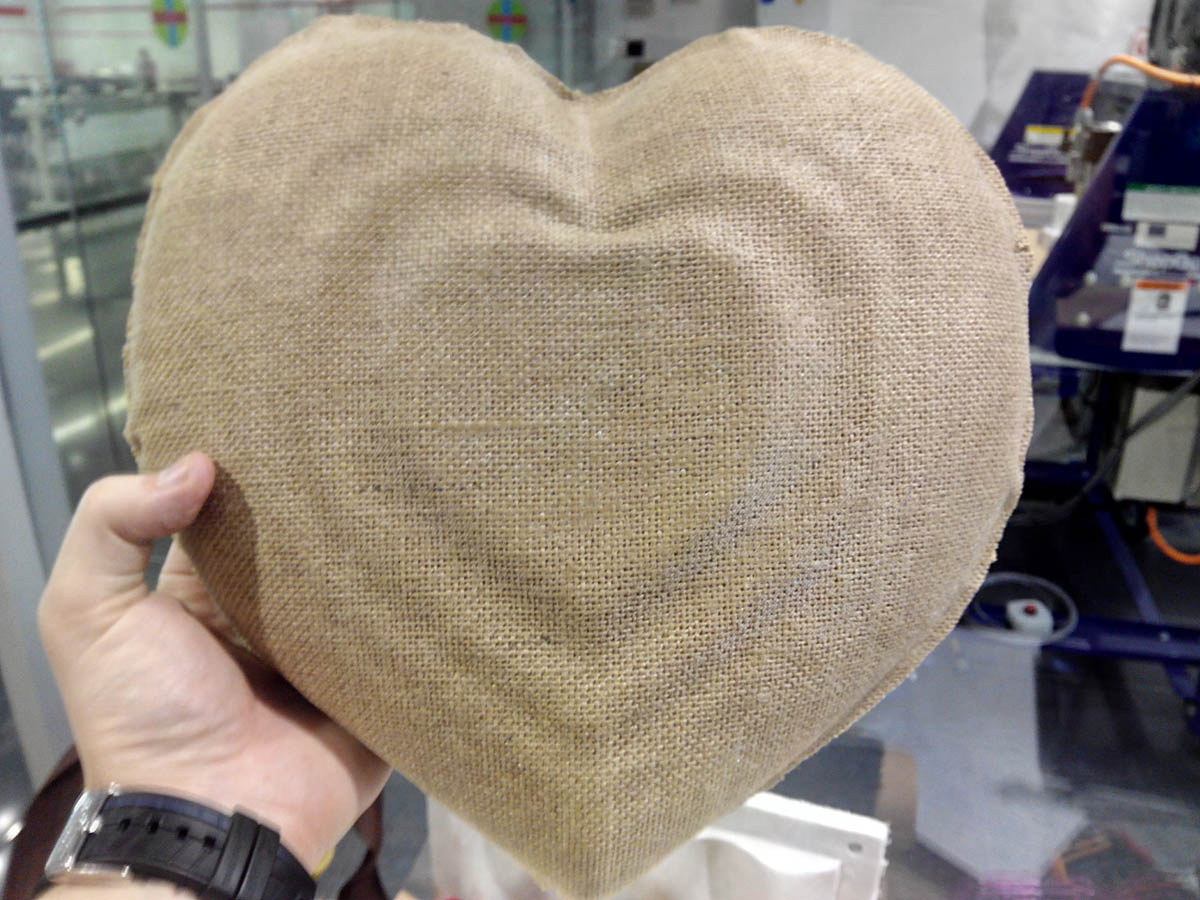
Final Result.
PROBLEMS:
Problems I've had: When cutting the fabric to make the file of cut of the fabric I could not deploy correctly the surface since rhino, it produced an error, the solution was to offset one of the forms that had, with which it had too much cloth.
Another problem I have had is that although I did the calculations there was just the right amount of resin.
The first layers gave them too much resin with the roller and the last ones lacked a little.
FILES:
heart 3d models
lasercut file
datasheet