Assignments:
- Design a 3D mold.
- Machine it.
- Cast parts from it.
--- WORKFLOW ---
1. Design a logo in 3d to place it in my final project.2. Create the 3d model of whole mould with measurements.
3. Adjust the parameters for milling the model and make it.
4.1 Read the datasheet of components of the mixture.
4.2 Make the negative.
5.2 Read the datasheet of components of the mixture.
5. Cast the parts.
1. Design a logo in 3d to place it in my final project.
In my final project there is nothing that can be reproduced in series, so I have chosen to create a logo that can be added in the final product, as an official brand.
I designed the logo in rhinoceros, from the 2d logo created for the web.
Design process:
First lines.
making the 2d logo into 3d
making the model
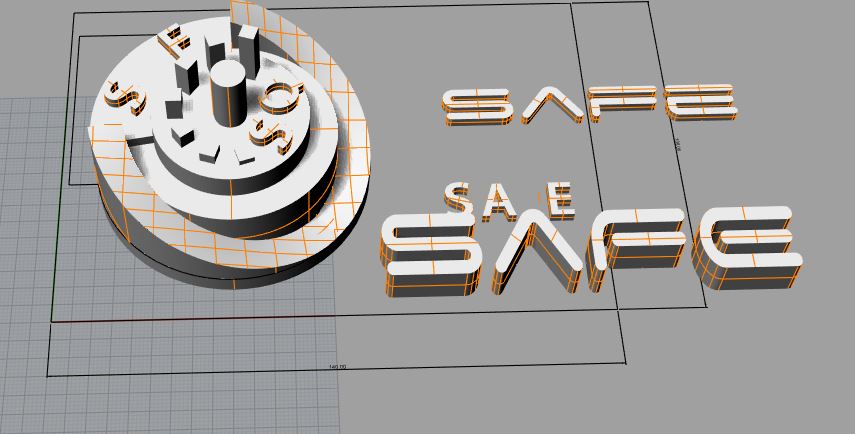
First design tape A
The main tools I have used for 3D modeling are:
Polyline, circle, text to draw in 2D.
Extrudecrv, Boolean operations and loft to convert 2D into 3D.
Creation of truncated spheres, cylinders and cones for mold elements.
You can see the first model in sketchfab:
Molding1
by alvarolaroja
on Sketchfab
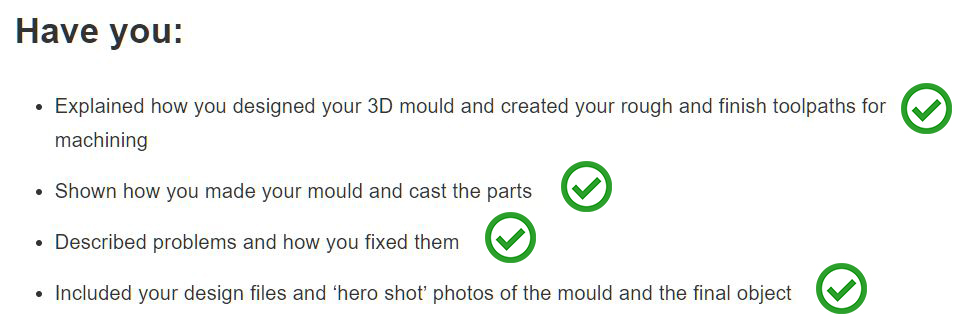
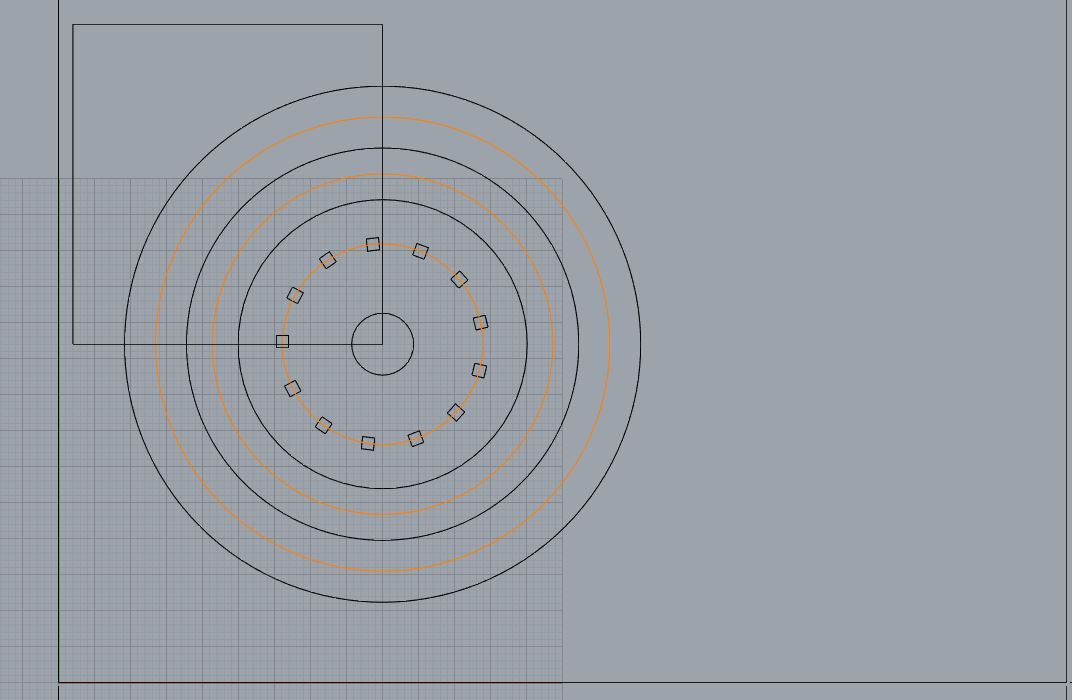
2. Create the 3d model of whole mould with measurements.
After seeing several examples of molds, I decided to change the design.
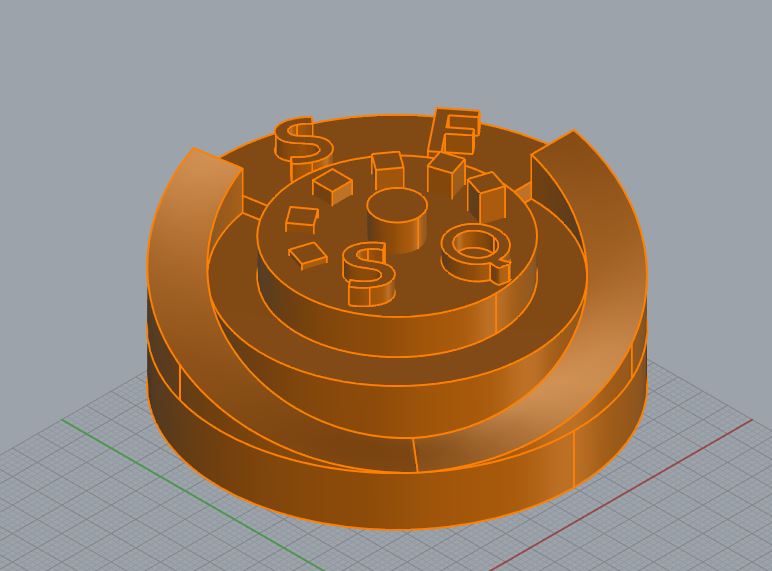
Fist design tape A
First design A-B

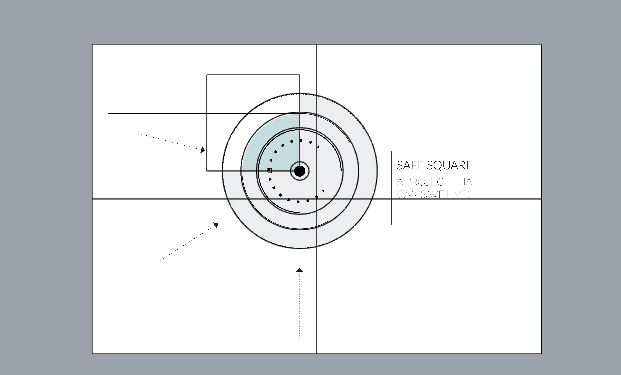
Boolean for mould body
Adding cone of casting and spheres of joints.
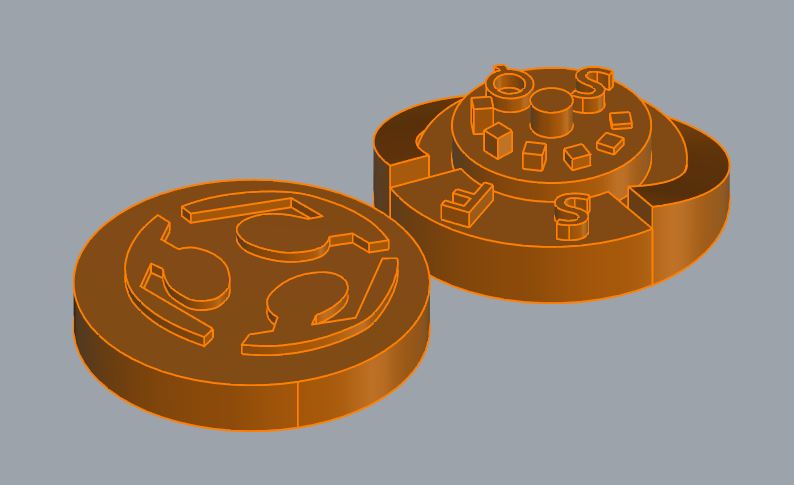
I had problems with the modeling of my rhino design, to turn it into a closed polysurface.
I modeled the 3d incorrectly and I got surfaces with the normals changed.
Changing upside down normals.
I had to reverse them several times by hand and some pieces reshape them by doing boolean joints.
Took me some time.
I made changes in the design for better milling.
the mesh is already closed, and with the shape we want the wax mold.
with the cone of casting and with some holes the air can leave.
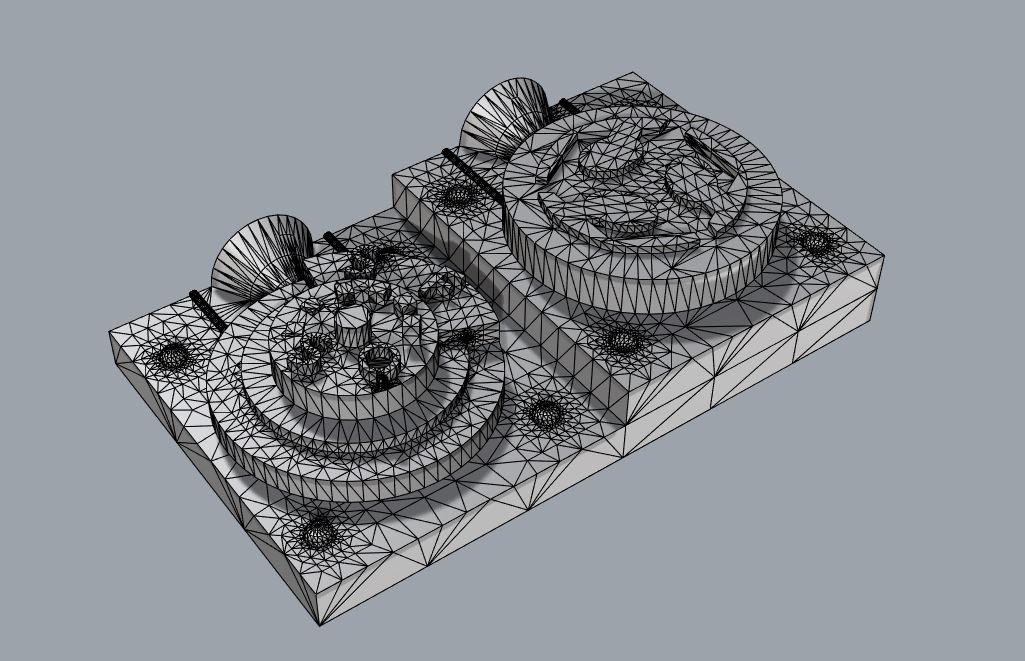
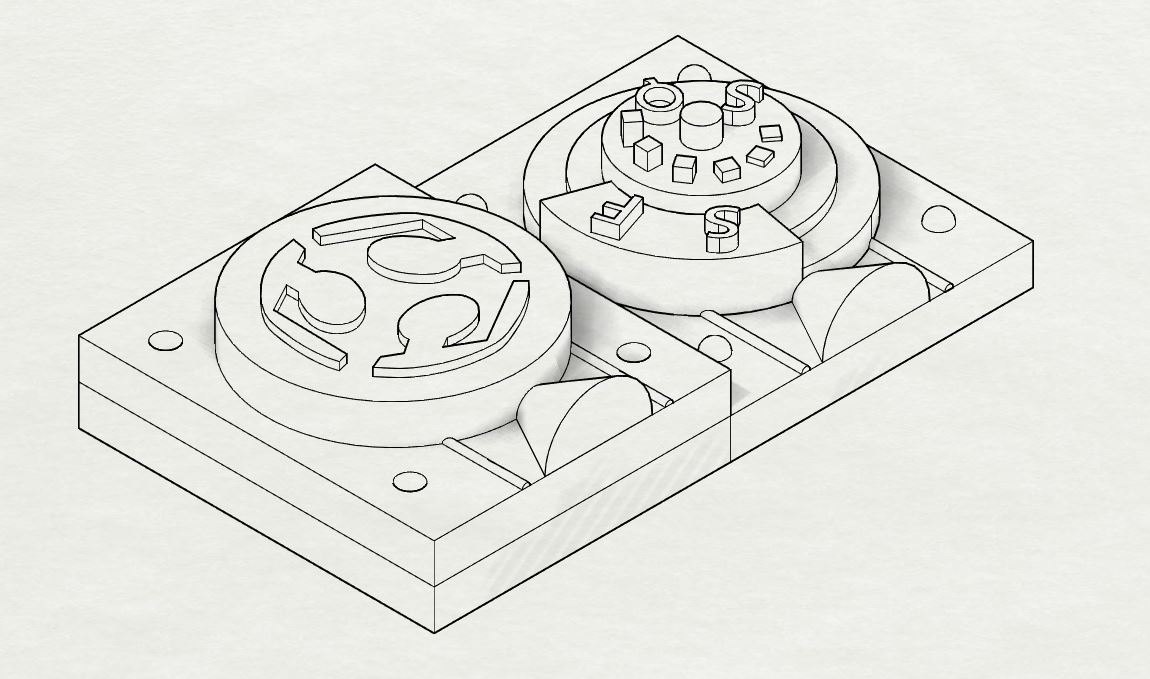
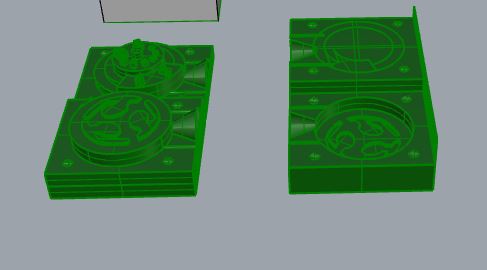
Final design
molding3dlogo
by alvarolaroja
on Sketchfab
3. Adjust the parameters for milling the model and make it.
Steps to introduce a stl in fabmodules and mill in wax.
1. Introduce as input the mesh - stl
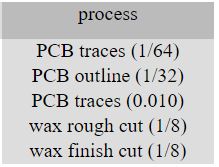
2. Adapt the units (25.4 from inch to mm) and calculate the height map
3. Choose the machine that we are going to use, ours is Roland mx-20
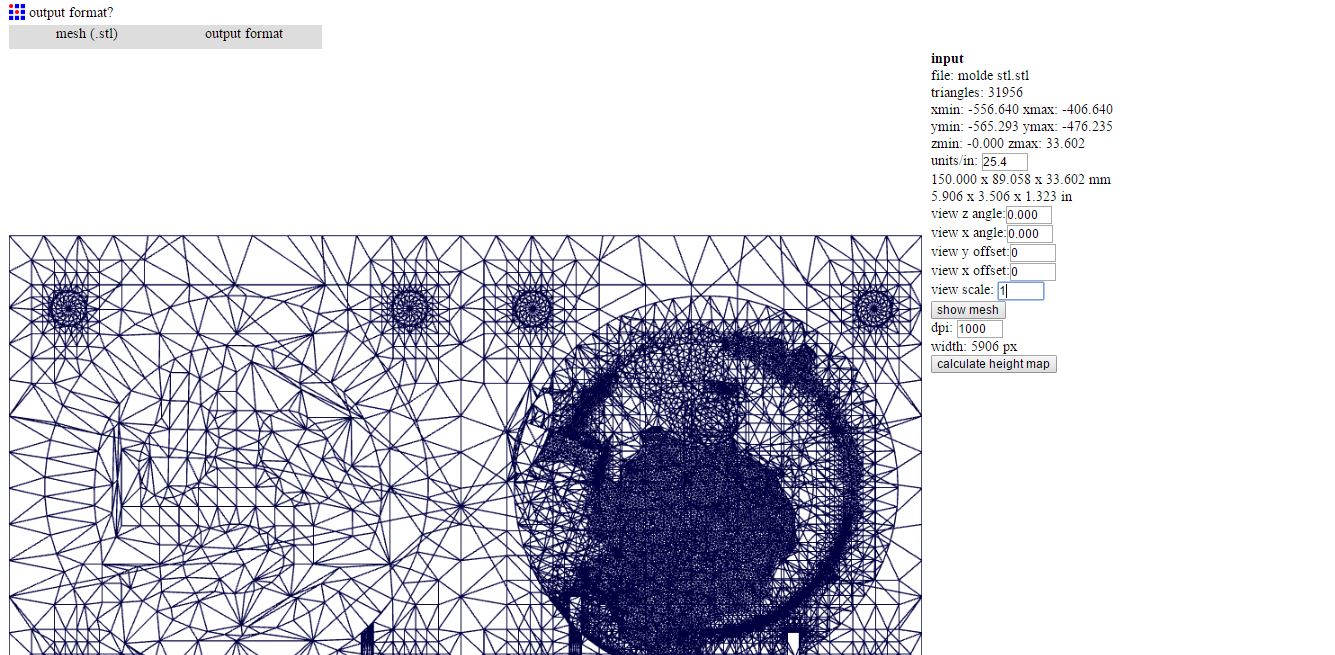
4. Choose the milling process
5. Change the parameters as a type of cutter
6. Calculates
7. Send to Mill
8. Repeat with the finish milling.
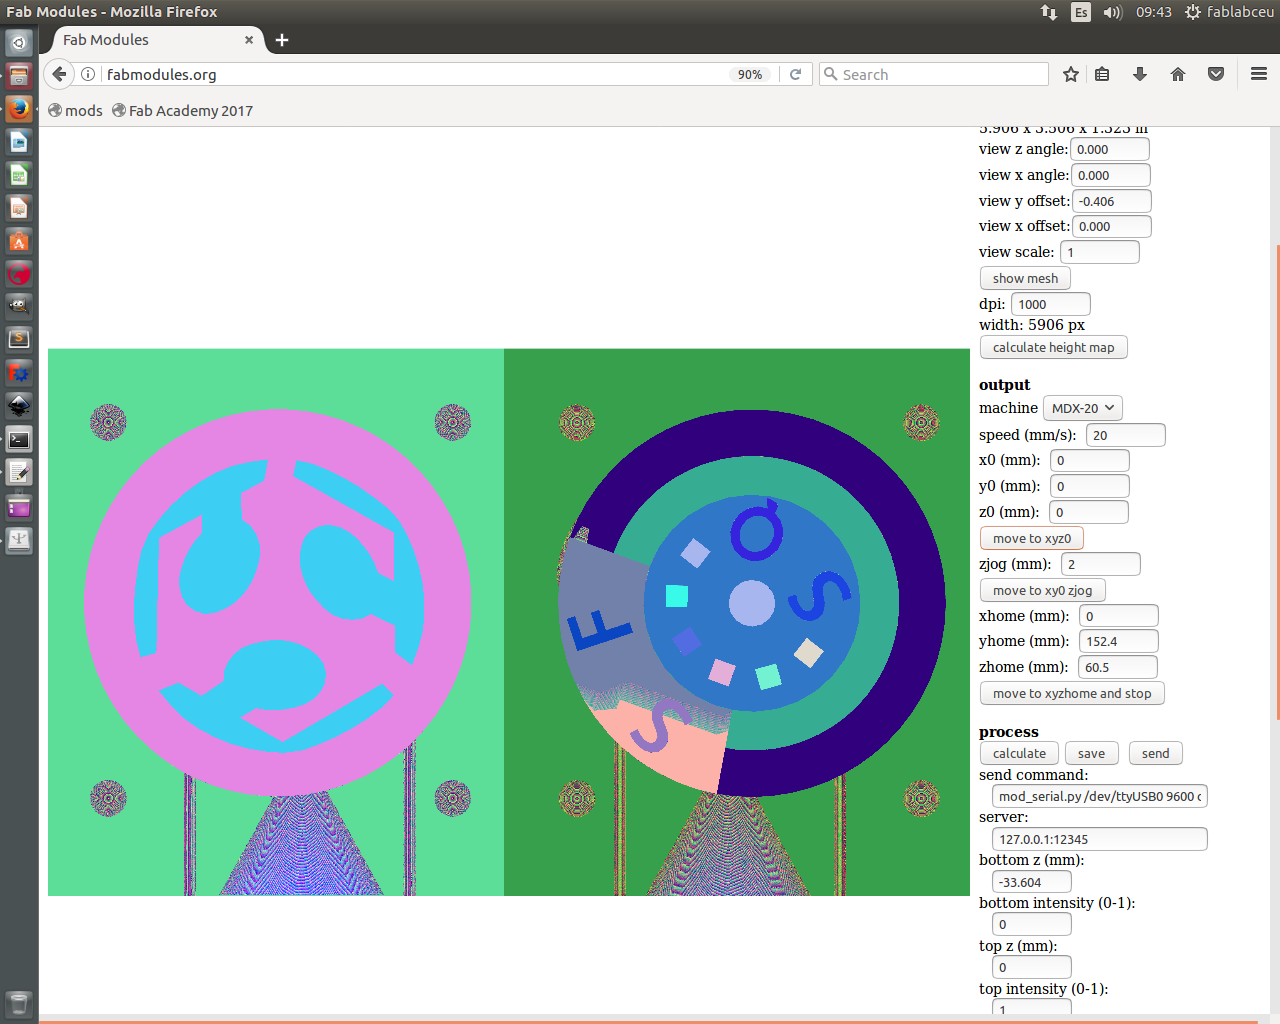
I upload the image, adjust the speed,verify that the size is well and the origin where it should, then calculate the height map.
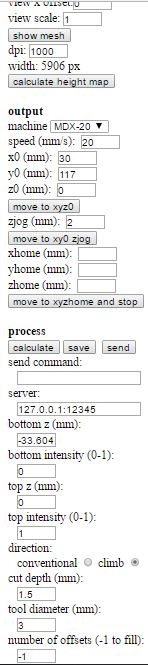
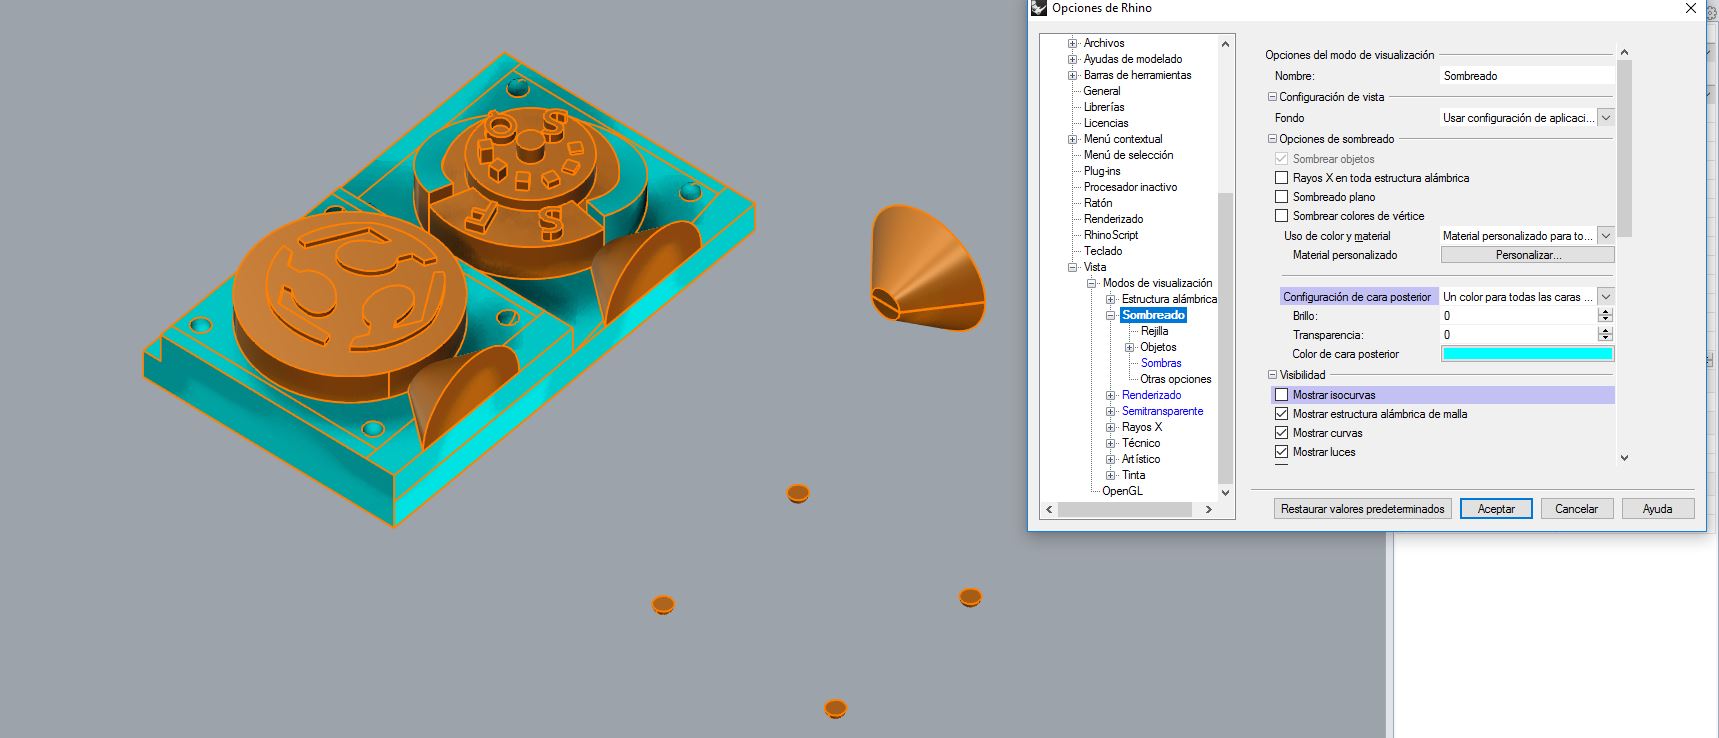
Parameters, Adjusting the settings in fab modules
Choosing the process wax rough or wax finish.
I select the type of mill with which we are going to do the milling and let it calculate the tool path, this operation can take several minutes
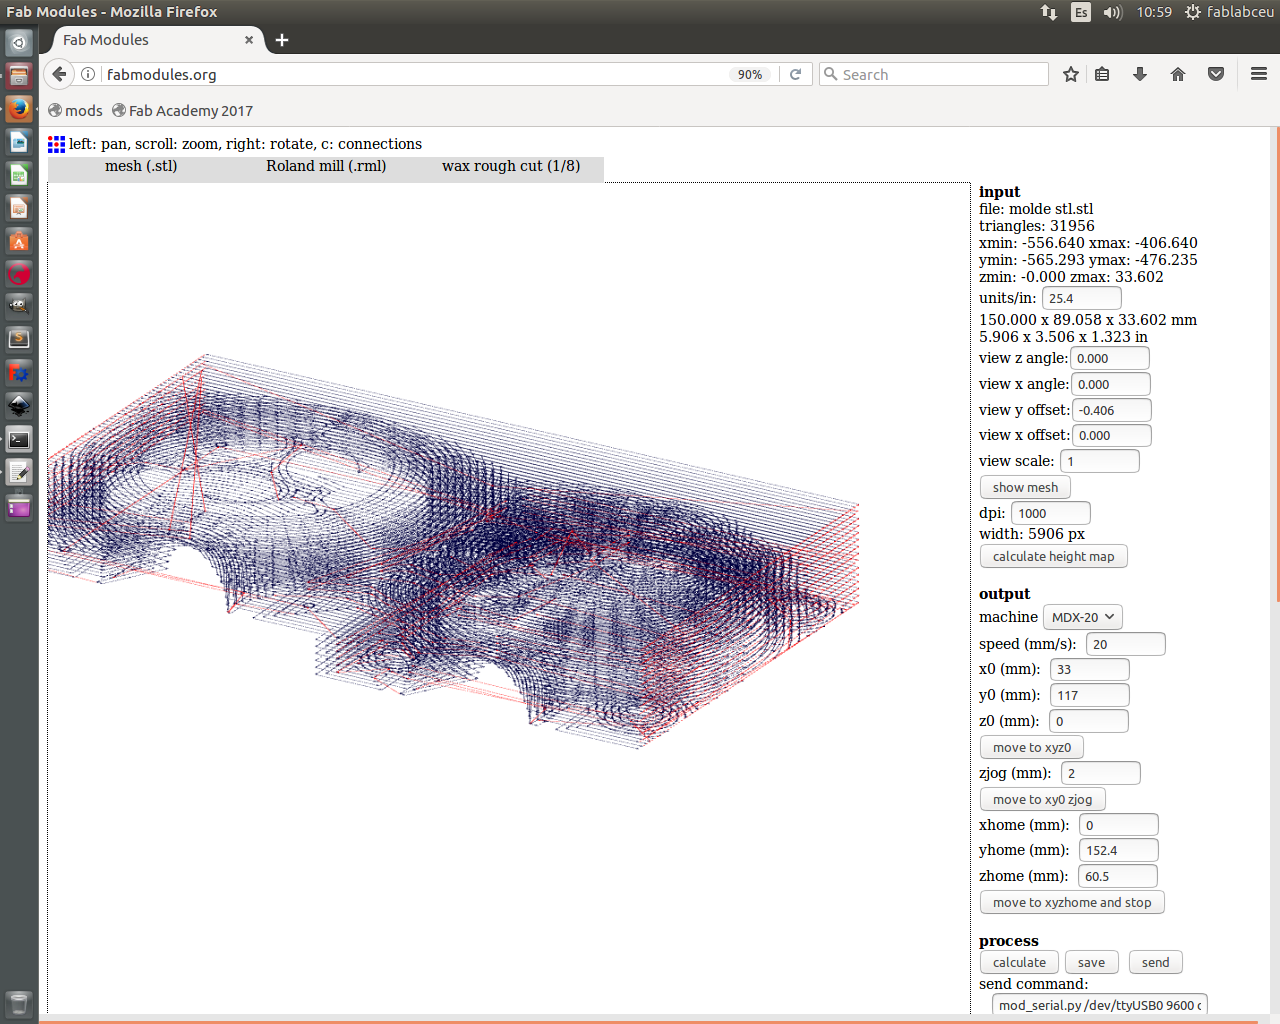
Once it is calculated I check that the tool path is correct and after adjusting the milling cutter in the machine to the material press send.

When you send a window opens with the time it takes to make the pass with the 6mm rough cutter, the spindle will go through 2 X and Y directions
Rough Cut:
This was the result, with the Wax Rough cut (3mm)
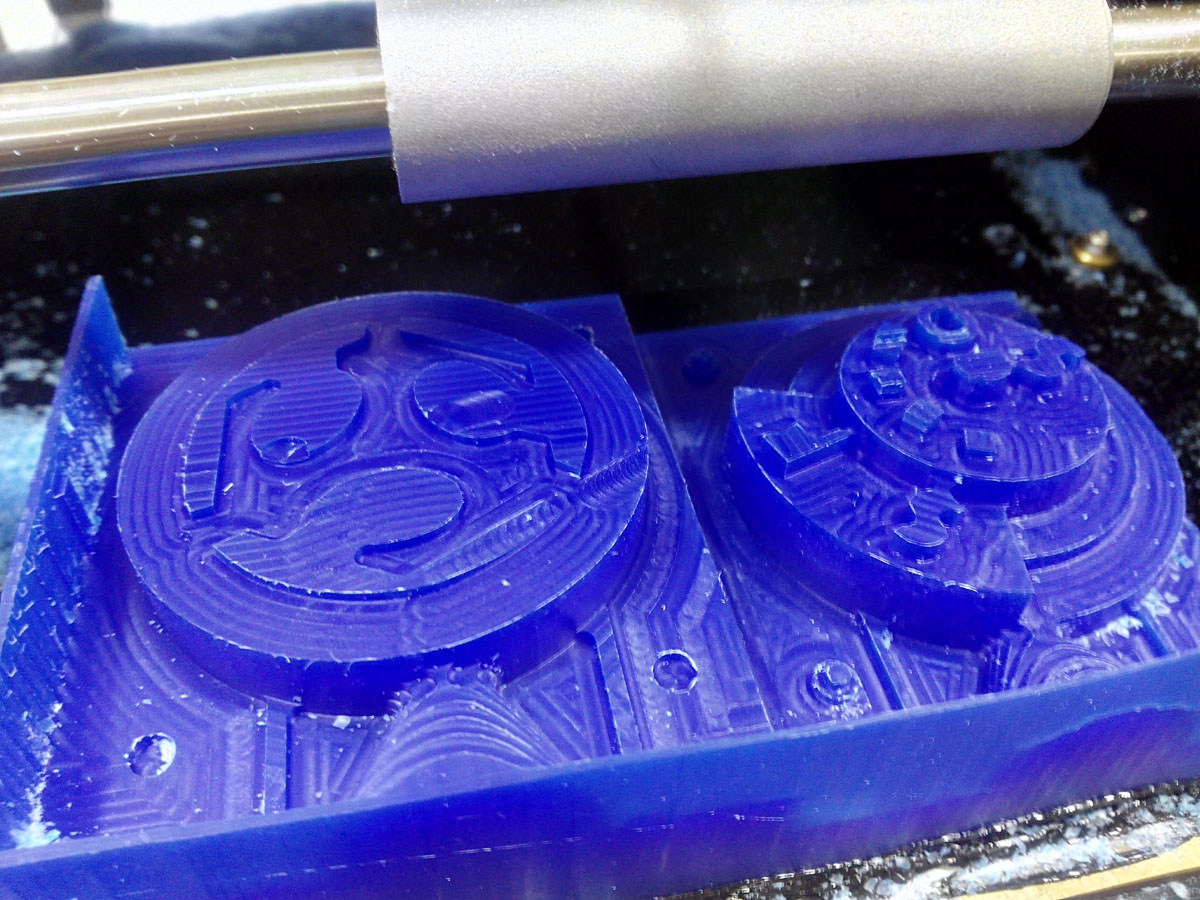
rough cut.
Problems: the design is very tight for the material I used, the right part is very fair so the walls of the rubber mold will be very thin.
Once done the rough cut repeat the operation for the finish cut.
Finish cut:
You can appreciate the difference of smoothness in the two different wax cut.
The finish cut is more accurate and slow than the rough, for this cut the tool will only make the last layers of toolpath in both directions to leave a smooth finish.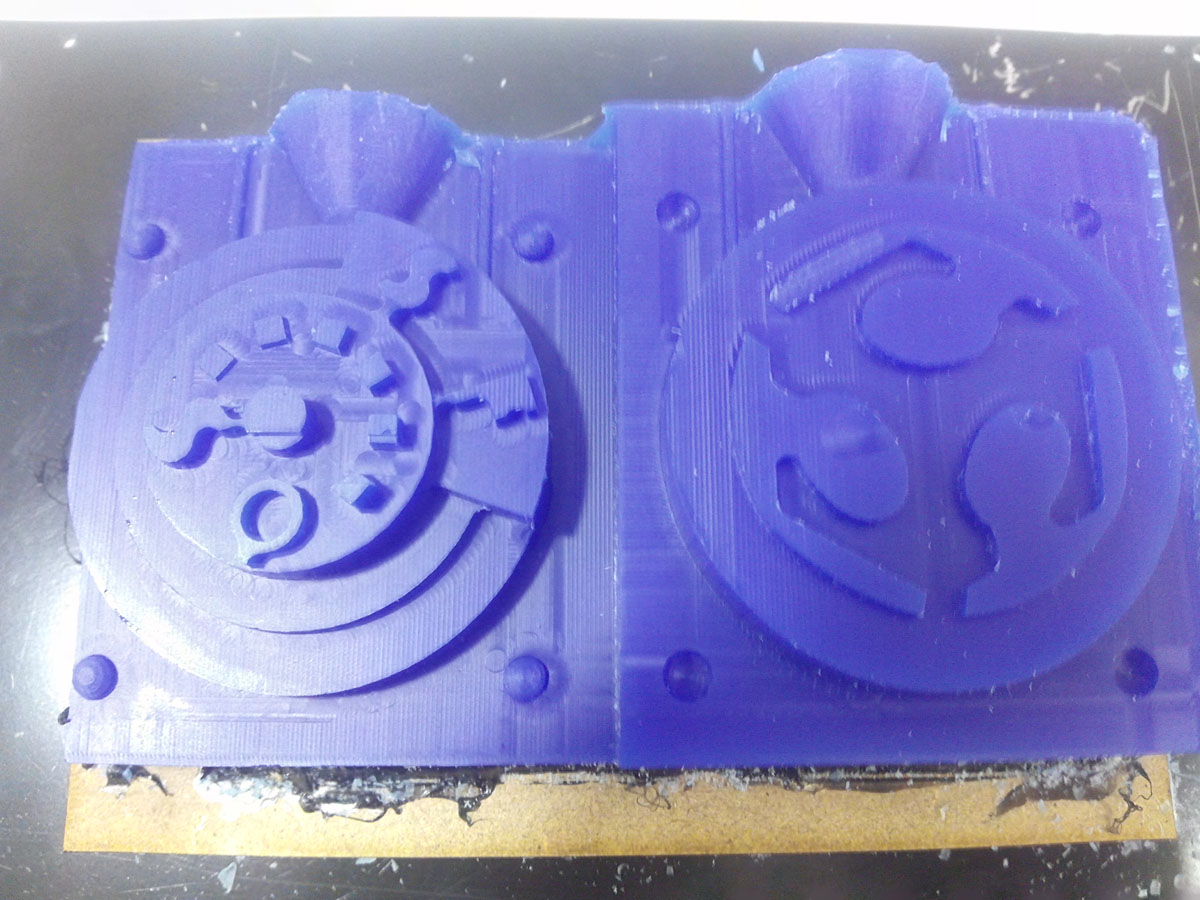
finish cut
diference between cuts:
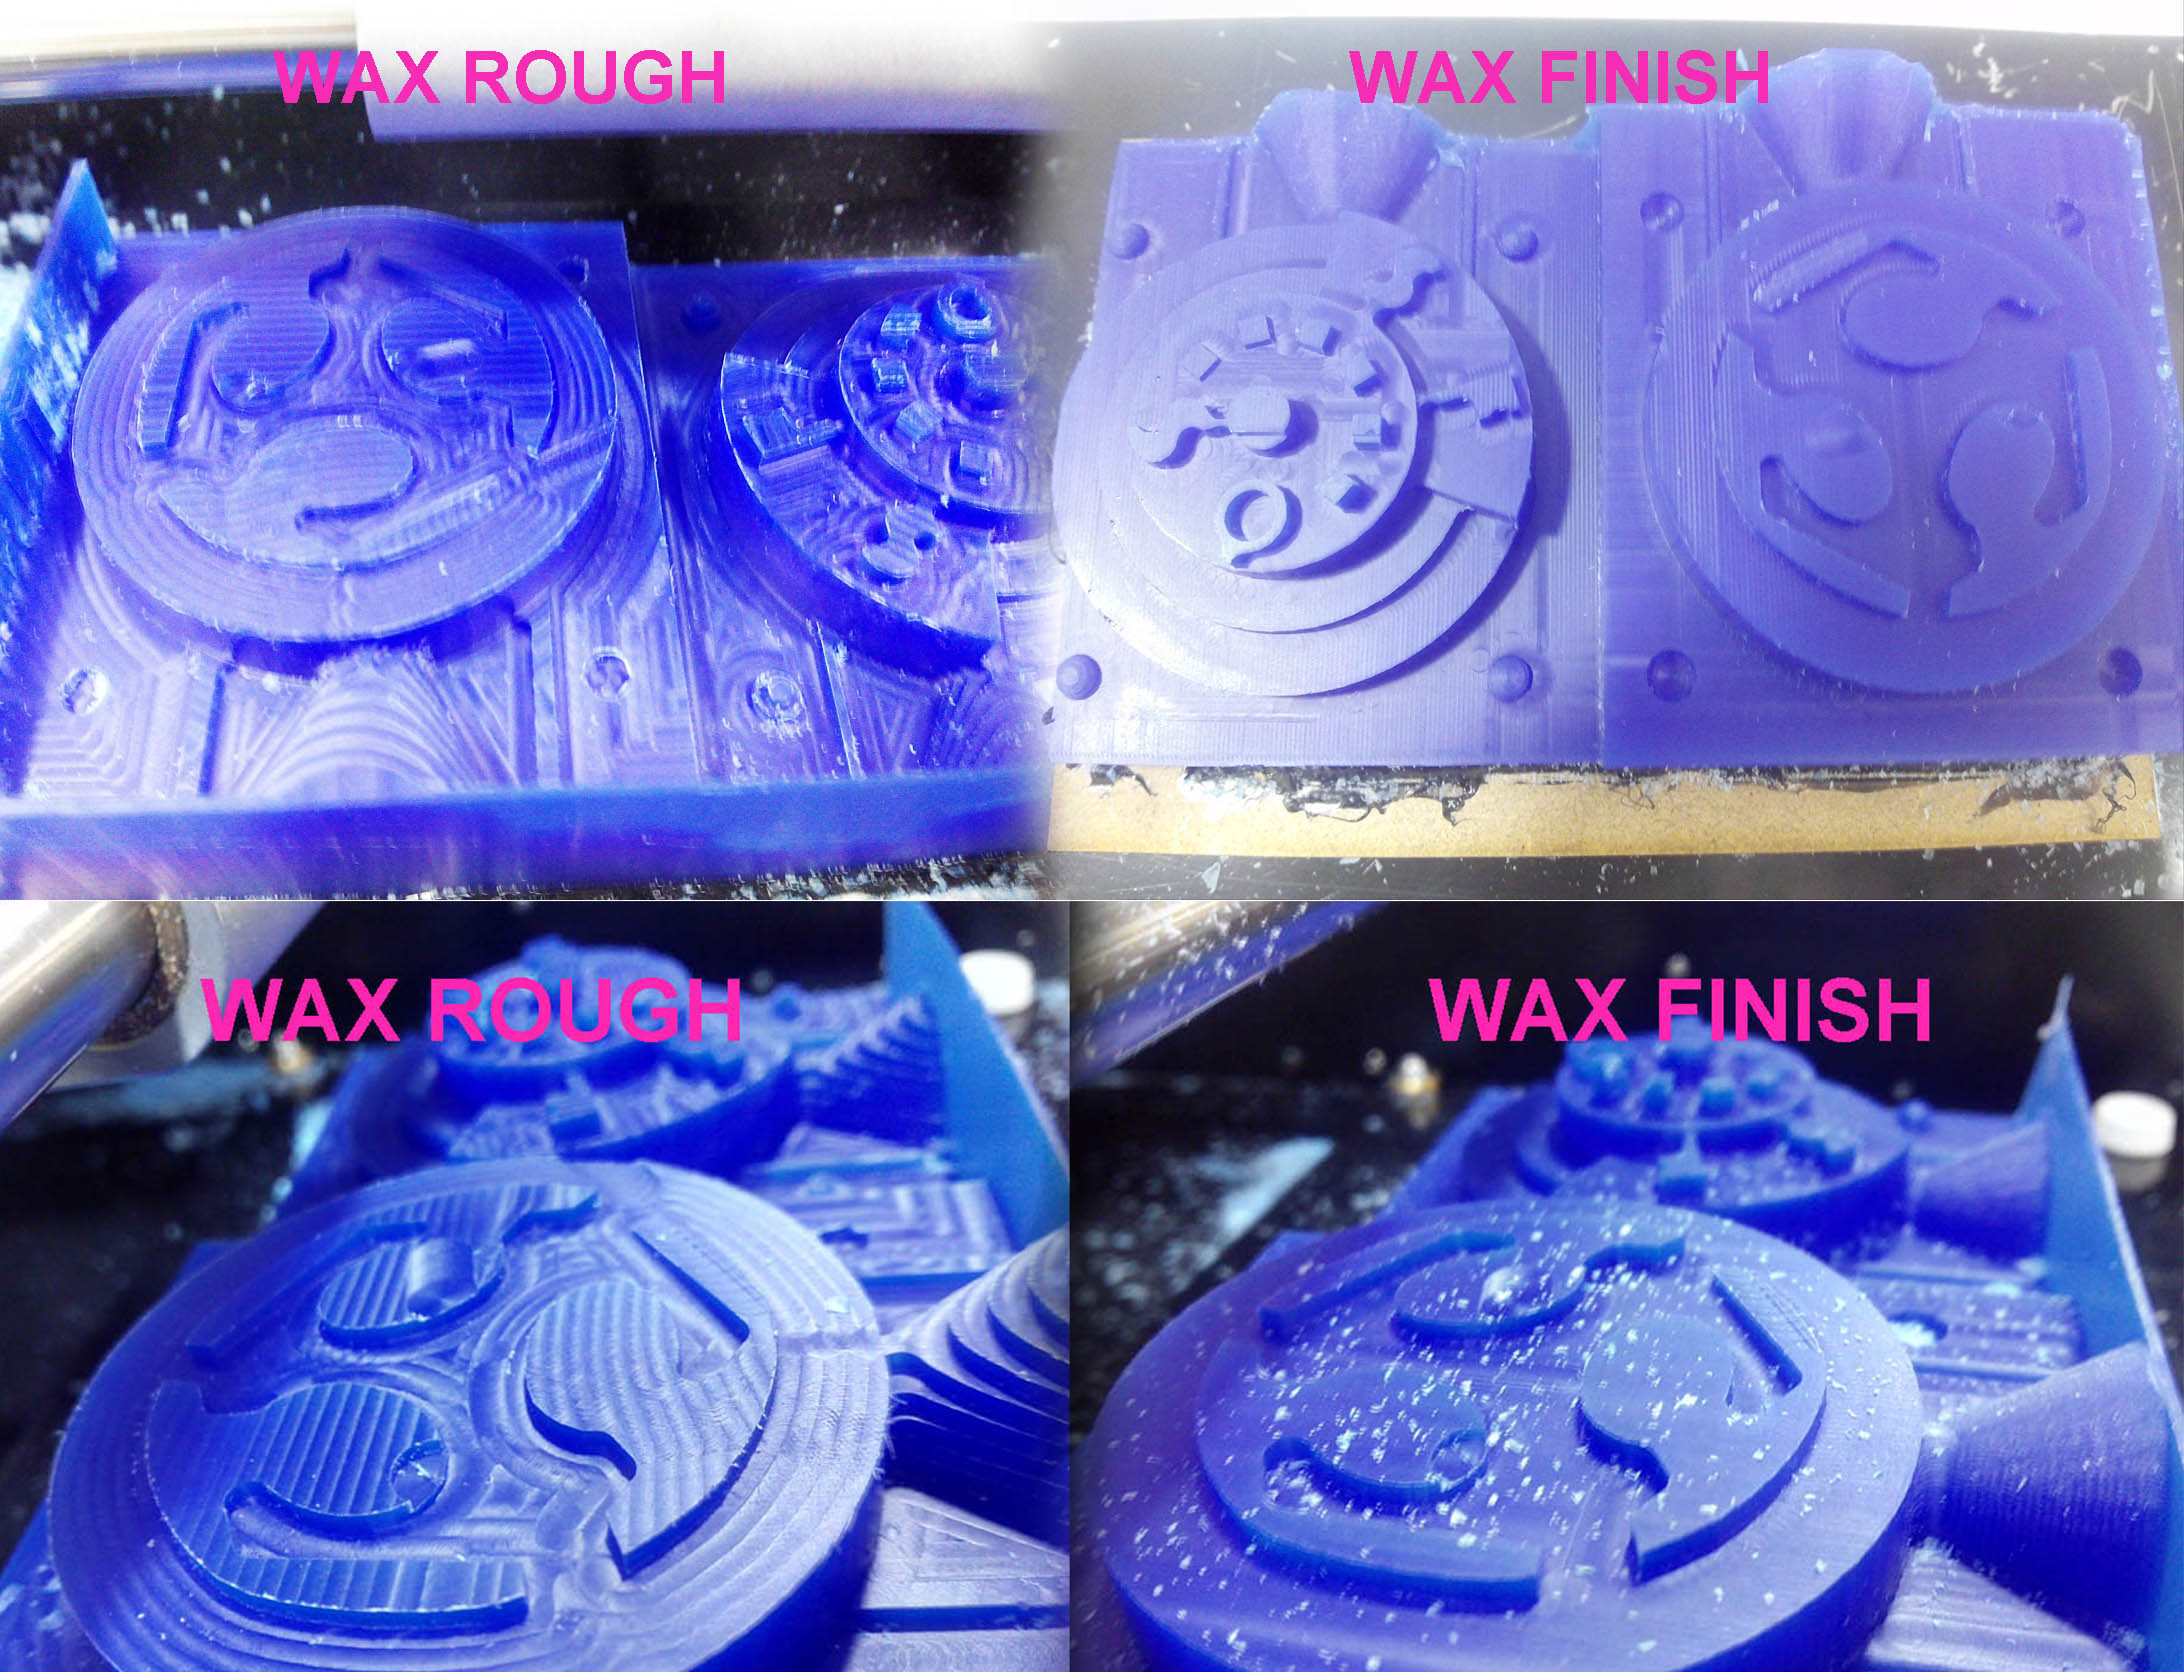
Difference between cuts
I already have the wax mold, the next step is to make the rubber mold, the negative, for this I have to make a box where to pour the liquid paste and calculate the volume of material I need.
4.1 Read the datasheet of mixture components.
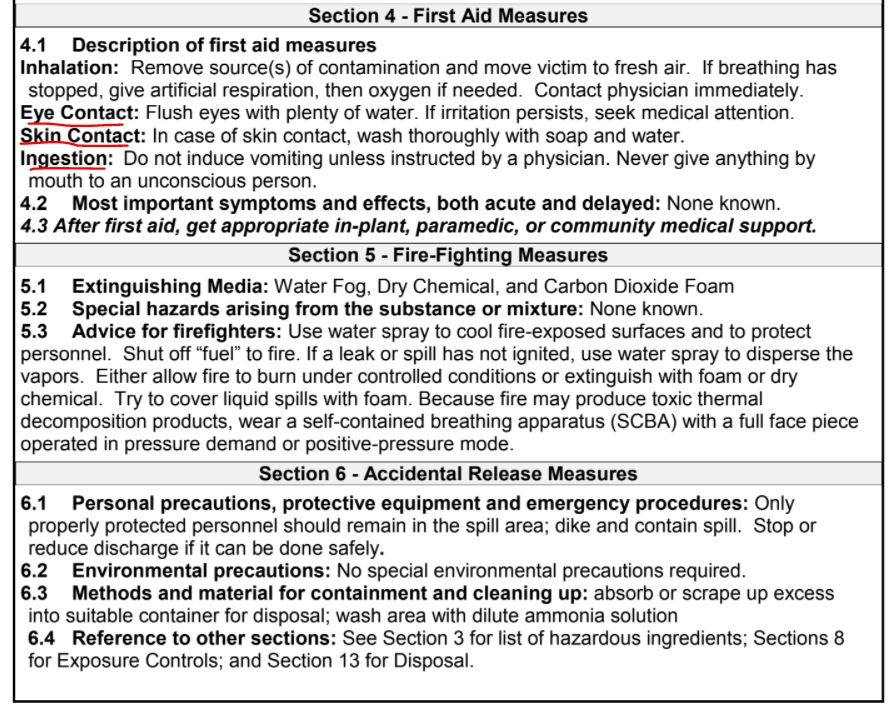
To be sure of the correct use of the product I read the material safety data sheet (MSDS) and technical data sheet (TDS). The product is called Smooth-On OOMOO25 are two components that form a mix by volume silicon rubber, this product is faster than similar ones with a 15-minute pot life and 75 minute cure time.
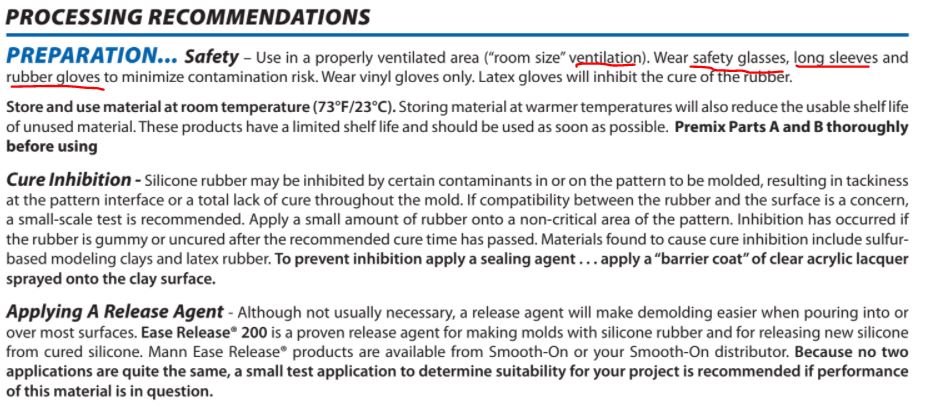
the material safety data sheet (MSDS) it is necessary to read it for safety, and for accidents that may happen in the casting process, also for storage and to dispose of waste.
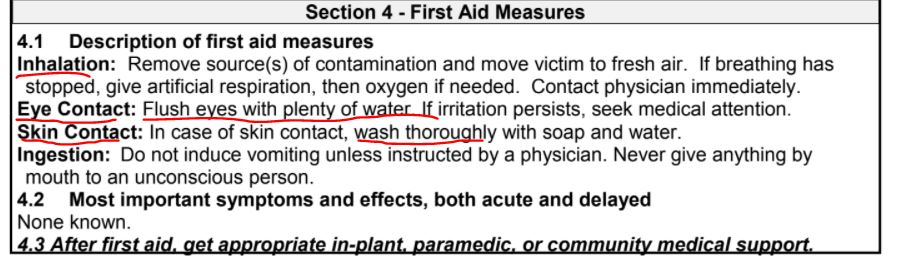
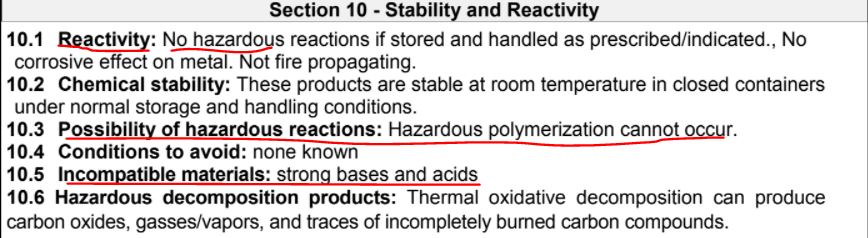
I have to have the proper protection elements, such as gloves, sticks, goggles, and a suitable workspace.
This particular material is quite safe and has no hazards when used.
Technical data sheet (TDS). indicates the process of how to make the mixture, the proportions, curing time, color volume and physical properties.
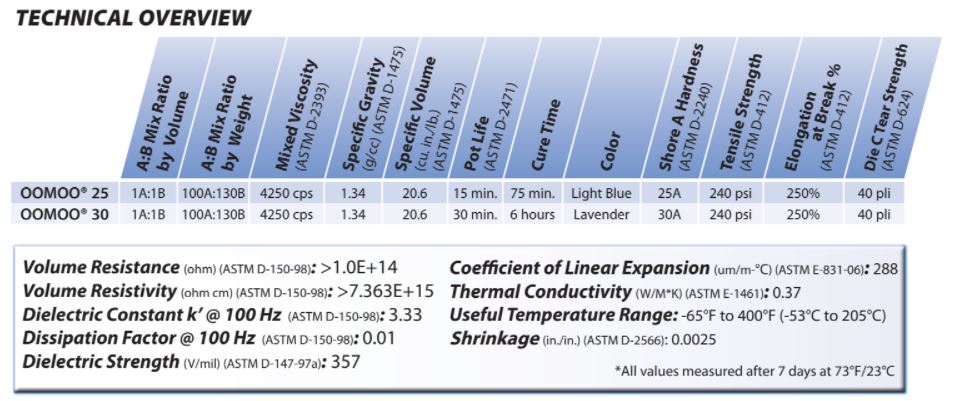
Proportion of 100-130 by weight and 1: 1 by volume Pot life of 15 minutes and curing time around 75 minutes under normal conditions.
Preparation
Curing time.
I have to respect the curing periods and carry out the discharge in the established time.
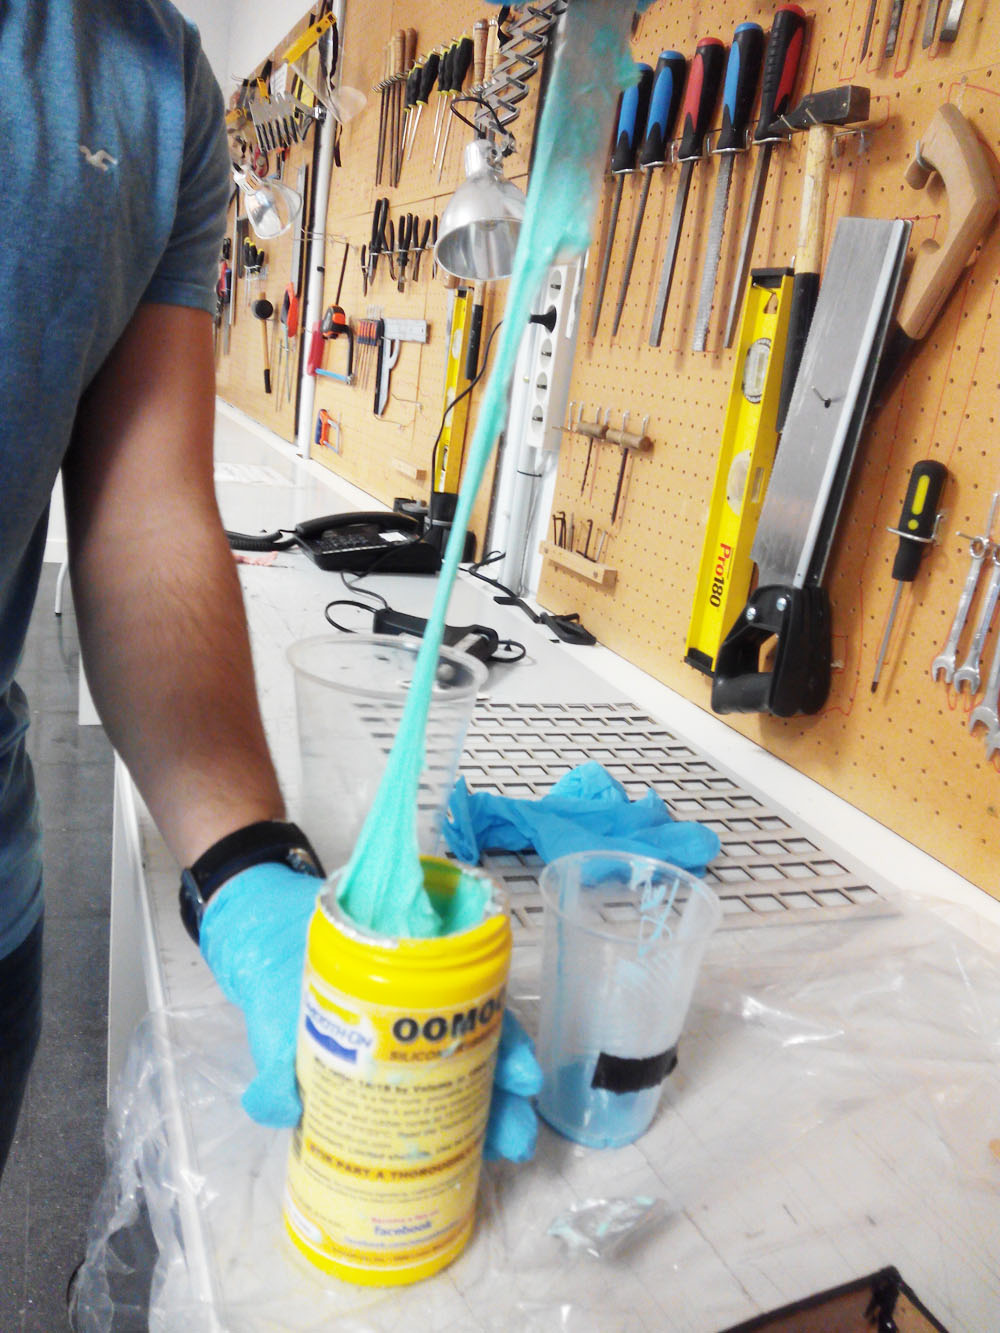
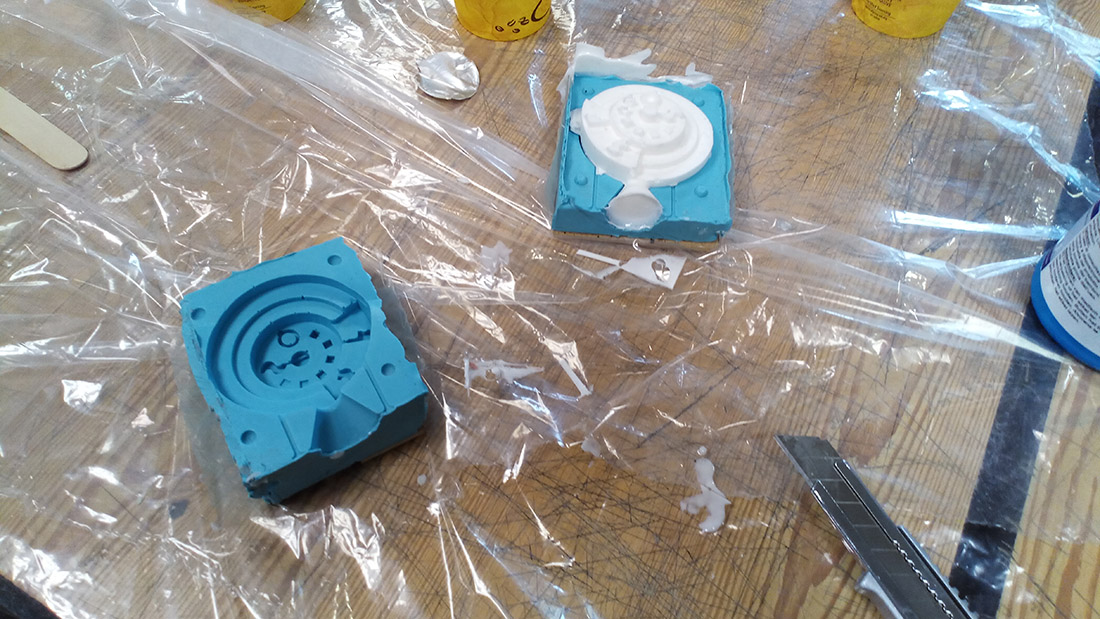
4.2 Make the mold in rubber.
-MATERIALS:
Box of mdf wood.
Mix by volume silicon rubber, Smooth-On OOMOO25.
Weighing machine
hot melt glue.
plastic cups, gloves, goggles ... etc
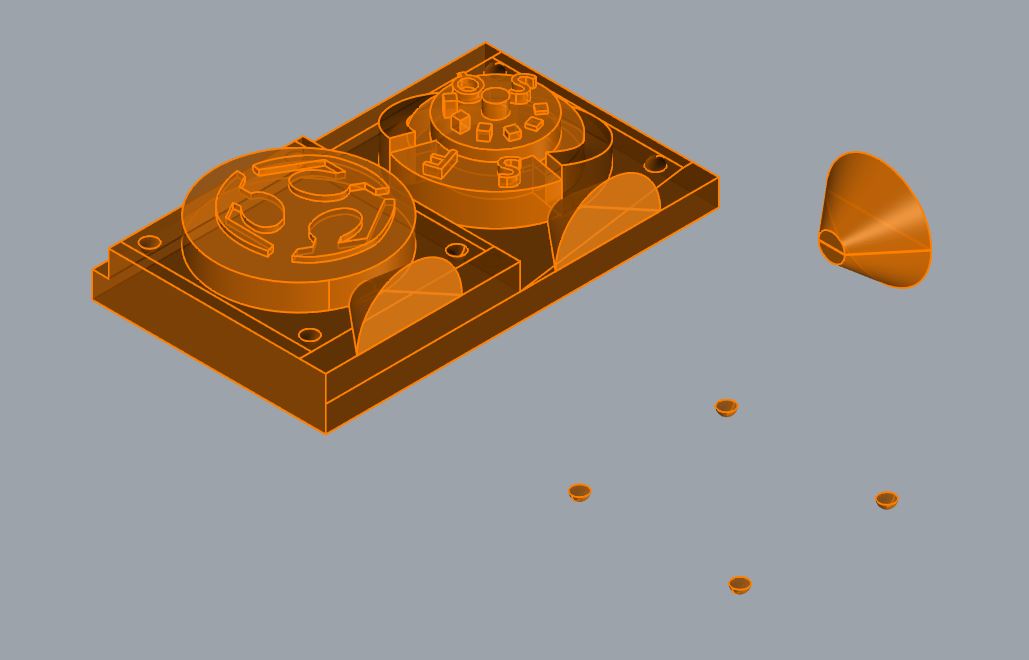
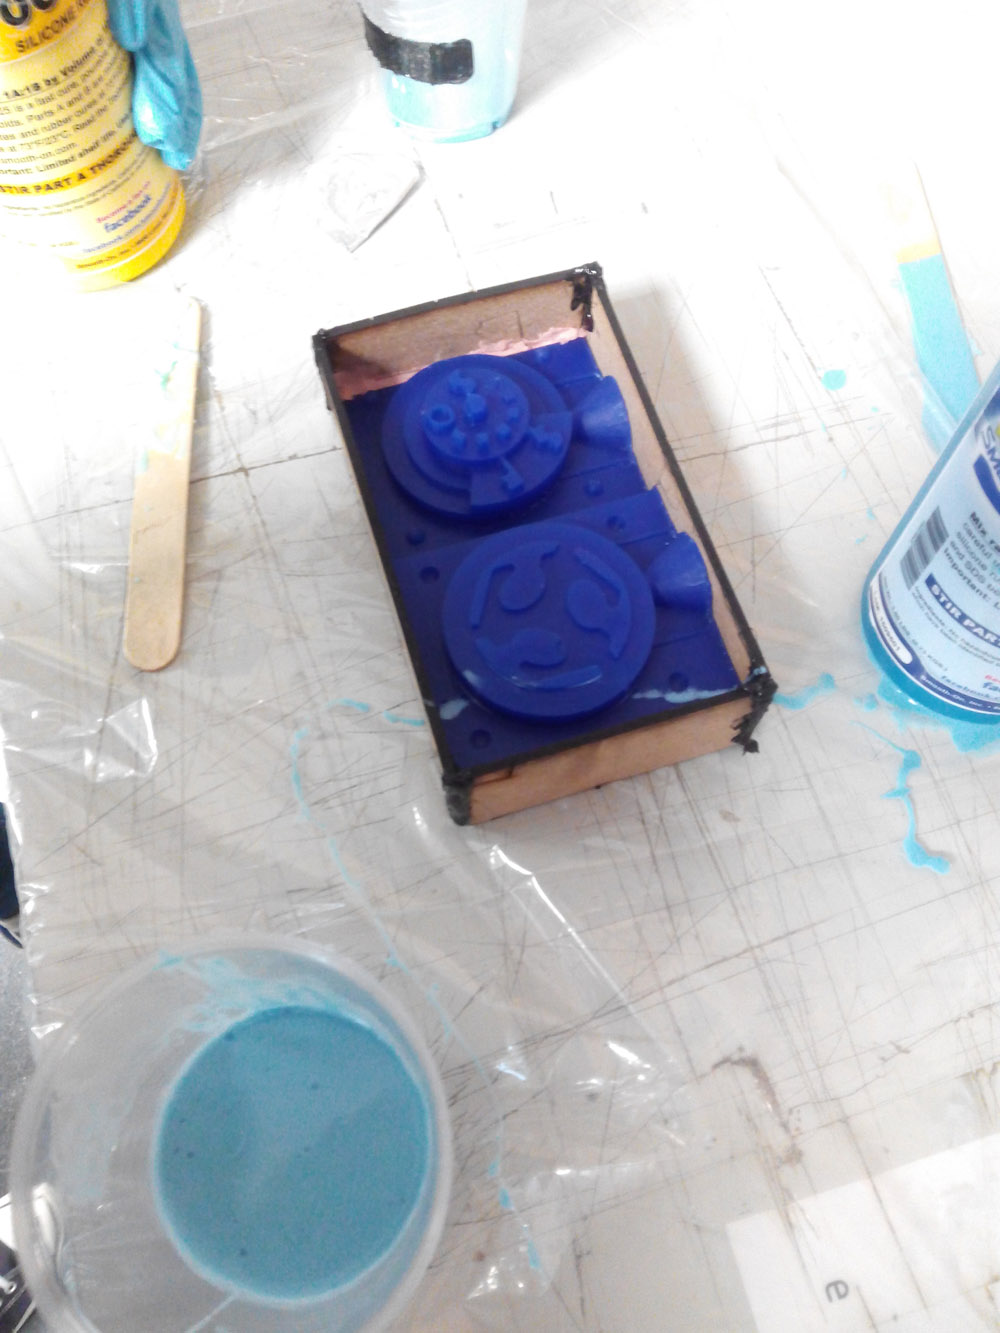
The box I made in 3d and then I cut it with the laser cutting machine, Then glued the pieces with hot melt glue.
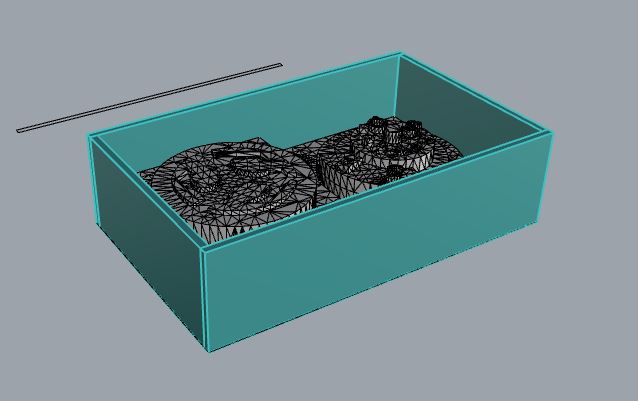
Designing the box
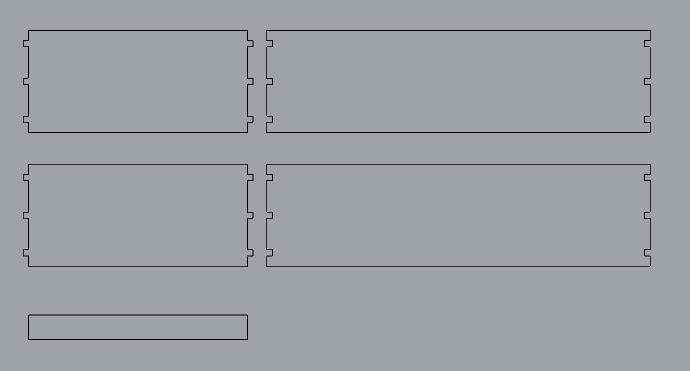
pieces
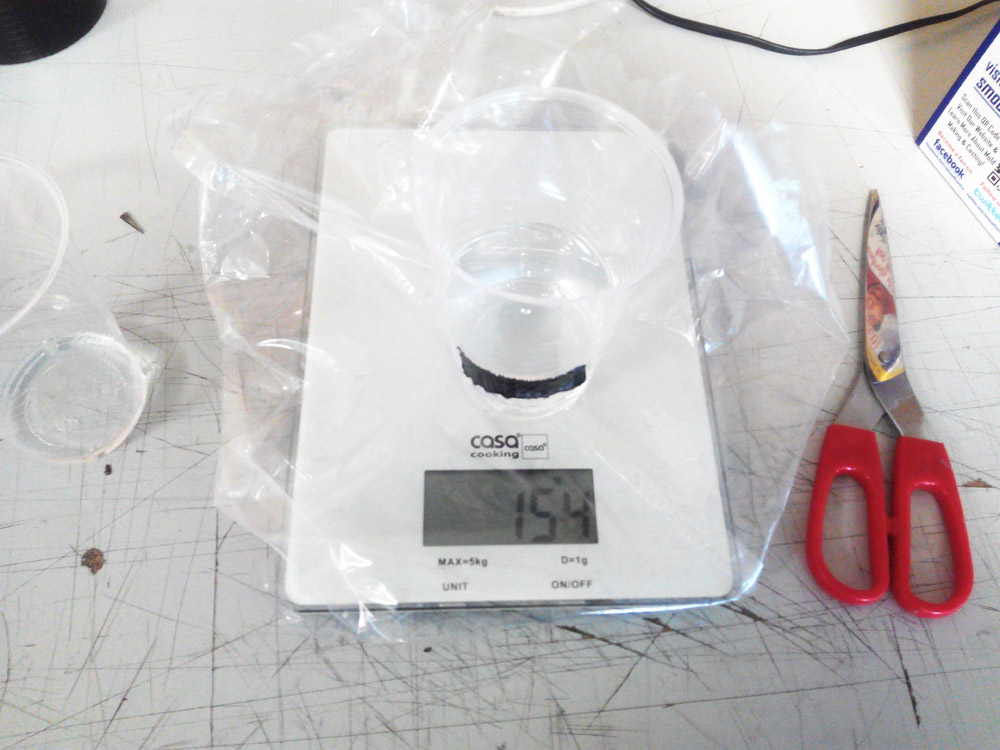
the volume of material I need is 297 ml, calculated by subtracting volumes in 3D rhinoceros, being the 1: 1 volume blend would require 150 ml of each component.
To calculate the amount of volume first weigh 150g of water which in volume are approximately 150ml and frame with a tape that measure.
Calculating the volume of the mixture in Rhino.
preparing the tools.
The material had a factory problem and I had to redo the same steps later with another product of the same brand and series.
Mould prepared, and mixture.
Ugg the B component its not liquid, we will try to make the mold with another product
I used this cup to measure how much I had to throw out of the two components.
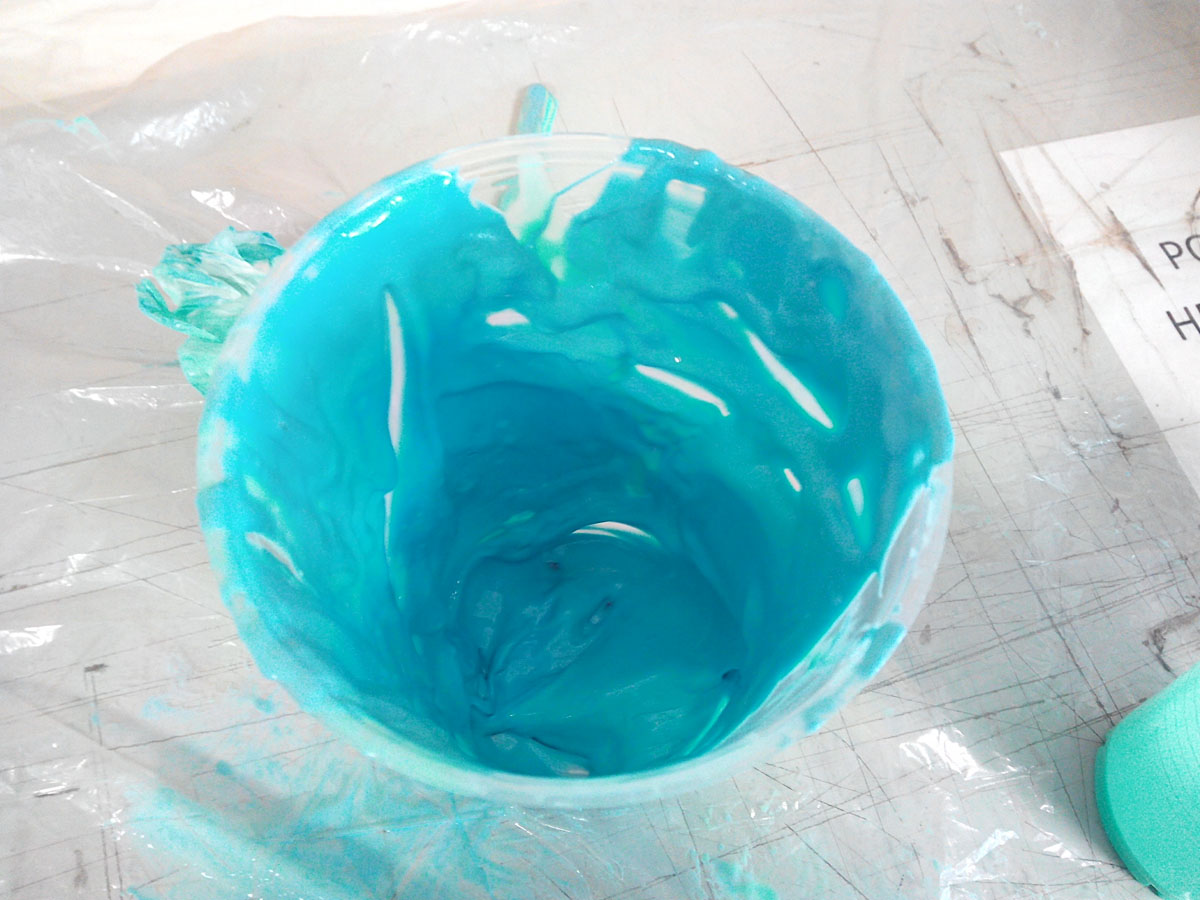
I mixed them for a few minutes until the mixture was dissolved.


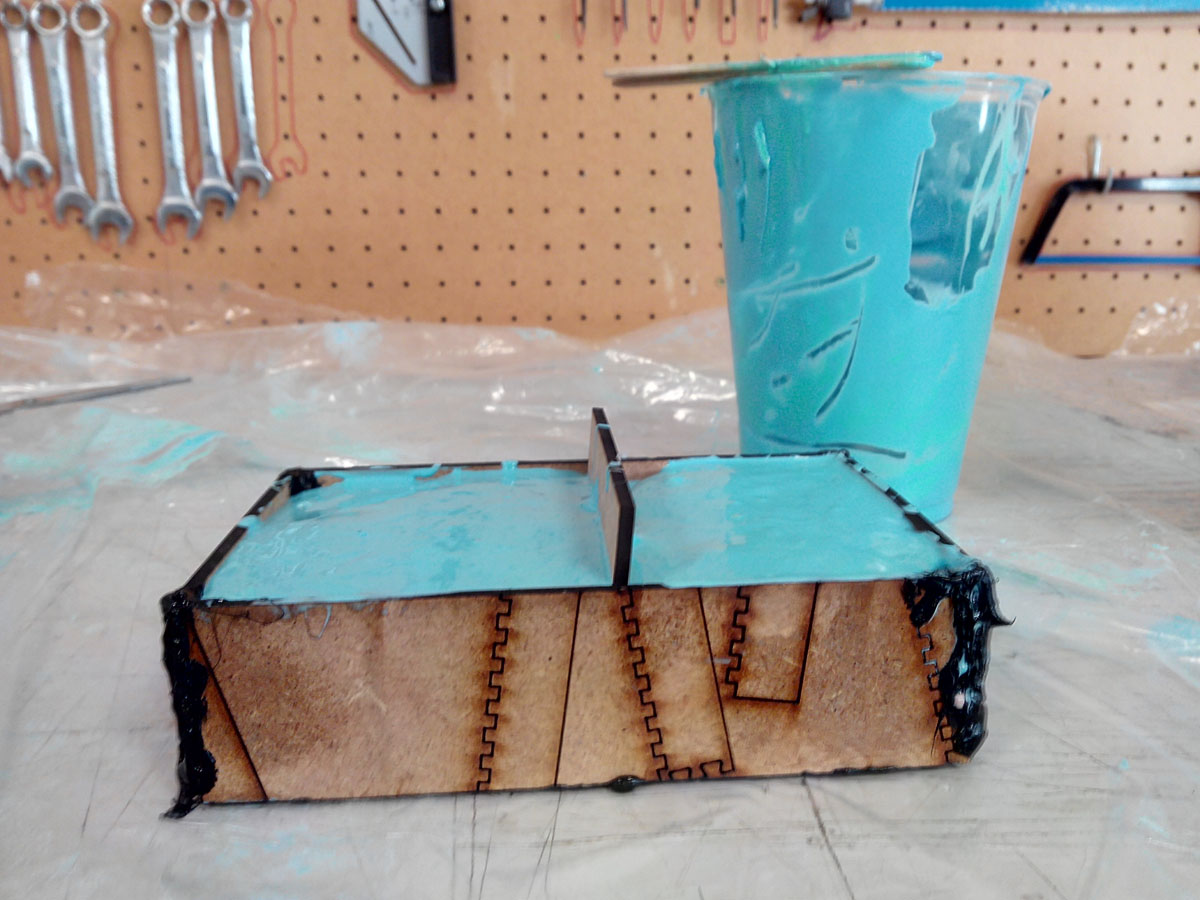
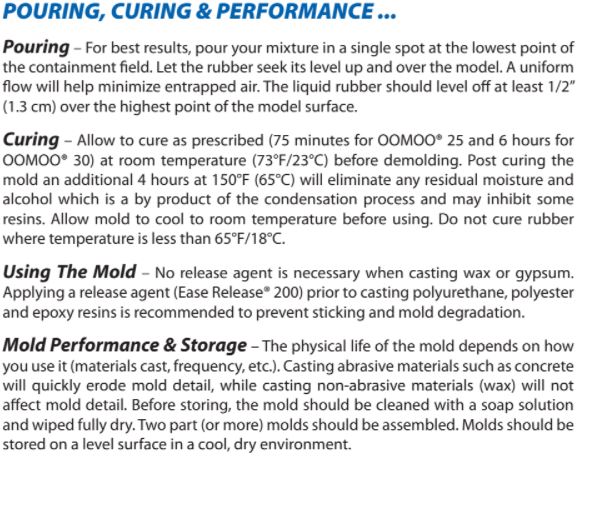
After pouring the product let it dry for a little more than 2 hours as a precaution. (with 75 minutes would have sufficed)
In the drying process the base must be vibrated so that the bubbles rise to the surface, I did it manually.
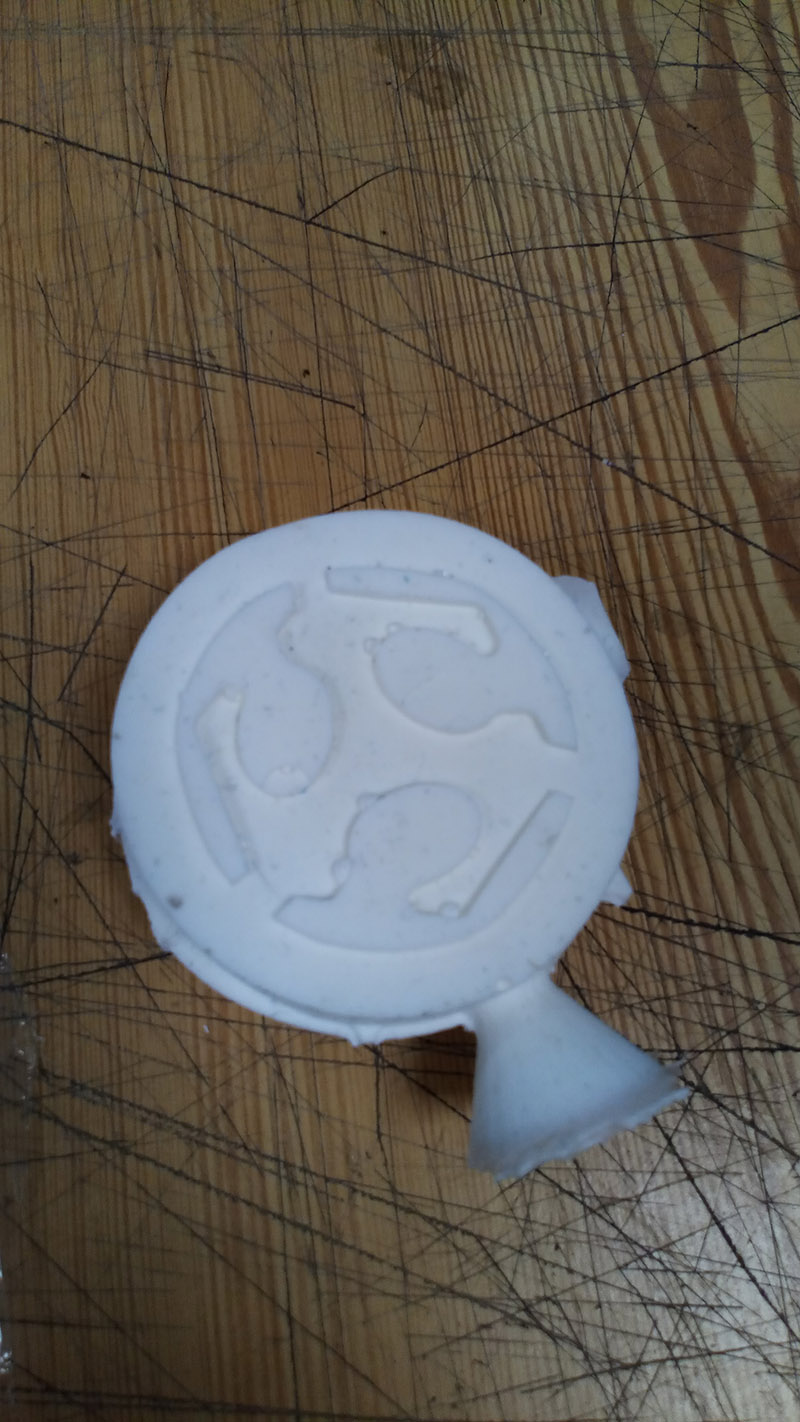
This was the end result, it has some flaws like I have had some bubbles left and the outer walls are a bit flimsy.
But it can be used to do the casting.
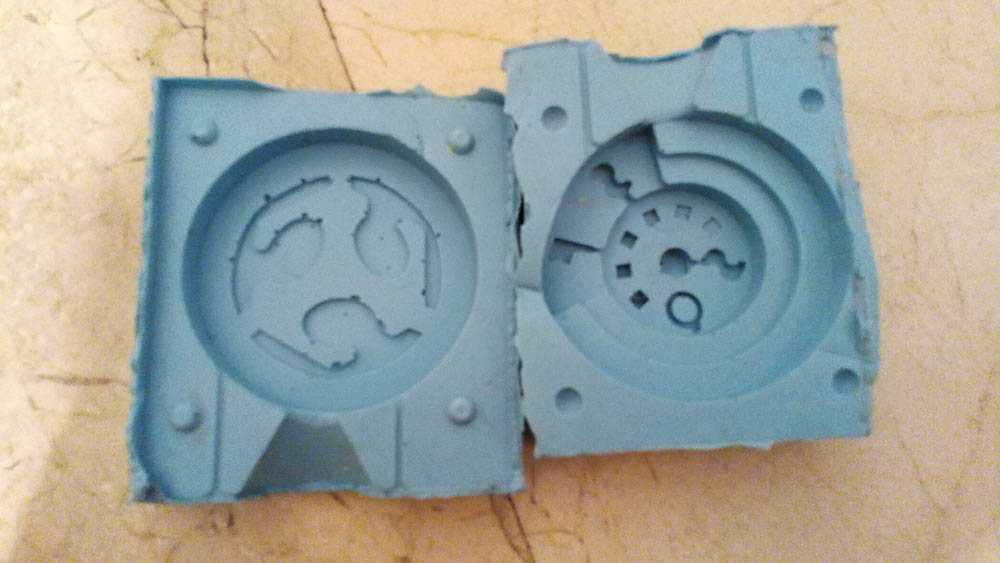
We already have the mould ready to do the casting.
5.1 Read the datasheet of mixture components of the cast.
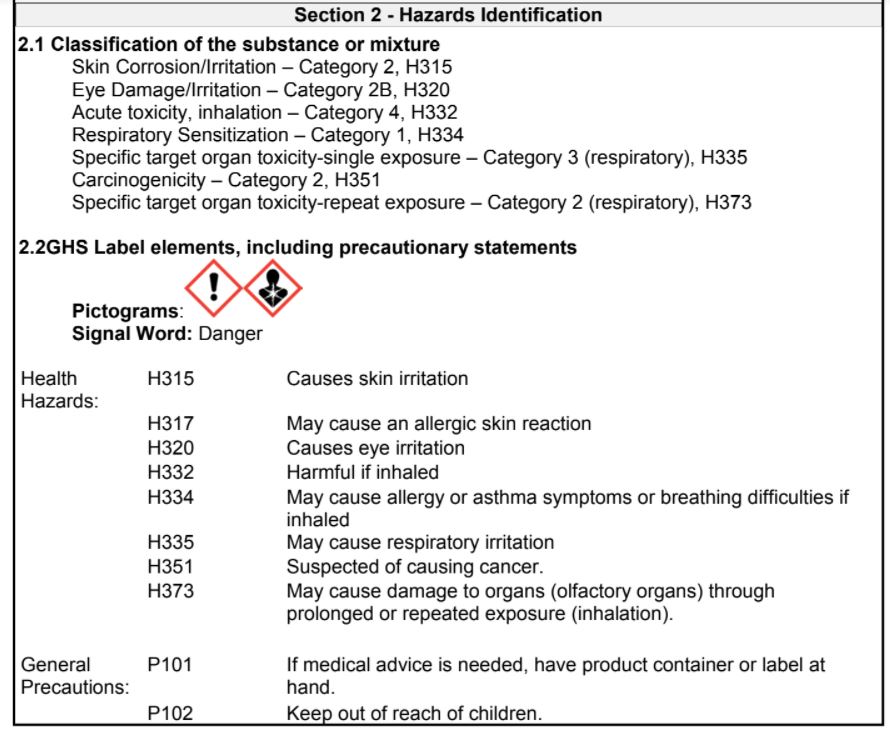
To make the cast I used 2 types of material, the first is an Ultra Low Viscosity Liquid Plastics, brand Smooth-On 305.
Although the first test I performed with Gypsum cement from which I performed all the process but I retain few photos of the process.
In both cases I read the datasheet of both, from which I upload the information.
Both the safety data sheet (MSDS) and technical data sheet (TDS).
but the plastic product is the most dangerous, you must be careful not to have contact with the product in case of contact wash well.
MSDS
TDS
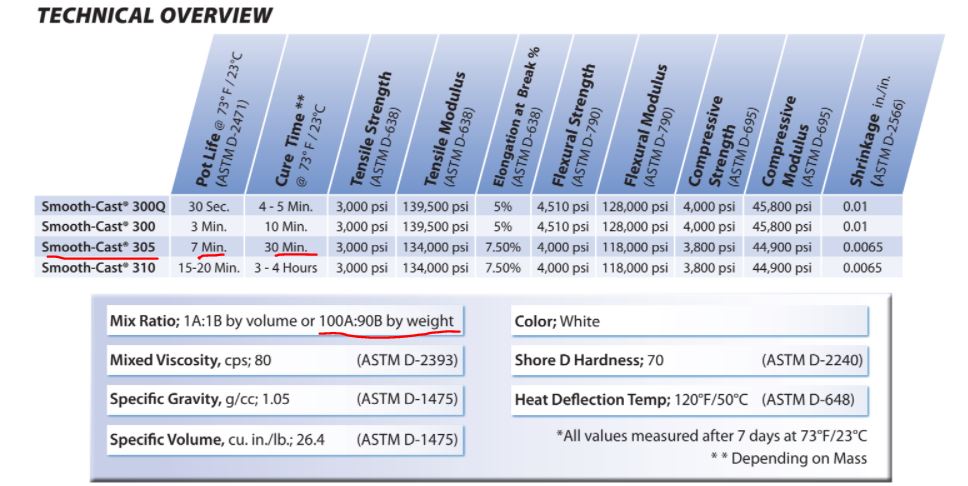
I have 7 minutes to make the mix and I have to let it separate for at least 30 minutes.
These are the products.
5.2 Cast the parts.
Before casting, the mold must be prepared:
I cut some rectangles of MD so that the back was stiff and I hit them.
With tape I surrounded the two pieces of the mold so that the cast could not leave and I verified that there were no escapes.

there aren't escapes.
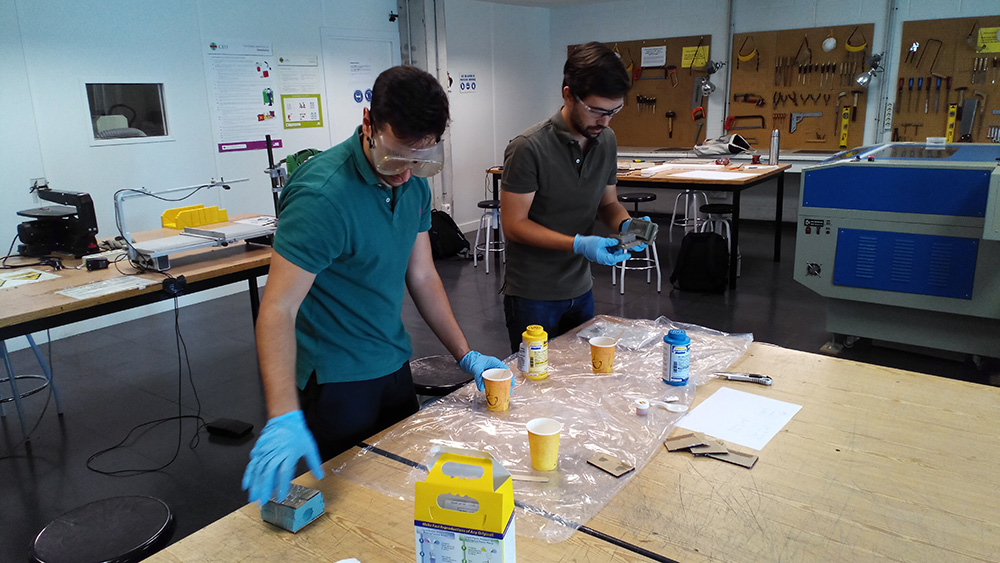
Me, making the mixture .
To cast with plastic the weight ratio is 100 A - 90 B.
The volume of my cast has to be 76.67 ml, so in volume of the two components would be 38.30 ml each.
Mark 39 ml in the plastic cup as we have done before, add component A to that volume and measure the weight.
For component b latch another cup and multiply the weight of component 42g * 0.9 the result is 37.8g, fill the cup up to that amount.
I mix the two cups and stir well for 2 minutes.
Me waiting.
I then poured the contents into the mold and waited for 40 minutes.
This is the result:
Opening the mold.
My cast in plastic
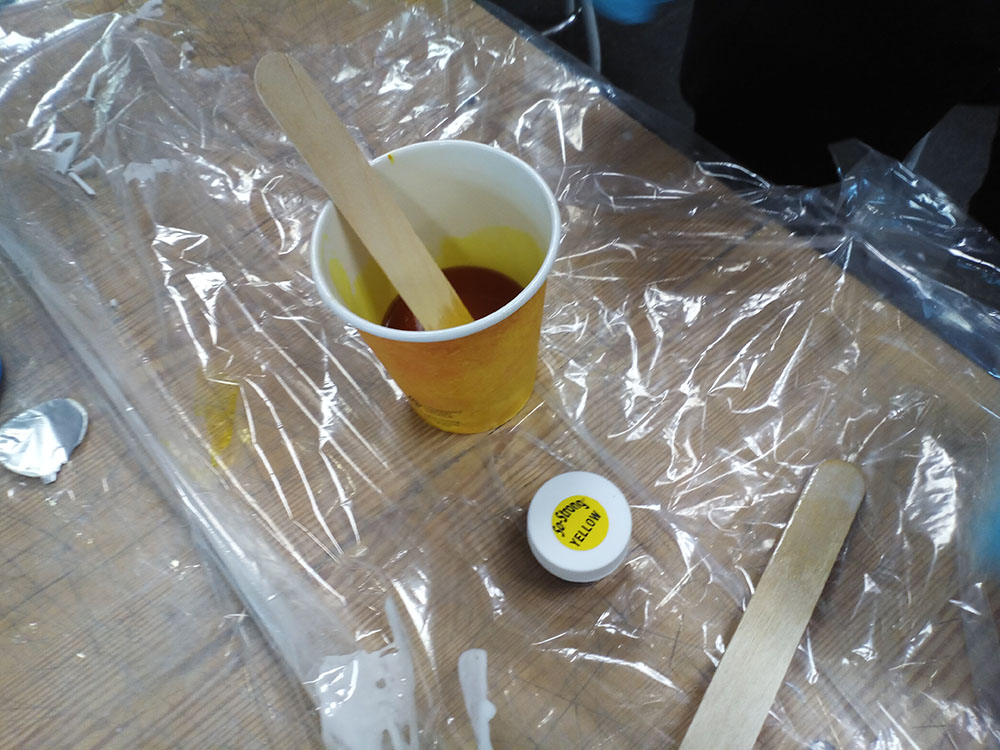
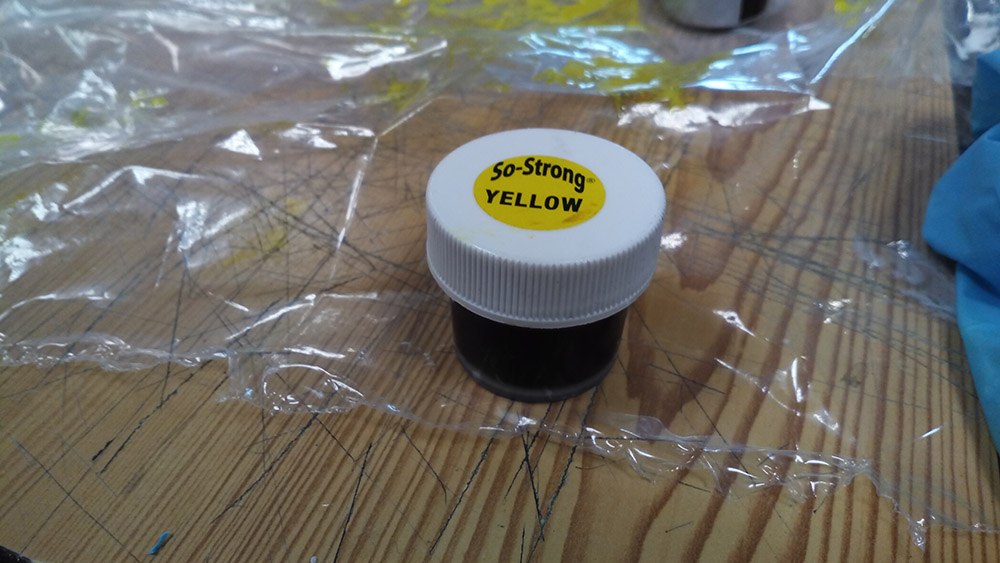
I also tried to do it again this time adding colorant to the mixture, it took 5-6 drops to give it a yellow color.
colouring
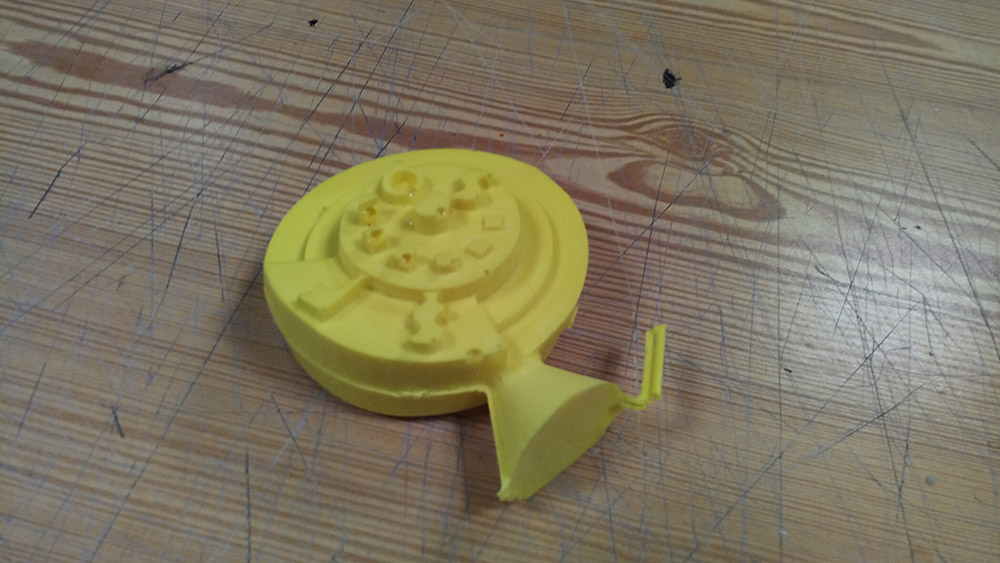
My cast in yellow plastic
Here all the pieces produced for this assignment.
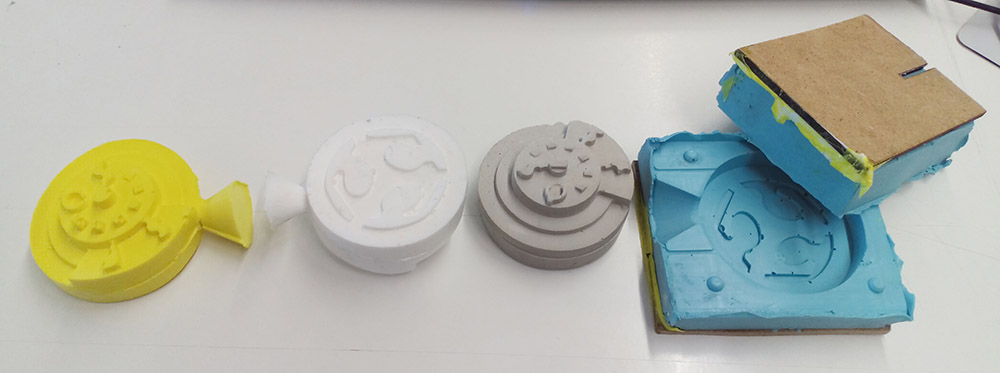
Gypsum cement,yellow and white plastic.
Problems:
Mold weak and that moves, Solution: To do it with greater thickness, to place tables so that it does not deform, Larger hemispheres so that it fits better or in form of cube.
Interior bubbles in the mold, Solution: Reform the mold with a slower curing paste, be more careful and make it vibrate more when it is healing.
Design with easily breakable parts, solution: better adapt the measurements to what is to be milled with the mdx-20 or do it with a smaller milling cutter.
mould
box
Designfile
First design
Datasheets