Assignments:
- Build a personal site in the class archive.
- Plan and sketch a potential final project.
- Work through a git tutorial
- Building this website -
This week was required Website to view the final project and presentation projects every weekend
After reviewing some of the sites:
Put the sites here information,
I decided to start with html-css
The workflow is going to be as follows: 1.get basic template,
make changes in texts and titles,
make the sections of the next exercises,
introduce some photo change font style.
I am a person with a low level in programming except some sporadic courses, I have never done any work at programming level and it is the first time I see html, css, javascript ... etc.
The first thing I have done has been, from the template, small changes like the texts of titles bodies ... etc.
 The image looks very big.
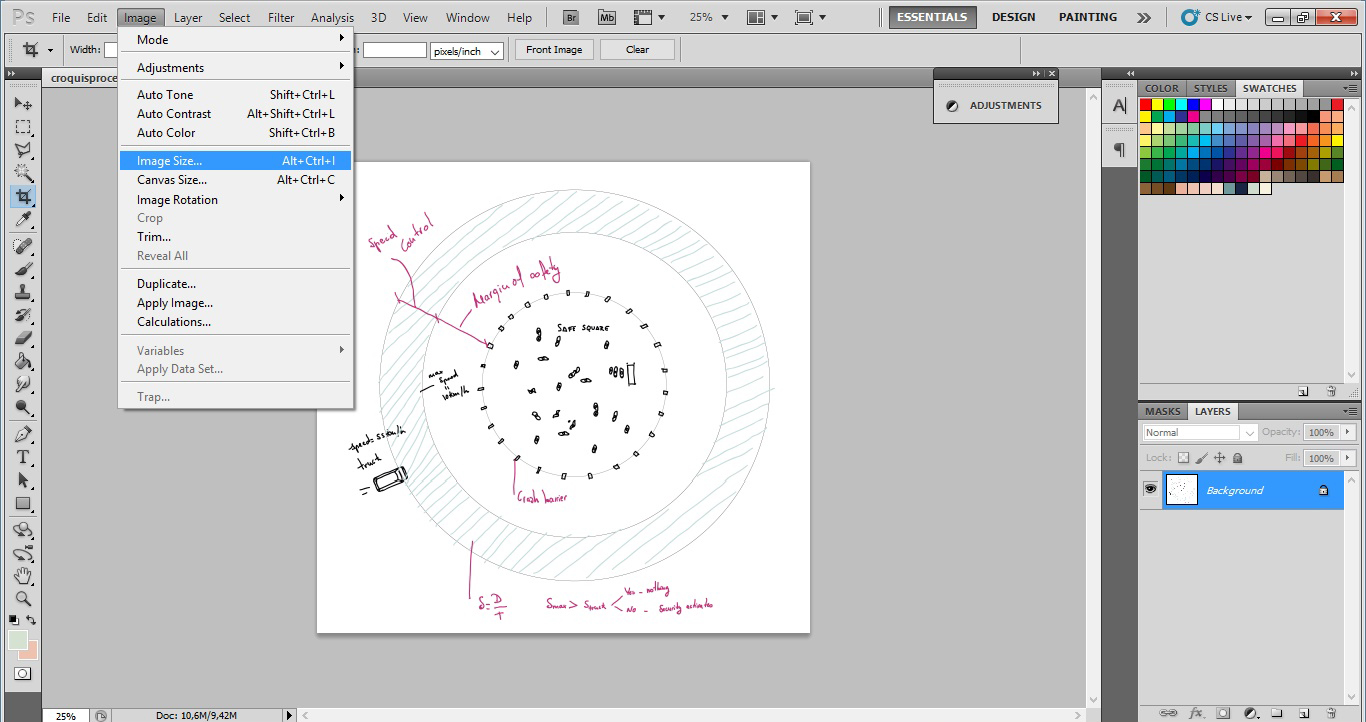 I try to change its image size wirh photoshop but the result is not the expected.
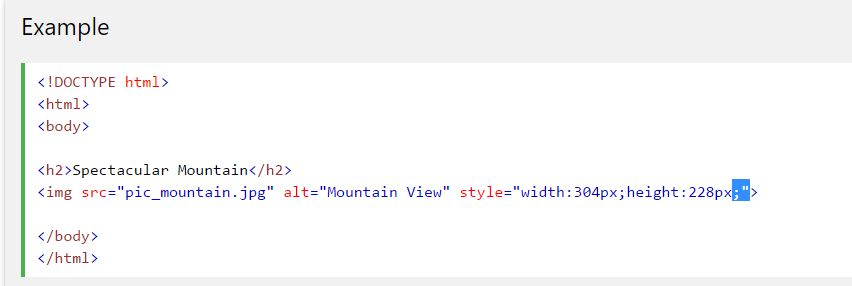
In W3schools there are a tutorial about upload images,and saw the following
 I made the changes.
 And you can see the result in the Final Proyect Process.
Changing colours and sizes of fonts without css:
changing the colour and the size of this text.

 the result.
Actions I've learned over time:
Link a web page:
 link
link
Link a video:a video of embedded programming

Link a file:Presentation Card
 Use the buttons for links or jump to a split:
 Put different types of caption into an image:
or this one

- Separate with a line
 Update:
After week 6 I started to make a new web and migrate all the content to a new web, which was responsive, that was blog mode, and with a good presentation in css, I resorted to modifying a template.
This template was downloaded from the following website.
At first I was a little lost but little by little I was understanding how it was programmed and what things had to change.
I was making the new posts in the new page and migrating the ones I had in the previous one.
The result has been learning to handle an html5 file that is not mine, and a somewhat clearer and cleaner web.
- Sketch a Potential Final project -
Concept:
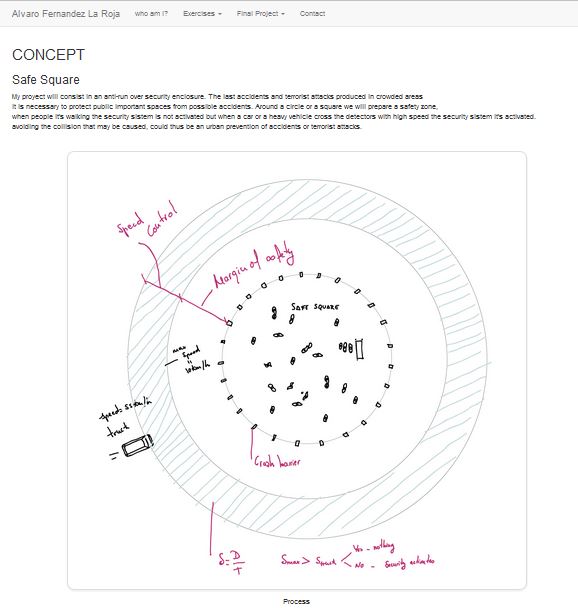
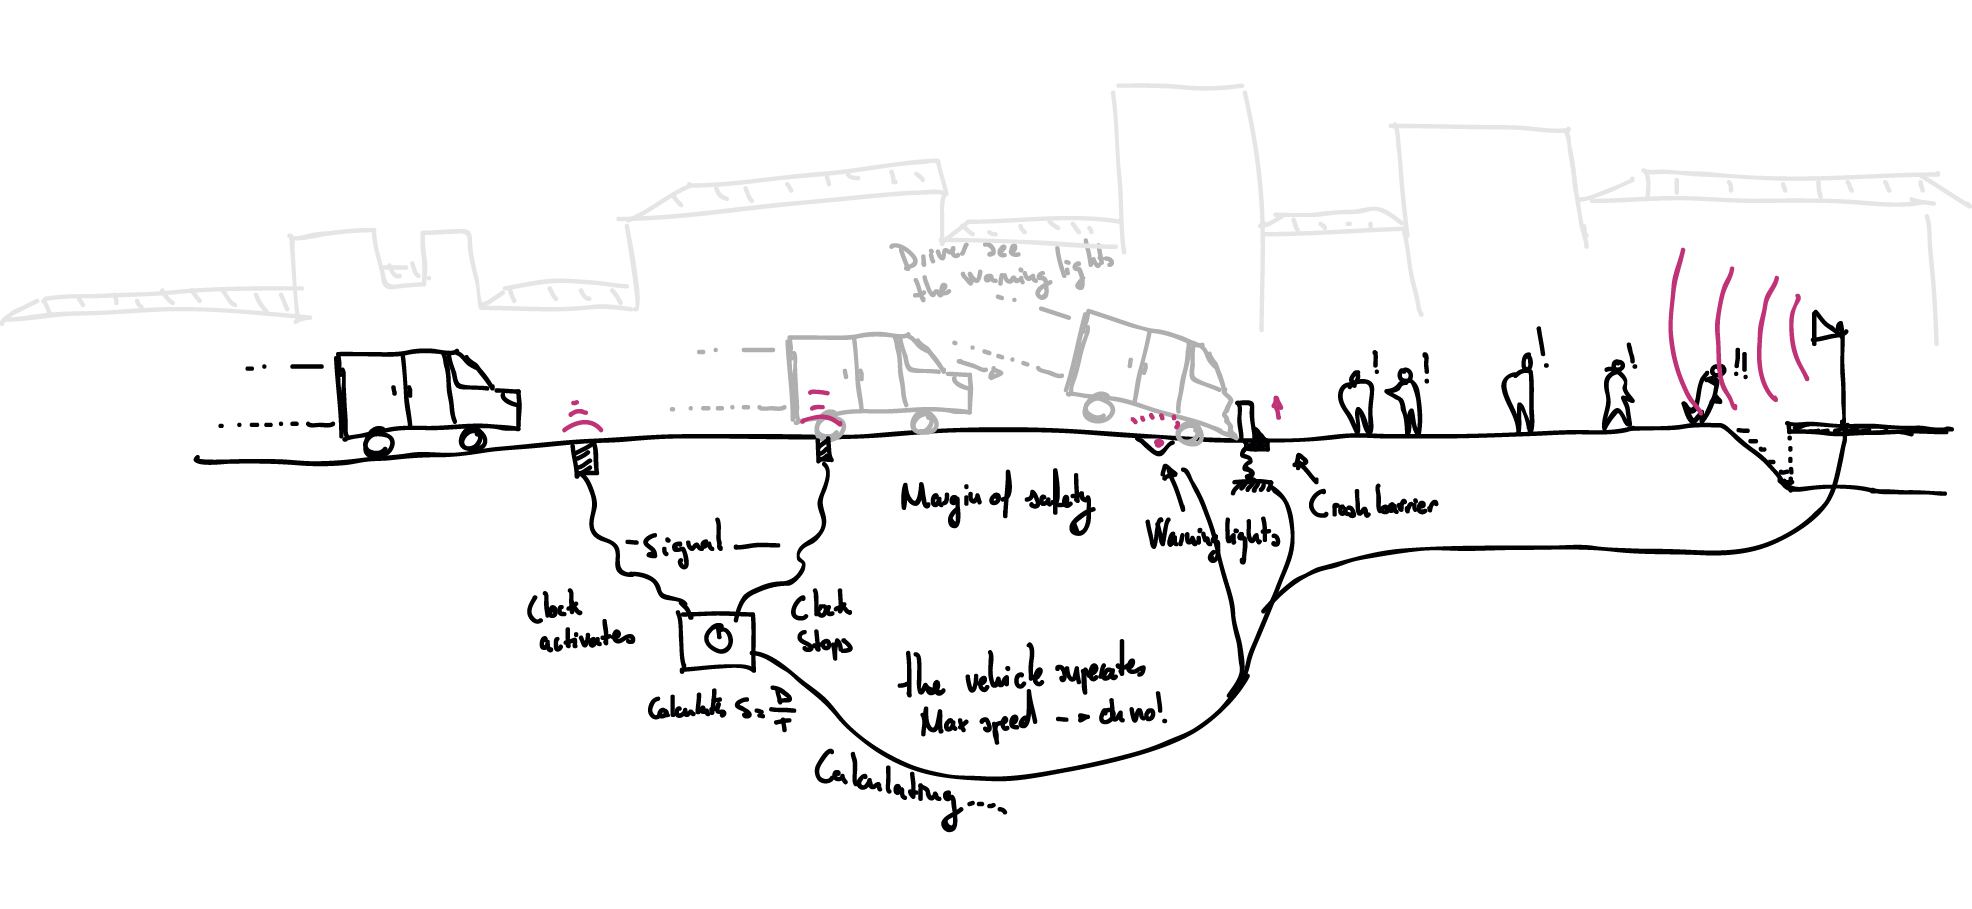
-My project will consist in an anti-run over security enclosure. The last accidents and terrorist attacks, produced in crowded areas,
makes necessary to protect public important spaces from possible accidents.
Around a circle or a square we will prepare a safety zone,
when people it's walking the security sistem is not activated but when a car or a heavy vehicle cross the detectors with high speed the security system it's activated.
avoiding the collision that may be caused, could thus be an urban prevention of accidents or terrorist attacks.
--- How does it works? ---
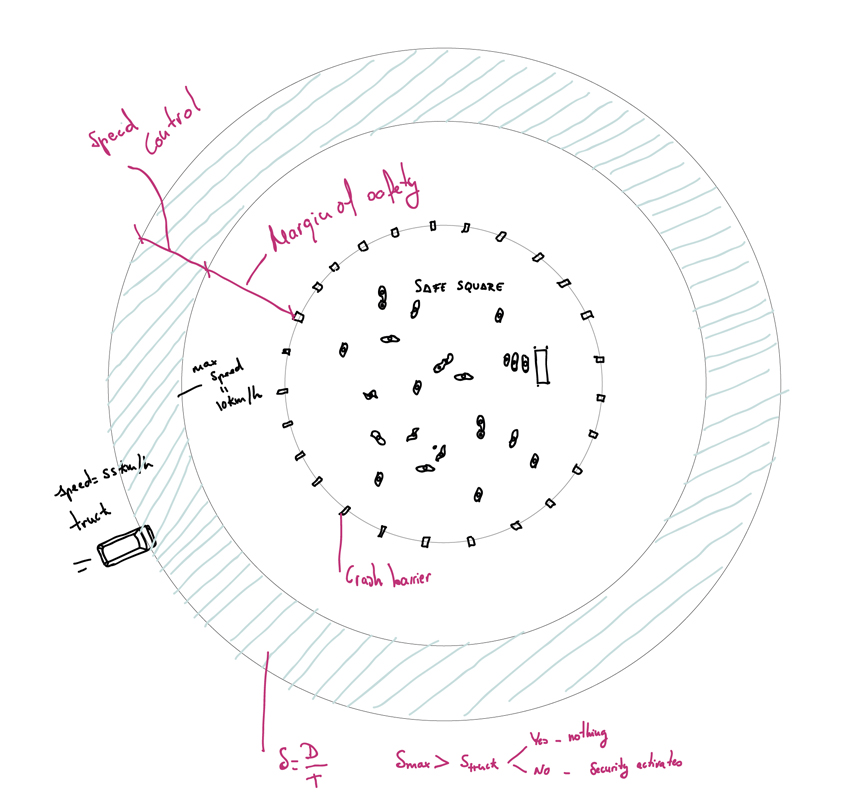 Safe Square and zones.
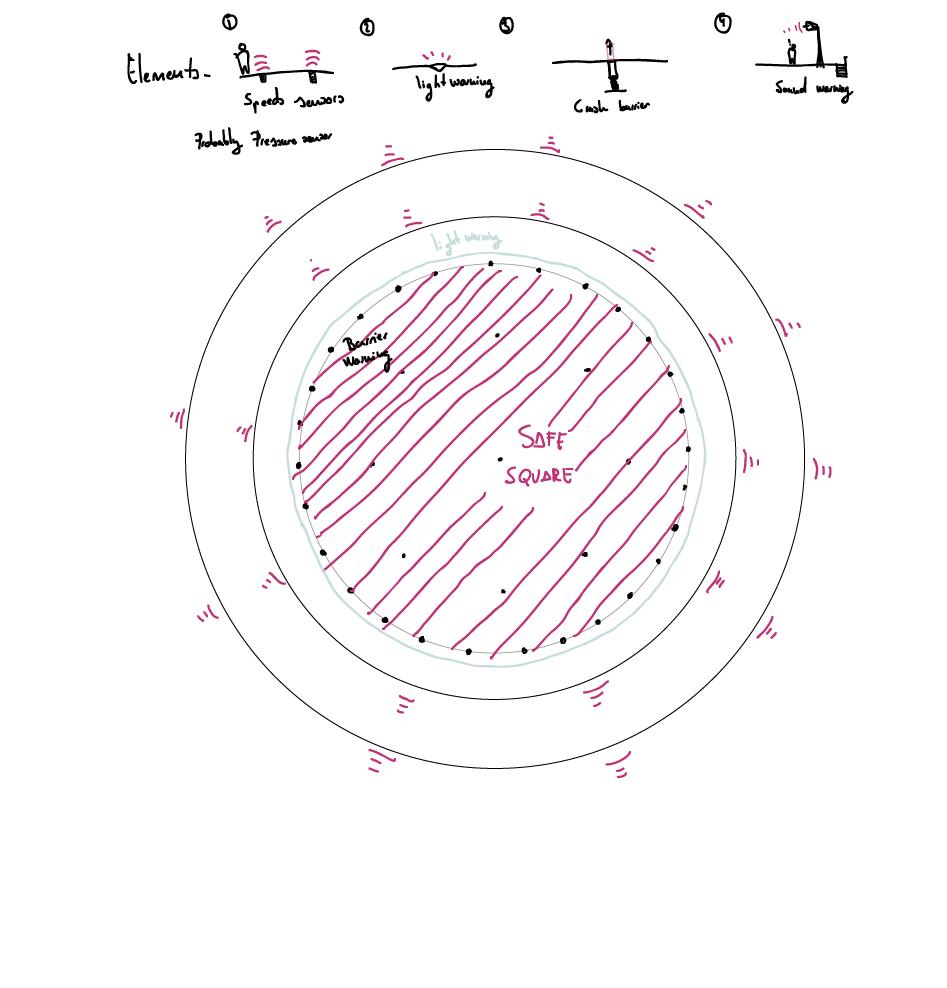 Elements and devices.
 How does it works?
I was chosen by random and exposed on February 1st for the first time my final project sketch and assignment of this week.
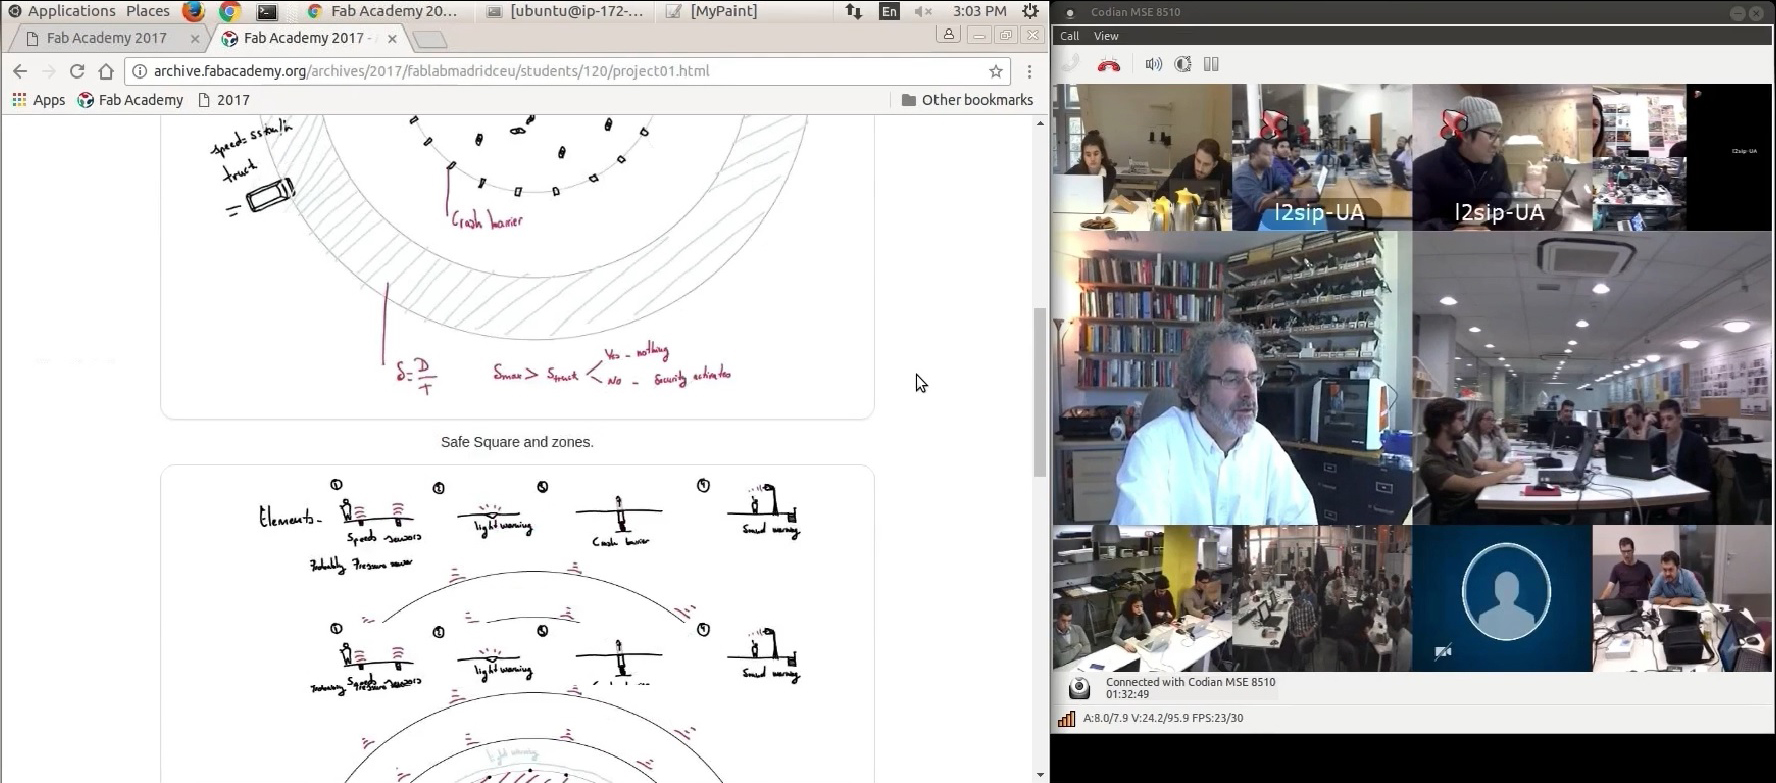
Me talking with Neil about my final project sketch
For more information click in this button.
- Getting familiar with GIT Platform -
1.Setup GIT:
I installed Git from its official page and downloaded the user's manual, I took the first steps, enter my username my email(I had some problem when entering my username and email did not get answer, until I found the folder inside user) and get my ssh key.
I visualized and copied the ssh key from Gitbash to the clipboard and got familiar with the basic commands for moving between folders.
I pasted the key on the gitlab website in the ssh keys section and added my password.
I already have a password!
Following the steps I cloned the repository of my fablab and I placed everything in a folder, in my desk.
Then, I copied my progress on my website inside the folder and I prepared to do my first pull and push.
 Pull.
Pull.
 adding my files and the name of the update.
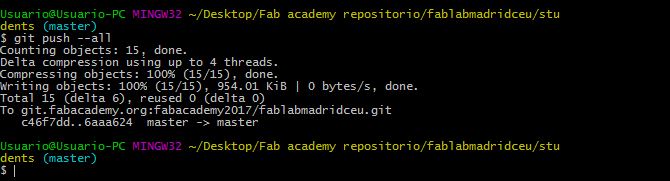 Updating my website.
- GIT tutorial -
This tutorial explains how to import a new project into Git, make changes to it, and share changes with other developers.
Git Tutorial's Website: https://git-scm.com/docs/gittutorial
The first commands you see in the tutorial are these:
-Git Cd command, is to locate and navigate the hard disk, in Windows is a more intuitive option to right-click in the folder and gitbush here.
-Git help that opens a list of the most used commands
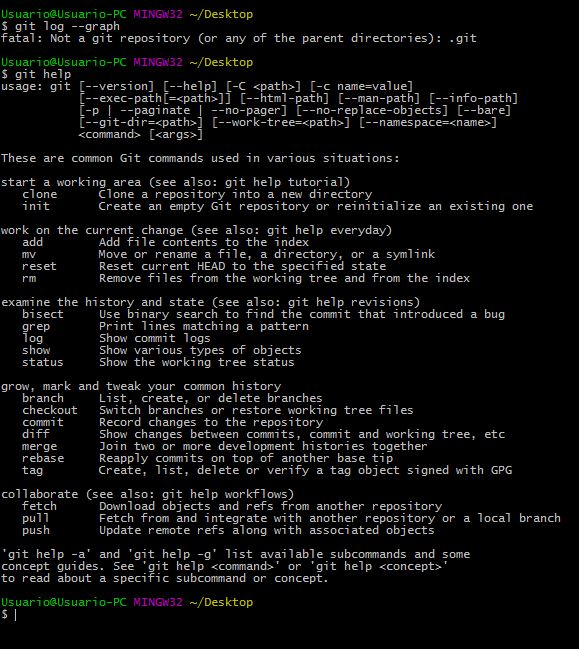 help command.
Then teaches you how to configure your data to be committed
 My data.
-Git config --global user.name "Firstname Lastname"': sets name for commits
My data.
-Git config --global user.name "Firstname Lastname"': sets name for commits -Git config --global "address@site": sets emails for commits
-Git config --global': user's configuration
-Git init that create an empty Git repository or reinitialize an existing one.
-Git add, temporarily stores a snapshot of what is currently in the folder.
-Git commit, Permanently stores the files in the folder, a message is required as the storage legend.
-Git commit -a Add the files permanently modified without having to perform a git add, skip that step.
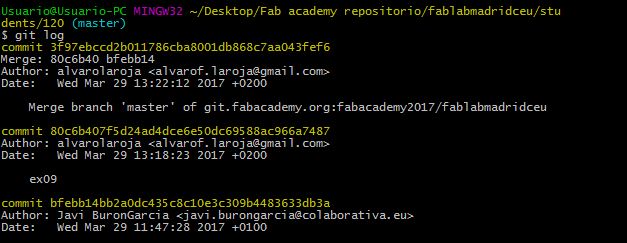
-Git log: You can see the history of changes in the repository, the changes are named with a code, with the message of the commit, the author and the date.
 -Git log --name -status': shows names and status of changed files
 -Git log --graph --online --stat' -compact history view with graph and changes.
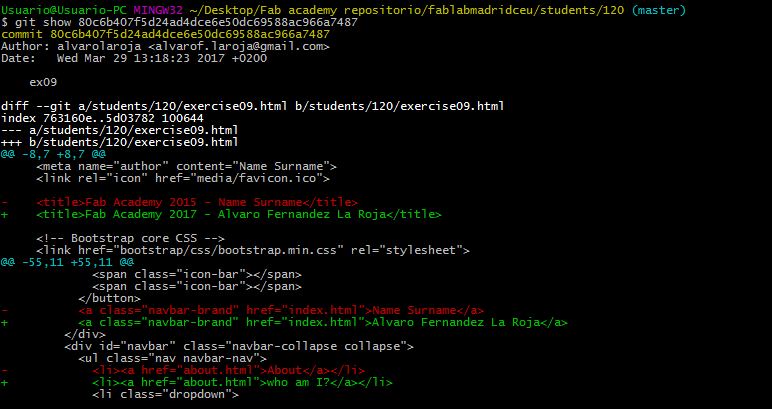
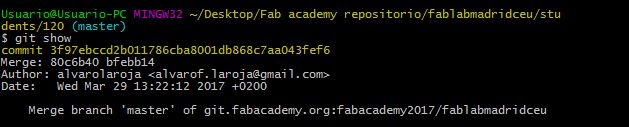
We can give this name to git show to see the details about this commit.
 Pull.
Pull.
 Pull.
-Git show, We can give this name to git show to see the details about this commit.
Pull.
-Git show, We can give this name to git show to see the details about this commit.
Using the example of two people working remotely (Alice and Bob) explain the steps of how to work remotely using the pull push command, without overwriting important information, and explains the precautions to be followed, such as git status, and git fetch .
-Git Status,report the repository status and gives you information about the modified files.
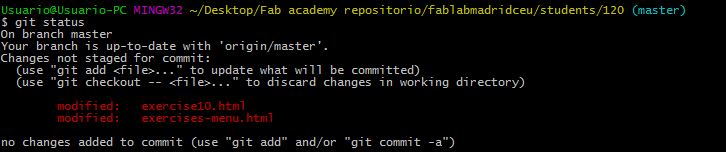 status-Shows the files that have been modified.
-Git tag, you can tag the commit names to make them easier to find than the name given by git.
status-Shows the files that have been modified.
-Git tag, you can tag the commit names to make them easier to find than the name given by git.-Git grep, to search for a specific commit.
 searching for "r2"
This is the end of the tutorial.
Other commands I've seen in gitEveryday and $ git help:
-git-checkout and git-branch[1] to switch branches.
searching for "r2"
This is the end of the tutorial.
Other commands I've seen in gitEveryday and $ git help:
-git-checkout and git-branch[1] to switch branches.-git-reset and git-checkout[1] (with pathname parameters) to undo changes.
-git-merge to merge between local branches.
-git-rebase to maintain topic branches
-git-clone from the upstream to prime your local repository.
-git-request-pull to create a summary of changes for your upstream to pull.