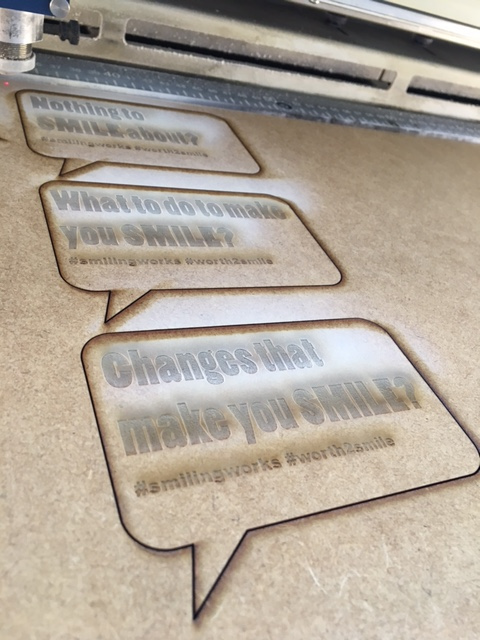
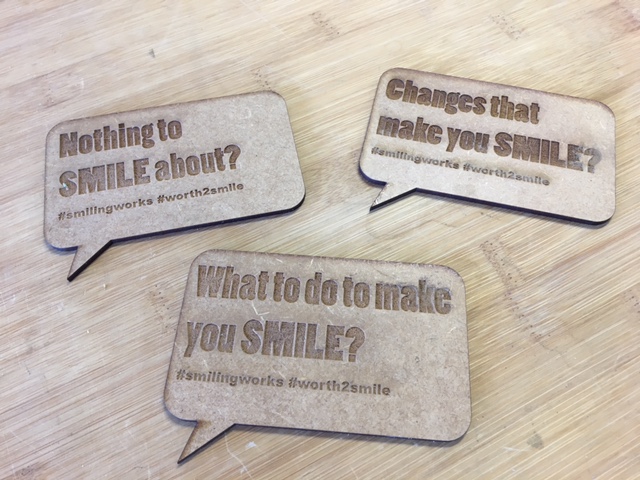
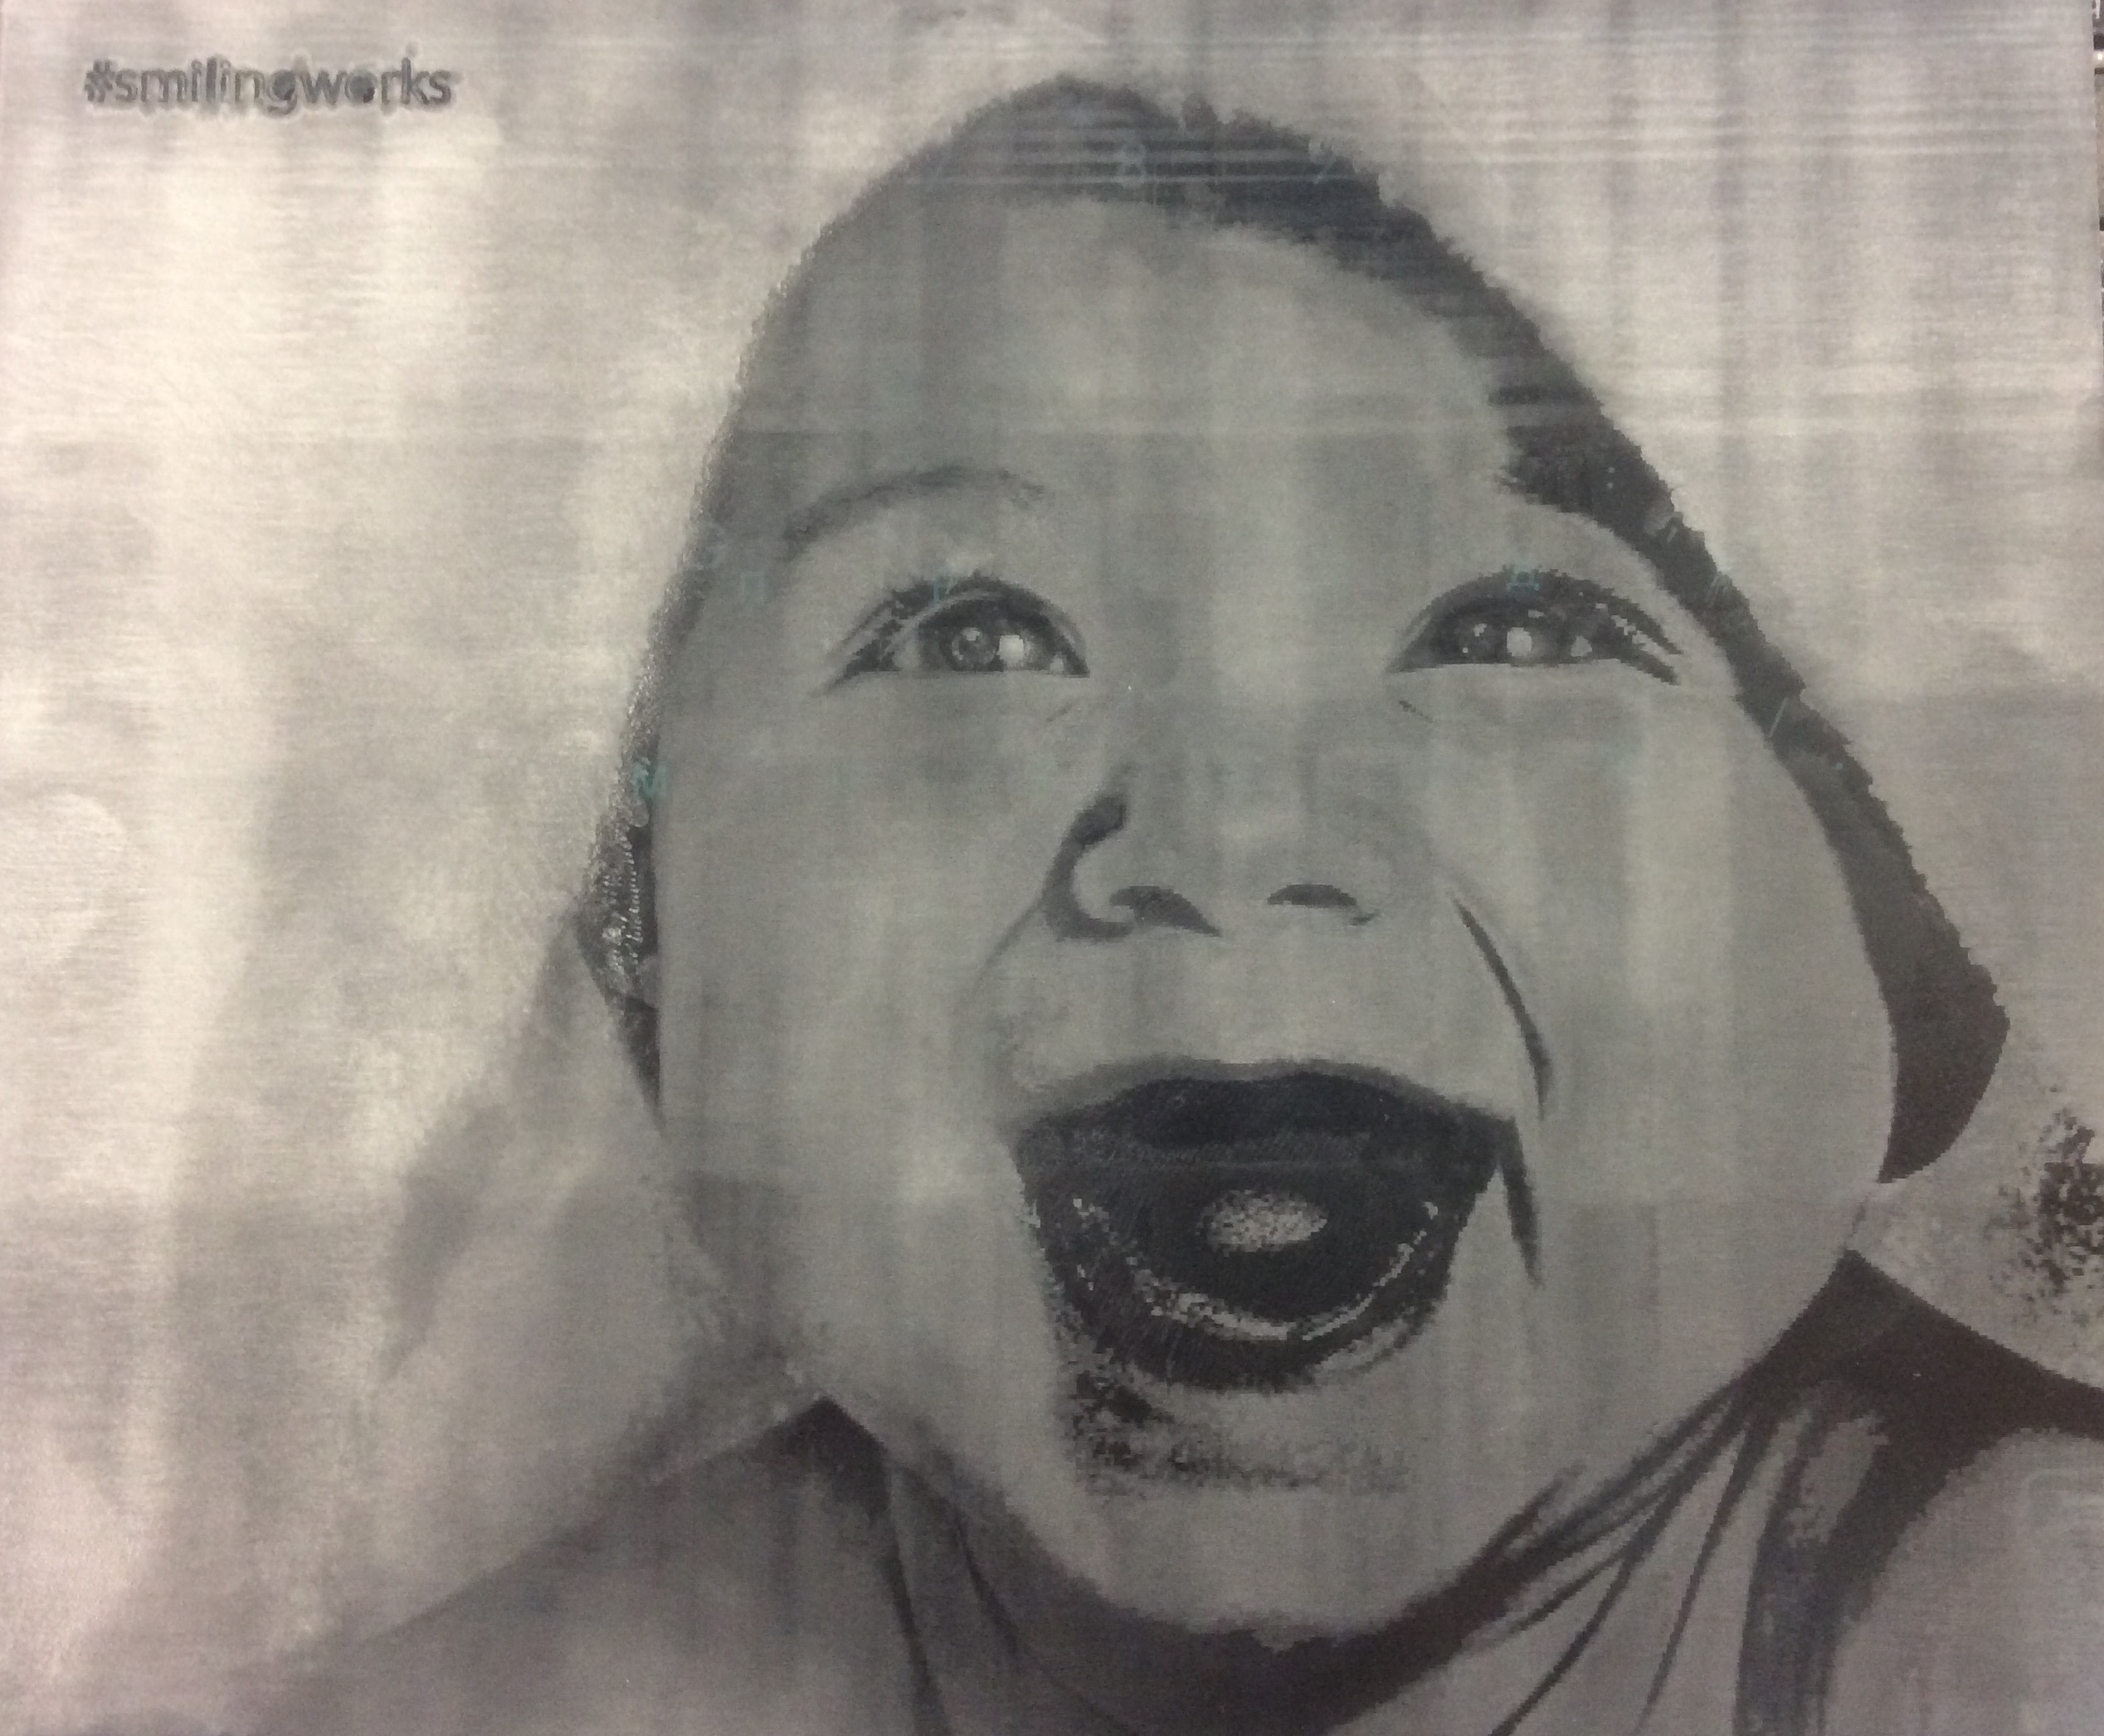
Karsten Nebe's #smilingworks
During one of our group meetings about Olafur's assignment of 'smile' we discussed the 'why' of smiling.What makes people smile and what does not.
'Why' do we/people smile.
It can be a matter of sympathy, happiness and joy.
It can also be a reaction on someone or something.
But when do and don't people smile?
People want/like to smile.
But how to make them smile even in unpleasant situations? (That's the content)
Let them think. You cannot control the thoughts and you may not want to. But you can drive them to think in a certain direction. Caused by the form and content.
Thoughts caused by a situation may make people smile, if you present them a form that make them think - with positive attitudes.


I wanted to make people think (or memorise) in a positive way, especially in unpleasant situations. Seeing the bad but thinking about the good may not just create a smile and pleasure - it also may have an effect on peoples thinking. A smile can make a change.
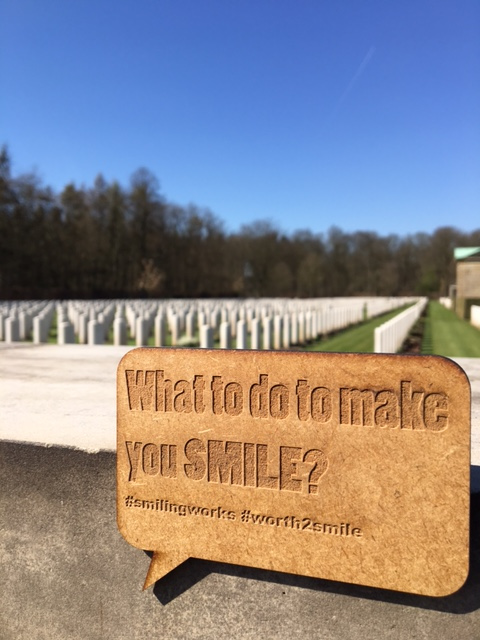
#worth2smile by Karsten Nebe
Jörn Kiwtt's #smilingworks
Menu
My thoughts about a smile
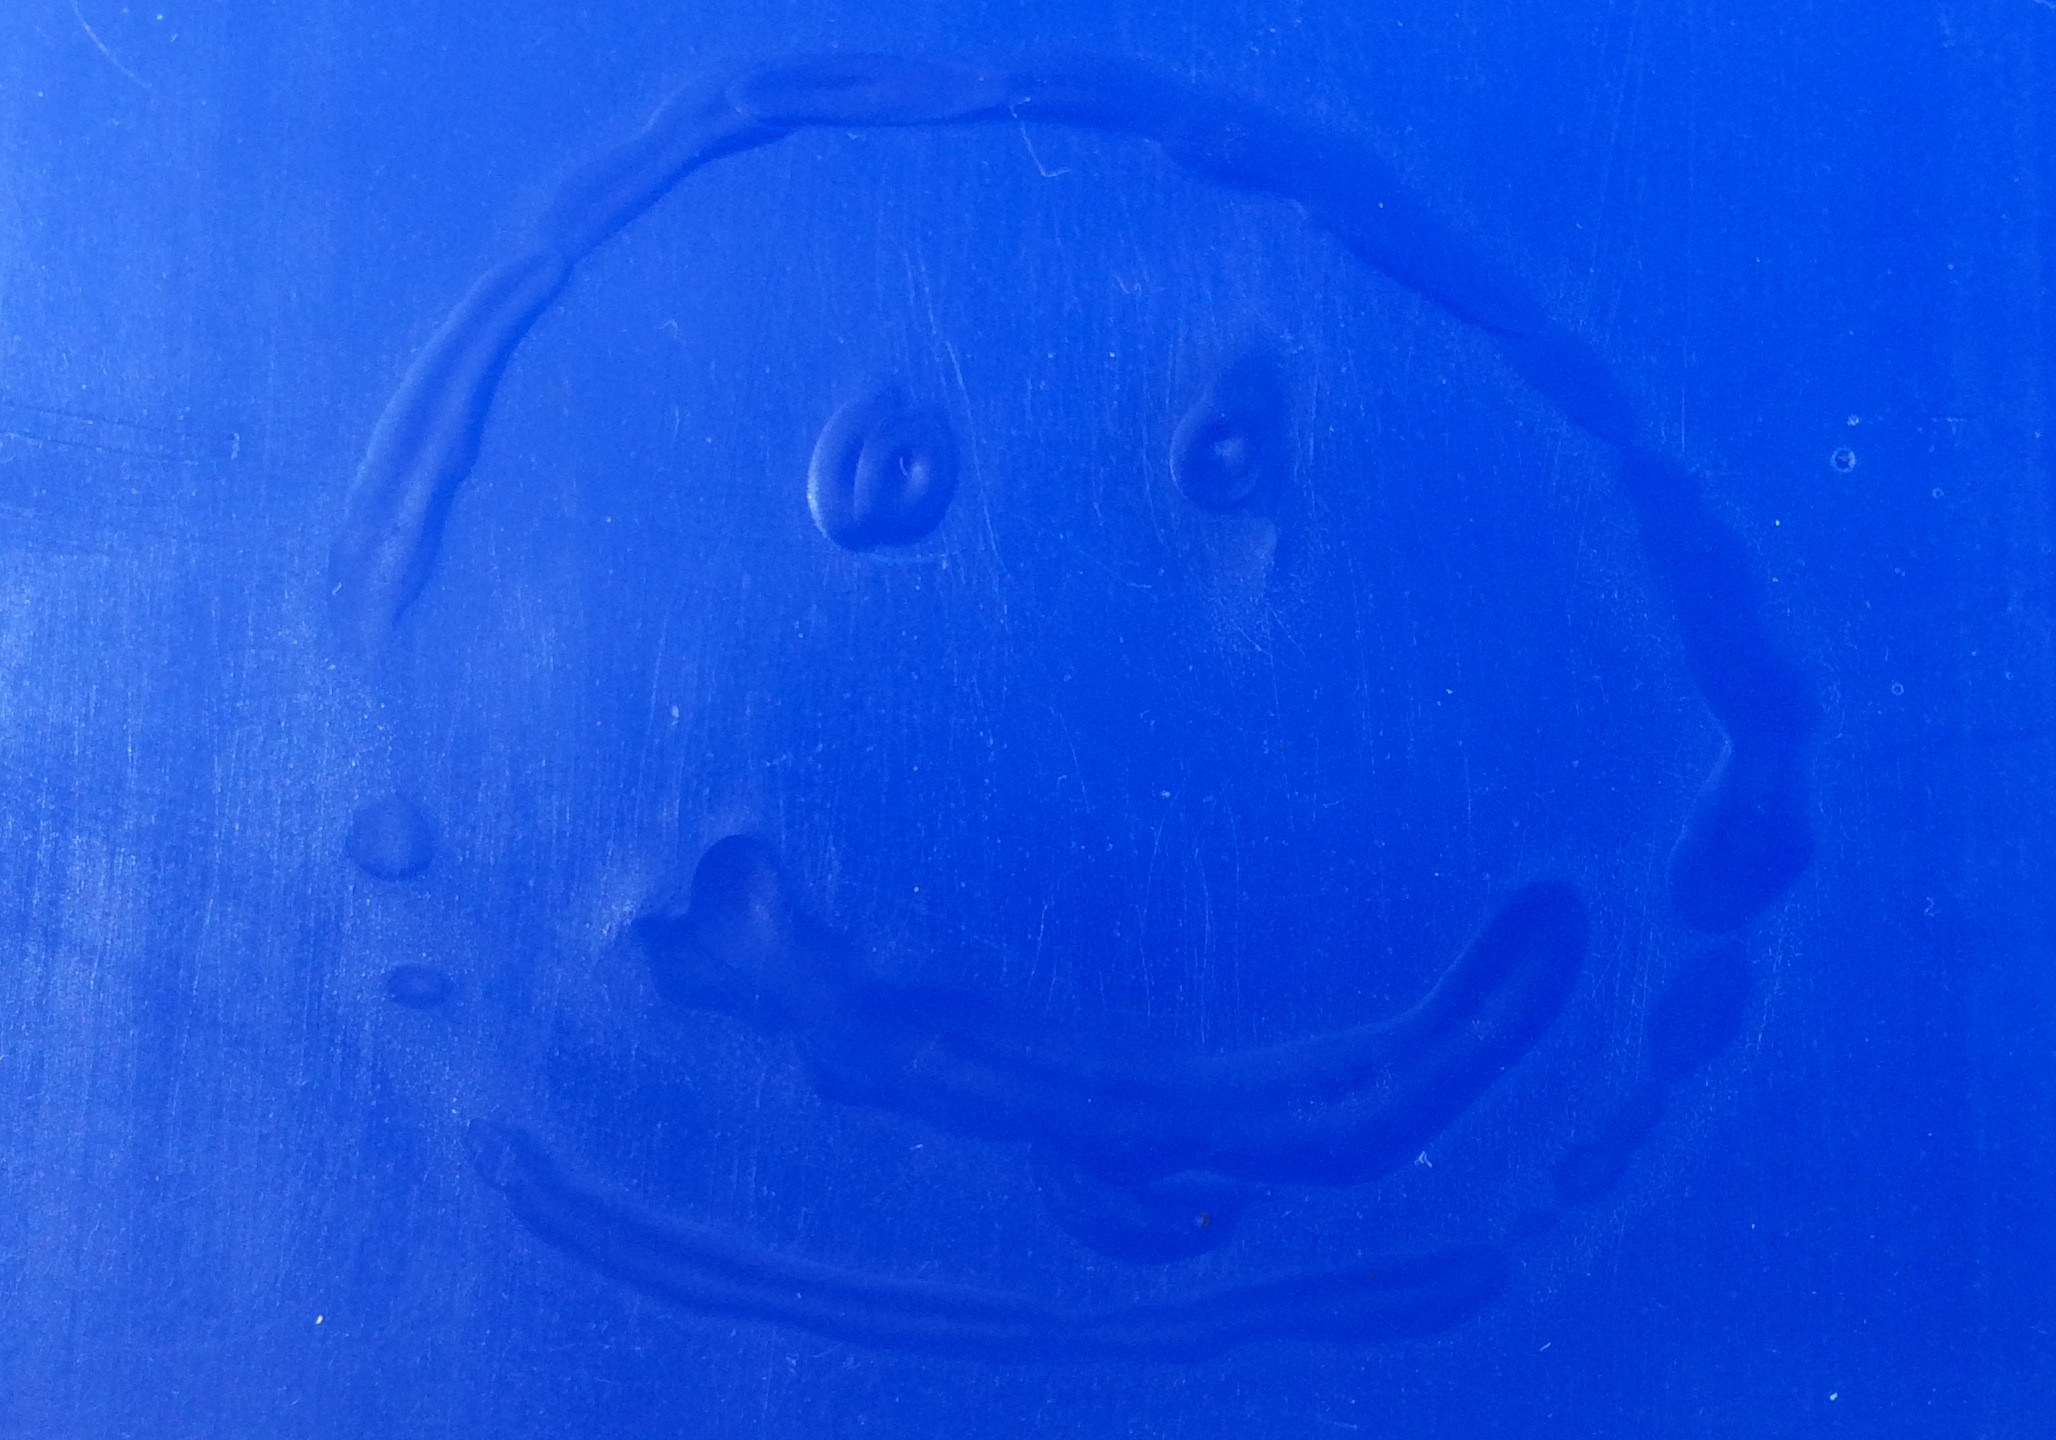
We had an longer discussion about what a smile is and what a smile means in an intercultural context. Most people would return a smile, when they get a smile but we also talked about the fake smile, the sarcastic smile. These completely unconstrained tasks are new to me, but I like the idea of starting with "why" we do something, instead of "what" and "how" a task can be completed.
Task:
- Make something that makes other people smile
I stuck with the initial hypothesis, that a smile is most often returned but also asked myself the question whether a smile can go by unannoticed. So, the idea of my product is that once you make a person aware that he or she has just been "given" a smile that this person will automatically respond with a smile.
I made this small piece out of Plexiglas on the laser cutter, which you can hold in your hand during a handshake. When the person asks "what do you have in your hand?" you can tell that he or she has just been given (handed over) a metaphoric smile. The design can be very much improved. I can be turned into a band you wear on your wrist or a glove but the basic idea remains the same.


Making the smile
I used the laser cutter with 3 mm of Plexiglas. Engraving settings were:
Engrave:
- Power: 100
- Speed: 100
- Frequency: 50
Cut:
- Power: 100
- Speed: 10
- Frequency: 50

Download files
Daniele Ingrassia's #smilingworks
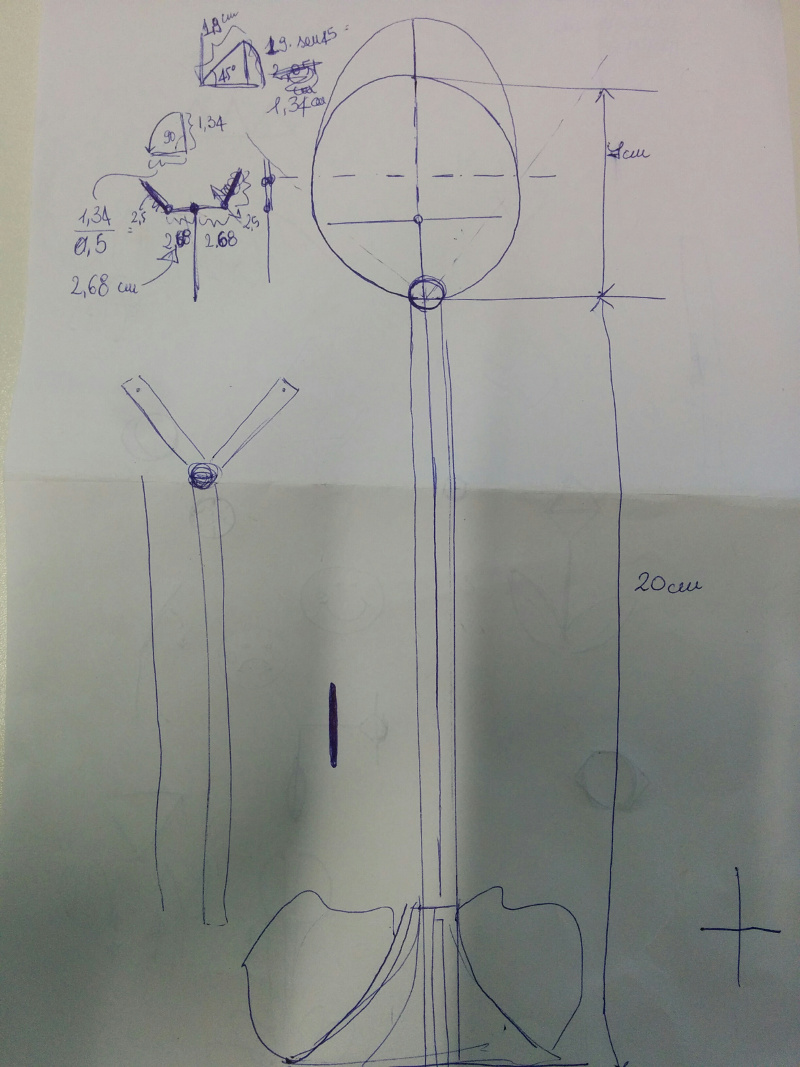
A Smiling Flower
Luckily this assignment come up during a period in which my girlfriend Gaia was visiting me in Germany, so I was happy to let she participate with me in making it.
Our main idea is a very simple one, what if you can have something that smiles at you when you walk somewhere?
We tought that having a nice figure with a simple mechanism could make anybody smile (at least a bit) in any environment.
After freely talking about which kind of shape and colors could be suitable for us we find ourself pretty childish, and therefore we decided to make a smiling flower.
We focused more in having fun together in making this rather than making a complex mechanism and a detailed design.
The flower will work in a way that if you get near it, it will open the petals and showing you a smiling face for few seconds.
If you want to have another smile you have to move in front of the flower again :).
The flower will also be battery powered so it could be deployed in sad environments like hospitals, graveyard and so on..
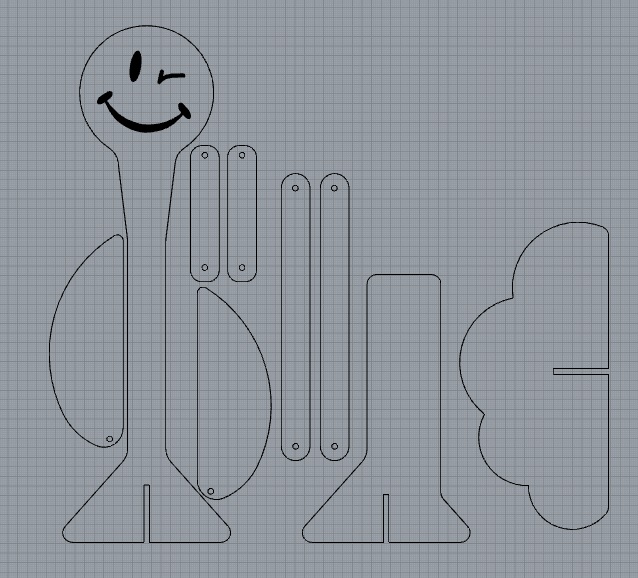
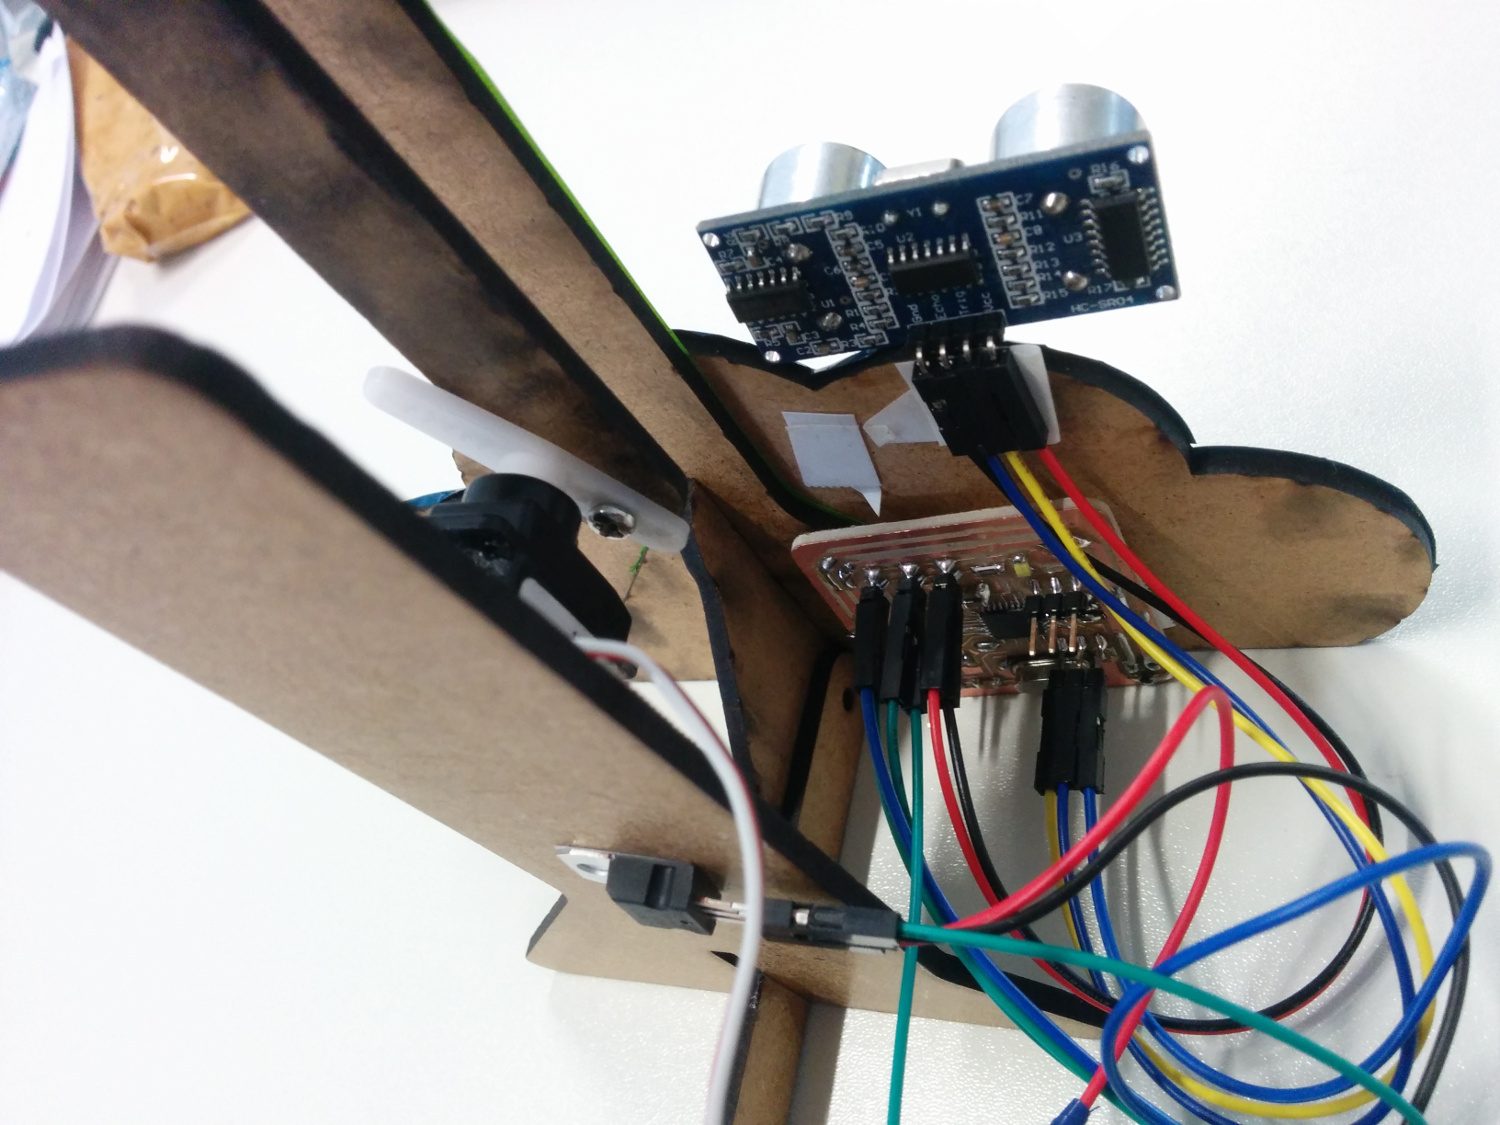
Gaia sketched and designed the flower both for laser cutter and vinyl cutter:
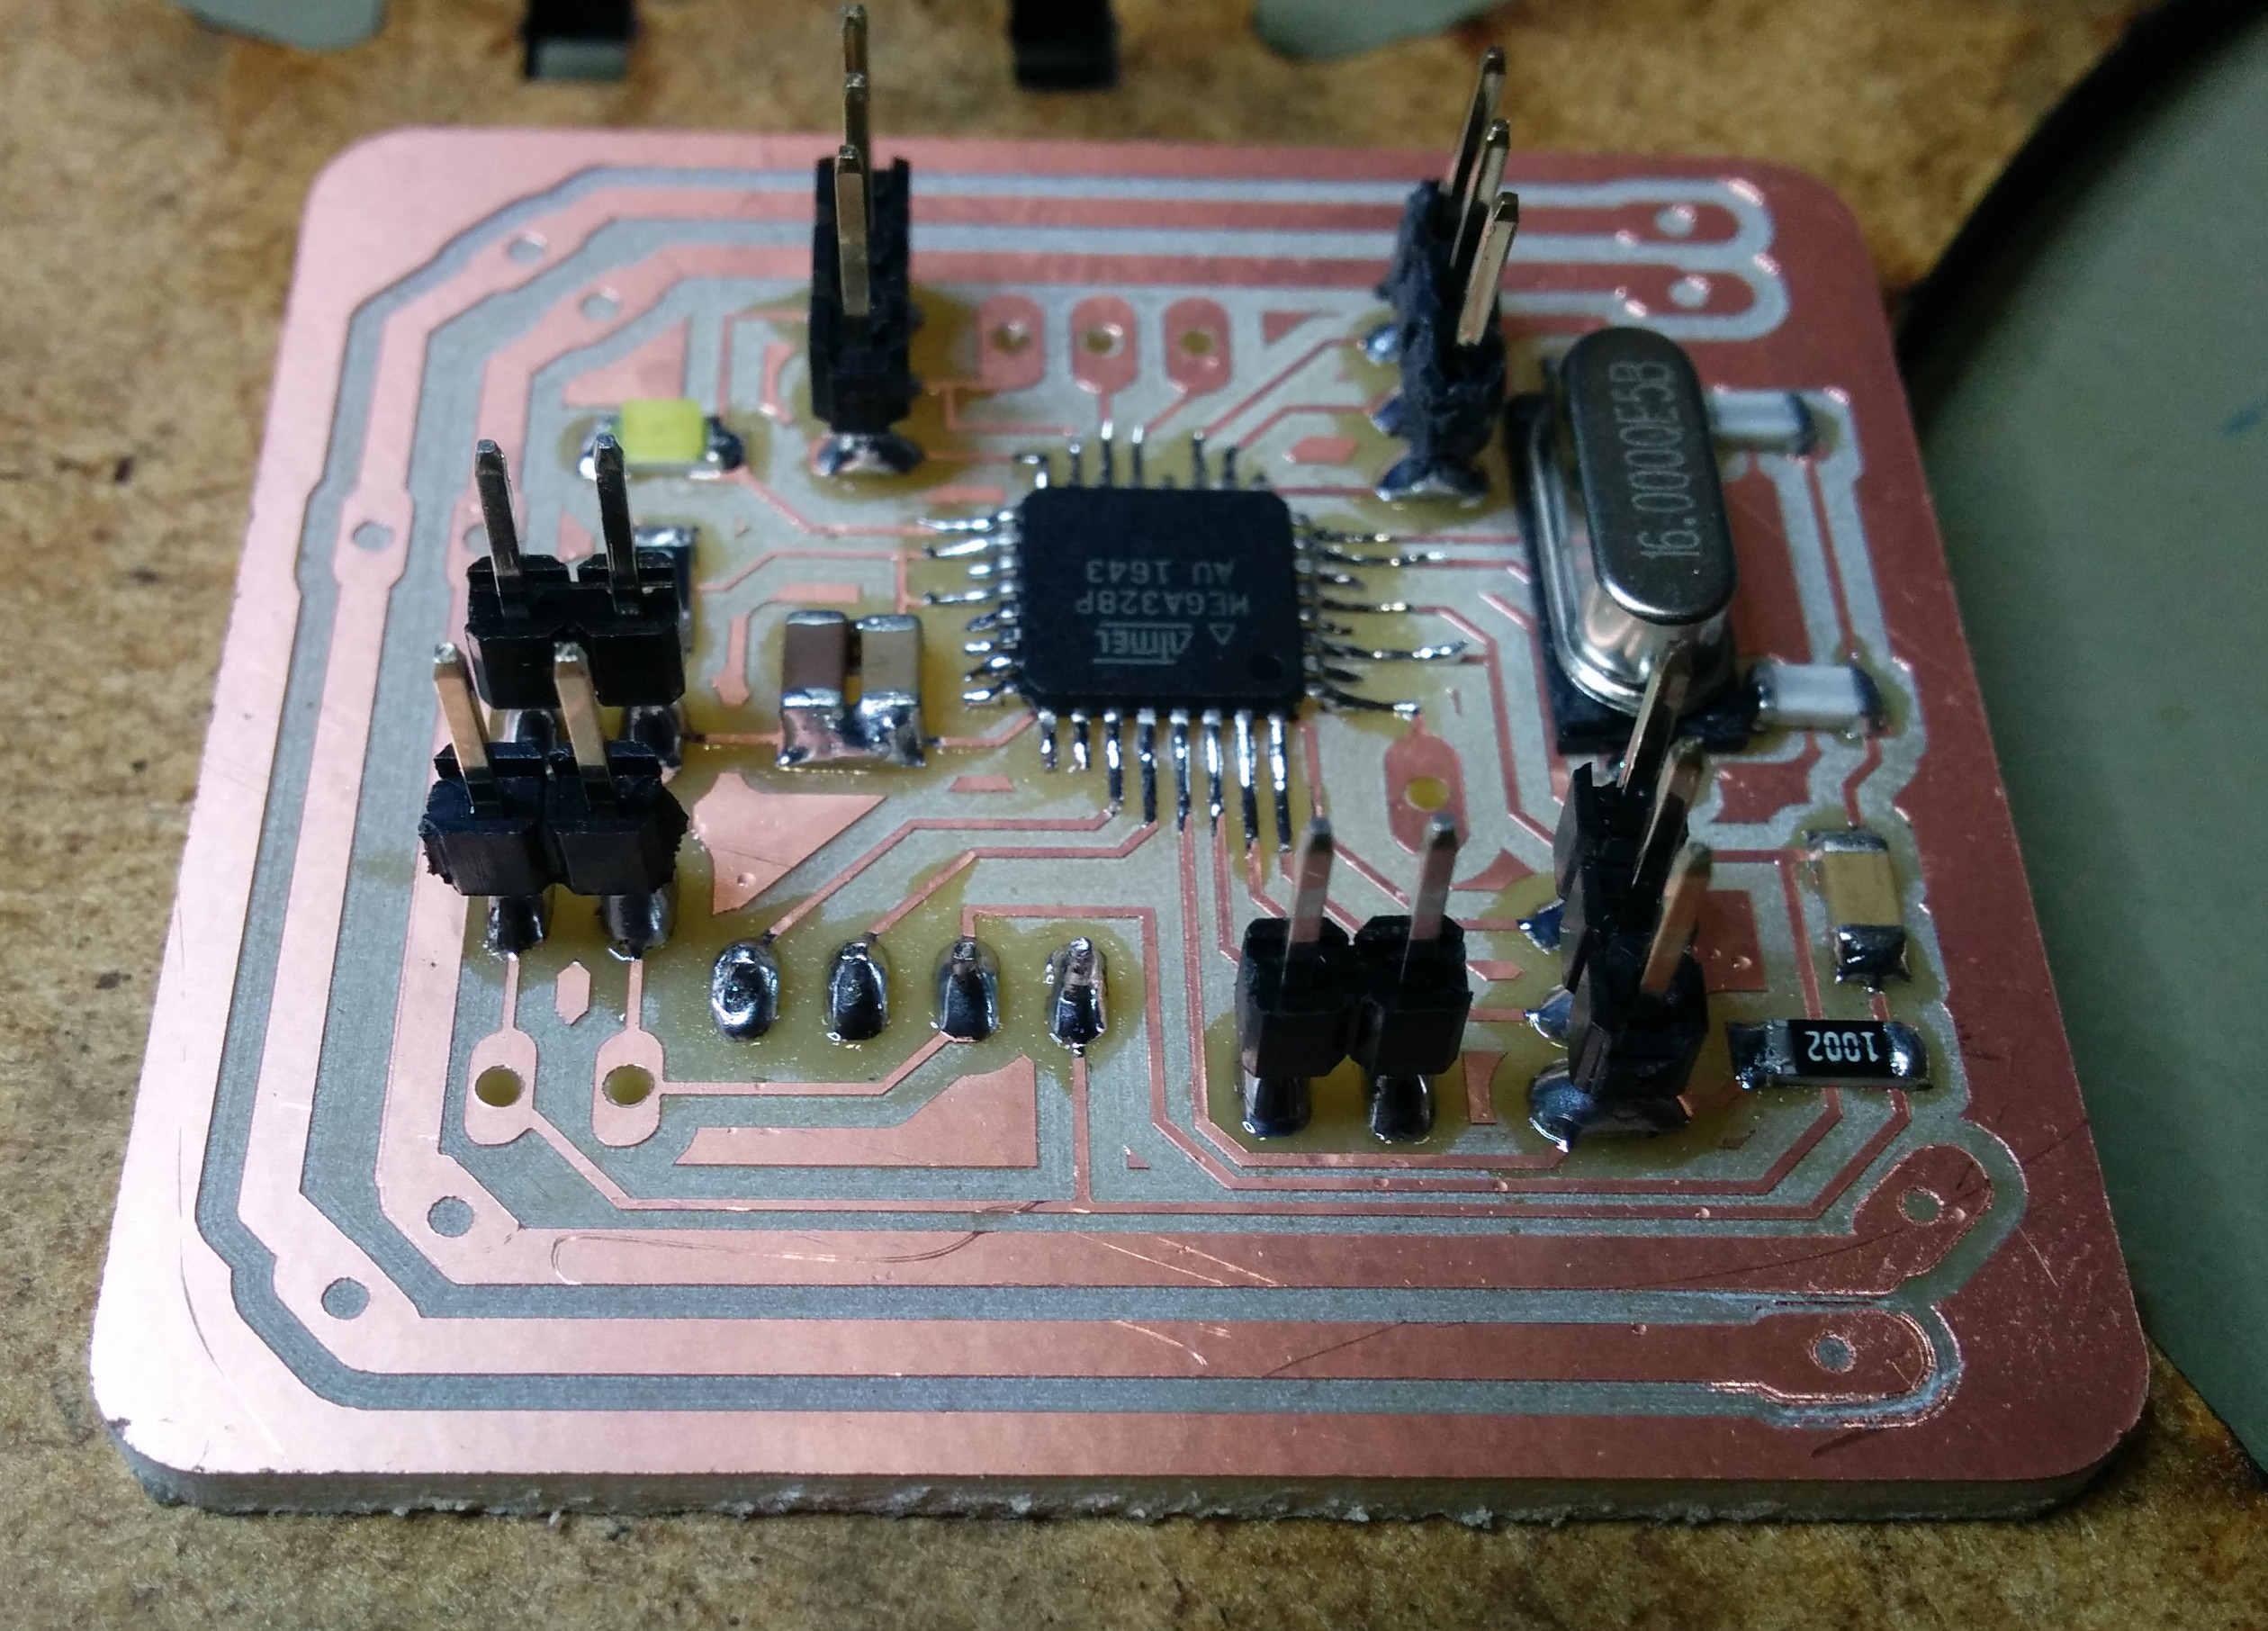
While I did the board and the programming, reclycling an old mini flight controller board and some Arduino libraries:
#include <VarSpeedServo.h>
#include <NewPing.h>

VarSpeedServo servo;
//NewPing sonar1(TRIGGER_PIN1, ECHO_PIN1, MAX_DISTANCE1)
NewPing sonar1(5, 6, 400);
int distance;
boolean side;

void setup() {

  servo.attach(7);
  Serial.begin(19200);
  Serial.println("ciao");

  servo.write(90, 30, true);

  side = true;

}

void loop() {

  distance = sonar1.ping();
  distance = distance / US_ROUNDTRIP_CM;
  Serial.println(distance);

  if(distance < 60 && distance != 0){

      Serial.print("trigged!");

      if(side){

        servo.write(180, 30, true);
        servo.write(90, 30, true);
        side = false;

      }else{

        servo.write(0, 30, true);
        servo.write(90, 30, true);
        side = true;

      }

  }

}
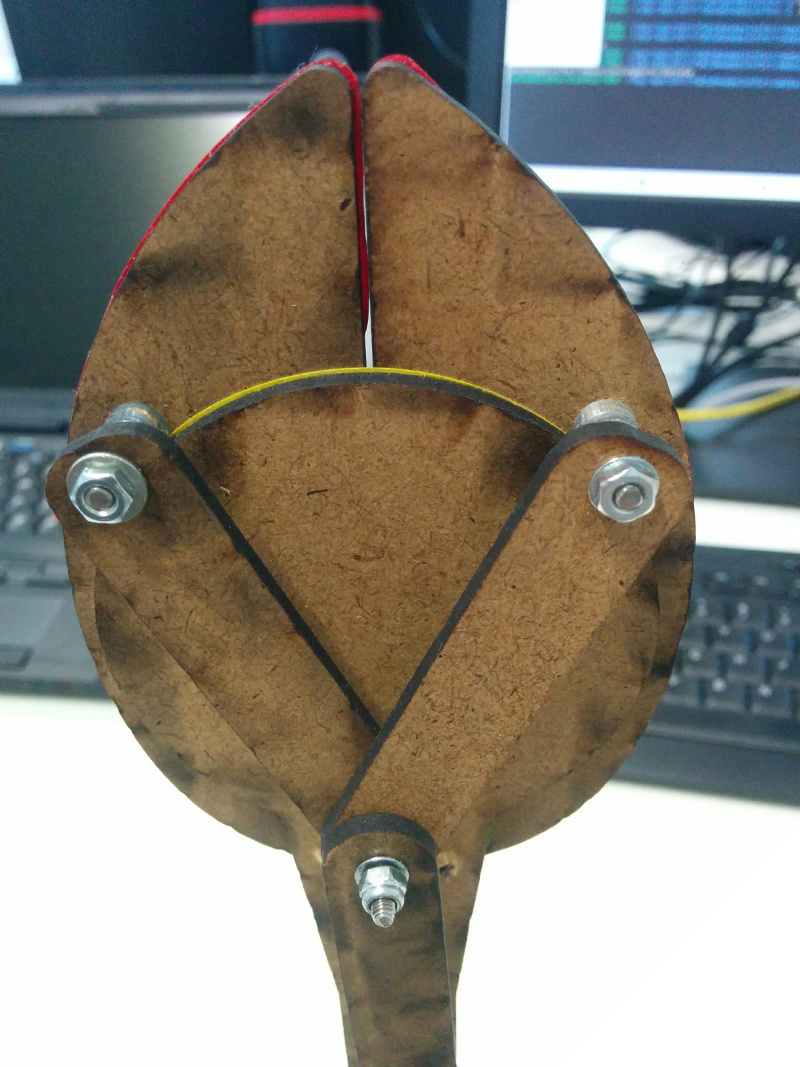
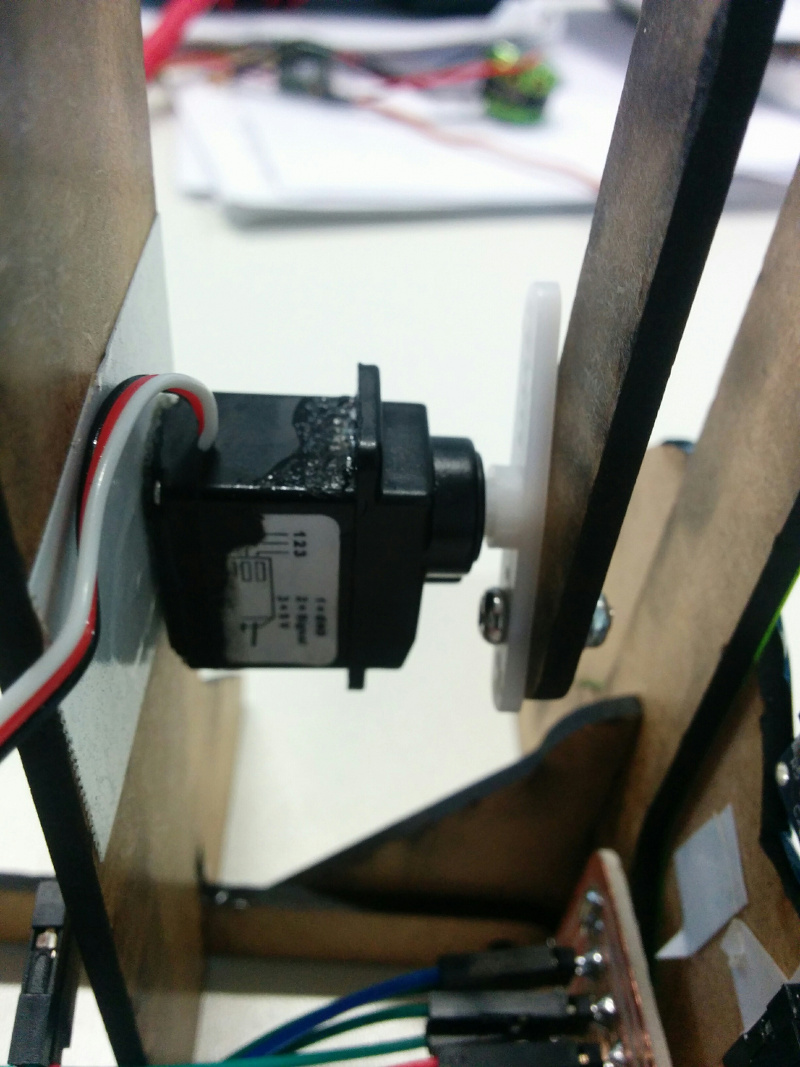
Here you can see some details about the structure of the flower:

And here is the smiling plant in all of his splendor into the sun :):
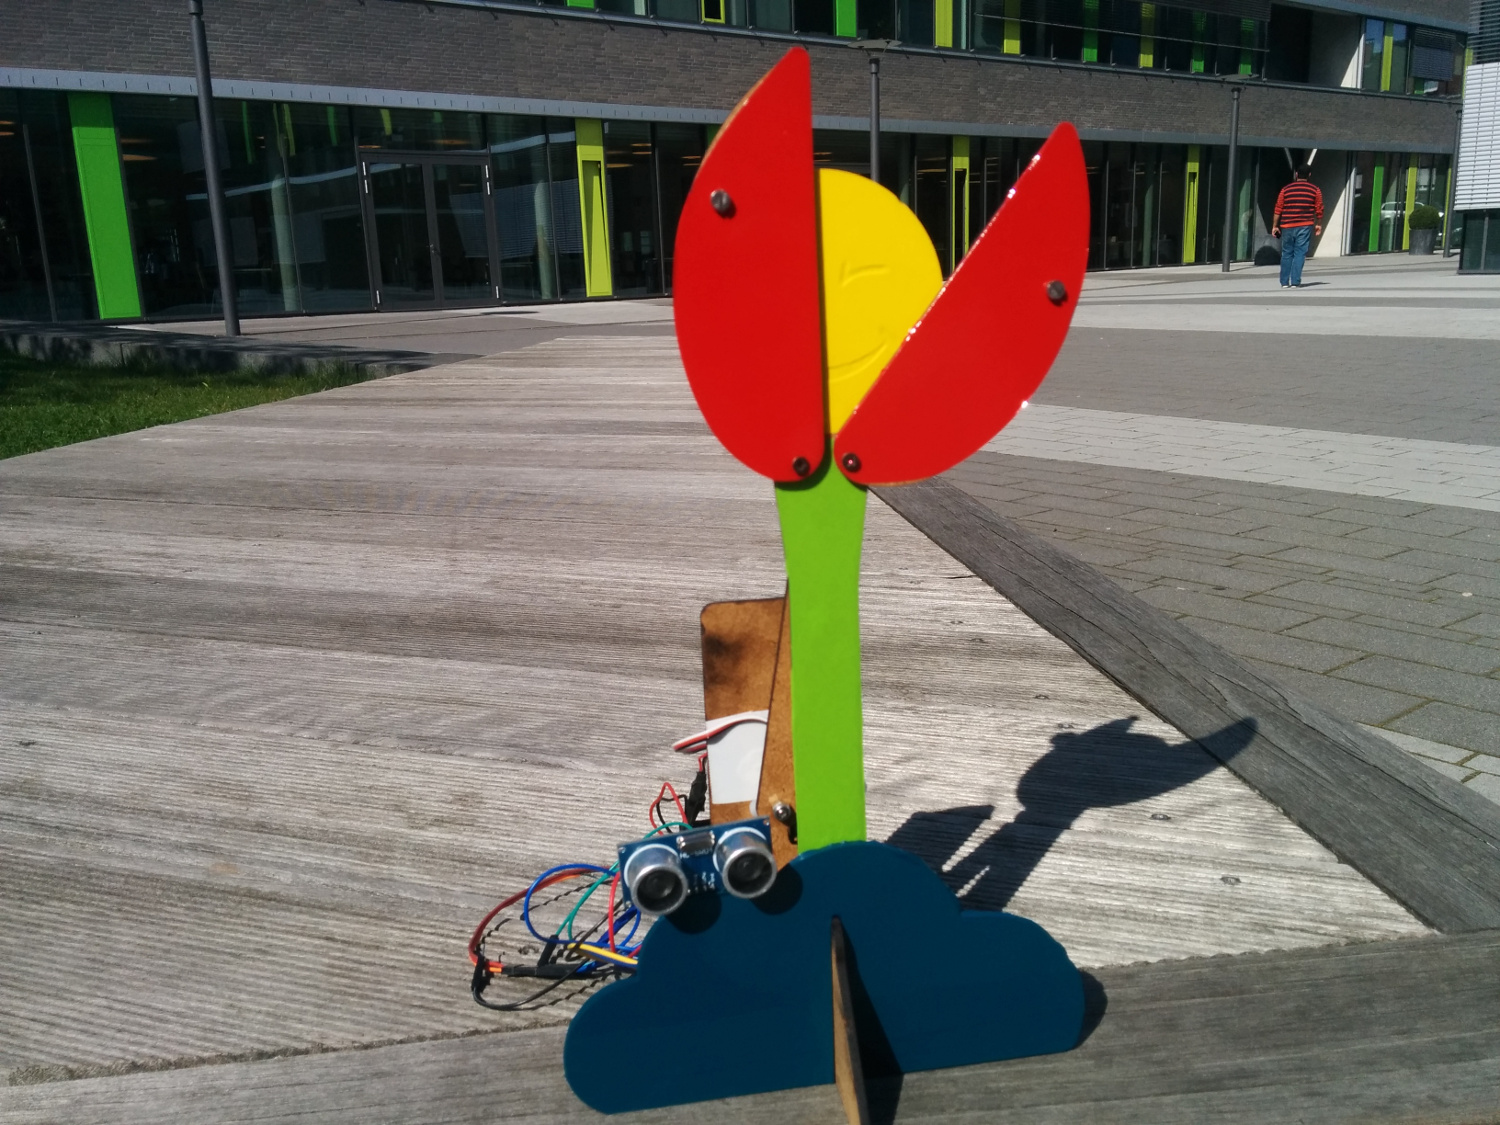
Finally here some videos about how it works. we deployed this outside in the campus plaza, and several people come and smiled at it :)!
Downloads
Personal Toughts
I think that other than having a general effect on people this little flower had a very nice effect on me and my girlfriend.We enjoyed a lot and this project was the excuse to stay and lovely work together in the Fab Lab, which made me very happy :)
Dima: BABY's SMILE #smilingworks
Group #smilingworks
The SMILE of the SUN
CESAR MARISCAL - #smilingworks
THE SMILE TREE
It was difficult to come with an idea for a smile that could have an impactful effect on the people around.
The idea is a 8 metre tall structure that looks like a tree and lights up, just like light posts in an urban city.
It would look as follows:
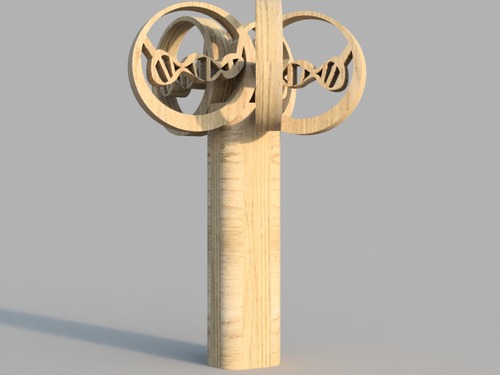

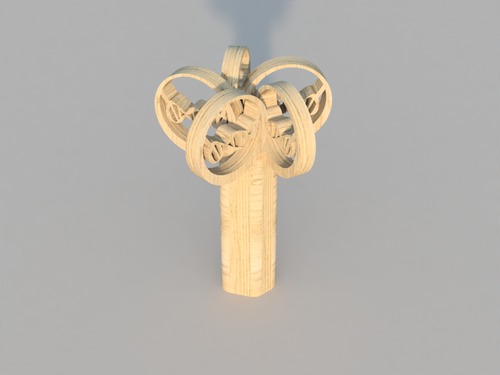

A smile is stored in our DNA structure and trees represent life and growth.
DOKU
The Pac-Man Fab
Adriana cabrera and thi yen thu
When surroundings are thought of as stable, we tend to lose the feeling of responsibility for the environments in which we move. ELIASSON, Olafur.
In general, we have a good mood in the FabLab, but, as we spend a considerable amount of time there, situations arise in which our perceptions and moods change. At the end we are kind of a family, trying to have a pleasant coexistence between each other.
How can designers use negative emotions in product experiences that have a positive impact?
Enables meaningful activities.
Positive Design encourages people to balance pleasure and virtue. It stimulates people to engage in meaningful activities that are rooted in their deeply held values.Delft Institute of Positive Design
Why to improve the coexistence and create a happy mood?
Reflecting on a positive experience, I though of a situation of how to generate happiness in moments where you normally wouldn’t be in a good mood. The fab lab, is a place where we are learning new forms of sharing and where different kind of personal interactions appear.
Situation:
One of the situations that makes me irritated is when the workspaces are suddenly chaotic, How can you ask the students and fellow colleagues to organise in a non offensive manner and without being angry?
How to create good memories for people through materializing something?
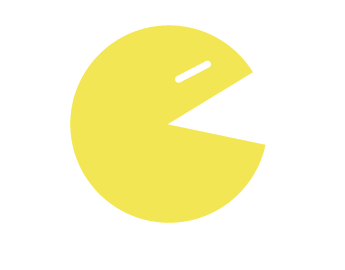
For me, the Pac-Man is the representation of the most simple pictogram for smiling, it is something that produces a sensation of happiness. The game also reflects the happiness of eating.
Using material experimentation provides a different approach of prototyping interfaces, envisioning the changes of a more near connection between the human being and the interaction.
For me the Pac-Man is the representation of the most simple pictogram for smiling, it is something that produces a sensation of happiness. The game also reflects the happiness of eating.
What is pacman?
The original Pac-Man is a single-player arcade video game released by Namco in 1980 where a yellow, circular character navigates a maze, eating pellets and fruit, avoiding ghosts and occasionally eating them.
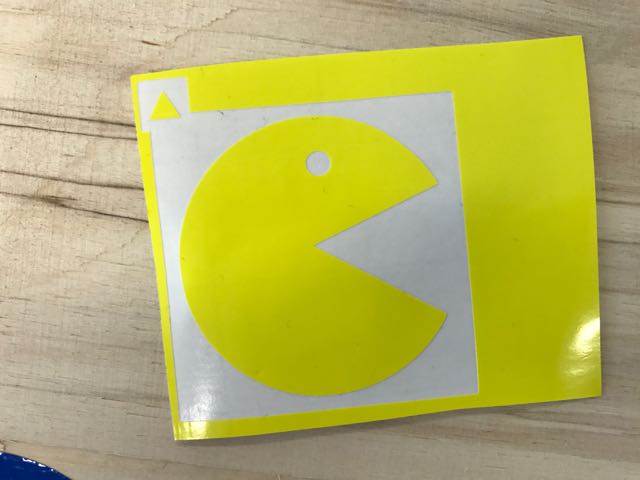
In the following picture you can see differents forms addressing that the Pacman with the chaos of 3D printing, tools , and electronics station. (foto)

After this process I touch in a for to combine this idea with an interactive way that the people react.
We have different process in the lab that we did objects and interaction using conductive inch odr conductive textiles in order to create capacitive sensors and make interactive objects.
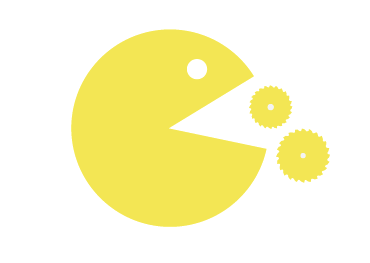
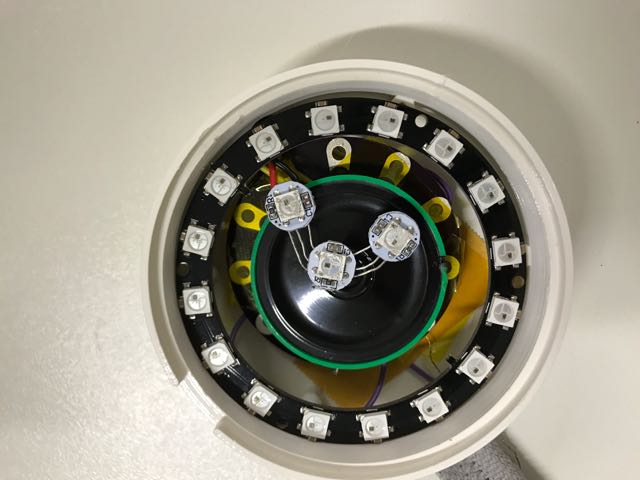
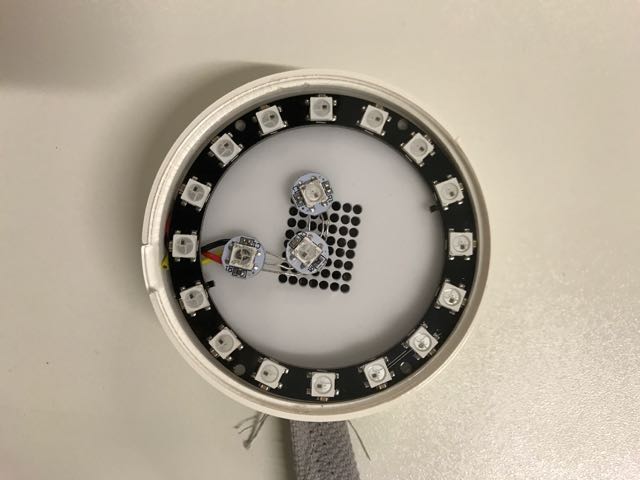
In the first experiment we tried to subtract the pacman form with a neopixel ring and generate this form .
https://youtu.be/ZUtEeWy7XAg
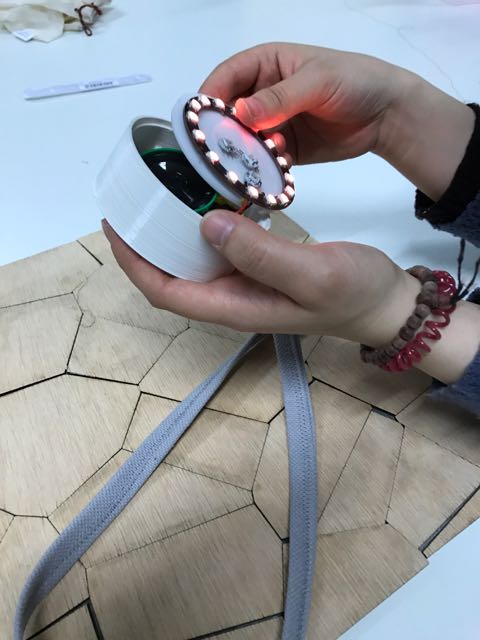
We started out with soldering extra Neopixels (in this case 3) to the already available 16-pixel ring, in order to make the outline of the Pacman. Wires also need to be soldered to the final ring in order to test the circuit. We used crocodile clips to connect the circuit according to this schematic, or the table below:
Lilypad simple board pin | Components’ pin |
VCC | Neopixel ring PWR |
GND | Loudspeaker - Neopixel ring GND |
Between pin 5 and 6 | 10M Ohm resistor |
6 | Capacitive sensor |
9 | Loudspeaker + |
11 | Neopixel ring DIN |
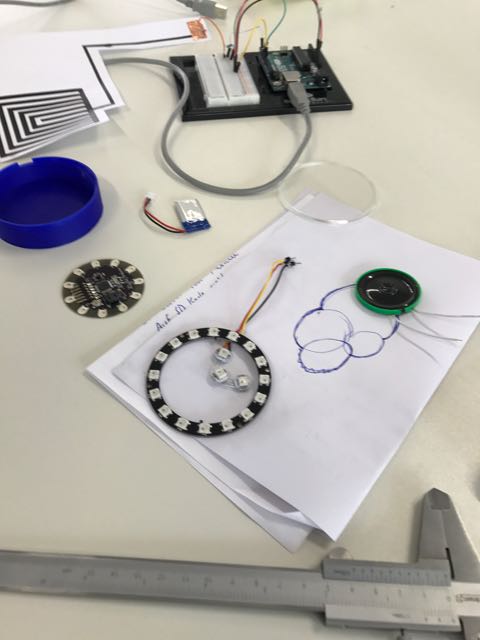
The test circuit using crocodile clips setup should look like this.
In order to run the test, we need to upload the Arduino sketch to the Lilypad simple board using Arduino IDE via USB serial converter cable.
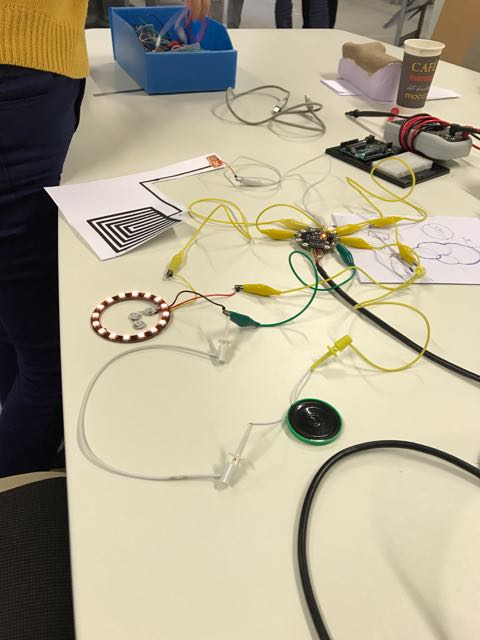
- Solder components
After making sure that the circuit works well, we solder the components and wires to them for assembly later.
The resistor has to be fixed to the board and wires have to be soldered to the loudspeaker.
- Put the soldered components together for final test
At this point the wires of the components can be soldered directly to the Lilypad board for final testing. Make sure there are no parts of different components touching each other by using Kapton tapes on the bottom surface of the board and the loudspeaker.
Also, we only solder a long wire (~ 50cm) to the sensor pin (pin 6) so that we can connect them later to the conductive fabric.
First prototype: https://youtu.be/ZUtEeWy7XAg
PROCEDURE
Components and materials list
- Components list
Component name | Quantity |
Arduino Lilypad Simple board | 1 |
USB Serial converter cable | 1 |
Adafruit Neopixel ring (of 16, or as needed) | 1 |
Adafruit Neopixel | 3, or as needed |
Loudspeaker | 1 |
Capacitive touch sensor (a piece of metal foil) | 1 |
10M Ohm resistor | 1 |
3.3V LiPo battery | 1 |
- Materials list
Wood 40x40 cm, thickness variable | 1 piece |
Fabric 40x40 cm | 1 piece |
Conductive textile 35x35 cm | 1 piece |
Conductive thread | A few meter |
Wood glue | 1 |
- Additional tools
- Soldering tools
- Multimeter
- Laser cutter
- Sewing machine
- Scissors
- 2D, 3D design software
- Arduino IDE
Electronics prototyping
- Initial circuit test
We started out with soldering extra Neopixels (in this case 3) to the already available 16-pixel ring, in order to make the outline of the Pacman. Wires also need to be soldered to the final ring in order to test the circuit. We used crocodile clips to connect the circuit according to this schematic, or the table below:
Lilypad simple board pin | Components’ pin |
VCC | Neopixel ring PWR |
GND | Loudspeaker - Neopixel ring GND |
Between pin 5 and 6 | 10M Ohm resistor |
6 | Capacitive sensor |
9 | Loudspeaker + |
11 | Neopixel ring DIN |
The test circuit using crocodile clips setup should look like this.
In order to run the test, we need to upload the Arduino sketch to the Lilypad simple board using Arduino IDE via USB serial converter cable.
- Solder components
After making sure that the circuit works well, we solder the components and wires to them for assembly later.
The resistor has to be fixed to the board and wires have to be soldered to the loudspeaker.
- Put the soldered components together for final test
At this point the wires of the components can be soldered directly to the Lilypad board for final testing. Make sure there are no parts of different components touching each other by using Kapton tapes on the bottom surface of the board and the loudspeaker.
Also, we only solder a long wire (~ 50cm) to the sensor pin (pin 6) so that we can connect them later to the conductive fabric.
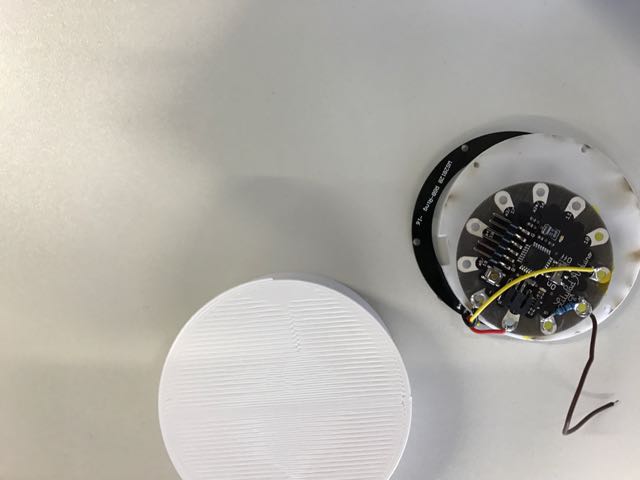
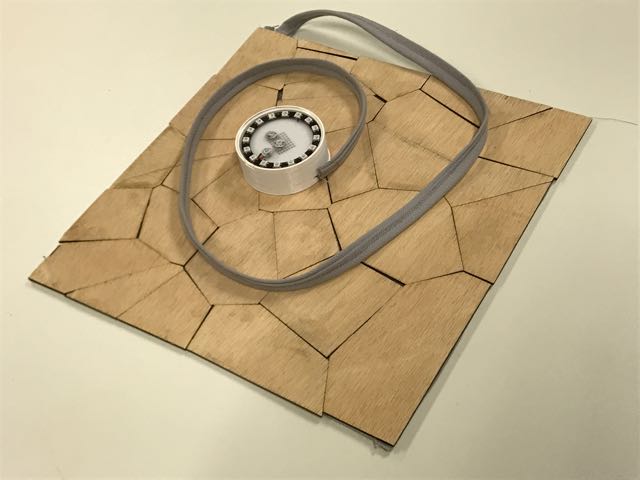
3D printing and laser cutting container partsWe take the dimension of the Neopixel ring and all electronic components in order to find the right dimension for a container to hold them in. We design the container in Fusion 360 and print this with Ultimaker 2+.
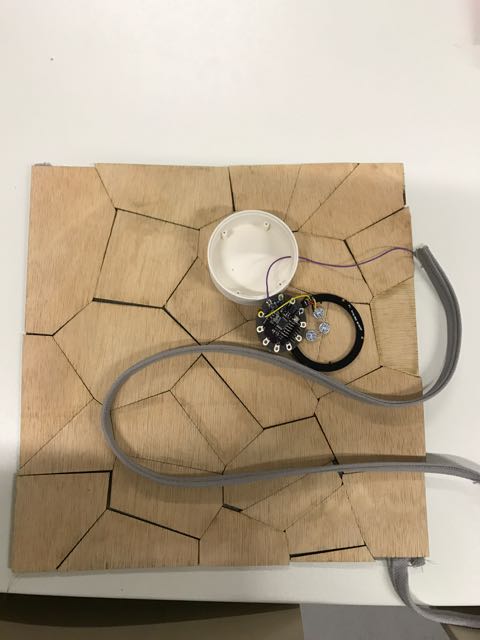
The components should snugly fit into the container.
Finally, the divider inside the box is cut on opaque plexiglas and the box cover is cut on transparent plexiglas.
Make capacitive sensor matt with textile and wood
- Prepare the wood pattern
We generated voronoi pattern of size 35x35 cm using the Voronoi generator tool add-on in Autodesk Fusion 360.
Afterwards, we exported 2D design (.DXF) file from the generated structure and imported into Adobe Illustrator for editing so that it is suitable for cutting in the laser cutter.
After the wood pieces are cut, we cleaned it with water and let it dry.
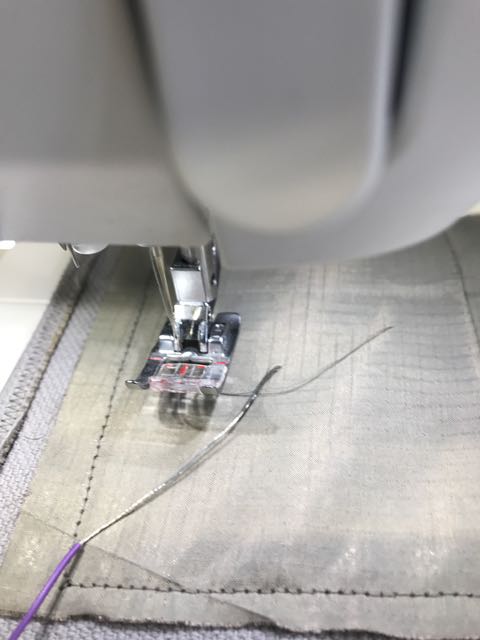
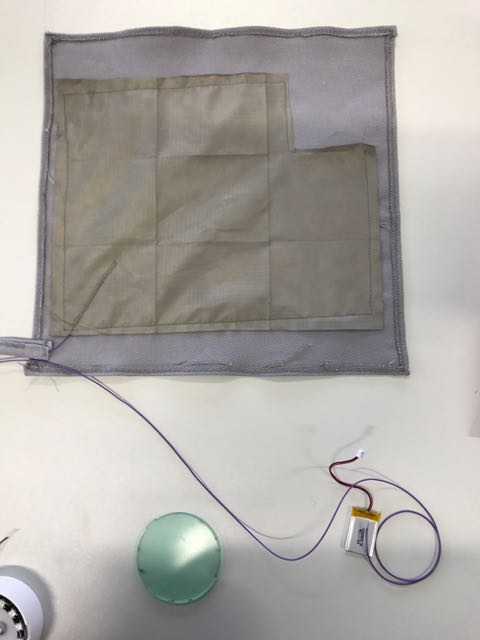
- Prepare the fabric as capacitive sensor
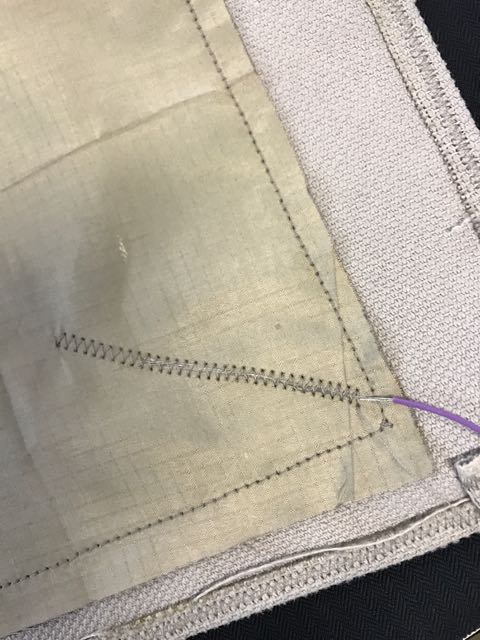
In order to make the capacitive sensor, we sew conductive textile onto the bottom of the fabric piece.
Next, we connect the wire which comes out of pin 6 on the Lilypad to the conductive textile and test the conductivity with multimeter.
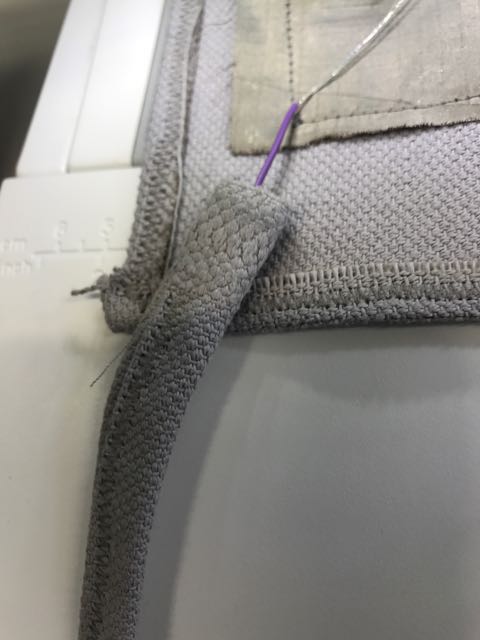
When there is good conduction, we put all electronics components, including battery, inside the container box, slip the wire through the hole on the box and then sew the wire to the textile.
For aesthetic reason, we cover the cable with some fabric strip.
Finally, we applied wood glue to the wood pieces and then assemble them to the fabric. When the glue dried, we are finished with the mat
t.
Now all of the components and parts are ready for assembly.
Final assembly
The final step is to close the box using the lid and let the capacitive sensor matt do it magic!
Final video: https://youtu.be/C0OFoBHgEbM