Computer-Controlled Cutting
Week 2 projects were awesome to create and design, as the Epilog Laser/Cutter and Engraver and the Roland Vinyl Cutter are two of my favorite machines since they are so versatile. For this weeks assignment I decided to create a vinyl cut t-shirt design on the vinyl cutter and a press fit lantern on the laser cutter.
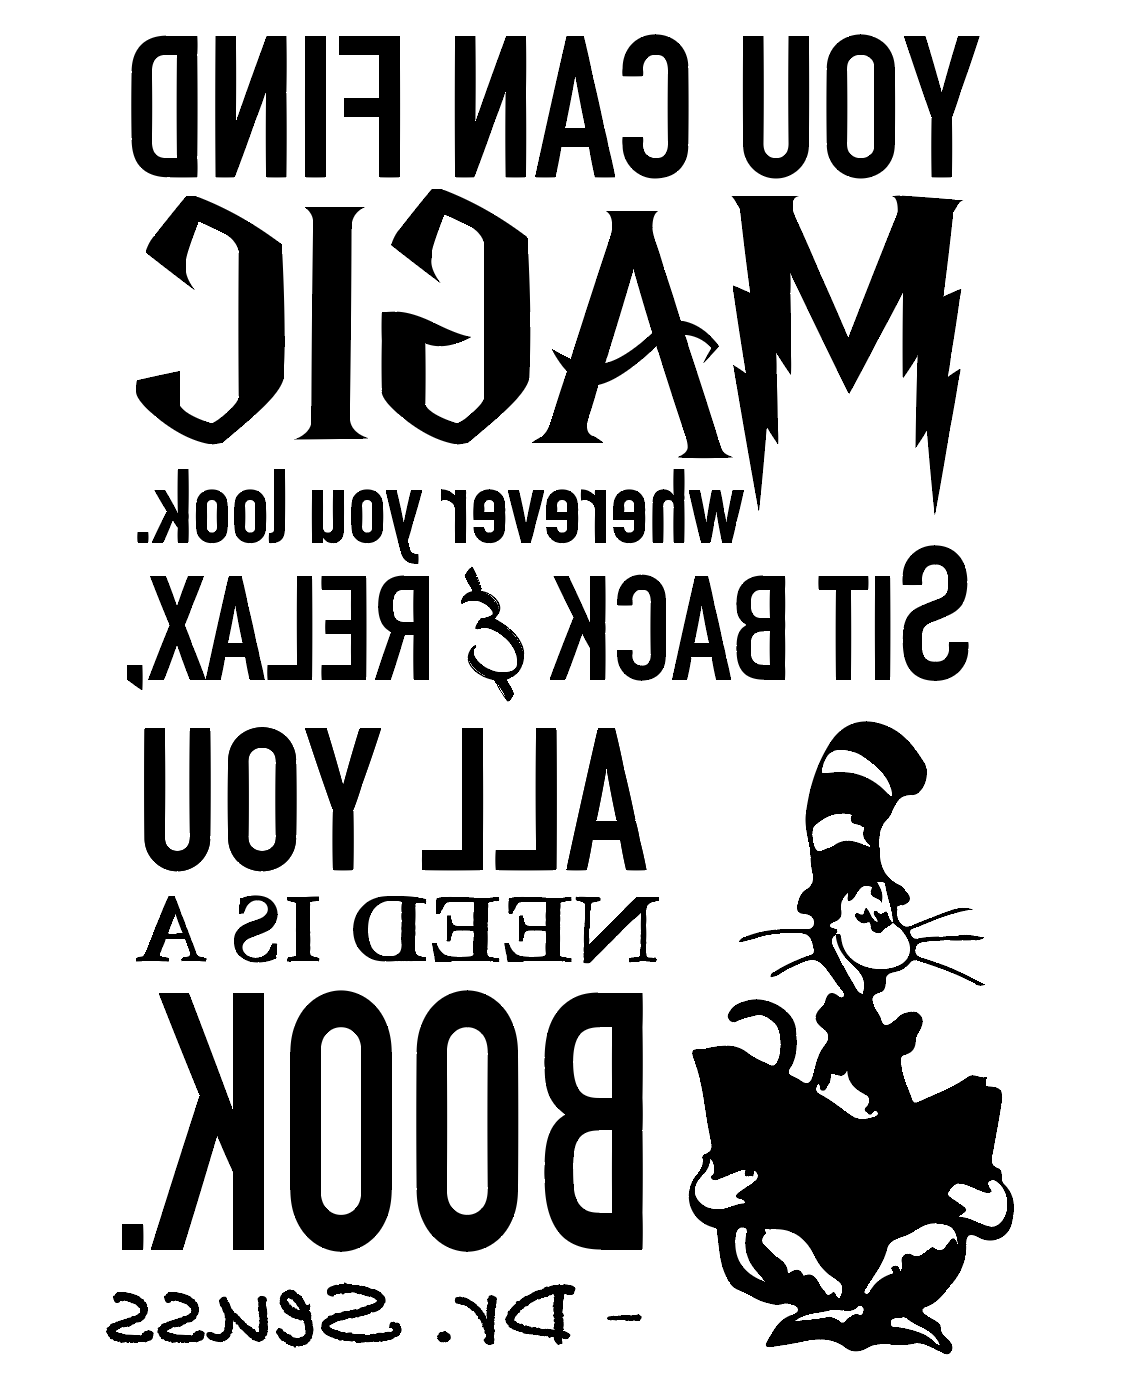
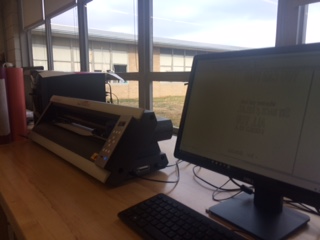
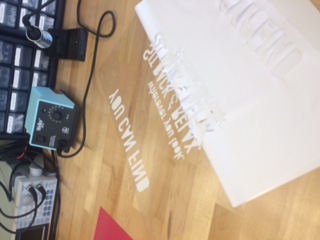
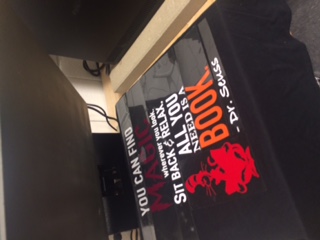
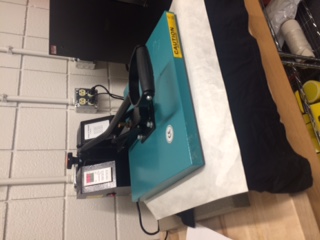
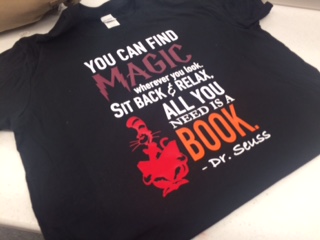
Vinyl Cutter Project: Using Illustrator I created my t-shirt design using different fonts and images to create the unique design. My sister is a 2nd teacher and has been wanting a shirt for Dr. Seuss day, which is coming up on March 2nd, so this was a great opportunity to test out my designs skills with the vinyl cutter. Once the design was created and scaled to fit the shirt, the image had to be inverted in Illustrator and converted to outlines to prepare the file to be cut. For this project I did have to use different vinyl that would allow me to heat press/apply it to the cotton t-shirt. As a reminder when using different vinyl the pen force will have to be adjusted (for our machine the force was 160) so that it doesn’t harm the vinyl. Once the vinyl was cut I peeled away the excess. To get the multiple colors each piece was cut separately and then placed accordingly on the t-shirt. Using the heat press, I heated the press up to 360 degrees and pressed the vinyl for 20 seconds. The final product I had a unique t-shirt design!
Materials:
- Roland Vinyl Cutter - Settings pen force 160
- Heat Press Vinyl
- Cotton T-shirt
- Heat Press - settings temp. 320 degrees time- 20 seconds
- Illustrator Software
File: Vinyl Cut File
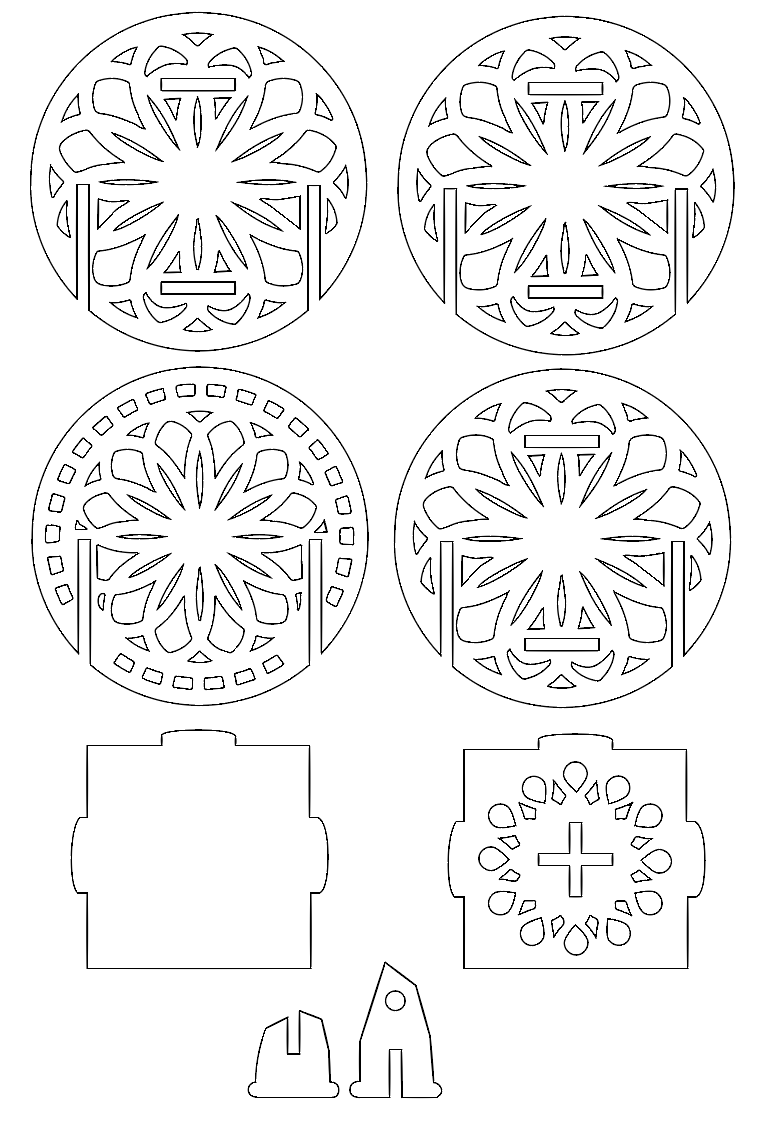
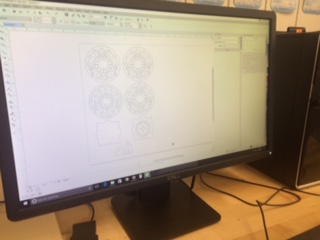
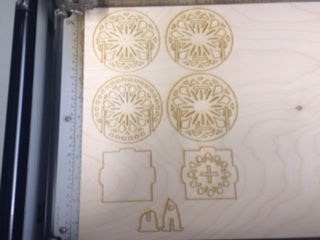
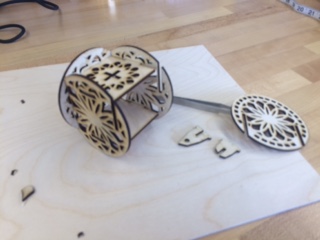
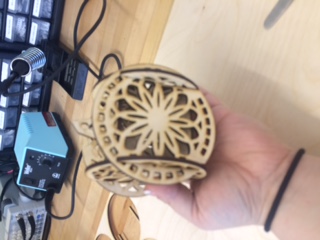
Laser Cutter/Engraver Project: For the laser cutter I designed a press fit lantern in which an LED candle could be placed. The material used was a 12”x24”x1/8” plywood. The idea for this project was to create from a 2D material an object that would not need glue but would fit together to form a 3D object. Again, using Illustrator I began with basic shapes to prototype my design. Accounting for the depth of the material 1/8” I adjusted the slots for the lantern so that the pieces could be locked in place. Using a square design for the top and bottom of the lantern and circles for the four sides, I design each piece accordingly. The square bottom and top had tabs on them that would then lock into the slots on the circular side pieces. The circular side pieces also had to have longer slots to accommodate for the overlap on the design. The front circular piece was the only piece that varied a little from the other circular pieces in that it only included two side slots to allow the front to slide on and off to allow for an LED candle to be placed inside. The final piece of the design was the stem to hold the lantern, this piece was also press fit using two shapes that would fit through a “plus sign” shape. Once the design was setup and ready to be printed all images were converted to outline and the Epilog Laser settings were adjusted accordingly for the material. The final product was a 2D to 3D lantern (picture didn’t show well but the design showed up great on the walls!).
To allow for the slots where the lantern snapped into were created to be parametric pieces which would allow them to be easily changed in the Illustrator software or any other vector based software. Simply go to transform and select the height and width you would need the slot to be to create a new parametric slot.
Materials
- Epilog Laser Cutter/Engraver
- 12”x24”x1/8” ply wood
- Illustrator
- Settings: Auto Focus; 24x12; Vector ONLY; Speed 12; Power 100; Frequency 500
Video:
File: Laser Cut Lantern File