Week 5:
Mission objectives:
Show how you designed and made your object and explaine why it could not be made subtractively.
Test the design rules for your printer (group project).
3D scan an object (and optionally print it).
Outline problems and describe how you fixed them.
Include your design files and "hero shot" photos of the scan and the final object.
Printing final project miniature model.
Material: PLA
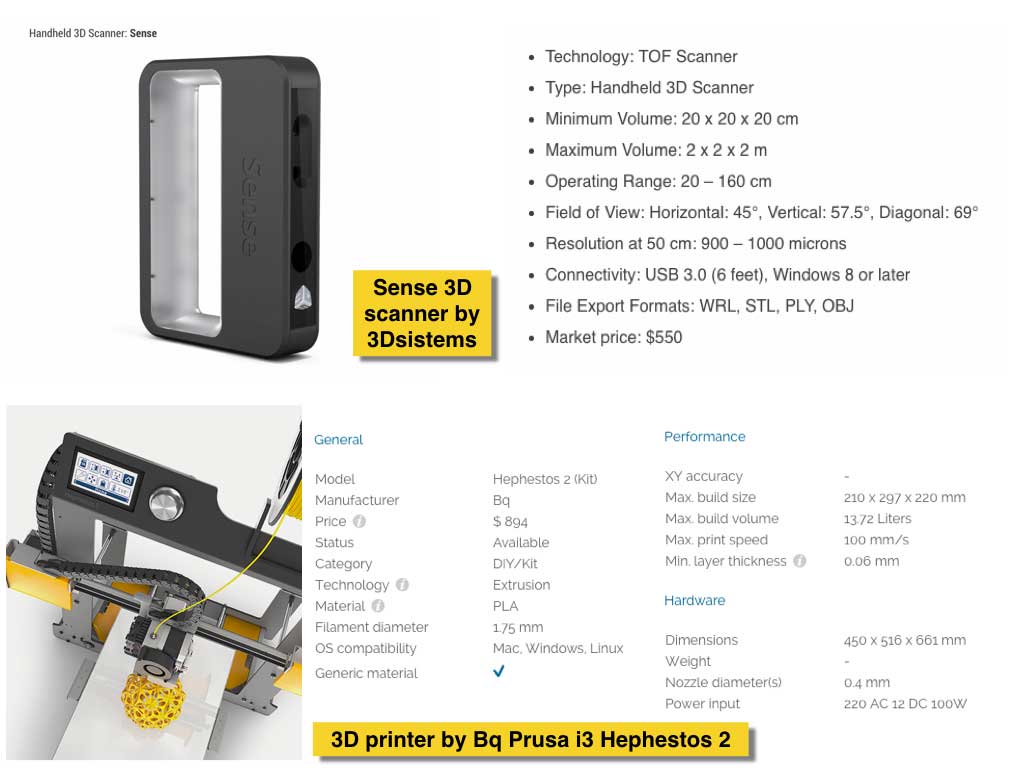
3D printer: Bq Hephestos 2
Modeling
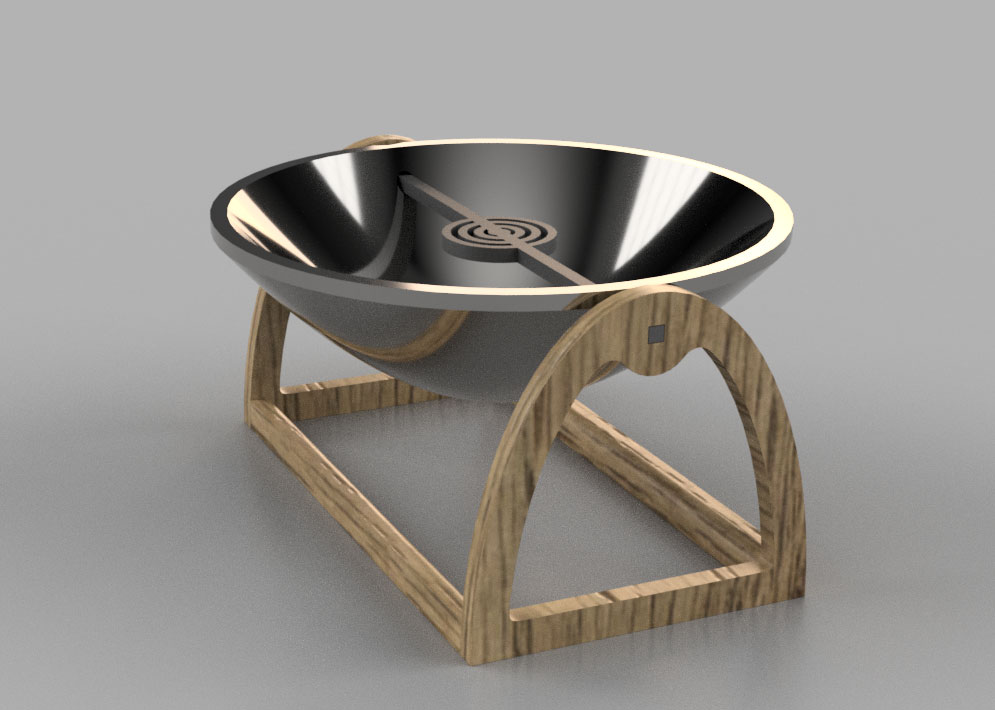
For this assignment I decided to 3D print mini model of the final project with one turnable hinge.
Print file preparations
Creating the model was the easiest part by using the Fusion 360. Exported from Fusion STL binary file wich was later used with
Cura to prepare the model for print.
3D Model in Fusion 360 Autodesk
It seems you are using an outdated browser that does not support canvas :-(
Download .stl file
Cura was my software choice for checking the model before the print and for converting the meshes in to G-code. From Cura the G-code has been exported to flashcard that fits the 3D printer.
At my first attempt the diameter of the dish was 50 mm and the thickness of the parts was about 1.5-2 mm. that was the first mistake. Too thin parts for the machine resolution capabilties.
Printing
I made a mistake also by nesting all three parts at the same print file. They were to far one from another.
For the next attempt I scaled the parts 1.5 times bigger and sent the parts one per each print. That worked much better. This time the wall thickness was defined as 2 mm and the in-fill as 80%.
Cura path simulation vs real print reference
I was very surprised and queries to find printed pattern/ornament that was mathematically created by the machine path G-code. It looks like elliptic loops between the layers. I used to recognize that optical effect as moire pattern illusion on the screen or as bad render quality or as screen side effect. At first, when I saw it, it just caught my attention for a second. Only during the documentation process i realized the potential that appears from the random and unplanned visual patterns.
The axis is square and the dish has cylindrical hinge extensions that rotates perfect on it. It could be possible but pretty complicated to create those perfect joints at such a small scale without 3D printer.
Group assighment
In case of testing our printing machines we downloaded scale-test files from
Tinkercad site in tense measure and to compare same PLA material with same printing preferences printed on two different printers.
Scanning and Printing
For the our common assignment we decided to scan each other with the available 3D scanner to make a statue of three of us together - totem of the class 2017.
During the scanning we realized that it is much easier turn ourselves on an office chair than to walk around the scanned person.
We used the scanner of
Sense site in tense measure and to compare same PLA material with same printing p, handheld one, to create 3 different mesh files. We edited them in Rhinoceros and exported the single mesh file in to Cura to extract the G-code for the
Hephestos 2 printing machine.