Week 2:
Mission objectives:
Model experimental objects/part of a possible project in 2D and 3D software.
Show how you did it with words/images/screenshots.
Include your original design files.
2D and 3D modeling
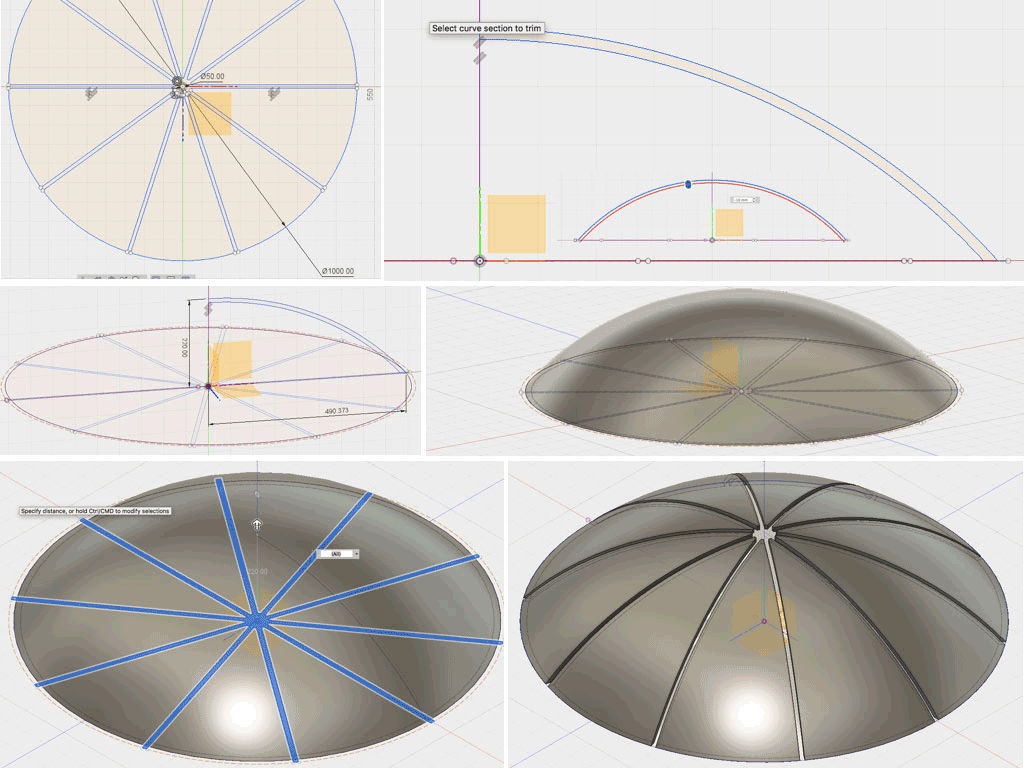
I decided to deticate this week for development of the parabolic mirror for my final prroject. This big shape should be created in small machines to make the project to become a personal fabrication process.
Exploring Fusion 360 Autodesk software and magic of constrain oriented parametrical manipulations.
Usually I use black pencils and sketch book to express in drawings and text the first vision. When we are taking about virtual modeling I try to use as simple tool as possible that still fits the mission objectives. SolidWorks was to complex for me even during my industrial design studies.
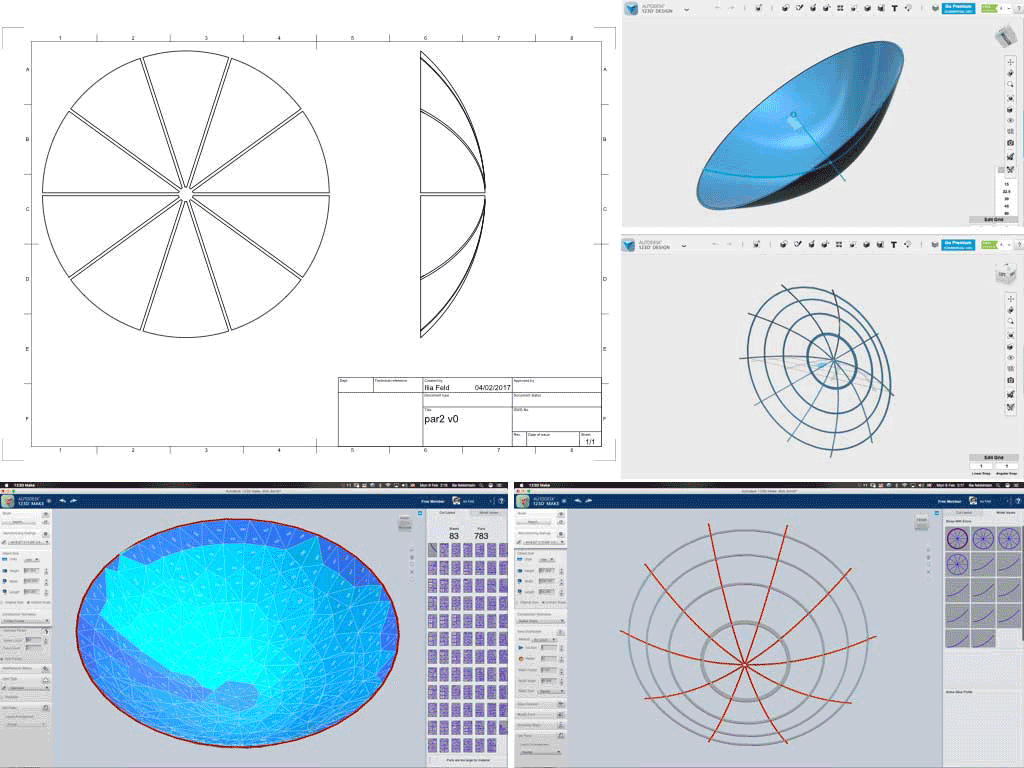
Rhino became a friend for me to compile complex shapes and I still use Sketch-Up for set and decorations designs. My Autodesk account gives me variety of their features, like Auto-cad, 123D Design, 123D Make and I had tried all of them during past years.
Grabbing the opportunity to discover new territories I started with new tool for me. Fusion 360 seems to be powerful joker for most of the requirements of my modeling and the most important its build in parametric constrain powers.
VIDEO
Here you can find some basic animation that has made to show how the solar concentrator should follow the sun. This is one rotary axis model with I captured diretcly from Fusion 360 editor window.
Creating the shape
Following video shows powerful parametric cutting tool created by me in intention make changes in:
VIDEO
1. The quantity of slices.
VIDEO
The video above shows the parabolic shape creation and the slicing tool in action.
VIDEO
Here I show the project development and versions/branches tree management. VIDEO
Autodesk 123D Make gives large range of build-in operations. For example: unfolding the model from 3D back to 2D and also creating the inner structure/sceleton with ribs and snaps.
I also found many useful and simple graphic parabola calculators on web. One of them is in the link.
For 2D software research I chose also the
NodeBox. to explore.
This is powerful parametrical tool which commands looks as box features.
The user interface is convincing and simple.
The visual screen is at left half. The parameters expressed in values and numbers on top right and the features editor with box and logic wiring system on right bottom.
First I added star as geometry parameter. The position, the outer and the inner sizes as the quantity of the spikes/points are adjustable.
Added line and grid nodes to make parametric cutting tool more advanced.
During the shape and parameters exploration I found some values that aren’t connected or needed in my project but still it was very interesting to discover them by mistake.
I found this Moire effect appearing with the growth of the lines in the sketch. As more points had been added to the star as the Moire effect increased.
After this illusion I found also that the “after image” of central blue ring appears in negative yellow color in perception, after few seconds of staring in to the black center of the star.