Week 12:

Molding and Casting

Mission objectives:

Design a 3D mould, machine it, and cast parts from it.

Explain how you designed your 3D mould and created your rough and finish toolpaths for machining.

Describe problems and how the team solved them.

Show how you made your mould and cast the parts.

Included your design files and ‘hero shot’ photos of the mould and the final object.

Modeling

The render bellow shows the esthetic level that I would like to achieve in the final project.

My decision for the weekly assignment was to create silicon parts for the final project. Those parts are going to keep the solar oven parabolic dish slices together and keep the right spacing between them.

There will be two molds, one for gaps connectors between slices and another one for central dish part.

The plan is to make 3 spacers for each gap. 3spacers*9gaps=27 identical parts and the moulding process is the best working option.
There is only one central silicone part, like a flower heart it keeps the weakest corners of the dish slices. Silicon, with its flexible qualities, fits for reducing the stress there.

In this case machinable wax is milled with CNC to create negative moulds from 3D models. This way I decreased the process to two steps instead of three: negative wax moulds milling and positive silicone casting.

I used two wax bricks, one for each part. Each half of mould on opposite sides the same wax cube. The cube has been sliced in the middle with bend saw after milling and then flipped face to face.

I was trying to use 5mm flat nose milling bit only. The idea was to run all the milling steps with a single tool, meaning: to save time. In the reality there was only one milling path/layer that required to switch the tool to 3mm flat nose bit.

The machinable wax was from Du-Matt Corporation. One blue CA-2762 1lb bar and one purple CA-2756 1/2lb bar. Purple is medium density wax and behaved perfect during milling and blue one is softer but still behaves great, even after 10 casting cycles.

The milling speed was low to avoid wax melting.

For safety reasons I used dust mask, eyes and ears protection in milling process.

During the modeling step I was breaking my mind by trying to reduce all the processes that are involved in this part of project. I was trying to save machining time and material, to reduce steps in machining and casting as much as possible. Kind of personal desire to minimize my footprint.

Here came the idea about external material locked in the wax mold and gives the undercuts to the casted shape. That will allow the CNC negative mold to be much simpler.

I planed in 3D model level and used 2mm (final material thickness) laser cut shapes from Plexiglas to add the necessary undercuts to my molds by putting those inserts between the two molds sides.
It helped me to simplify the machining process and to make it much shorter. The CNC paths were all built from 2D paths.

Those Perspex undercut inserts also reduced the quantity of the molds parts and allowed me to cast the parts in once without reducing the complexity of the final result.

Wax mould milling and Acril inserts laser cutting

I prepared 3D stl moulds files but at the end 2D files were created in AlphaCam CNC GUI which were much more efficient in reality. It was mach faster for me to accomplish the CNC operation by creating 2D layers for each depth of cut and to plan milling without any 3D finish path. It saved machining time and dismissed tool switching.

Milling took about half hour for each wax brick/mold. The wax bricks were attached to the CNC bed in pressure from all the directions with wood blocks covered with rough sand paper against slipping and screwed to the machine bed.

Here you can find timelapse video of the moulds milling and the silicone casting processes.

Mould assembly

Casting the silicone parts

I repeated this process 8 times, later at the Final project development stage, to cast all the 27+spare parts for my parabolic mirror prototype.

One connector had weight about 15g. Each 4 connectors (one casting process capacity per mold) had weight about 60g of silicone. Totally for all the project were used about 500g of silicone, including the central rosette part.

Breathing mask, glasses, rubber gloves and ventilated space were used during the silicone mixing and casting.

First test had been made with Mold Max 27T silicone from Smooth-On . It is a water white translucent tin cured silicone rubber compound that has exceptional tear strength and working properties. Mixed 100A:10B by weight, rubber cures overnight at room temperature.

For the rest of the casting process I used some urecognised brand from local supllier. It was soft wight molding silicone. The proportions for this silicone was 1kg of Base A component to 50g of the Hardening B (fix/dry) component. 100gA:5gB. Curing time was about 10-12 hours.

My moulds had open side and I did not have to worry too much about air locked inside but for reducing that risk I splitted the casting process in to 3 major steps:
Smallest part fill
Undercut inserts layer set
Large part fill

After two hours the silicone was dry enough and it could already resist the release stress.

Releasing the silicone casts timelapse video.

At the first test the silicone components mixing motion I’ve done was too fast. I wiped the components A and B to hard and locked by that plenty of bubbles in it. The final result was is still good enough to use, very strong and still flexible.

The mold of the central dish rosette has its undercut Acril insert as the third mold part that sits between the two wax half blocks. That plexiglass insert has meny undercuts and I had to split it in to quarters to release it from the flexible silicone positive. It is a single cast that is needed in my project from this mold but it is still usable for future replications. Later I used Vacum Forming process to crealte 10 full scale mirror pieces from 2mm PVC sheets and connected them together with those silicone spacers and flexy steel wire in to 1m diameter parabolic shape.

In my final project case I created my positive forms in Fusion 360 and converted them in to negative molds in the software. My process had only two steps: machining step to get negative molds from wax and the silicone casting step to get the final positive object.

Group assignment

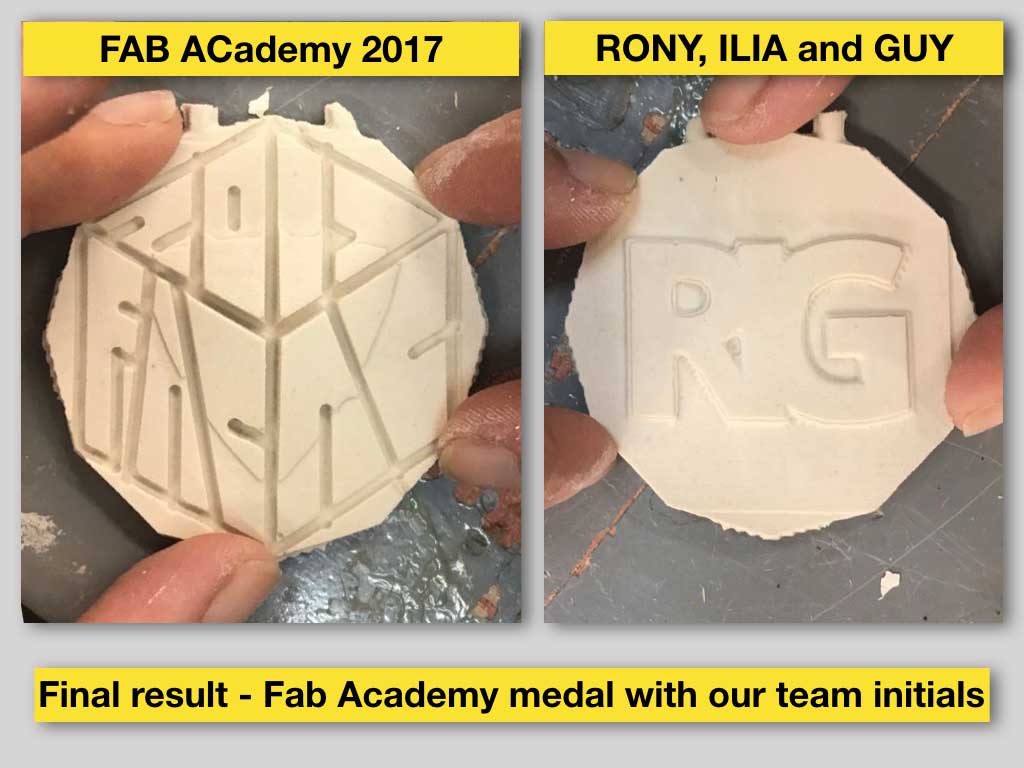
For the course we have made a group medal which involved all three steps of the assignment: machined wax positive mold, casting soft negative mold from it and then hard material positive replica casted in the silicine mold.

Modeling

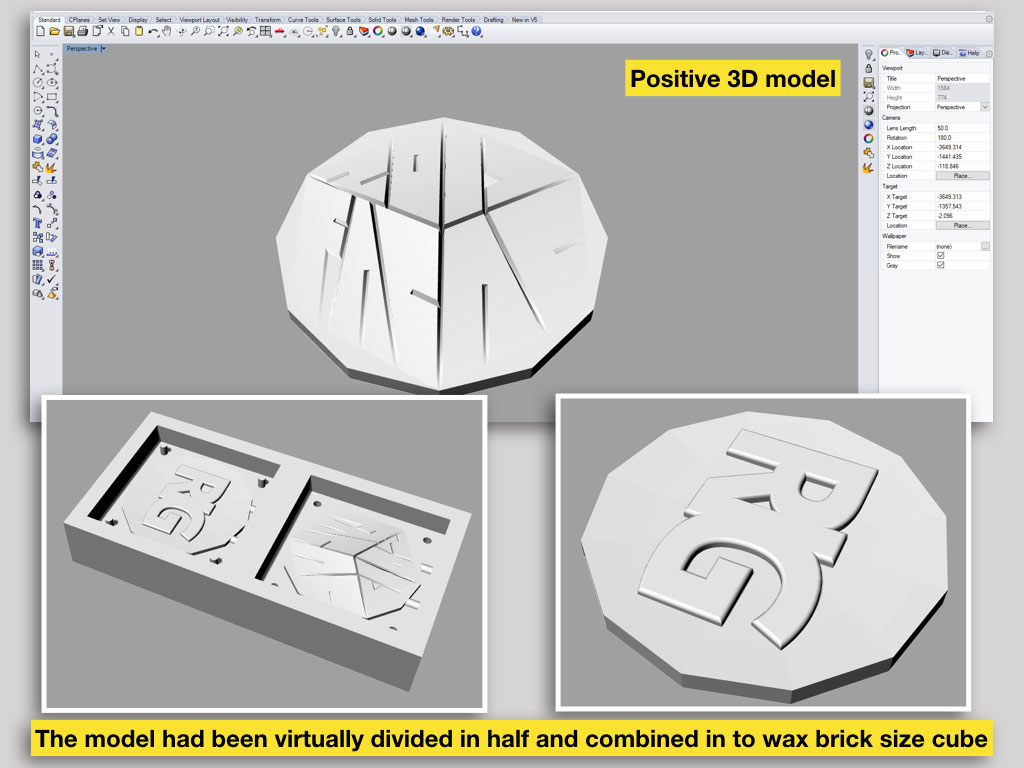
Splitting the 3D medal model in the middle in two opposite surfaces let us combine each half of the medal in to separate "bath" wax mould. We also added the material enter and release/exit canals to the "baths" to avoid air pockets.

File preparations in AlphaCam and machinable wax milling

Casting silicone negative mould, drying it and casting the plaster positive in it

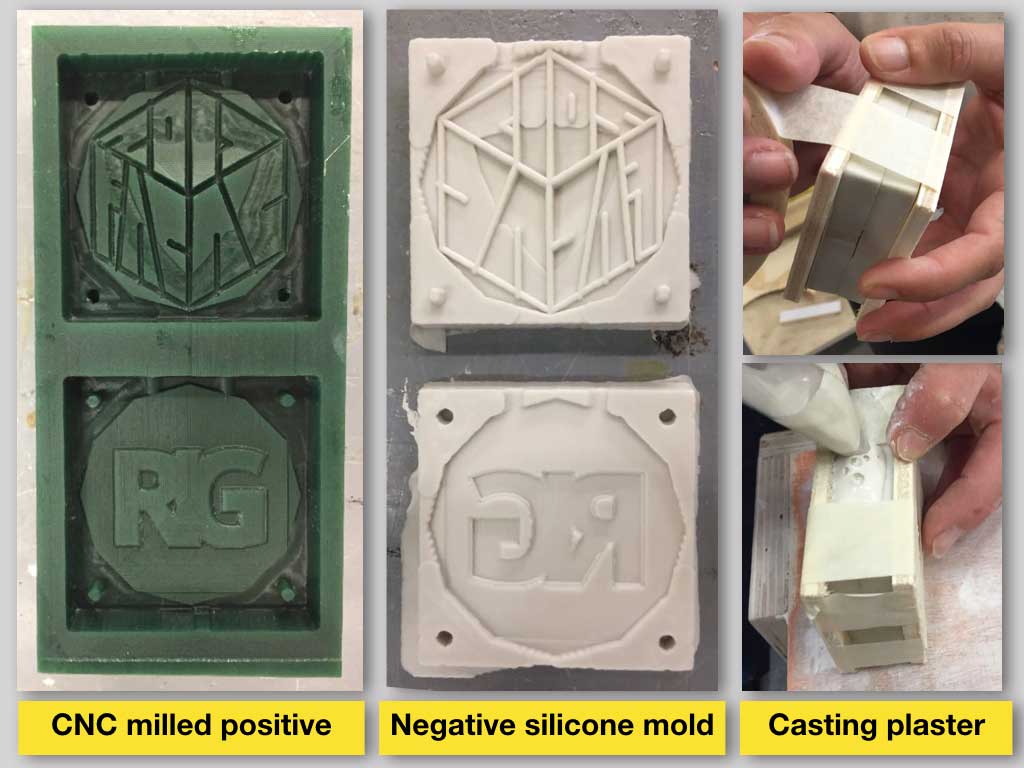
Each positive half medal got its own silicone “bath” with hole and pin mold connectors. After silicone mould was dry it was wasy to connect it in right position thanks to those pins and holes. If the mould parts do not fit perfect you will get leaks and ugly parting lone on the casted replica.

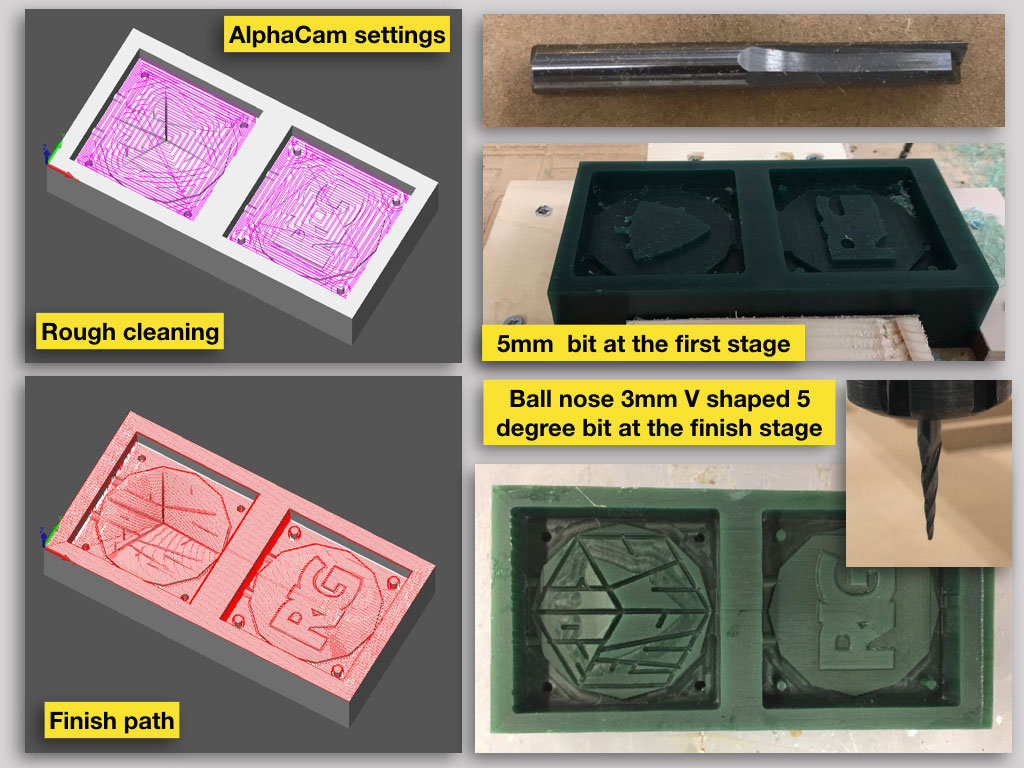
In first two stages we used same machine settings and materials that I describe above on this page, with the same safety measures.

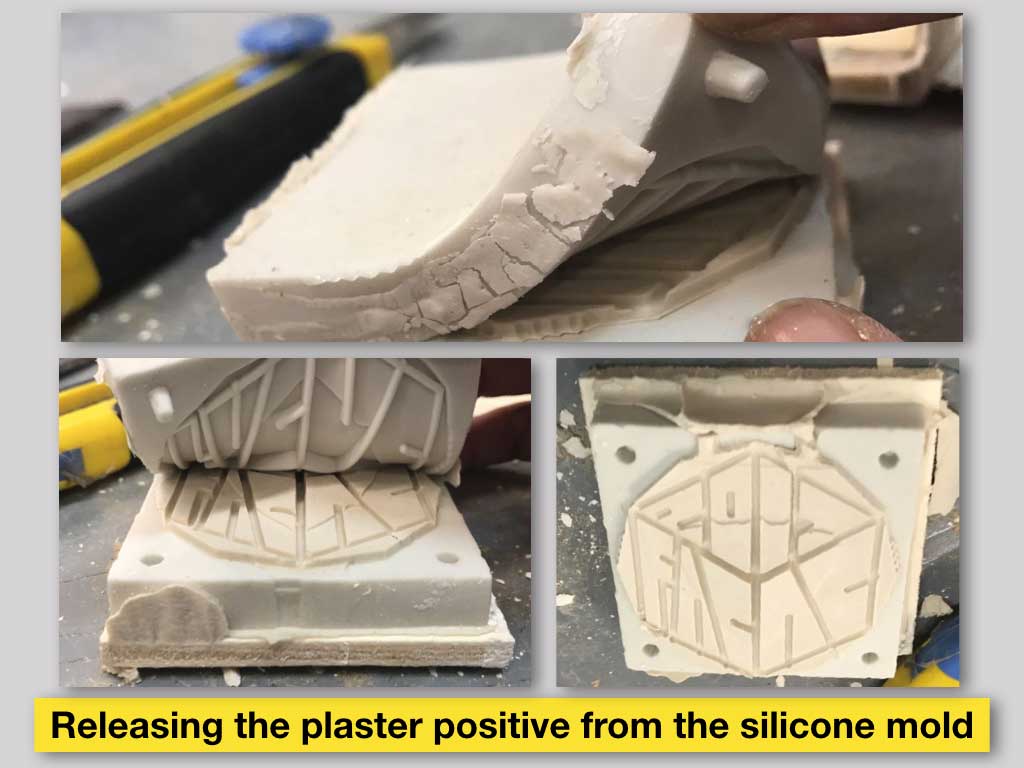
Hard dental plaster was used at the last casting step to make the medals stronger.

We do have our own FabAcademy graduation medals now.