Electronics Production
For this assignment I had to build an in-circuit programmer called Fab ISP. The programmer I chose to do is derived from another version of an AVR ISP programmer/board named Fab TinyStar . The name of this new version is “FabTinyISP Minimal” and I followed the process from Brian website.
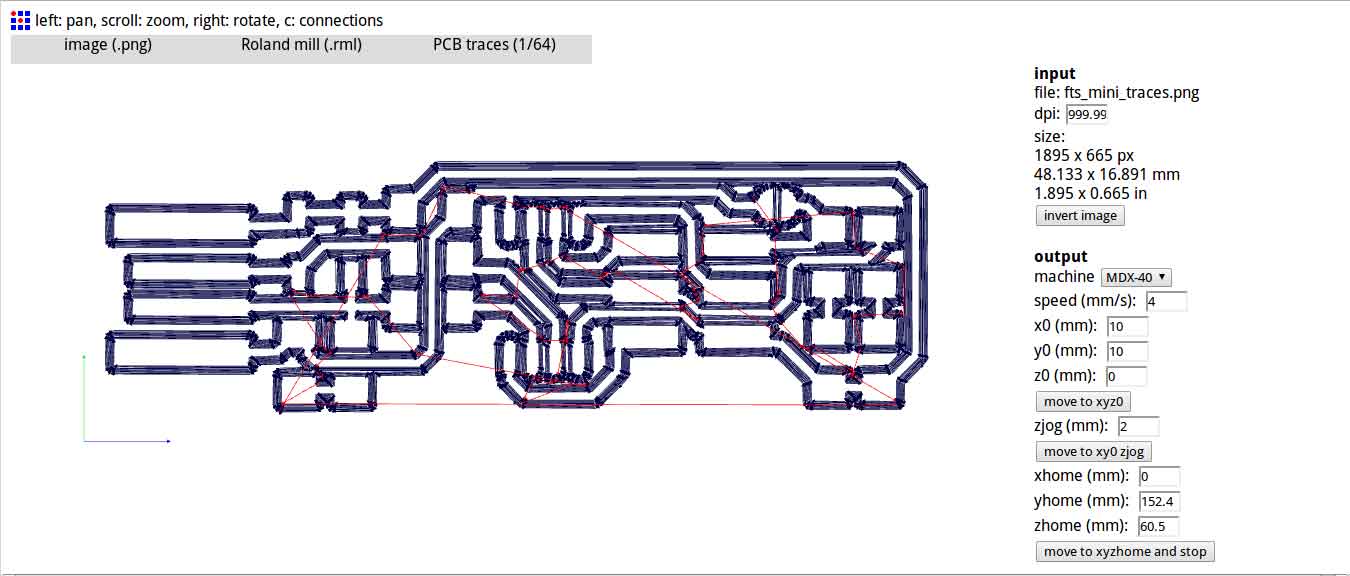
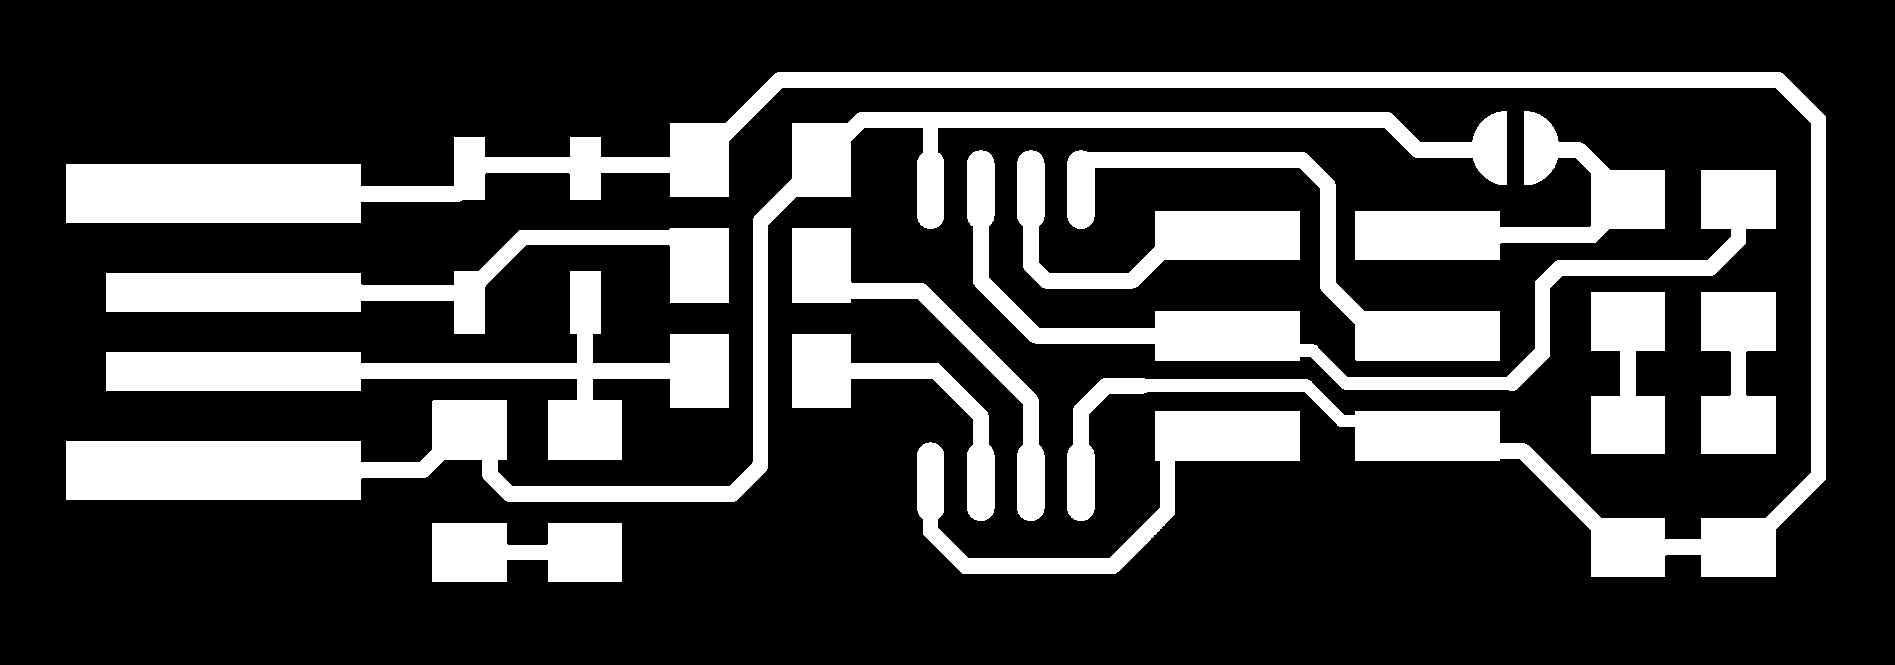
So the first thing I did was to fabricate my PCB. The traces and outline for the board were already done so what I did was download the .png files and open each in the Fab Modules website in order to obtain a proper .rml file to mill the board using a milling machine.
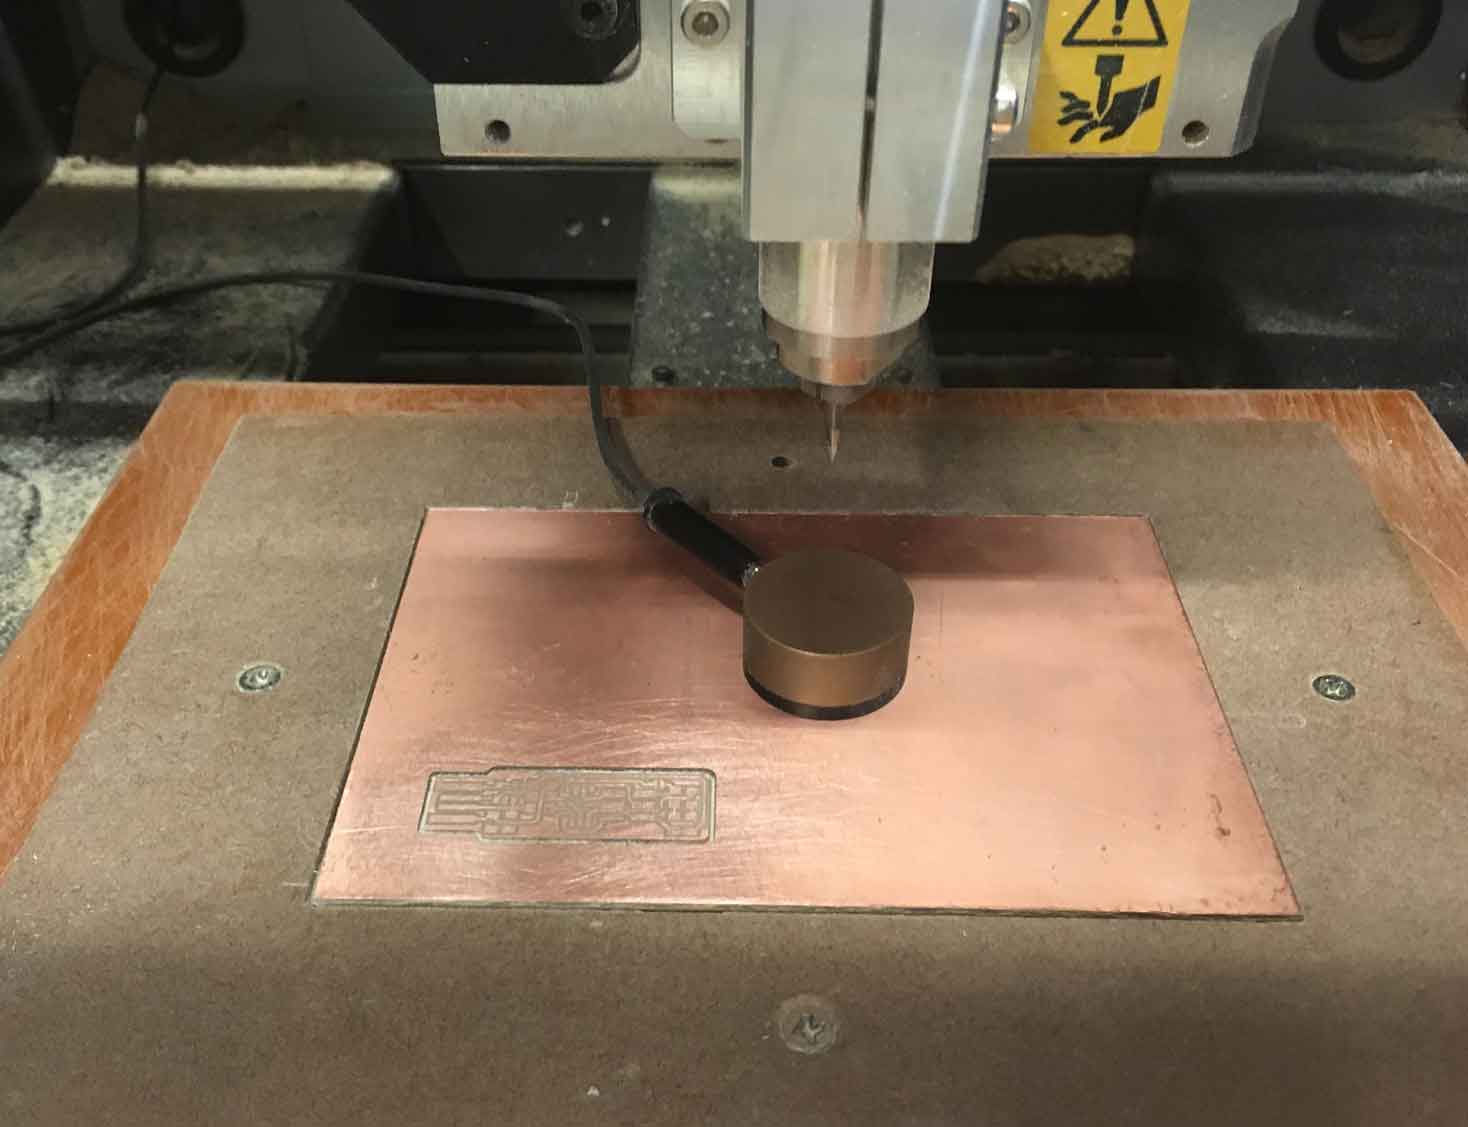
The milling process was taken in FabLab Insper and the steps that I took were the following:
- Generating my .rml file in Fab Modules:
- After input the .png file I set the Rolland Mill (.rml) as my output file and within the process tab I selected the brand of the milling machine I was going to use which is a Modela MDX 40A;
- Associated with this brand comes a list of default parameters related to the milling tool I’m going to use. I simply changed those parameters (cut depth, tool diameter, number of offsets) and let the program calculate before saving the .rml file;
- I repeated the same process to generate the .rml file to both files: traces and outline cut.
- Placed the PCB in the milling machine. There was a screwed MDF frame in the working area that secured the PCB (with the right dimension) in place. As I generated the .rml files in a different computer than the one I used to mill I saved the files in a pen drive and transfer them to a folder in the computer dedicated to the milling machine. In this computer I open the Roland VPanel software (for MDX-40A) and defined the x,y origin and afterwards, with the sensor help, the z origin. After defining x, y and z origins I imported the .rml files through the “Cut” command.
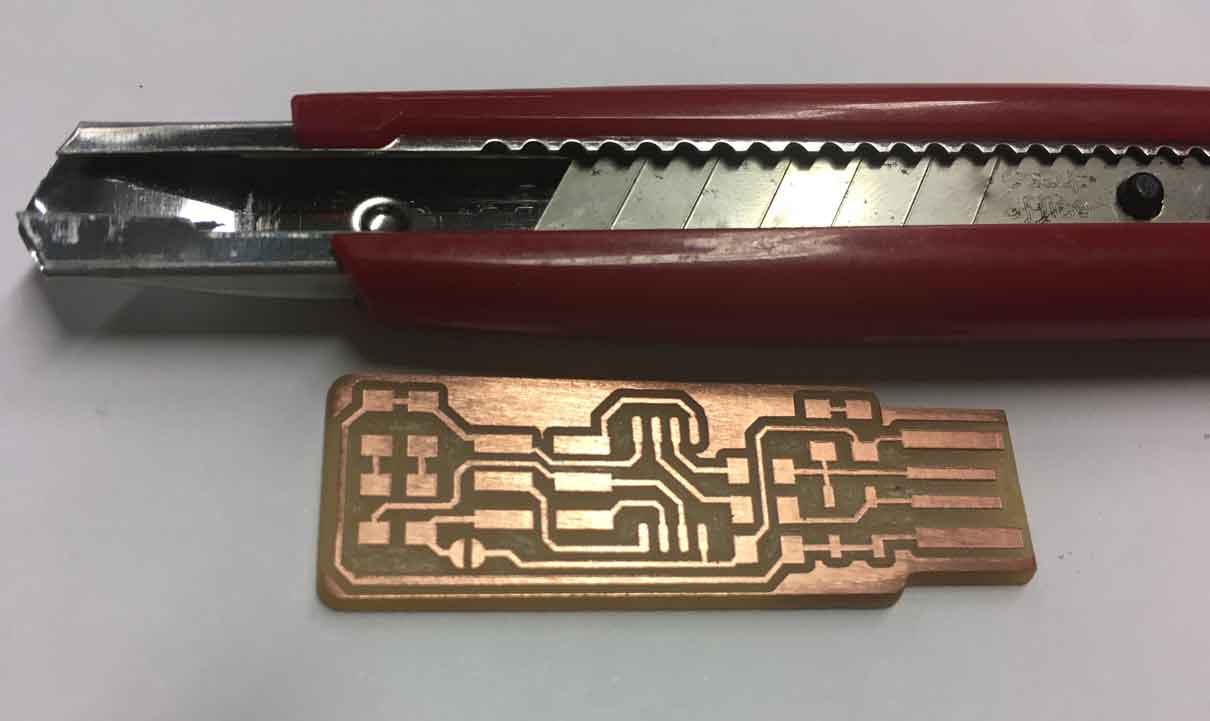
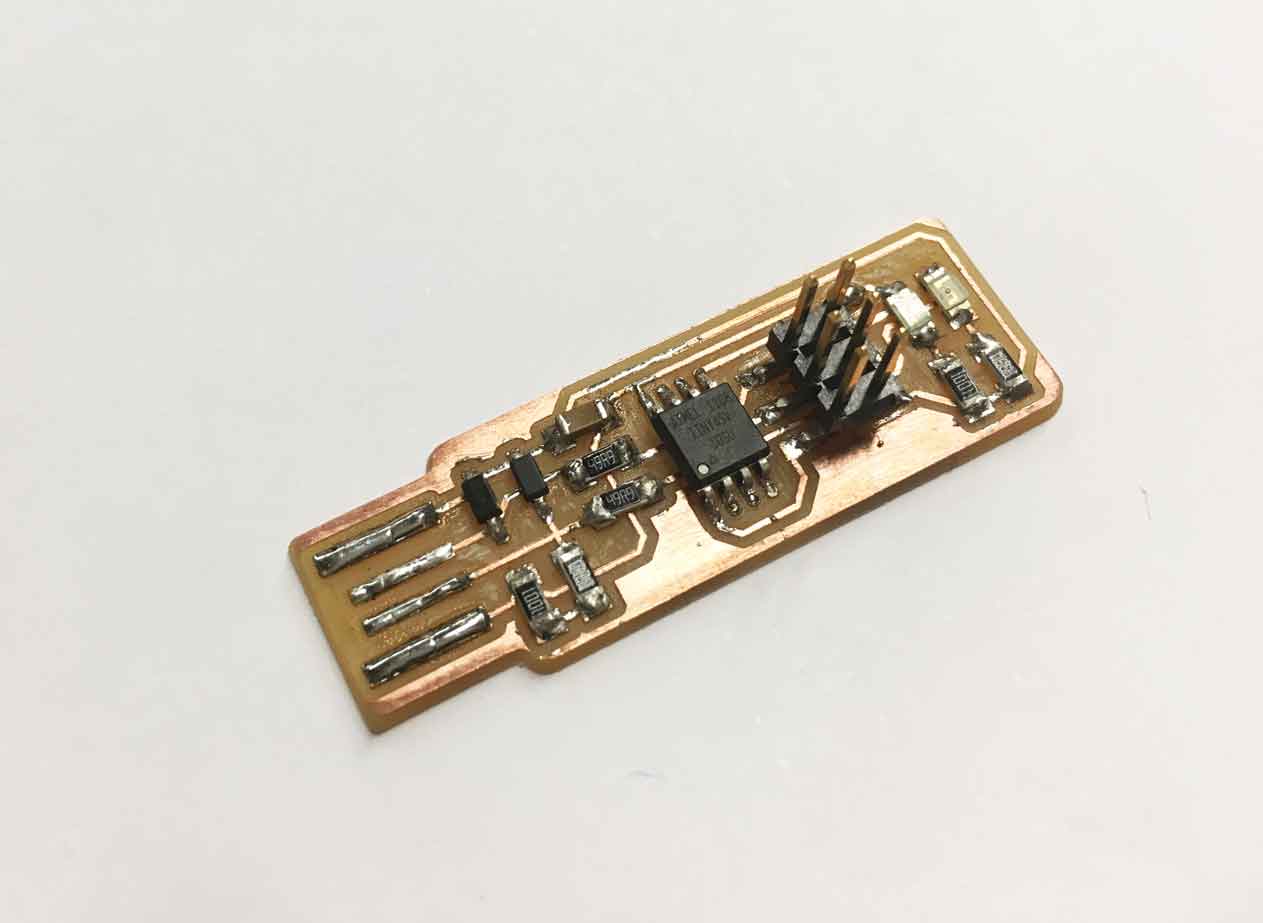
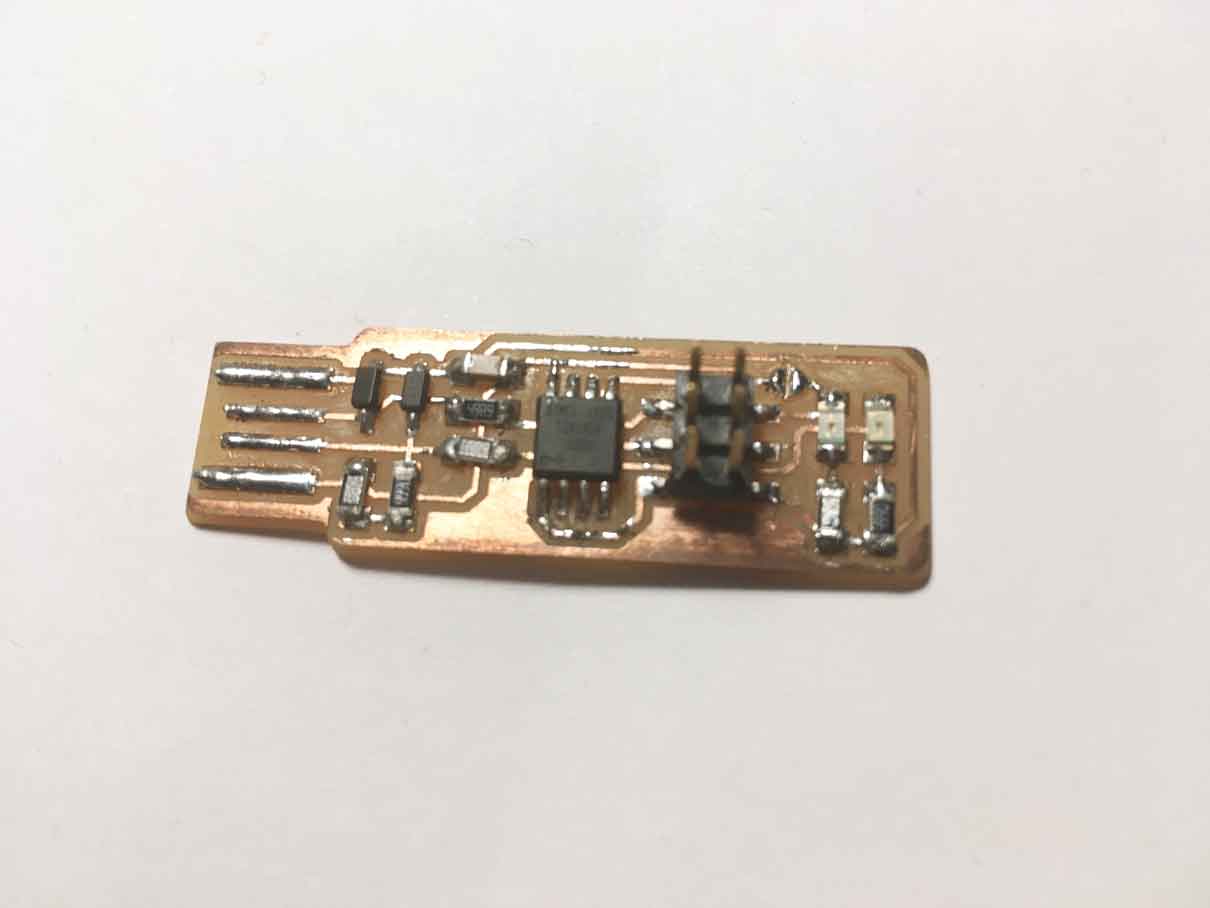
- After the traces were milled and the outline was cut I detached the clean circuit from the base and cleaned the edges using a sandpaper. The PCB was ready to the next phase of soldering components!
The step of soldering components started by scratching away unnecessary elements from the PCB.
With a clean board there was the step of checking all the necessary components.
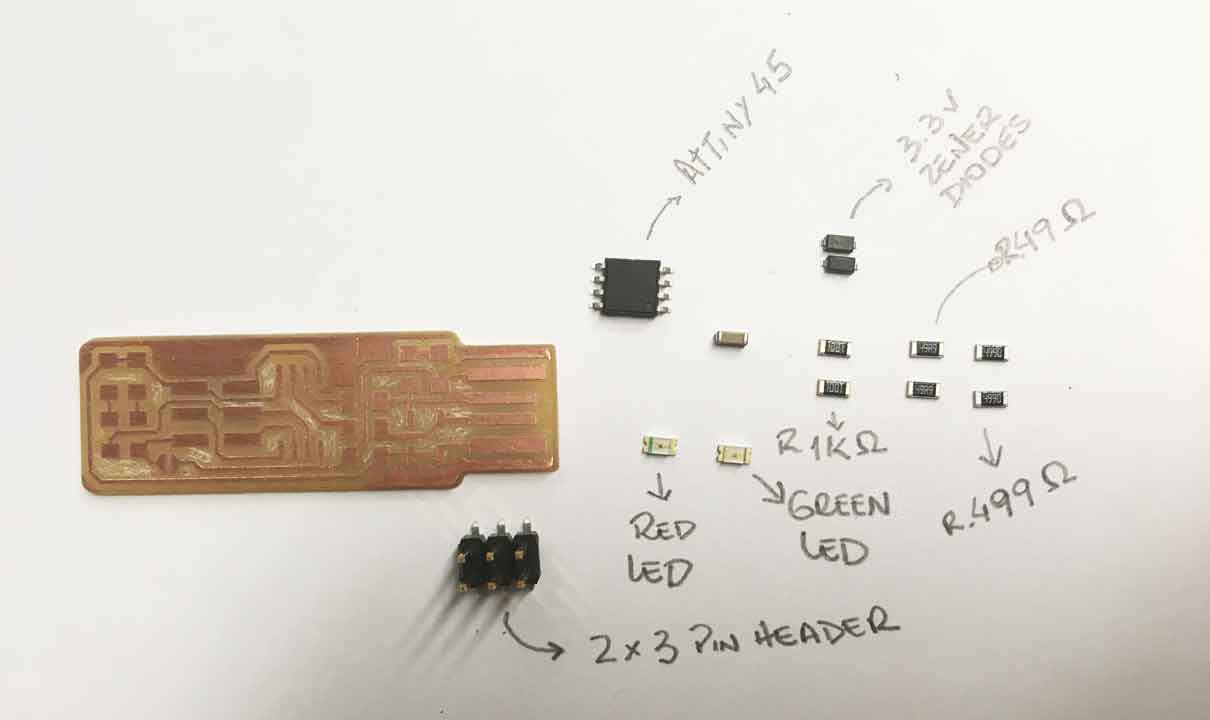
The soldering was a straightforward process once I have done it before in Fab Academy. My tip for who is about to do the same thing is to pay attention to the soldering iron you use. Because the electronic components are too small you should use a lower Watt soldering iron in order not to burn your components in case you are not too fast in soldering. I chose a 30W soldering iron for this step of the project.
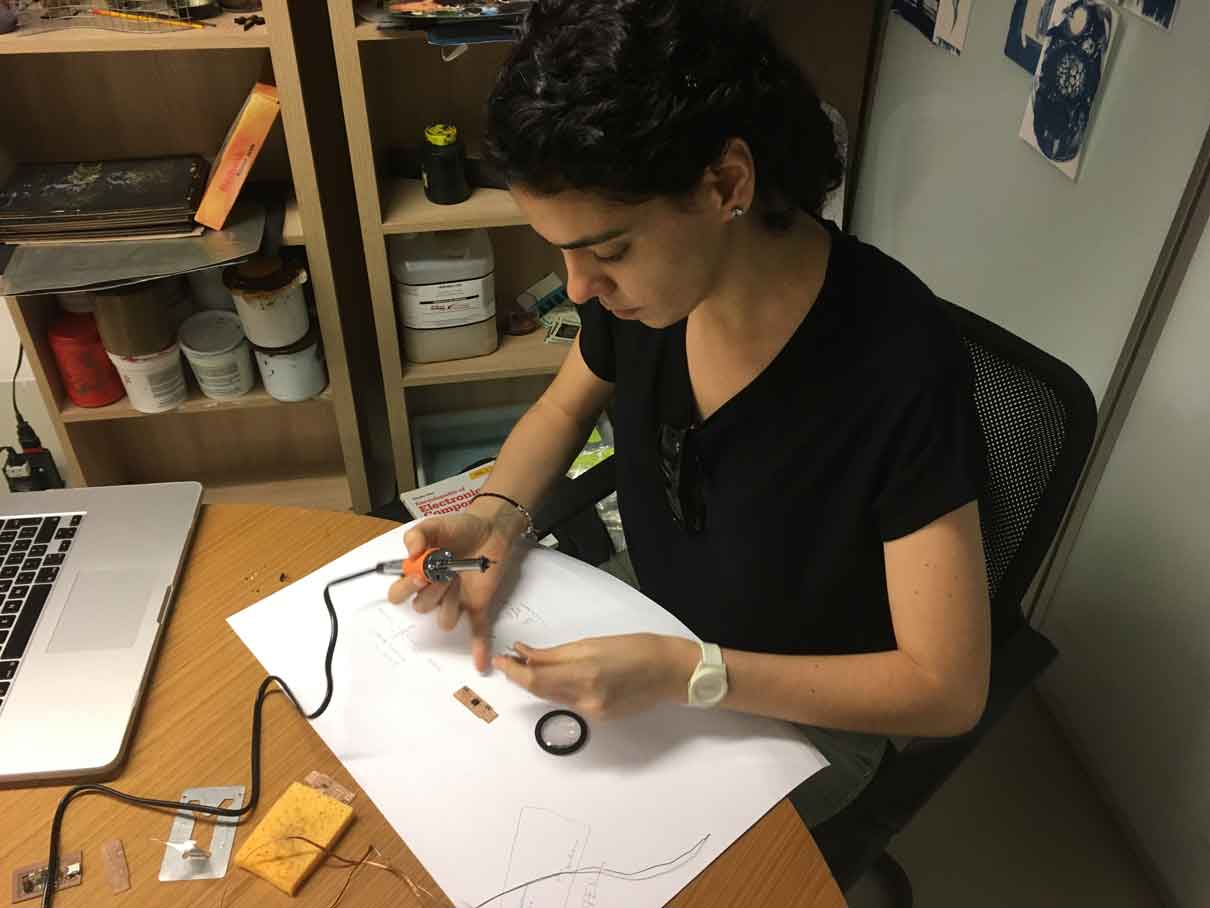
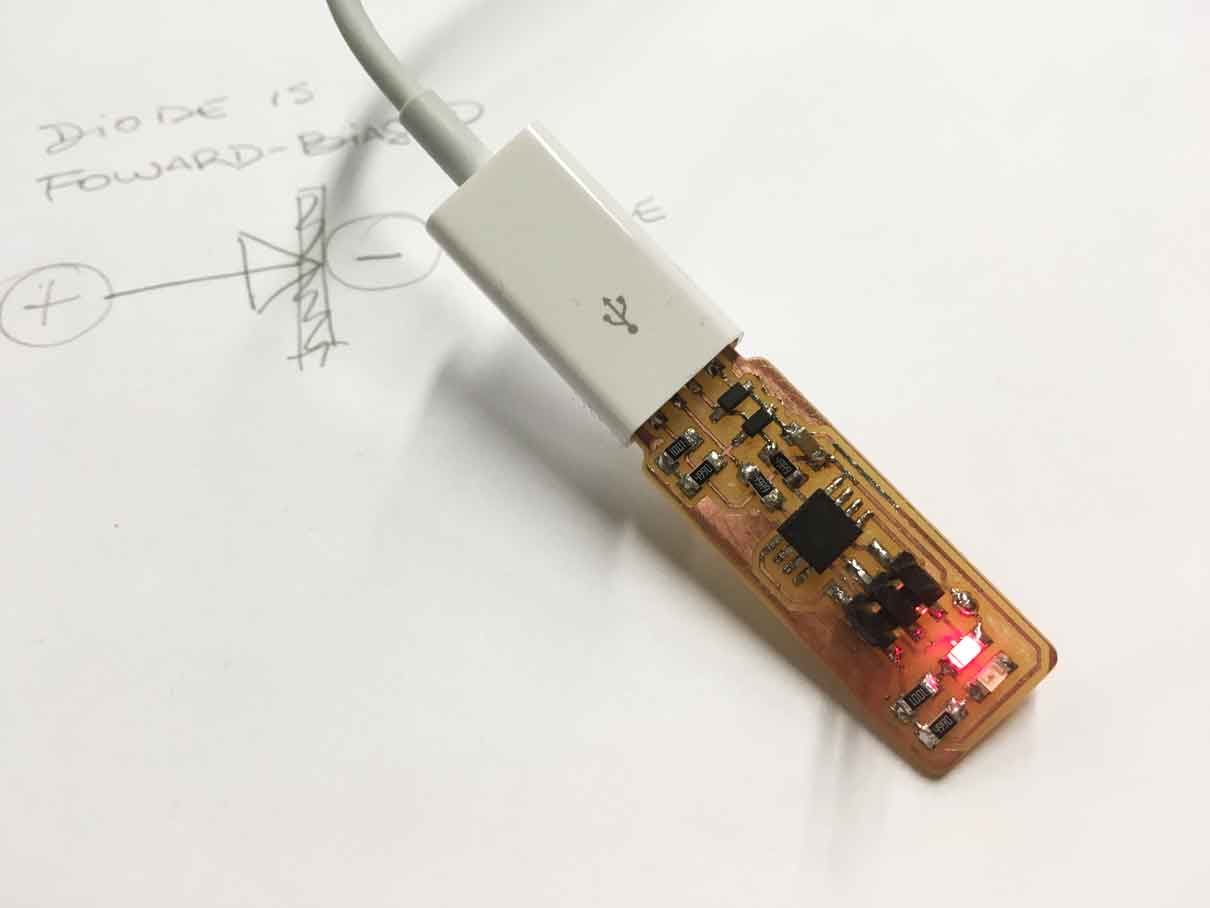
Next step is to test the board. I plugged my FabTinyISP to the USB port of my computer using an USB extension cable. Immediately the red LED lit!
Following the steps from “FabTinyISP Minimal” guide I set up my development environment by:
- downloading and installing CrossPack;
- downloading the firmware source code;
- in my terminal running “make” into the source code directory in order to build a hex file that will (in a later step) get programmed onto the microcontroller;
- update the Makefile with the programmer I’ll use to program the board (small translucent blue programmer).
After completing this steps my board was plugged to the USB port and the VSP programmer was connected to the ISP header of the board.
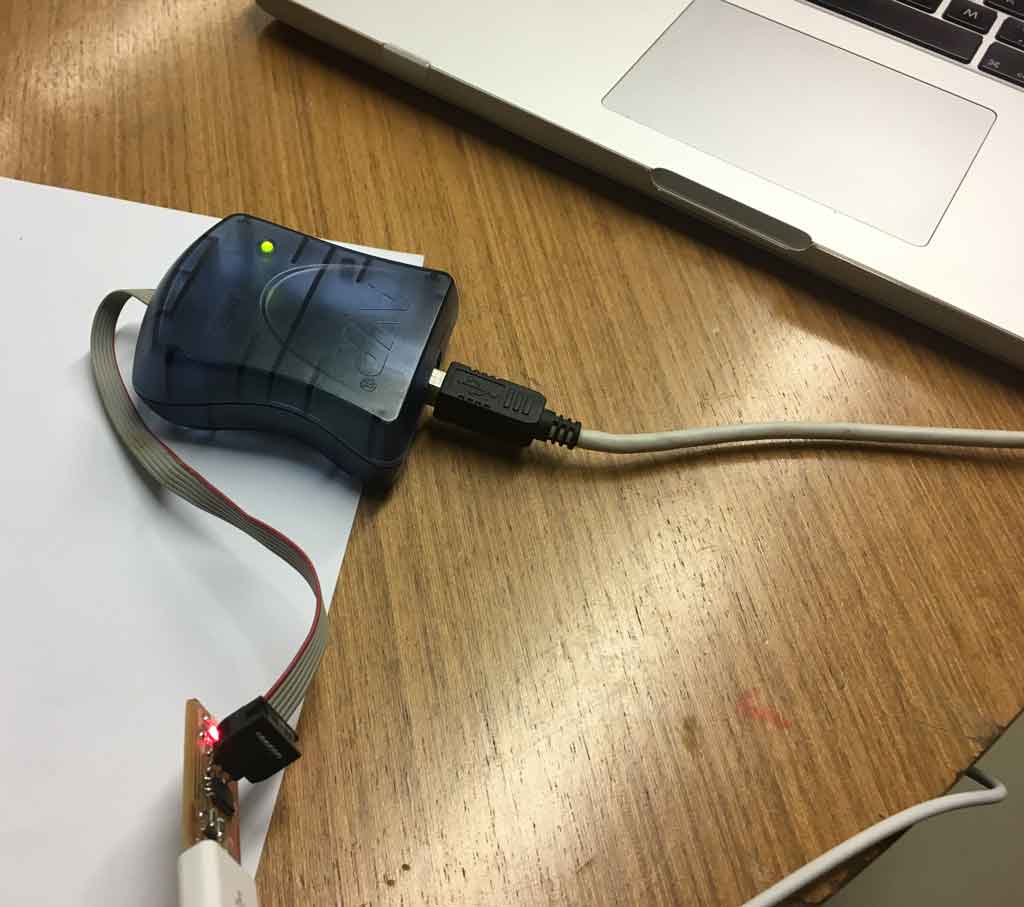
Back to the terminal I run the command “make flash” in order to erase the microcontroller and program its flash memory with the .hex file. Everything went fine!
Next step was to set the configuration fuses by running the command “make fuses” in the terminal. This went also fine, the fuses are now set!
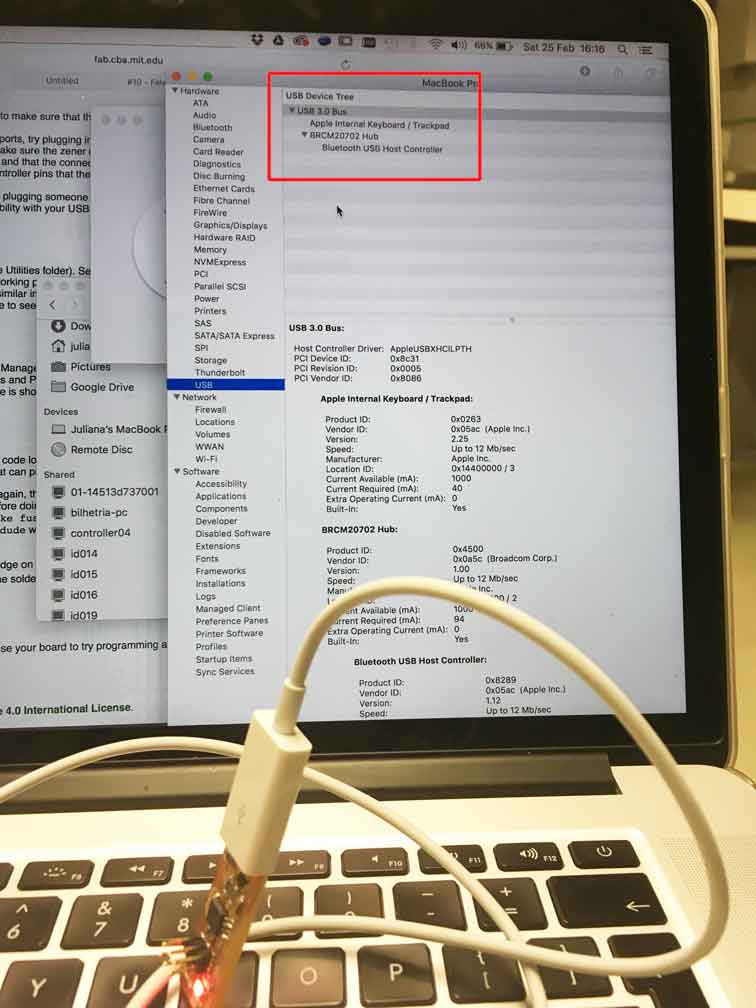
From this step onwards I could not advance once I was not able, yet, to make my USB recognizable by the Mac OSX operational system. I still need to run some debugging tests in a Linux.
Update
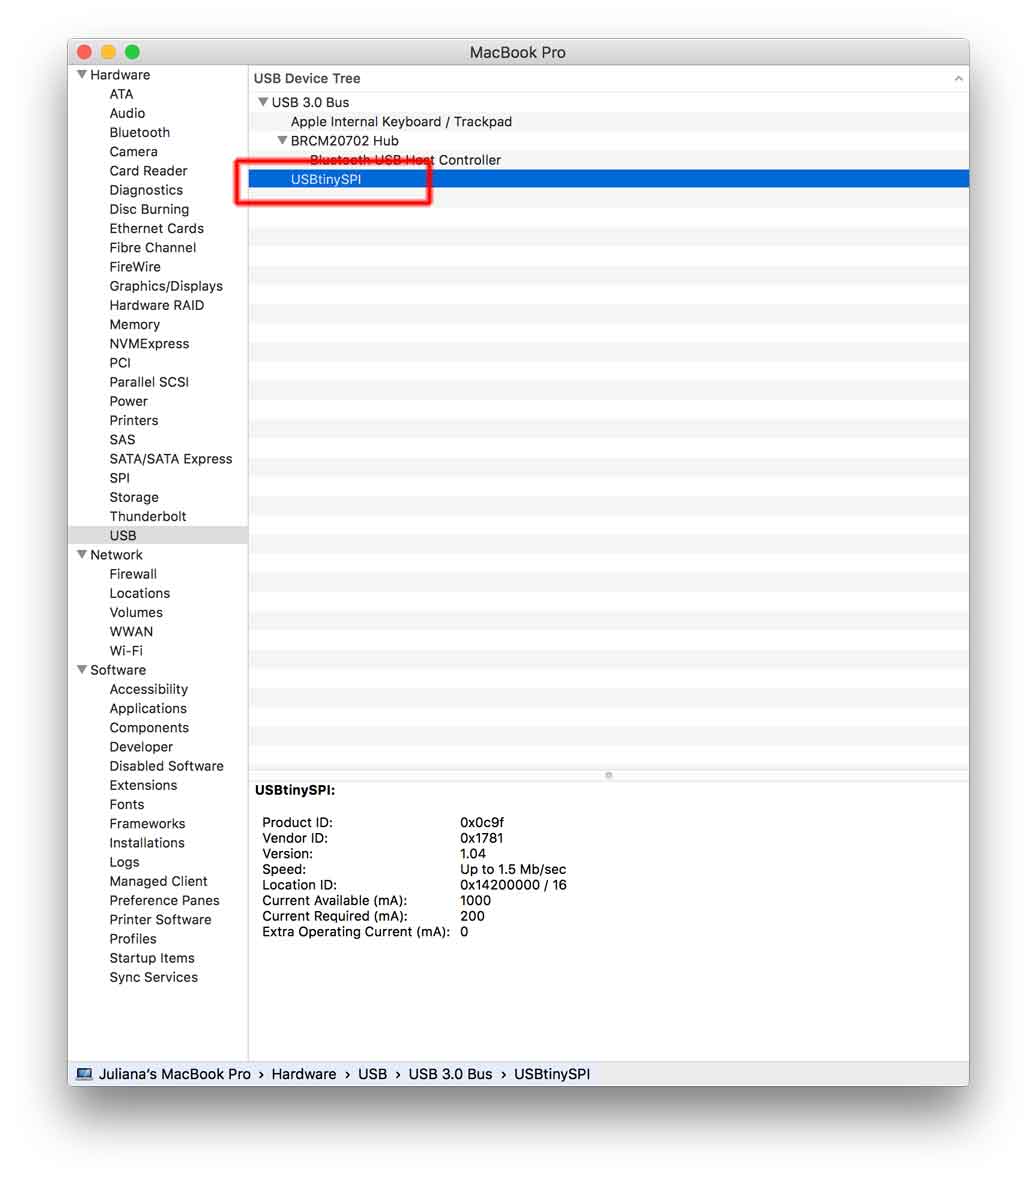
Because the debugging process in Linux was not effective, I was advised by my tutor to reinforce the components soldering parts that may be fragile or visually disconnected. After this simple task my FabISP was finally recognized by the Mac OS X:
Now that my FabISP has the code loaded and is recognizable by my computer I had to turn the ATtiny 45 reset pin into a GPIO pin (disabling the microcontroller to be reprogrammed in the future). In order to achieve this I connected my ISP to my computer and in the Terminal I run the command “make rstdisbl”. Next I had to remove a solder jumper I created before between VCC and VPROG.
Now my FabISP is ready and working properly so I can use it as a programmer to program other boards.
Softwares used:
- Fab Modules
- Roland VPanel (MDX-40A)
- Terminal Mac OS X
Machines used:
- Precision CNC Milling Machine - Roland Modela MDX 40-A
Files: