Computer-Controlled Cutting
For this group assignment we were supposed to make lasercutter test parts in order to test the laser kerf and cutting settings. As an individual assignment I was expected to cut something on the vinylcutter and finaly design, make and document a parametric press-fit construction kit having in mind the concepts learned about adjusting the lasercutter kerf.
Group Assignment
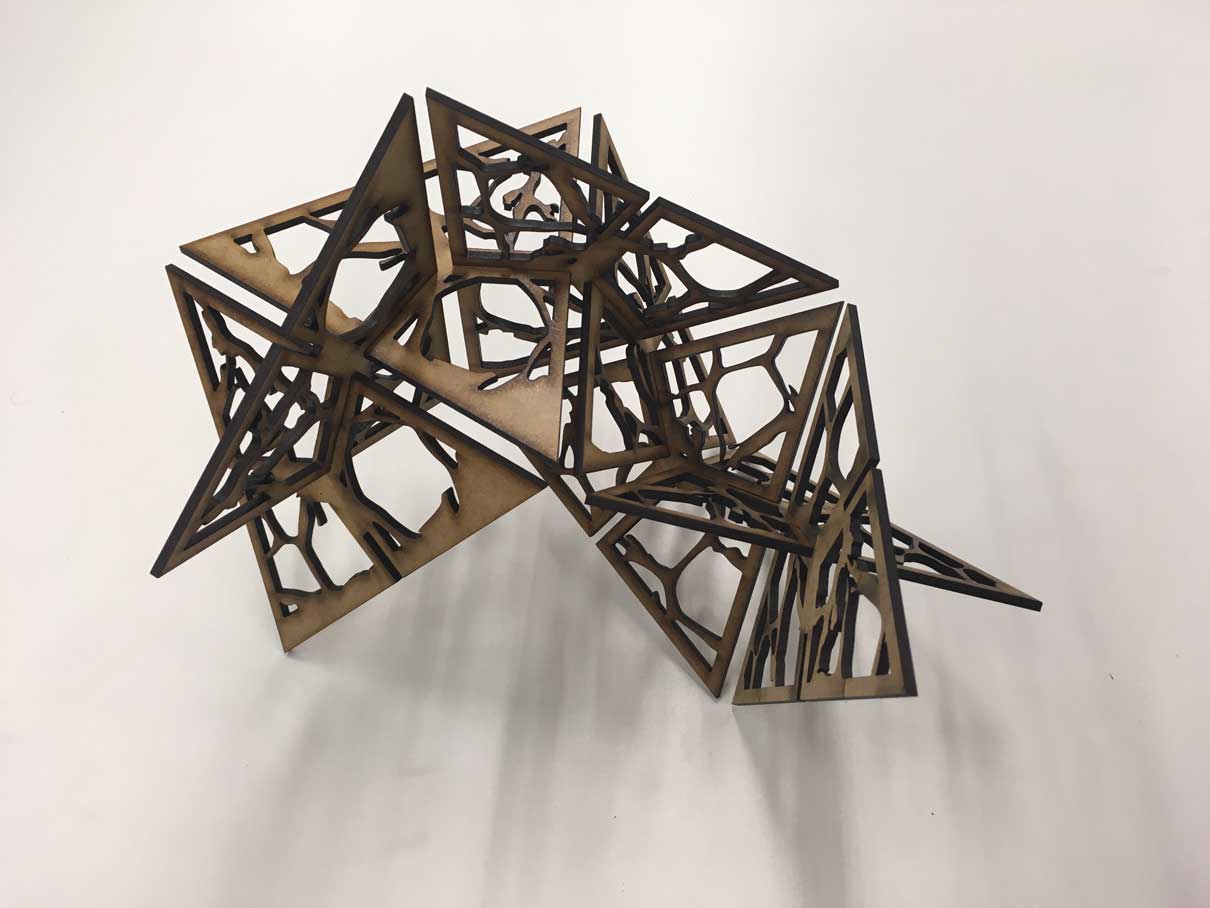
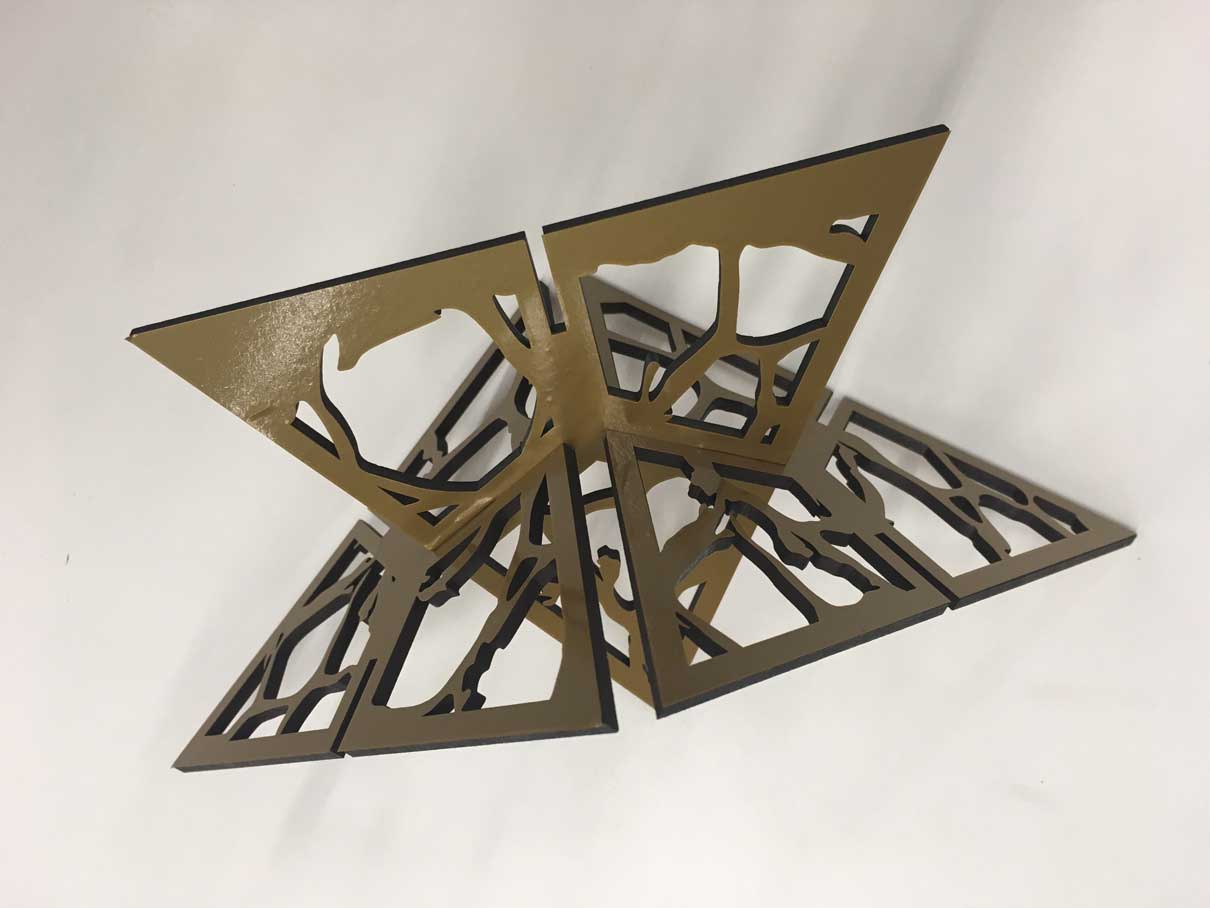
For this group assignment the idea was to work in a modular shape based on an equilateral triangle. Each triangle have 3 slots placed in each side in order to enable the adjustment between its parts. The final configuration of the modules would result in a sculpture.
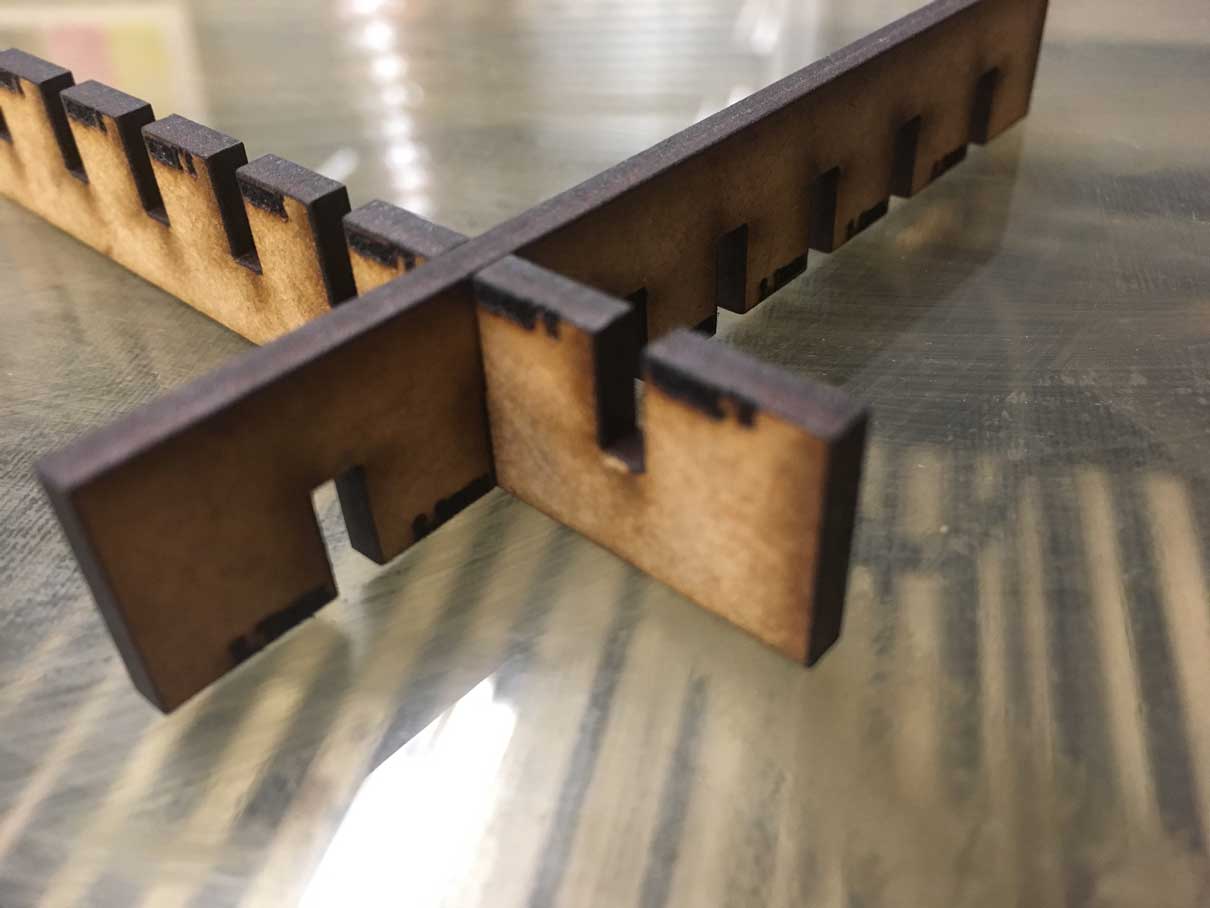
Before starting the design of the triangle parts we perform a controlled test with the lasercutter in order to avoid waste of material and time. This test is meant to calculate the material kerf, that is the amount of material removed by the lasercutter. Having in mind the right kerf I will be able to design the triangles and adjust the slots according to the correct material thickness so the parts will tight fit. For this kerf test we agreed about the use of MDF of 3mm thickness.
Using Rhino 3D we created a rectangle with several slots being the one in the middle the thickness of the MDF (3mm). We place three more slots in the right side and three more in the left side of this ideal slot. Those additional slots varied in width 1mm each.
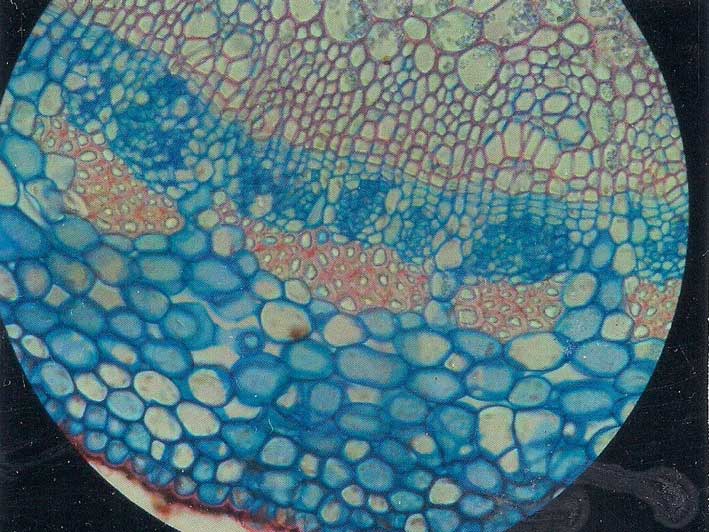
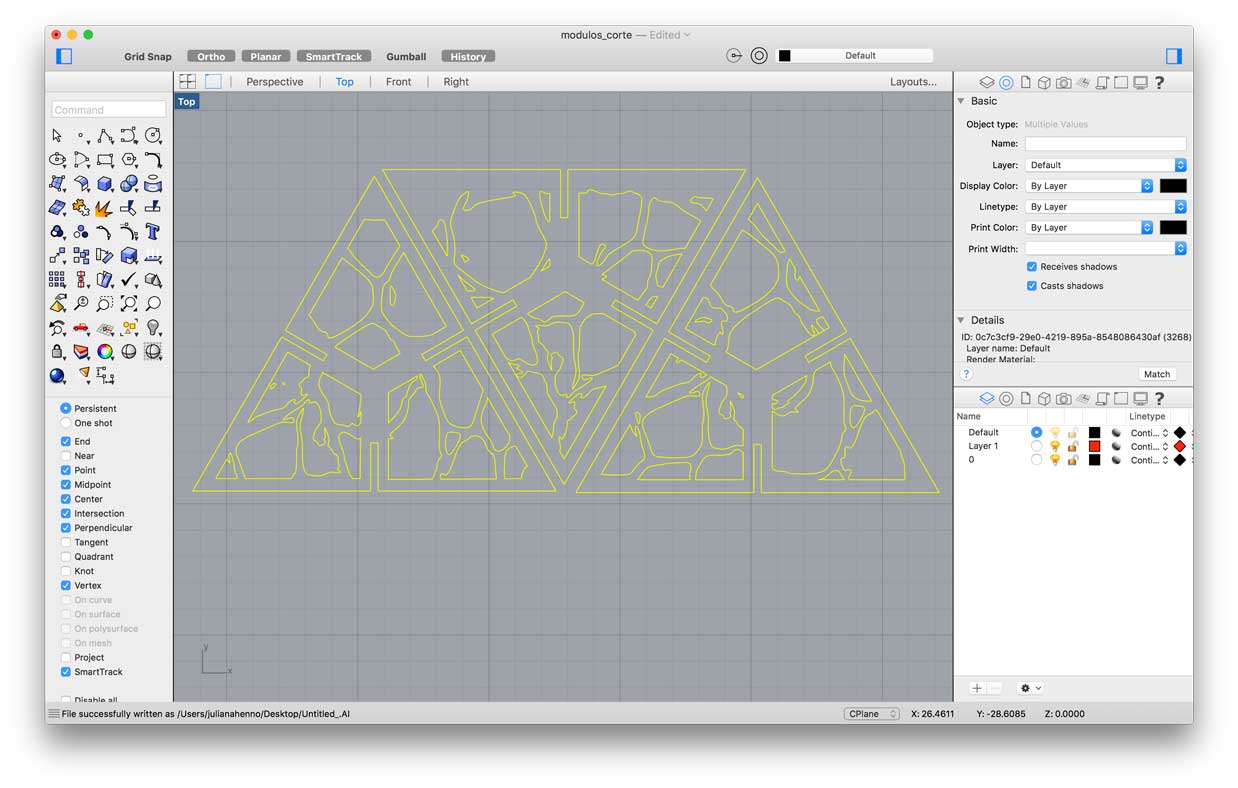
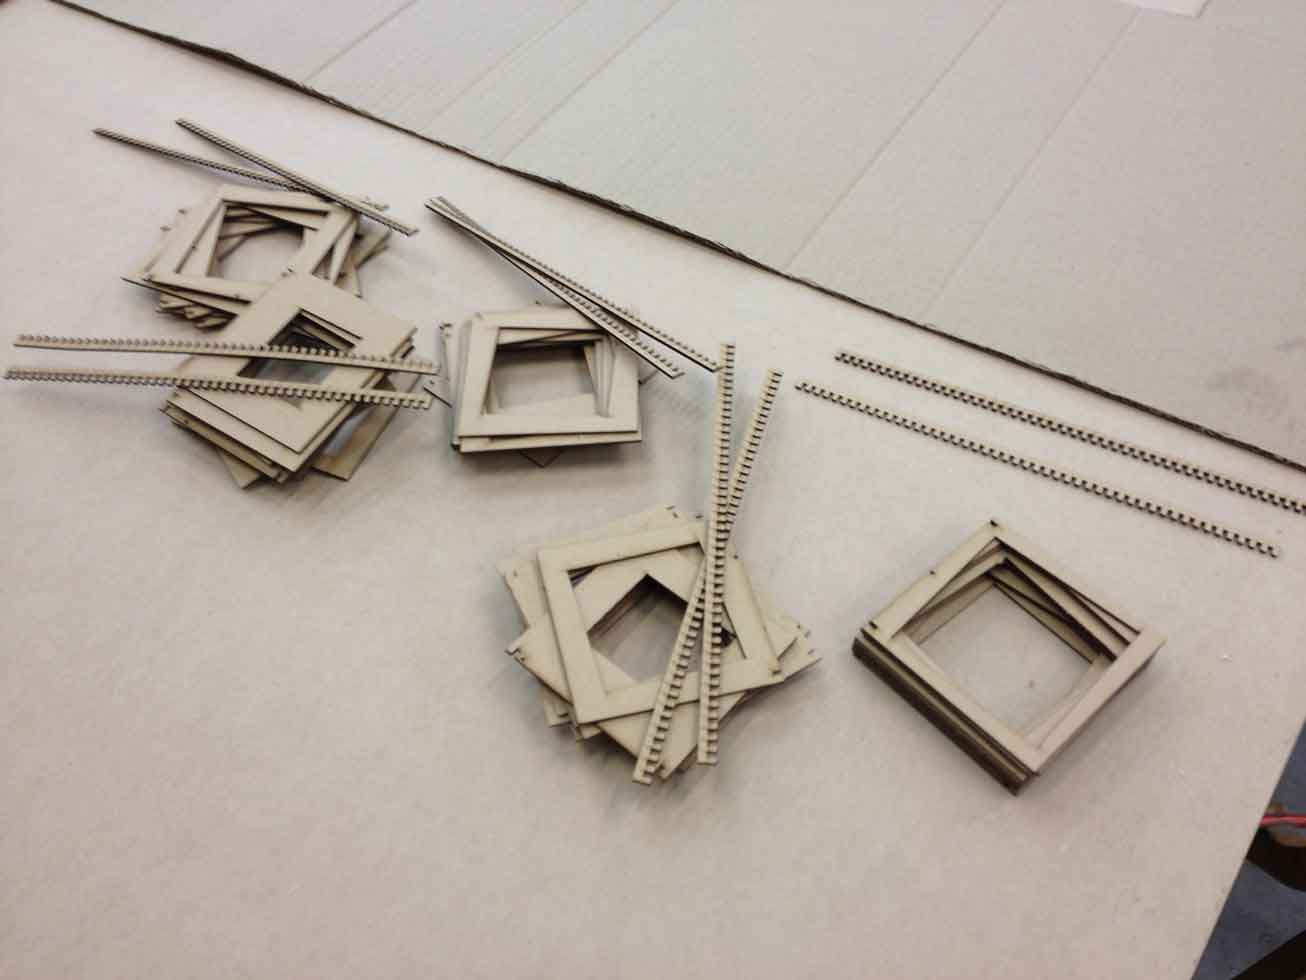
After knowing what was the ideal width of the slots (2,8mm) I designed the modules. The module were based on an equilateral triangle and its internal shape was organic and based on microscope images of cells. Three different modules were drawn using Adobe Illustrator and Rhino 3D and are inspired in the design of cells photographed by microscope.
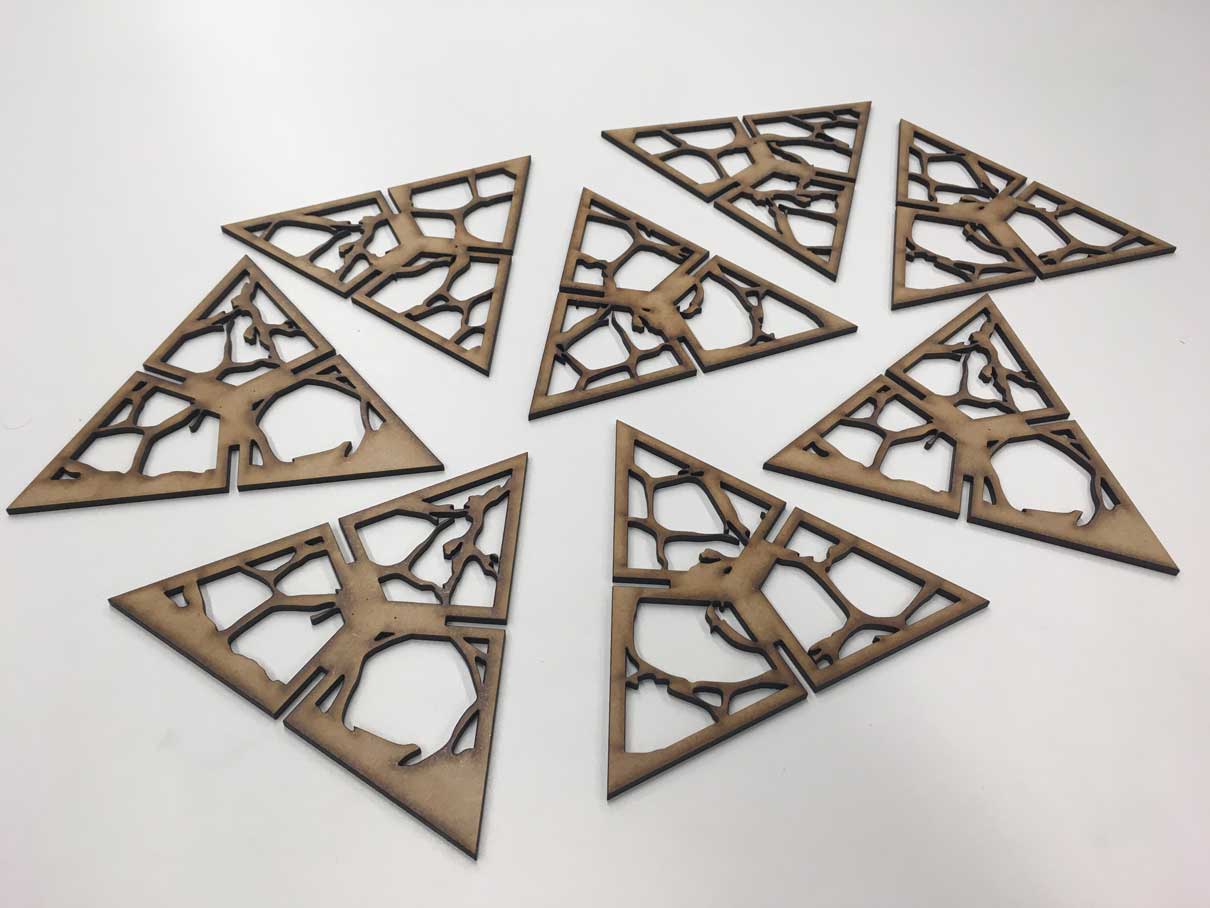
The modules with the correct slot size were then cut with the same speed/power parameter used during the test and they fitted perfectly as it can be seen in the photos:
Cut something on the vinylcutter
For testing the vinylcutter I thought it would be a nice idea to decorate the modules done before. Taking advantage of the precision of numeric controlled tools I changed a bit the original chape of the triangle, imagining the coloured surface only in its center.
The adaptations of the design were made in Adobe Illustrator and after that I chose a golden vinyl colour to cut the design.
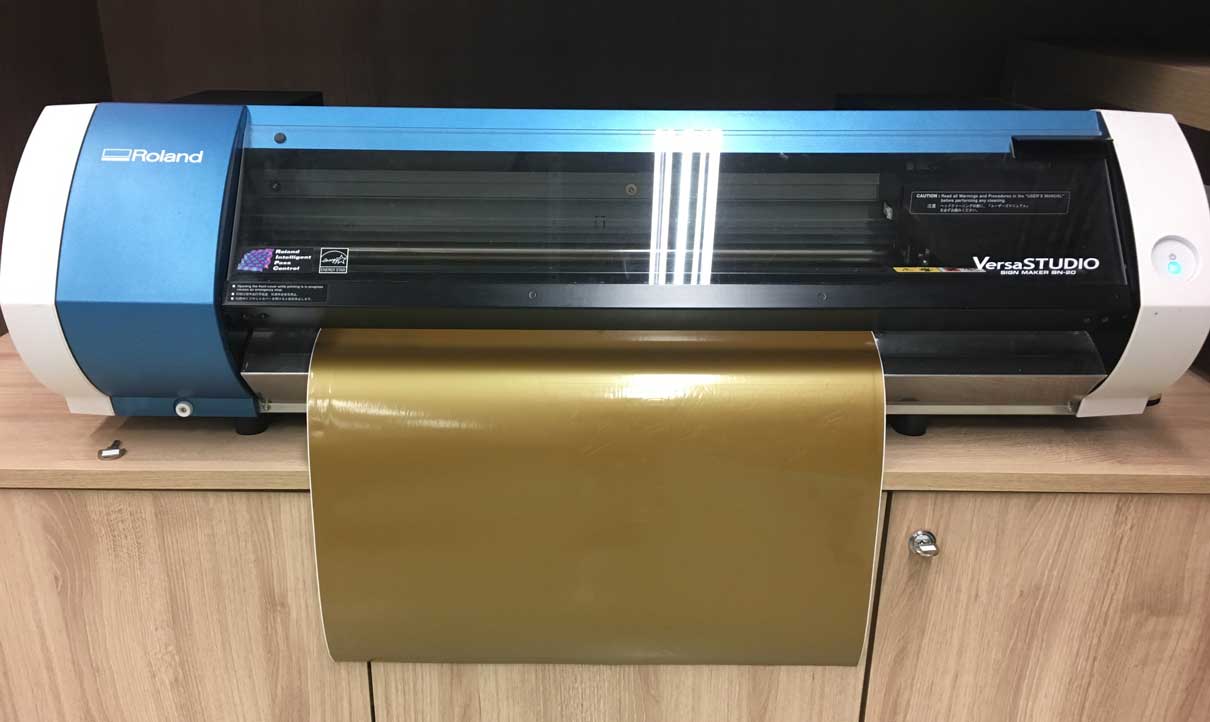
Here are the steps taken in order to cut my design in a Epson Vinyl Cutter (VersaStudio - sign maker BN-20):
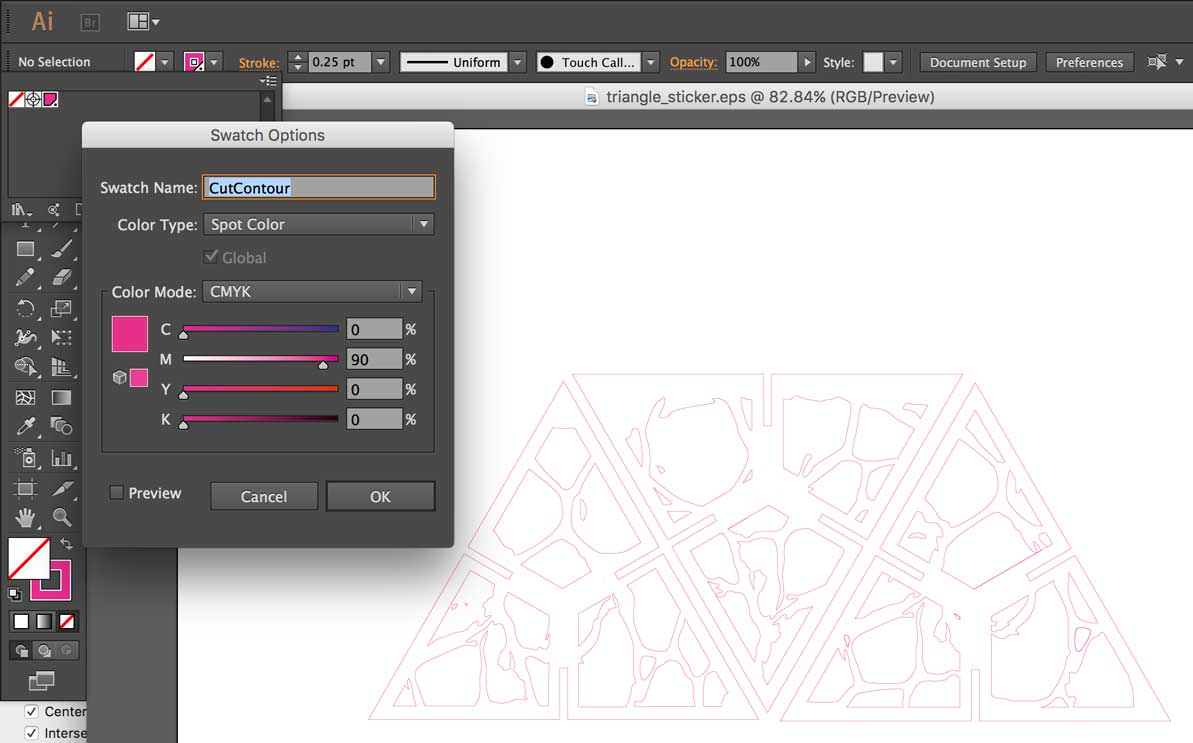
- Open a copy of the triangle module in Adobe Illustrator;
- Modified the file taking care for not to add any element to the original design but just extracting what I didn’t want like the edges of the triangle as an example;
- In order to prepare the file to open in the vinylcutter software (Roland Versa Works) I eliminated the fill and set the vector stroke to 0.25 points coloured with the spot colour “CutContour” (C:0/M:90/Y:0/K:0);
- I created a rectangle around the design (to facilitate peeling the vinyl afterwards) and exported the vector as a .EPS file.
Now comes the usual steps to cut any vector in a vinylcutter. First thing is to insert the golden vinyl colour that I chose into the vinylcutter. Using the software Roland Versa Works, I imported the .EPS file and checked if the file was recognizable. Usually there may be problems if I forget to change the stroke colour or if there are some hidden elements in the file. If everything is right I should be able so see the extension of the vector dotted and blinking. This is the moment to check if the design is in the right scale and to position it in the vinylcutter working area.
After the cut was finished I started with the peeling process. All the negative area that I don’t need must be removed preferably with the help of tweezers.
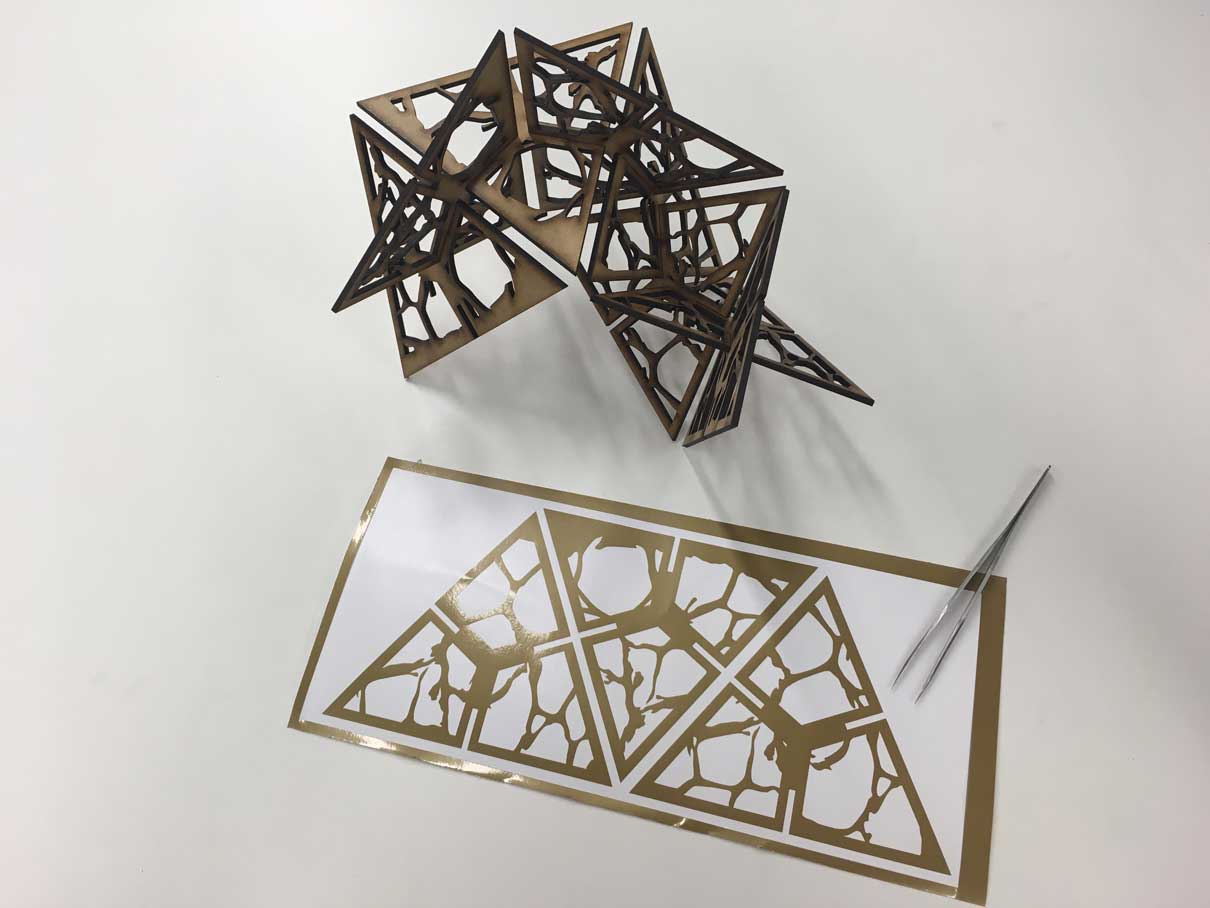
After peeling the vinyl and letting only the actual design I started the transfer process. Because it’s a very detailed, with disconnected parts I had to use a transfer tape to have the precision to glue all the design in the correct place.
![]()
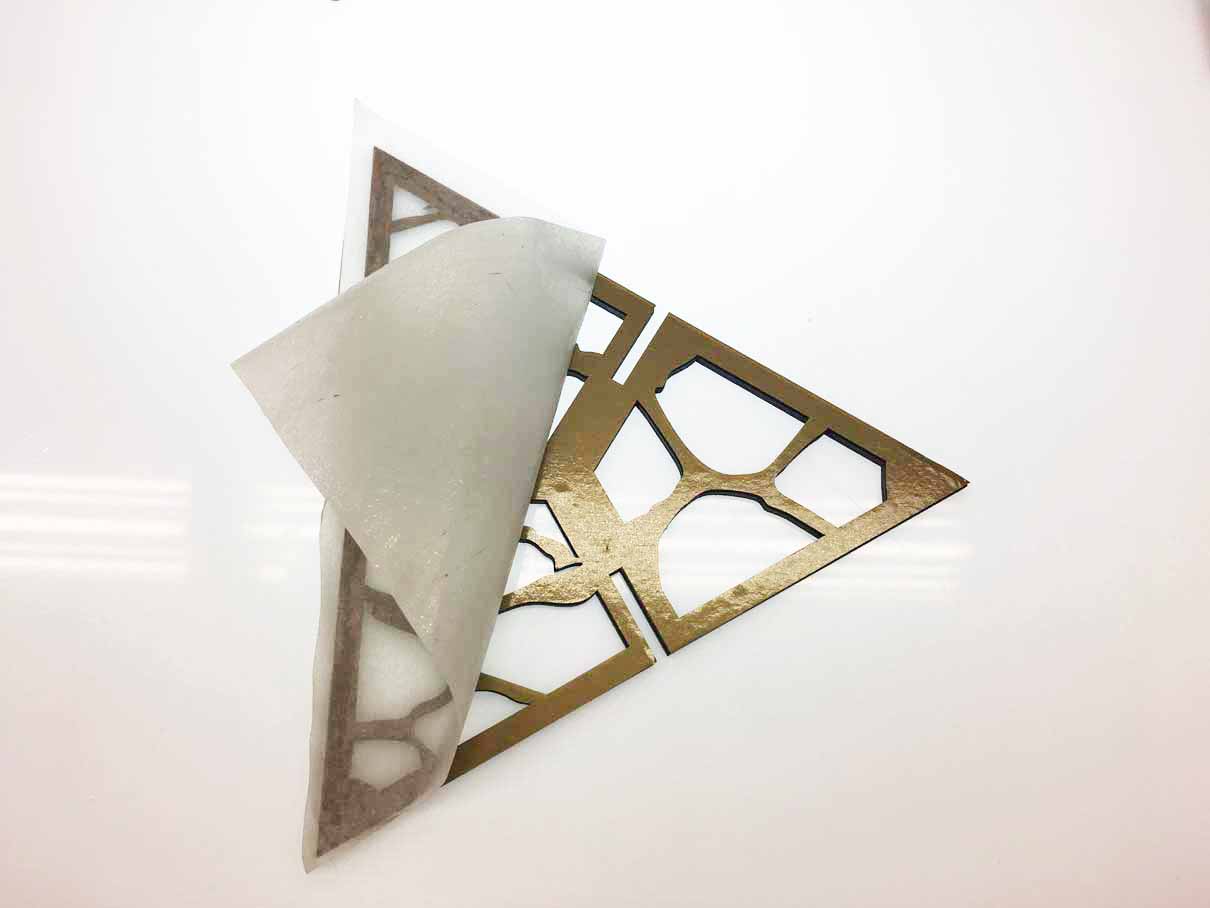
Improvements could be done by mixing different vinyl colours in the same triangle part. In that case I should repeat the process saving one file for each vinyl colour I would like to have in my final sculpture.
Parametric press-fit construction kit
For this experiment I'll refer to the assignment I did back in 2013.
From all the machines that there is in a Fab Lab SP, the one that I use the most is the laser cutter. The adjustments are very straightforward, being them: adjusting the distance from laser cannon to the material, defining the x,y origin (saving as much material area you can) and determine the relation of power/speed of the laser.
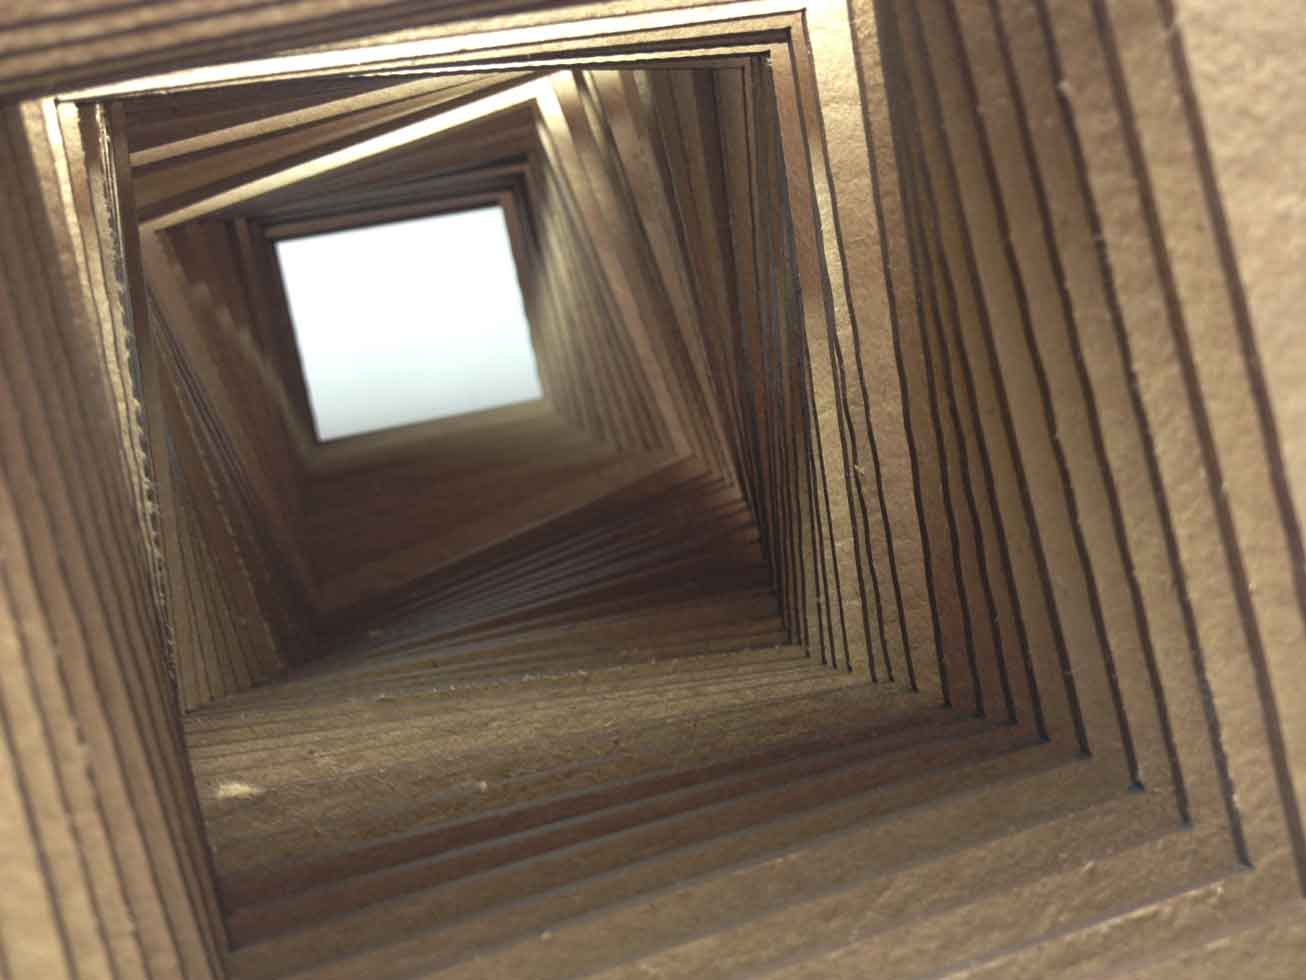
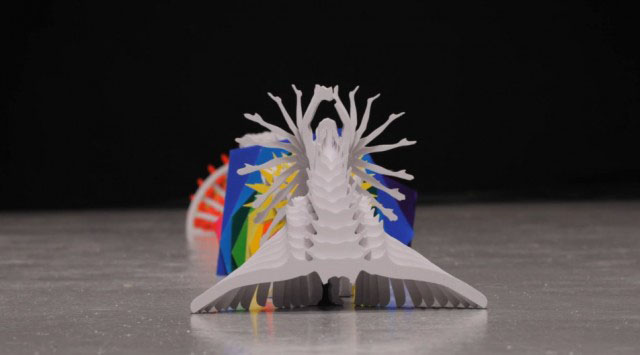
For this assignment I decided to work with the context of motion as well as I intend to do for my final project. The idea was to create a press-fit construction kit that altogether would give the idea of something moving.
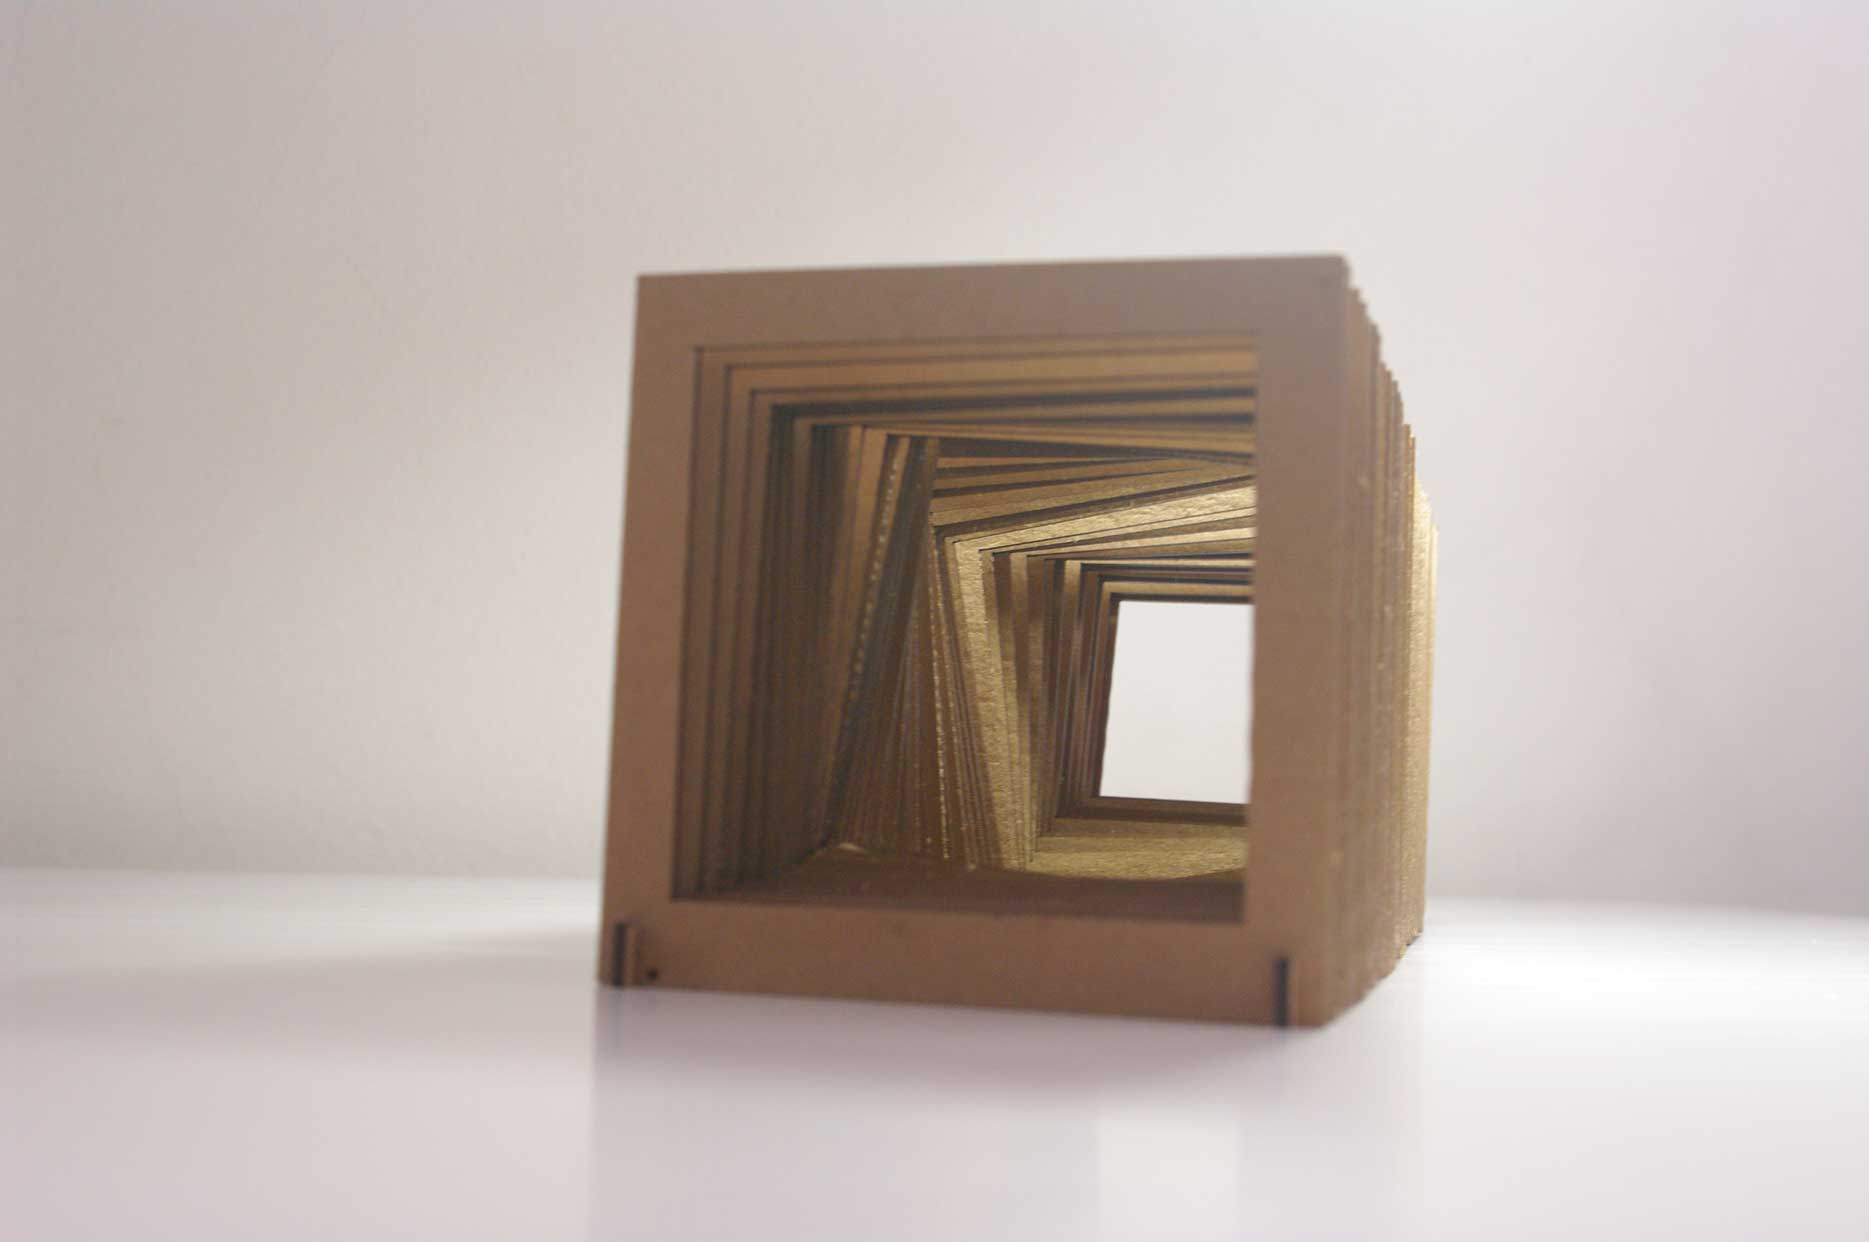
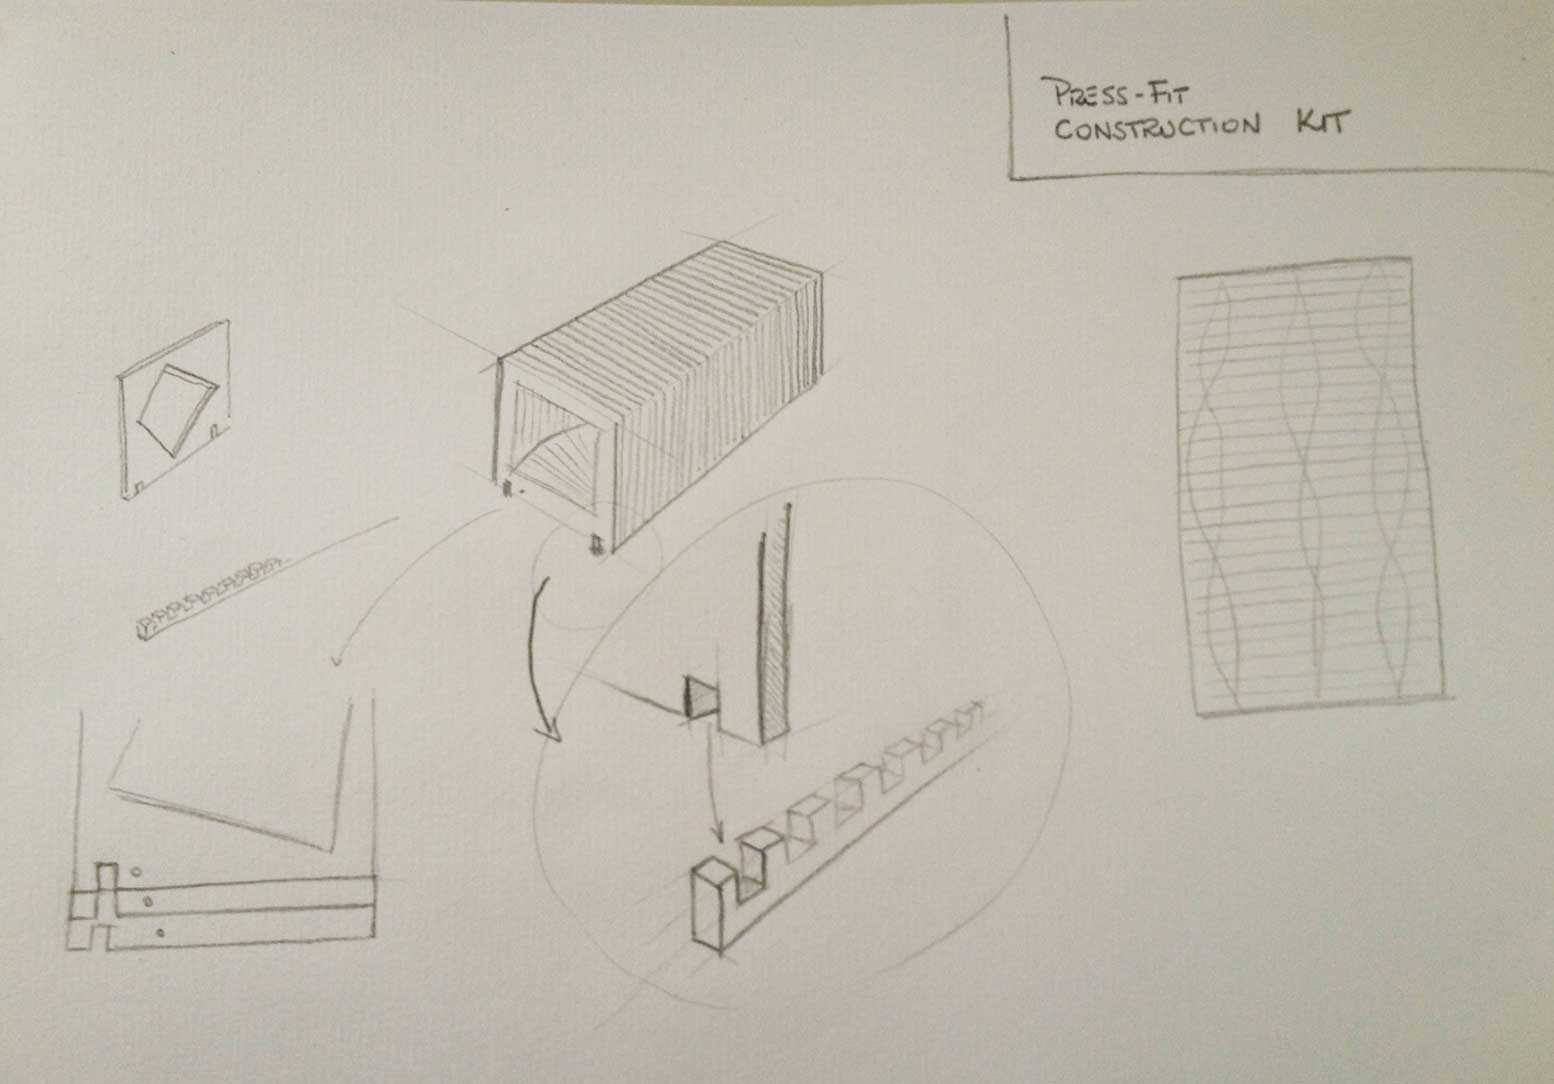
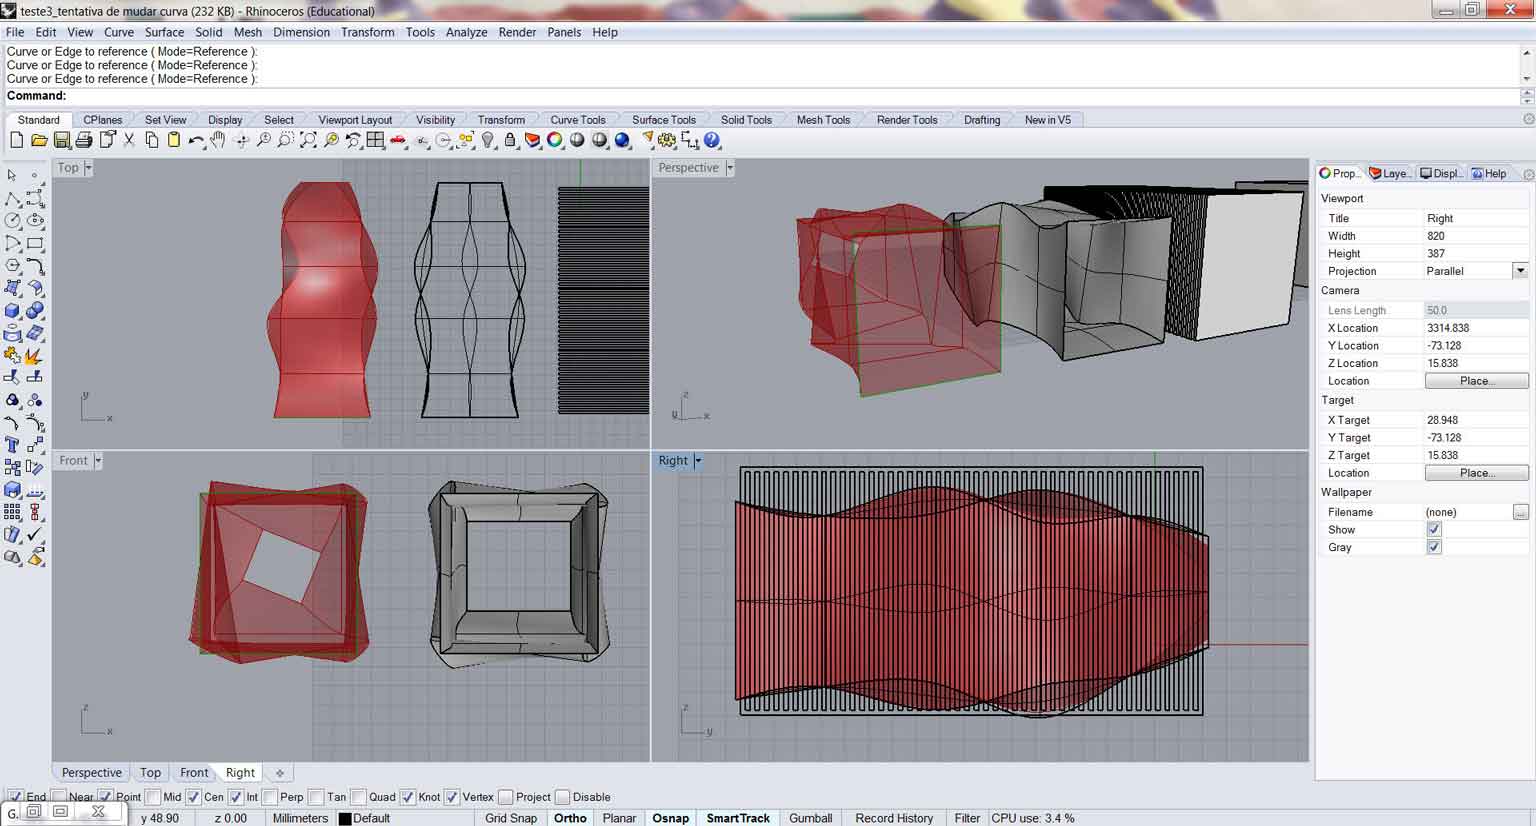
I made 48 layers of squares that would press-fit on a base keeping the set aligned and straight. The motion would happen inside this set of squares like a moving object had created a shape out of its interior.
I managed to achieve the expected result but I found on the way a lot of minor details that could had improved the result. In the end of this assignment I´ll list some references that came my way during the creation process and that inspired me somehow.
The steps I took to create this project were the following:
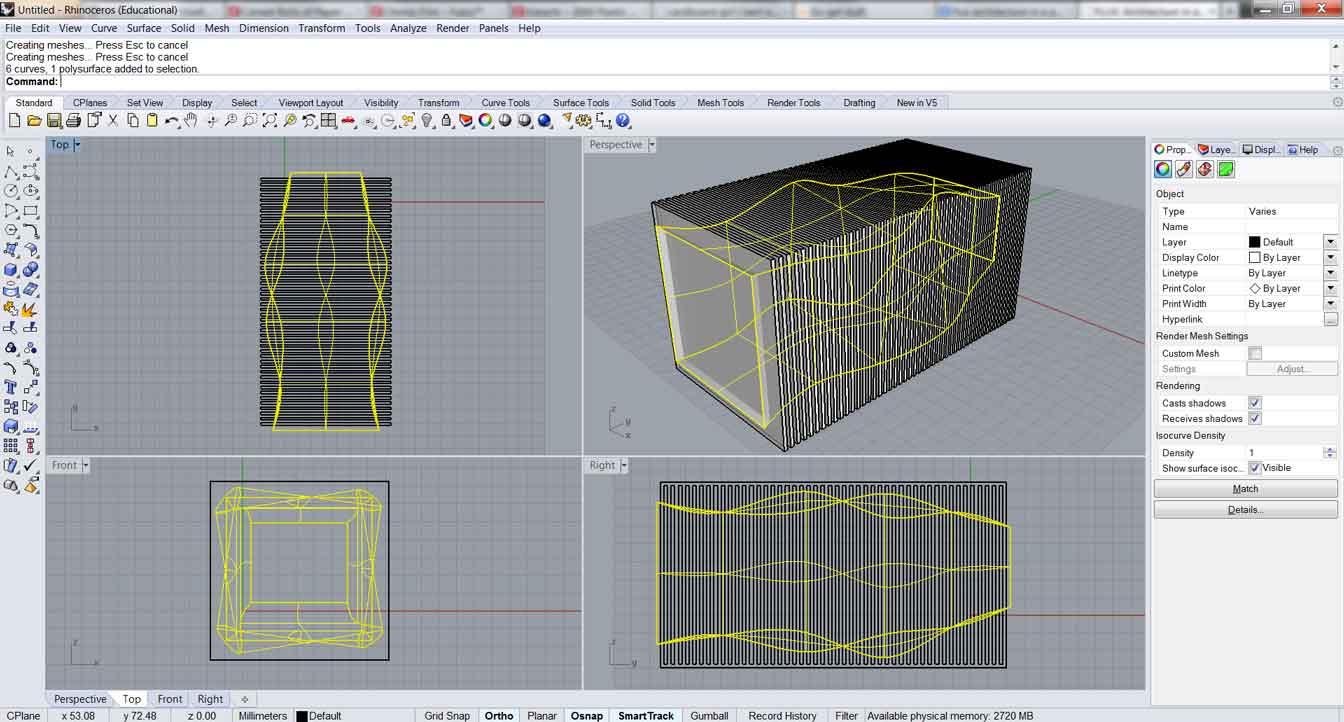
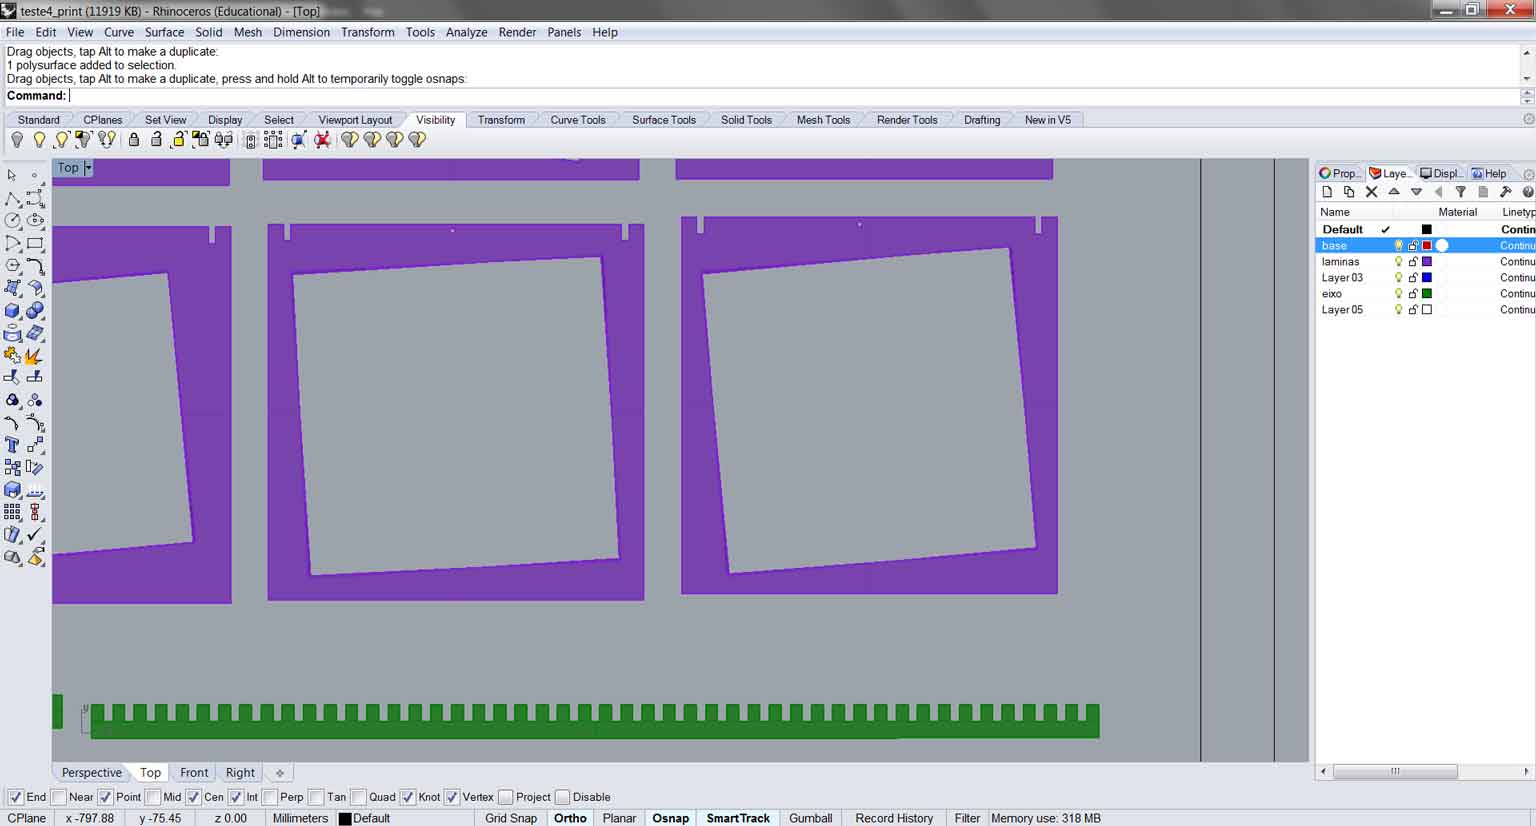
- From the initial sketches I draw the object in Rhino 3D
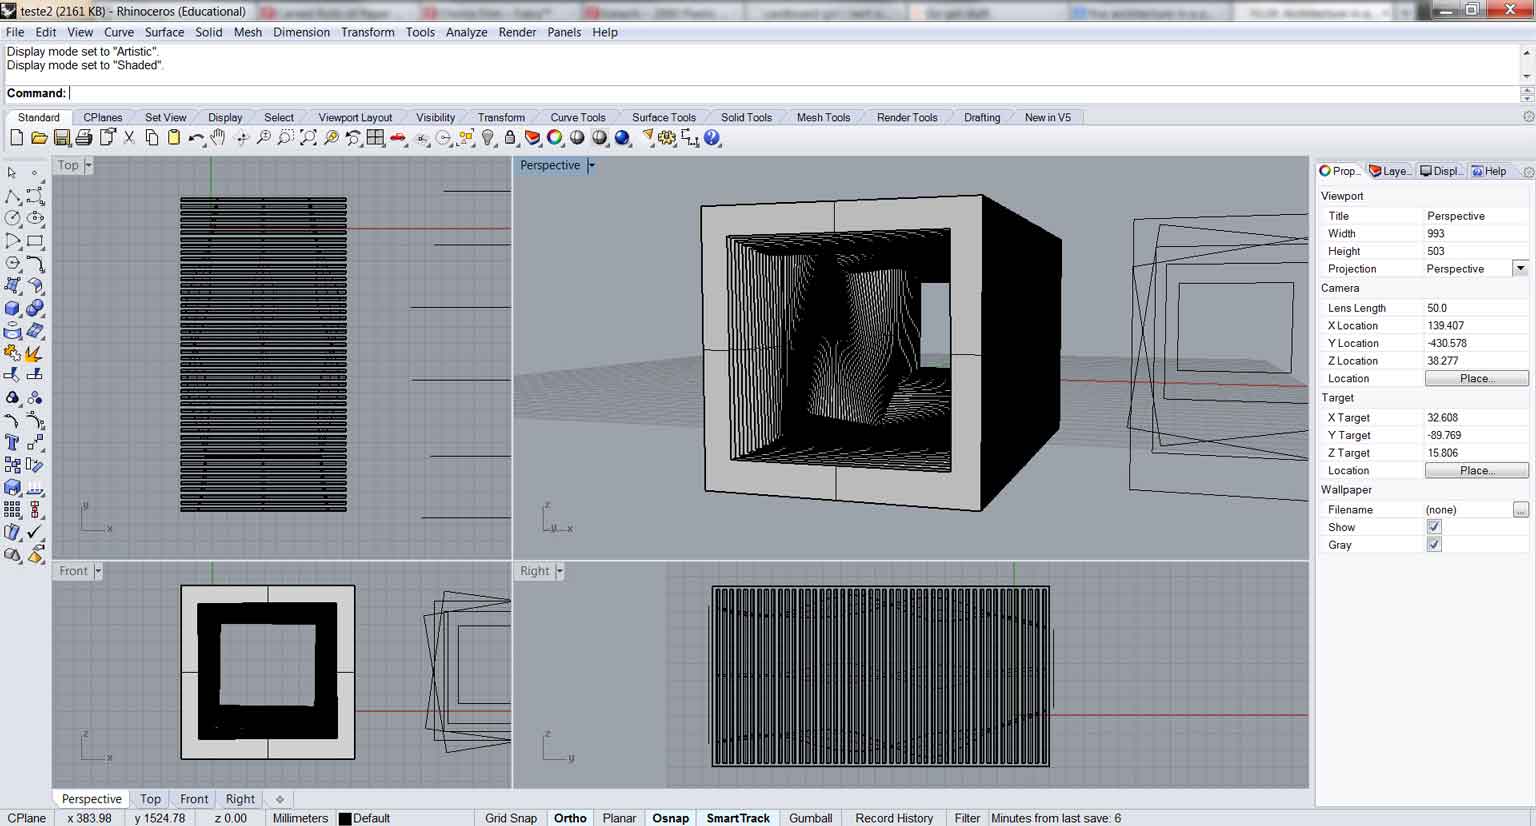
- Inside Rhino I created the 48 layers of squares, aligned and punched them with a shape of a meshed surface
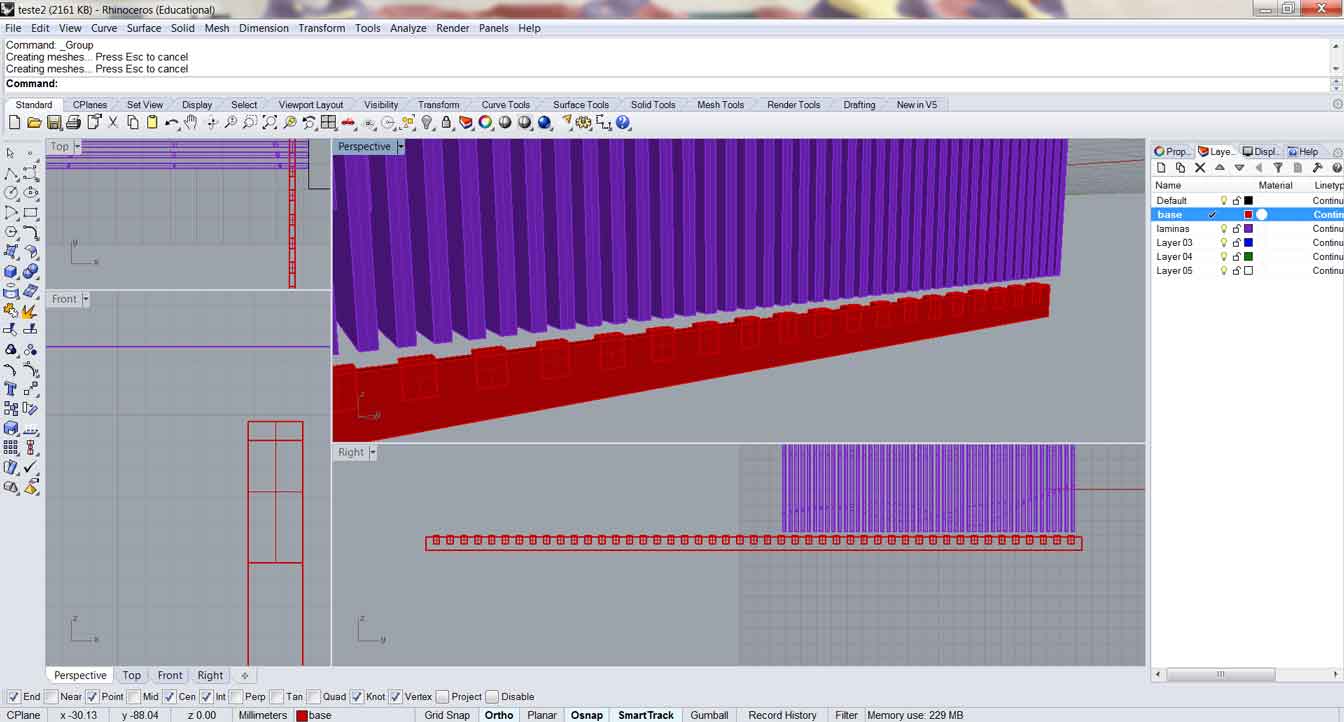
- Inside Rhino I created the base and adapted the pieces so they could fit to each other
- Inside Rhino it was necessary to create signs (a circle mark at the bottom of the square), so that I would know how to order the layers during assemblage
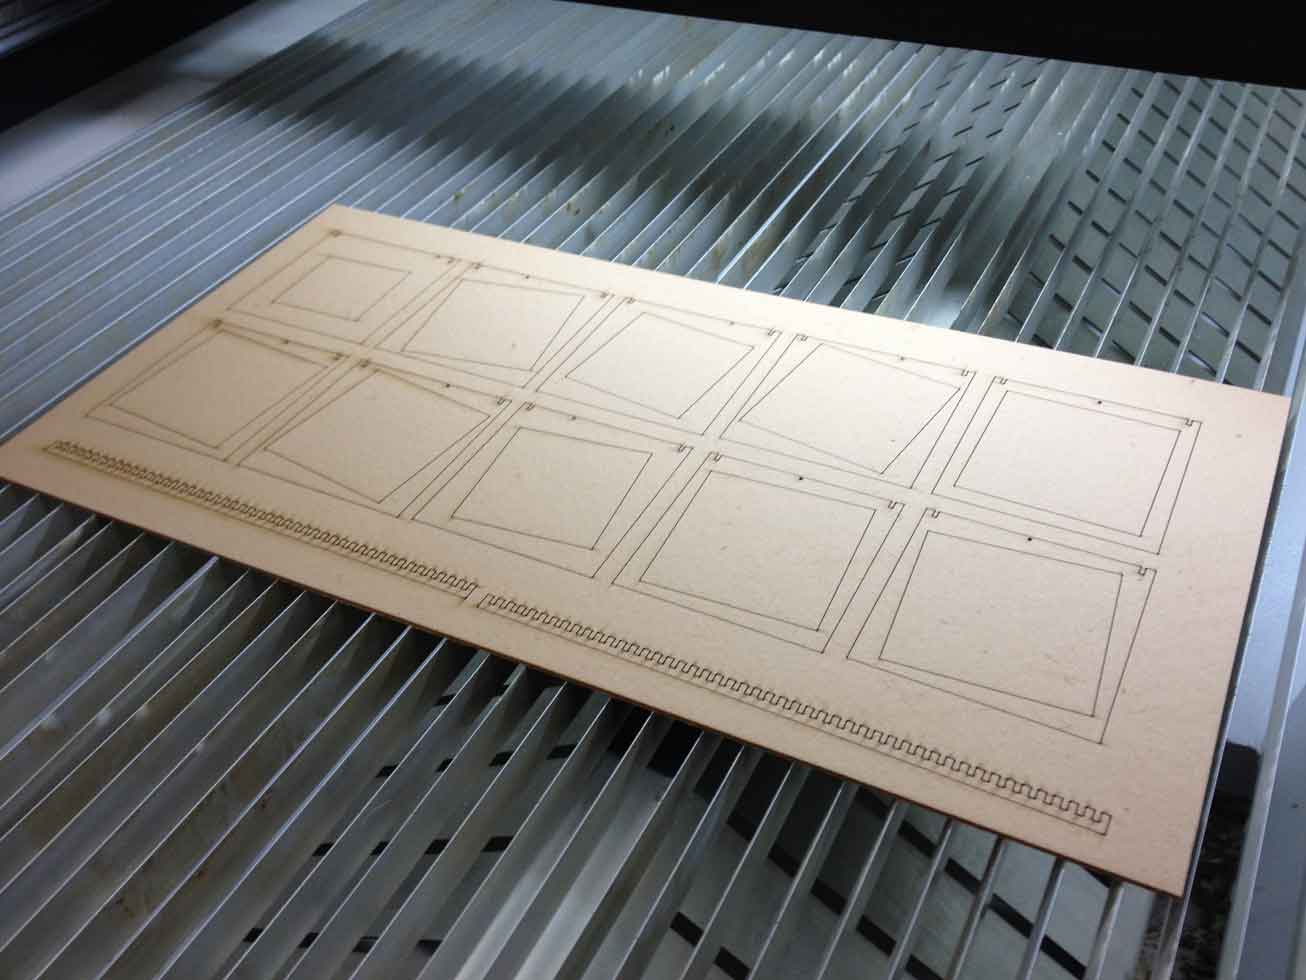
- Selected the curves of the objects and exported the file to a .DXF file with is recognized by the laser cutter software
- Determine speed and power of the laser cutter (120W) according to the material I wanted to use, in this case it was a high density cardboard. For the power I used 35 and for speed 45
- Assemble the press-fit construction kit and document the process
Using Grasshopper:
I intend to use parametric design for the next assignments. I know that doing so, I could achieve even better results and would speed up all the construction process. The application I´m more interested at the moment is the Grasshopper plugin for Rhino 3D, this generative application could automate some steps of the development of my project like adapting changes in the size of the set and fit as a whole.
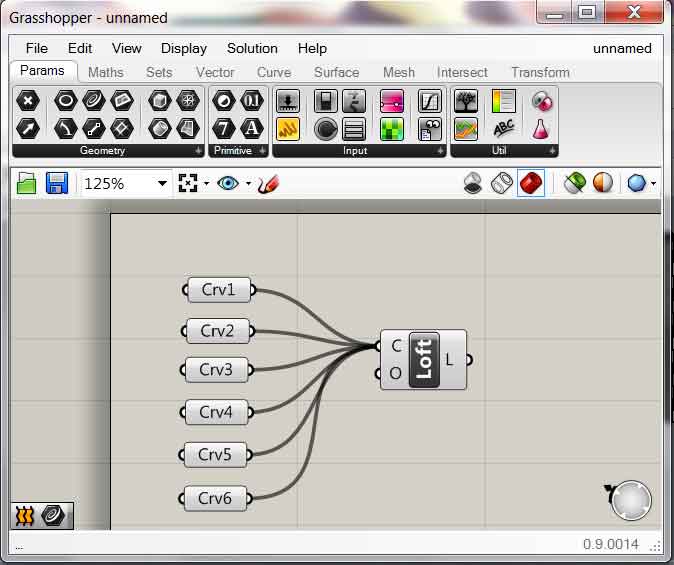
For the Motion Tunnel I tried using Grasshopper to create the mesh between the curves that would originate the moving space inside my object. The steps were the following:
- Open Grasshopper
- Drag curve parameters to the canvas (those curve parameters should be corresponding to my curves previously created in Rhino)
- Select the Loft component from the Surface Tab and drag it to the canvas
- Assign the curves of my object to each curve parameter (Set one curve)
- Connect the curve parameters to the Loft connector (Section Curves) and bake it
The assembling:
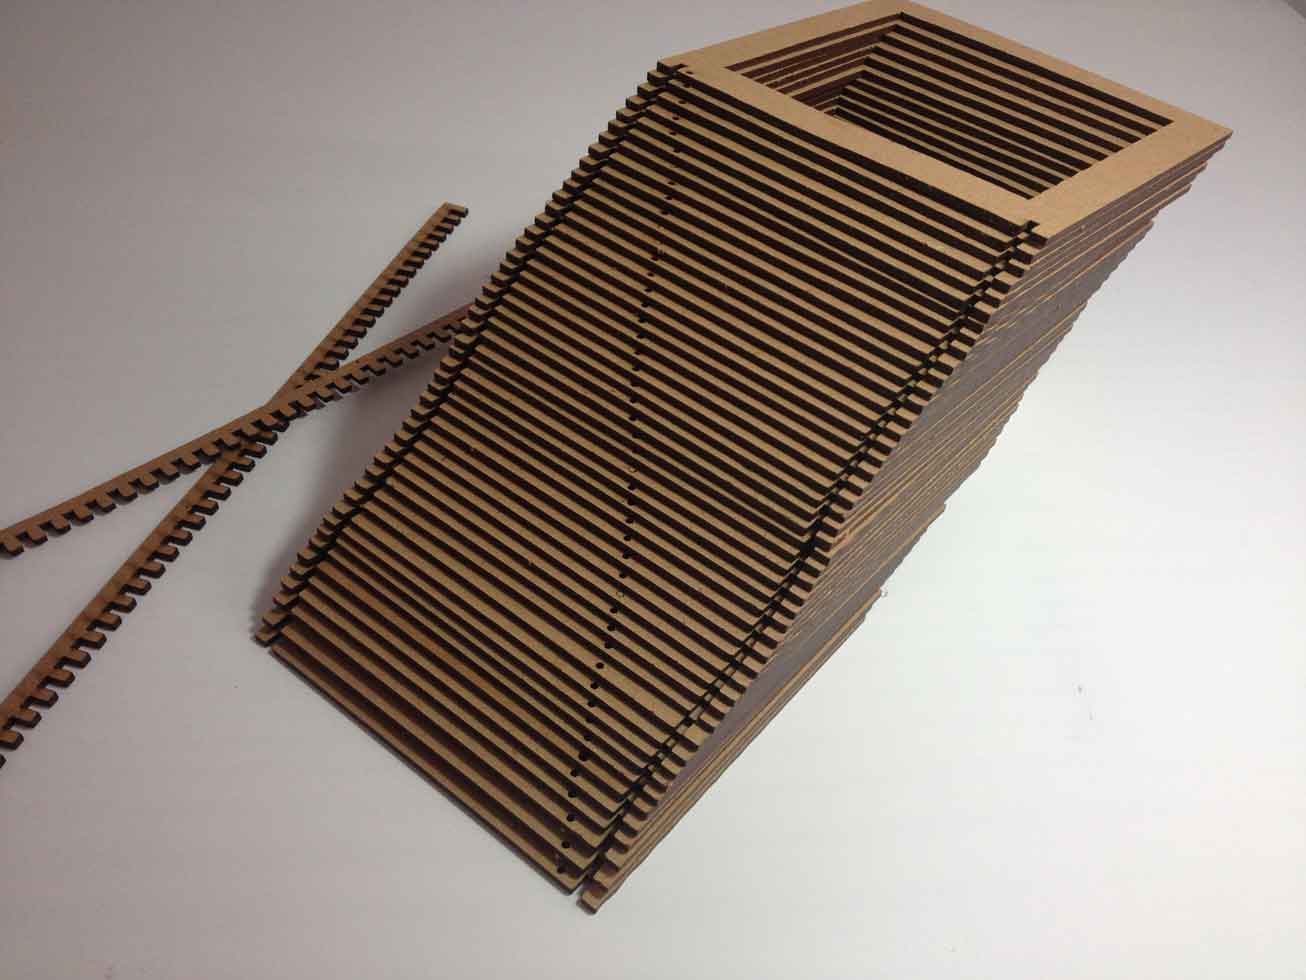
After assembling the kit I noticed that only two lines to hold the layers were not sufficient, because they would not hold the layers straight at 90°. To resolve this problem I would add two more lines of structure symmetrically positioned at the top of the set.
Other thing that took me a lot of time during assembling was finding the right face of each square. I thought that only creating circles alongside the bottom of each square would help me during arranging the layers to their correct position, but I totally forgot not to cut these circles out of the surface. This caused a lot of problems because I didn´t know which of the faces were the correct ones. The simplest solution would be to just engrave those circles on each surface, so simple and so helpful!
Some references that inspired this assignment:
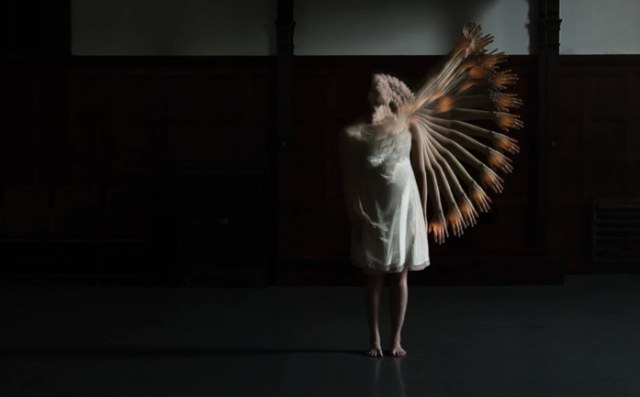
Choros Film is a short film by Michael Langan and Terah Maher that captures the movement of dance and body as a visual experience. Similar to this idea, the Motion Tunnel tries to register the movement in its interior so we could notice each step of a moving square.
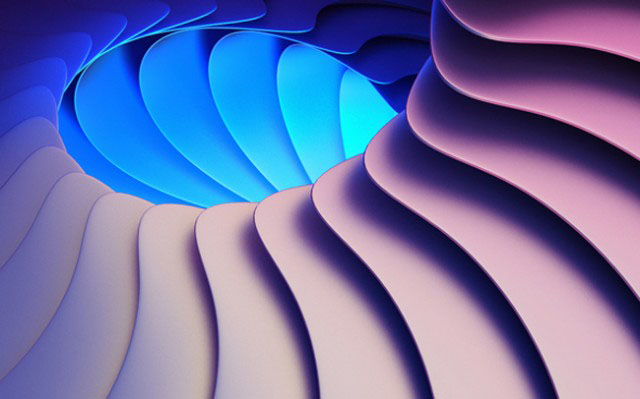
Revolved Forms is a series of 3D shapes, by Črtomir Just, that were cloned and illuminated in a unique way. The light and motion here inspired me to think on a new proposal for the Motion Tunnel, adding light to the artwork through each layer.
Katachi is a stop-motion video that uses more than 2000 pieces of plastic to compose it. The motion here is captured layer by layer and translated into something physical.
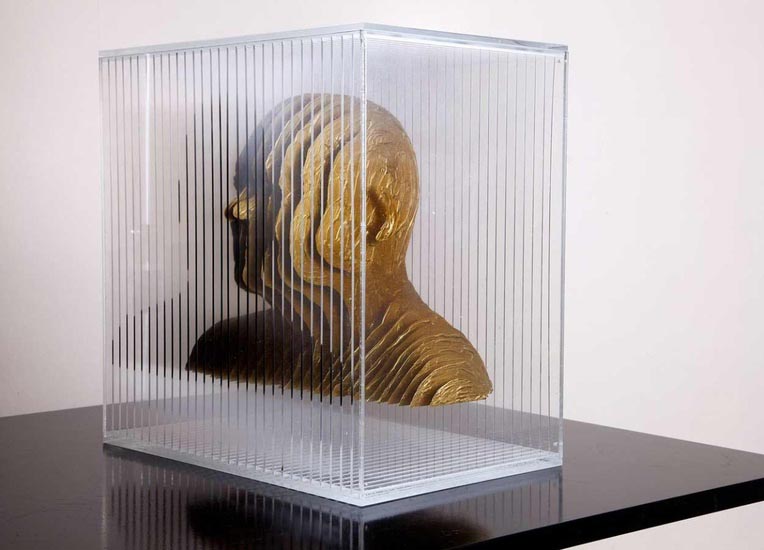
Where are you? is an artwork that deals with the understanding of the physical world. It deals with the layers of acrylic in an association with the layers of energy fields creating the illusion of solidity. The layer division and the possibility to see the piece in different angles called my attention.
Softwares used:
- Rhino3D
- RD Works V8
- Adobe Illustrator
- Roland Versa Works
Machines used:
- Laser cutter
- Vinylcutter
Files: