Week 16
Interface and Application Programming
Final Project
ASSIGNMENT
write an application that interfaces with an input &/or output device that you made,
comparing as many tool options as possible
For Interface I decided to learn about processing as its an easy yet powerful GUI based development environment.
Processing is based on Java as its core and it is port over it.
Following are the steps i followed.
- First Installed processing by visiting http://processing.org/download/, and downloaded the “windows” version.
- Extracted it into a folder
The interface looks like this.


The interface looks like that of arduino
- On pressing the play button the Code executes and its compiled at same time.
- there no separate compile button like that in arduino IDE
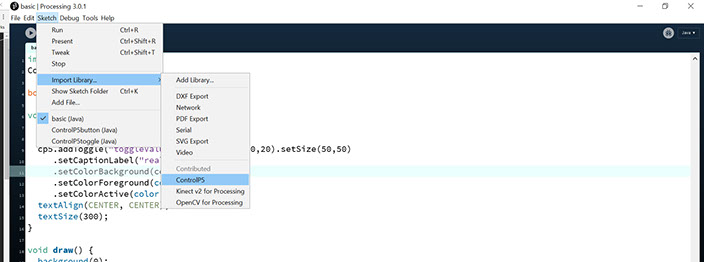
Next I downloaded the ControlP5 library form following link
The library written by Andreas Schlegel for Processing
- What he has done is Used a the JAVA framework to create GUI elements with easy commands
- This Saves us from writing complex code to Create the GUI elements
- it also gives event callback functions
- To Install The library Go to http://www.sojamo.de/libraries/controlP5/
- Unzip and put the extracted controlP5 folder into the libraries folder of your processing sketches.
- Start processing, go to file->preferences and find the sketchpad folder for processing. In my case, it’s C:\Users\VirajGandhi\Documents\Processing, and add a folder called “libraries” (if it’s already there, you don’t need to).
- copy the controlP5 folder into the library folder
- And now Restart the Processing
The Library Will appear in Processing As below
To get Started With Coding I first Referred The two example given along with the ControlP5 library
also to learn processing This link is Useful https://processing.org/examples/
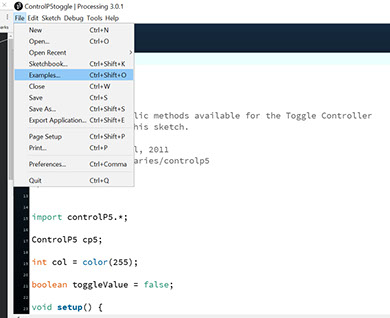
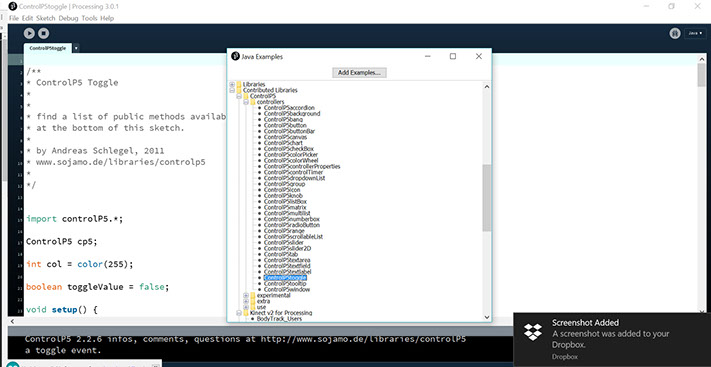
Go To Example and Scroll down to the Controllers
Each of this is a UI element which we can add
I started to Refer as how this Example was made
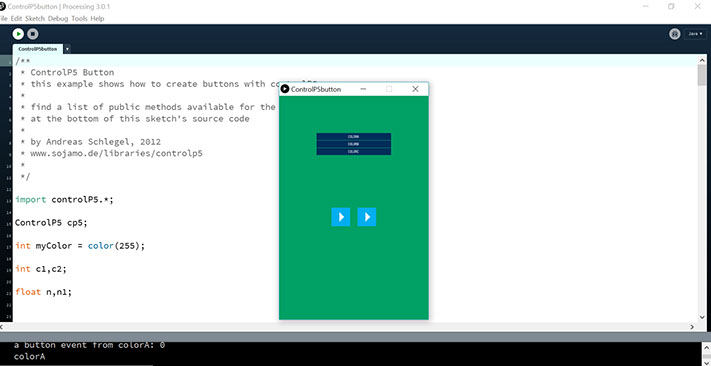
Next Is the toggle example which I ends up using as base of my code.

Next Is the toggle example which I ends up using as base of my code.
- What this library does is that it gives us a Callback function that will hold our code
- Also it gives us the current state of the button.
- The overall look and feel of the button can be changed as we desire.
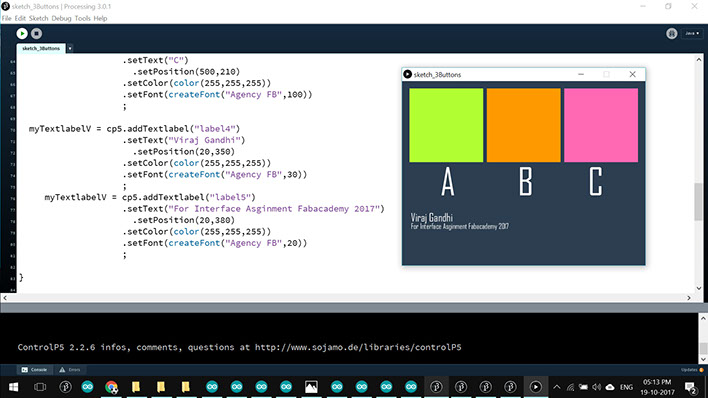
Below Is the Code I have Written Referring to all above mentioned examples
/*
By Viraj Gandhi
Fabacademy 2017
*/
import controlP5.*;
import processing.serial.*;
ControlP5 cp5; // we need a object of class controlP5
Textlabel myTextlabelA; // Defining THe lable of type Textlabel
Textlabel myTextlabelB;
Textlabel myTextlabelC;
Textlabel myTextlabelV;
Serial myPort; // Create object from Serial class
void setup() {
//***** Enebling serial to send data to arduino
String portName = Serial.list()[0]; //change the 0 to a 1 or 2 etc. to match your port
myPort = new Serial(this, portName, 9600);
size(660,430);
noStroke();
cp5 = new ControlP5(this);
/*
Below we declare Toggle button and we add it.
The positon elemnt sets it X Y positon
The Background Colour is the Base colour or the Delault colour of the Button
*/
cp5.addToggle("ServoA").setPosition(20,20).setSize(200,200)
.setCaptionLabel("") // kept empty because it will add text below our button in very tiny font which i didnt wated
.setColorBackground(color(177,255,50)) //The Background Colour is the Base colour or the Delault colour of the Button
.setColorActive(color(177,255,50)) // Triggers when we hover over it
.setColorForeground(color(211,211,211)); // this colour activates when we press it
cp5.addToggle("ServoB").setPosition(230,20).setSize(200,200)
.setCaptionLabel("")
.setColorBackground(color(255, 153, 0))
.setColorActive(color(255, 153, 0))
.setColorForeground(color(211,211,211));
cp5.addToggle("ServoC").setPosition(440,20).setSize(200,200)
.setCaptionLabel("")
.setColorBackground(color(255,105,180))
.setColorActive(color(255,105,180))
.setColorForeground(color(211,211,211));
myTextlabelA = cp5.addTextlabel("label")
.setText("A")
.setPosition(100,210)
.setColor(color(255,255,255))
.setFont(createFont("Agency FB",100))
;
myTextlabelB = cp5.addTextlabel("label2")
.setText("B")
.setPosition(300,210)
.setColor(color(255,255,255))
.setFont(createFont("Agency FB",100))
;
myTextlabelC = cp5.addTextlabel("label3")
.setText("C")
.setPosition(500,210)
.setColor(color(255,255,255))
.setFont(createFont("Agency FB",100))
;
myTextlabelV = cp5.addTextlabel("label4")
.setText("Viraj Gandhi")
.setPosition(20,330)
.setColor(color(255,255,255))
.setFont(createFont("Agency FB",30))
;
myTextlabelV = cp5.addTextlabel("label5")
.setText("Interface Assginment Fabacademy 2017 "+"\n"+ "Servo Controller Via Serial Communication")
.setPosition(20,360)
.setColor(color(255,255,255))
.setFont(createFont("Agency FB",20))
;
}
void draw() {
background(color(44, 62, 80)); //rgb()
}
// THis function is for debuging
public void controlEvent(ControlEvent theEvent) {
println(theEvent.getController().getName());
}
public void ServoA(int theValue) {
println("Button A Pressed: "+theValue);
myPort.write("a"+theValue+"\n");
myTextlabelA.setText("A"+theValue);
}
public void ServoB(int theValue) {
println("Button B Pressed: "+theValue);
myPort.write("b"+theValue+"\n");
myTextlabelB.setText("B"+theValue);
}
public void ServoC(int theValue) {
println("Button C Pressed: "+theValue);
myPort.write("c"+theValue+"\n");
myTextlabelC.setText("C"+theValue);
}
GET FILE
Download The Processing Code
Understanding Code:
- First We Have added 3 Buttons
- Then we Have The call back function of These buttons
- they way it works when we press the button this function is executed each time
- It also changes the value of the variable : theValue
- When It changes the Value We use the value to display it on The GUI using the Terminal
- and we also send the command to Serial Port
- So the Command such as a1 is send if the button is pressed once
- as it is the toggle button the value toggles between 1 and 0
- The text label is set updated each time the button is pressed
Below are Few Images of how it Came out.
Understanding The CODE


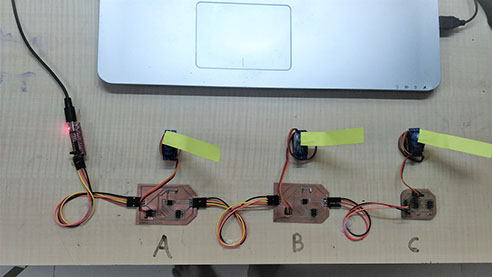
- I connected The Network of Boards From Networking Week
- Detail Explanation of the code inside the Board is given on the Week15 Page
- I took to ready programmed boards and Connected to my PC Using FTDI module as follows.
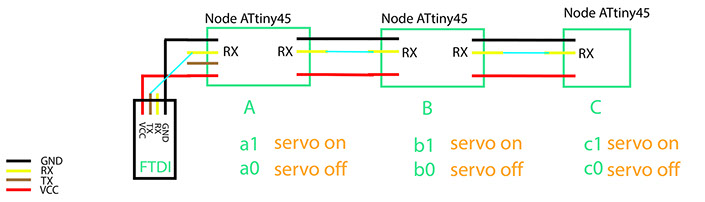
As per this above image marked green are the commands
when we press first button the command a1 is transmitted turning the servo on at 90 degree
When we press the same first button again a0 is transmitted turning the servo off

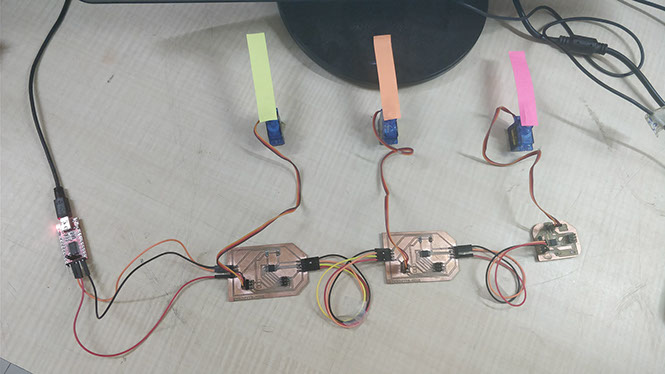
Attached above are the connection of the boards with PC via FTDI
Working Video of The Interface
Processing Interface Designing Serial Communication With ATtiny45 Network from Viraj Gandhi on Vimeo.
We can see each button is colored with its respective marker.
Below is the Screen Shot Taken while making the Video


The interface !!
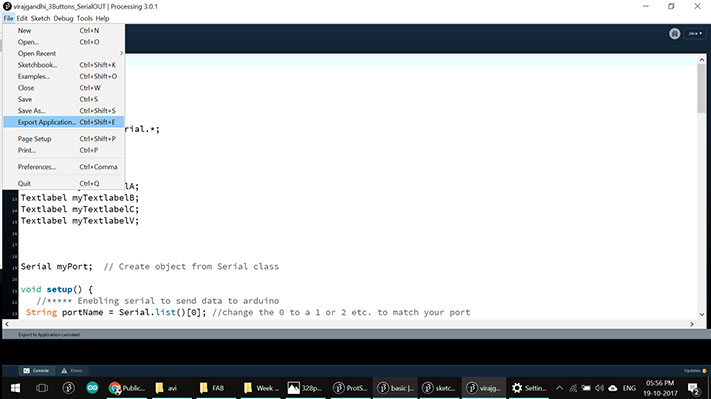
Once the Code was Working I exported the Application as below
To export go to Files >> Export Application
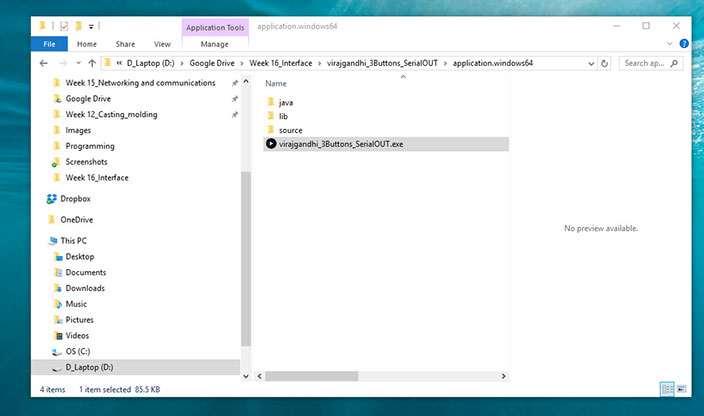
A folder will popup showing all the files exported along with java and other dependences.
After we export we can install this application in another pc by just copy and pasting the folder
This is how the the application looks in full screen.

LEARNINGS OF THE ASSIGNMENT
- Interfacing Processing via Serial Communication.
- Working With ControlP5 Library