Week 1: Principles and Practices & Project management
Tasks for the week:
- To create a website
- To upload it on the Class Archive using GIT Hub
- To conceptualize the Final Project
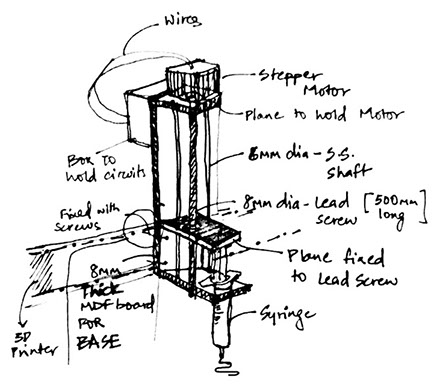
EX-TERRA-DUR is an extruder that extrudes Terracotta clay. Terracotta is locally available in my country 'India'. As a material, terracotta has been used by craftspeople all over the world to fabricate cultural products. Also, it has different consistency and composition than ceramic clay and is sustainable too.
My idea is to make an extruder using simple components and 'Fab-able' , so that the local craftspeople here can make it and use and this could make a "connection between digital fabrication and culture" by inviting craftspeople to use FabLab to produce cultural products.
Final Project:
Task:01
Creating a website of my own
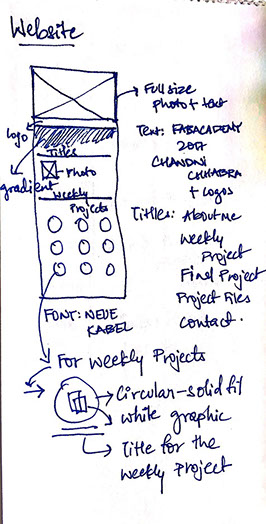
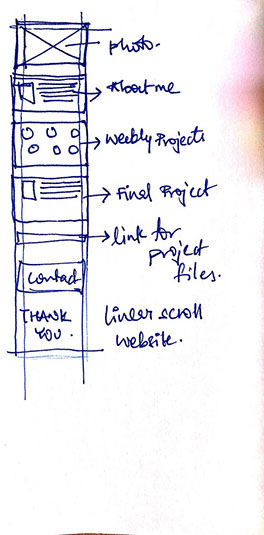
Before creating the website on a software, my first step was to sketch out my idea for the website to understand what kind of graphic language do I want to customize my website with.
Step:01
Downloading Adobe Muse.
" What is Adobe Muse?
- Adobe Muse is a website builder that allows designers to create fixed, fluid, and adaptive websites without having to write any code. Muse generates static websites giving users the freedom to host their sites with any hosting provider. Users can add more advanced functionality such as blogging and eCommerce to their website with plugins created by third-party developers. This application is available through Adobe's Creative Cloud subscription.
- Adobe Muse themes are created inside Adobe Muse and shared as a .muse file. Since Adobe Muse generates static HTML files, the files can be exported to the browser for testing without needing to connect to a server or webhost. Users can also temporarily host their website in Business Catalyst for free as part of the Creative Cloud subscription. Existing content can not be imported into a theme."-Source: Wikipedia
Adobe Muse can be downloaded from this link.
Step:02
Working in Muse to develop the website
Open Adobe Muse
The above window opened up to start a new website.
Next step was to fill in the 'Page width'. I kept it as 1964 pixels because I wanted a full screen view for my website.
Step:03
Creating pages for the website
The interface of Adobe Muse is similar to that of Adobe Photoshop and Adobe Indesign.
As seen in the above window, two slides are seen when we fill up the required page width to start making the pages.
"A- master or the 'Master' page is useful when same set of tabs, logos,images or text is required on more than one pages of the website. Any image or text or logo that is placed on the master page gets repeated in all the pages on which the master is applied. It basically acts as a template to the page."
Step:04
Adding Data to the pages of the website
This is how the blank page looks when we open the page for the website. Now the next step is to personalise it by adding data such as text, images and any other file that is required.
It is simple to add data to the pages. Just as in Adobe Photoshop and Adobe Indesign, image files can be added by dragging the file into the active page on 'Adobe Muse'.
Step:05
Inserting Pages to the Website
More pages can be added to the website by simply clicking the "+" button shown at the three sides of the page as shown in the above picture.
Step:06
Adding links to the pages of the Website
Links can be added to any text box created on the page by selecting the text box and then changing the link destination on the above right corner as shown in the image above.
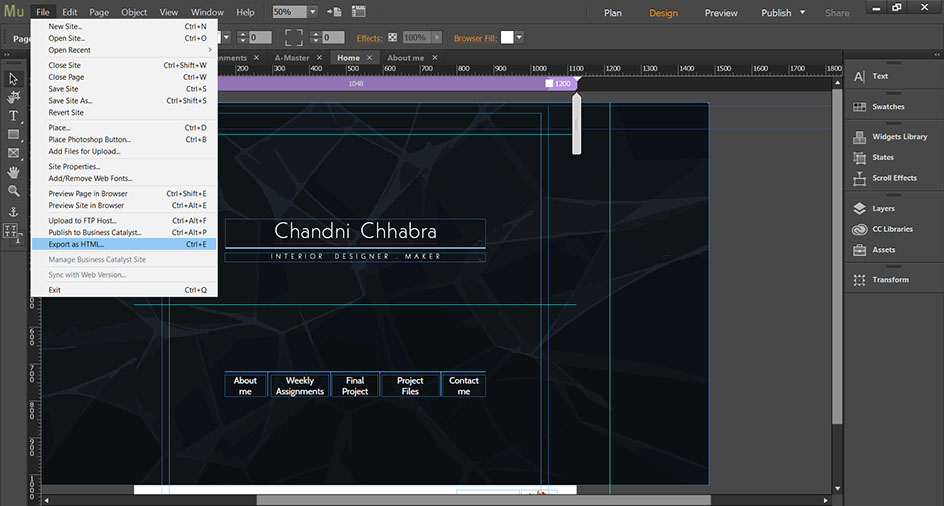
Step:07
Exporting the website in "HTML" format.
By using the above steps I created my website and then exported it in the HTML format to upload it on the class archive through GIT Hub.
Task:02
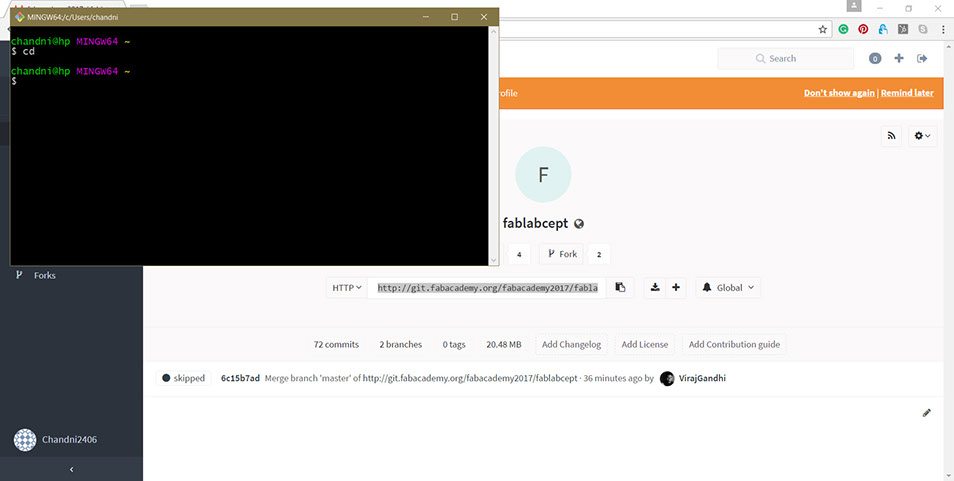
Uploading the website to Class Archive through GIT Hub
After creating the website, the next step is to upload it on the class archive using GIT Hub.
GIT Hub
"GitHub is a web-based Git or version control repository and Internet hosting service. It offers all of the
distributed version control and source code management (SCM) functionality of Git as well as adding its own
features. It provides access control and several collaboration features such as bug tracking, feature requests,
task management, and wikis for every project."
Link
GIT can be installed from the
To start working with GIT, I made notes from the introduction and process explained by my instructor at
FabLab CEPT (Rudrapalsinh Solanki). I made notes of the commands that I need to use in a sequence.
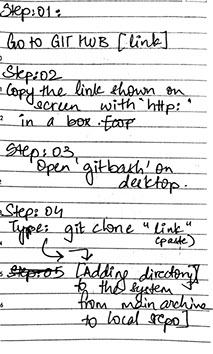
Step:01
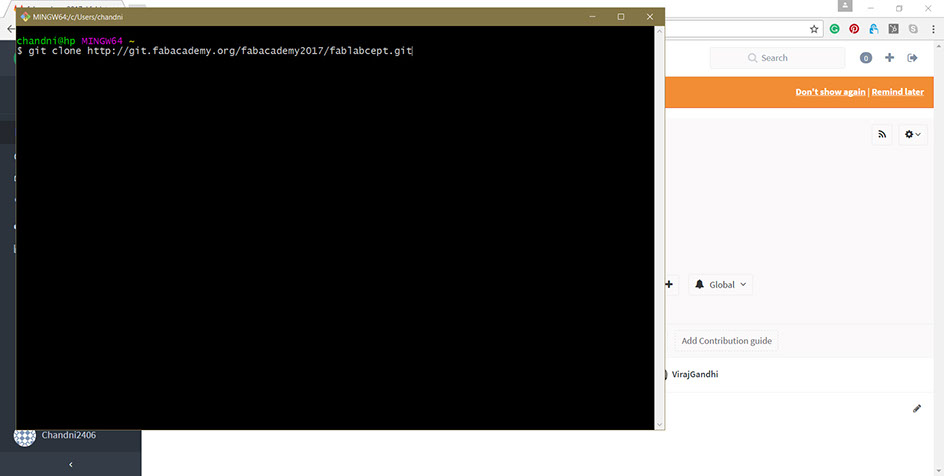
Cloning GIT Repository
After registering into the GIT Lab, the above shown tab opened. Next, I copied the link and then opened GIT bash on the desktop.
Next step was to paste the copied link along with the following command in GIT Bash.
Command used:
git clone http://git.fabacademy.org/fabacademy2017/fablabcept.git
Step:02
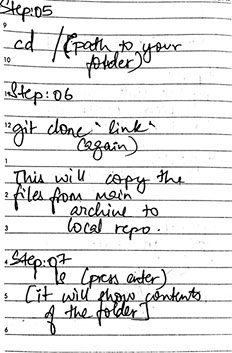
Defining the Local Repository
Next command is "cd" (change directory). Now the folder that would serve as the local repository needs to be dragged into GIT Bash.
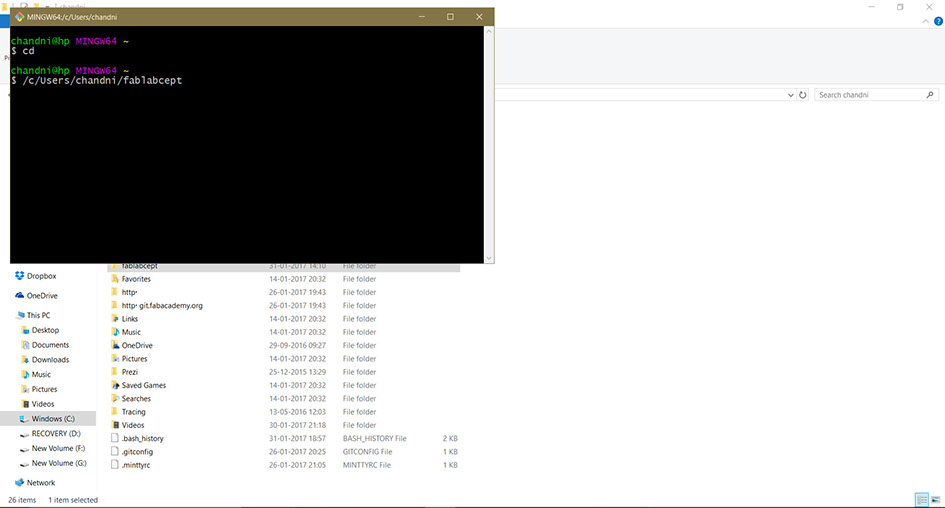
As shown above, I copied the folder that I wanted to become my local repository into the GIT bash.
Step:03
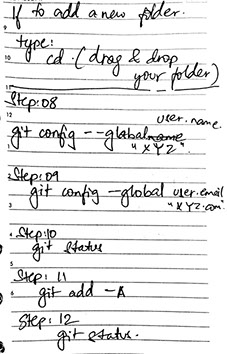
Configuring GIT
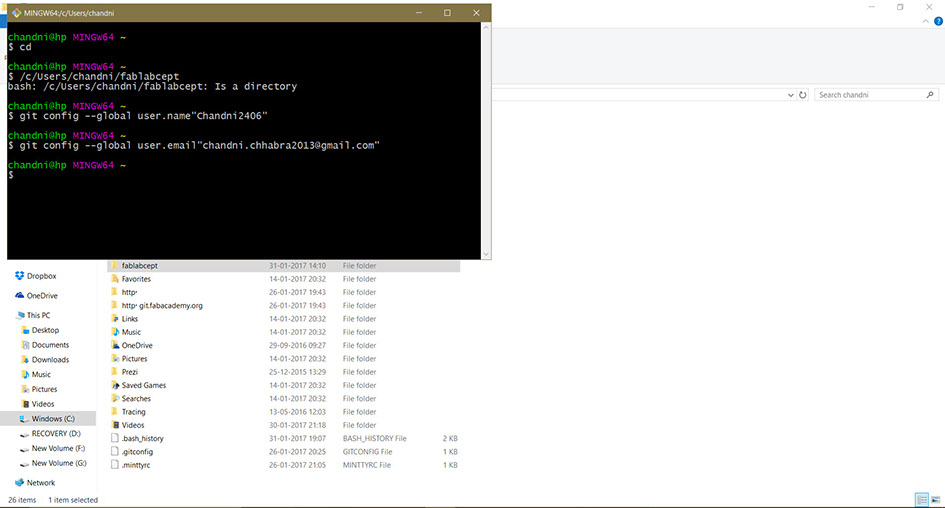
To configure my account I used the following commands:
git config --global user.name "username"
git config --global user.email "email id"
Step:04
Adding data from Local Repository to Global Repository
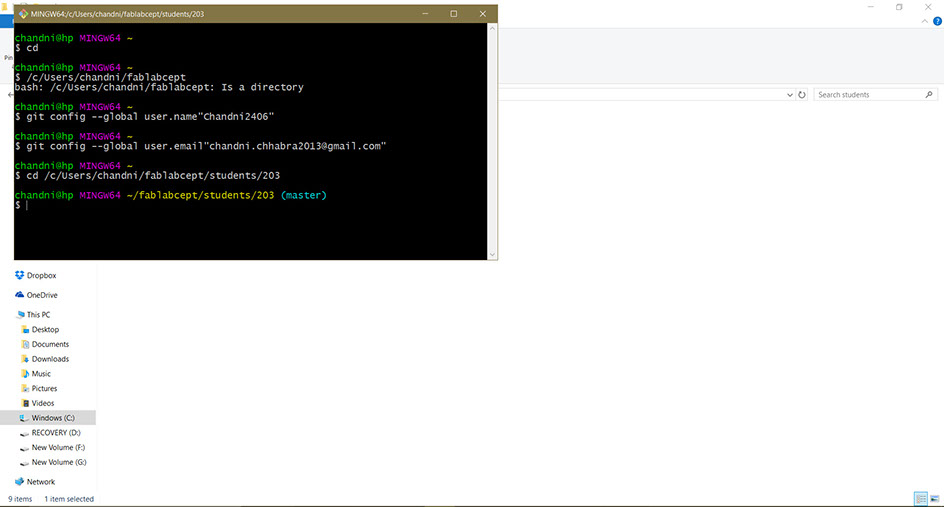
Next, I added my local repository to global repository by using the following commands:
cd /c/Users/chandni/fablabcept/students/203
Step:05
Adding data to the Global Repository.
For this I used the following commands in the stated sequence:
ls
git add -A
git status
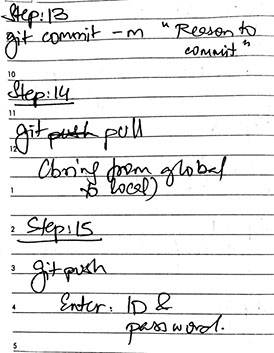
git commit -m "Website"
git pull
git push
Here ls means "list". This command lists down all the present files in the folder.
Command git status then states the files that are present in the local repository but have not yet been uploaded to the global repository.
To upload these files command git add -A is used.
Next to commit these new changes the command git command -m "website" is used.
Now all files are first pulled by the command git pull and then all files are pushed using command git push to update all the new changes committed to the Global Repository.
This week's files can be acessed here.
.jpg?crc=3992475538)
.jpg?crc=3839918054)
.jpg?crc=313467070)
.jpg?crc=3932815524)
.jpg?crc=4229992877)
.jpg?crc=3809591182)
.jpg?crc=414789313)

EX-TERRA-DUR by Chandni Chhabra is licensed under a Creative Commons Attribution-ShareAlike 4.0 International License.