Interface and Application Programmings
This week we should create a project, where a microcontroller is communicating in some kind of way with another device that has a UI that is able to control the microcontroller.
Problems with the bluetooth connection
After some investigations the an iOS App was ready to use but I had problems with the serial bluetooth breakout chip. After some research with it I hooked the chip up totally and already received a AT command once. After this communication the chip was not responding anymore. Thats why I investigate in a new idea and will now create a Chrome app that is communicating over a serial connection to the ATMega.
Chrome App
First you habe to enable Chrome to run Chrome Apps. Because this is at development state at the moment, this is a funcionality that has to be enable one time.
To enable it you have to navigate your Chrome browser to chrome://flags/ and enable Chrome apps.

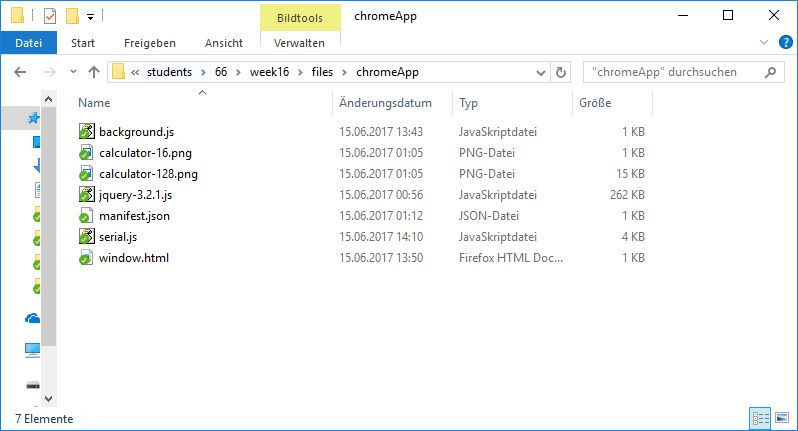
Then you have to create a folder with a file structure as the image below.
Below is the main code serial.js from the Chrome app javascript. This code manage the serial communication, open the channel for communication and handle the callbacks for event handling.
// serial.js file
var connectionId;
const serial = chrome.serial;
/* Interprets an ArrayBuffer as UTF-8 encoded string data. */
var ab2str = function(buf) {
var bufView = new Uint8Array(buf);
var encodedString = String.fromCharCode.apply(null, bufView);
return decodeURIComponent(escape(encodedString));
};
/* Converts a string to UTF-8 encoding in a Uint8Array; returns the array buffer. */
var str2ab = function(str) {
var encodedString = unescape(encodeURIComponent(str));
var bytes = new Uint8Array(encodedString.length);
for (var i = 0; i < encodedString.length; ++i) {
bytes[i] = encodedString.charCodeAt(i);
}
return bytes.buffer;
};
var SerialConnection = function() {
this.connectionId = -1;
this.lineBuffer = "";
this.boundOnReceive = this.onReceive.bind(this);
this.boundOnReceiveError = this.onReceiveError.bind(this);
this.onConnect = new chrome.Event();
this.onReadLine = new chrome.Event();
this.onError = new chrome.Event();
};
SerialConnection.prototype.onConnectComplete = function(connectionInfo) {
if (!connectionInfo) {
log("Connection failed.");
return;
}
this.connectionId = connectionInfo.connectionId;
chrome.serial.onReceive.addListener(this.boundOnReceive);
chrome.serial.onReceiveError.addListener(this.boundOnReceiveError);
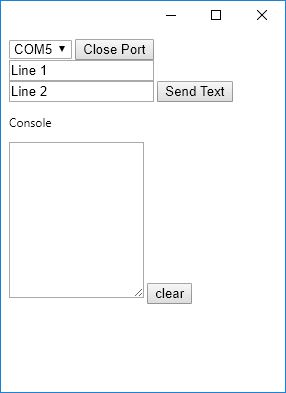
$("button#open").html("Close Port");
$("#cmdLine").show();
console.log('Connection opened with id: ' + this.connectionId + ', Bitrate: ' + connectionInfo.bitrate);
this.onConnect.dispatch();
};
SerialConnection.prototype.onReceive = function(receiveInfo) {
if (receiveInfo.connectionId !== this.connectionId) {
return;
}
this.lineBuffer += ab2str(receiveInfo.data);
var index;
while ((index = this.lineBuffer.indexOf('\n')) >= 0) {
var line = this.lineBuffer.substr(0, index + 1);
this.onReadLine.dispatch(line);
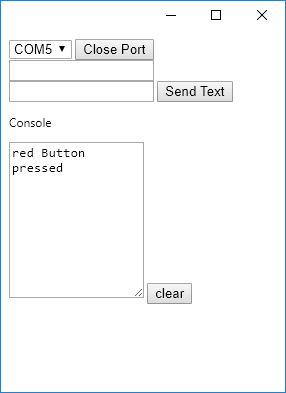
$("#console").val($("#console").val() + line);
this.lineBuffer = this.lineBuffer.substr(index + 1);
}
};
SerialConnection.prototype.onReceiveError = function(errorInfo) {
if (errorInfo.connectionId === this.connectionId) {
this.onError.dispatch(errorInfo.error);
}
};
SerialConnection.prototype.connect = function(path, baud) {
serial.connect(path, {bitrate: baud}, this.onConnectComplete.bind(this))
};
SerialConnection.prototype.send = function(msg) {
if (this.connectionId < 0) {
throw 'Invalid connection';
}
serial.send(this.connectionId, str2ab(msg), function() {});
};
SerialConnection.prototype.disconnect = function() {
if (this.connectionId < 0) {
throw 'Invalid connection';
}
serial.disconnect(this.connectionId, function() {
console.log('Connection with id: ' + this.connectionId + ' closed');
});
};
var connection = new SerialConnection();
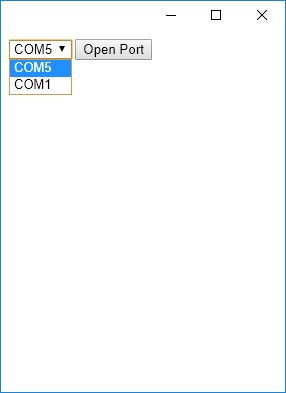
$(document).ready(function() {
serial.getDevices(function(devices) {
for (var i = 0; i < devices.length; i++) {
$('select#portList').append('<option value="' + devices[i].path + '">' + devices[i].path + '</option>');
}
});
// ui hook
$('button#open').click(function() {
var clicks = $(this).data('clicks');
if (!clicks) {
var port = $('select#portList').val();
connection.connect(port, 9600);
} else {
connection.disconnect();
$("button#open").html("Open Port");
$("#cmdLine").hide();
}
$(this).data("clicks", !clicks);
});
$('button#send').click(function() {
var line1 = ($("#Textfield").val() + " ").slice(0,16);
connection.send(line1);
connection.send(($("#Textfield2").val() + " ").slice(0,16));
});
$('button#clear').click(function() {
$("#console").val("");
});
});
The manifest.jsonfile. This file is file that is necessary and consist of the meta data of the Chrome app. It's mostly self explained. What is important here is to set the permissions to allow serial. Without this permission the app cannot connect to the serial interface.
{
  "name": "RemoteDisplay",
  "description": "My first Chrome App.",
  "version": "0.1",
  "manifest_version": 2,
  "app": {
    "background": {
      "scripts": ["background.js"]
    }
  },
  "permissions": [
    "serial"
  ],
  "icons": { "16": "calculator-16.png", "128": "calculator-128.png" }
}
The rest of the app is more likely a simple html page that comes with some buttons and some input fields.
AVR Uart communication
placeholder
 /*
 * UartDisplay.c
 *
 * Created: 13.06.2017 14:36:55
 * Author : Florian Paproth
 */

#include "main.h"

int mode;       // 0 = Timer ; 1 = Stopwatch
uchar f_timer_tick;

ISR(TIMER0_OVF_vect) // deprecated: SIGNAL(SIG_OVERFLOW0)
{
    f_timer_tick = 1;
}

void init(void){

    USART_init();

    TCCR0B |= ((1 << CS02) | (0 << CS00));      //divide by 256 * 256
    TIMSK0 = 1<<TOIE0;                          //enable timer interrupt

    timerinit();
    sei();

    lcdInit();  // Initialize the LCD
}

void whiteButtonPressed(){
    char String[]="White Button pressed";    // White button string
    USART_putstring(String);                // Pass the string to the USART_putstring function and sends it over the serial

    lcd_clear();
    lcd_home();
    lcd_string( " white");
    lcd_setcursor( 0, 2 );
    _delay_ms(2000);
}

void redButtonPressed(){
    char String[]="red Button pressed";    // Red button string
    USART_putstring(String);    //Pass the string to the USART_putstring function and sends it over the serial

    lcd_clear();
    lcd_home();
    lcd_string( " red" );
    lcd_setcursor( 0, 2 );
    _delay_ms(2000);
}

int main(void){
    // Initialize the I/O
    init();

    while(1){           // main loop
        if( f_timer_tick ){
            f_timer_tick = 0;
            timertick();
        }

        // Read from RX pin
        if ( (UCSR0A & (1<<RXC0)) ){
            // Character was received
            char Line[17];      // Strings for each line of the display
            char Line2[17];

            USART_getstring( Line, sizeof( Line ) );    // Read the first line
            USART_getstring( Line2, sizeof( Line ) );

            // Write read data to the display
            lcd_clear();
            lcd_home();
            lcd_string( Line );
            lcd_setcursor( 0, 2 );
            lcd_string( Line2 );
        }

        if (!WHITE_BUTTON_PRESSED){
            whiteButtonPressed();
        }

        if (!RED_BUTTON_PRESSED){
            redButtonPressed();
        }

    }
    return 0;
}
placeholder

Feel free to use my design for your own project.
Download section rebuild the board
| AVR Studio Project (Display / two buttons / Uart / ATmega328) | download |
| Chrome Uart console (Chrome App archive) | download |