
Feb 01: computer-aided design
This week we learned a lot about 2D/3D tools. We were introduced to the big world of 3D fabrication. I was in a lot of tutorials for solidworks, rhino3d combined with grasshopper3d, blender and the world of antimony.
I already used cinema4d but it was already a couple of years ago, so lets start from scratch. My idea is that i use most of the programms and try to make in every software the same model so i have a good starting point and know which software is the one or two i am comfortable with.My biggest probelm was that i want to run windows on my mac via an external ssd which gave me a lot of headaches because i run on macosx sierra which is kind of new and hard to hack. I will write a tutorial here to save other students this headaches.
2D tools like Illustrator, Photoshop, etc...
I work in advertising as an Art Director and working since at least ten years in the usual 2D tools like Illustrator, Photoshop,etc.. If you want to see my magic I do in this softwares visit my Homepage to have a look at my designs, campaigns and advertising.
Blender
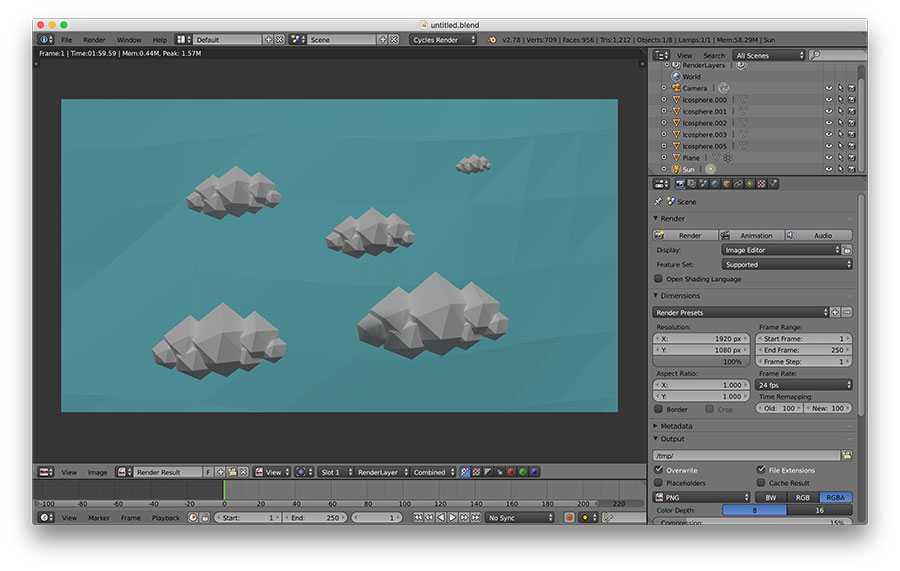
I started with blender because it have that kind of arty touch too it. I watched a tutorial about lowpoly cloud on youtube Blender Tutorial: Low poly Clouds which was quit simple and i shortly after felt comfortable. Biggest problem was to get the lights and camera right. I found out that when you use a "plane" on top of the stuff you want to light up, its easier too get nice lightnings in it. About the camera settings i started to fiddle a little with the different kind of lenses and to focus only on one cloud. At the end i really liked the programm and i will definetly work more with it, also because it has a really nice kind of rendersystem integrated.


Rhinoceros
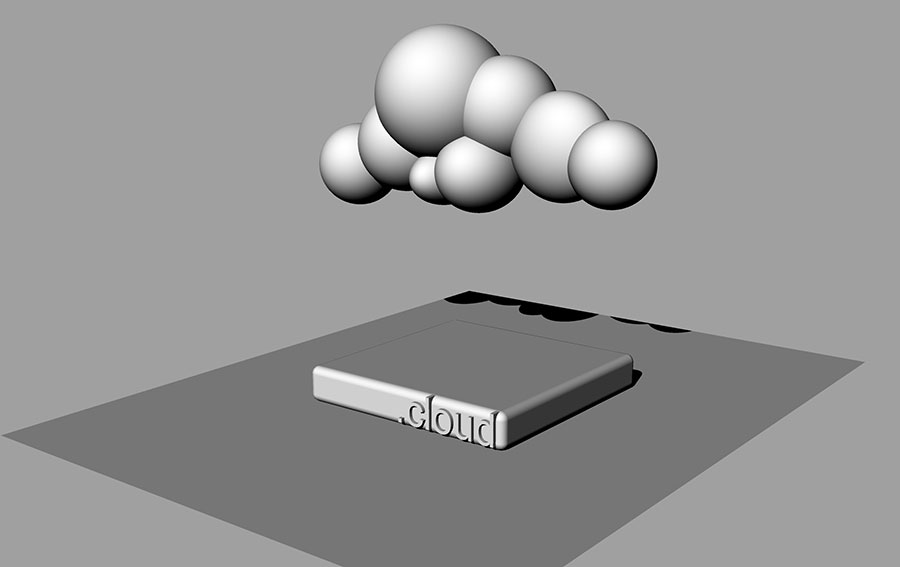
Next software i tried was rhino. At the start it was really difficult to find all the commands, but i am getting used too it. It also doesnt help that i had my keyboard in windos select as a mac keyboard. After that changes it started too get much easier to use. I started to build a small box and used the "fillet" command to make the corners round. after that i put a surface under it and started to make my cloud. At the beginning very simple with circles. After that i found out that i need to "group" my circles and make a "boolean union" command to get it ready to start the lowpoly convertion.
I did it with "from nurbs object" and after that could make the "reduce mesh" command until i finally was happy with it. After that i worked on some surfaces and materials and made a sun and a spotlight for lightning out my render.
For rendering software i found neon rendering which is a free, fully raytraced viewport plug-in for Rhino 5.
After that i worked a little bit with the different surfaces and could easily export my jpg too my folder.


Cinema 4D
I started with Cinema4D ten years ago and used it last time two years ago. We had a tutorial in the FabLab Barcelona where i was getting back to use it. I always liked it because for me it is more a 3D Photoshop then a 3D software. I started to make rectangles, which i then evolved in to a "null object" and then put it in a "subdivision surface" to get the lowpoly look. Afterwars i played with some lightnings, floor and background and rendered it out.


Antimony
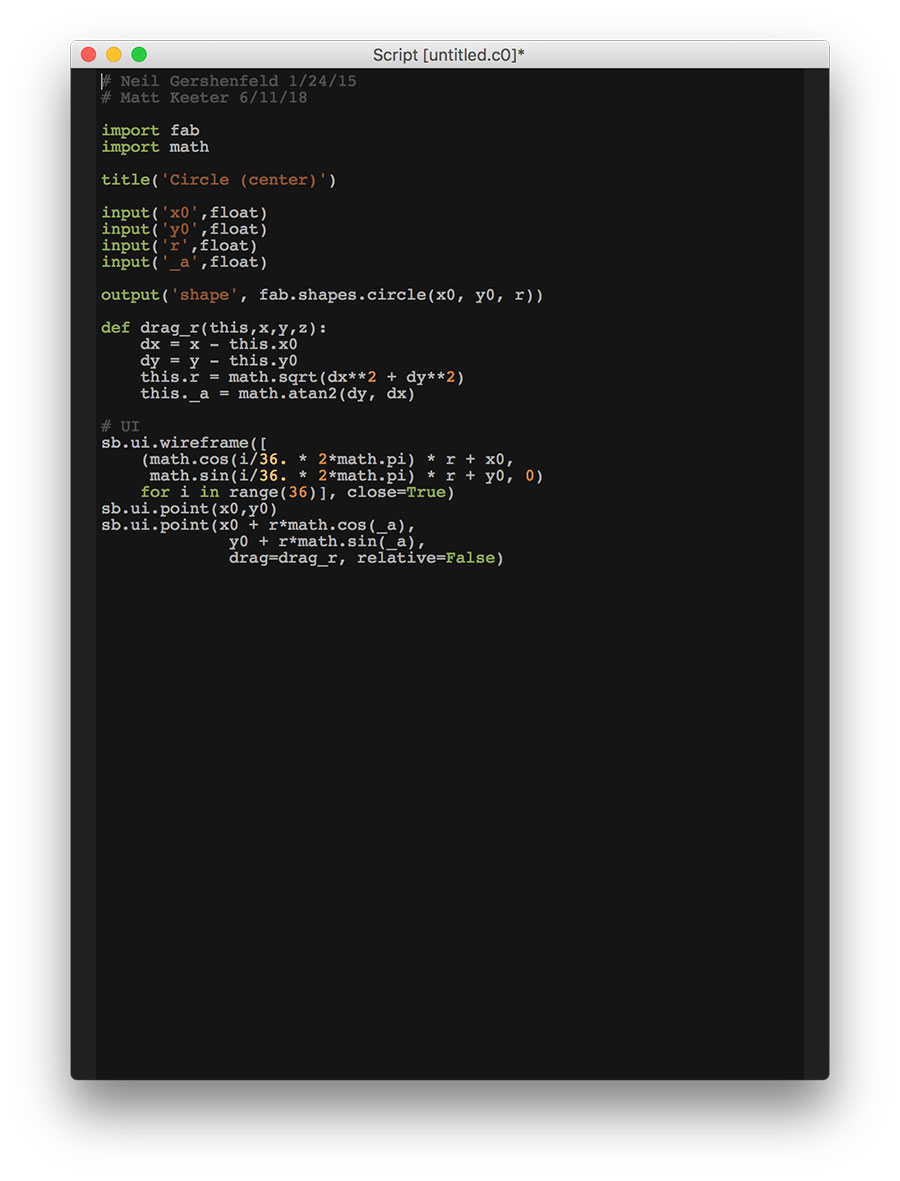
I watched the tutorial about the screwdriver in antimony and tried too start with it. but with my ssd problems i didnt have enough time to really look into it, but definetly will try to work with it and make something simple like my clouds.

Life Hack: How to get windows to work on a external ssd with macosx sierra
This problem really kept me awake for the whole week. I thought that you don't have to get to all the problems I made a small tutorial here for you. I watched this "How to Install Windows 10 Boot Camp External SSD Thunderbolt" here which was really helpful.
At first you need to go the "disk utility" to make your ssd in "GUID-Partition" and "MS FAT32".
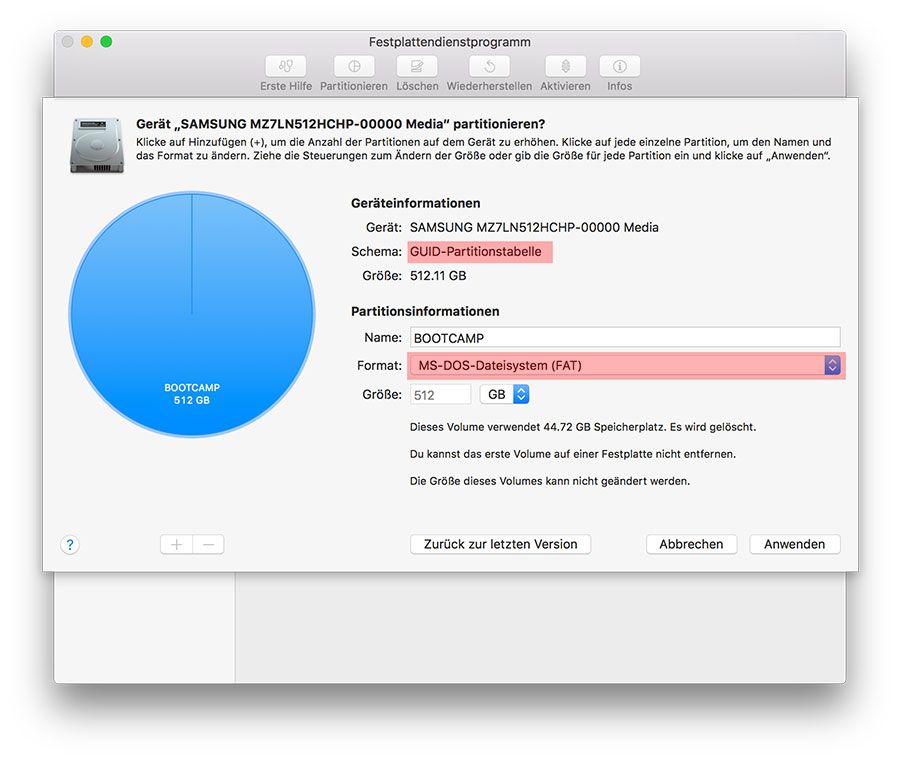
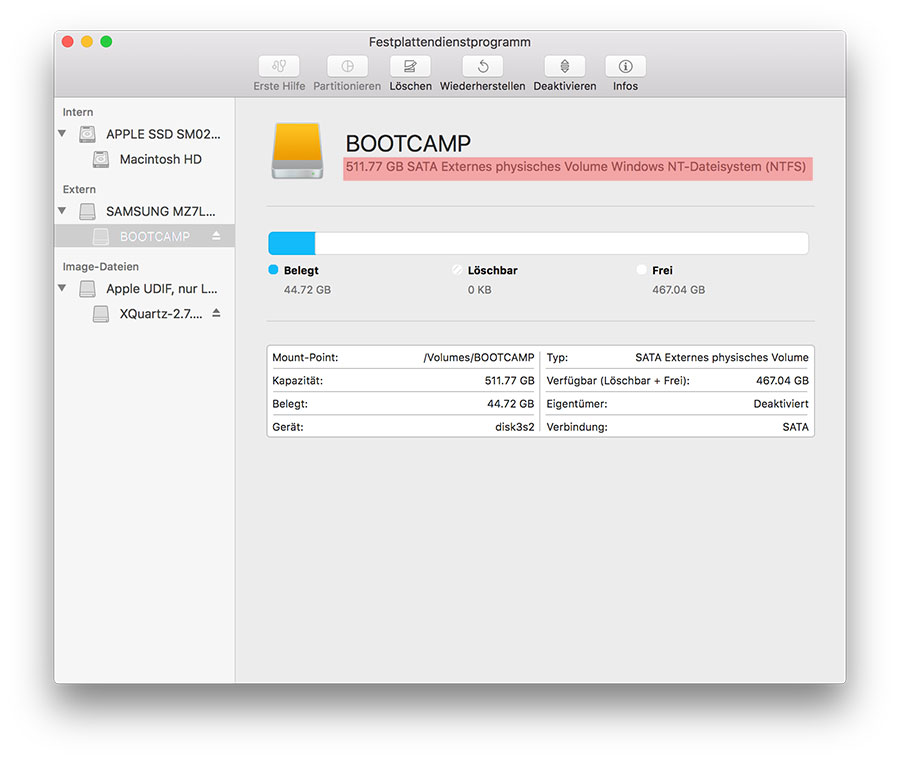
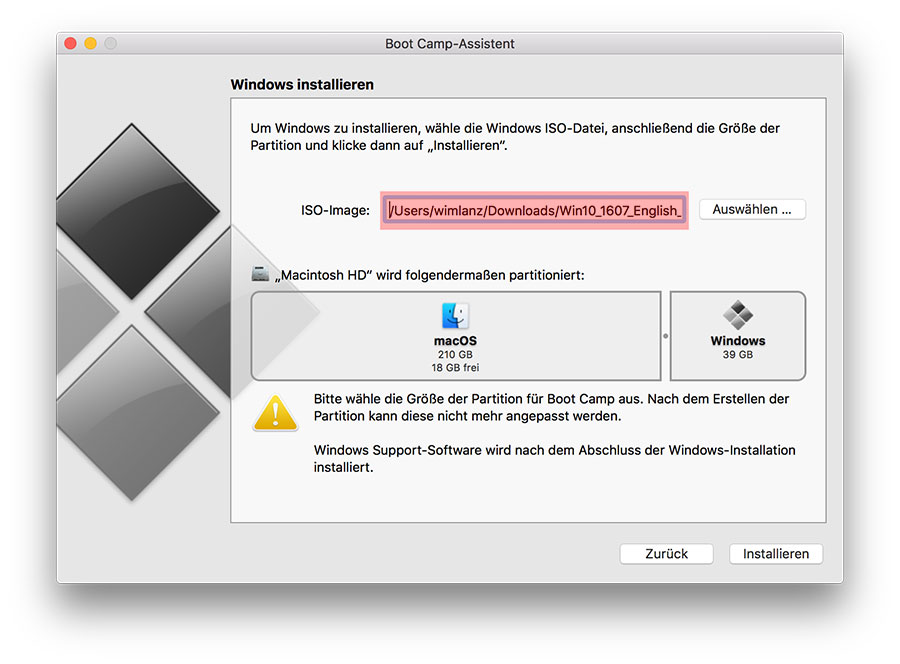
After that you can start the "BootCamp Partition". The ".iso file" you can download it from the microsoft homepage.
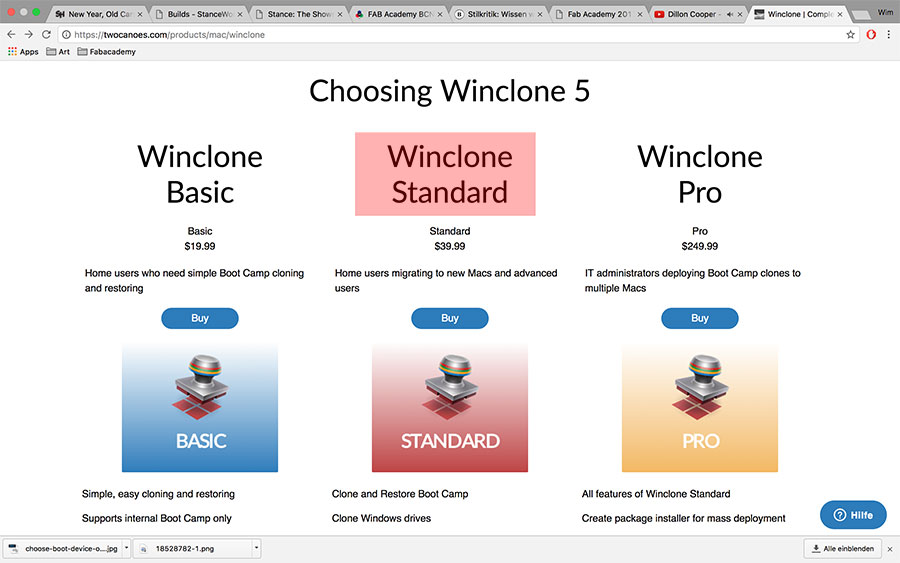
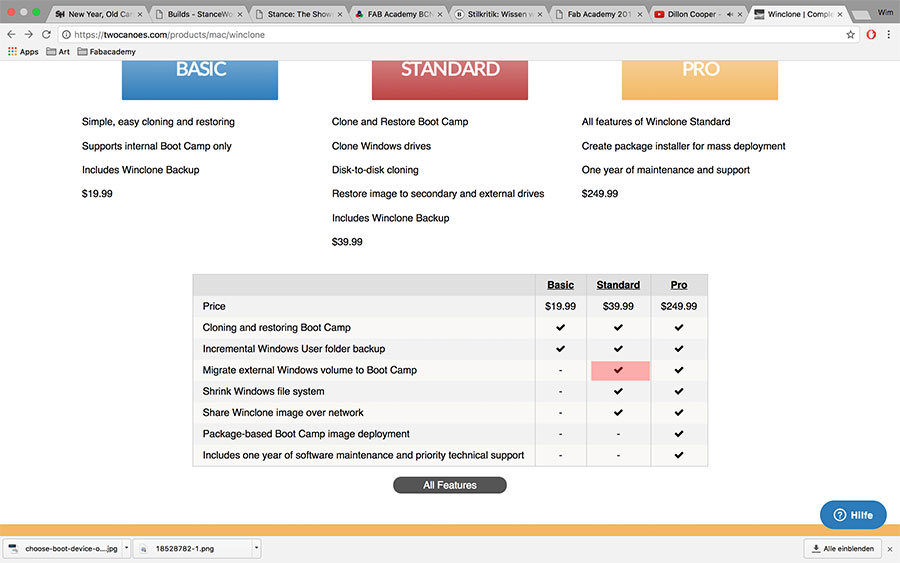
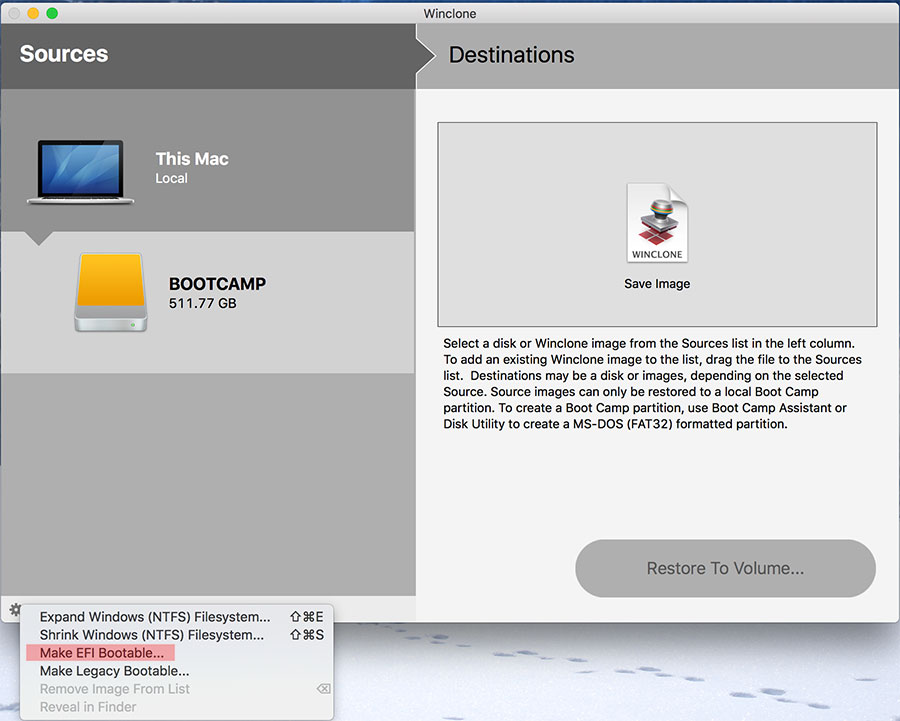
When Bootcamp made the partition you need to download a clone tool, which I prefer Winclone. It costs 40 dollars but it is definitely worth it because you also can save images, etc. Please look that you download the standard version, otherwise you don't can clone to external hard disks. After that it gets a little tricky, you need to disable "System Integrity Protection (SIP)" which you can find a good tutorial at Winclone and System Integrity Protection . You need to go in the terminal with restarting your mac and pressing "command + r" then you can disable the sip and restart the mac. After that you can clone the bootcamp to the ssd.

The next big problem was that my bootcamp couldnt start up from "start disk" in the "system preferences". I made the "disable sip" again and could afterwards select in the winclone menu "Make EFI Bootable".
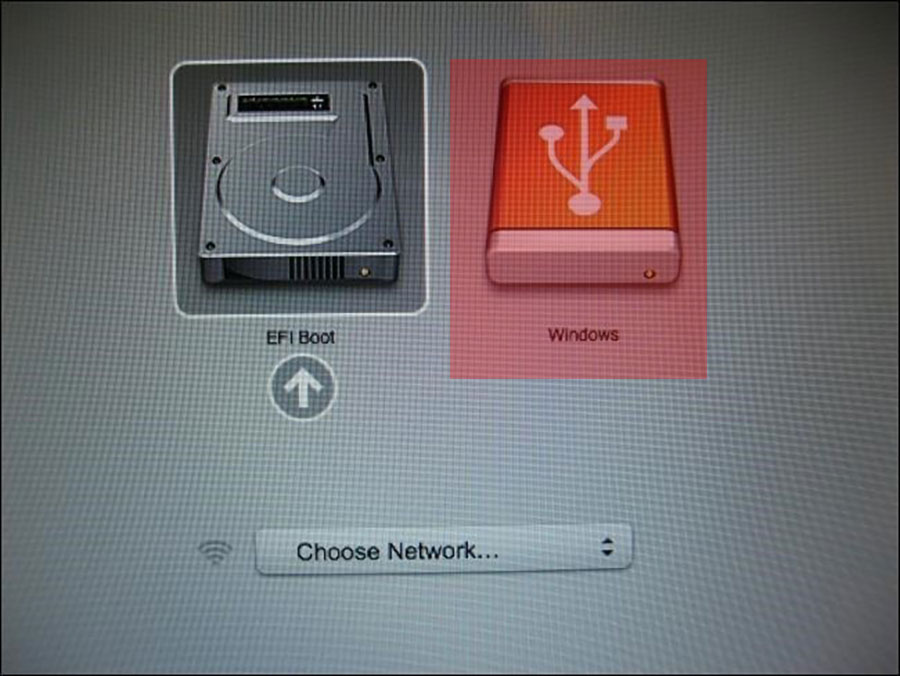
If you restart your mac now and press the "alt" key it should show you the windows partition on the ssd in the startup menu and you can select windows. Enjoy!
Click here to download all the files.