
Assignment
- Model a possible final project, and post it on your class page
1.Photoshop
I am using photoshop as a raster 2D tool, I have used it year before just for pictures additing. I took about 2 hours to get fimillar with it. I found it really usefull for documentation as well because we use lots of images in documenting our task in fab lab so it is really helpful in image resizing and componsating it to make it suitable to upload.
I found this video very usefull.
I have designed the my initial final project poster, it is given below.
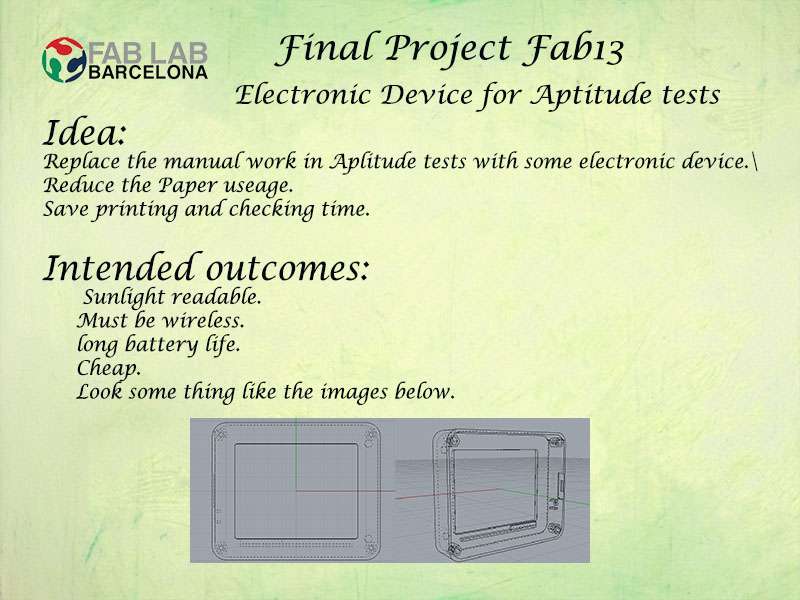
This is a small poster just to discribe my final project. The best thing about photoshop is that it uses a different layer for each part of your project automatically. In this poster I also used lots of layers like for heading, main text, logo backgroud and final project image.
2. Inkspace
This is the vector software I am going to use. so lets start from the a basic tutorial, but before that we need to download and install.
We can download it from HERE and easily install like any other ordinary software. The first thing I like about this software that it is a open-source vector graphics editor.
2.1 Creating cool icons using inkspace
Drag and drop the image in inkspace and then go the "view" menu and click to custom.
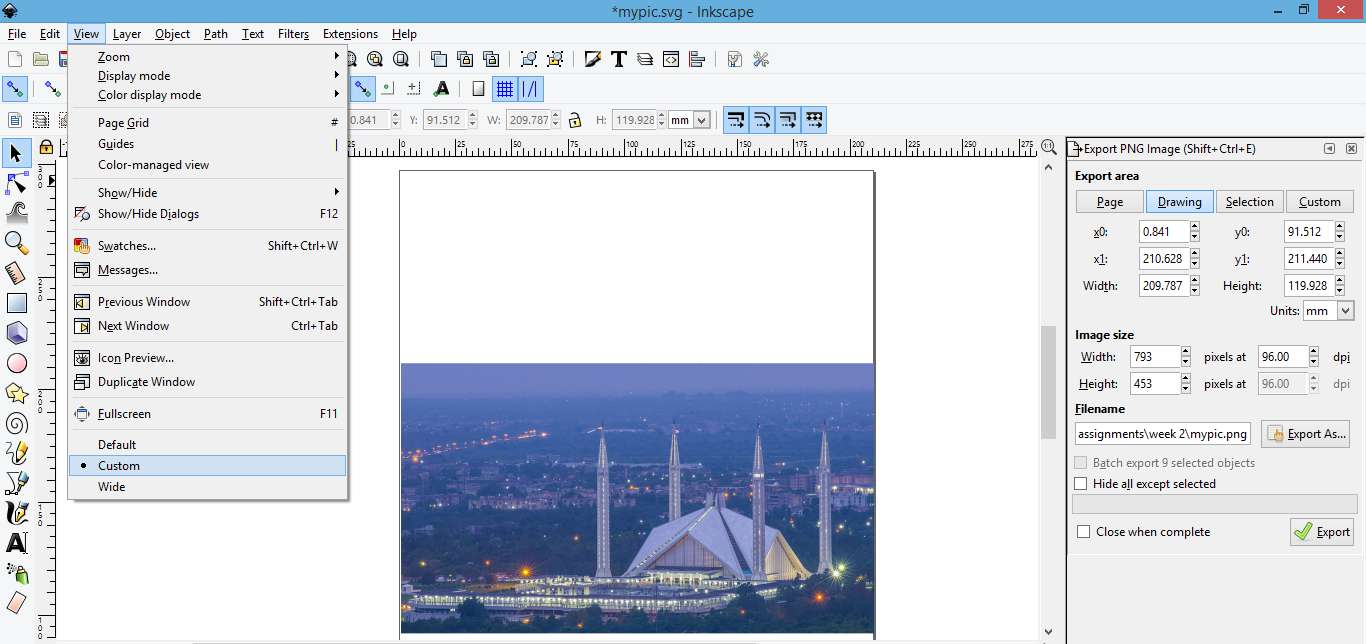
Click on the icon highlighted in the image given below or press "Shift+ctrl+F"
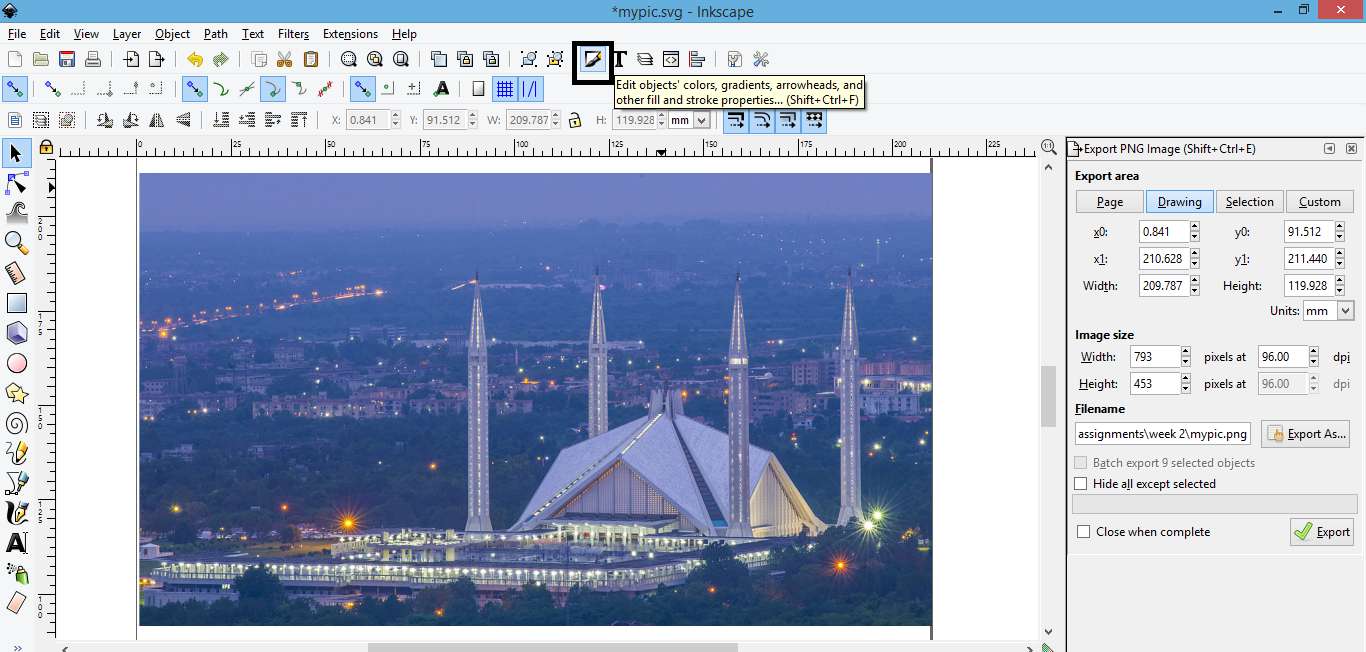
Set the opacity of image to 50%, it will help during the drawing.

Select "Draw Bezier Curve tool" and draw across boarders of the object.
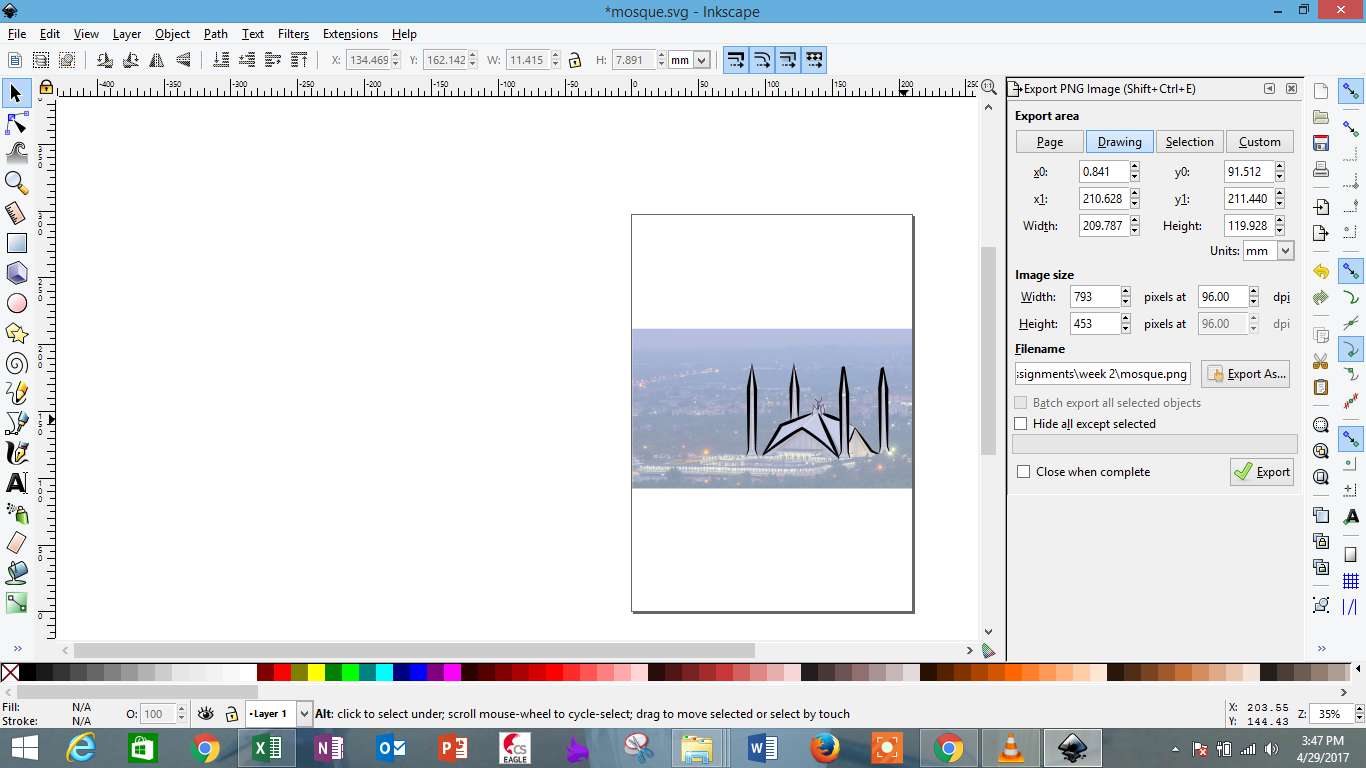
Now we can move or delete the backgroud picture.

Export the drawing in the png format.

2.2 Its simple to make a 2.5D text in inkspace
- The first step is to make a custom view in the "View" menu.
- Now Write a text you want by click on the "create and edit text object" or simply press F8.
- To edit the text and make some change is it select the text and press "Shift+Ctrl+T", you will see a dialog box in which you can change the font and other details of the text.
- After doing this create a dublicate of that text by right clicking on the text. and then go to the "Object" Menu and click "fill and stroke" and change the colour with some light colour.
- Send that new layer to button by going to the "Object" menu and click "lower to button" or simply press "END" key from keyboard.
- Now without deselecting press the arrow keys to move the lower layer. move it three or four times on any side you want and now you will get the effect of 2.5D text or some shadow of text.
- You can also create a new layer and repeat the same process to get better 3D effect of the text.
The next images will show what I got In first attempt.


3. Fusion360
This software is completely new for me. As usual before start using it I was looking for a good tutorial and I have found this.
If we spent some more time to see this lecture series on youtube and trying to make the same samultaneouly it will be really helpful to learn the software.
I am going to design my final project model in this Fusion360.
The first thing we need to do is to download and install Fusion360 HERE is the link to do that.
Here is the procedure and few snapshots showing how I have created this design.
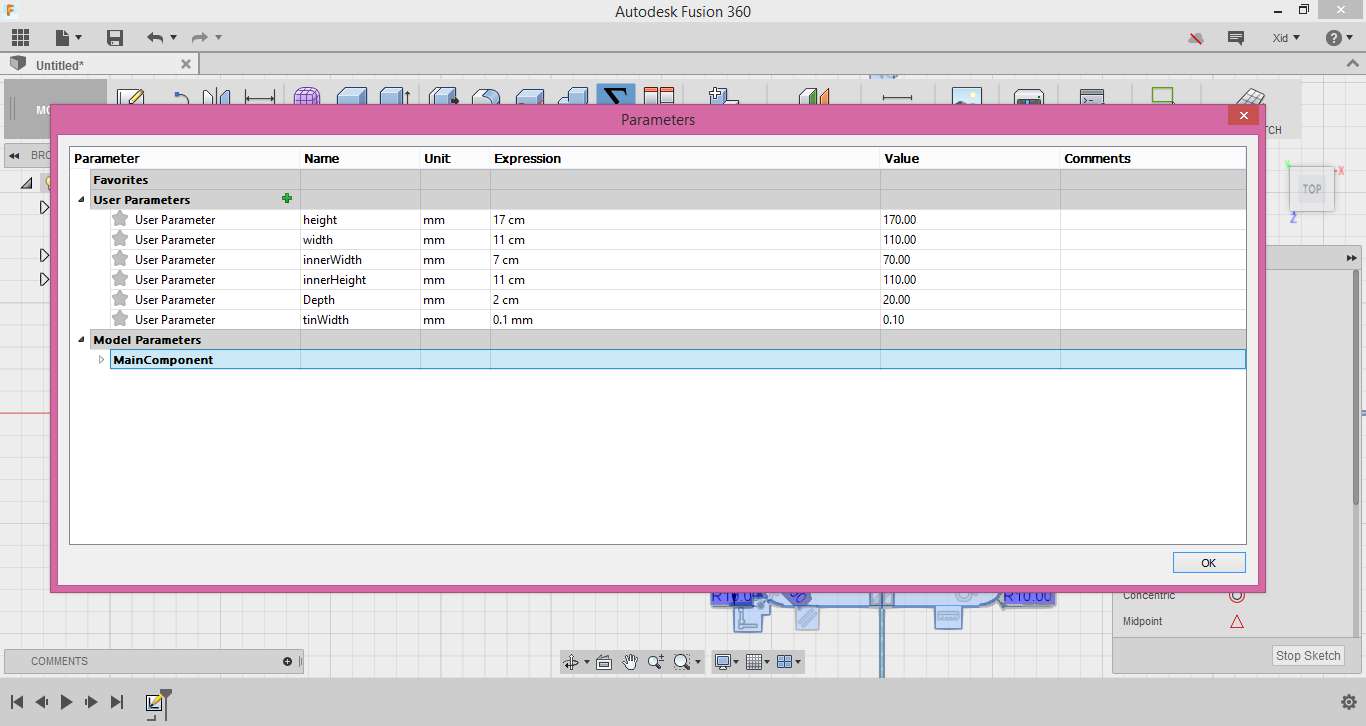
1. First step is to creat a sketch and defined the parameters, as shown in the image given below.
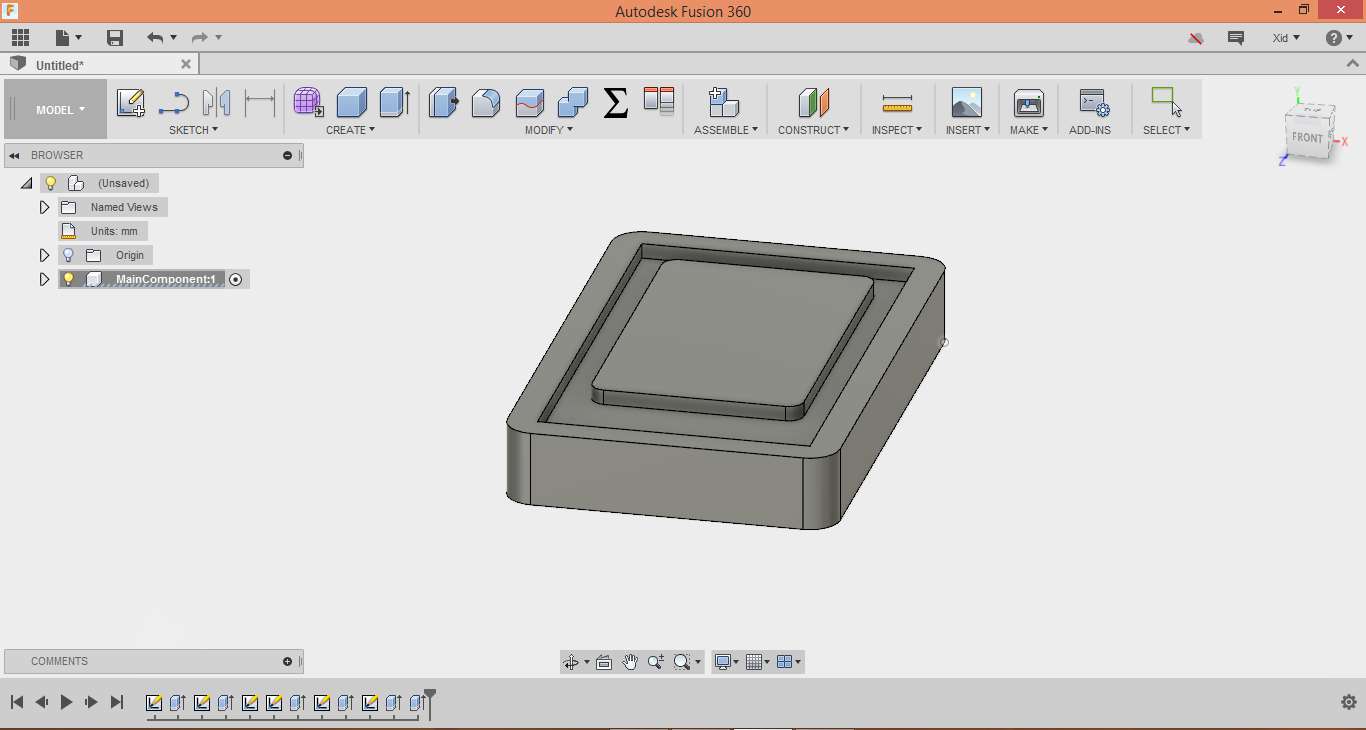
2. Here is the first look of the model showing all the dimensions.

3. Now make the positive extrusion of complete model, now to create a gap with the boarder and screen part of the model we need to draw another rectangle and make the negative extrusion of the amount you want to create the depth, following image showing the result after this step.
4. After that I need to draw some buttons, for that we can do the same process is to draw the rectangle of the size of buttons and perform postive and negative extrusion and here is what we get.
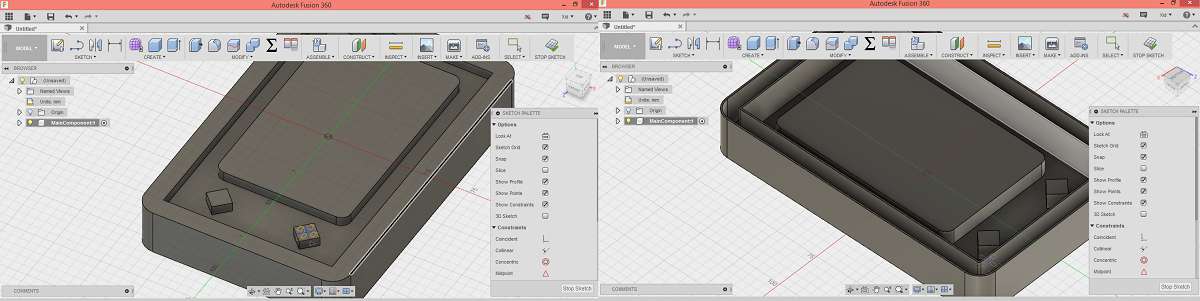
This is just an initial idea of my project, so far I do not know that what will be the final dimensions and its apparent look. This is just to explain the idea.
I found this software very user friendly amoung the other paramatric 3D design softwares. After doing future assignments hopefully I will be more comfortable with this software.
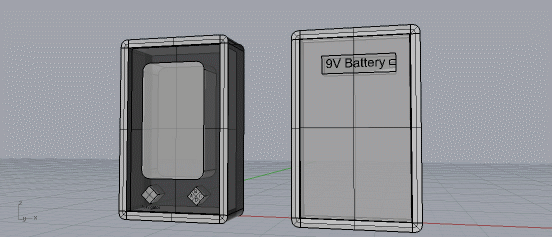
4. Rhinoceros
Now I am trying to work in Rhinoceros 5.0, we can download its 90 Days trail version from HERE
I have tried to make the rough model of my final project in this 3D software.
Here is the snapshot of the model.
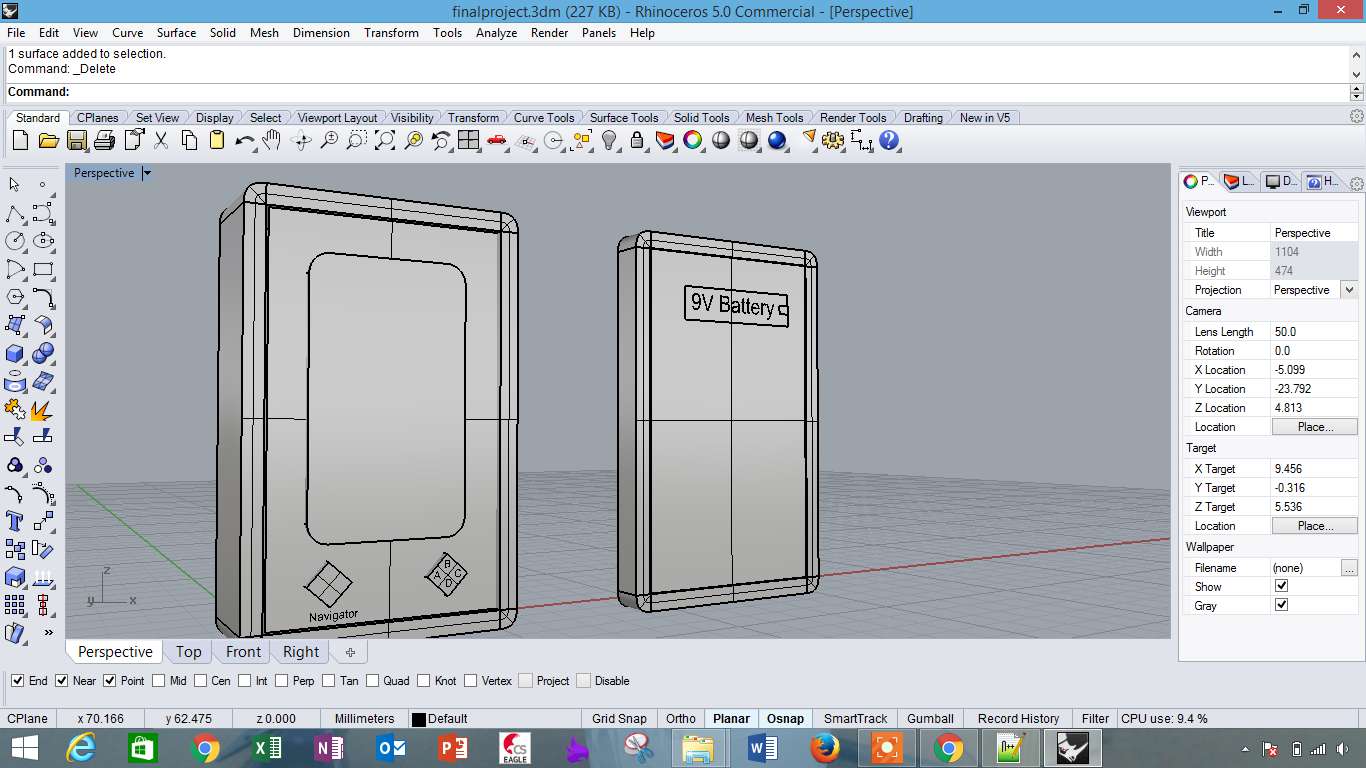
In Rhinoceros I have designed this model using the same approach as i did in fusion360, First draw the 2D model with dasic drawing tools like rectangles, circles etc, and extrude them at your desired height, then finishing touch by using boolean addition and subtraction and finally added some text.
I also made 360 degree simulation of this model by going to the render tools and then click to animation tool. as shown in the image given below.

Here is the 360 animation.

This work is licensed under a Creative Commons Attribution-NonCommercial-ShareAlike 4.0 International License
.