Assignment
measure something: add a sensor to a microcontroller board that you have designed and read it
For this assignament I decided to create my own arduino, based on a microcontroller Attiny44/84, so I can program my board using the usb port and also be able to use the arduino IDE.
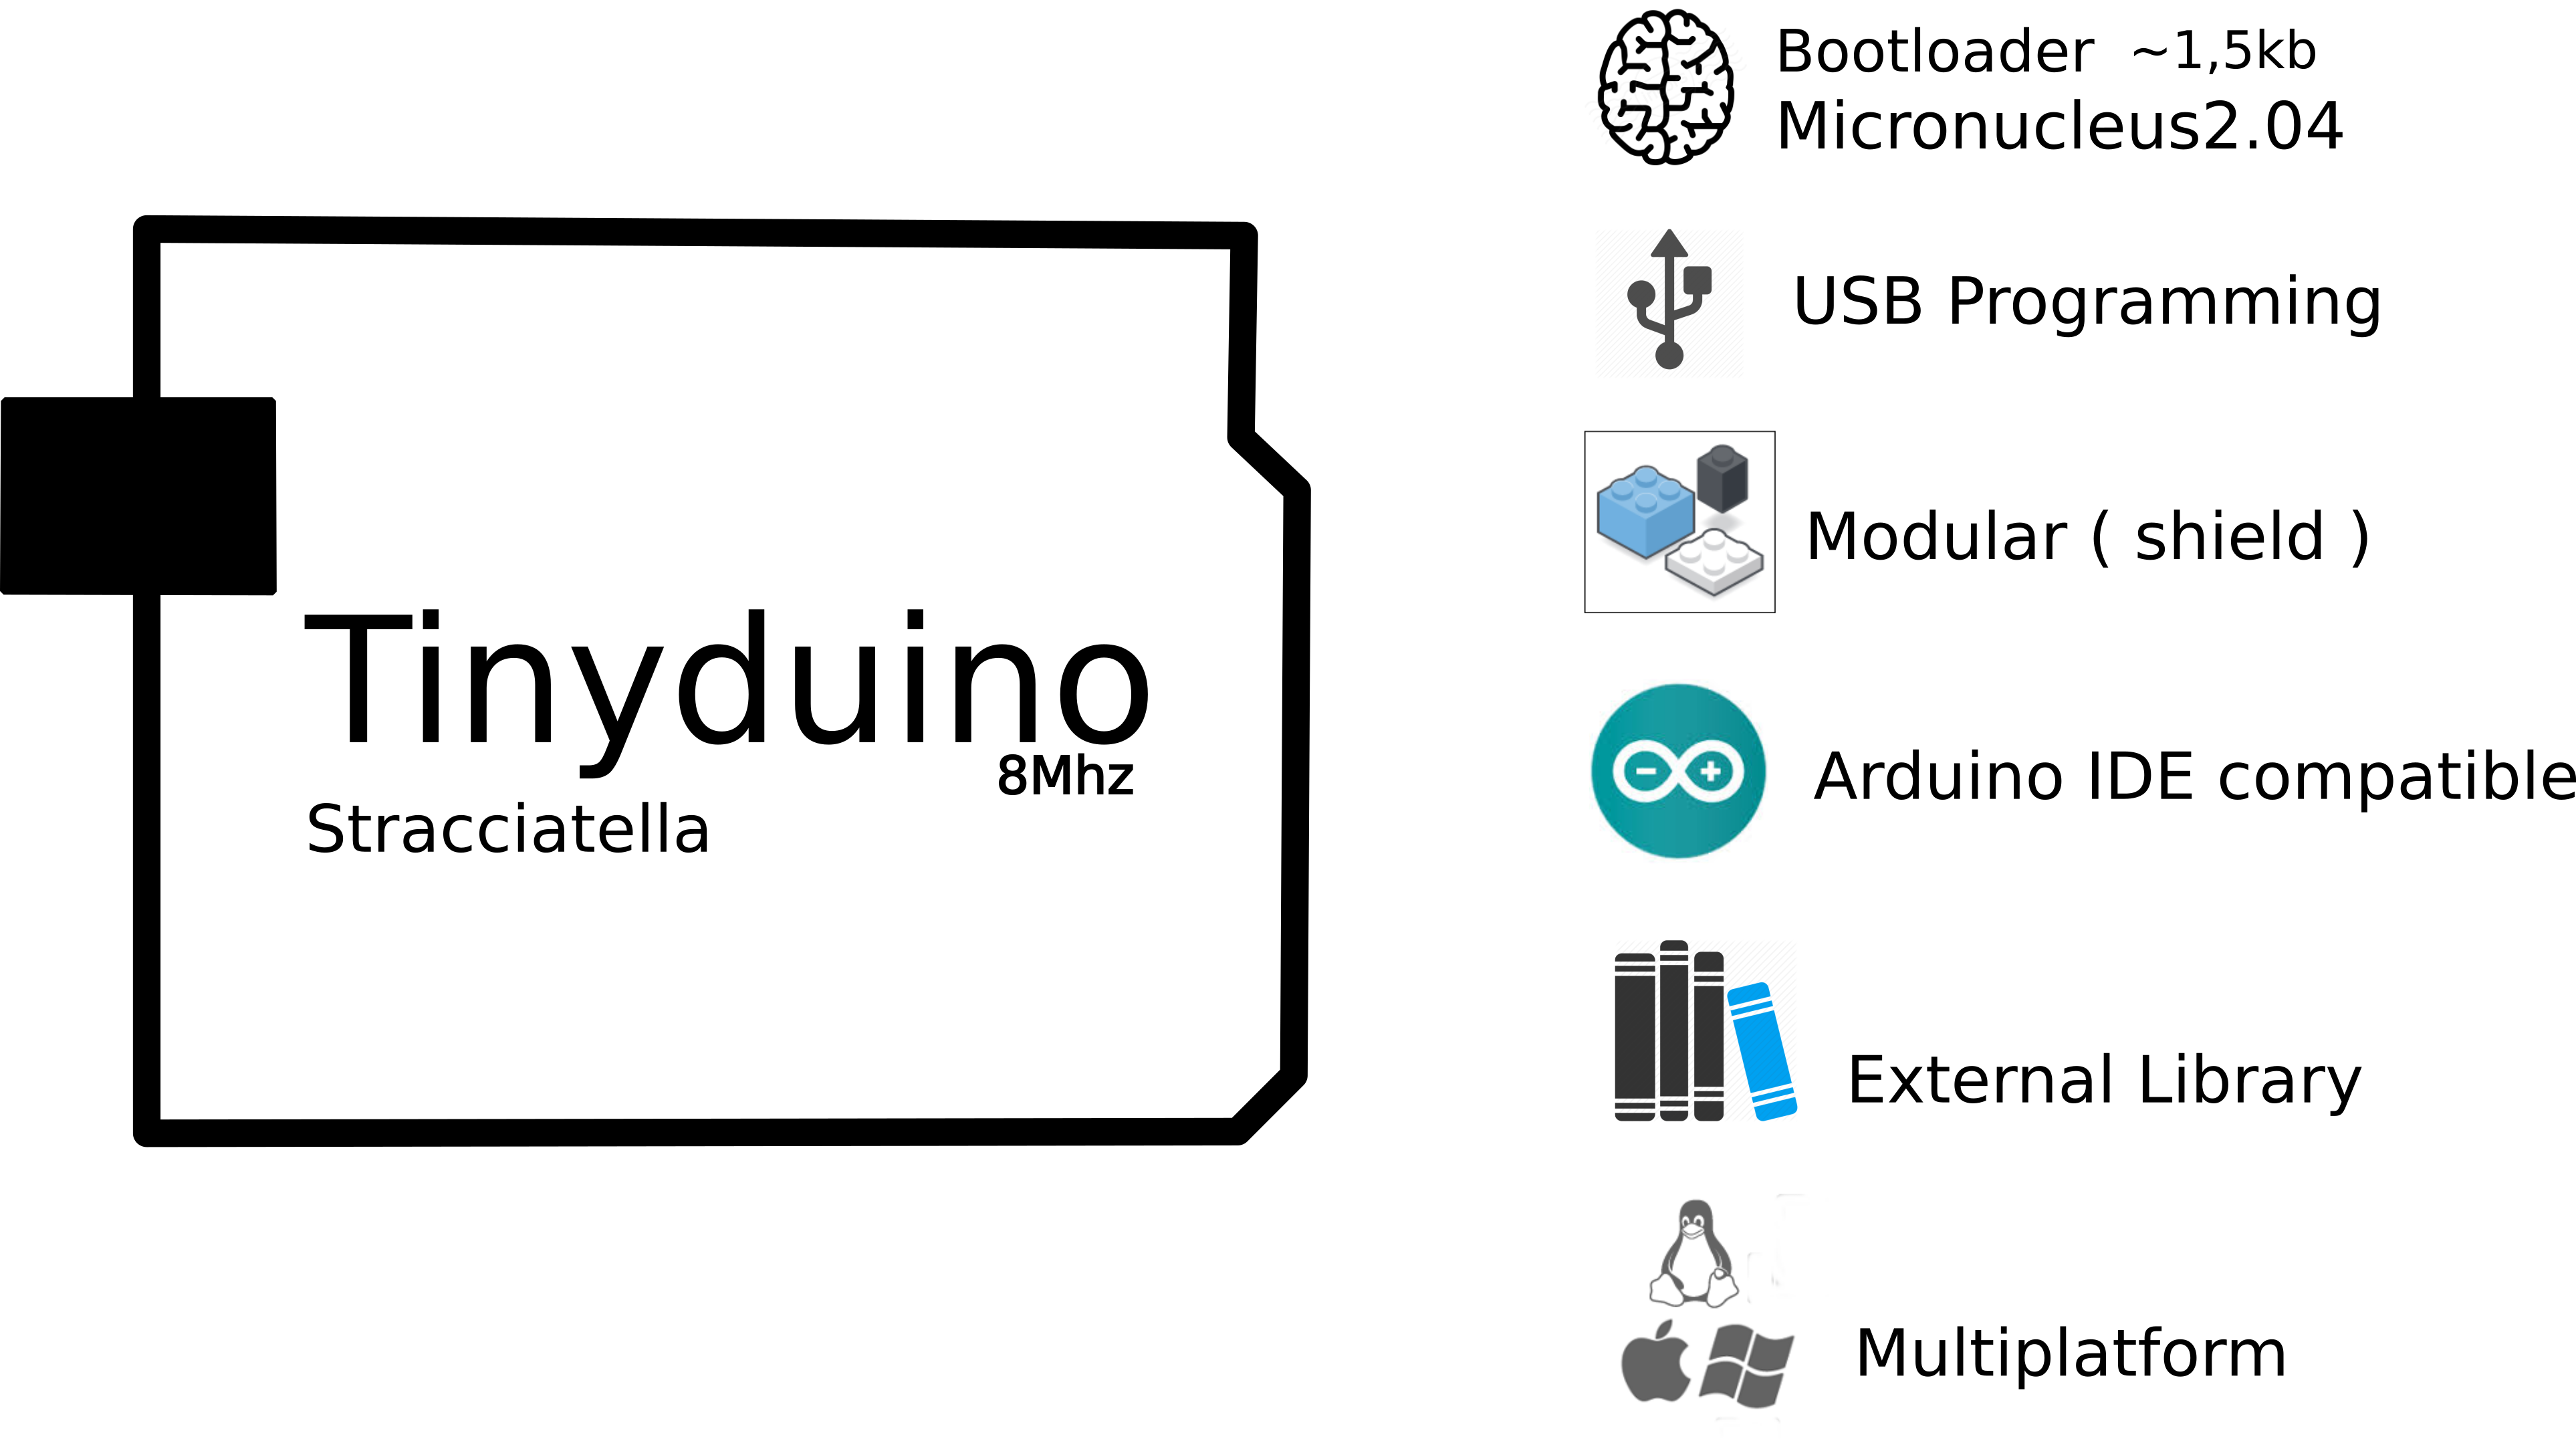
Tinyduino ver. Stracciatella (Attiny44)/Mint (Attiny84)
Tinyduino is a light version of Arduino, its based in a cheaper and smaller microcontroller: the Attiny44 or the Attiniy84. As it can be deduced from the name the 44 has a flash memory of 4k and the 84 of 8k.
HARDWARD
Tinyduino allows you to save the programs without using a external ISP programmer. The board uses six pins (ISP) to program the microcontroller, allowing a simple design and smaller board. Thus, using a Tinyduino is as easy as plug and program.
The technical specifications of Tinyduino are:
- Microcontroller Attiny44/84
- Flash [kB] ~ 2.5/6.5
- CPU Speed: 8 Mhz
- Operating/Input Voltage: 5V and 3.3V
- Digital IO/PWM: 11 / 4
- Analog In/Out: 8
- MicroUSB connection
- I2C protocol
- Internal Led (pin 10)
- Reset Switch
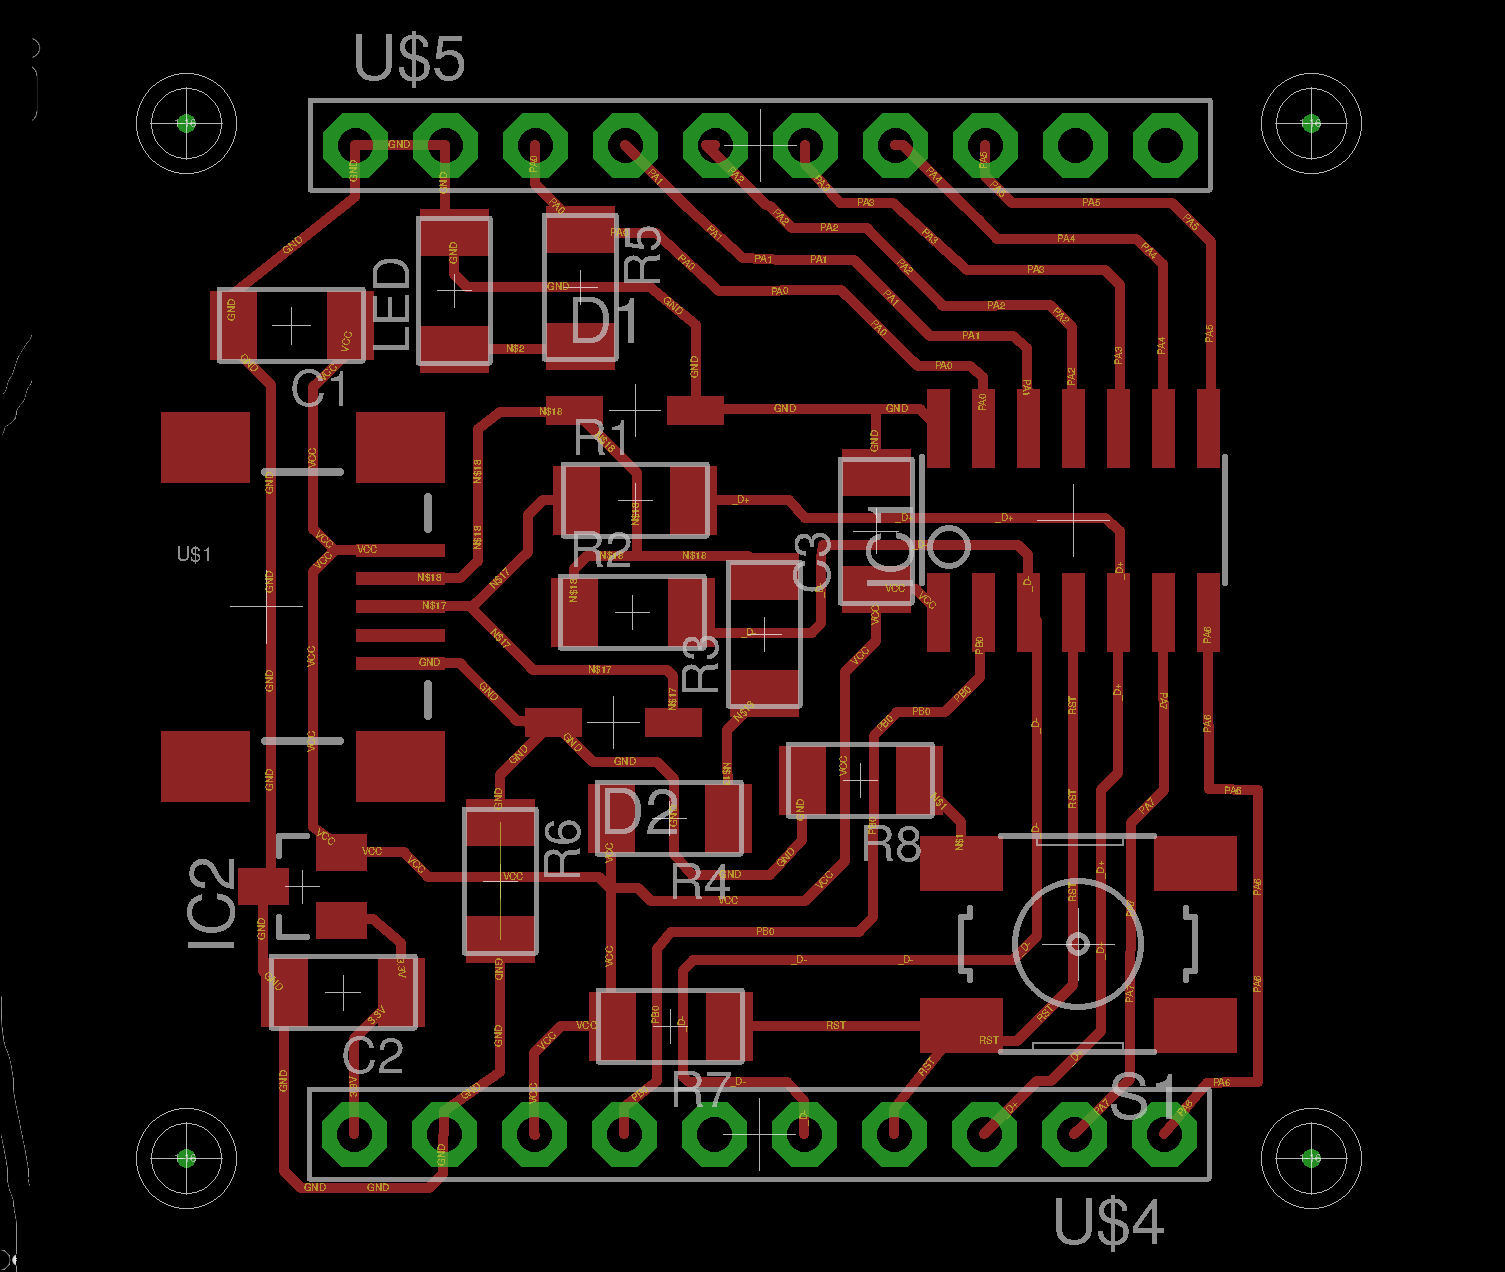
Schematic
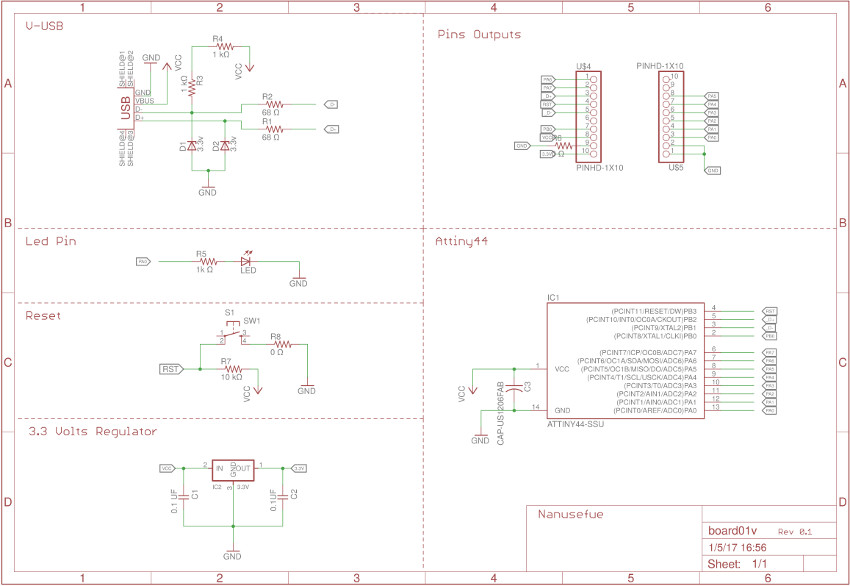
Eagle/Tinyduino
USB Communication
In order to create my own arduino I have used the v-usb library, which is the same one used by USBTinyISP.
"(V-USB is a software-only implementation of a low-speed USB device for Atmel’s AVR® microcontrollers, making it possible to build USB hardware with almost any AVR® microcontroller, not requiring any additional chip.)"
V-USB Hardward Consideration
To use in our V-USB project, it is important to consider certain hardware considerations when creating our own board.
The voltage level problem
Solution: Level conversion on D+ and D-

</p>
Instead of reducing the AVR's power supply, we can limit the output voltage on D+ and D- with Zener diodes. We recommend 3.6 V low power types, those that look like 1N4148 (usually 500 mW or less). Low power types are required because they have less capacitance and thus cause less distortion on the data lines. And 3.6 V is better than 3.3 V because 3.3 V diodes yield only ca. 2.7 V in conjunction with an 1.5 kΩ (or more exactly 10 kΩ) pull-up resistor. With 3.3 V diodes, the device may not be detected reliably.
If you use Zener diodes for level conversion, please measure the voltage levels to make sure that the diodes you have chosen match the requirements.
Advantages of the Zener diode approach:
- Low cost.
- Easy to obtain.
- Entire design can be at 5 V.
- AVR can be clocked at high rates.
Disadvantages:
- Not a clean solution, a compromise between all parameters must be found.
- Zener diodes come with a broad range of characteristics, especially at low currents, results may not be reproducible.
- High currents when sending high-level.
- High level is different for signaling and in idle state because signaling uses high currents to drive the diodes while idle state is driven by a 1.5 kΩ pull-up resistor.
SOFTWARE
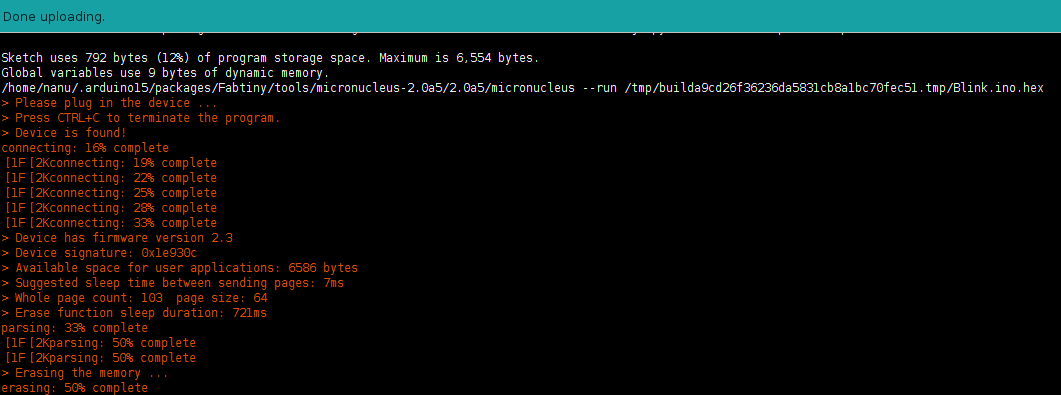
Bootloader
The bootloader that is used for tinyduino is the opensource Micronucleous project, I made a proyexto forck to add the modification to use the Attiny44 version. Micronucleus

Arduino Custom Board
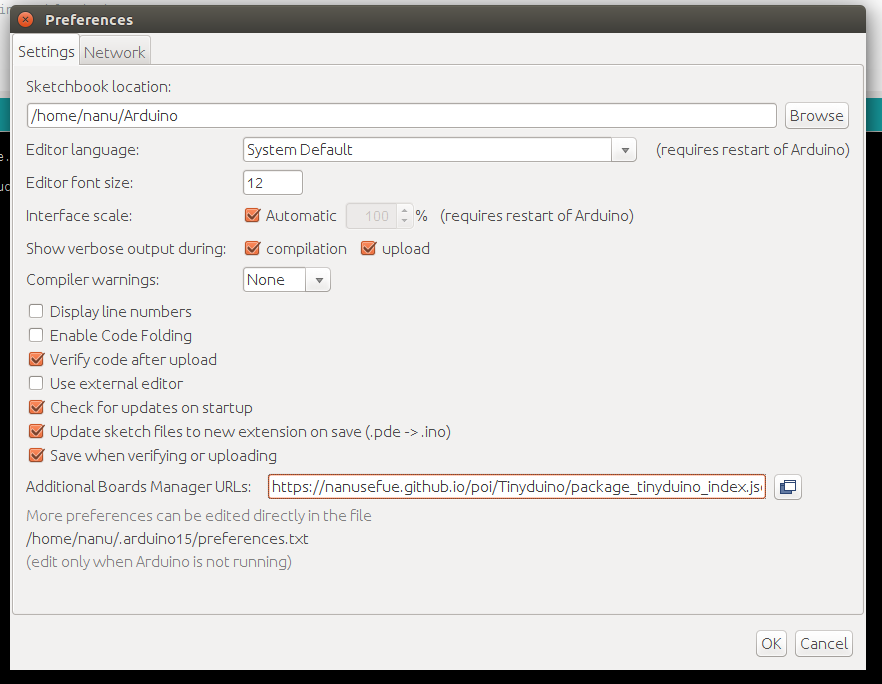
How to add Tinyduino to use in our Arduino IDE
Paso 1
Copy and paste the following url into our IDE in the menu: File -> Preference </ b>
https://nanusefue.github.io/poi/Tinyduino/package_tinyduino_index.json
</p>
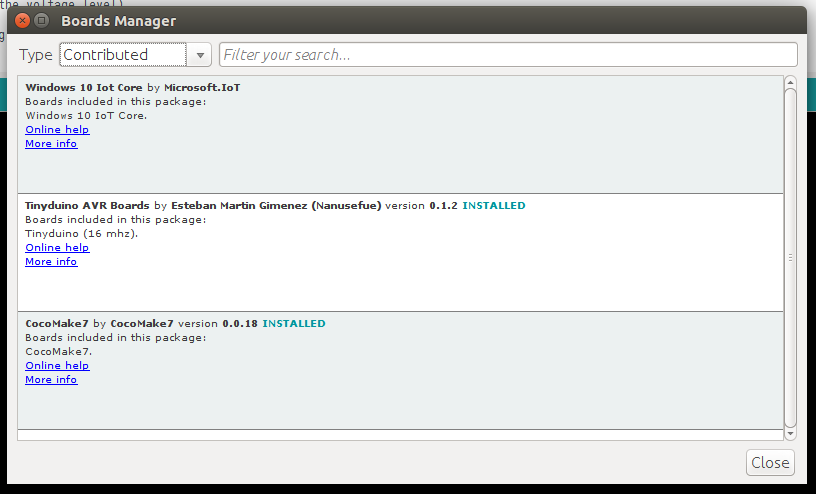
Step 2
Download and install all necessary components to select the correct board.
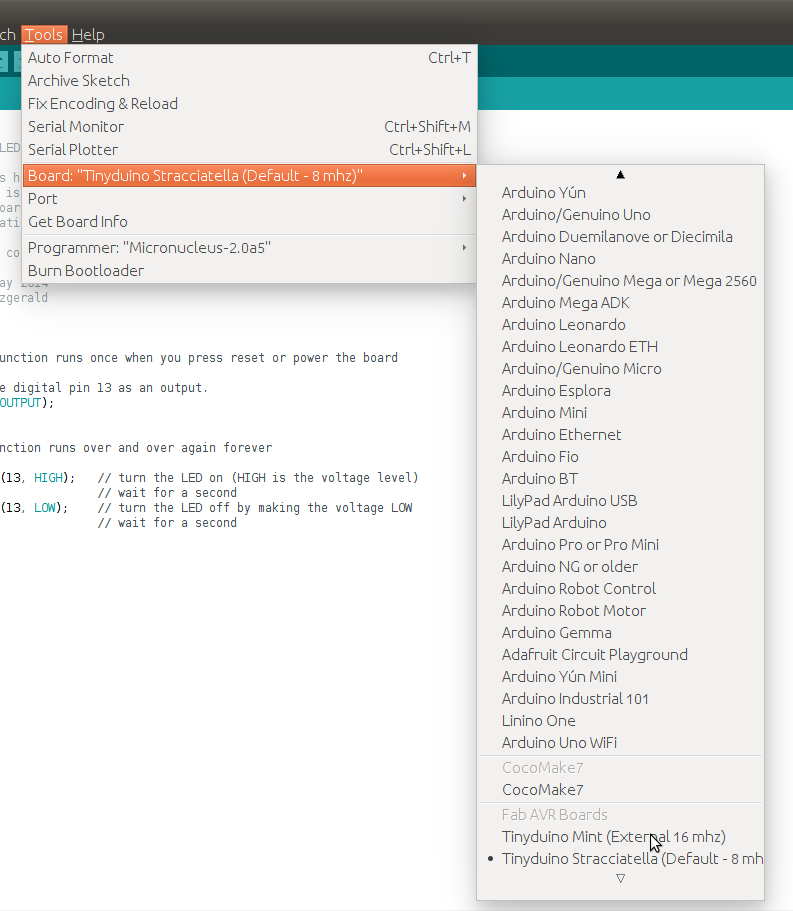
Step 3
Now we can select the version of our tinyduino, Stracciatella or Mint
Arduino IDE
Shield Accelerometer (ADXL 343)
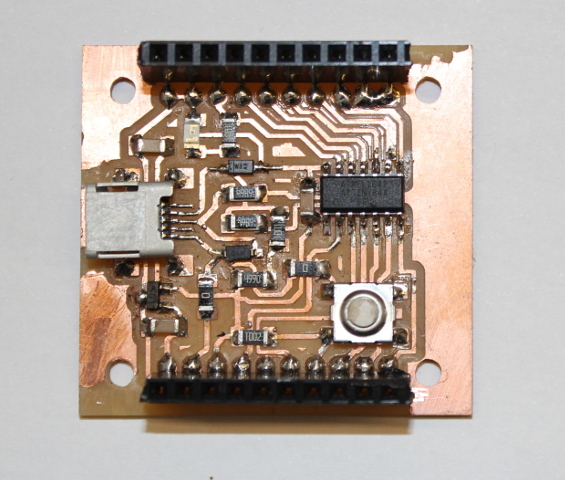
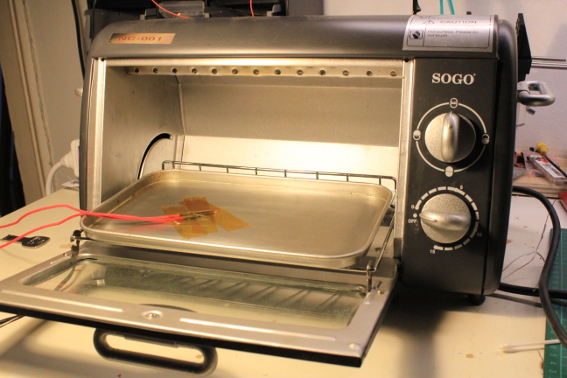
Reflow
Nice tutorial about the technique reflow, usind solder past. Turorial
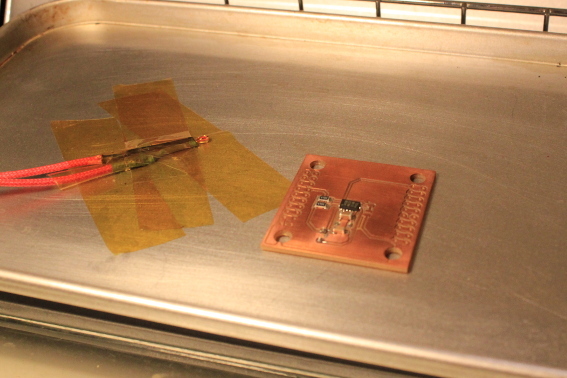
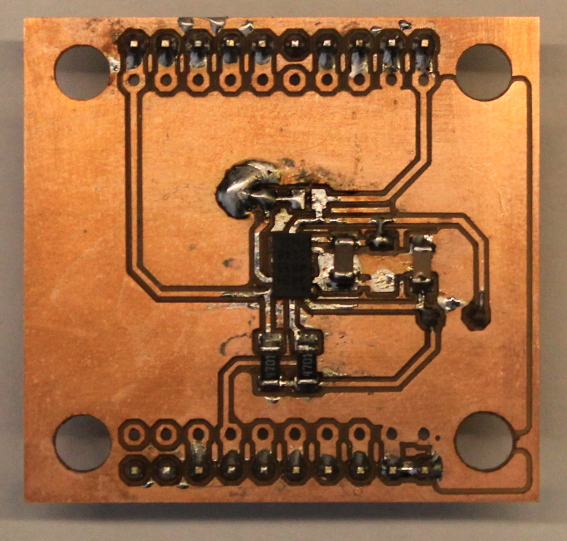
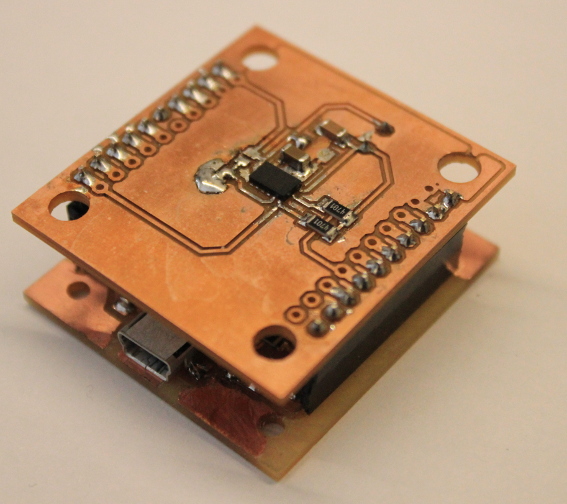
My own reflow
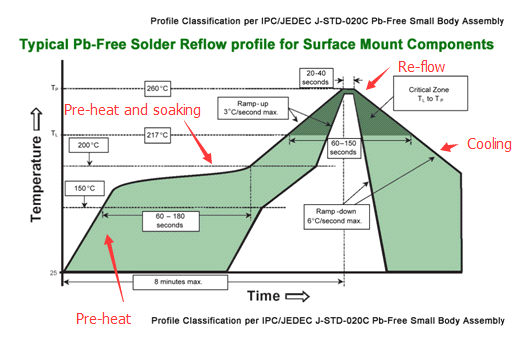
Reflow Profile
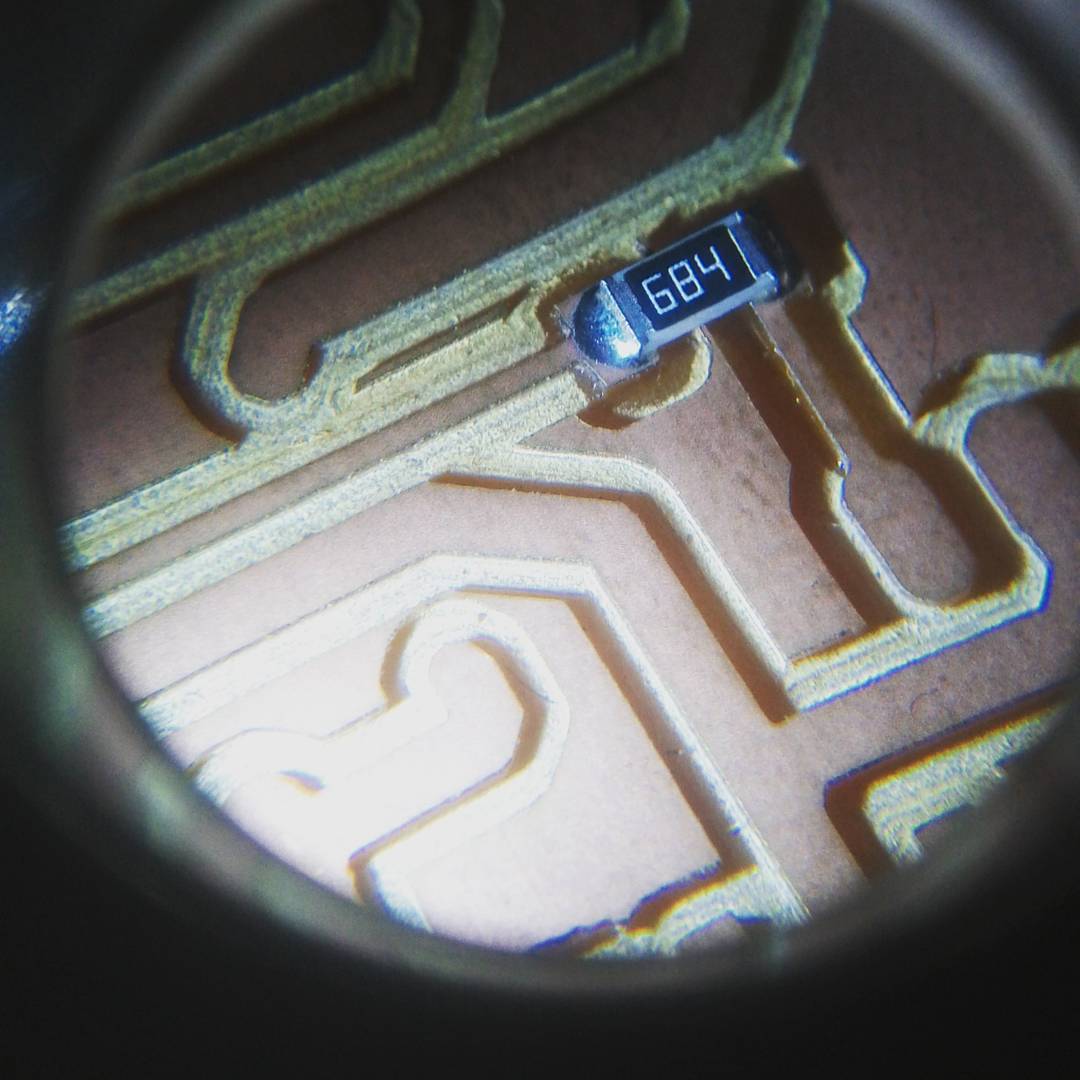

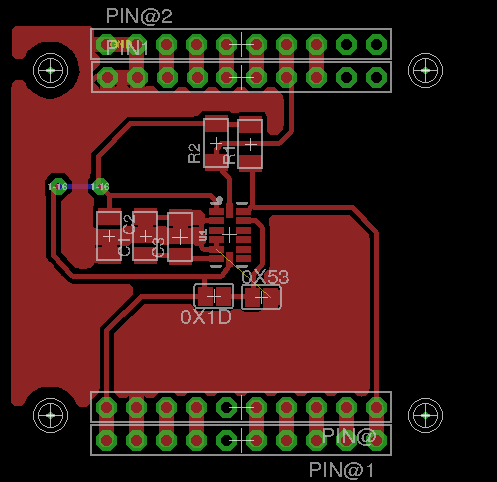
Eagle Shield ADXL 343
Schematic

Board
Arduino Code
ADXL.ino
1
2
3
4
5
6
7
8
9
10
11
12
13
14
15
16
17
18
19
20
21
22
23
24
25
26
27
28
29
30
31
32
33
34
35
36
37
38
39
40
41
42
43
44
45
46
47
48
49
50
51
52
53
54
55
56
57
58
59
60
61
62
63
64
65
66
67
68
69
70
71
72
73
74
75
76
77
78
79
80
81
82
83
84
85
#include "ADXL_2.h"  /* Ne pas oublier d'inclure la librairie <TinyPinChange> qui est utilisee par la librairie <RcSeq> */
#include <TinyWireM.h>                  // I2C Master lib for ATTinys which use USI
#include <SoftSerial.h>     /* Allows Pin Change Interrupt Vector Sharing */
#include <TinyPinChange.h>  /* Ne pas oublier d'inclure la librairie <TinyPinChange> qui est utilisee par la librairie <RcSeq> */


SoftSerial mySerial(9, 8); // RX, TX
void setup(){

   CLKPR = (1 << CLKPCE);
   CLKPR = (0 << CLKPS3) | (0 << CLKPS2) | (0 << CLKPS1) | (0 << CLKPS0);

  mySerial.begin(19200);
  TinyWireM.begin();                    // initialize I2C lib
  uint8_t data = Read(ADXL_ADDR,0x00, 1,buffer)[0];
  mySerial.print(data,HEX);
  if(data == 0xE5)
  mySerial.print("Connected!!!");
  else
  mySerial.print("No Conected!!!");

  Write(0x2D, 0x08); //init ADXL
  Write(0x31, 0x08); //Set Range

}

void loop(){
  Acc_get();

}


AccelerometerRaw ReadRawAxis()
{
  Read(ADXL_ADDR,0x32,6,buffer); //Read value
  AccelerometerRaw raw = AccelerometerRaw();
  raw.XAxis = ((int)buffer[1] << 8) | buffer[0]; //DATAX0
  raw.YAxis = ((int)buffer[3] << 8) | buffer[2]; //DATAY0
  raw.ZAxis = ((int)buffer[5] << 8) | buffer[4]; //DATAZ0
  return raw;
}


void Acc_get(){  // Get the temperature from a DS1621

  AccelerometerRaw raw = ReadRawAxis();
  mySerial.print("X: ");
  mySerial.println(raw.XAxis);
  mySerial.print("Y: ");
  mySerial.println(raw.YAxis);
  mySerial.print("Z: ");
  mySerial.println(raw.ZAxis);
  delay(100);

}

void Write(int address, int data)
{
  TinyWireM.beginTransmission(ADXL_ADDR);
  TinyWireM.send(address);
  TinyWireM.send(data);
  TinyWireM.endTransmission();
}


uint8_t* Read(int m_Address,int address, int length,byte buffer[])
{
  TinyWireM.beginTransmission(m_Address);
  TinyWireM.send(address);
  TinyWireM.endTransmission();

  TinyWireM.beginTransmission(m_Address);
  TinyWireM.requestFrom(m_Address, length);

  if(TinyWireM.available() == length)
  {
    for(uint8_t i = 0; i < length; i++)
    {
      buffer[i] = TinyWireM.receive();
    }
  }
  TinyWireM.endTransmission();

  return buffer;
}
ADXL.h
1
2
3
4
5
6
7
8
9
10
struct AccelerometerRaw
{
  	int XAxis;
  	int YAxis;
  	int ZAxis;
};

byte buffer[6];
#define ADXL_ADDR   0x53              // 7 bit I2C address for ADXL343
int data;
