Week 17:application and implications
This week's agenda for Fab academy was :
To understand and decide the detailed breif of our final project
Material and cost estimation
process and steps to finish the final project
MyDi
MIDI controller to spin off music and generate visuals
What is a MIDI ?
A Musical Instrument Digital Interface.This is the program/device/software which helps an electronic instrument or digital music tool communicate with each other.The midi has inouts to turn the note on or off, velocity - which adds up to the volume basically and pitchwhere you can control factors to change the pitch.Here in the table below you can see the usual protocal of linking a note to the digital number the software understands as a musical note while coding and/or programming in order to generate music/sounds


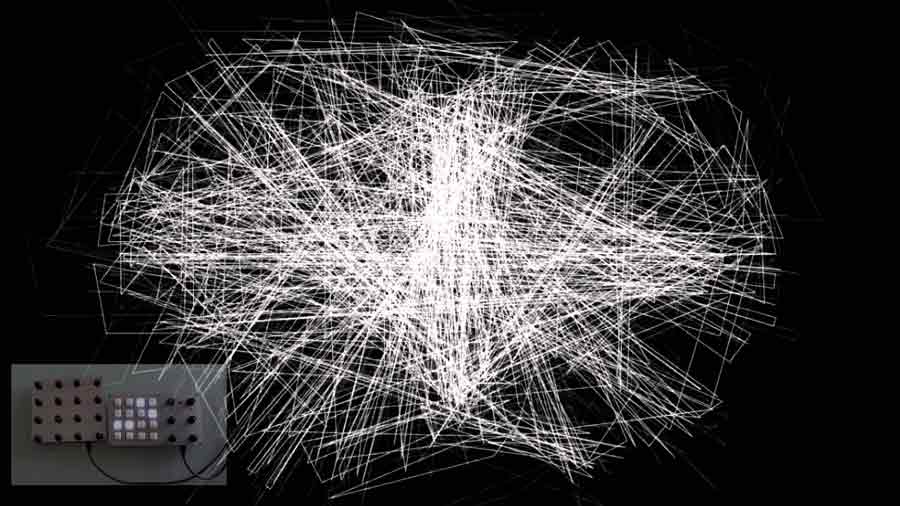
before I get into the details of materials needed and the costs, process and production, I would like to give you a little snippet of what I want to achieve in the end. But this video only demonstrates the output and not the electronics and fabrication and installation part of my assignment.
So, now that we hav an idea od what the output would look like, I work backwords to chieve the output in order to make it an installation.
A MIDI board that communicates with a software called Ableton which is a music production software. A virtual MIDI port on the computer will communicate this sounds/music from Ableton as an input onto Processing which acts as an interface inorder to generate visuals
There are a lot of people who have done what I want to achieve in parts. So here as per the breakdown, I list projects and references I am going to use.
The MIDI device is basically going to be an arduino flashed with an AVR to behave as a MIDI.And this MIDI then gets called a HIDUINO.Here is a project reference in order to do that. MIDI YOUR ARDUINO
Now, this MIDI board is going to be attached to controllers . it could be buttons/pads/knobs/ynaptic touch pads.Here I add 2 link of how to make them. One is to make a LED push button pad - Adafruit Trellis and the other one is to make it with arcade buttons - Arcade button MIDI on Instructables. Here are videos of how each would work.
This MIDI then intercats with Ableton It needs to be mapped to musics/instruments/chords on Ableton.*NO SURPRISES FOR GUESSING HOW DIFFICULLT THIS WILL BE FOR AN ARCHITECT GRAPPLING WITH DJ INSTRUMENTS FOR THE FIRST TIME*
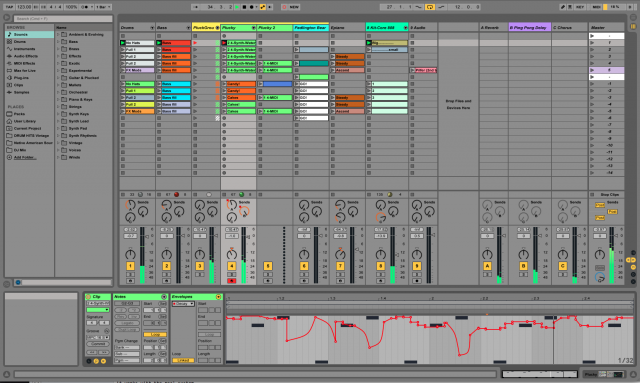
Ableton then interacts with processing via a virtual MIDI port. For a Mac user , the virtual MIDI port already exits but for a Windows user, there are many softwares out there in order to communicate with a virtual MIDI , and after some research, I realised many prer to use the Loop MIDI. here is where the Output of sound/music from ableton get converted to an Input to processing.
Then we integrate the sketch on processing to generate visuals
And here is a wood and fabric composite bracelet made at Fab Textiles
Satsha kit
conductive sewable buttons
insulated copper wire
USB wires and ports to connect to computers
Projector
3mm or 4mm thickness wood board for MIDI pad
fabric material to make the MIDI pad flexible
Glue to make the fabric composite with wood
Satsha kit - will be milled in the lab
conductive sewable buttons - general departmental stores
insulated copper wire - Diotronics store
USB wires and ports to connect to computers- will use the ones in the lab for prototype
Projector - will use the one n the lab for the prototype
3mm or 4mm thickness wood board for MIDI pad - eithe some scrap from the fab Lab or will buy it from Madera Estadillas
fabric material to make the MIDI pad flexible - Fabric stores / Servei Estacion
Glue to make the fabric composite with wood - Servei Estacion
satsha kit Electronics fabricated at the lab
Midi pad with conductive buttons Cast from a lasered wooden board and fabric
The music and graphics will be Interfaced with the help of ableton and processing
conductive button as input devices stitched and fabricated as a circuit
Eagle
Rhino
Processing
Ableton
Milling of PCBS
Laser cutting
composites
Conductive buttons ~ 2 euros for a set of 8 buttons
insulated copper wire ~ 25 euros for a 15 meter roll
3mm or 4 mm wood ~ 10 euros for 1000 mm by 500 mm peice
Fabric to make composite ~ 10 euros
a small portiion of wood glue ~ 5 euros
Testing the fabric composite as MIDI pad and it's flexibility.
Satsha kit as MIDI controller, as I have tested it for now with a commercial board.
how will the inulated copper wire be connected to the conductive button inputs and the microcontroler without making it messy.
should the project be divided in 2 parts one as interfacing only with ableton and next stage as also interfacing with visual softwares
How much flexibility can the MIDI pad have
The first priority, is to make the satsha kit functioning completely in the coming week.
The next week will be for fabricationg the MIDI pad by making the flexible composite.
And the final week will be to make the final video and presentation.
The concept of a Soft MIDI device has never been undertaken in this manner. It usually is with conductive paint at max, hence one major point of this project woud be the conception itself. The integration of many kinds of techniques from Fab Academy and Fabricademy Bootcamp into one seemless product in a project is another takeaway of this project.