16 - interface and application programming
The assignment this week is to write an application that interfaces with an input or output device that you made.
Before I’m going into solitary confinement to work on my final project, I wanted to build one fun, completely unrelated product and I decided to use this week for that. However after making it I think it can be very useful for my final project, just with a different subject.
CHOOSING A LANGUAGE
Part of this week’s assignment is to evaluate as many programming languages as possible, which is something I have done before I started Fab Academy. Most notably I’ve worked with Python, Java and Javascript, so this week I decided to work with a language I never used; Processing.
Even though Processing runs Java under the hood, it’s IDE and language seem quite similar to Arduino.
THE PLAN
I want to make an interactive game-like interface to turn the data coming out of the sensors from my final project, the bricks, into something playful.
From a previous week I still had a VOC sensor, that I discovered is very sensitive to alcohol, so I wanted to make a breathalyzer game that responds to the amount of alcohol in your breath.
To do this I used:
- My smart brick that has a board inside with a microcontroller and serial connection over USB
- The sensor connected to an analog input
- Serial communication between the board and a computer
- A sketch running on the board/brick to read the analog pin and send the data to the computer
- A program running on the computer interpreting the serial data and converting it to an action.
LEARNING PROCESSING
To get started with Processing, we first got an introduction of the language and IDE from a guest lecturer at our Fab Lab. Taco taught us how to make Processing and an Arduino board talk to each other using a serial connection.
<
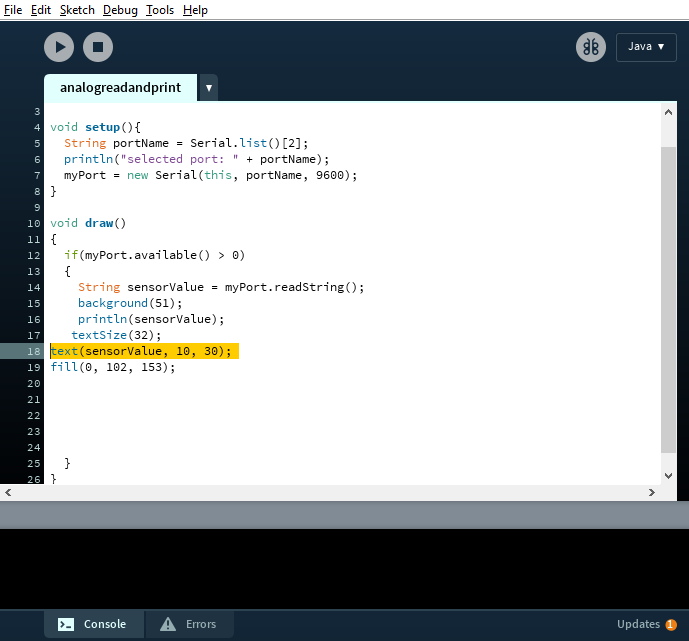
The first program I wrote during this class simply displayed the analog value from the VOC sensor connected to an Arduino Uno.
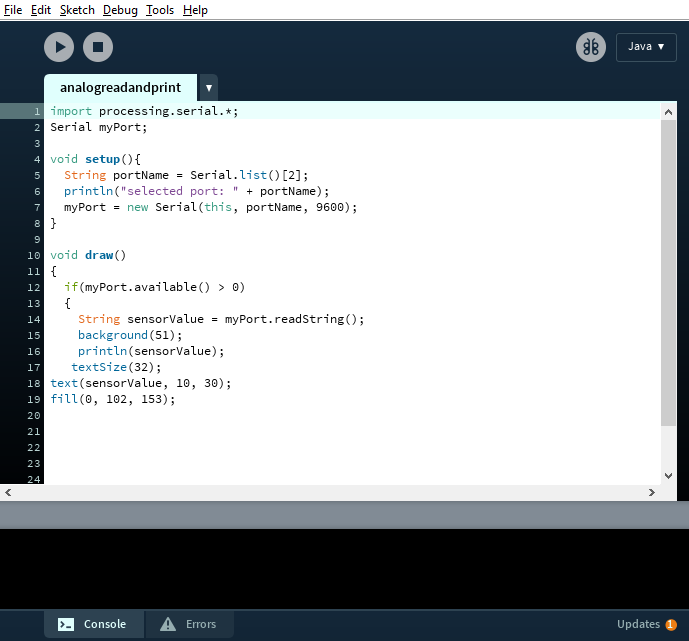

The second image is the output the program gave, just a simple rectangle that prints the value of the sensor.
To get something like this working you need to have a sketch running on the Arduino that prints the value of whatever you are measuring to the serial monitor and the processing program needs to listen to that serial connection.
In order to achieve this, you have to make sure you tell the Processing program where to look for the serial connection, in this case you specify it here:
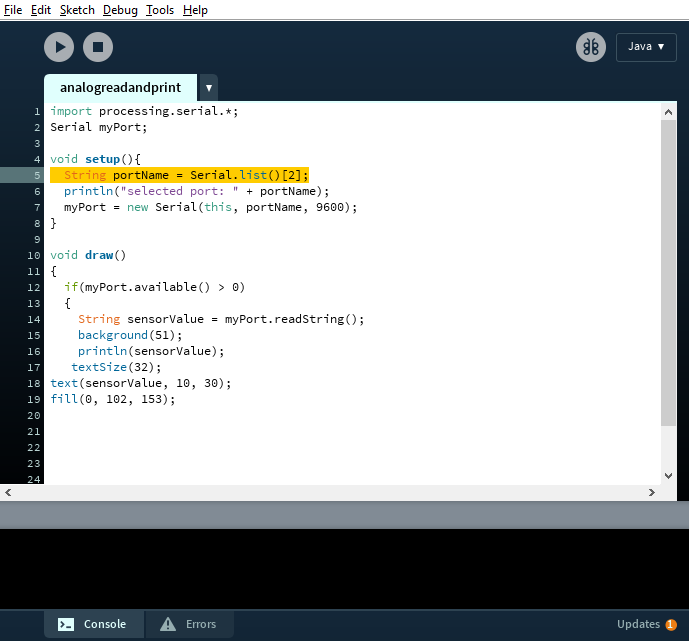
The number 2 at the end of the line tells processing which port to listen for. It can be a little confusing, as this particular port on my computer is called ‘COM3’ when you look it up in the Arduino IDE.
To figure this out I just tried all the options which are 0,1,2 because my computer has three USB ports.
MAKING AN INTERACTIVE PROGRAM
I thought that once I had the serial communication running, I could just start playing around with different shapes and functions and just insert the ‘sensorValue’ part and it would act as a number to which the program would react. Nope. Wrong.
The problem I ran into is that at this point the sensor value is a String, and to use it in other commands it needs to be converted to a Float.
To understand how to deal with this, I first had to recap what a String is and what it does, I found this description on the Processing website:
“A string is a sequence of characters. The class String includes methods for examining individual characters, comparing strings, searching strings, extracting parts of strings, and for converting an entire string uppercase and lowercase. Strings are always defined inside double quotes ("Abc"), and characters are always defined inside single quotes ('A').
To compare the contents of two Strings, use the equals() method, as in if (a.equals(b)), instead of if (a == b). A String is an Object, so comparing them with the == operator only compares whether both Strings are stored in the same memory location. Using the equals() method will ensure that the actual contents are compared. (The troubleshooting reference has a longer explanation.) “
When I was trying to make an ellipse but let its size or position be determined by the sensorvalue I got this error:
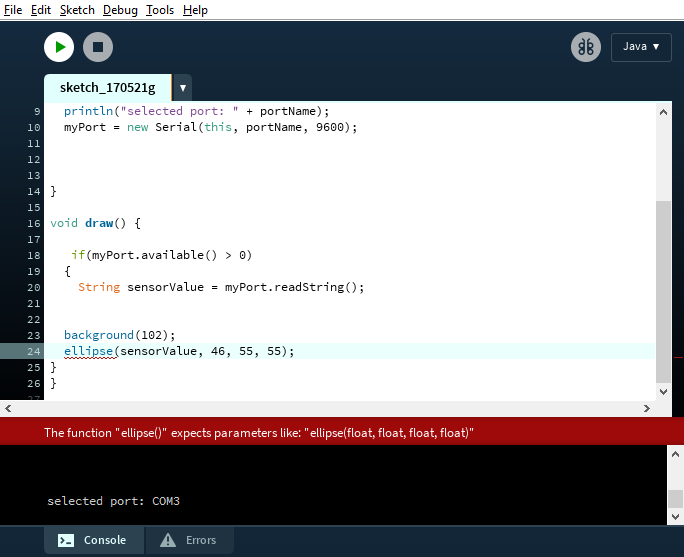
So the software was expecting a Float instead of a String, alright, let’s read up on that too:
“
Data type for floating-point numbers, e.g. numbers that have a decimal point.
Floats are not precise, so adding small values (such as 0.0001) may not always increment precisely due to rounding errors. If you want to increment a value in small intervals, use an int, and divide by a float value before using it. (See the second example above.)Floating-point numbers can be as large as 3.40282347E+38 and as low as -3.40282347E+38. They are stored as 32 bits (4 bytes) of information. The float data type is inherited from Java; you can read more about the technical details here and here.Processing supports the double datatype from Java as well. However, none of the Processing functions use double values, which use more memory and are typically overkill for most work created in Processing. We do not plan to add support for double values, as doing so would require increasing the number of API functions significantly. “
First I went looking for ways to convert a String into a float, one way is to ‘trim’ the string, but for some reason I couldn’t get that working. After a lot of searching online, I found a page with resources that I found to be really convenient, it’s the electronics tutorial page from the Processing website: https://processing.org/tutorials/electronics/
Here I followed example 2, which describes how to take an analog value from a photoresistor and using that value to manipulate a rectangle.
What this code does is take a serial port reading and turn it straight into a variable instead of a string, which is different from what I tried before
TRIAL AND ERROR
I didn’t just want to copy and paste the code, as I have plenty of Sketches I wrote that send serial data from a sensor, so first I just tried to use a temperature sensor(BME280) to send some data, on the serial monitor in the Arduino IDE the data looked like this:
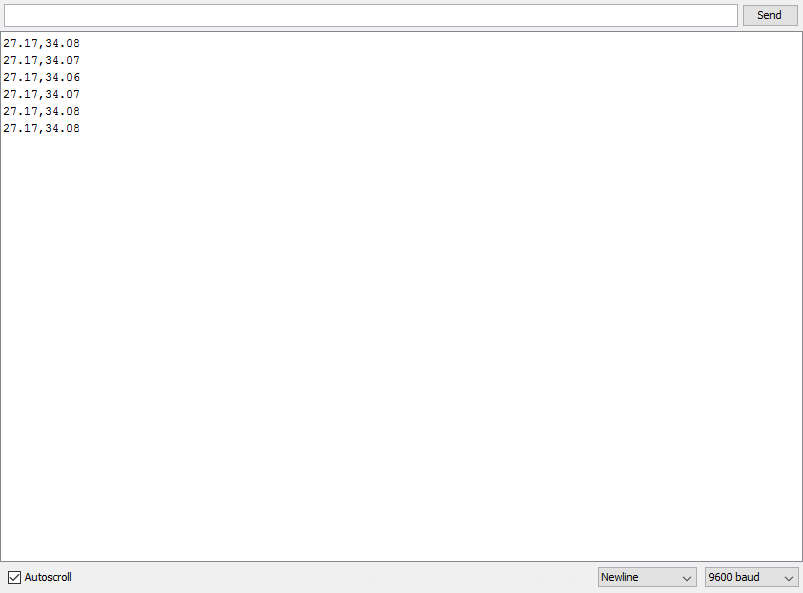
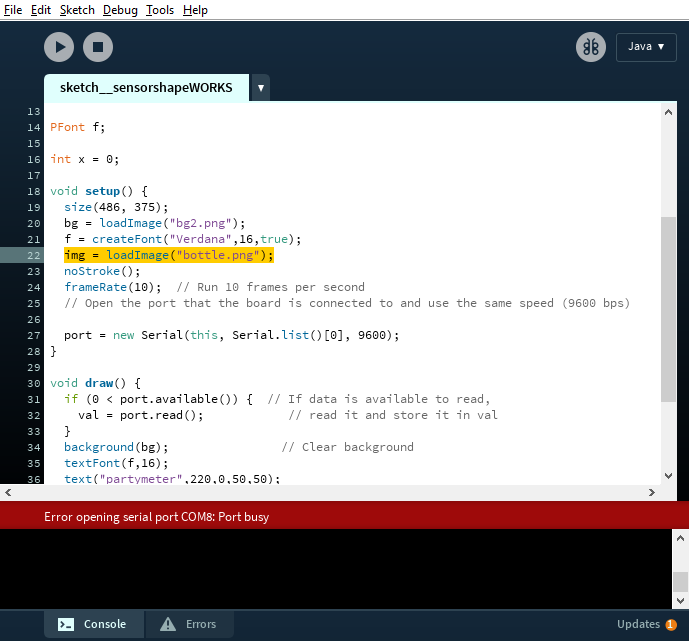
Looks fine right? Well, when I checked the terminal underneath in processing, which is basically its version of the serial monitor, I only got 0 readings.

So I tried the Arduino code that was given in the example, and this is what I saw in the serial monitor of the Arduino IDE:
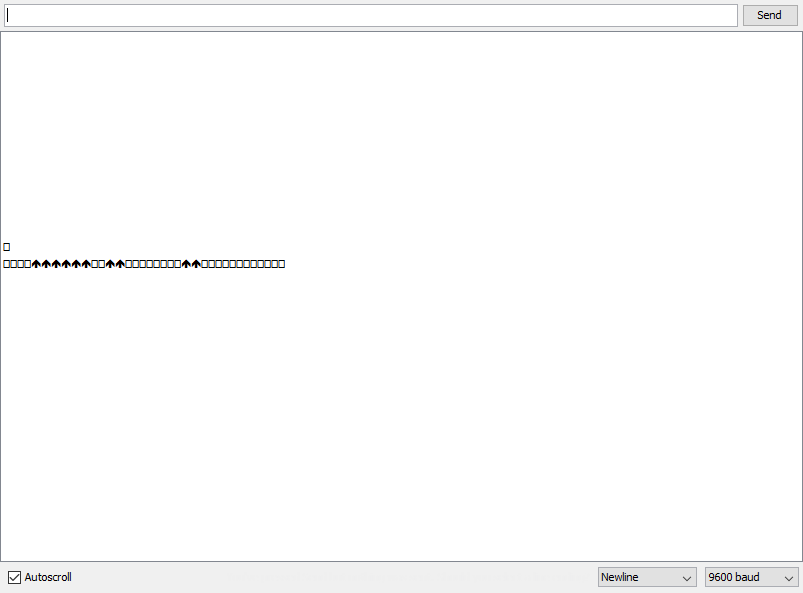
My first thought was, this can’t be good. But, not wanting to argue with the person that has written this example code, I went back to processing to see what happened there, and it worked!
I was now able to control the size of the square with the sensor value.

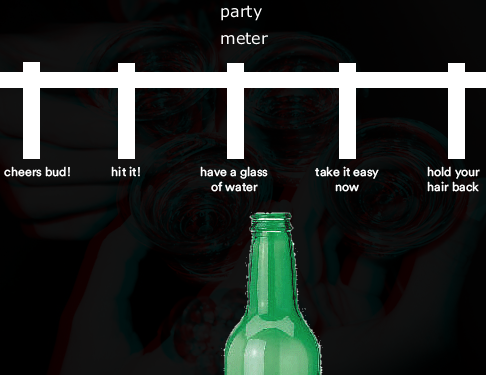
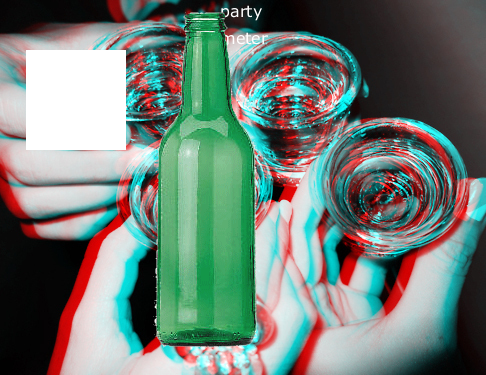
I wanted to make a game that shows the amount of alcohol in your breath in a fun way, so I wanted to make a sliding scale on which a beer bottle shows how much alcohol is in your breath.
background image
The first thing I did was giving the program a background image.
To insert an image into a program, you have to:
1 - put the image you want to use in the folder of your sketch
2 - go to ‘sketch’ tab and click ‘add file’

3 - then declare that you are using an image

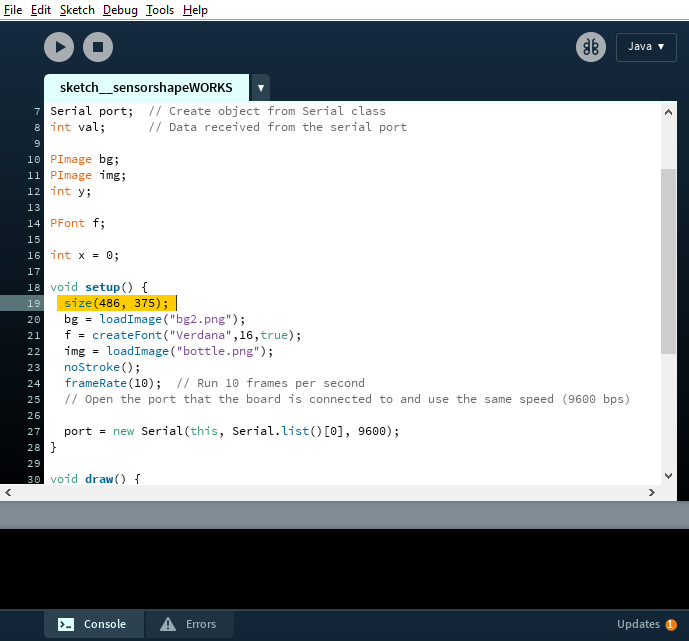
4 - set the size of your program, I kept this the same as the dimensions of the image
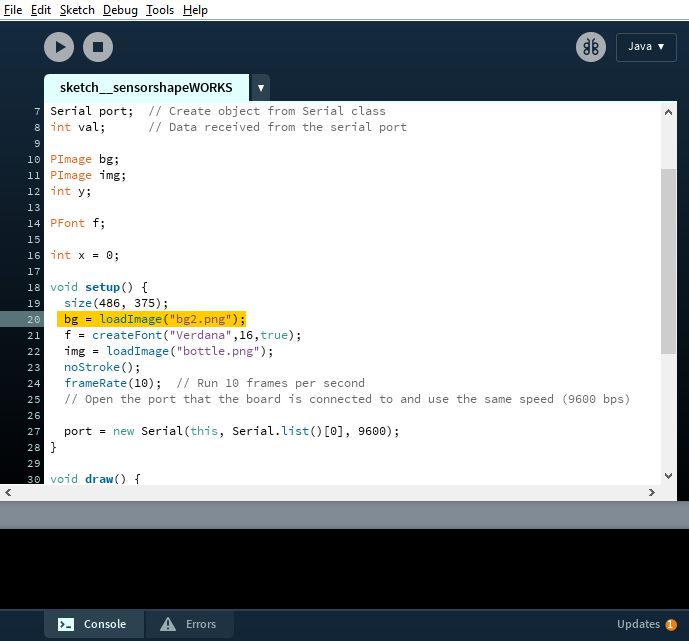
5 - tell the program that the background(bg) is an image
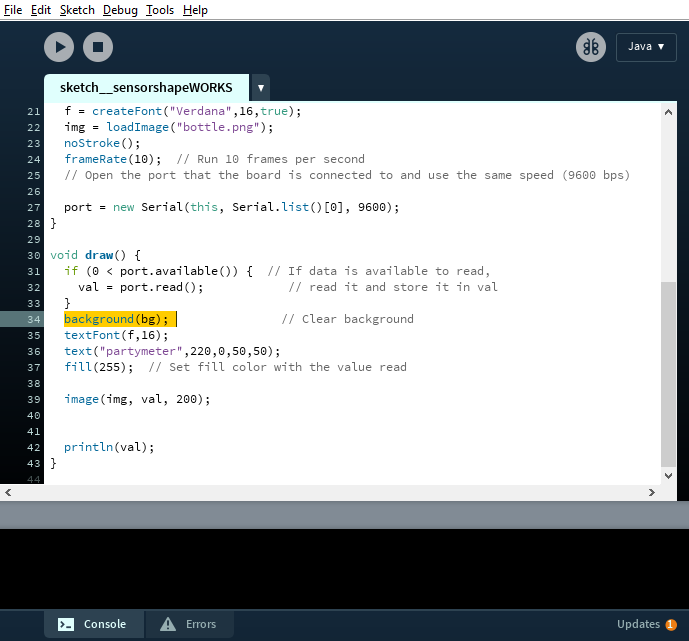
6 - under void draw make sure the program draws the background, this is also necessary to refresh
Alright, so now I have a background and a rectangle that changes position.

moving image
Now I want an image of a beer bottle in the program, and it should move left and right, according to the sensor value.
To insert an image, do the same as for the background, steps 1-3.
- declare the image in void setup
- draw the image in void draw, notice that on the value of the X-axis, I didn’t give it a numerical value, but instead wrote ‘val’, which is the reading from the serial monitor.

You now have an image in your program.
adding text
I also wanted to add some text at the top of the program, saying ‘party meter’, this is how you do it:
1 - declare PFont before the setup

2 - go to ‘tools’ -> ‘create font’ and select the font you want to use
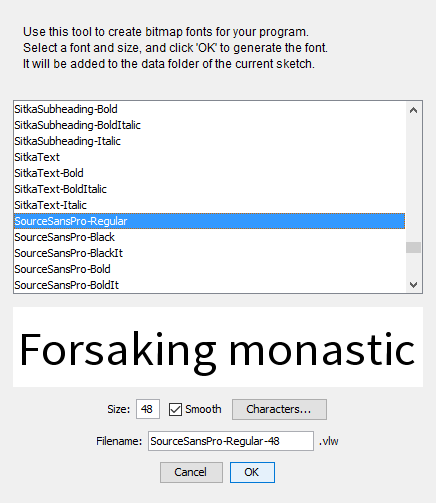
3 - in void draw, declare ‘text’, write what you want it to say and define the position

making some more graphics
In Photoshop I made the background a little darker and I added the sliding scale plus some more text. I realize that all of this can also be done in Processing, but I’m a quicker in Photoshop so I decided to do this in software I’m already familiar with.

electronics setup
In the coming weeks I will make a dedicated board for the VOC sensor, but as I’m still working on the design in relation to my final project I used it on a breadboard for this assignment.
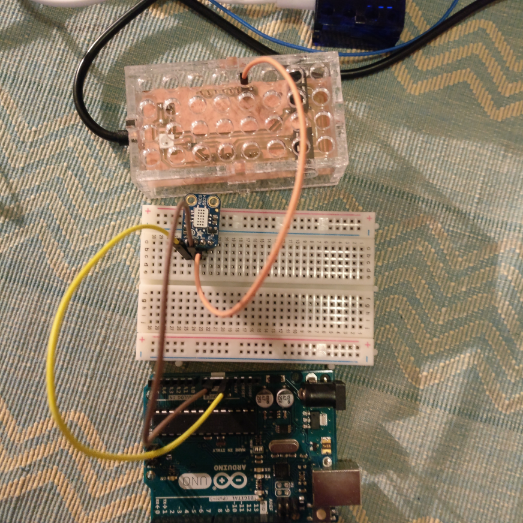
The sensor in this setup just gets power from an Arduino Uno as the VCC and GND pins are unaccessible in my brick for sensors that are not on an I2C line. It connects to the A0 analog pin on my board.
FINAL RESULT
The final result is this program/app that tells you approximately how much alcohol is in your breath.
The bottle slides left and right to indicate how much alcohol the sensor is measuring.
LEARNINGS AND CONCLUSION
Just sending any data over serial connection will not necessarily result in data that can be used for interactive applications in Processing. When sending the data as a variable will result in being able to use it in processing to manipulate assets, but it also results in not being able to read the data in the serial monitor of the Arduino IDE.
Arduino sketch

Processing code