Molding my first object
I never try molding and casting before and was really excited to try it out, the possibilities behind this process are really interesting and can be used in various field.
While we waited for our machinable wax, I decide to try to mold and cast an object that I already had. I took an old babyfoot table in the garbage a few weeks ago and I am repairing it.
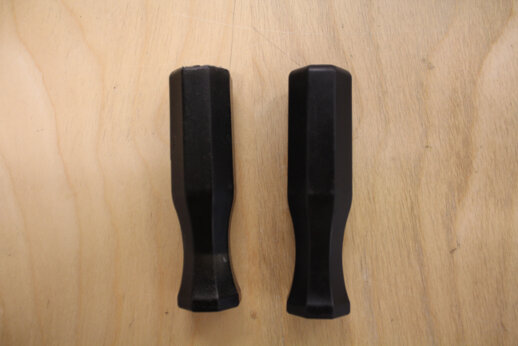
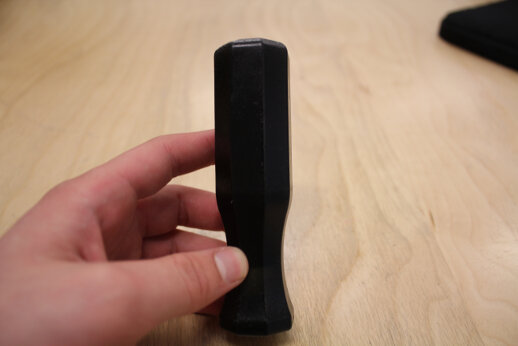
One thing I needed to do for it was to make new handle. Wich is a really easy and perfect object to mold for a first try!
First thing I did was to inform myself about what kind of sillicone and casting material I needed for my small project. Luckily for me, I have two awsome users of the lab that are really used to work with molding and casting process.
So I call them and scheduled a time with them so they could give me some information about what to buy.
Since it was my first time, I wanted something that I could work with a while before it gets rigid, so I look at all the sillicone available into the smooth-on chart and find that the moldstar 30 seems pretty good for me. Indeed, the moldstar 30 have a pot life of around 45 min wich is plenty of time to work with and dry in about 6 hours.
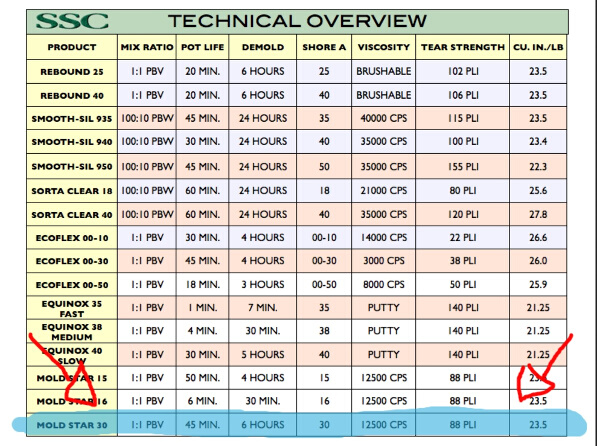
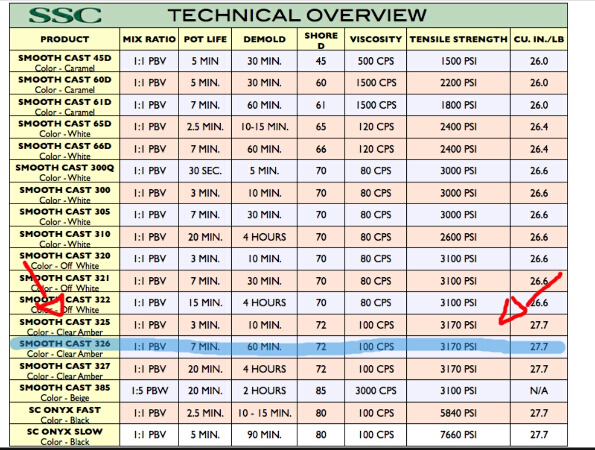
For the casting material, I took the smooth cast 326. The pot life is about 7 min wich is enouph but not a lot, but the real advantage with this material is that it only take 60 min to dry, so you can do lots of pieces in no time! Wich is good for me since I needed to do 6 handles for my babyfoot.
I also bought some little things that I needed for the process. some small cup of plastic, a big jar of plastic a stick to mix my component and some gloves. Once I had all my materials ready to go, I started to process.
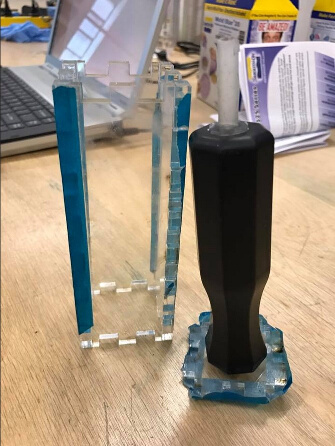
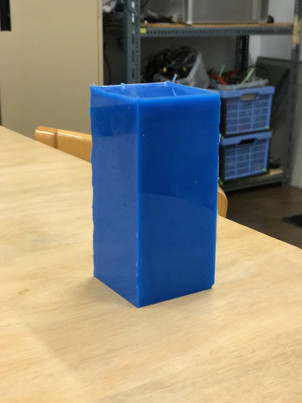
The first thing I needed to do was make a small acrylic box that would fit my babyfoot handle and contain my mold. I used Makercase to design my box. I also put a stick of hot glue on top of my handle so I could this space for the casting process.
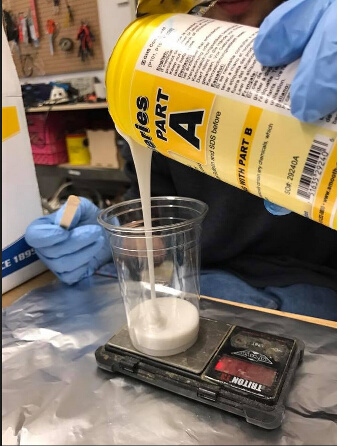
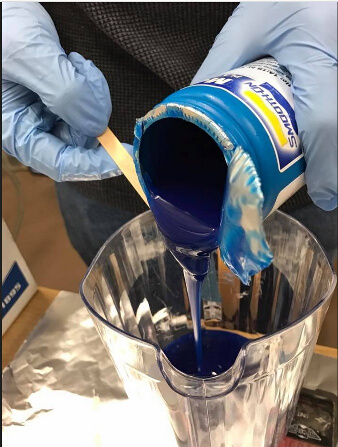
Then I open and mix the solution A and B of the moldstar 30. Once I was satisfied with how I mixed them individually, I scale 250g of each and put them together in my big jar. Once the two material made contact, I had 45 minute to work with the mix, wich is plenty of time, I mix the the solutions togheter for at least 5 min, once the color seemed perfectly mix, I stop and took the jar and put it inside the vacuum.
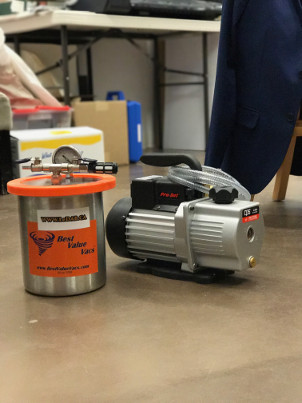
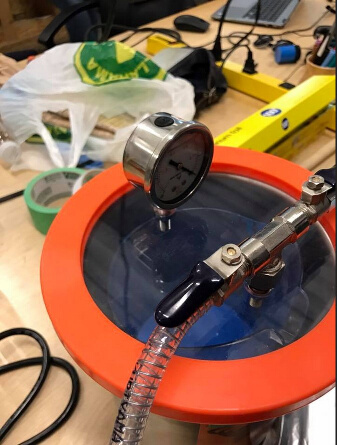
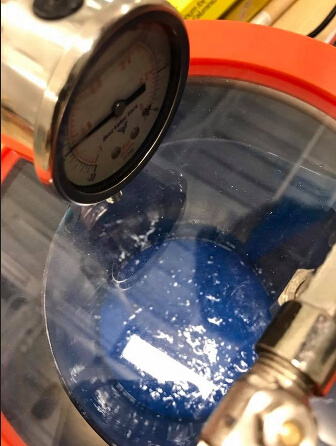
Once you start the vacuum the presure inside the tank goes really low, the air then densify and goes up, the sillicone mixture then get rid of the most part of the air it used to contain. So no more bubble! After that, we let it relax for about 2 minute and get ready to make our mold.
To make the mold I fill the box with the mixtures making sure that the liquid first apply on the bottom of the box and goes up by filling. The I waited 6 hours and my mold was ready!
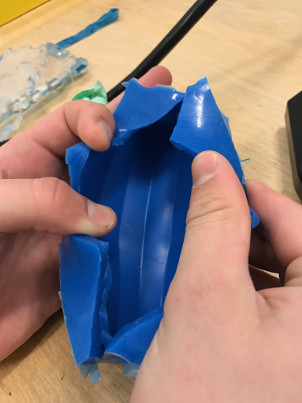
Same process goes with the casting process, but I used only 80g of each solutions to make my mix.The smooth cast 326 took about an hour to dry and I was really amazed by the final result!
« Go back to assigments page