Fabkit v.0.3-0.4
When I did the Fab Academy in 2012, I found very useful to learn to mill, solder and program a Fabkit, an Arduino-compatible board designed by David Mells and based on an ATMEGA382P microcontroller. With this board, you can write code with an Arduino IDE (and all of its libraries). So you basically learn how to build and use your own Arduino. I slightly improved the Fabkit and documented here its BOM and process.
01. Original version 0.2
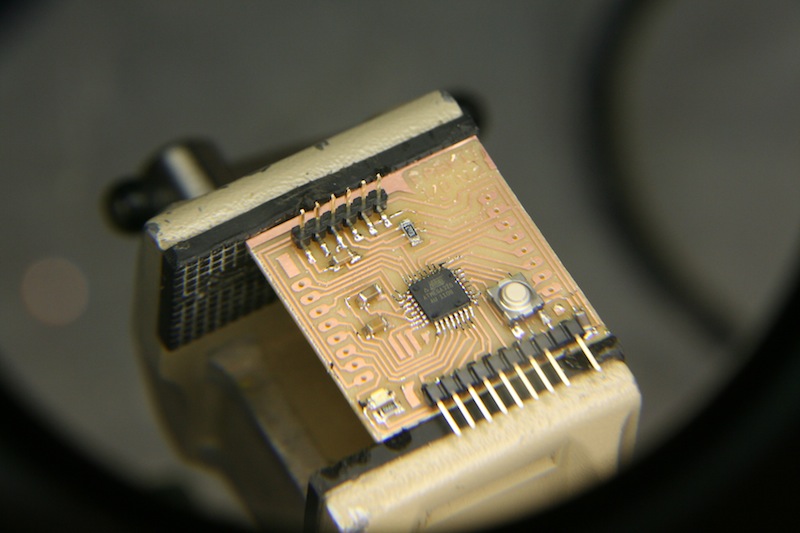
This is the original Fabkit, as milled and soldered at FabLab Amsterdam in 2012.
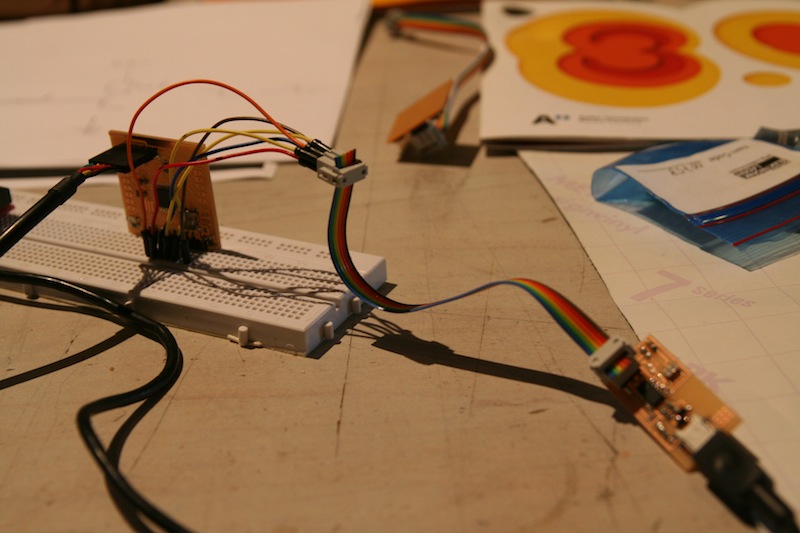
This is how the Fabkit was programmed: FTDI cable for powering the board, the FabISP for programming it from the Arduino IDE (more on this later).
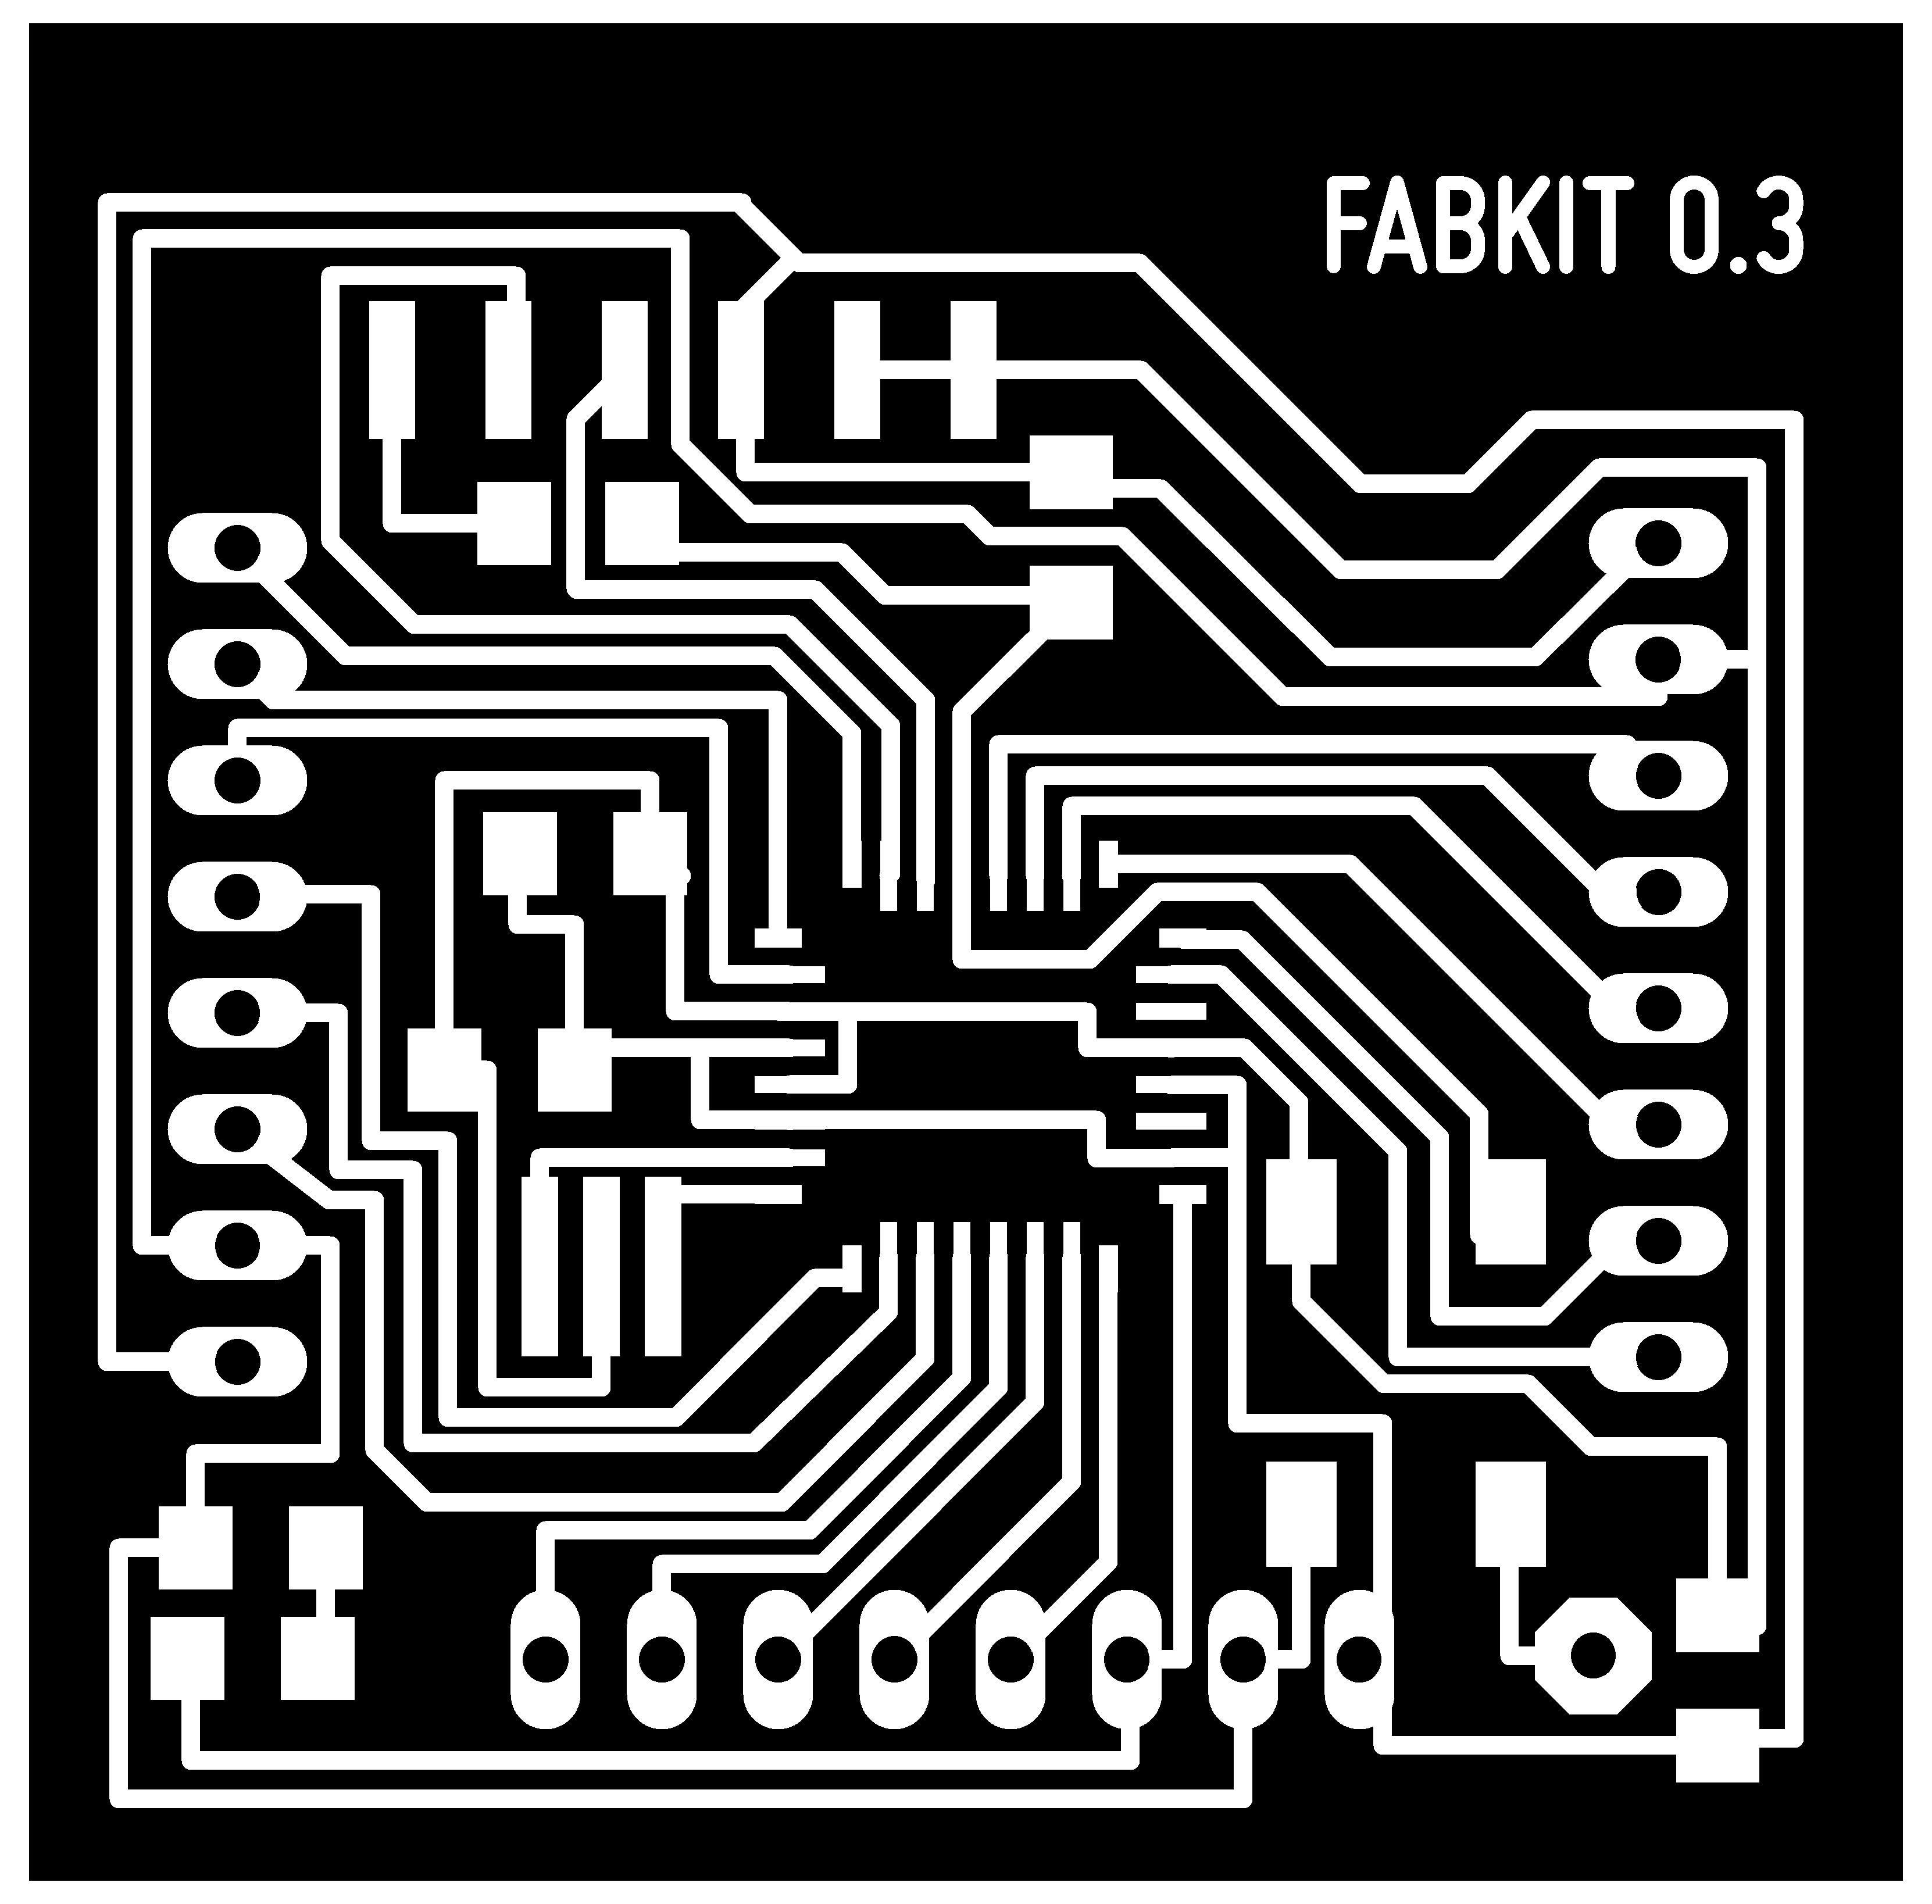
02. Version 0.3
The original version had one error in the Eagle Board and the traces were not really clean, so I modified it and improved it a bit. Here are the files:
Download v0.3:- Eagle Board
- Eagle Schematics
- Milling: Traces
- Milling: Holes
- Milling: Cut
- Milling: Gimp file
- Trotec Fiber+CO2: All passes
Here's version 0.3 ready for use:

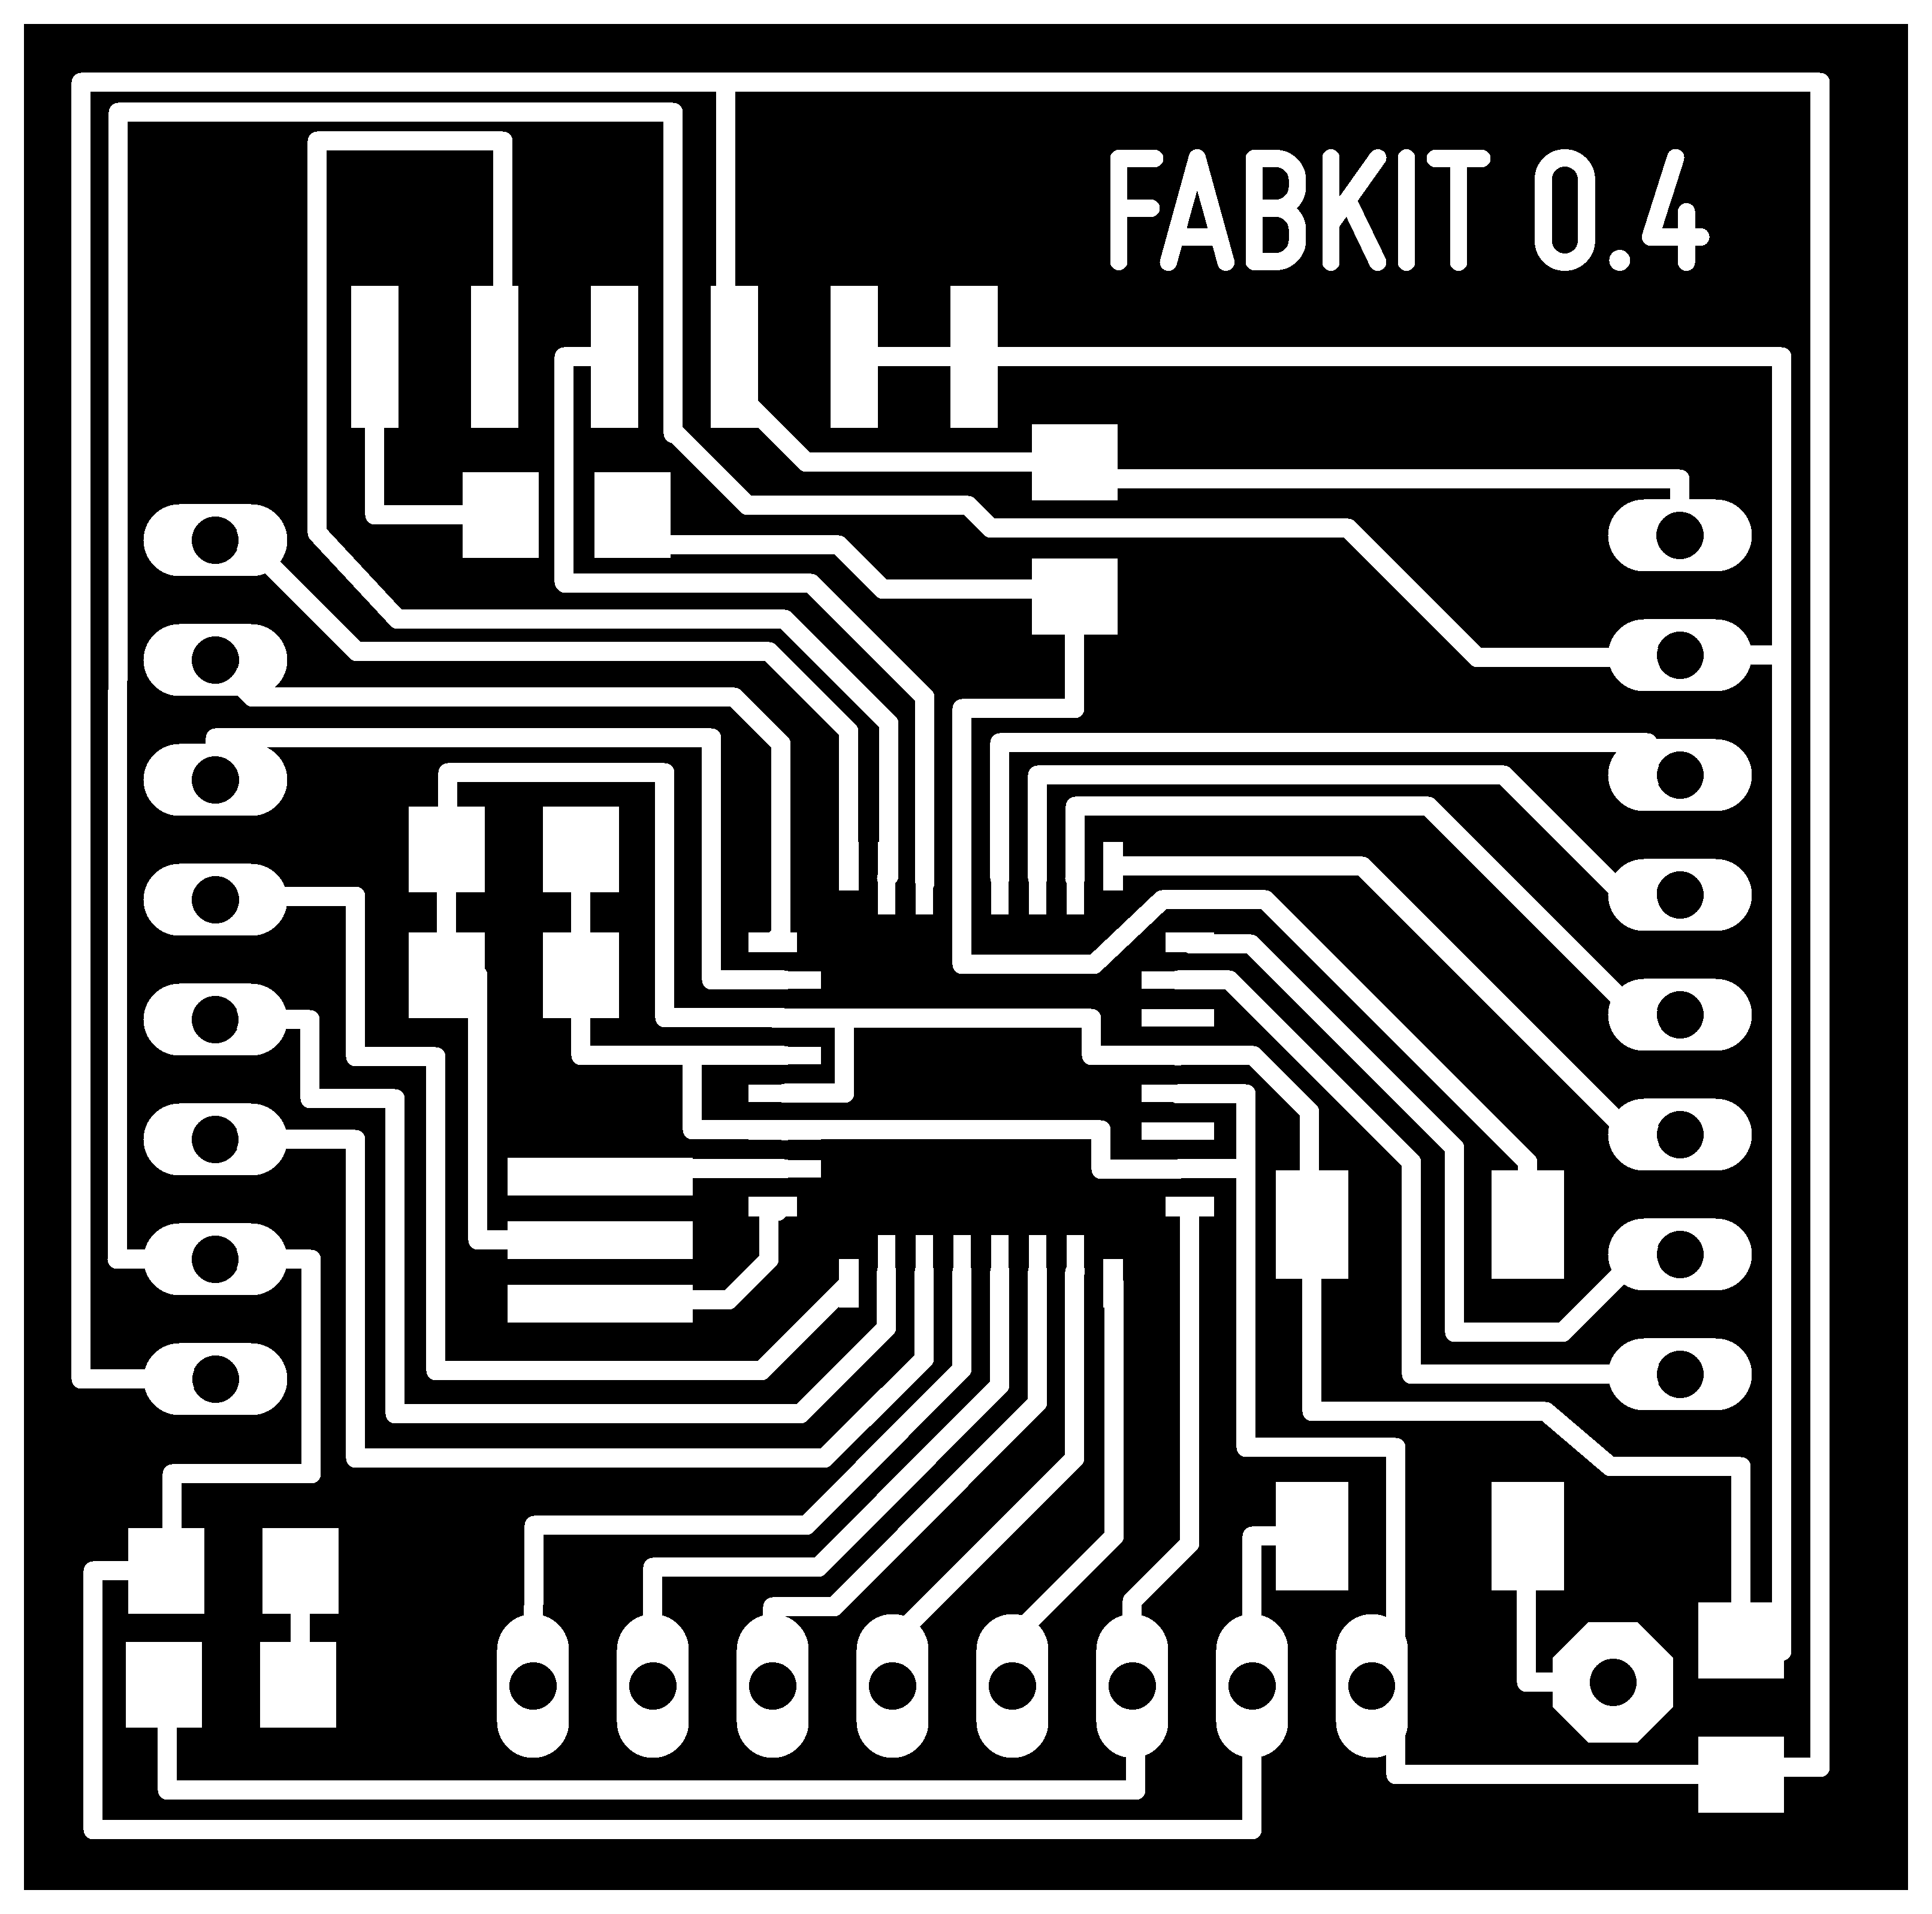
03. Version 0.4
Version 0.3 had few points were the traces were too close, and it was easier to connect wrong parts, so I improved it with version 0.4:
Download v0.4:- Eagle Board
- Eagle Schematics
- Milling: Traces
- Milling: Holes
- Milling: Cut
- Milling: Gimp file
- Trotec Fiber+CO2: All passes
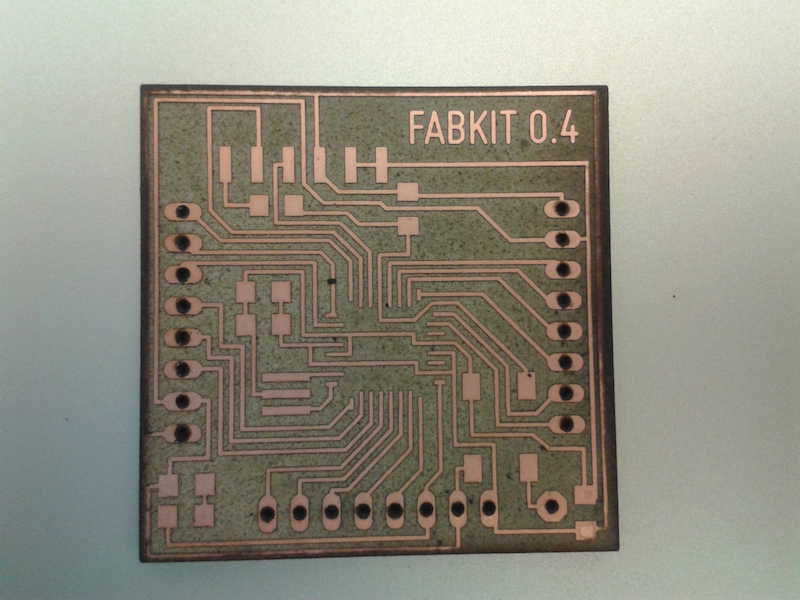
Here's version 0.4 manufactured with a Trotec Fiber+CO2 laser cutter:
04. BOM
In case you need to order the components, here's the BOM I created for it (the links point to the Italian Digikey website, and the price is in €, but it should be easy to find the right components from your vendor by checking the Digikey website). Each Fabkit should cost € 13.11 (plus the FR1 board... and your time):
Download BOM:05. Program the Fabkit
In order to use it with the Arduino IDE, you need to add this text to the boards.txt files of your Arduino IDE installation (note: code updated for Arduino IDE v.1.6 which has some different settings):
##############################################################

fabduino.name=Fabkit/Fabduino w/ ATmega328 (internal clock)

fabduino.upload.protocol=stk500v1
fabduino.upload.maximum_size=14336
fabduino.upload.speed=19200

fabduino.bootloader.low_fuses=0xe2
fabduino.bootloader.high_fuses=0xdd
fabduino.bootloader.extended_fuses=0x00
fabduino.bootloader.path=arduino:atmega
fabduino.bootloader.file=atmega/ATmegaBOOT_168_atmega328_pro_8MHz.hex
fabduino.bootloader.unlock_bits=0x3F
fabduino.bootloader.lock_bits=0x0F

fabduino.build.mcu=atmega328p
fabduino.build.f_cpu=8000000L

fabduino.build.core=arduino:arduino
fabduino.build.variant=arduino:standard

fabduino.upload.tool=arduino:avrdude
fabduino.bootloader.tool=arduino:avrdude
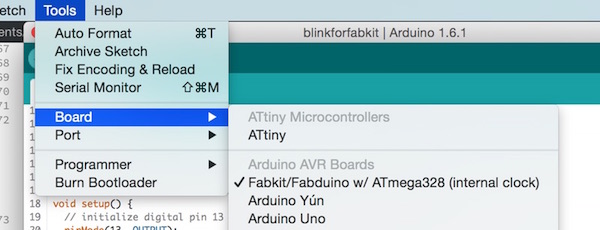
After this, you need to burn the bootloader for the Fabkit on the board. Choose Tools > Boards > Fabkit:
Choose your ISP with Tools > Programmer (USBTiny if FabISP, otherwise Arduino as ISP if you use an Arduino):

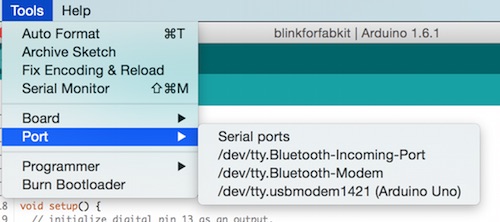
Select the port for your Arduino as ISP or FabISP with Tools > Port:
And then burn the bootloader with Tools > Burn Bootloader. You are now ready to work with the Fabkit.
06. Arduino IDE for the Fabkit
You can now program the Fabkit with the Arduino IDE. Write your normal Arduino code, and then upload it to the board with your ISP with File > Upload Using Programmer.
But...
You could program it on the command line.
For example, the Arduino IDE can be used on the command line, so you can compile the code and upload it later with avrdude (see the manual here):
Compile a sketch, put the build results in the build directory an re-use any previous build results in that directory.
arduino --pref build.path=/path/to/sketch/build --verify /path/to/sketch/sketch.ino
If you open the preferences.txt file of the Arduino IDE, you can change the output of the .hex files with this:
build.path=C:\Arduino-Output\
In this way you can use the Arduino IDE normally, but then upload the hex with avrdude for example (and your ISP).
You can upload your .hex files to the Fabkit with (if you are using Arduino as ISP):
avrdude -p atmega328p -P /dev/tty.usbmodem1421 -c stk500v1 -b19200 -U flash:w:file.hex
You can upload your .hex files to the Fabkit with (if you are using FabISP):
avrdude -p atmega328p -P usb -c usbtiny -U flash:w:file.hex
07. Use the Fabkit
Once the Fabkit is programmed, you just need the FTDI cable for powering it.
08. Another Fabkit: satshakit
Daniele Ingrassia created a new Arduino-compatible board during Fab Academy 2015, the satshakit. It is available on GitHub here. See here an example of his work.

